Salsify Integration helps WooCommerce store owners automatically sync product data from Salsify into WooCommerce. Instead of manually updating products or importing spreadsheets, you can manage product information from one centralized platform and automatically update your WooCommerce store.
The plugin is designed for businesses managing growing product catalogs, omnichannel operations, and high-volume ecommerce workflows. Whether you want to update product information, maintain catalog consistency, or reduce manual work, Salsify Integration simplifies the entire process.
With API-based connectivity, flexible field mapping, scheduled sync options, and SKU-based product matching, the plugin helps keep your WooCommerce product catalog accurate and up to date.
How Does the Salsify Integration Plugin Work?
↑ Back to topThe plugin connects your WooCommerce store with Salsify using API credentials. Once connected, you can choose a data source, configure field mapping, and sync product information directly into WooCommerce.
When products are synchronized, the plugin can create new products or update existing products by matching them using the SKU. This helps maintain accurate product information without manually updating products one by one.
You can manually sync products as needed or automate updates with cron-based scheduling for continuous updates.
Types of Configuration Settings
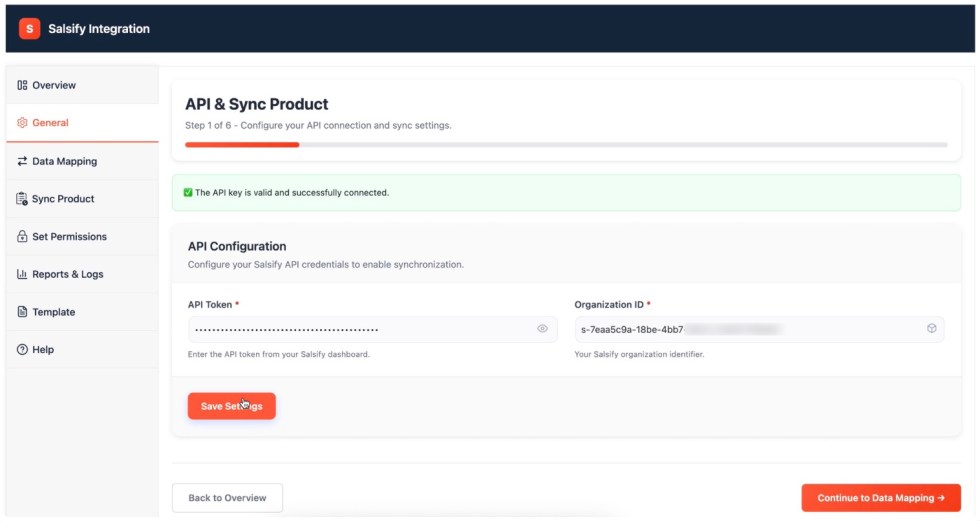
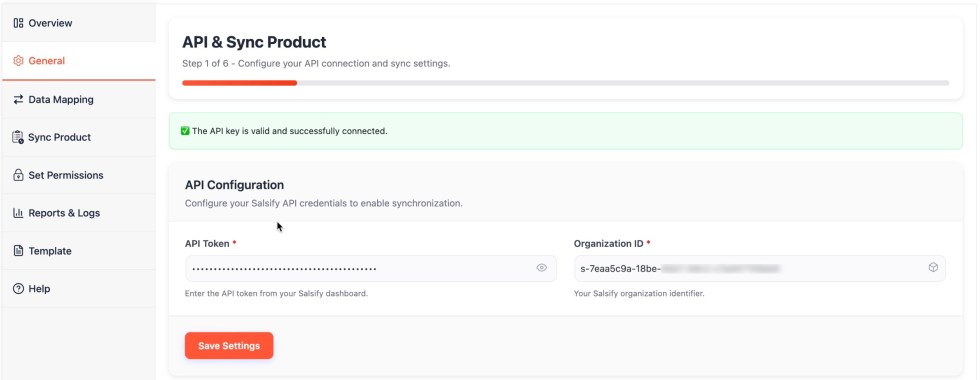
↑ Back to top1. API Configuration
↑ Back to topAPI Configuration allows you to securely connect WooCommerce with Salsify using your API Token and Organization ID.
Example:
You enter your Salsify API Token and Organization ID to establish the connection.
Use Case:
Perfect for connecting your WooCommerce store to your Salsify account to synchronize products.
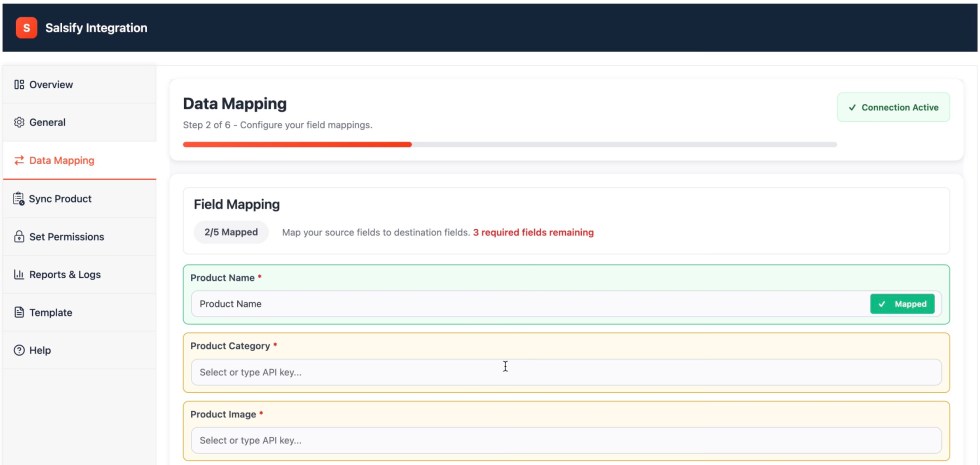
2. Configure Field Mapping
↑ Back to topField Mapping lets you map Salsify product fields to WooCommerce product fields.
Example:
Map Salsify Product Title → WooCommerce Product Name or Salsify Description → WooCommerce Product Description.
Use Case:
Helpful when your product structure requires customized mapping between platforms.
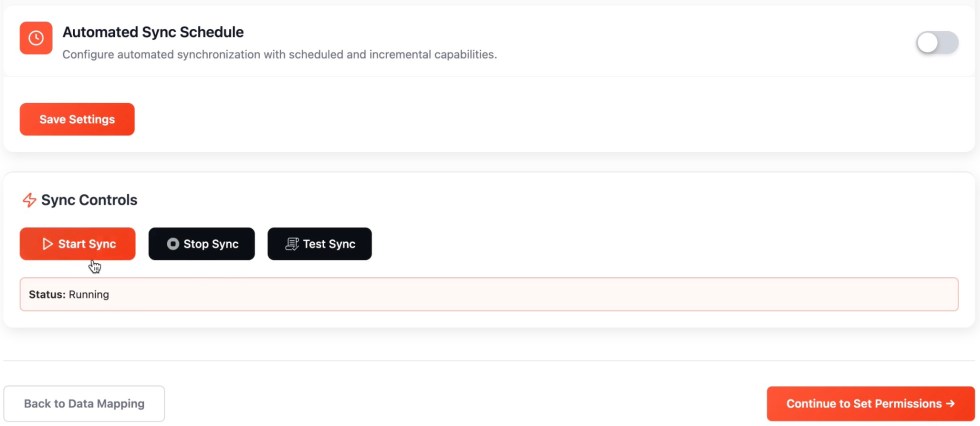
3. Manual Synchronization
↑ Back to topManual synchronization allows you to sync products whenever required, instantly.
Example:
Click the Run Synchronization button after updating products in Salsify.
Use Case:
Perfect when you want immediate product updates instead of waiting for scheduled sync.
Manual Product Sync:
4. Real-Time Synchronization
↑ Back to topReal-time synchronization automatically updates WooCommerce whenever product changes happen in Salsify.
Example:
A product title or description is updated in Salsify and appears in WooCommerce automatically.
Use Case:
Helpful for stores needing faster product updates and consistent catalog accuracy.

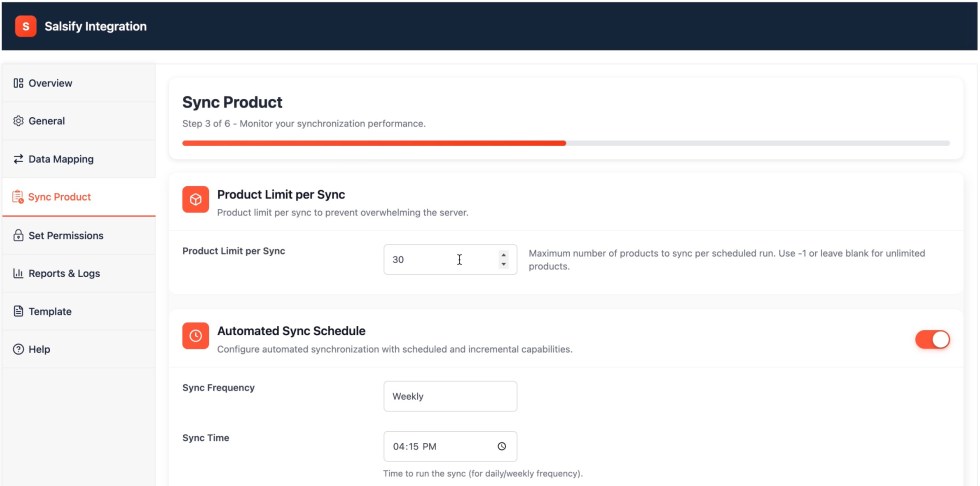
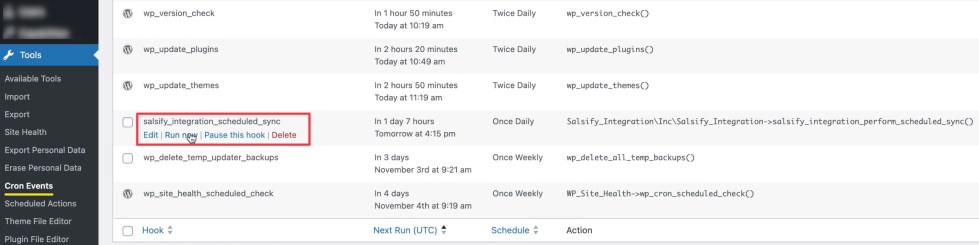
5. Cron-Based Sync Scheduling
↑ Back to topCron scheduling automates synchronization at scheduled intervals.
Example:
Automatically sync products every hour or once daily.
Use Case:
Best for stores with frequent product updates and large product catalogs.
6. Template-Based Product Sync
↑ Back to topTemplate-based synchronization allows reusable field mapping configurations for product syncing.
Example:
Create a predefined mapping template for product titles, descriptions, and images.
Use Case:
Useful for businesses managing recurring sync structures across multiple product groups.

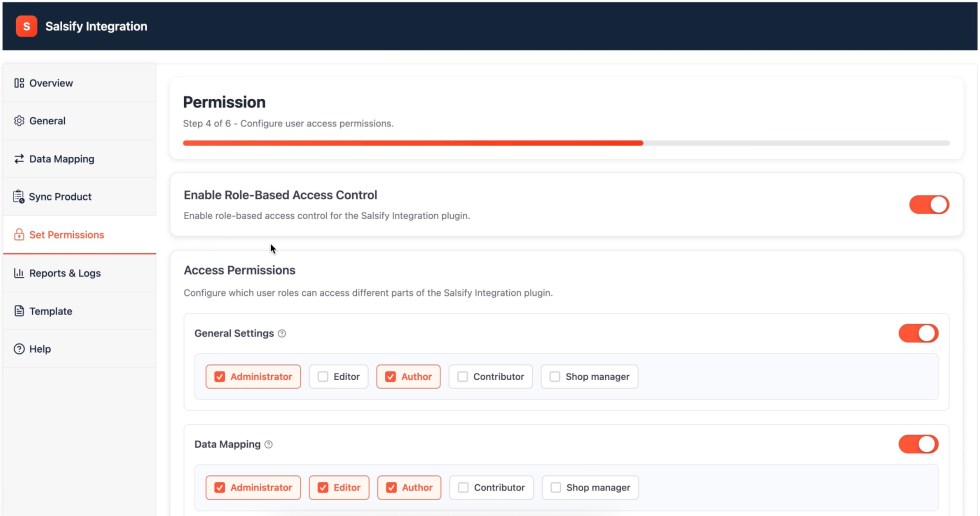
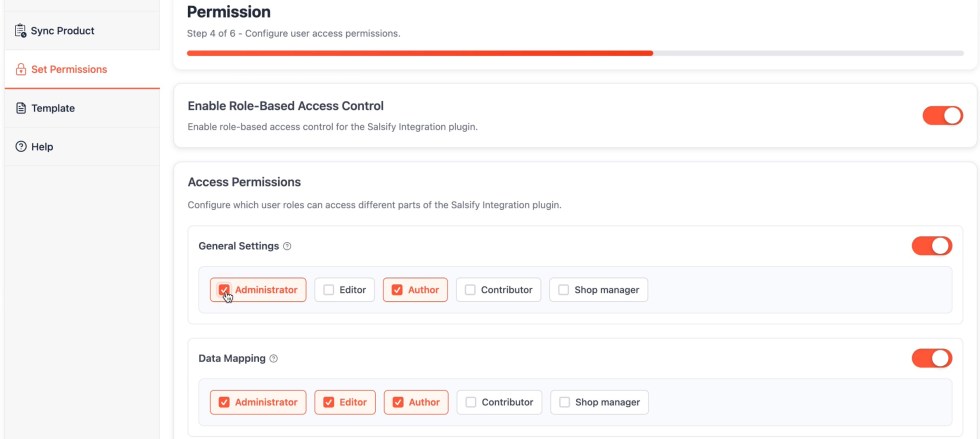
7. Permissions & Access Controls
↑ Back to topPermissions settings help control who can manage synchronization settings inside WooCommerce.
Example:
Allow store administrators to configure sync settings while limiting access for other users.
Use Case:
Helpful for stores managed by multiple teams or administrators.
Getting Started with Salsify Integration
↑ Back to topFollow these steps to connect and configure Salsify Integration with WooCommerce.
Step 1: Install and Activate the Plugin
↑ Back to topInstall and activate the plugin from your WooCommerce marketplace download or plugin upload section.
Go to: Plugins → Add Plugin → Upload Plugin
After activation, open the Salsify Integration settings page.
Step 2: Configure API Connection
↑ Back to topGo to the API Configuration settings and add:
- API Token
- Organization ID
These credentials help WooCommerce securely connect with Salsify.
Click Save Settings to verify access.
Step 3: Configure Field Mapping
↑ Back to topMap product fields between Salsify and WooCommerce.
Example mapping:
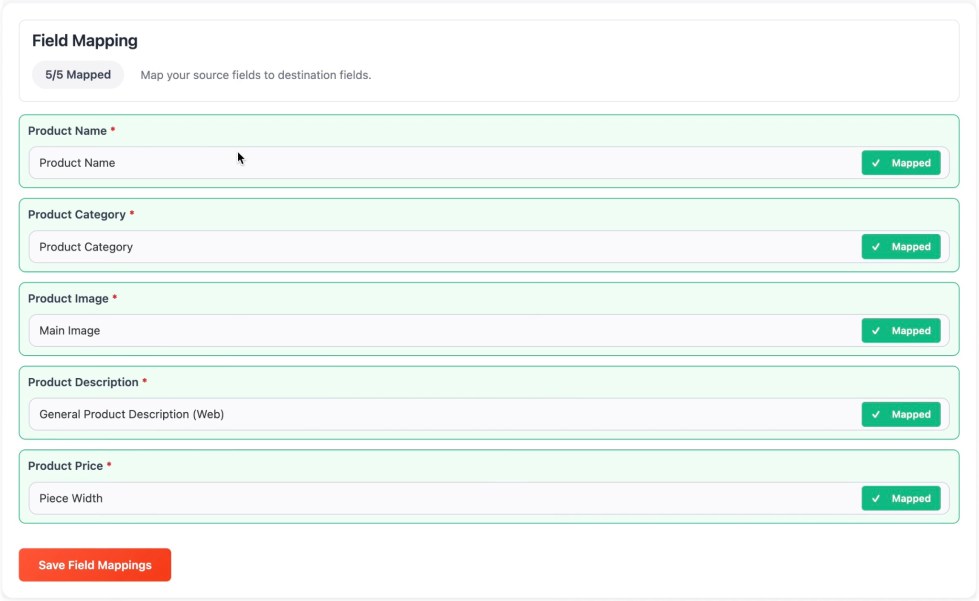
Review mappings carefully to avoid incorrect product data.
Step 4: Choose Synchronization Method
↑ Back to topSelect how products should sync.
Available options:
Manual Sync: Run synchronization manually whenever required.
Real-Time Sync: Automatically sync product changes instantly.
Cron-Based Sync: Schedule product synchronization at regular intervals.
Choose the method that best matches your business workflow.
Step 5: Run Synchronization
↑ Back to topClick Start Sync to start importing or updating products.
The plugin will:
- Create new WooCommerce products
- Update matched products by SKU
- Sync the configured product information
Wait for the sync process to complete.

Step 6: Configure Permissions
↑ Back to topSet permission access for administrators or store managers.
This helps protect sync settings and avoids accidental configuration changes.
Installation
↑ Back to topTo start using Salsify Integration for WooCommerce, you can install the plugin directly from your WooCommerce account.
- Navigate to My Subscriptions in your WooCommerce.com account
- Find Salsify Integration for WooCommerce in the list.
- Click the Add to Store button next to the product.
- Follow the on-screen instructions to connect and install the plugin automatically.
For more details, see:
Adding a WooCommerce.com subscription to your store
Managing WooCommerce.com subscriptions
FAQs
↑ Back to topHelp customers by answering commonly asked questions.
Why are my products not syncing?
Check your API Token, Organization ID, field mapping, and data source connection. Also, verify synchronization settings are configured properly.
How do I reconnect Salsify Integration?
Go to API Configuration settings and reconnect using your API Token and Organization ID.
Can the plugin update existing WooCommerce products?
Yes. Existing products can be updated by matching products using the SKU.
Can I manually sync products?
Yes. You can run manual synchronization anytime using the Start Sync option.
Does the plugin support automatic synchronization?
Yes. The plugin supports cron-based scheduled syncing.
Why are duplicate products being created?
Duplicate products may happen if SKU matching is not configured properly or if products use different SKU values.
Do I need a Salsify account to use this plugin?
Yes. You need an active Salsify account to connect WooCommerce with the plugin.
Is the plugin suitable for large product catalogs?
Yes. The plugin is designed to simplify product synchronization for growing and high-SKU WooCommerce stores.