Key Features
↑ Back to topIndividual & Variation Pre-Orders: Enable pre-orders on a per-product basis or apply them to specific product variations (e.g., pre-ordering only a specific size or color).
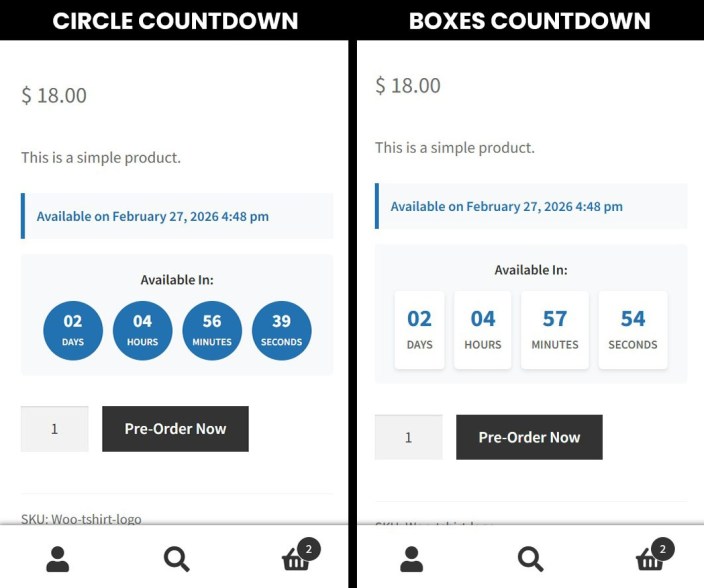
Launch Date & Countdown Timers: Set precise release dates and display customizable countdown clocks (Simple, Boxed, or Circular) to build excitement on the product page.
Flexible “Date TBA” Settings: Accept orders for upcoming items without showing a specific release date. Update the launch schedule globally when it is finalized.
Early-Bird Pricing & Discounts: Motivate shoppers by offering flat-rate or percentage-based discounts that apply automatically during the pre-order period.
Bulk Category & Tag Settings: Apply pre-order settings, release dates, and discounts to entire product categories, tags, or attribute ranges in seconds.
Automated Customer Email Notifications: Stay connected with automated confirmations, launch reminders, delay alerts, and “Ready to Ship” notification templates.
Mixed-Cart & Checkout Rules: Choose whether to allow customers to combine pre-orders and standard items in the same cart, or restrict checkouts to pre-orders only.
Modern Performance Support: Built to work natively with High-Performance Order Storage (HPOS) and WooCommerce Cart/Checkout Blocks without slowing down your site
1. Installation and Activation
↑ Back to topHow to get started with the leading WooCommerce Pre-Order plugin.
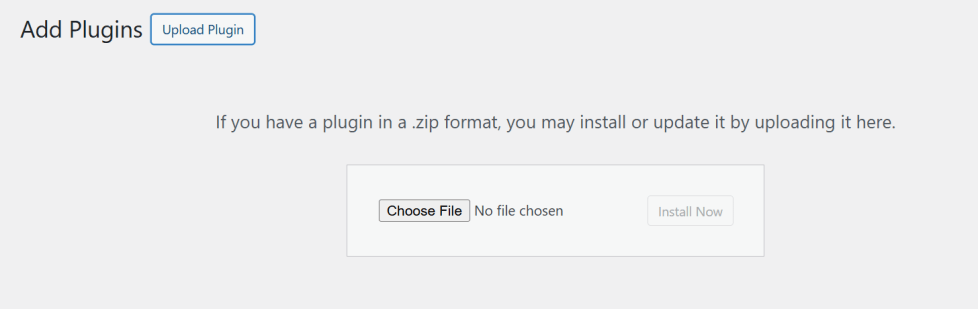
- Navigate to Plugins → Add New → Upload Plugin.
- Choose the
smart-pre-order-manager.zipfile. - Click Install Now and then Activate.
2. Global Configuration
↑ Back to topSettings are located at WooCommerce → Settings → Smart Pre-Order Manager.
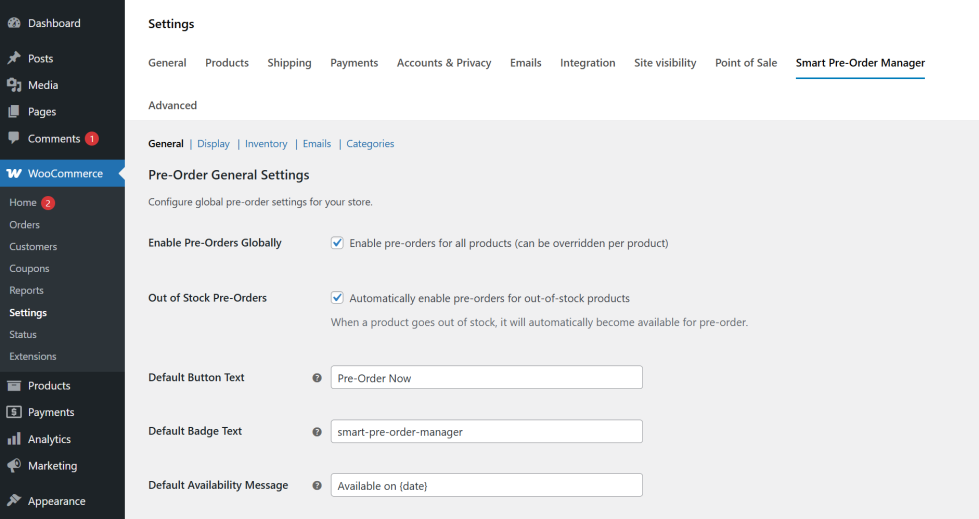
General Tab
↑ Back to top- Enable Pre-Orders Globally: Forces all products into pre-order mode (default: no).
- Out of Stock Pre-Orders: Automatically enables pre-orders when inventory hits zero.
- Default Button/Badge Text: Define the starting labels for your store.
- Default Availability Message: Use the
{date}placeholder to automatically display the scheduled launch date.
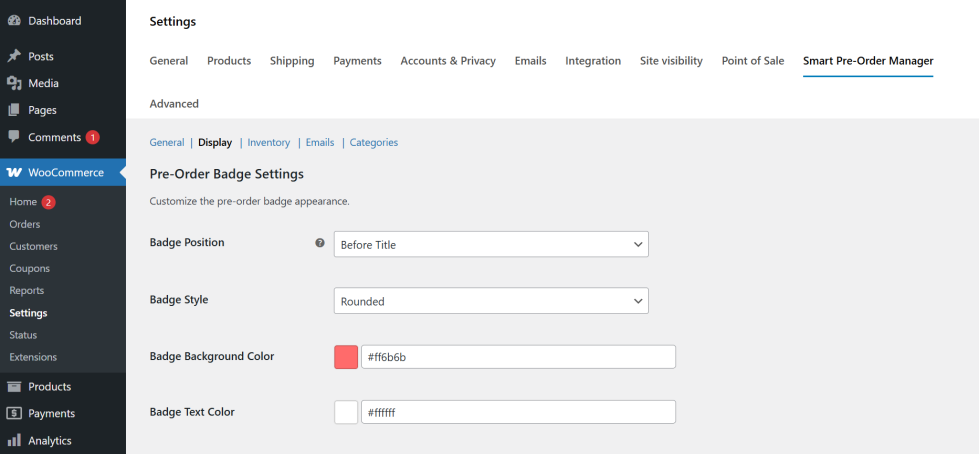
Display Tab
↑ Back to top- Badge Position: Choose from Before Title, After Title, or On Product Image.
- Badge Style: Select Rounded or Square.
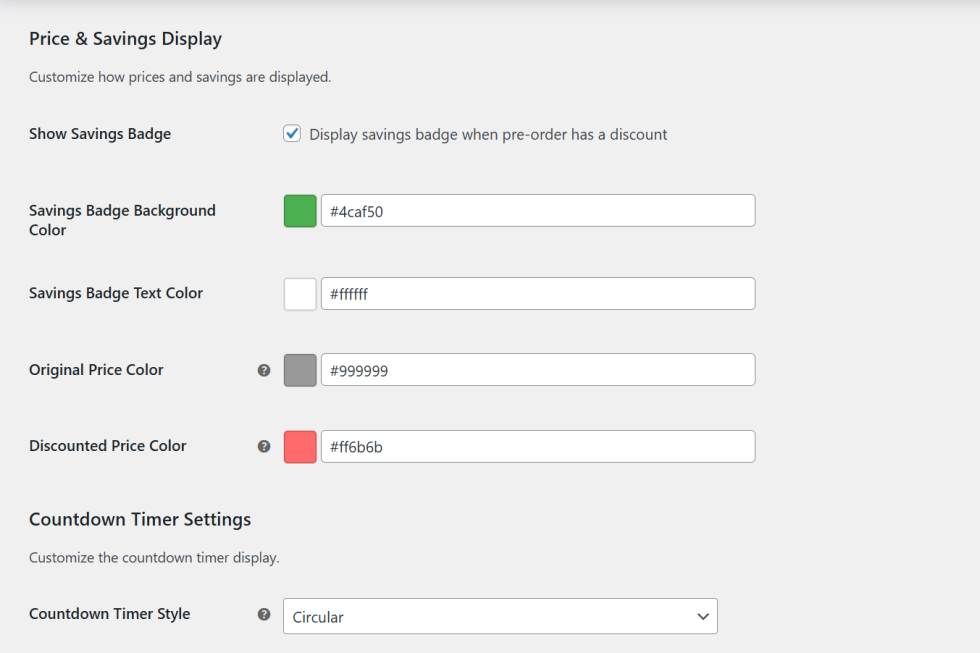
- Savings Display: Enable/Disable the automatic “Save X%” badge and customize colors.
- Countdown Timer: Select from Simple, Boxes, or Circular visual styles.
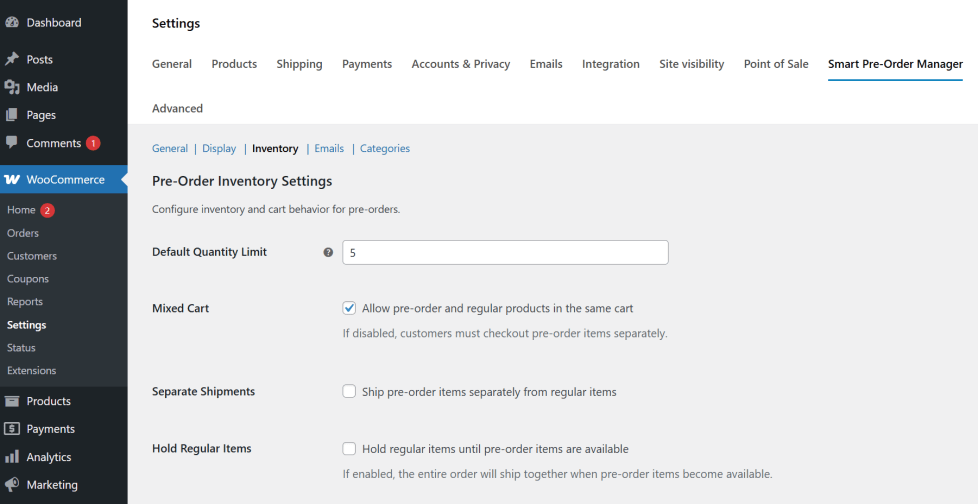
Inventory Tab
↑ Back to top- Mixed Cart: Allow or block pre-order items from being purchased alongside regular stock.
- Shipments: Configure if the entire order should be held until the pre-order is ready.
3. Setting Up a Pre-Order Product
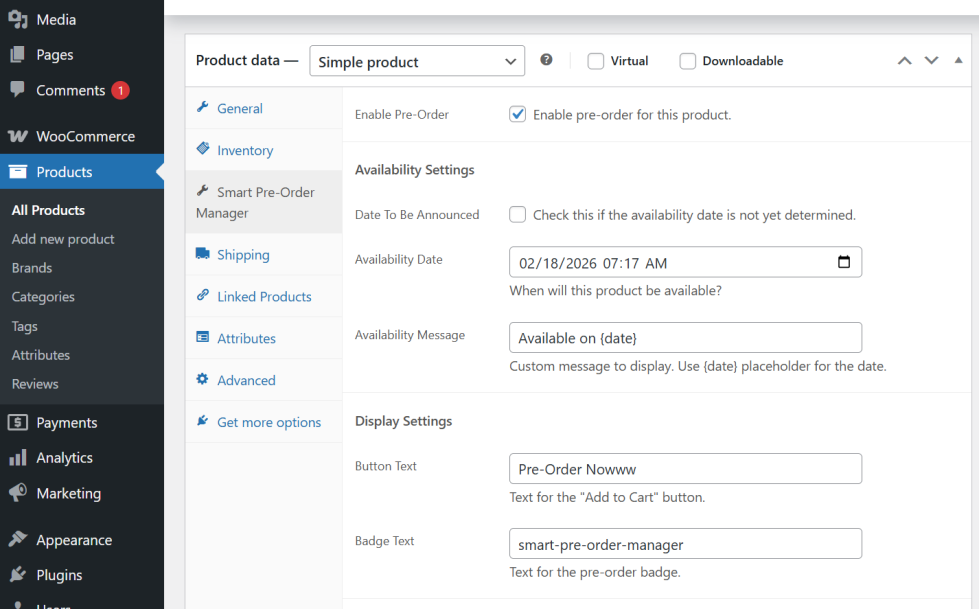
↑ Back to topInside the WooCommerce Product Edit screen, look for the Smart Pre-Order Manager tab.
- Enable Pre-Order: Toggle this to activate pre-order features for this specific item.
- Date To Be Announced (TBA): Use this if you don’t have a firm launch date.
- Availability Date: Select the exact second of your release. The plugin uses a
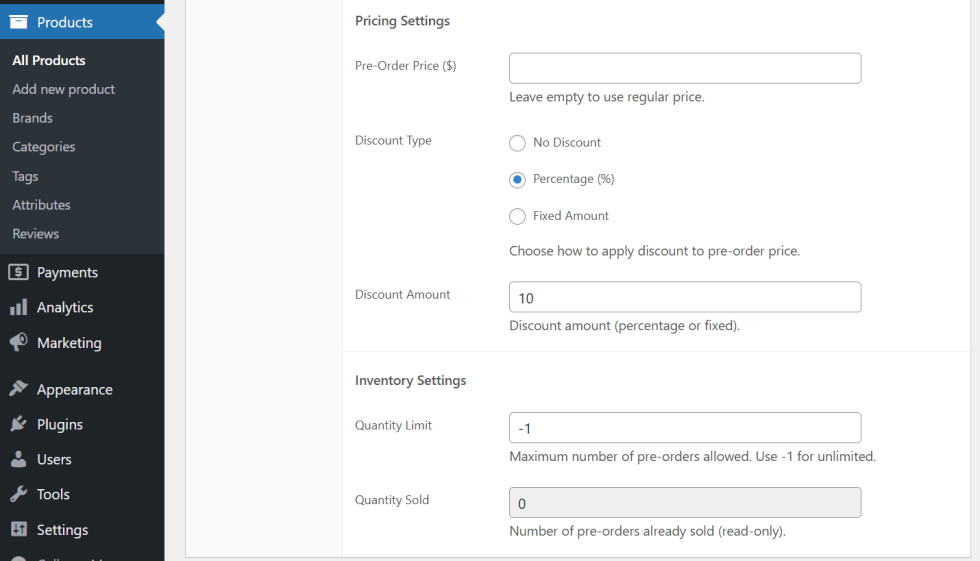
datetime-localpicker for precision. - Pricing Settings:
- Pre-Order Price: Set a specific price for the pre-order period.
- Discount Type: Choose None, Percentage (%), or Fixed Amount.
- Discount Value: Enter the amount to subtract from the regular price.
- Quantity Limit: Enter the maximum number of pre-orders allowed. Use
-1for unlimited. - Quantity Sold: A read-only field showing how many pre-orders have been processed by the system.
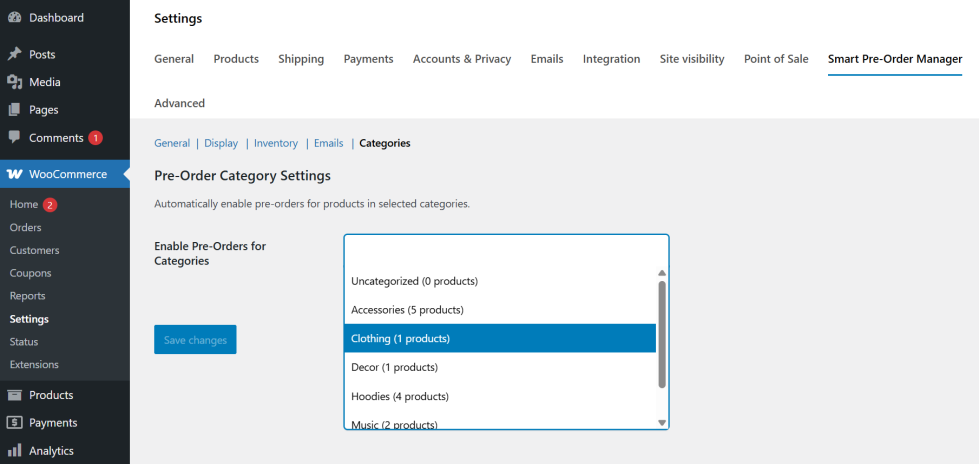
4. Bulk Category Management
↑ Back to topNavigate to the Categories tab in the main settings to activate pre-orders for entire collections.
- Select multiple categories using the enhanced multi-select field.
- Products in these categories will inherit pre-order status automatically.
5. Automated Lifecycles & Automation
↑ Back to topThe plugin manages the customer journey through a series of automated triggers.
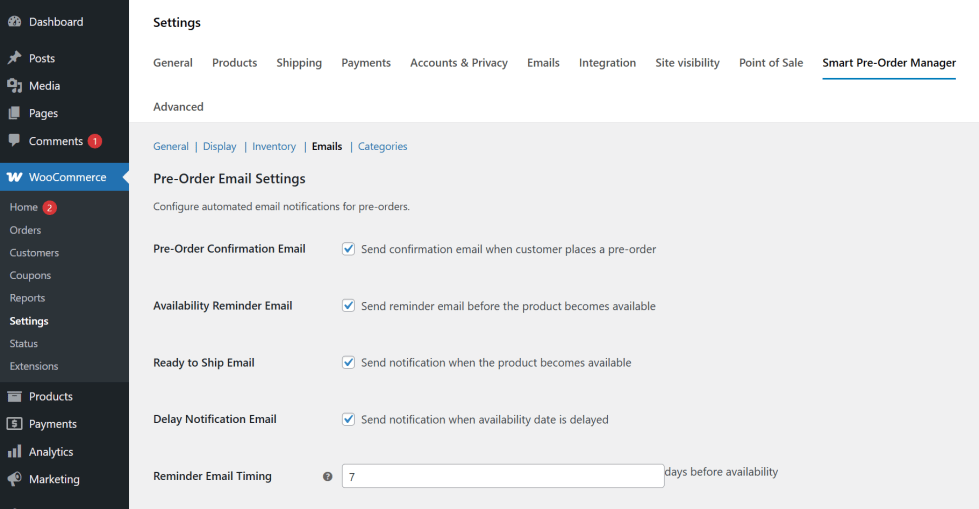
Email Notifications
↑ Back to top- Confirmation: Sent upon
processingorcompletedorder status. - Availability Reminder: Sent X days before launch (configured in Email settings, 1-30 days).
- Ready to Ship: Sent automatically when the product is converted to regular stock.
- Delay Notification: Sent if you update the availability date after orders have been placed.
Internal Automation (Cron Jobs)
↑ Back to top- Daily Check (Midnight): Converts products to regular status and sends “Ready to Ship” alerts.
- Hourly Check: Processes the queue for “Availability Reminders.”
- Weekly Cleanup (Sunday 2 AM): Optimizes the database by clearing old transients and cache.
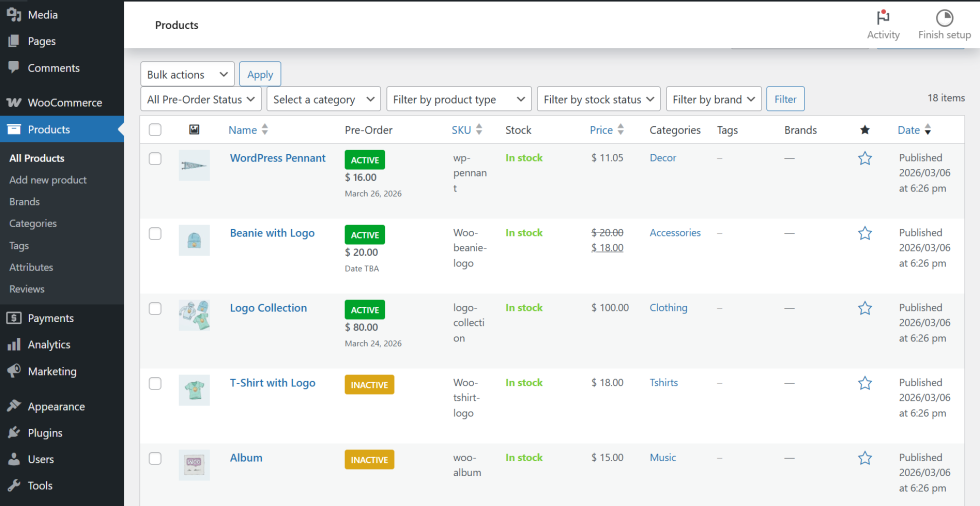
6. Developer & Admin Features
↑ Back to top- Admin Columns: View “Active/Inactive” status and release dates directly in the All Products list.
- Quick Edit: Quickly enable or disable pre-orders without opening the full product editor.
- HPOS Support: Built on the latest
wc_get_ordersarchitecture for maximum speed.
How do I install and configure the WooCommerce Smart Pre-Order Manager?
Setting up the plugin takes only a few minutes. Follow these simple steps:
Step 1: Installation & Activation
In your WordPress admin dashboard, navigate to Plugins → Add New.
Click Upload Plugin at the top, choose your plugin.zipfile, and select Install Now.
Once installed, click the Activate Plugin button.
Step 2: Accessing the Settings
Navigate to WooCommerce → Settings and click the Smart Pre-Order Manager tab. Here, you can configure your default button text, custom countdown badge styles, and automatic email triggers globally.
Where are the global settings for the WooCommerce Smart Pre-Order Manager?
You can manage your entire pre-launch configuration from one central location. To find the global settings:
Log in to your WordPress admin dashboard.
Navigate to WooCommerce → Settings.
Click on the Smart Pre-Order Manager tab at the top of the page.
Once inside, you can navigate through the sub-tabs:
General Tab: Configure button text behavior, mixed cart rules, and default order statuses.
Display Tab: Design your savings badges, colors, notices, and countdown timers.
Inventory Tab: Set global stock limits, remaining quantity notifications, and scarcity rules.
Emails Tab: Manage and toggle automated templates (Confirmations, Reminders, Delay alerts).
How do I activate pre-orders for individual WooCommerce products?
You can easily enable pre-orders on a per-product basis. Follow these steps:
Go to your WordPress backend, edit the product you want to configure, and scroll down to the Product Data box.
Check the Enable Pre-Order box.
Set the Availability Date (or leave it empty and check Date TBA).
(Optional) Enter a specific Pre-Order Price or percentage discount to incentivize early buyers.
Click Update to save your product changes.
Note for Variable Products: To enable pre-orders on specific sizes, colors, or options, go to the Variations tab in the Product Data box and configure the settings for each variation individually.
What automated emails does the WooCommerce Smart Pre-Order Manager send?
The plugin keeps your customers updated automatically throughout the launch lifecycle. You can enable, disable, and configure the following four email notifications:
Pre-Order Confirmation: Sent immediately after checkout to confirm their order reservation.
Availability Reminders: A customizable reminder email sent a set number of days before the scheduled product launch.
Ready to Ship Notifications: Sent automatically once the product is launched and converted to in-stock status.
Release Delay Updates: Sent automatically to buyers if you change or extend the release date.
All notification templates inherit your active theme’s styling and can be customized under the Emails settings tab.
Can I enable pre-orders for entire WooCommerce categories at once?
Yes! You can save hours of manual editing by bulk-enabling pre-orders for entire product categories. Follow these steps:
Go to WooCommerce → Settings → Smart Pre-Order Manager.
Click on the Bulk Settings (or Categories) tab.
Select the categories or tags you want to activate from the multi-select dropdown menu.
Set your release dates, pricing rules, or countdown styles for those categories.
Click Save Changes to instantly apply the pre-order status to all assigned products.