Printy Coupons allows you to create multi-purpose vouchers in your WooCommerce store.
Overview
↑ Back to topTo get an overview of the functions of Printy Coupons, you can watch this introduction video. If you have further questions, take a look at the corresponding section of the respective module below.
Installation
↑ Back to topTo start using a product from WooCommerce.com, you can use the “Add to store” functionality on the order confirmation page or the My subscriptions section in your account.
- Navigate to My subscriptions.
- Find the Add to store button next to the product you’re planning to install.
- Follow the instructions on the screen, and the product will be automatically added to your store.
Alternative options and more information at:
Managing WooCommerce.com subscriptions.

Install via the WordPress admin area
↑ Back to topOpen the WordPress admin area, go to Plugins -> Install and click the Install button at the top of the page. Select the ZIP file and install it.
Once the installation process has been completed you need to click the Activate button. Now you can create your voucher templates under “WooCommerce -> Voucher templates (Printy Coupons)”.
Install via FTP
↑ Back to topUnzip the ZIP file to your hard disk. You now have the folder „printy-coupons“ on your PC.
Use your FTP program to create a connection between your PC and your web space.
Load the printy-coupons folder into the WordPress directory /wp-content/plugins.
Log into WordPress and activate the plugin. Now you can create your voucher templates under “WooCommerce -> Voucher templates (Printy Coupons)”.
Create voucher templates
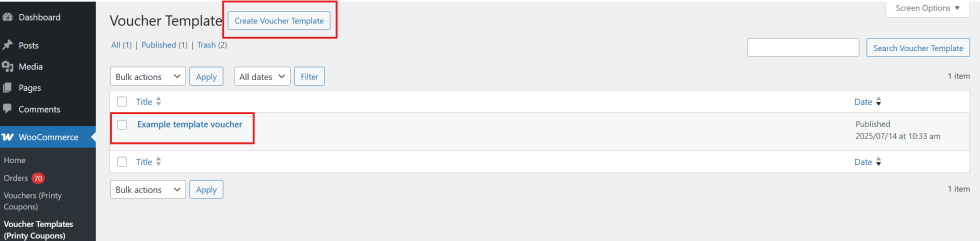
↑ Back to topThe templates for your vouchers can be created from your store’s WP Admin dashboard by navigating to WooCommerce > Voucher Templates. A sample template is provided when the extension is first installed.
To create a new template, click the Create Voucher Template button to enter template mode.
First steps
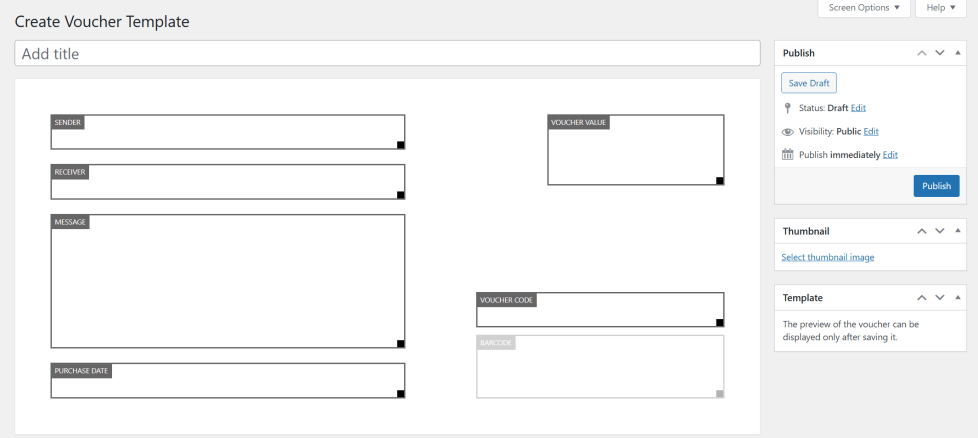
↑ Back to topFirst, assign a title to your voucher template and choose a thumbnail image:
The thumbnail image appears on the product page of any voucher assigned to the template:

The product image itself (left) can be inserted directly into the product. For details, see Create voucher product.
After completing the basic settings, save the template by clicking Update.
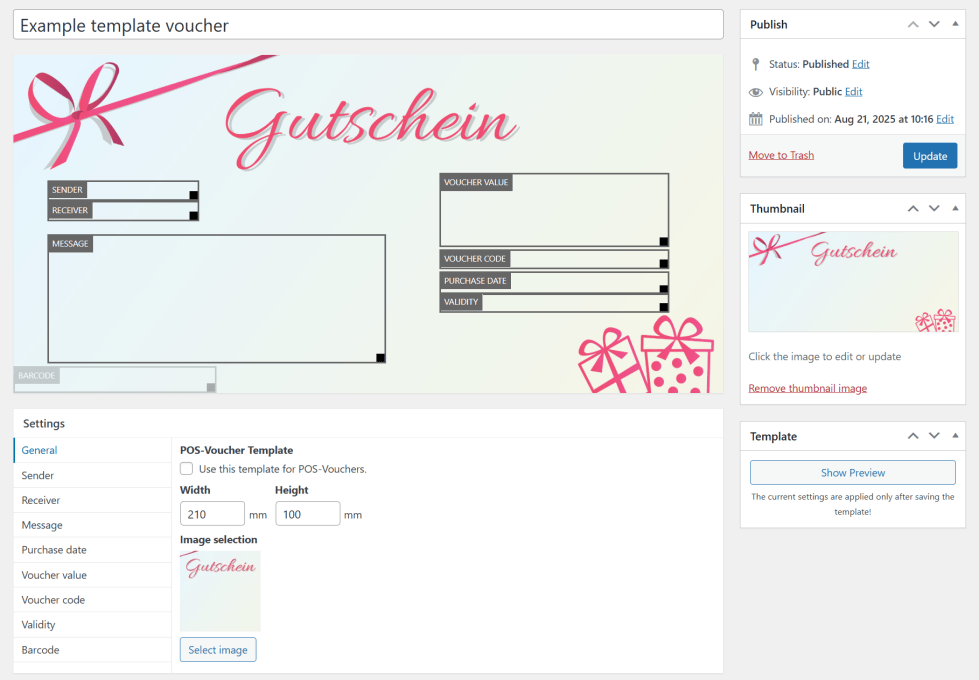
The voucher can now be previewed with sample text in the Template area.
Note: Changes to the template become visible only after the template has been saved.
Settings
↑ Back to topThe individual fields available for the voucher can be customized and configured to be shown or hidden in the Settings area.
General
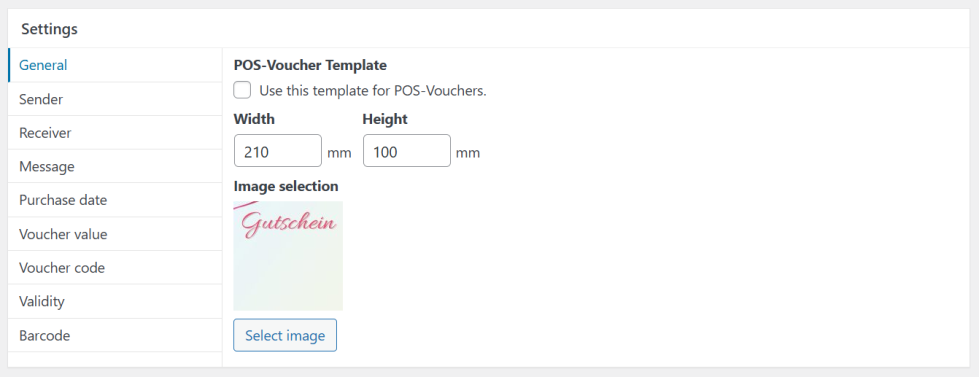
POS voucher template
When this option is enabled, the template can be used in the POS vouchers (Point of Sale) area, i.e. for your local store. For further information on this area, refer to the corresponding section of the documentation.
Width and height
Define the dimensions of the voucher in millimetres.
Image selection
Select the background image for the voucher template. This image serves as the base for the voucher design.
Other settings
In the areas Sender, Recipient, Message, Purchase date, Voucher value, Voucher code, Validity, and Barcode, the corresponding output can be customized (e.g. position, font) or hidden if not required, depending on the option. If a field is defined as required, it must be completed on the product page.
A default value can also be specified for the Message field. This value will be pre-filled in the Message field on the product page. Additionally, it is possible to configure individual text to appear before the generated content (prefix) or after the generated content (suffix).
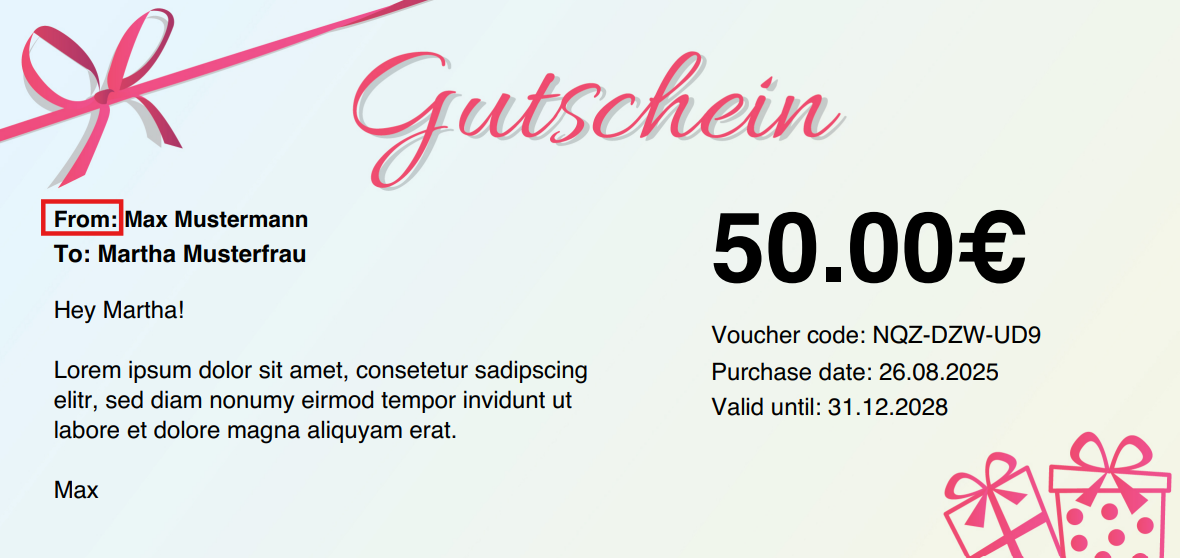
Example (Sender): A prefix such as From: can be defined.
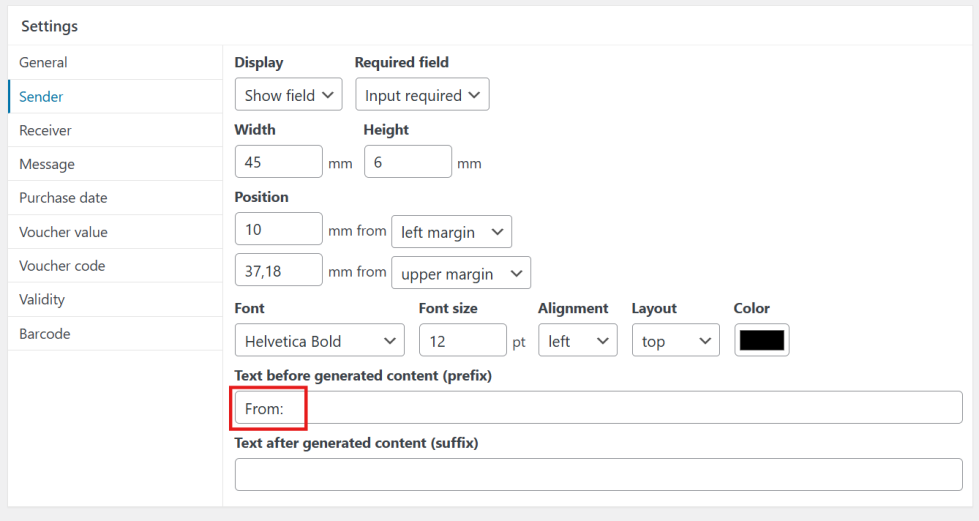
This text is shown on the voucher preceding the sender’s name:
Create voucher product
↑ Back to topCreate product
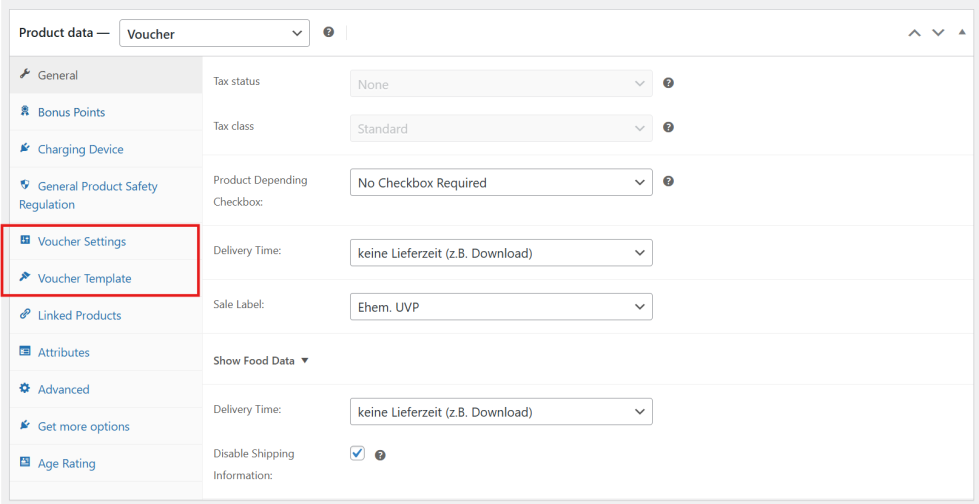
↑ Back to topWhen creating a product under Products, a new product type Voucher is available. After selecting Voucher, two additional tabs become visible: Voucher Settings and Voucher Template. These tabs allow you to configure the voucher product.
Taxation of vouchers
Products of the type Voucher are automatically assigned the tax status None, as no immediate taxation is applied when multi-purpose vouchers are sold. Taxation occurs only upon redemption of the voucher. It is strongly recommended to consult a tax advisor in advance to ensure proper taxation.
The image defined under Product image is displayed on the product page as the product’s main image. This image may differ from those used in the voucher template and is independent of the images specified when creating voucher templates.

Voucher settings
↑ Back to top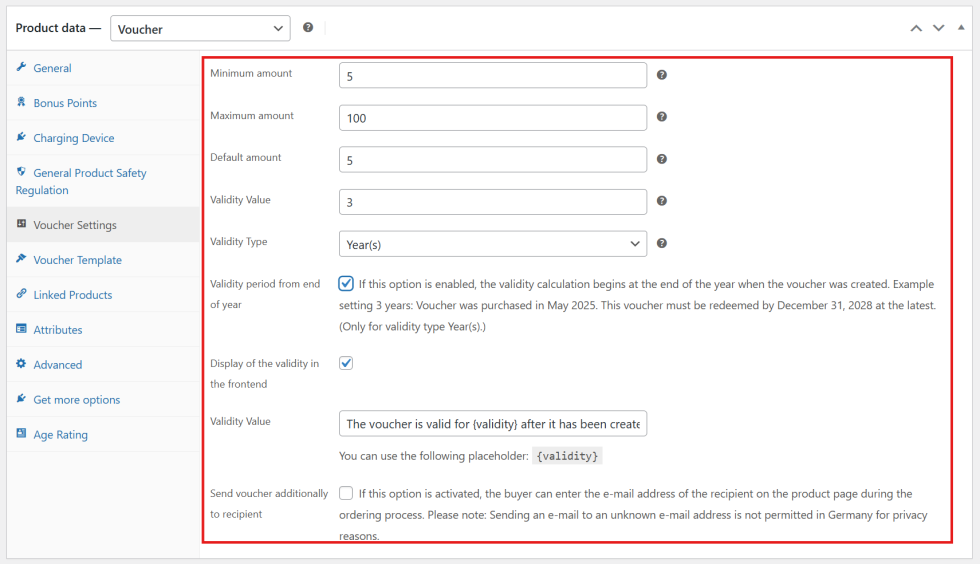
Minimum amount
Defines the minimum value that the customer must enter.
Maximum amount
Defines the maximum value that the customer can enter.
Default amount
Specifies the value that is automatically pre-selected.
Validity value
Enter the numerical value for the validity period of the voucher. By default, vouchers are valid for three (3) years. Enter 0 to set the voucher to unlimited validity.
Validity type
Specifies the unit for the validity period (months or years).
Validity period from end of year
When this option is enabled, the validity period begins at the end of the calendar year in which the voucher was created. This setting applies only when the validity type is set to Year(s) and is enabled by default.
Example: Validity set to 3 years. Voucher purchased in May 2025: voucher must be redeemed by December 31, 2028.
Display of validity in the front-end
When this option is enabled, the defined validity period is displayed on the product page.
Validity text
The text displayed for the validity in the frontend can be customized. The placeholder {validity} represents the defined validity (validity value plus validity type).
Example:
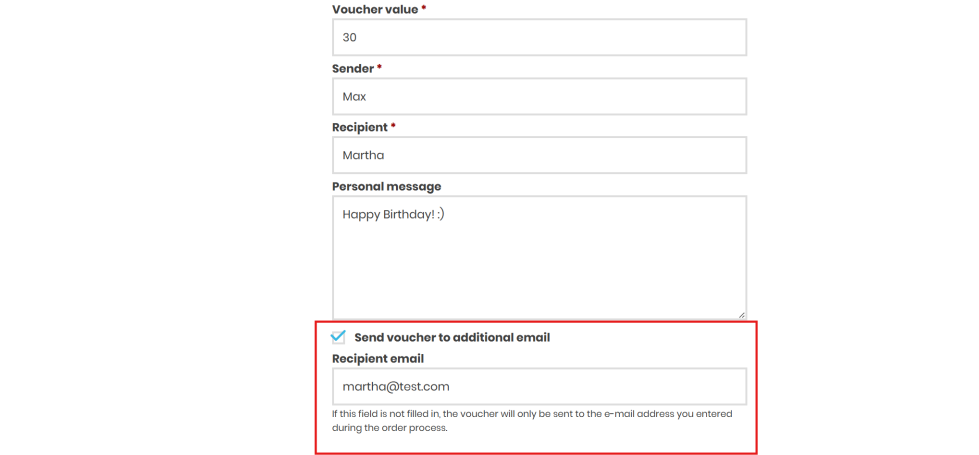
Send voucher to recipient
When this option is enabled, the buyer can specify the recipient’s email address on the product page during the ordering process:
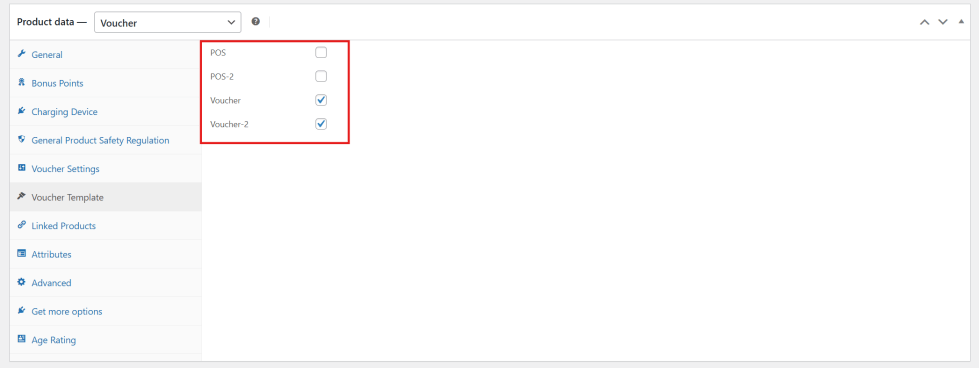
Voucher template
↑ Back to topSelect one or more voucher templates previously created (see Voucher templates) to be used for this product:
Buy and redeem vouchers
↑ Back to topOnce the product has been created (see Create voucher product), the voucher becomes available for purchase in the online shop.
Product page
↑ Back to top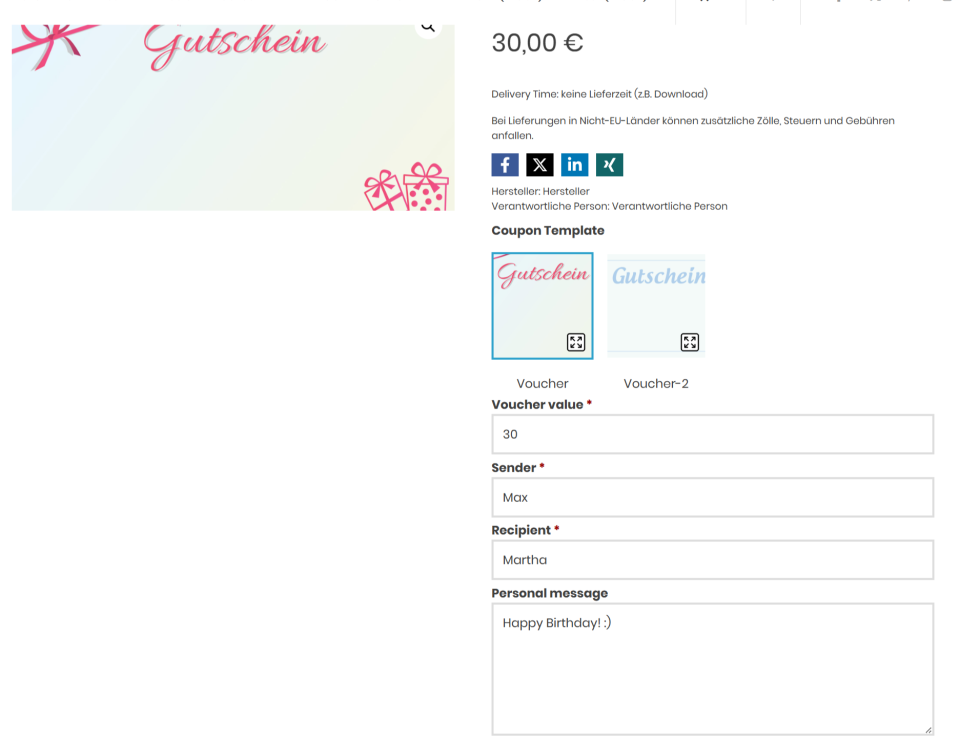
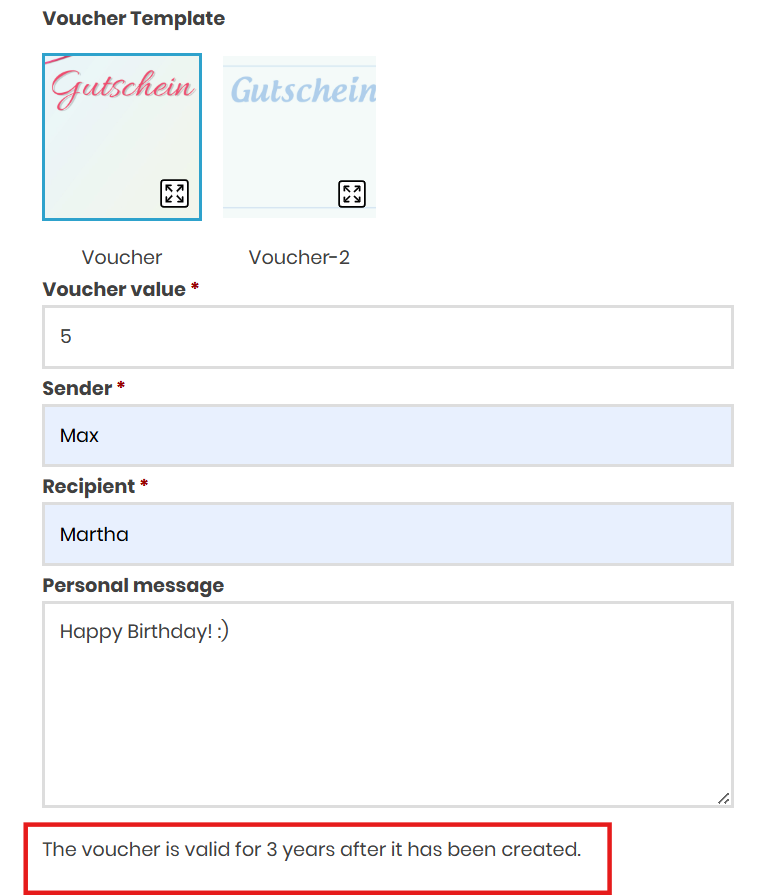
Depending on the configuration of the voucher template, details such as voucher value, sender, recipient, and personal message may be required, optional, or not displayed at all.
Checkout
↑ Back to top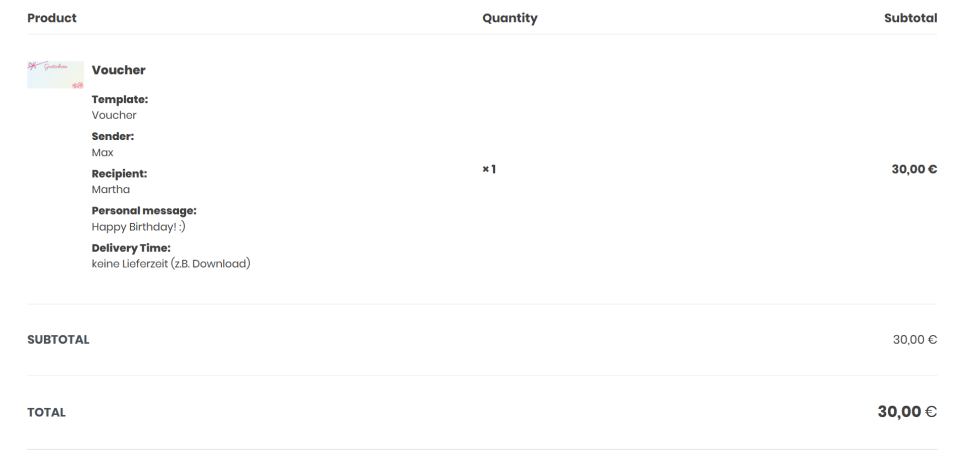
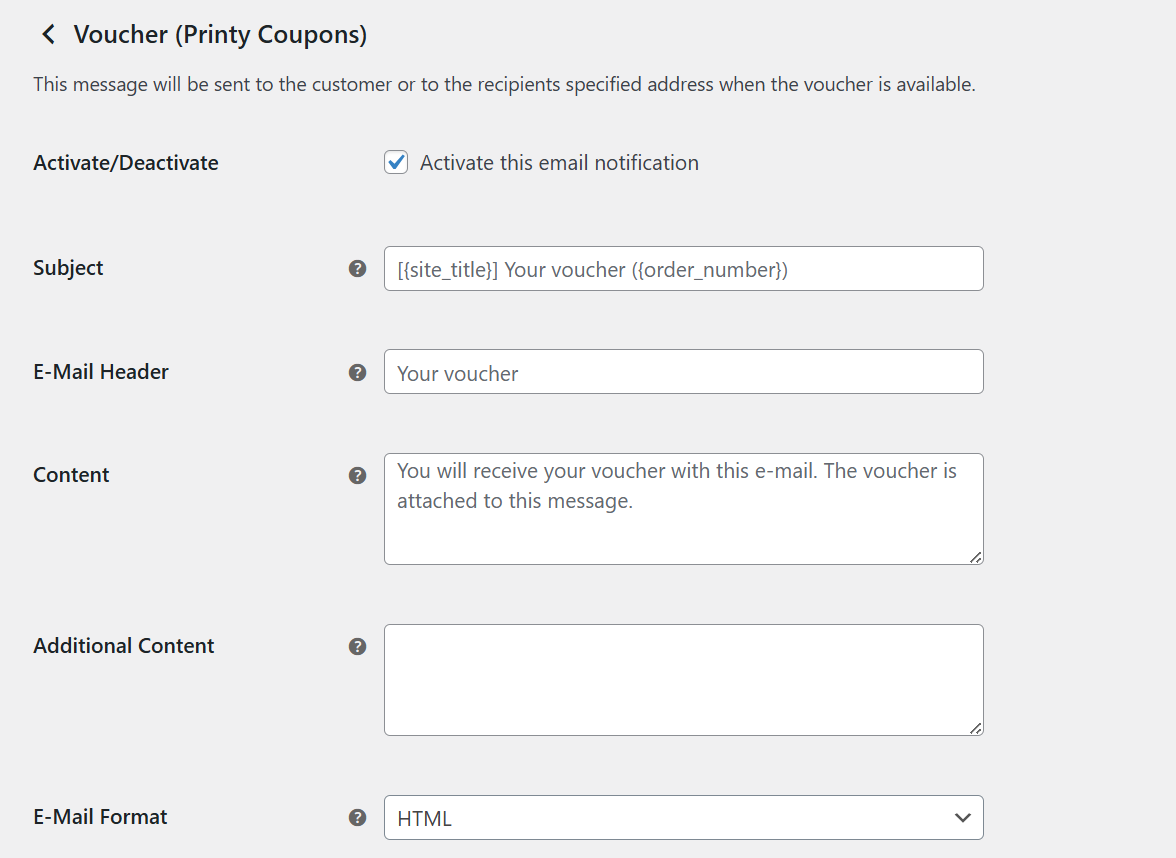
Voucher email
↑ Back to topThe customer receives the voucher as a PDF attachment by email once the order status is set to Completed. The Voucher (Printy Coupons) email can be enabled and configured in your WP Admin dashboard by navigating to WooCommerce > Settings > Emails.
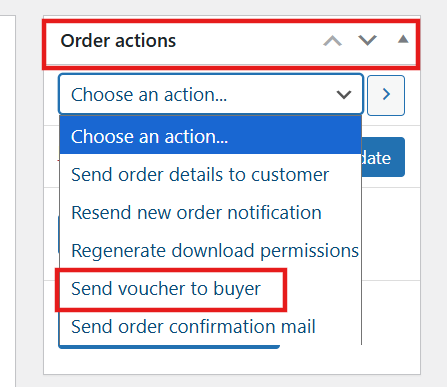
Send voucher email again
↑ Back to topWithin the order, under Order Actions, the store owner can resend the voucher email to the customer:
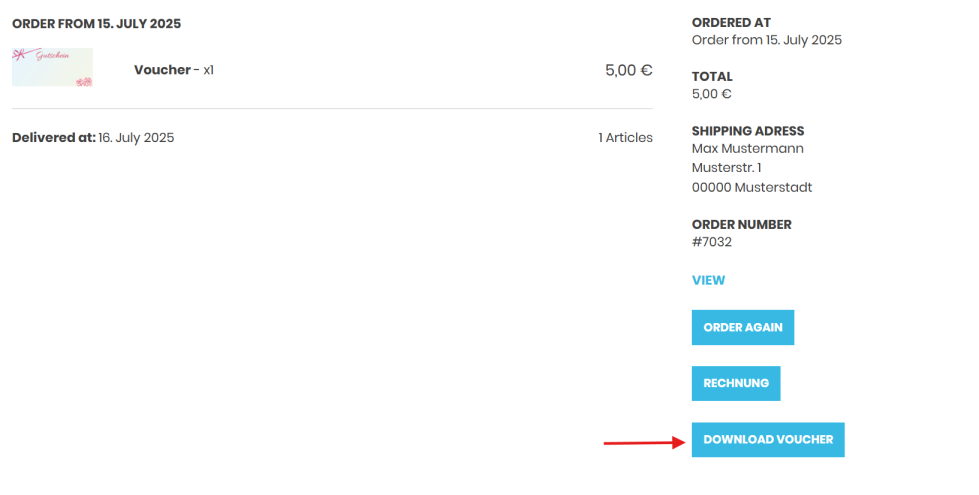
My account page
↑ Back to topCustomers can also download their purchased voucher from the My account page:
Redeem vouchers
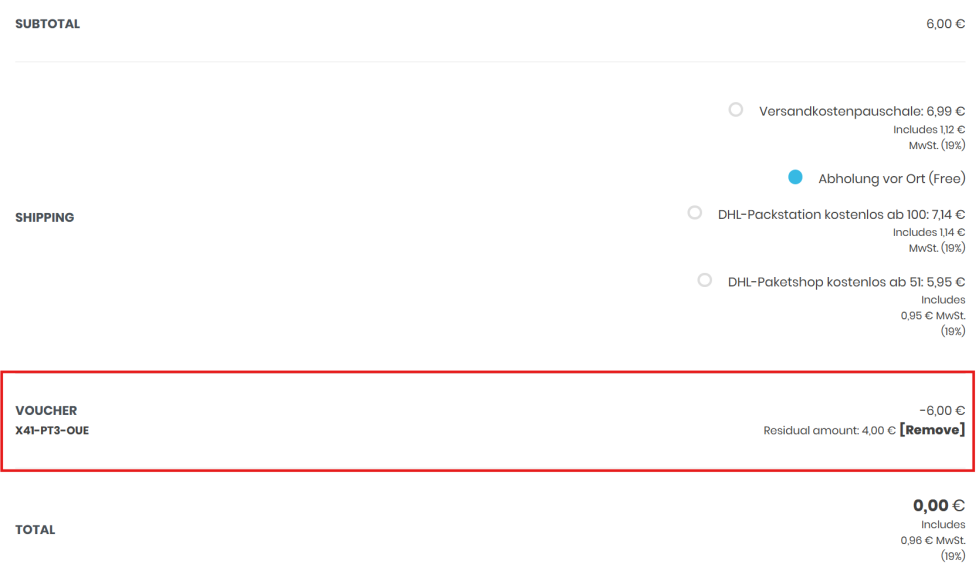
↑ Back to topCustomers can redeem their vouchers during the checkout process in the online shop. If a remaining balance exists after the purchase, it will remain on the voucher and can be used for future orders. The remaining balance is also displayed to the customer at the time of purchase:
Admin overview of vouchers
↑ Back to topAll created vouchers can be accessed via WooCommerce > Vouchers.
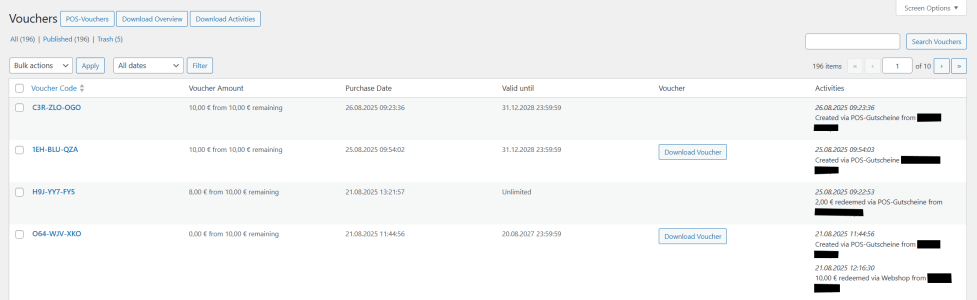
Voucher code
Displays the voucher code.
Voucher amount
Displays the value of the voucher and, if applicable, the remaining balance.
Purchase date
Indicates when the voucher was created or purchased.
Valid until
Shows the validity of the voucher.
Voucher
The voucher can be downloaded as a PDF from this section. This is only available if the voucher was purchased through the online store.
If vouchers were created via POS Vouchers, they can only be downloaded here if they were printed or sent by email at the time of creation. In these cases, assignment of a template is required.
Activities
Displays activities such as voucher creation via POS Vouchers or voucher redemption.
Overviews as Excel export
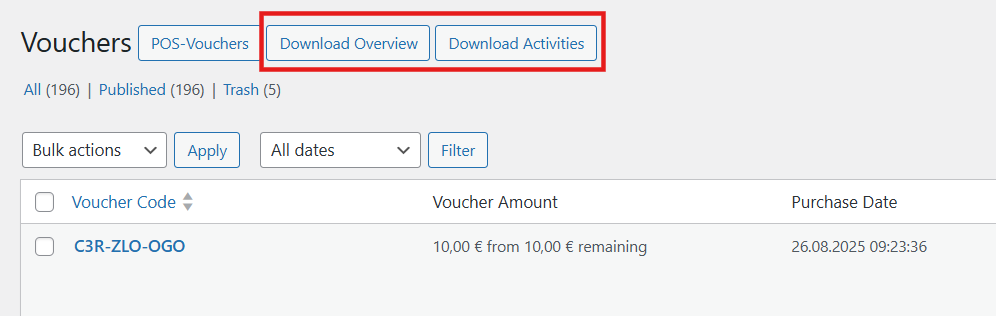
Under Download Overview, a complete Excel file containing all vouchers can be downloaded.
The Download Activities section provides an overview of all voucher-related activities.
POS vouchers
↑ Back to topThe POS Vouchers feature allows vouchers to be purchased directly in the offline store and redeemed locally. This function can be accessed either from the admin bar in the back-end or via WooCommerce > Vouchers.

Check and redeem vouchers
↑ Back to top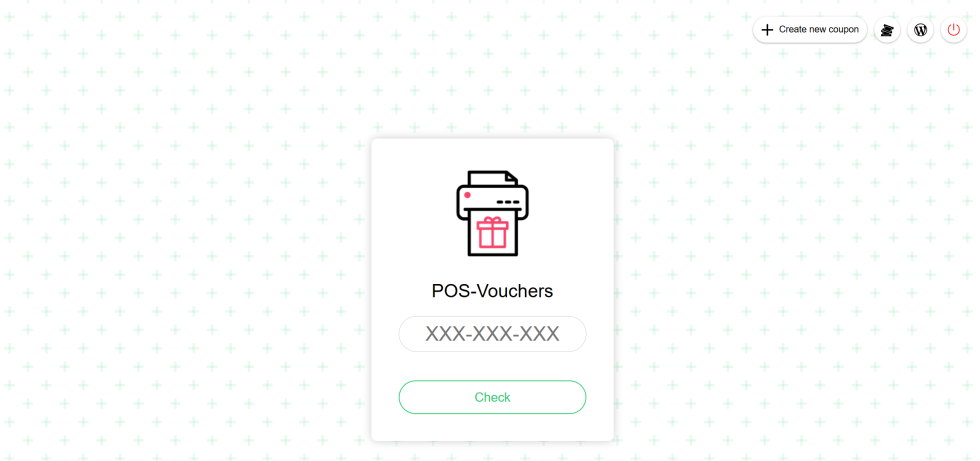
Before redemption, the voucher can be checked for validity and current value. Multi-purpose vouchers may be redeemed multiple times until the balance has been fully used.

The feature also displays the remaining balance of the voucher. When a purchase is made in a store, the voucher can be redeemed directly.

After redemption, the voucher balance is reduced accordingly. If the full amount has been redeemed, the voucher becomes invalid.

Create a new voucher
↑ Back to topIf customers should also be able to purchase vouchers directly in the store, a voucher can be created using the Create New Coupon option. Please note that this process is independent of online shop orders. The voucher must be charged to the customer through the store’s checkout system, as no WooCommerce order is generated. This is the same procedure that applies when vouchers are redeemed locally.
To create a voucher, specify the desired amount and the validity period. Entering 0 (e.g., 0 Year(s)) will set the voucher to unlimited validity.
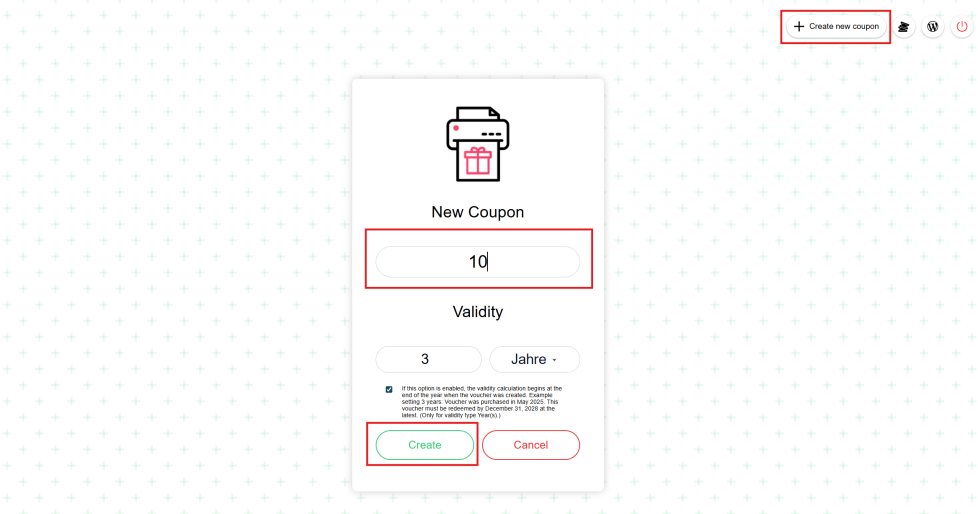
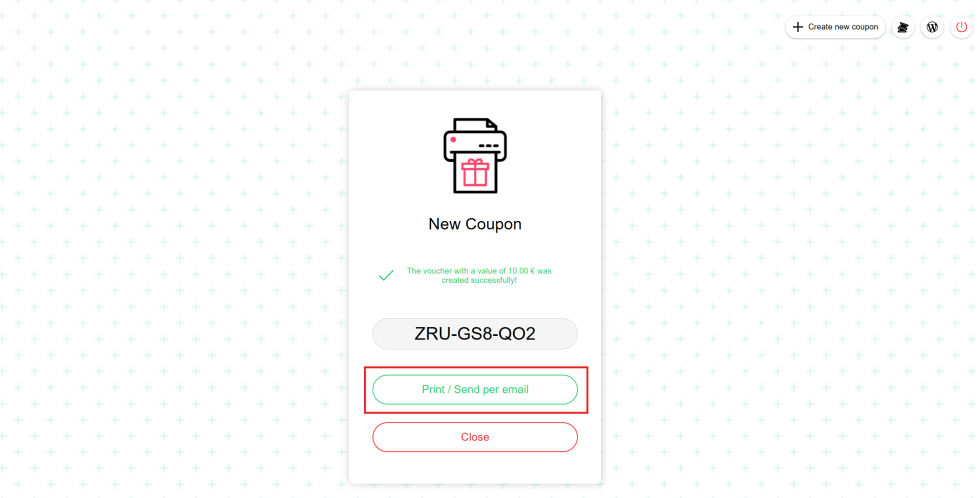
After clicking Create, the voucher is generated. The voucher code can then either be provided to the customer manually or sent using the Print / Send per Email option, which allows the voucher to be emailed or printed directly in the store.
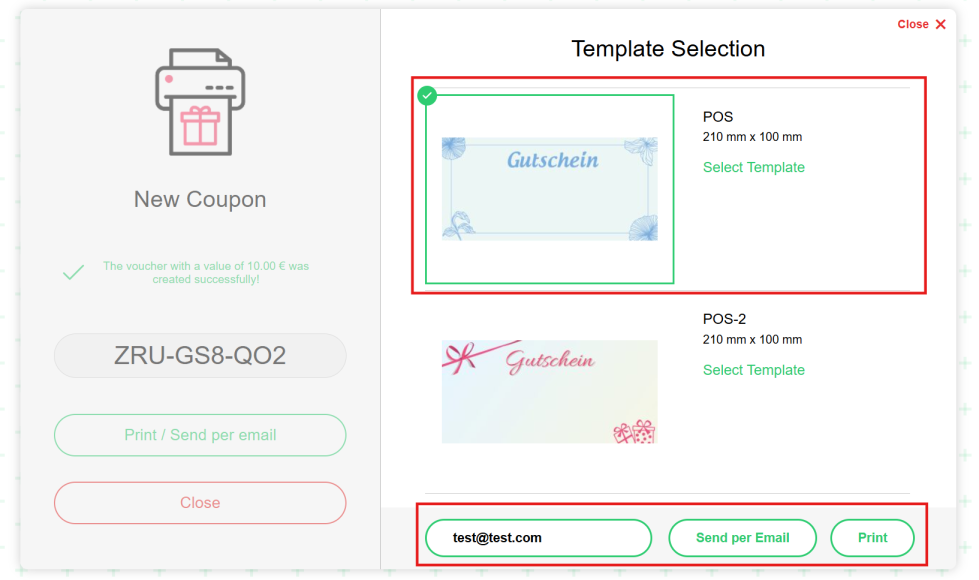
To proceed, select the template previously created for POS dispatch (see POS voucher template). You can then either generate a PDF file by cliing Print, or send the voucher to the customer by entering an email address and clicking Send per Email.
The created voucher is listed in WooCommerce > Vouchers in your store’s WP Admin dashboard.