
OTP login with Phone Number for WooCommerce allows customers to easily log in to your store using their phone numbers. Verify the OTP and log in or register with ease.
Installation
↑ Back to top- Download the “Registration & Login with Mobile Phone Number” plugin.
- Go to WordPress > Plugins and click on “Add New” to upload the .zip file that you downloaded.
- Install and Activate the plugin.
Configuration
↑ Back to topBefore configuring the settings, you will need to create an account on Google Firebase. You can create the app using the link. Watch this video on “How to Create an App on Google Firebase Console” for further information. Once that’s done, we can move on to configuring the plugin. To configure the plugin, go to WooCommerce > Settings > Login with Phone, and you will find the following settings:
General Settings
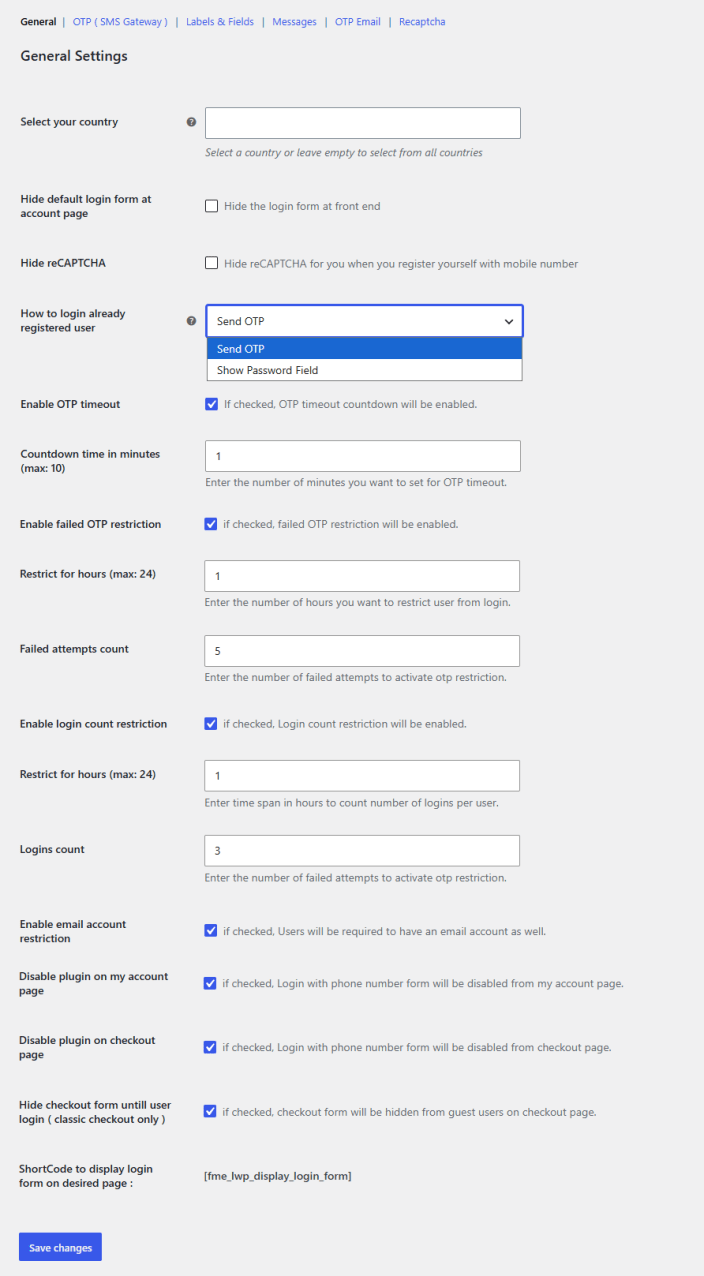
↑ Back to topTo configure the general settings, go to WooCommerce > Settings > Login with Phone > General Settings:
- Select Your Country: Choose a country to limit phone number registration to that country only. Leave this field empty to select from all countries.
- Hide Default Login Form at Account Page: Enable the checkbox to hide the default login form at the front-end account page.
- Hide reCAPTCHA: Enable the checkbox to hide reCAPTCHA for users when they register with a mobile number.
- How to Login Already Registered User: Select how an already registered user logs in. You have the following options:
- Send OTP
- Show Password Field
If you select “Send OTP,” the plugin sends a one-time password to the user’s registered mobile number for verification at each login. If you select “Show Password Field,” the user logs in using their mobile number and account password instead of an OTP.
- Enable OTP Timeout: Enable the checkbox to activate the OTP timeout countdown.
- Countdown Time in Minutes (max: 10): Enter the number of minutes for the OTP timeout.
- Enable Failed OTP Restriction: Enable the checkbox to restrict users after they exceed the allowed number of failed OTP attempts.
- Restrict for Hours (max: 24): Enter the number of hours to restrict a user from logging in after exceeding failed OTP attempts.
- Failed Attempts Count: Enter the number of failed OTP attempts allowed before the restriction is activated.
- Enable Login Count Restriction: Enable the checkbox to restrict the number of logins a user can make within a set time span.
- Restrict for Hours (max: 24): Enter the time span in hours used to count the number of logins per user.
- Logins Count: Enter the number of logins allowed within the restriction time span before the user is blocked.
- Enable Email Account Restriction: Enable the checkbox to require users to also have an email account to complete registration.
- Disable Plugin on My Account Page: Enable the checkbox to disable the login with phone number form on the account page.
- Disable Plugin on Checkout Page: Enable the checkbox to disable the login with phone number form on the checkout page.
- Hide Checkout Form Until User Login (classic checkout only): Enable the checkbox to hide the checkout form from guest users on the checkout page until they log in. Note: This applies to classic checkout only.
- Shortcode to Display Login Form on Desired Page: Use the following shortcode to display the login form on any page of your choice: [fme_lwp_display_login_form]
OTP (SMS Gateway) Settings
↑ Back to topConfigure different SMS gateway services to send OTP. Go to WooCommerce > Settings > Login with Phone > OTP (SMS Gateway). Here you can select a Service Provider from the dropdown. You have the following options:
- Firebase
- MSG91
- Twilio
Depending on the service provider you select, a corresponding settings section appears below the dropdown.
Firebase Settings
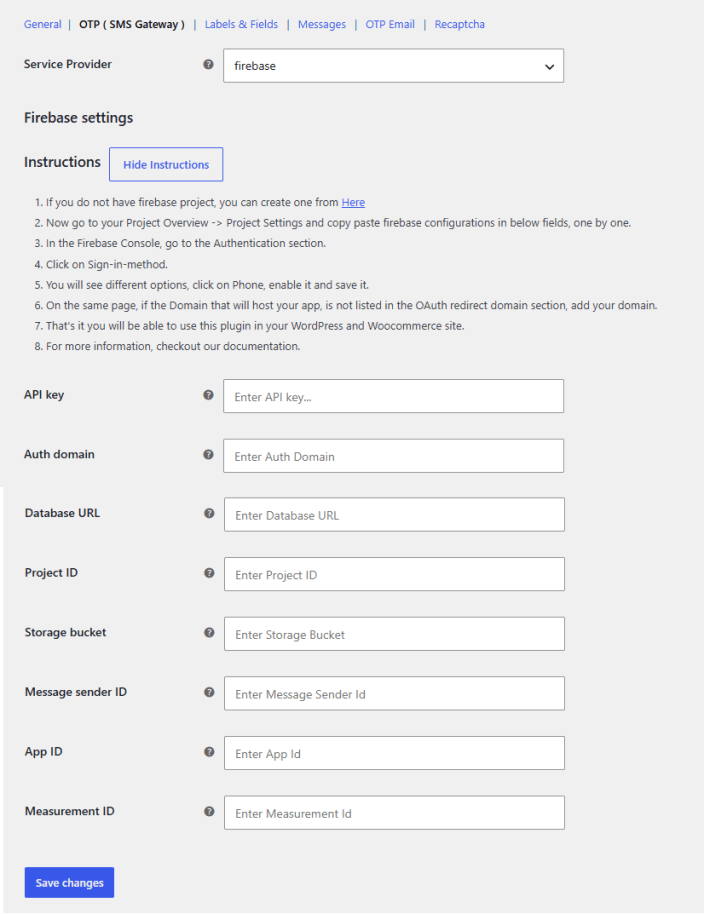
↑ Back to top- API Key: Enter the API key from your Firebase account.
- Auth Domain: Enter the Auth Domain from your Firebase account.
- Database URL: Enter the Database URL from your Firebase account.
- Project ID: Enter the Project ID from your Firebase account.
- Storage Bucket: Enter the Storage Bucket from your Firebase account.
- Message Sender ID: Enter the Message Sender ID from your Firebase account.
- App ID: Enter the App ID from your Firebase account.
- Measurement ID: Enter the Measurement ID from your Firebase account.
Instructions (Firebase):
- If you do not have a Firebase project, you can create one from here.
- Now go to your Project Overview > Project Settings and copy and paste the Firebase configuration into the fields above, one by one.
- In the Firebase Console, go to the Authentication section.
- Click on Sign-in method.
- You will see different options. Click on Phone, enable it, and save it.
- On the same page, if the domain that will host your app is not listed in the OAuth redirect domain section, add your domain.
- That’s it. You will be able to use this plugin on your WordPress and WooCommerce site.
MSG91 Settings
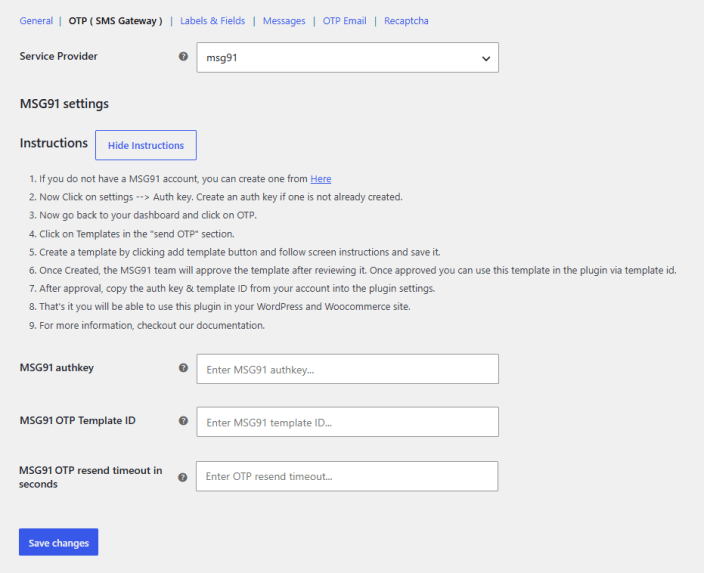
↑ Back to top- MSG91 Authkey: Enter the auth key from your MSG91 account.
- MSG91 OTP Template ID: Enter the OTP template ID created in the OTP template section of your MSG91 account.
- MSG91 OTP Resend Timeout in Seconds: Enter the number of seconds a user must wait before the OTP can be resent.
Instructions (MSG91):
- If you do not have an MSG91 account, you can create one from here.
- Now click on Settings > Auth Key. Create an auth key if one is not already created.
- Now go back to your dashboard and click on OTP.
- Click on Templates in the “Send OTP” section.
- Create a template by clicking the Add Template button and follow the on-screen instructions, then save it.
- Once created, the MSG91 team will approve the template after reviewing it. Once approved, you can use this template in the plugin via the template ID.
- After approval, copy the auth key and template ID from your account into the plugin settings.
- That’s it. You will be able to use this plugin on your WordPress and WooCommerce site.
Twilio Verify Settings
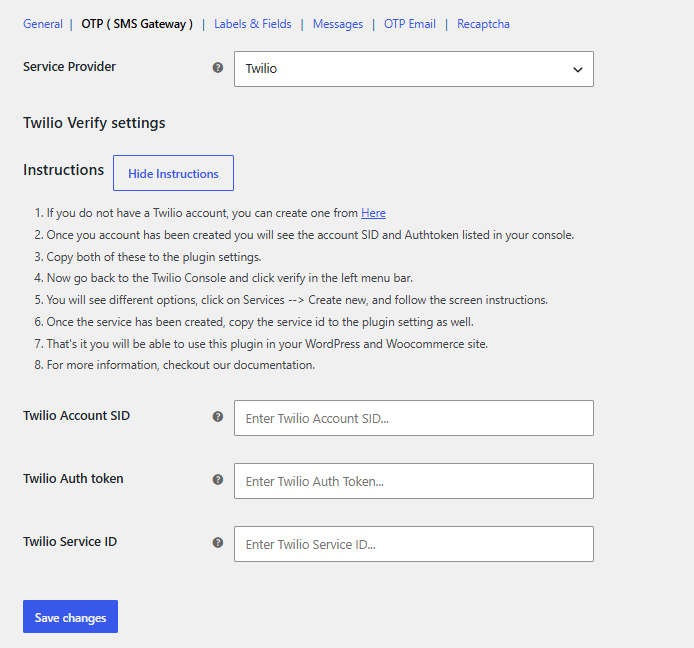
↑ Back to top- Twilio Account SID: Enter the Account SID from your Twilio account.
- Twilio Auth Token: Enter the Auth Token from your Twilio account.
- Twilio Service ID: Enter the Service ID from the service created in your Twilio account.
Instructions (Twilio):
- If you do not have a Twilio account, you can create one from here.
- Once your account has been created, you will see the Account SID and Auth Token listed in your console.
- Copy both of these into the plugin settings.
- Now go back to the Twilio Console and click Verify in the left menu bar.
- You will see different options. Click on Services > Create New, and follow the on-screen instructions.
- Once the service has been created, copy the Service ID into the plugin settings as well.
- That’s it. You will be able to use this plugin on your WordPress and WooCommerce site.
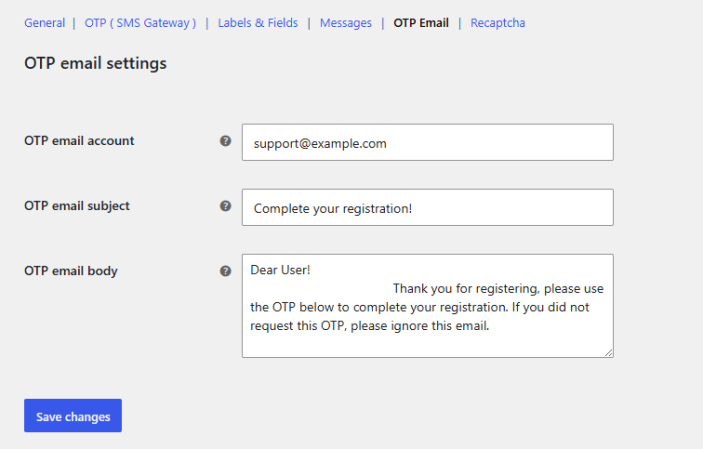
WhatsApp Meta Settings
↑ Back to top- Access Token: Enter the permanent Access Token from your Meta WhatsApp Business app.
- Phone Number ID: Enter the Phone Number ID from your Meta WhatsApp Business app.
- WhatsApp Business Account ID: Enter the WABA ID from your Meta WhatsApp Business app. Note: Save the Access Token and WABA ID before fetching templates.
- Message Template: Click Fetch Templates to pull in the templates approved in your Meta Business account, then select a template from the dropdown. Once selected, the body parameter count and OTP button info are shown, along with a preview of the template body.
Instructions (WhatsApp Meta):
- Create a Meta WhatsApp Business app and get your permanent Access Token, Phone Number ID, and WABA ID from the Meta WhatsApp Cloud API docs.
- In Meta Business Manager, create and approve an Authentication/OTP template that includes {{1}} for the OTP.
- For API connectivity testing, make sure Meta’s sample hello_world template is available. It is usually pre-approved. If it doesn’t appear in Fetch Templates, create and approve hello_world in Meta for testing only.
- Enter the Access Token, Phone Number ID, and WABA ID, then Save.
- Click Fetch Templates, pick a template, check the body preview, then Save again.
- Set the OTP expiry. The plugin stores the OTP locally and verifies it after Meta delivers the message.
- Select WhatsApp Meta as the service provider and Save.
Note on connectivity check: Select Meta’s sample hello_world template from the list and send a test request to verify your API credentials. If hello_world isn’t listed, create and approve it in Meta Business Manager for testing purposes. For live OTP login, switch to an Authentication template with {{1}} (confirm the placeholders in the body preview) and save before going live. There is no separate test mode.
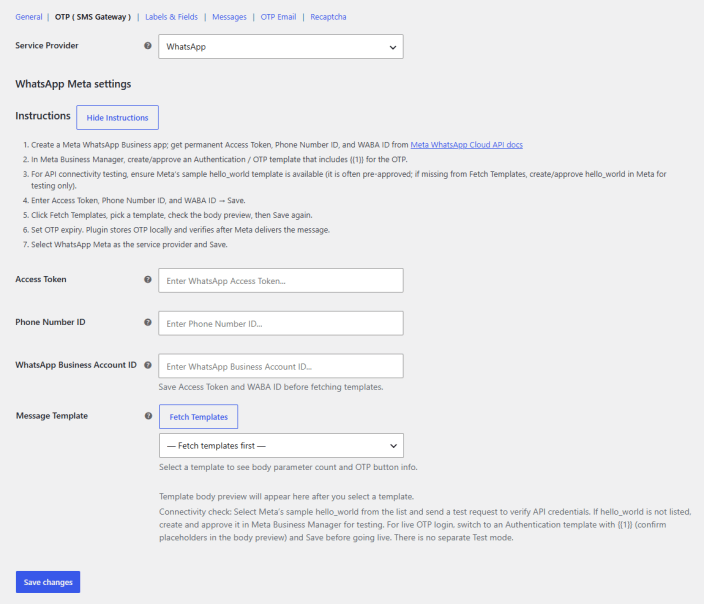
Labels & Fields Settings
↑ Back to topGo to WooCommerce > Settings > Login with Phone > Labels & Fields, and in this tab you can configure the settings for labels & fields.
- Main Form Heading Text: Customize the main heading text of the login with phone form.
- Phone Number Field Placeholder: Add custom placeholder text for the phone number field, e.g. Enter Your Phone Number.
- Send Code Button Text: Customize the text for the send code button.
- Verify Code Placeholder: Add custom placeholder text for the verify code field, e.g. Enter Code Here.
- Verify Code Button Text: Customize the text for the verify code button.
- Add Login Button Text: Set the text for the add login button.
- Change Login Button Text: Set the text for the change login button.
- Enter Phone/Verify OTP Button Background Color: Set the background color for the enter phone and verify OTP buttons.
- Enter Phone/Verify OTP Button Text Color: Set the text color for the enter phone and verify OTP buttons.
- Registration Popup Active Tab Button Color: Set the background color for the active tab button in the registration popup.
- Registration Popup Active Tab Button Text Color: Set the text color for the active tab button in the registration popup.
- Registration Popup Tab Button Hover Color: Set the background color for a tab button in the registration popup on hover.
- Registration Popup Tab Button Text Hover Color: Set the text color for a tab button in the registration popup on hover.
- OTP Countdown Message Text Color: Set the text color for the OTP countdown message.
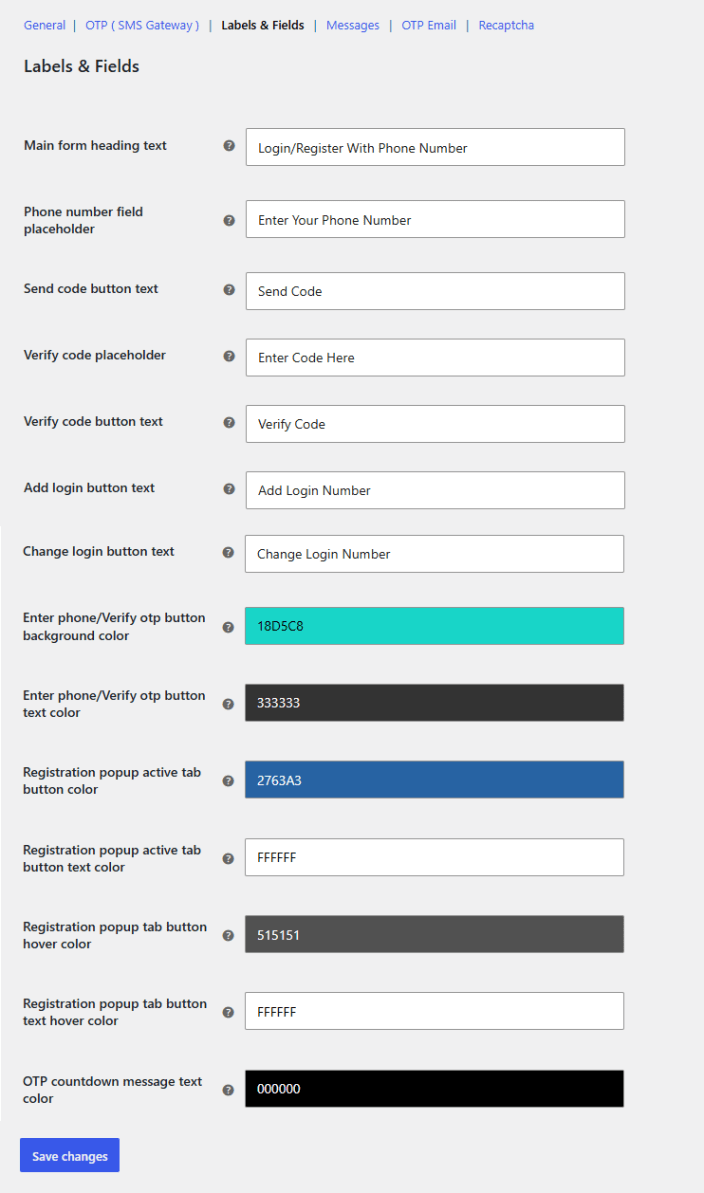
Messages Settings
↑ Back to topGo to WooCommerce > Settings > Login with Phone Number > Messages, and here you can configure the following settings:
- Phone Number Error Text: This message is shown when the phone number field is left empty.
- Sent Verification Code Message: This message is shown when the verification code has been sent.
- Authentication Code Error Message: This message is shown when an invalid code is entered.
- Too Many Login Attempts: This message is shown when a user attempts to log in too many times with the same number or from the same IP address.
- Invalid Phone Number: This message is shown when the user enters an invalid phone number.
- Successful Verification Text at Registration: This message is shown after successful verification during registration.
- Successful Verification Text at Login: This message is shown after successful verification and login.
- OTP Repeated Failure Error Text: This message is shown on repeated OTP verification failure.
- Repeated Login Error Text: This message is shown after the login limit is reached.
- OTP Countdown Message: This message is shown along with the OTP countdown timer.
- Registration Popup Message: This message is shown in the registration popup when a phone number isn’t associated with any account.
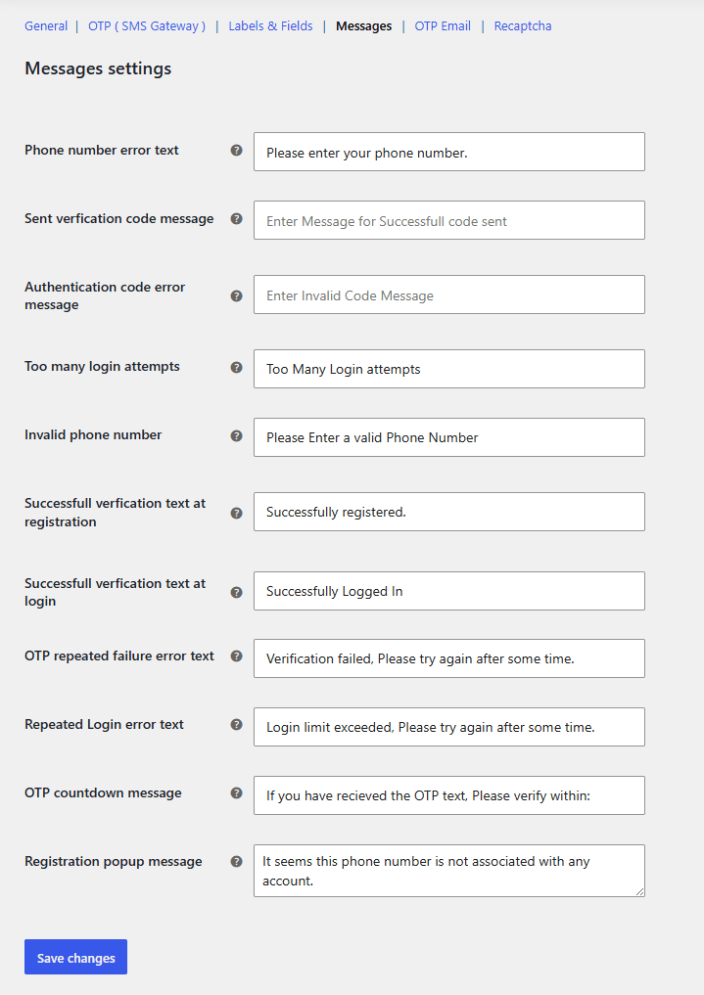
OTP Email Settings
↑ Back to topGo to WooCommerce > Settings > Login with Phone Number > OTP Email, and here you can configure the following settings:
- OTP Email Account: Enter the email address you want to use to send OTP emails to customers.
- OTP Email Subject: Set the email subject line for the OTP email.
- OTP Email Body: Enter the body content you want to use for the OTP email.
Checkout Verification
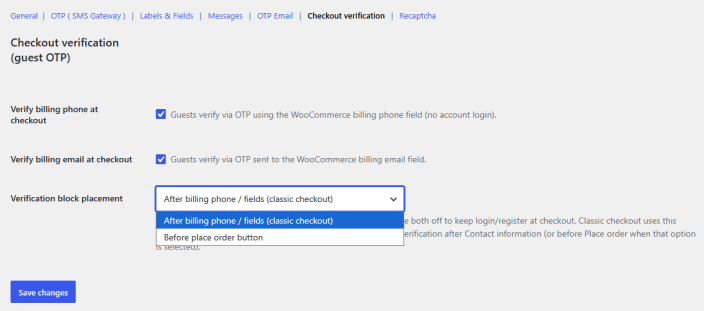
↑ Back to topEnable OTP verification for guest shoppers at checkout, so a store can confirm a buyer’s phone number or email is real before the order goes through, without forcing them to create an account or log in. Go to WooCommerce > Settings > Login with Phone Number > Checkout Verification and configure:
- Verify Billing Phone at Checkout: Enable so that guest customers gets a one-time code sent to the number they typed in the standard WooCommerce billing phone field.
- Verify Billing Email at Checkout: Check the box to send an OTP to the email the customer added at checkout.
- Verification Block Placement: Select where to display the verification block on the checkout page:
- After Billing Phone/Fields (Classic Checkout)
- Before Place Order Button
Classic checkout uses this placement. WooCommerce Checkout block always shows login/verification after Contact information (or before Place order when that option is selected).
reCAPTCHA Settings
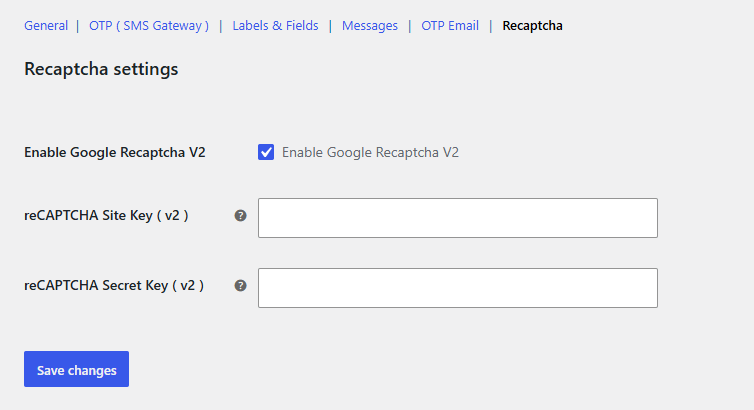
↑ Back to topGo to WooCommerce > Settings > Login with Phone Number > reCAPTCHA, and here you can configure the following settings:
- Enable Google reCAPTCHA V2: Check this box to enable reCAPTCHA on the login/registration form.
- reCAPTCHA Site Key (v2): Enter the reCAPTCHA site key (v2).
- reCAPTCHA Secret Key (v2): Enter the reCAPTCHA secret key (v2).
Frequently Asked Questions
↑ Back to topDo customers need to create an account to log in with their phone number?
↑ Back to topNo. Customers can log in by entering their phone number and verifying the OTP sent to them.
Can already registered users log in with a password instead of OTP?
↑ Back to topYes. Under General > How to Login Already Registered User, select Show Password Field instead of Send OTP.
Which SMS/OTP providers does the plugin support?
↑ Back to topFirebase, MSG91, Twilio, and WhatsApp (via Meta). Select one from the Service Provider dropdown under OTP (SMS Gateway).
Why can’t I fetch WhatsApp templates?
↑ Back to topThe Access Token and WhatsApp Business Account ID (WABA ID) must be entered and saved first before Fetch Templates will return results.
What happens if a customer enters the wrong OTP too many times?
↑ Back to topIf Enable Failed OTP Restriction is checked under General settings, the customer is blocked from further attempts for the number of hours set in the Restrict for Hours field.
Can I hide the checkout form from guests until they log in?
↑ Back to topYes, but only for classic checkout. Enable Hide Checkout Form Until User Login (classic checkout only) under General settings.
How do I display the login form on a custom page?
↑ Back to topAdd the shortcode [fme_lwp_display_login_form] to any page or post where you want the form to appear.

