Cart Options and Addons for WooCommerce gives you complete control over your WooCommerce cart by letting you manage discounts, limitations, abandoned carts, and cart features with ease.
Installation
↑ Back to topTo start using a product from WooCommerce.com, you can use the “Add to store” functionality on the order confirmation page or the My subscriptions section in your account.
- Navigate to My subscriptions.
- Find the Add to store button next to the product you’re planning to install.
- Follow the instructions on the screen, and the product will be automatically added to your store.
Alternative options and more information at:
Managing WooCommerce.com subscriptions.

Setup and Configuration
↑ Back to topInstalling and Activating the Plugin
↑ Back to top- Log in to your WordPress Admin Dashboard.
- Navigate to Plugins → Add New → Upload Plugin.
- Upload the Cart Options and Addons ZIP file.
- Click Install Now and then Activate.
Configurations:
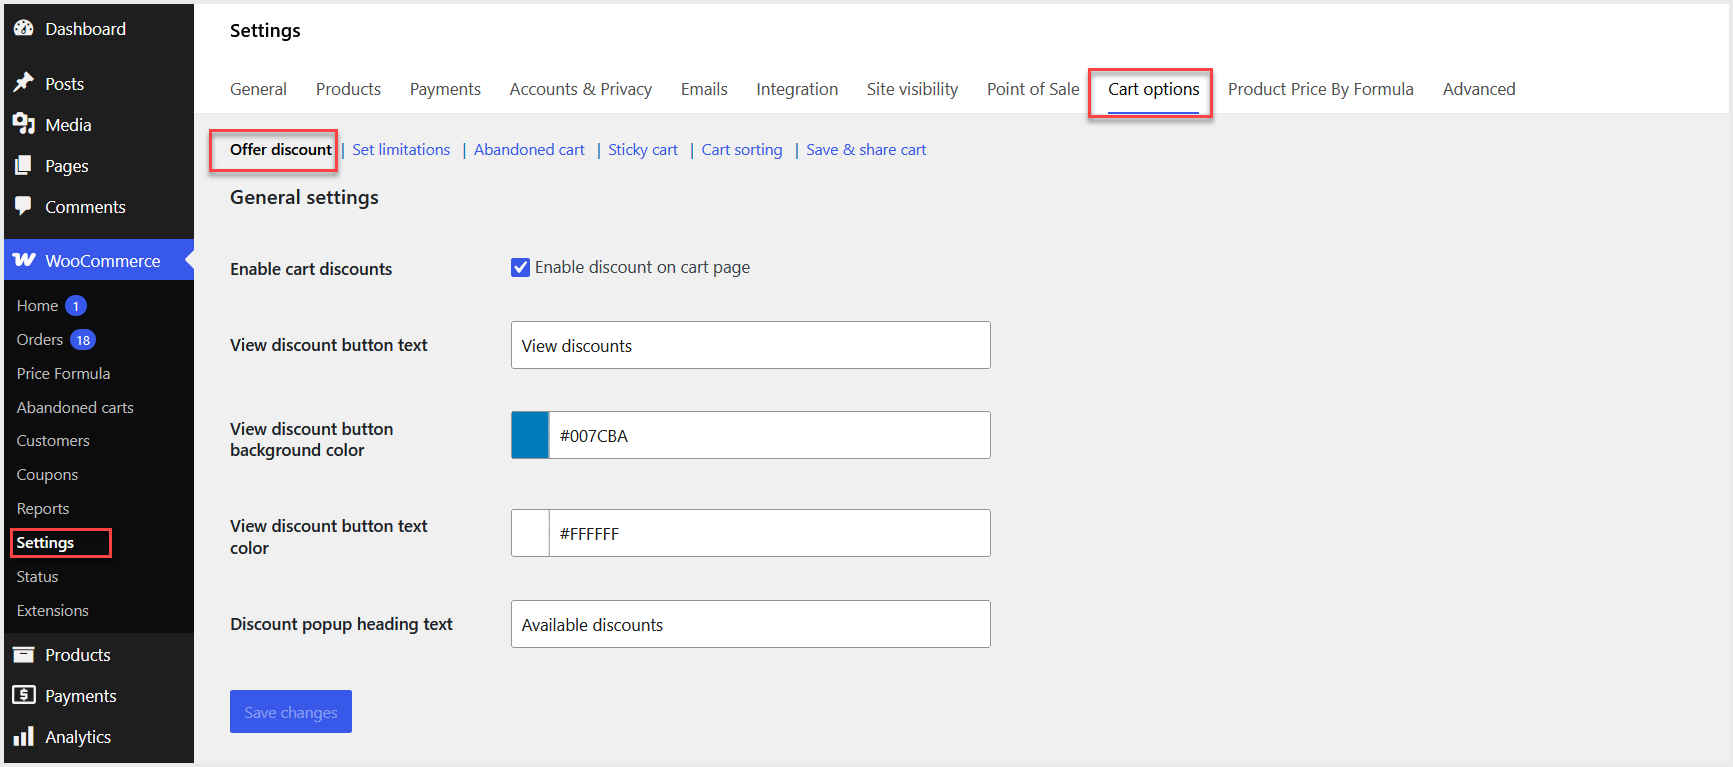
↑ Back to topTo configure the settings, go to WooCommerce>Settings>Cart Options at the admin panel. Here, you will find 6 tabs having different configuration options. Each tab is described below.
Offer Discount
↑ Back to topClick “Offer Discount” tab to enable/disable cart discount option and customize the “View Discounts” button’s text and colors.
Scroll down to view all the existing rules and click the “Add Rule”button to add the new rule.
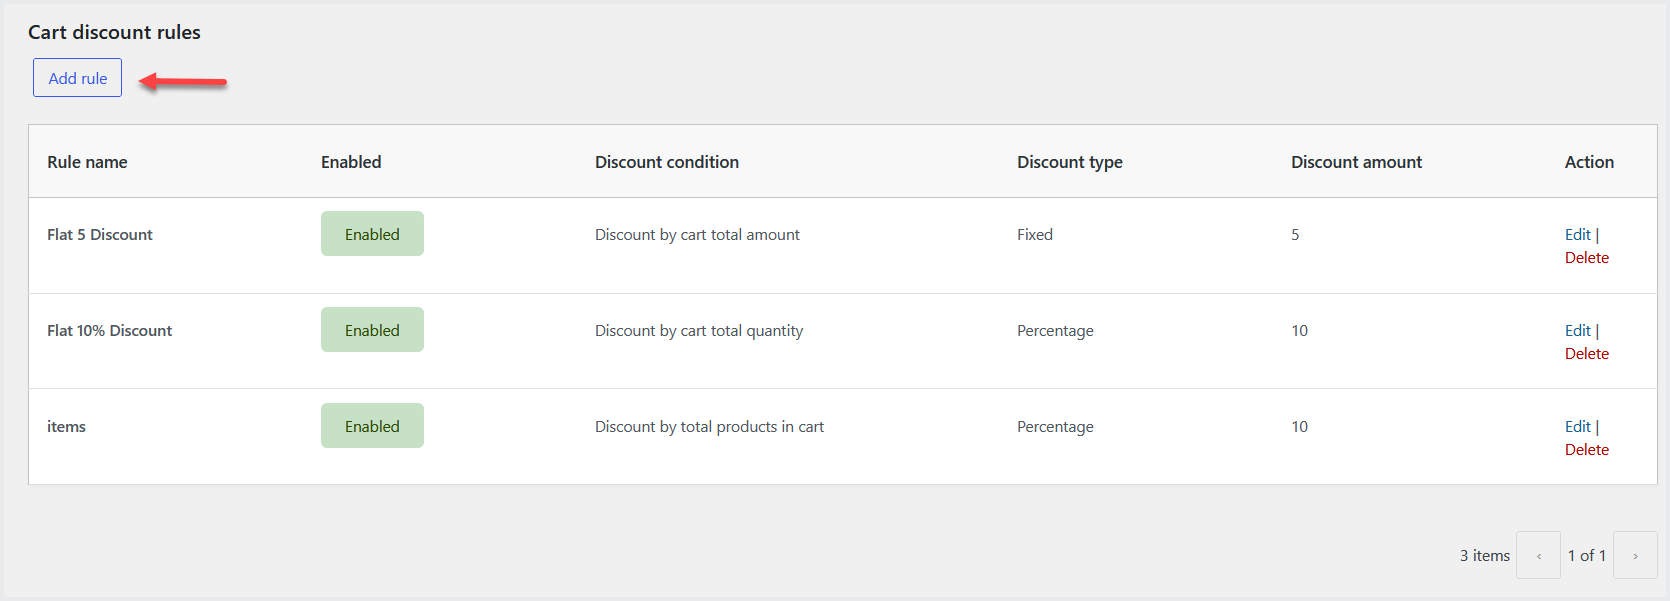
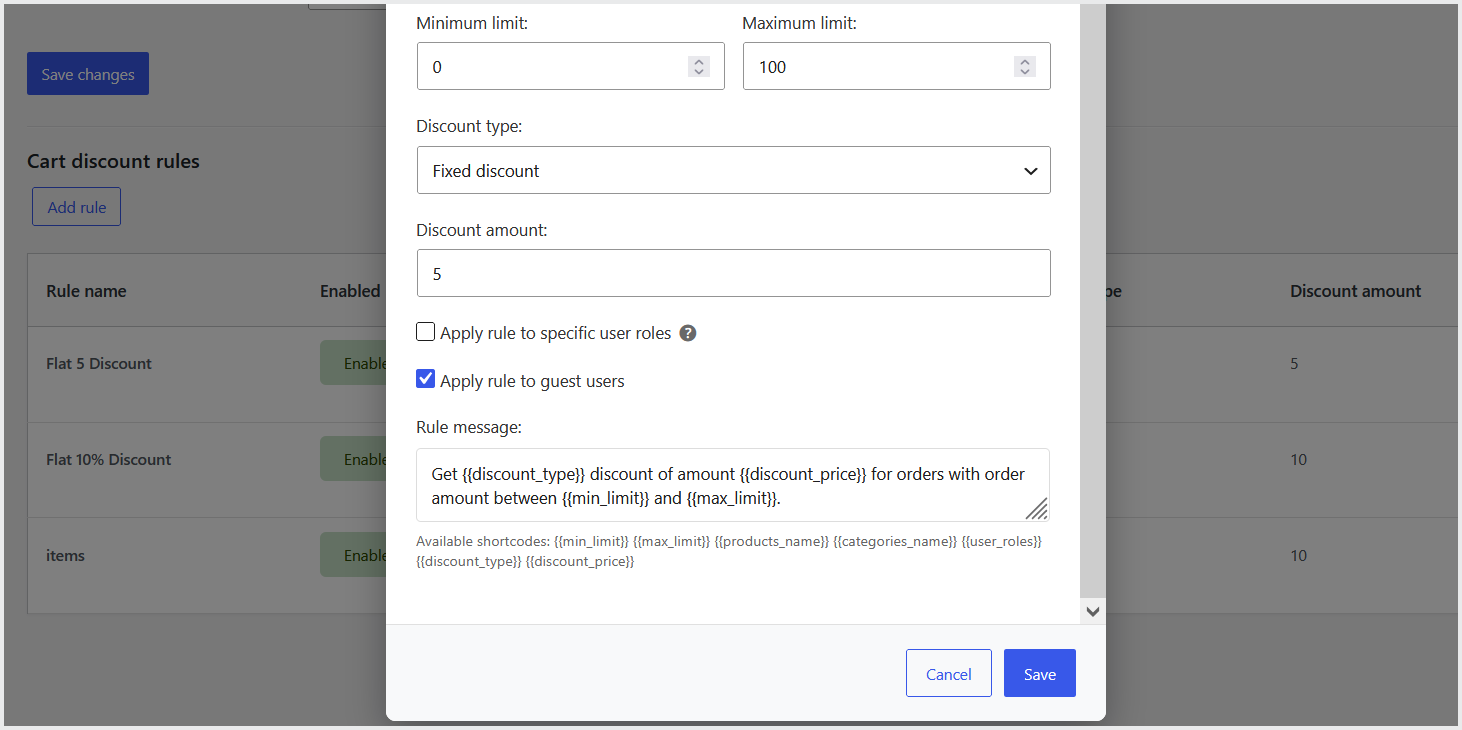
A popup will appear where you can configure the new rule. In each rule, you can set the rule name and select the discount type such as discount on cart amount, product quantity, item’s quantity and many more.
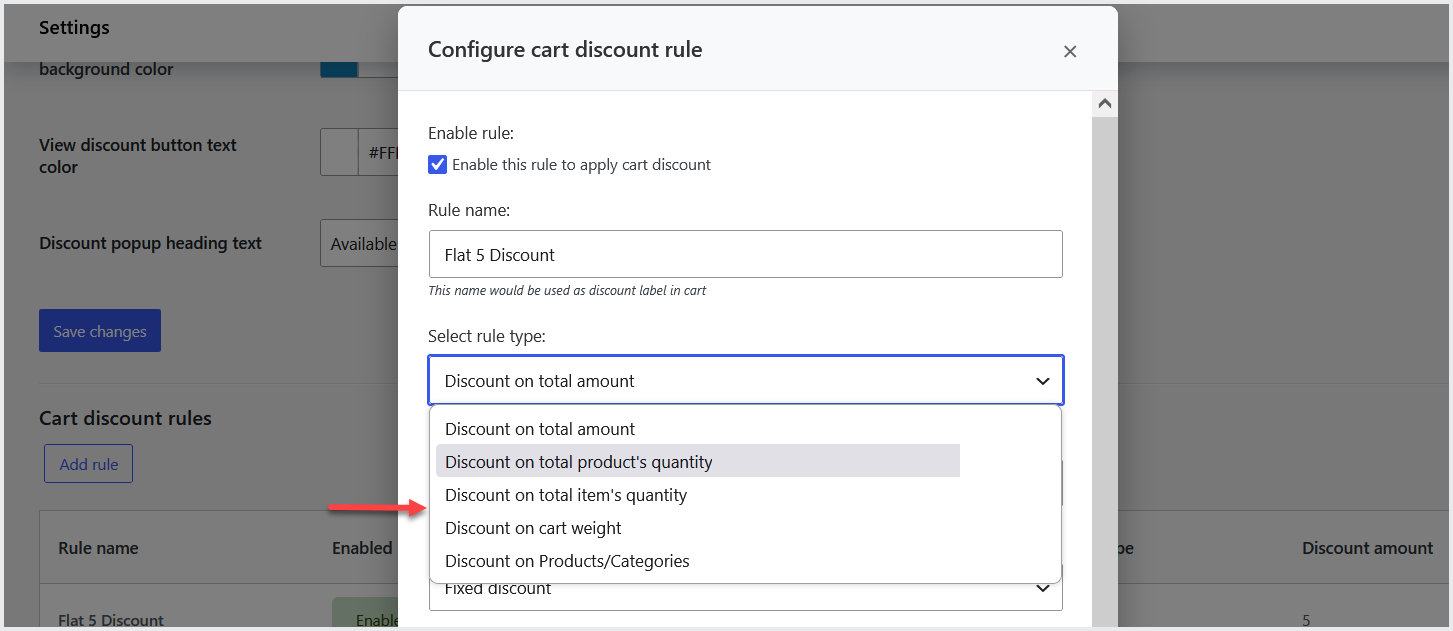
You can also set min/max limit to provide discount and discount type such as fixed or percentage. Option to offer discount to specific user role as well as guest users. At the bottom you can define custom rule message that will appear on cart page once user click the “View Discounts” button and click the “Save” button to apply this rule.
Set Limitations
↑ Back to topNow click the “Set Limitation” tab where you can view all the existing rules click the “Add Rule” button to add the new rule.
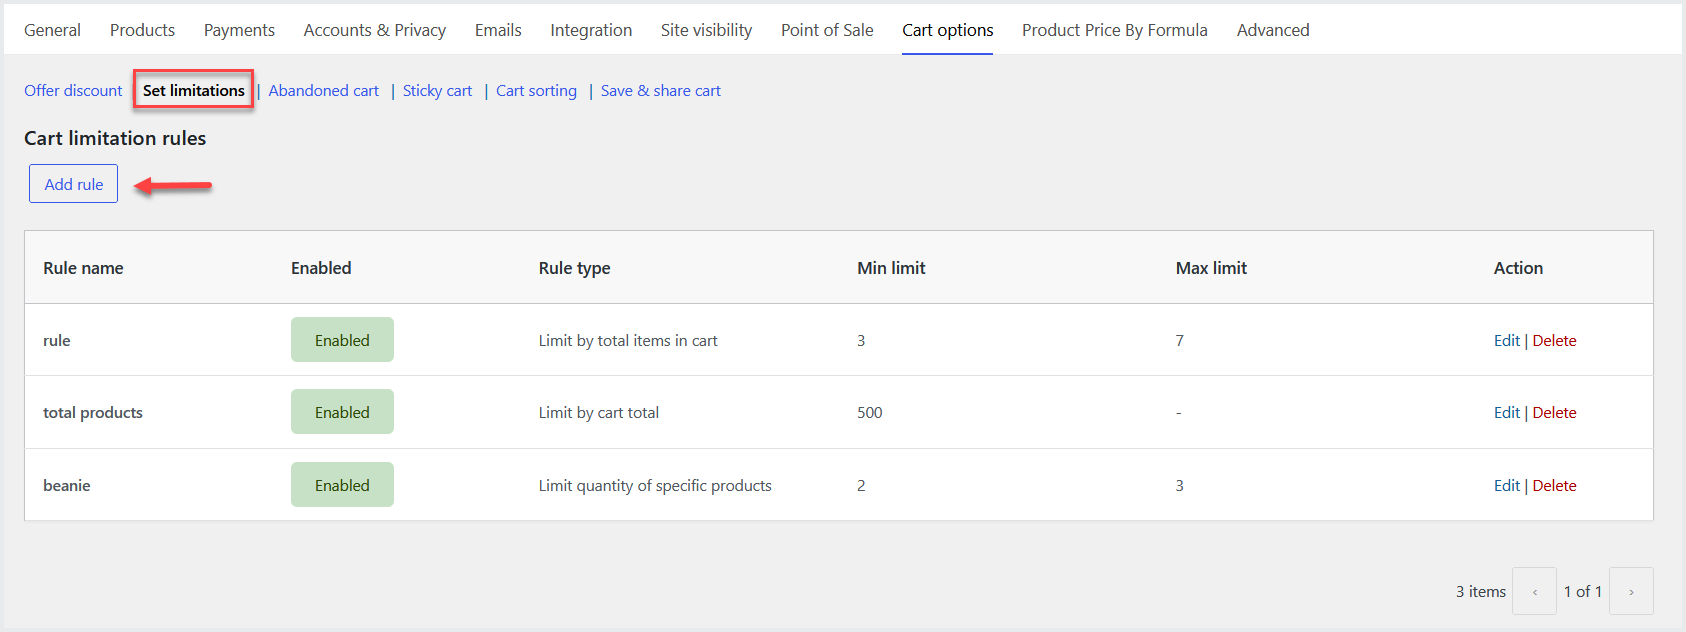
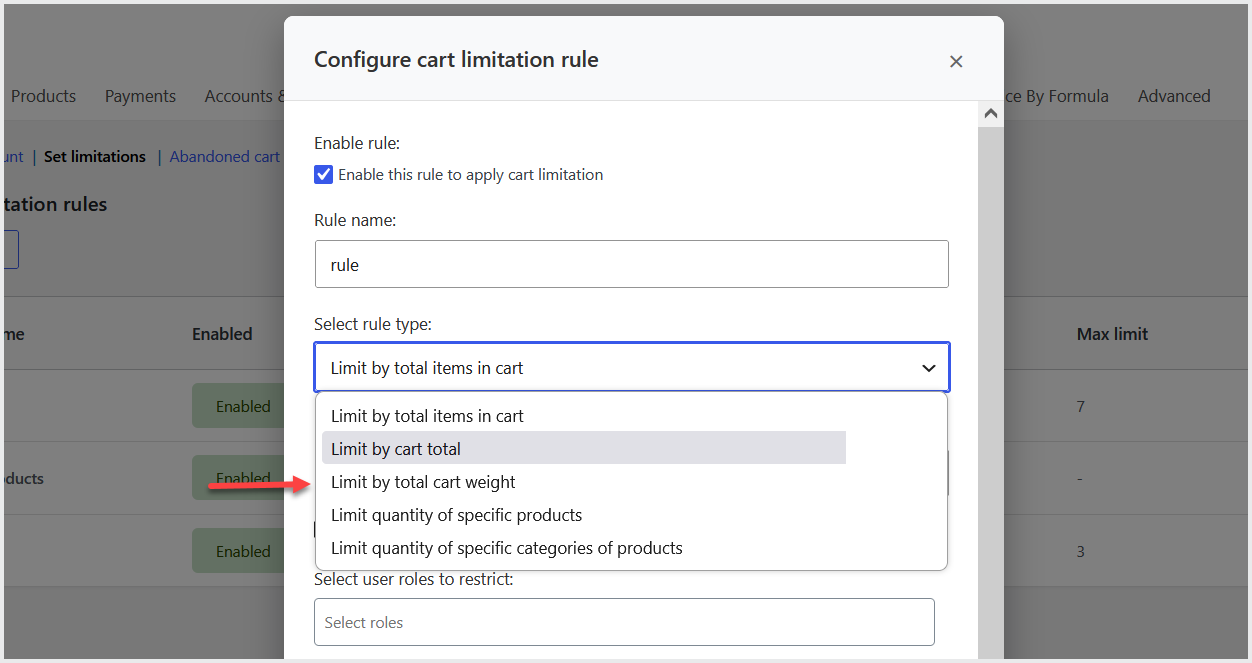
A popup will appear where you can configure the new rule. In each rule, you can set the rule name and select the rule type such as total items in cart, cart total, weight and many more.
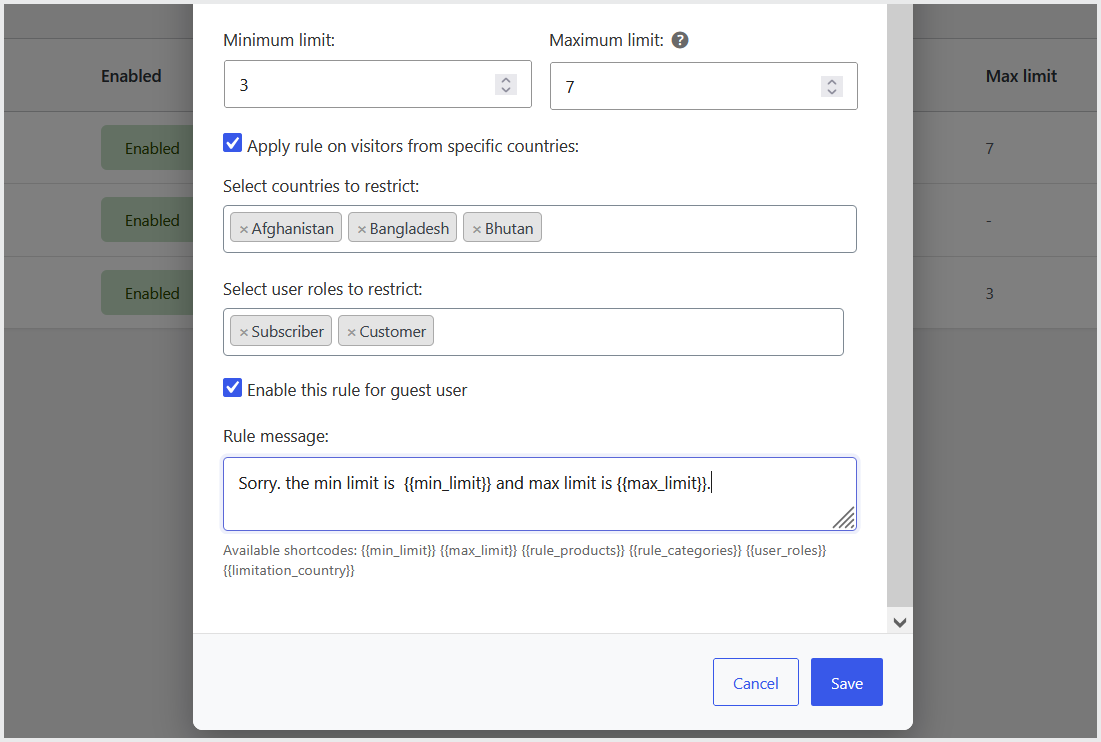
You can also set min/max limit that users must have to meet for purchasing. Option to select countries you want to apply cart restrictions or apply this rule to specific user roles and guest users. At the bottom you can define custom rule message that will appear on cart page when customers are unable to meet the limits.
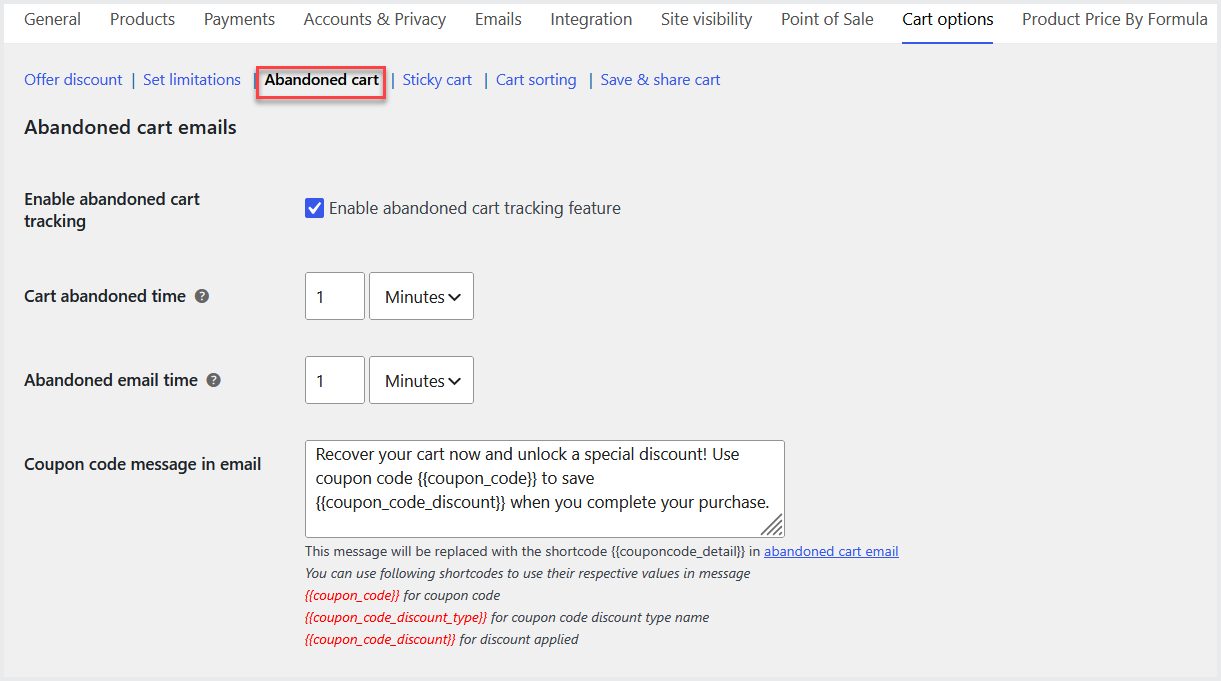
Abandoned Cart
↑ Back to topMove to “Abandoned Cart” tab to enable abandoned cart tracking. You can set time after which the cart will be marked as abandoned and set email time so that the email will be sent automatically after this time once cart is marked as abandoned. You can also set custom message that will be sent to users in abandoned cart email if you are sending the coupon code.
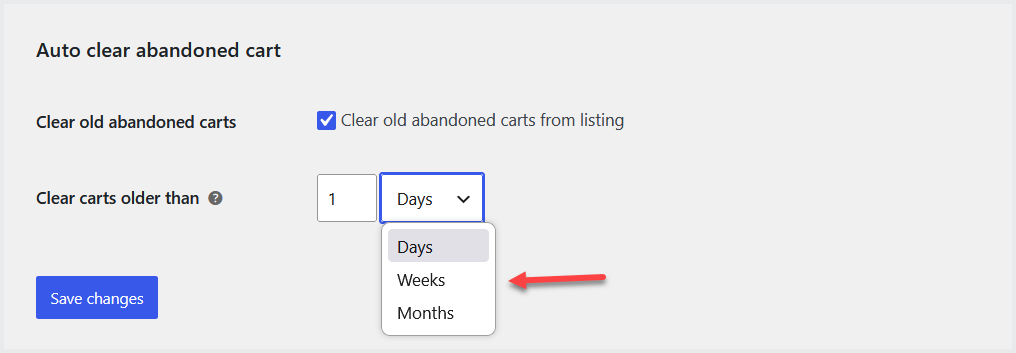
You can also clear the carts and sessions of customers after the specific time to reduce the load of store’s server.
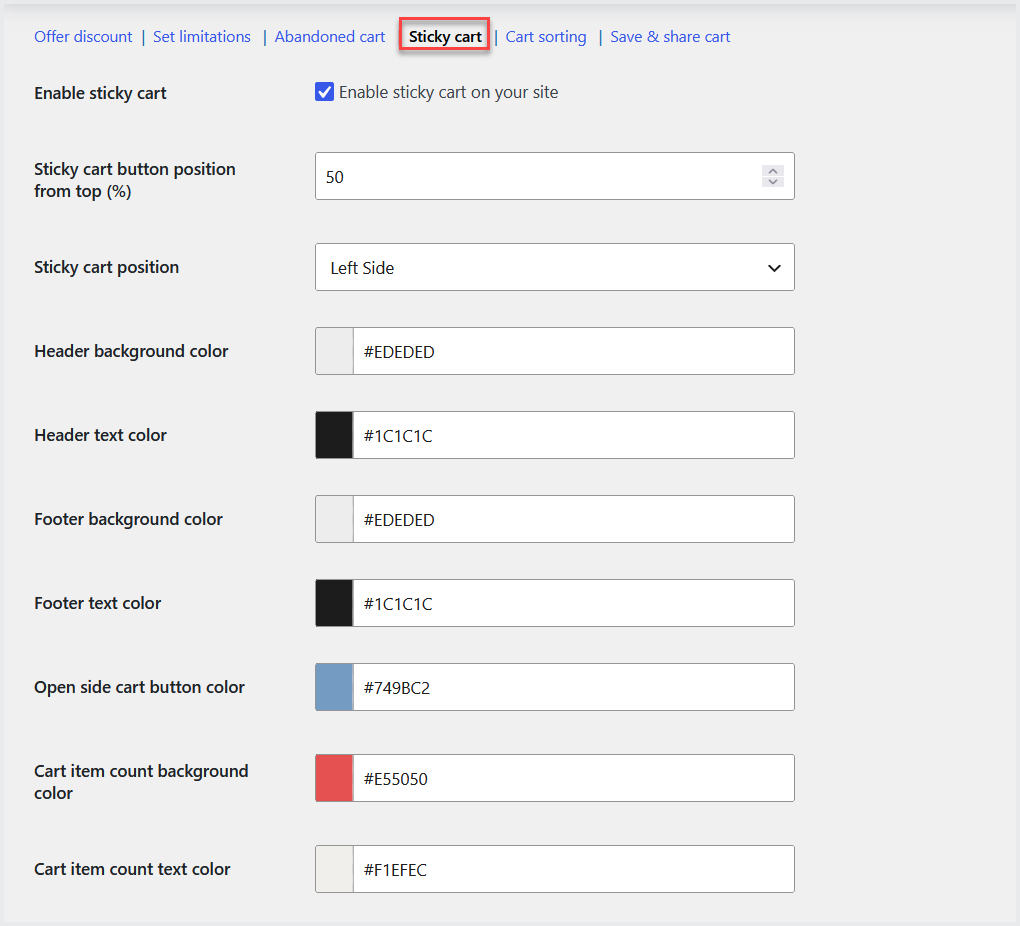
Sticky Cart
↑ Back to topNow click the “Sticky Cart” button to enable/disable the sticky cart on your store and customize it’s text and colors.
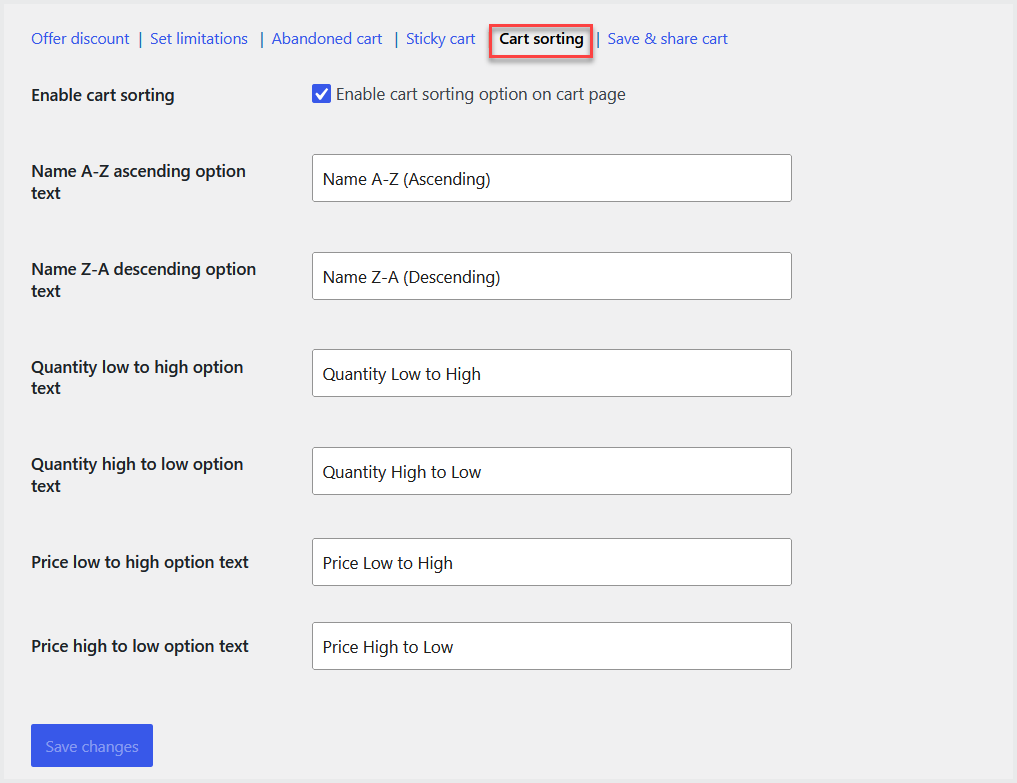
Cart Sorting
↑ Back to topGo to the “Cart Sorting” tab to enable cart sorting for customers on the cart page. You can also customize the text of different sorting types.
Save & Share Cart
↑ Back to topVisit the “Save & Share Cart” tab to enable the save and share cart feature for logged-in users. You can also customize the style of buttons.
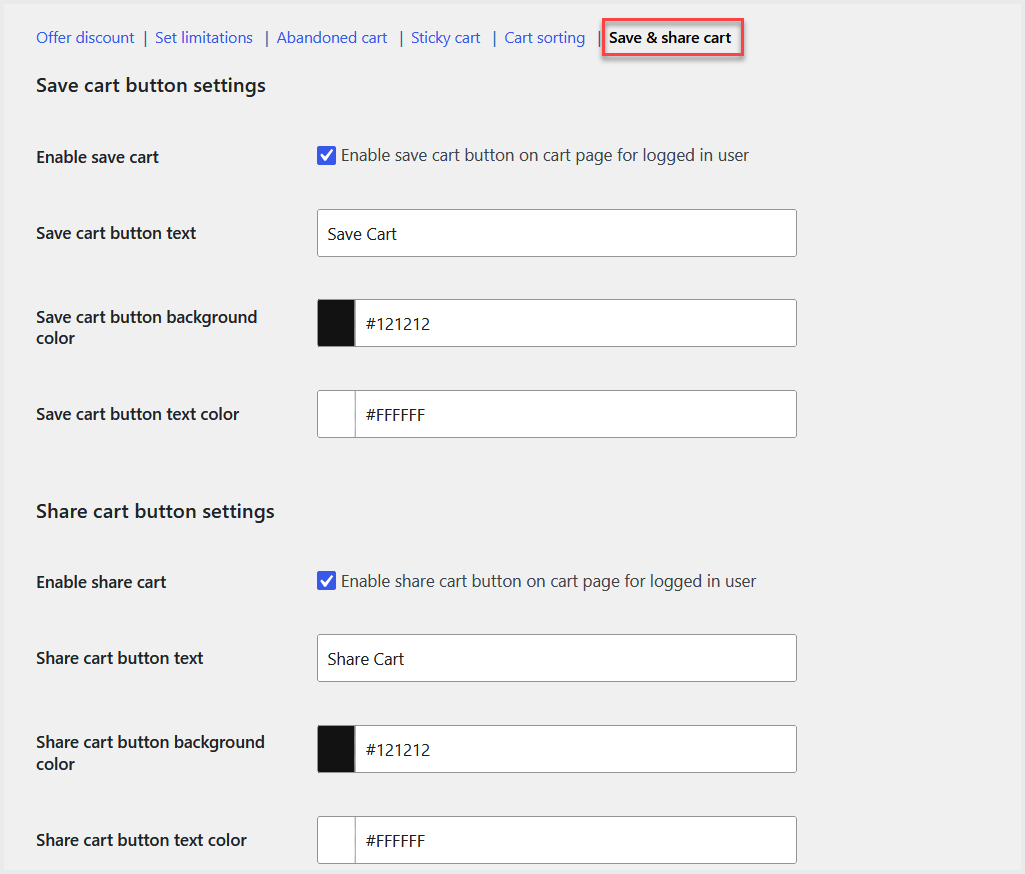
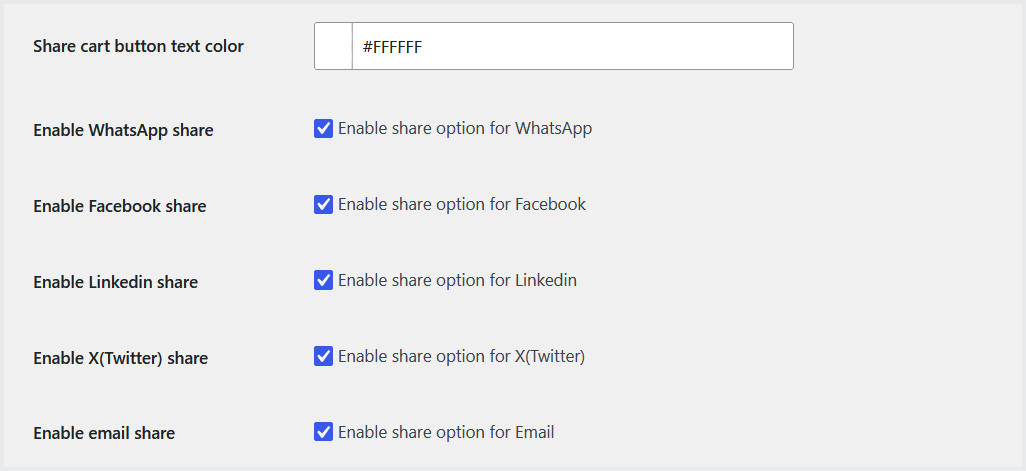
Option to enable/disable the sharing to any social platform such as WhatsApp, Facebook, Linked-in and more.
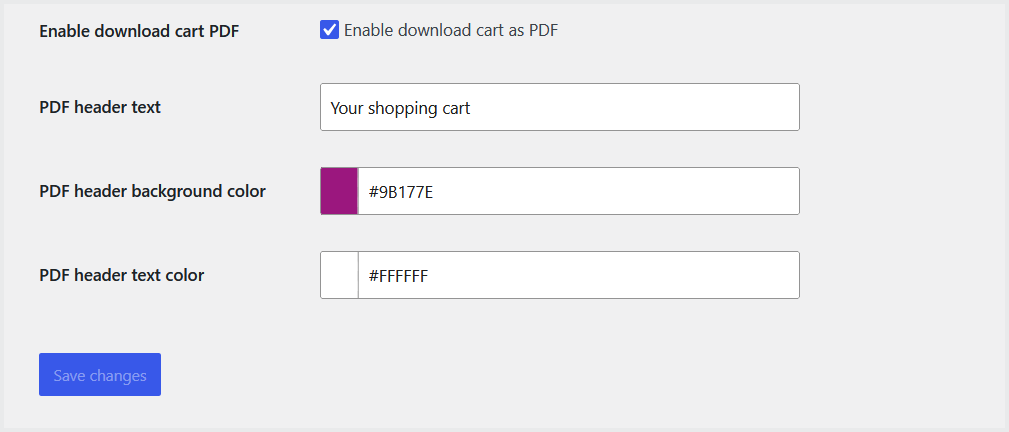
You can also enable the “Download Cart as PDF” button for customers on a cart page and personalize this button as well.
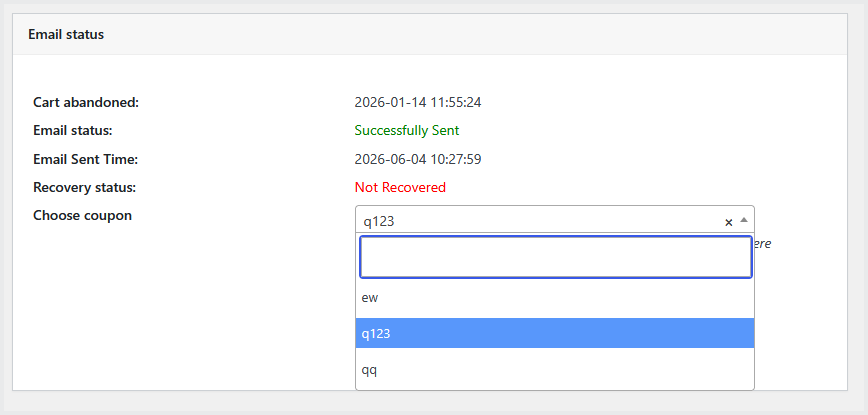
View Abandoned Carts & Send Coupons
↑ Back to topAt the admin panel, go to WooCommerce>Abandoned Carts to view all the abandoned carts in a table form.
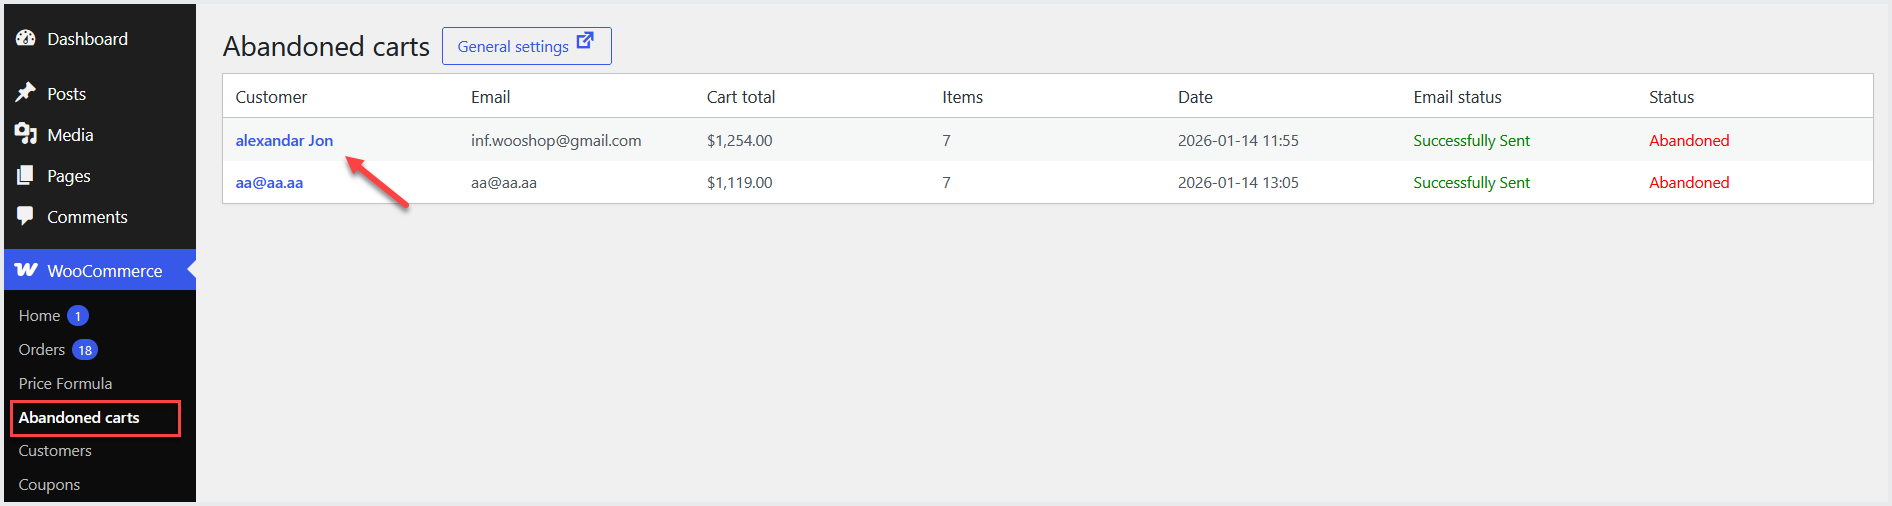
Click on customer’s name to view his profile and cart details.
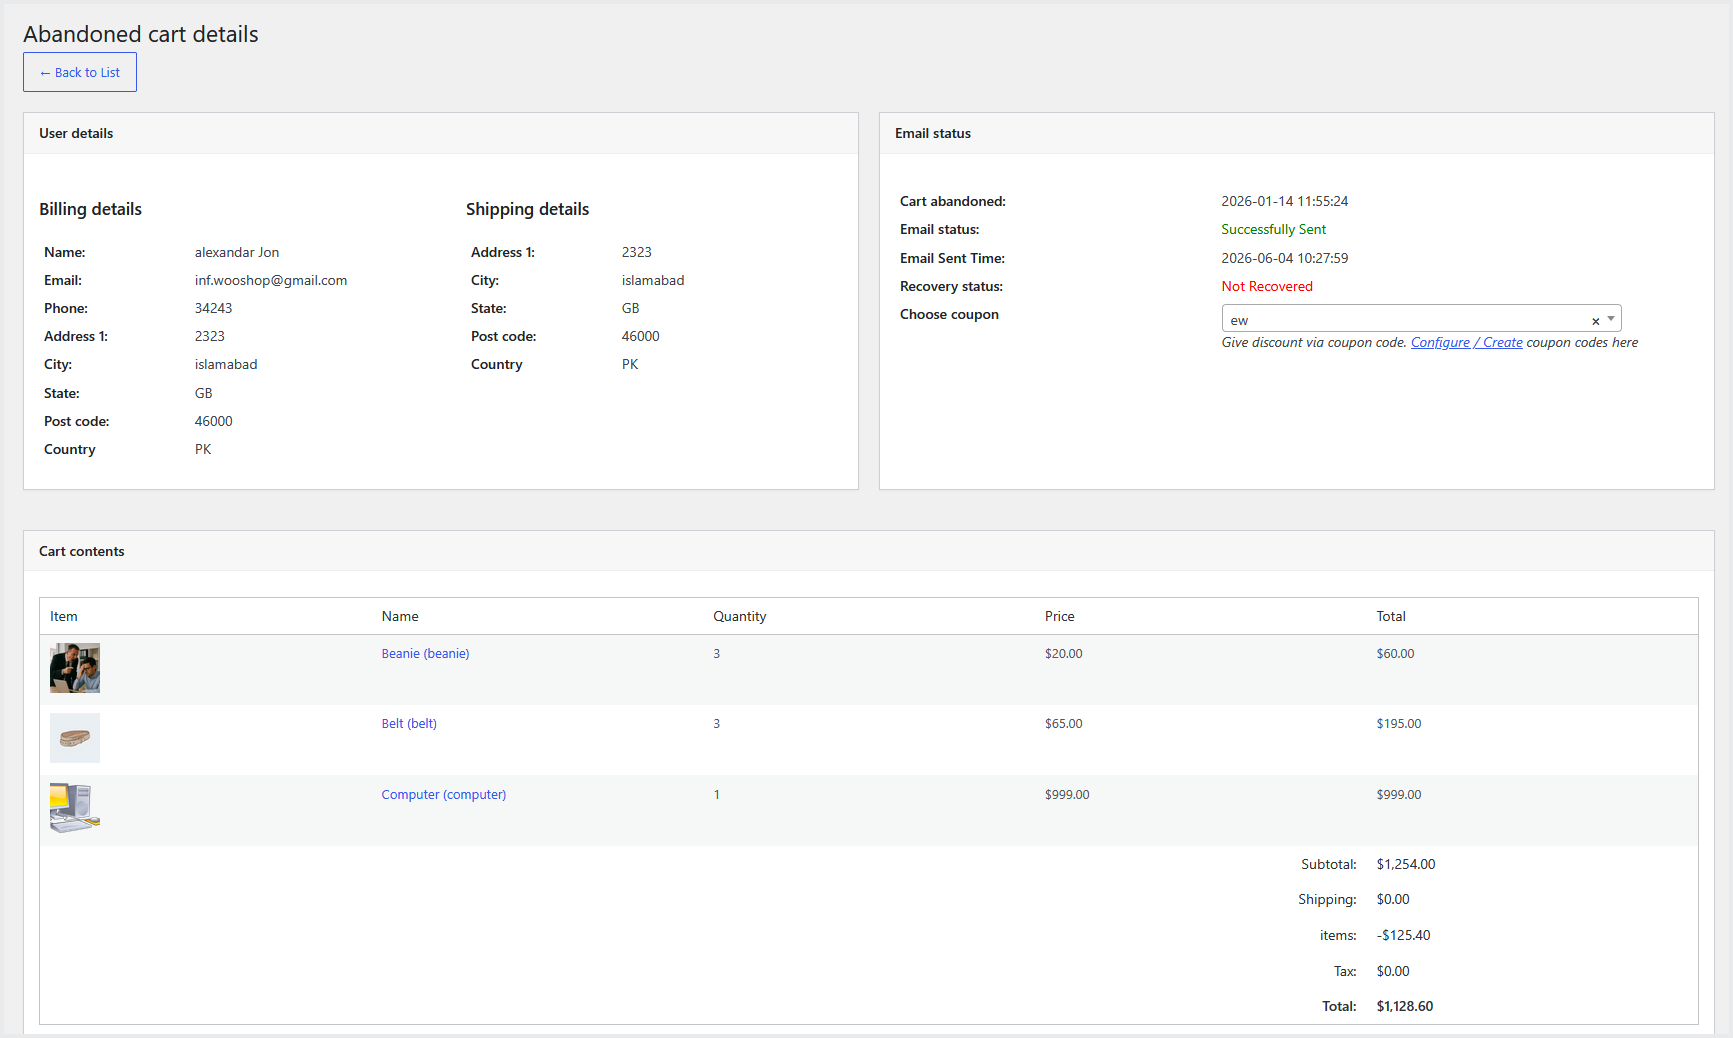
You can attach the coupons in a “Email Status” section, so that the selected coupon code will be automatically sent to customer in a next email notification.