Add FAQs and display them on relevant products and FAQ pages.
- Download the .zip file from your WooCommerce account.
- Go to: WordPress Admin > Plugins > Add New and Upload Plugin with the file you downloaded with Choose File.
- Install Now and Activate the extension.
More information at
Install and Activate Plugins/Extensions.
As soon as the plugin has been installed, you can view the plugin in
WordPress Admin Panel > All FAQs. To customize plugin settings, click on
All FAQs.
Go to FAQs Manager and navigate to settings to configure product and store FAQ settings.
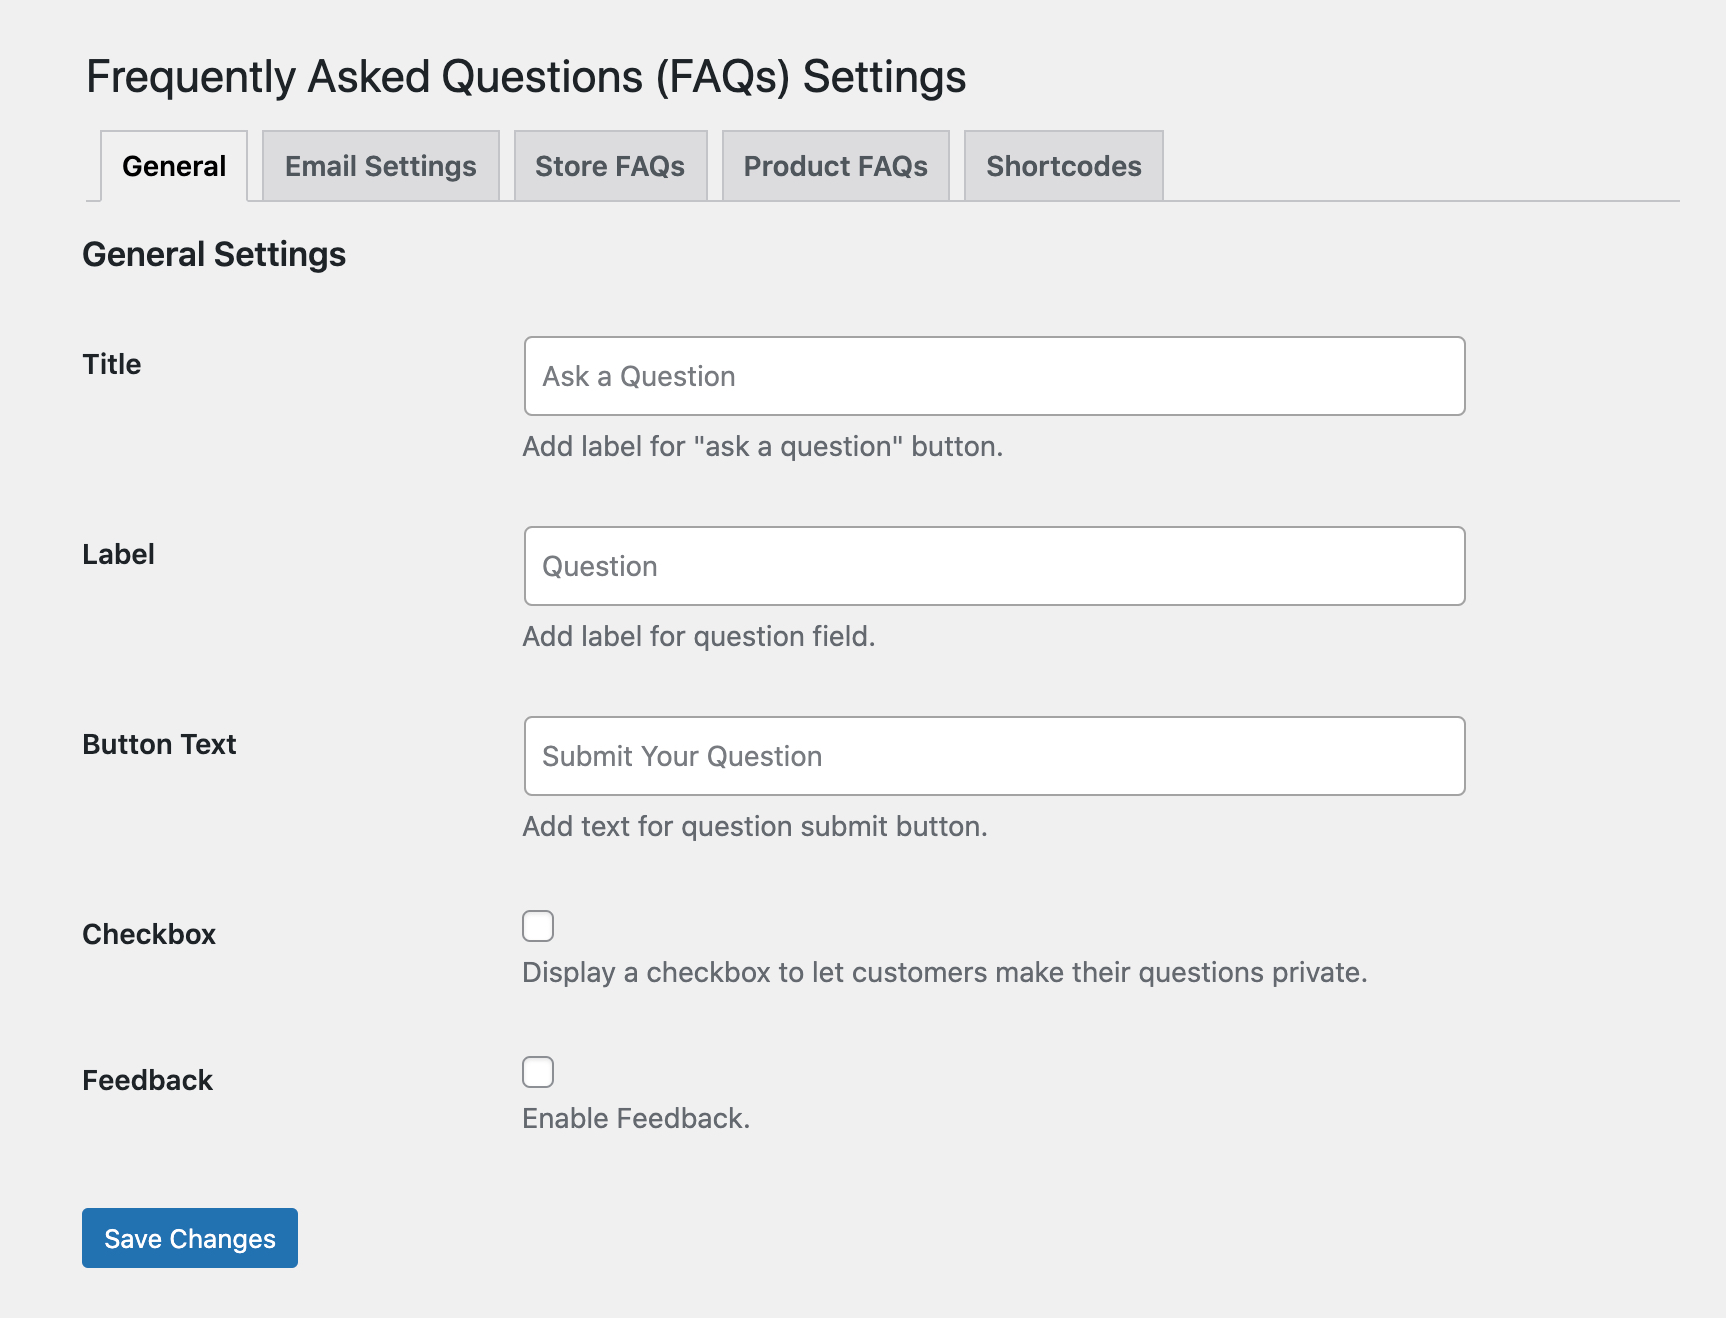
These settings will help you establish the general settings of the pop-up that is shown to the customer once they click the “Ask Question” button and the feedback area.
- Title: The title set here is shown as the title of the pop-up
- Label: This label will appear on top of the text box where the customer enters their question, as a title of the text box.
- Button Text: You can define the text as to be shown on the button in this field.
- Make Question Private: Place a check in this checkbox to display a checkbox on the pop-up. The user can then choose to make their question public or keep it private. The question by default is always kept private.
- Label: If you do check this checkbox, an additional text box will appear. This text box allows you to add a question as a label to your checkbox. ( Note: Add a question to ask if the customer want to make the question public, as if the user checks this box they will agree to making their question public)
- Feedback: This option allows you to enable a feedback feature at the front end. Any user can click Yes/No to define if the question was helpful or not.
- Label: Placing a checkbox in this checkbox will show you another text field. Use this field to enter a question as a label for the feedback area.
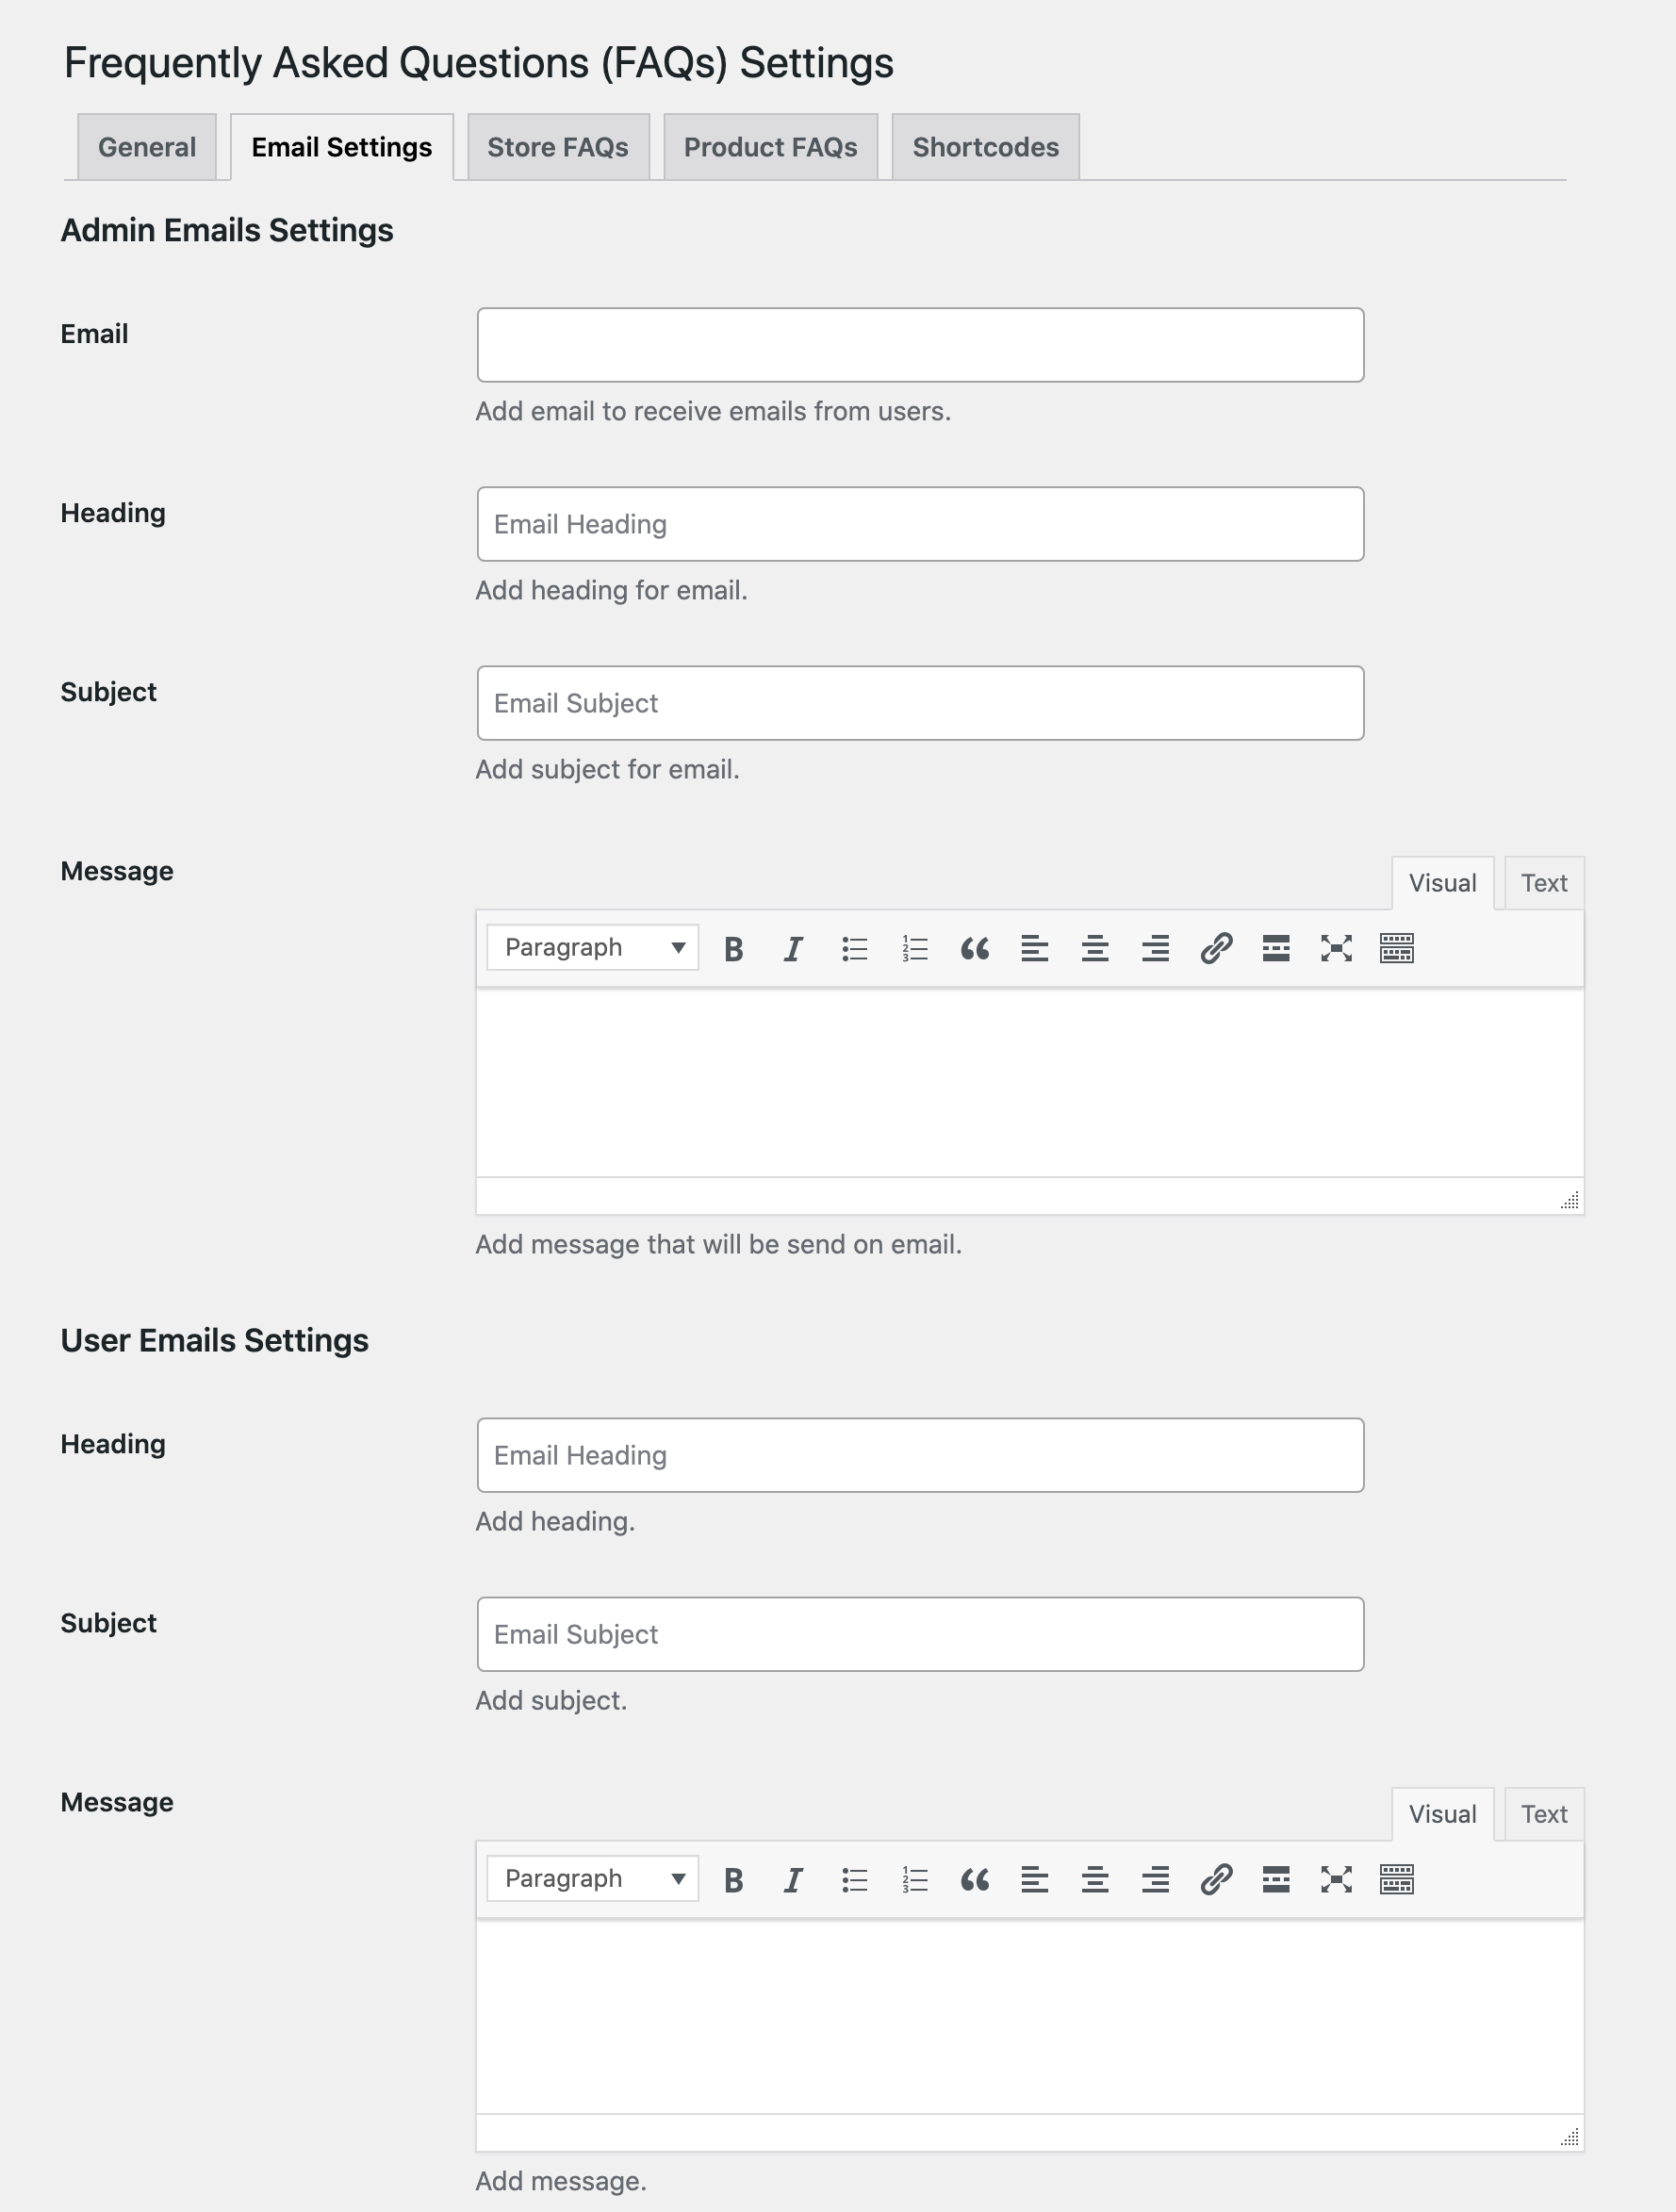
This section is to help configure email settings for your user and Admin that will be sent through the extension.
Admin Email Settings
This is to customize the email settings that will be sent to the admin account you define to receive user related updated regarding FAQs only
- Email: Enter the email ID that you want to define as the admin email to receive emails from a customer that asks a question
- Heading: Use this field to add a suitable heading
- Subject: Define a subject that easily conveys an FAQ has been received
- Message: Use this area to enter a system generated message that will be sent to your customer once a question has been received from your customer
User Email Settings
These settings are to customize the email settings that will be sent by admin in response to the question raised
- Heading: Use this field to add a suitable heading
- Subject: Define a subject that easily conveys that the email contains an answer to their email
- Message: Use this area to enter a standard message that will be sent to your customer in addition to the answer you have defined in the Answer box while editing an FAQ
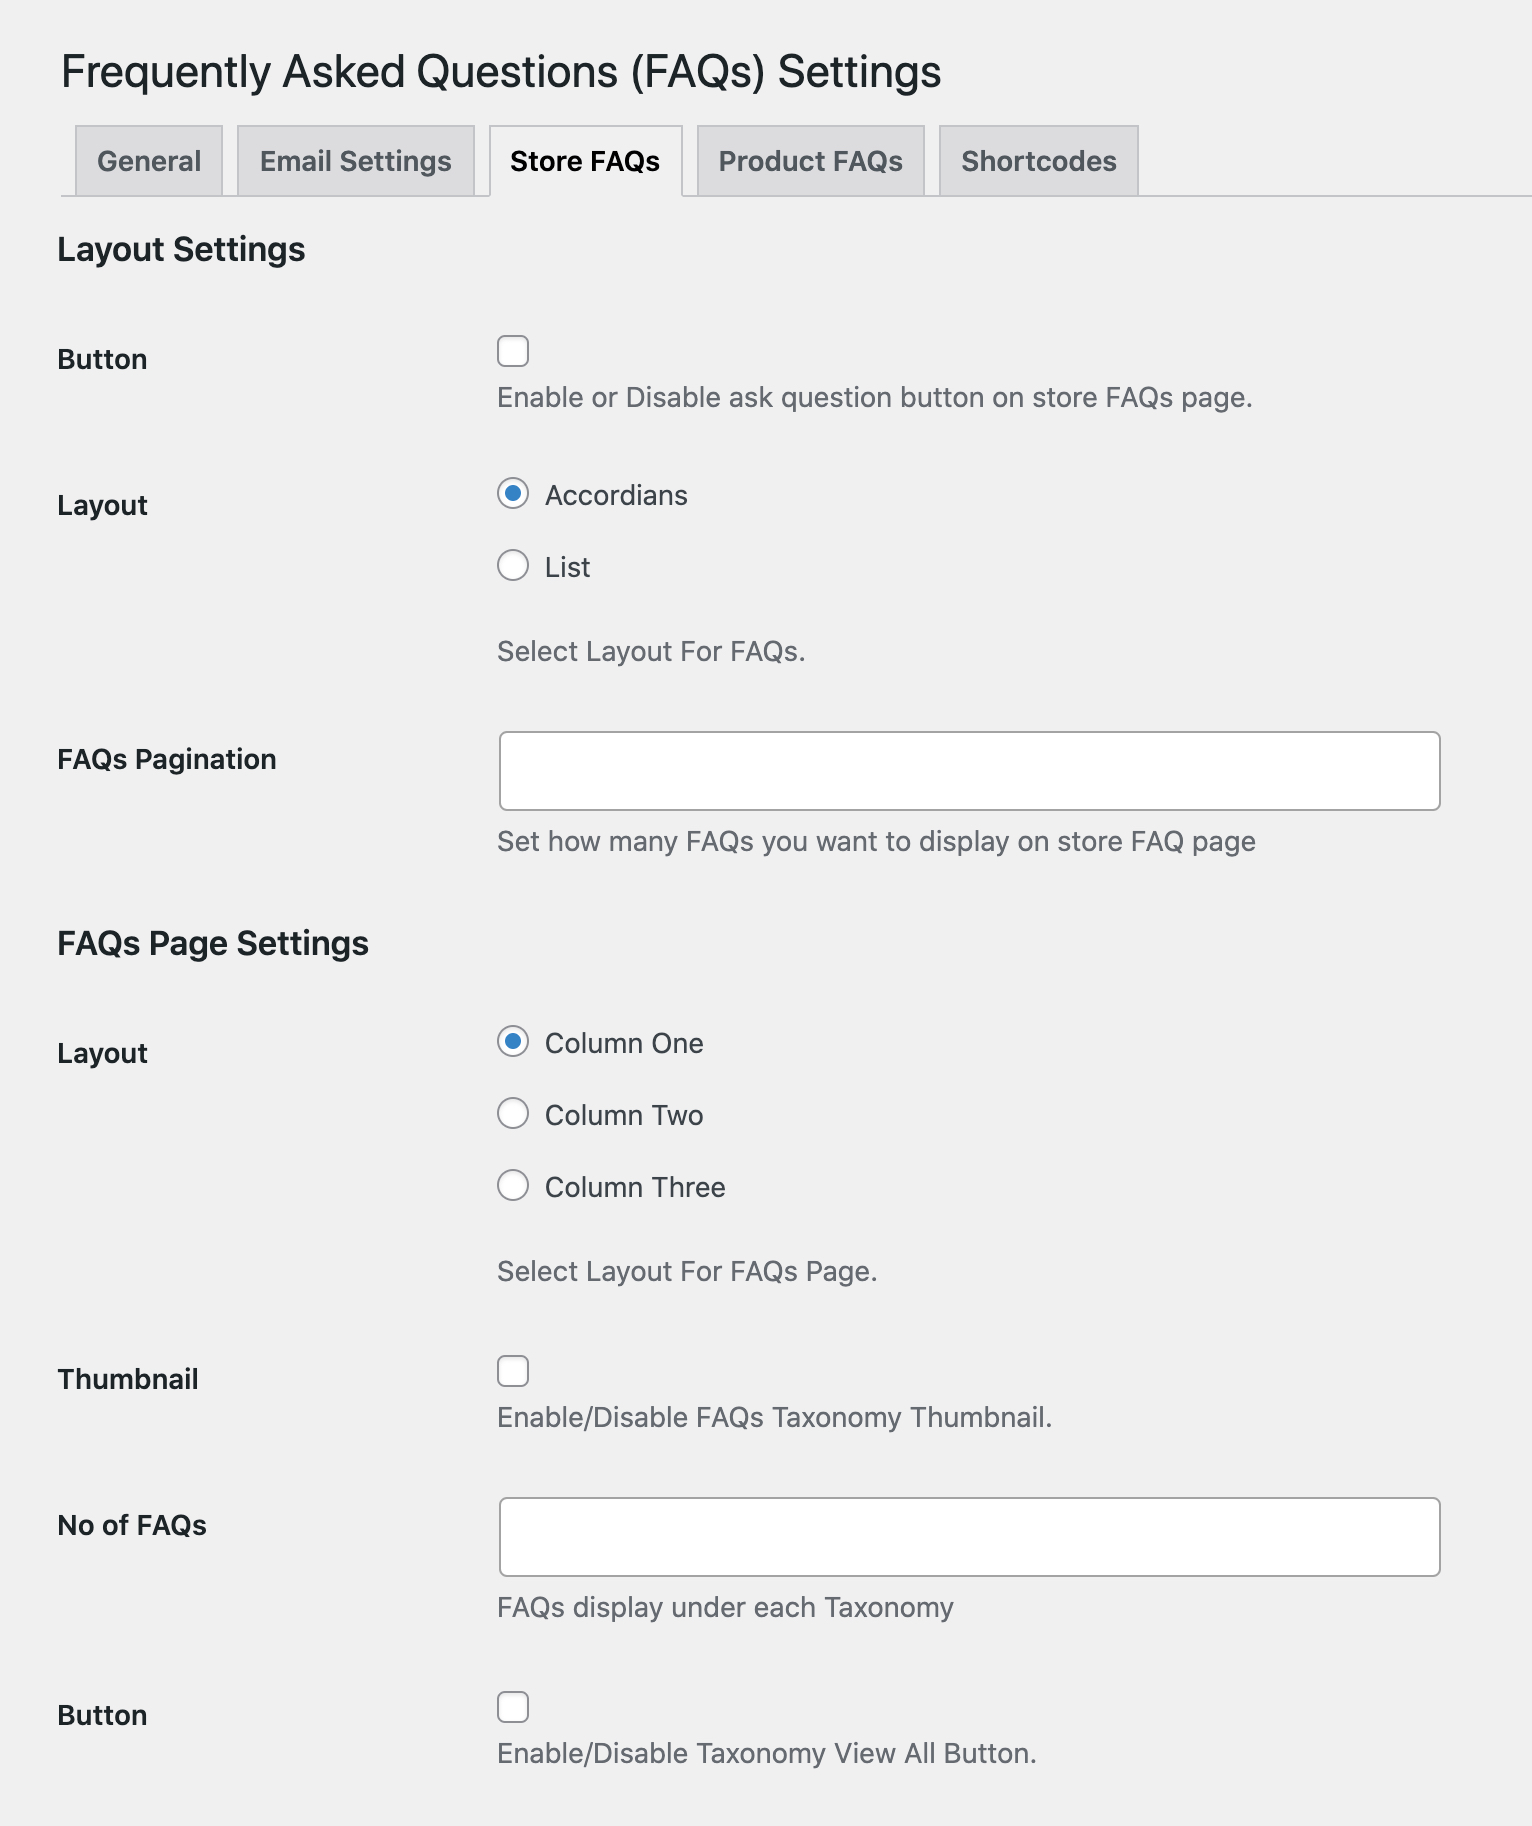
These settings allows you to customize store FAQs page.
Layout Settings
- Button: Check this box to add an Ask Question button on your store FAQs page
- Button Text: If you place a check in this box
- Layout: You can choose between an accordion or list style to display questions to your visitors
- FAQs Pagination: Enter the total number of FAQs you want to display on the Store FAQ page
FAQs Page Settings
- Layout: Select the number of the columns used to display the categories and their relevant FAQs
- Thumbnail: If you check this box it will automatically apply the thumbnail you have added to the question’s relevant category. Note: these categories are the ones added to the extension in FAQ Category
- Thumbnail Border Radius: You can set a round border around the thumbnail in terms of pixels.
- No of FAQs: This will enable you to directly enter a number of FAQ you would like to display under each category
- Button: In continuation of above, if you show a limited number of questions and would like to add a button to view all questions of that specific category, check this checkbox.
If a user clicks the view all button they will be directed to a page of that specific category.
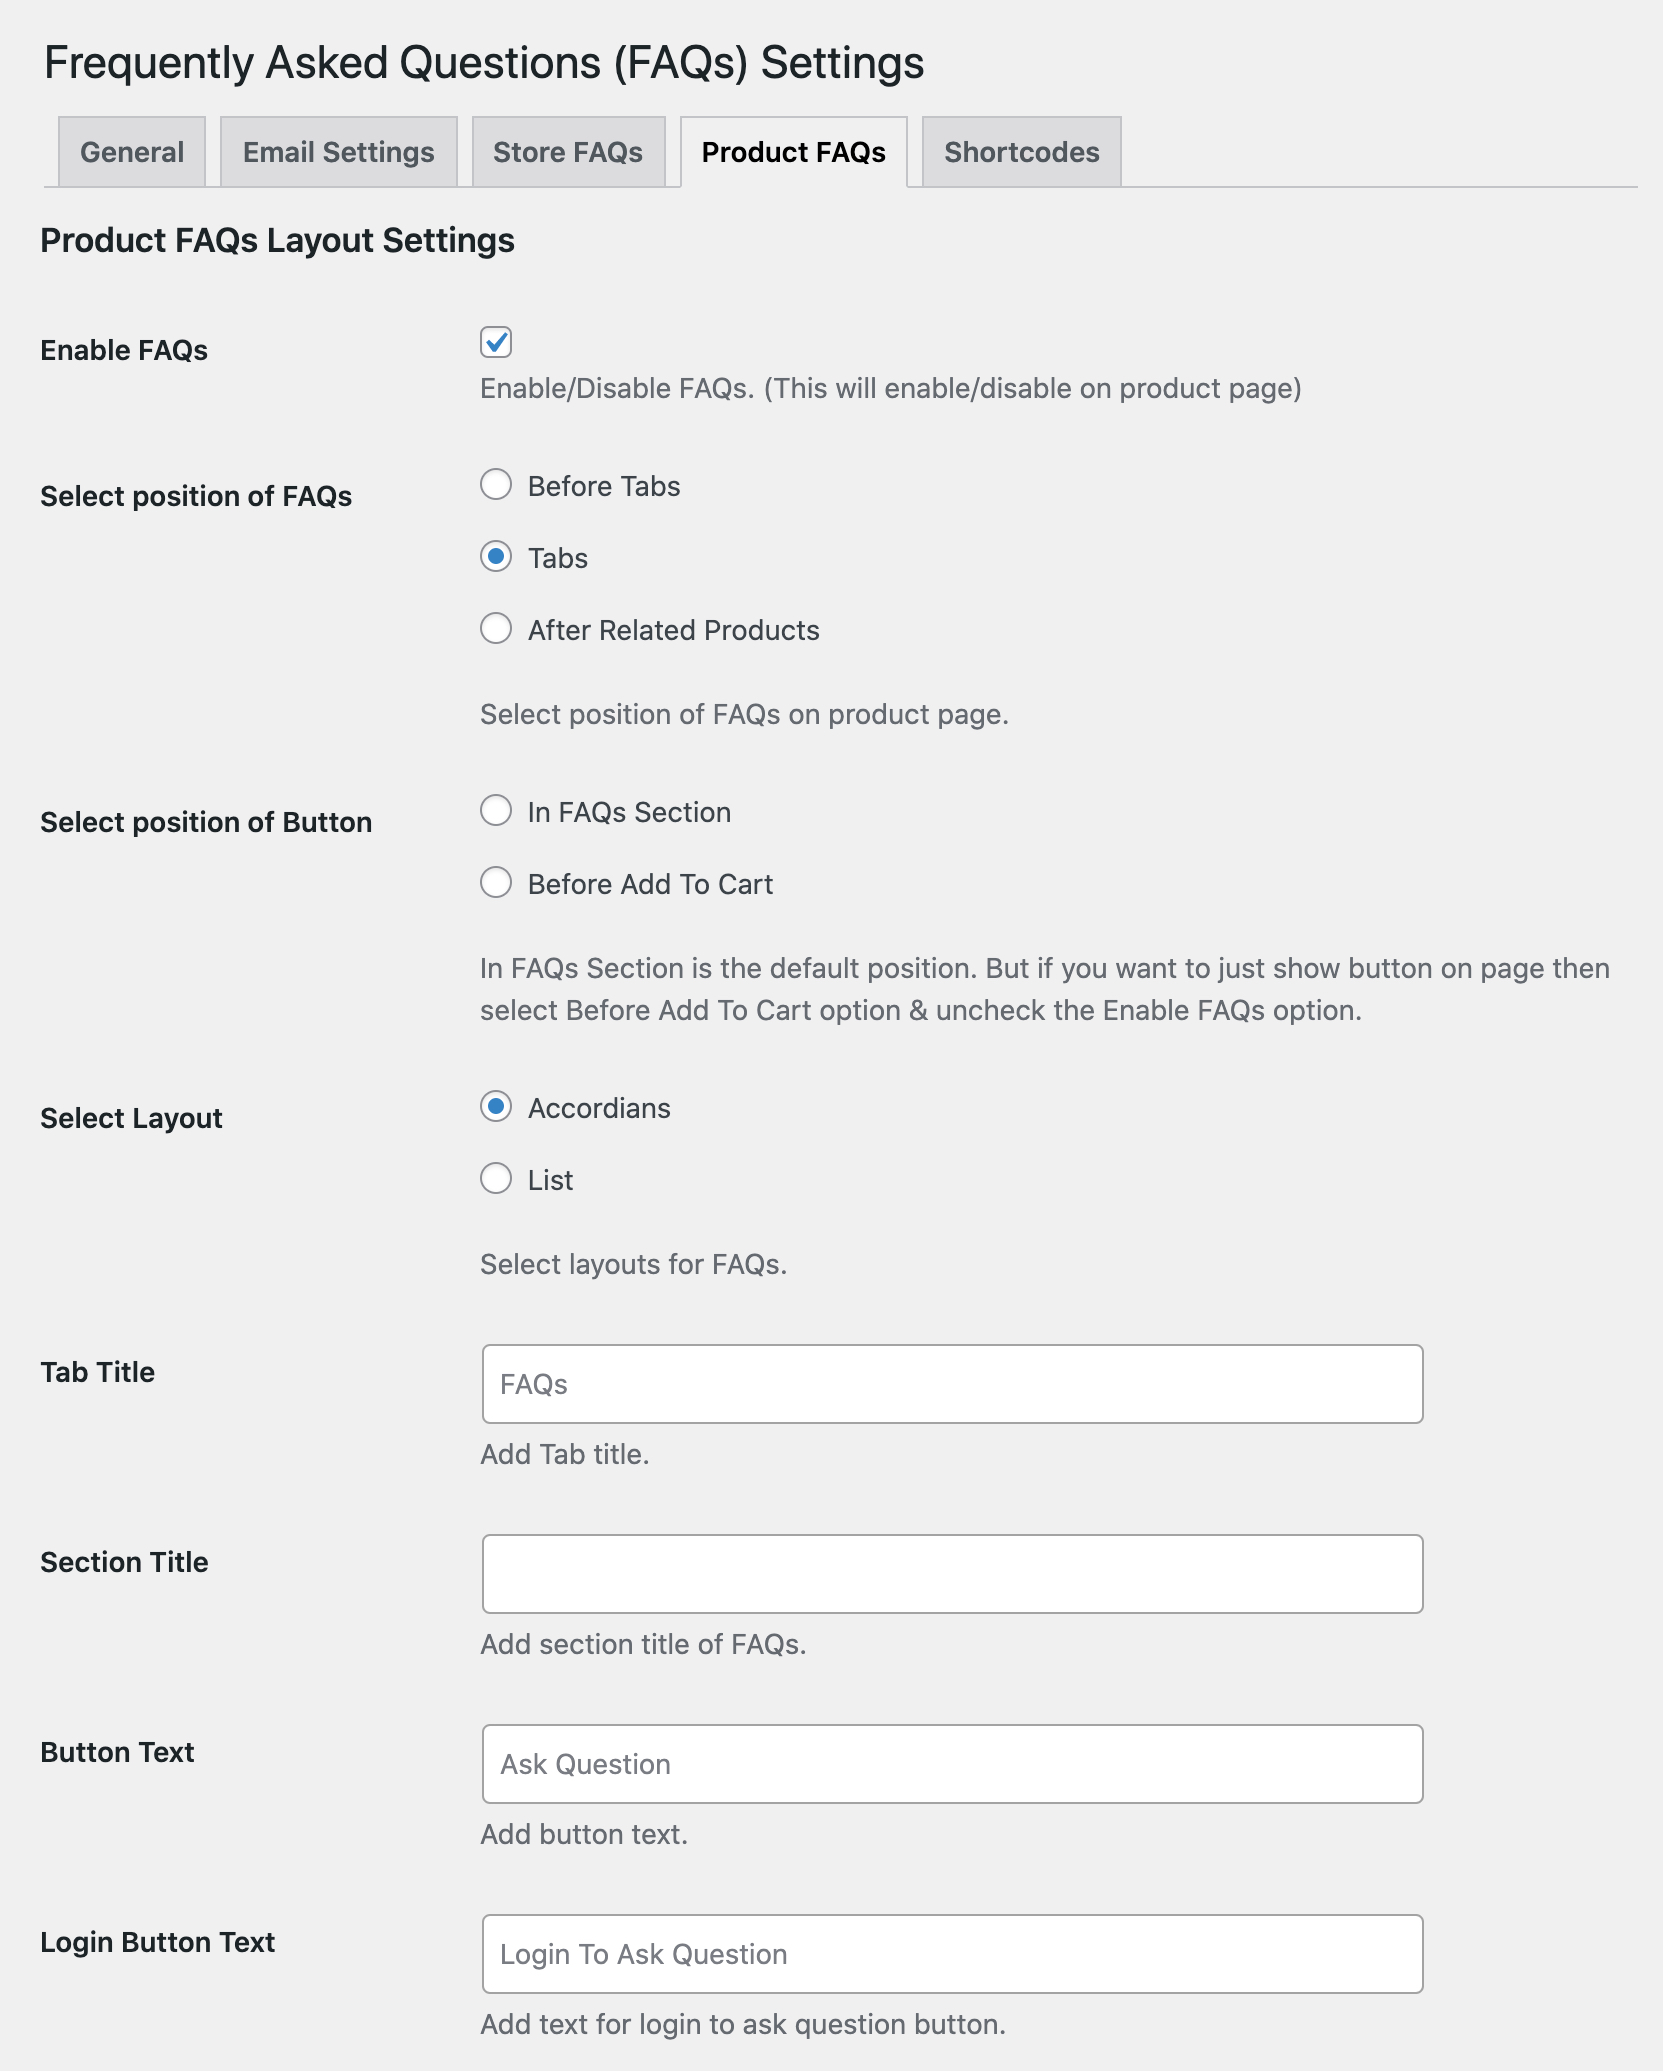
 Enable FAQs:
 Check this box to enable FAQs on product page(s). Enabling this option reveals the following settings:
Select Position of FAQ
- Before Tabs: This will position the FAQs above the description and tabs
- Tabs: This will position it within the tabs
- After Related Products: this will position it under the related products towards the end of the page
Select Position of Button
- In FAQ Section: this will position the button in the section only. This is the default selection.
- Before Add to Cart: this will position the button above the Add to Cart button.
Please note that selecting the Before Add To Cart option and disabling the Enable FAQs option will keep the
Ask Question button
- Select Layout: Display the FAQs in either an Accordion or List format within the FAQ tab
- Tab Title: Rename the Tab here by entering custom text in this text field
- Section Title: This is the heading of this section that will show to the user upon clicking the tab. If you have positioned your FAQ section Before Tabs or After Related Products, then the Section Title will remain the only heading visible to the front-end user.
- Button Text: Customize the label of the button placed for a customer to ask a question using this text field.
- Login Button Text: Use this field to customize the text of the button which requires a customer to login in order to ask a question
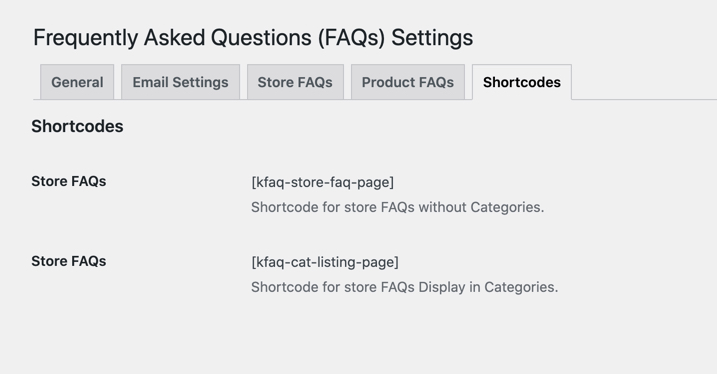
This section helps you establish the layout of a page designed only for FAQs. You will create a page by navigating to
Pages > Add New from your WP Admin Panel. Add a short code block and paste the short code based on your preferred layout.
Use the
All FAQs,
FAQs as Category and
FAQs as Tags short codes available here to create a specific page containing the FAQs relevant to the short code used.
- All FAQs: Use this short code to display all of your FAQs
- FAQs as Category: This short code will help you display FAQs under its relevant Category
- FAQs as Tags: Use this short code to show FAQs associated to tags
This area maintains a record of each FAQ that has either been created by a customer or you have directly created from the backend. A filter is available in case you are searching for a specific FAQ by date.
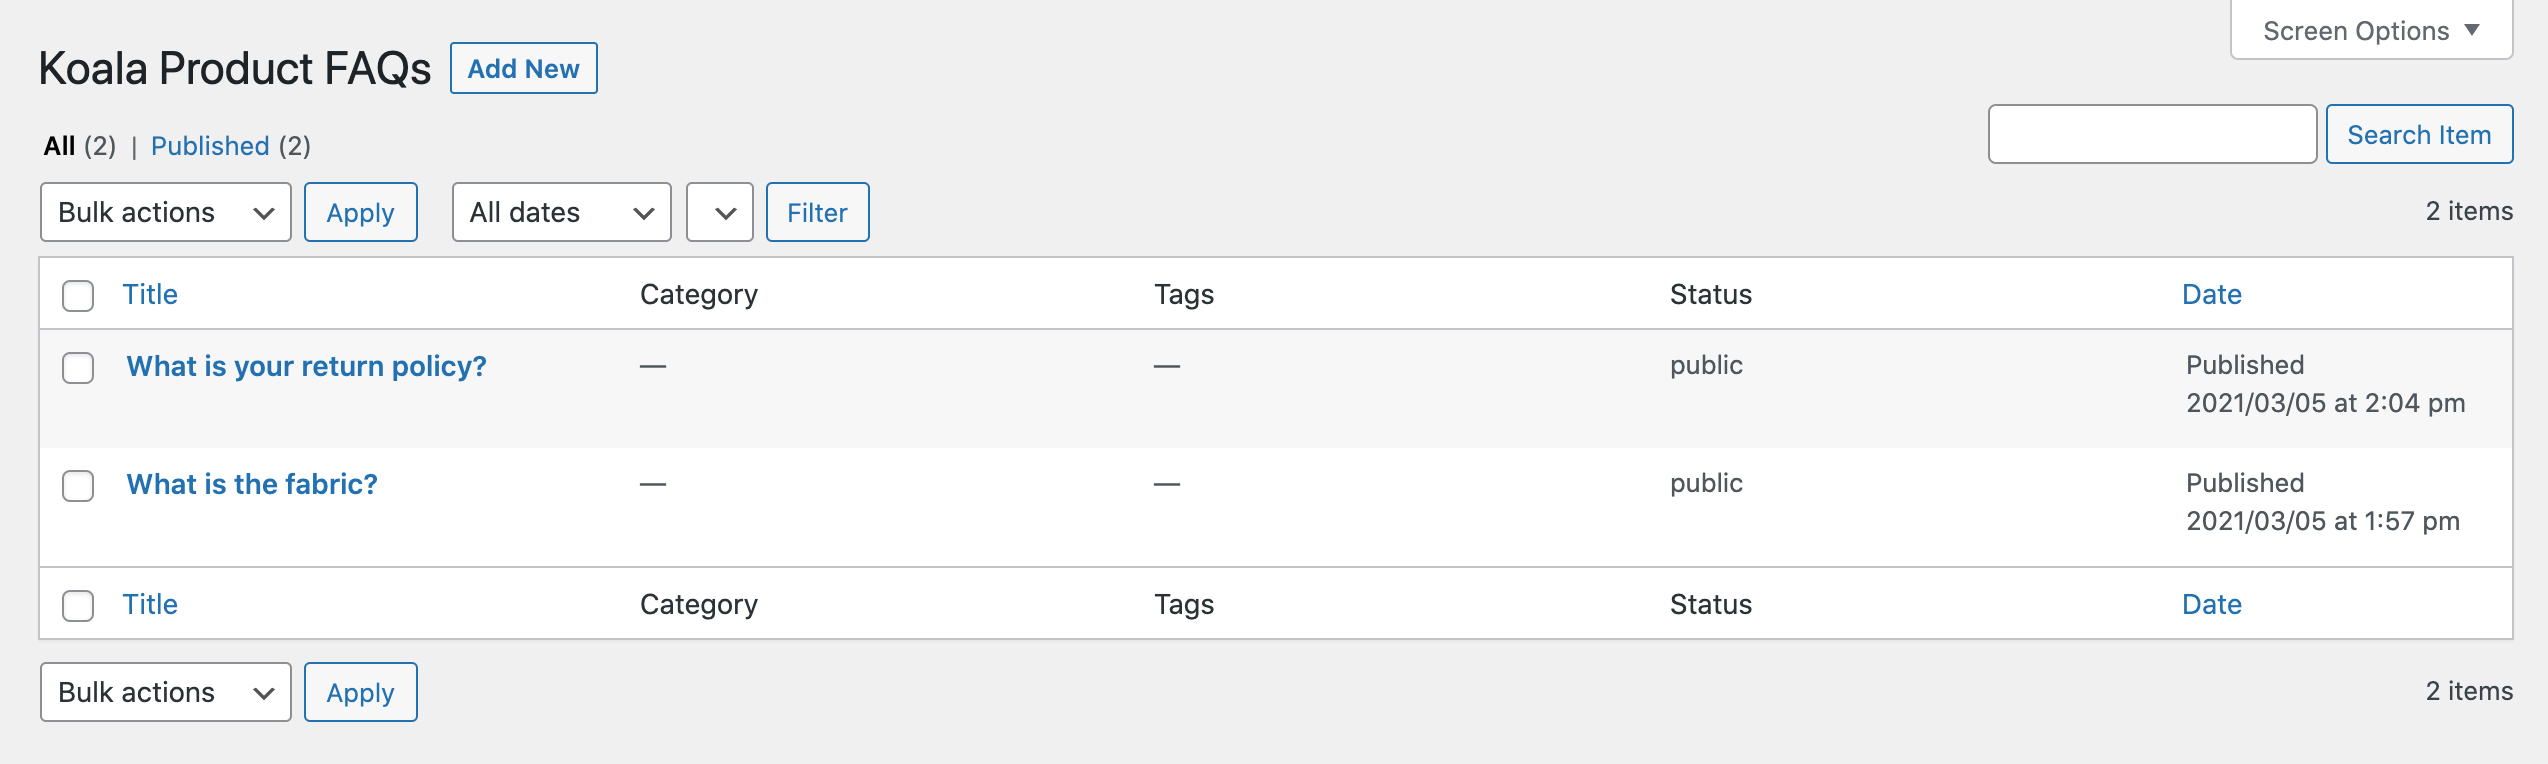
To add a new FAQ you can either click on the
Add New Tab button on the
All FAQs page or you can access the
Add New section from your WP Menu. Each FAQ should be assigned a self-explantory title as it will be shown in the
All FAQs section for future reference.
Any FAQ submitted by your customer will automatically be added to the
All FAQs. Use the edit option to answer their question and manage the answers visibitly on your store. The first five words of the customer’s question will be used as the title by default, you can edit the title here.
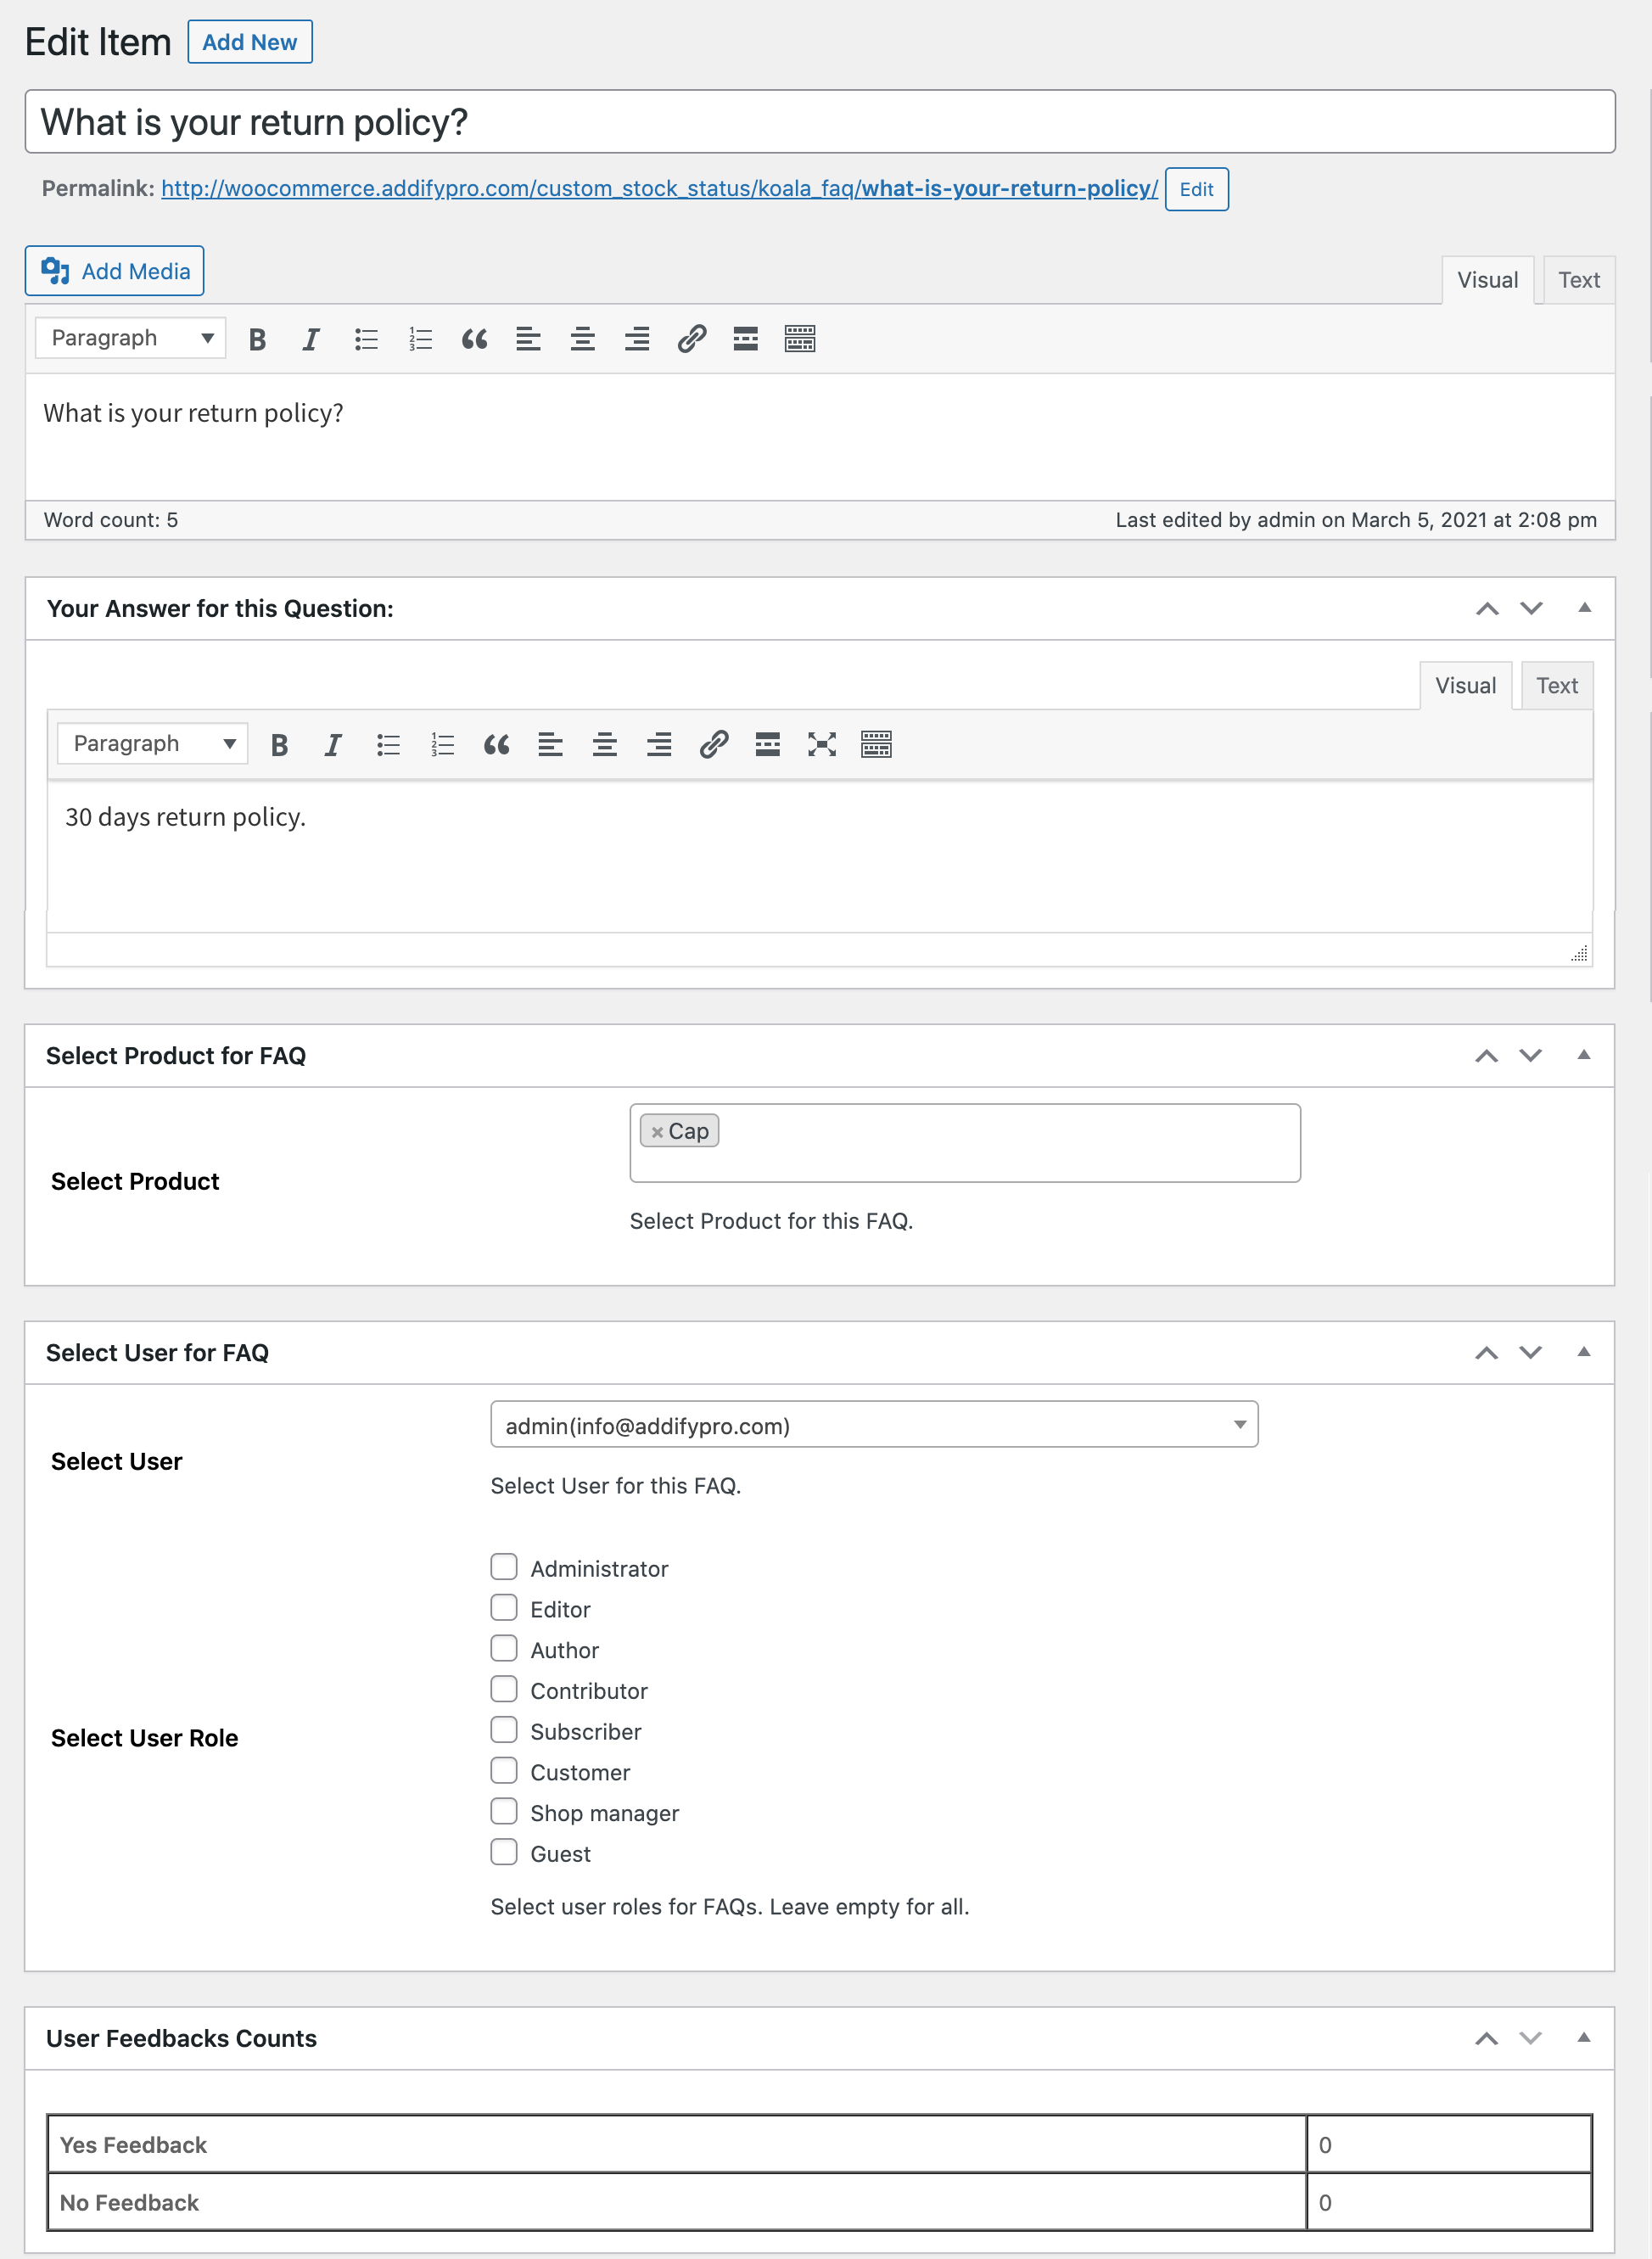
- FAQ Text Box: Use the first text box to add your FAQ. If you are answering a customer’s question this box will already have the question ready to be edited (if necessary).
- Answer Text Box: Use this second text box to enter the answer for your FAQ.
- Product: This field allows you to select products on which the FAQ will be displayed. Type in a minimum of three characters to use predictive text. If the customer has raised the FAQ the product will already be mentioned here. You can continue to list additional relevant products that the FAQ should be shown on.
- Select User for FAQ
-
- Select User: This field is for the customer’s email address. The text you have entered in the Answer box will become the answer for the question asked. Type in a minimum of three characters to use predictive text.
- Select User Role: Place a check on each User Role to show the FAQ to your selected Roles only. **Note: In order to show to all users leave all checkboxes blank.
- User Feedback Counts: This read-only section shows the count of how many people found your answer helpful or not.
- Status & Notification:
- FAQ Status: Assign a public or private status of the FAQ from the dropdown. If you have allowed your customer the option of choosing to keep their question private, this field will reflect the option they have mentioned at the time of raising their question.
- Notify the User: If you select ‘Yes’ the answer you have provided in the Answer box will be sent to the customer defined in Select User with an automatic notification.
- Display on Store FAQ: Allow the FAQ to show on your store by selecting ‘Yes’ from the dropdown.
- Category:
-
- Category: Select a category/categories to assign to the FAQ.
- Most Used: Select any of your frequently used categories from this tab
- Add New Category: Click here to add a completely new category. Enter the name in the text field and select its relevant Parent Category from the dropdown.
- Tags: Select all tags that will be associated with the FAQ. Also, click on Choose from the most used tags, to select frequently used tags.
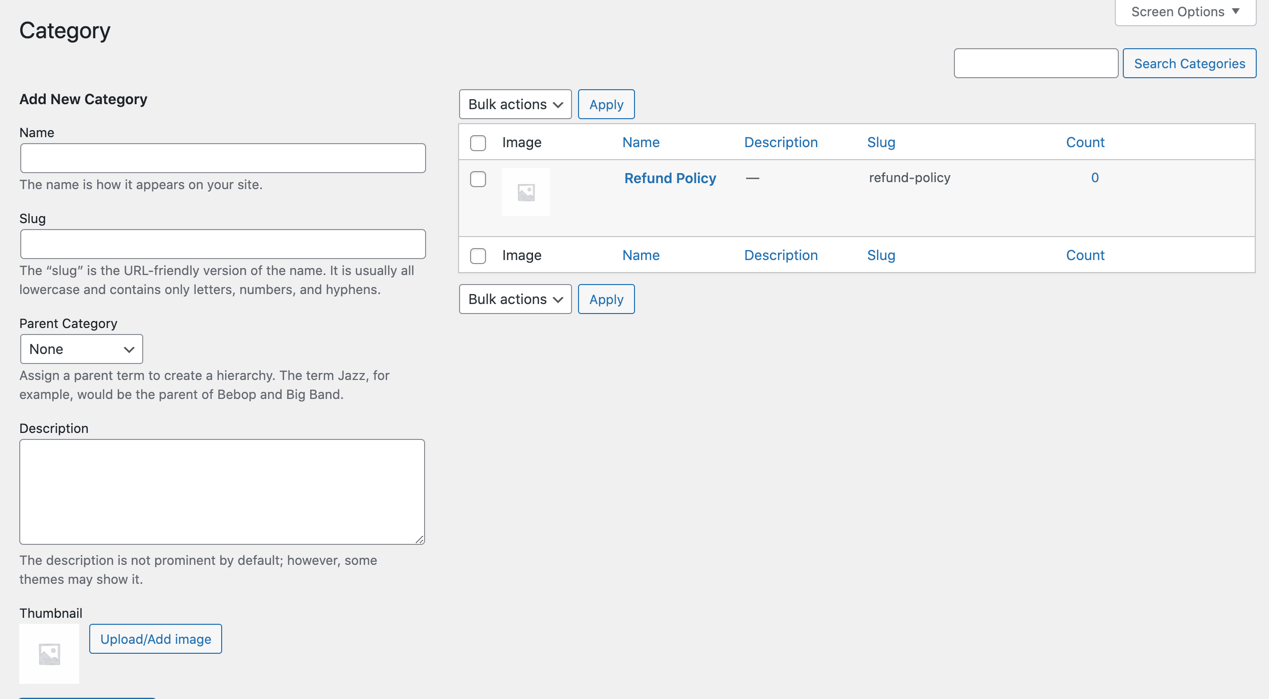
Click on FAQ Categories to create see existing and add new FAQs category
- Name: Enter the name of the category you are going to create. The name you set here is how it will show on your site.
- Slug: A slug is usually that part of a URL that easily describes the page’s content. In this text field you can define a URL-friendly version of the name in the field above. This is generally written in lowercase with only letters, numbers and hyphens.
- Parent Category: When creating product hierarchies a parent category would be the main under which sub categories are included. Use the dropdown to select any existing Parent Category.
- Description: This field enables you to provide a description for the newly added category. This description is generally concealed from view. However, depending on the theme you are using, it could be shown.
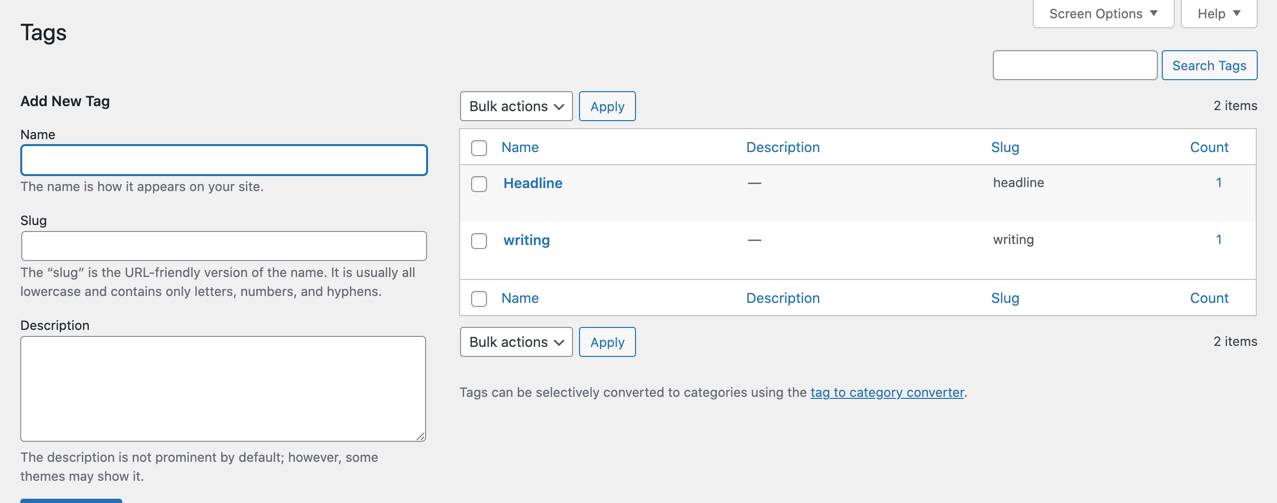
Click on tags to add new tags for FAQs
- Name: Enter the name of the tag you are going to create. The name you set here is how it will show on your site.
- Slug: A slug is usually that part of a URL that easily describes the page’s content. In this text field you can define a URL-friendly version of the name in the field above. This is generally written in lowercase with only letters, numbers and hyphens.
- Description: This field enables you to provide a description for the newly added tag. This description is generally concealed from view. However, depending on the theme you are using, it could be shown.