
Welcome to the KOMOJU Payments documentation! Here you will find an overview of the extension’s installation process as well as good to know tidbits of the extension’s settings and features.
Overview of KOMOJU Payments
↑ Back to topKOMOJU is a payment gateway built for merchants who want to open up their store to buyers in Japan and across the region.
KOMOJU Payments gives your WooCommerce store access to Japan’s most used payment options like PayPay, Konbini payments, and local credit cards through a single installation where each payment method can be enabled individually, letting you offer exactly what your customers expect.
Beyond Japan, KOMOJU also supports payment options from across the region with new methods added over time as KOMOJU continues to expand coverage.
Prerequisites
↑ Back to topYou will need a KOMOJU account to connect your WooCommerce store to KOMOJU. A live account is not required for initial setup and testing, but will be necessary once you are ready to accept payments from real customers.
How it works
↑ Back to topWhen a customer reaches checkout, each payment method you have enabled through KOMOJU will appear as a separate option. Once the customer selects a method, they are redirected to KOMOJU’s hosted payment page to complete the transaction so no sensitive payment data ever touches your server.
After the payment is completed, the customer is redirected back to your store and KOMOJU notifies WooCommerce via webhook, automatically updating the order status.
Installing the plugin
↑ Back to topStep 1: Search for KOMOJU Payments in WordPress
↑ Back to top- Log in to your WordPress admin dashboard
- Navigate to Plugins → Add Plugin
- In the search field, type KOMOJU
- Locate KOMOJU Payments in the results and click Install Now
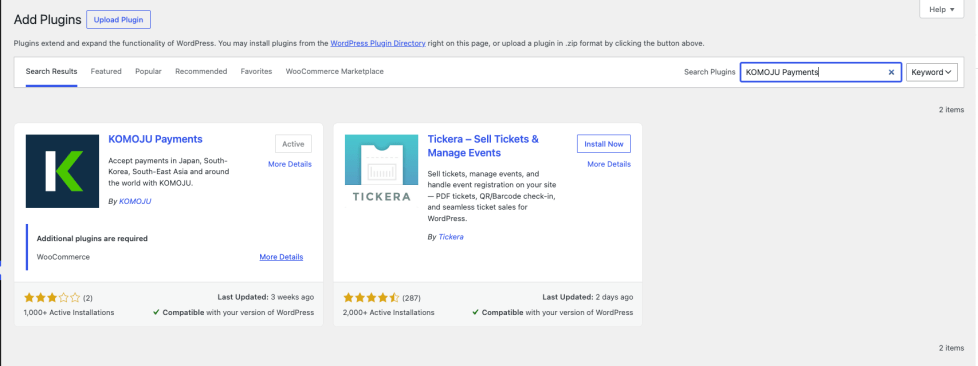
Step 2: Activate the plugin
↑ Back to topOnce installation completes, click Activate. To confirm the plugin installed correctly, navigate to Plugins and verify that KOMOJU Payments appears in the list with a Deactivate link visible.
Connecting your KOMOJU account
↑ Back to topRather than manually entering API keys, KOMOJU uses an OAuth-style sign-in flow that connects your account, sets up your API key, and configures your webhooks.
Step 1: Open the KOMOJU settings tab
↑ Back to topFrom your WordPress admin, navigate to WooCommerce → Settings → KOMOJU.
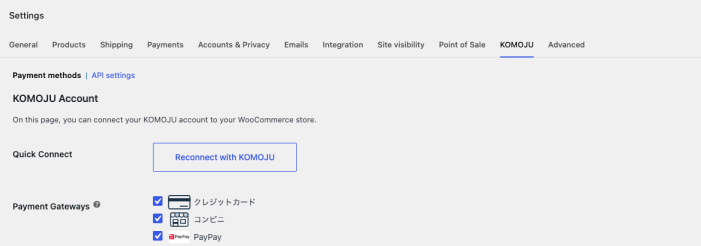
Step 2: Sign in to KOMOJU
↑ Back to topClick Sign into KOMOJU. You’ll be redirected to the KOMOJU login page.
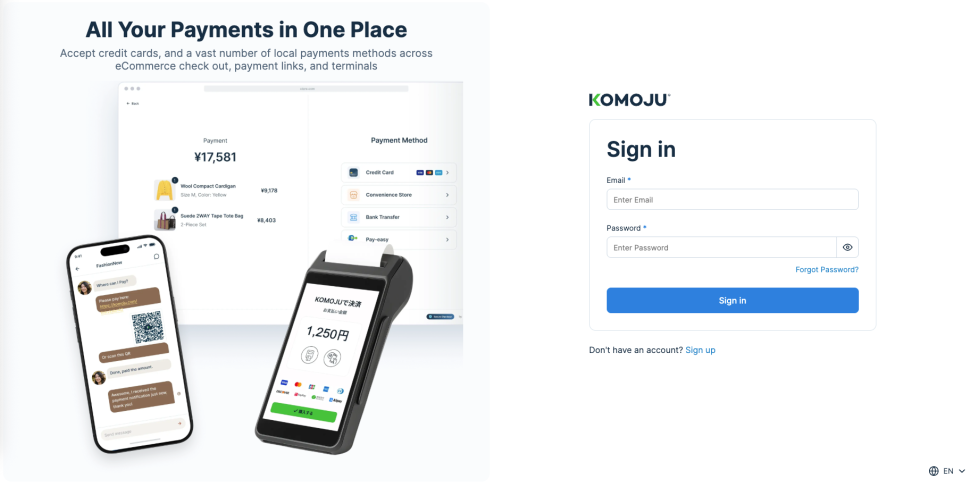
Step 3: Select your account and mode
↑ Back to topAfter logging in, you’ll see your KOMOJU account(s) listed. Select the account you want to connect and choose a mode:
- Test Mode: for testing payments without processing real transactions
- Live Mode: for accepting real customer payments (requires prior approval)
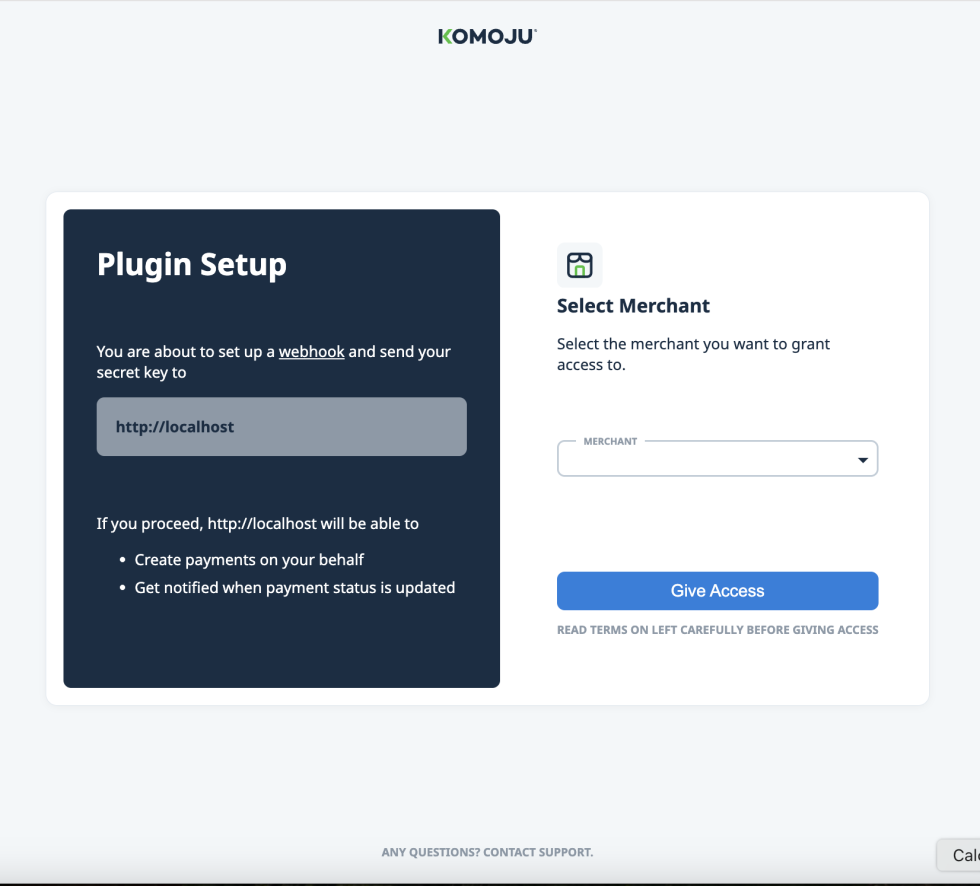
Step 4: Confirm the connection
↑ Back to topYou’ll be redirected back to WooCommerce. If the connection was successful, your available payment methods will appear in the KOMOJU settings tab.
Enabling payment methods
↑ Back to topSeeing payment methods in the KOMOJU tab is not enough. You also need to activate them in WooCommerce’s payments settings so they appear at checkout.
Step 1: Select payment methods in the KOMOJU tab
↑ Back to top- Go to WooCommerce → Settings → KOMOJU
- Check the box next to each payment method you want to offer
- Click Save Changes
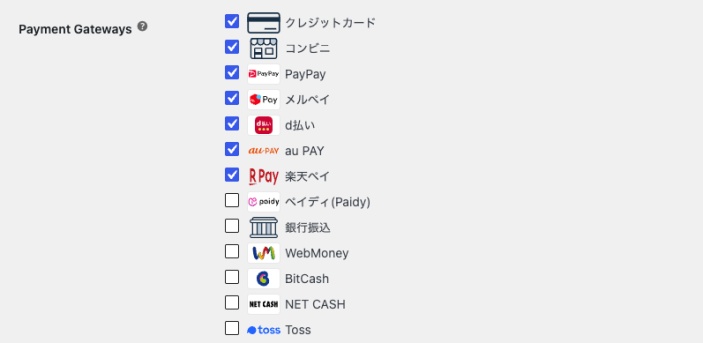
Step 2: Enable them in WooCommerce Payments
↑ Back to top- Navigate to WooCommerce → Settings → Payments
- Find each payment method you selected, listed as KOMOJU – [Payment Method Name]
- Enable each method
- Click Save Changes at the bottom of the page
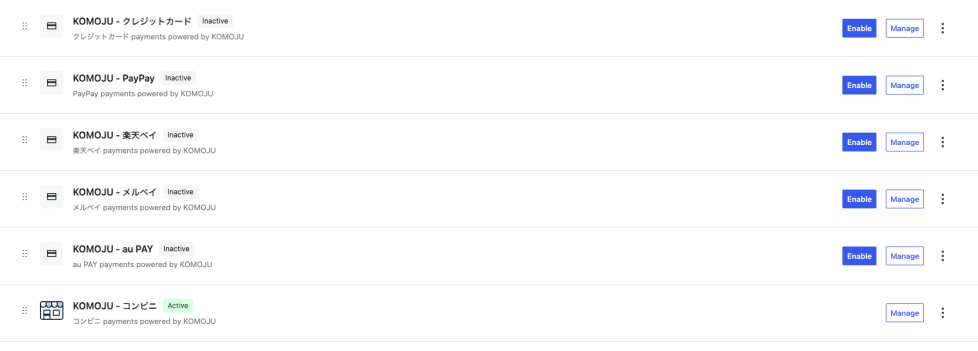
The Payments page may look different depending on the version of WooCommerce you’re using. In newer versions, the toggles have been replaced with buttons.
Testing your integration
↑ Back to topBefore going live, run a test payment to check that the full flow works correctly.
Step 1: Connect in test mode
↑ Back to topIf you selected Test Mode when connecting your account, your store is already set up for testing. If you connected in Live Mode and want to test the integration, return to WooCommerce → Settings → KOMOJU and reconnect, this time selecting Test Mode.
Step 2: Place a test order
↑ Back to topAdd a product to your cart and proceed to checkout. Select one of the KOMOJU payment methods and complete the payment using test credentials.
Step 3: Verify the order
↑ Back to topReturn to WooCommerce → Orders and confirm that the order status has updated correctly.
Further reading
↑ Back to topThe following pages provide detailed information about the KOMOJU Payments extension and can serve as a reference for helping maintain or adjust your integration.
- About KOMOJU Payments: Describes the relationship between KOMOJU Payments and WooCommerce orders and how to find relevant details about a payment or order on both platforms.
- Features & settings: Explains all of the different prominent settings and features found for KOMOJU Payments.
Contact us
↑ Back to topIf you run into trouble during setup or have questions about a specific payment method, the KOMOJU support team is here to help. You can reach us through the contact page.

