Search and Buy by Voice for WooCommerce empowers your online store with cutting-edge voice command capabilities. Your customers can now search and shop hands-free using natural voice commands. This extension includes versatile options for adding voice interaction buttons via floating buttons, sidebar widgets, and Gutenberg blocks — all fully customizable and optimized for accessibility and mobile responsiveness.
Installation
↑ Back to top- Download Search and Buy by Voice for WooCommerce .zip file from your WooCommerce account.
- At the Admin Panel, go to Plugins > Add New and Upload Extension with the file you downloaded after purchase.
- Install and Activate the extension.
How to Configure Search and Buy by Voice for WooCommerce?
↑ Back to top- Go to WooCommerce > Settings and click on the Voice Commerce tab to access the extension’s settings page.
- Customize the settings to match your store’s needs
Key configuration options include:
↑ Back to top- General Settings: Enable/disable voice search and add to cart features.
- Button Styling: Customize button colors, gradients, and animations.
- Button Positioning: Choose from 9 positions (top-left, middle-center, bottom-right, etc.) and whether buttons float or show only on shop/product pages.
- Voice Commands: Customize the voice command phrases.
- Language Settings: Select from 16 supported languages for voice recognition.
- Analytics: Enable tracking and view usage statistics including success rates and popular commands.
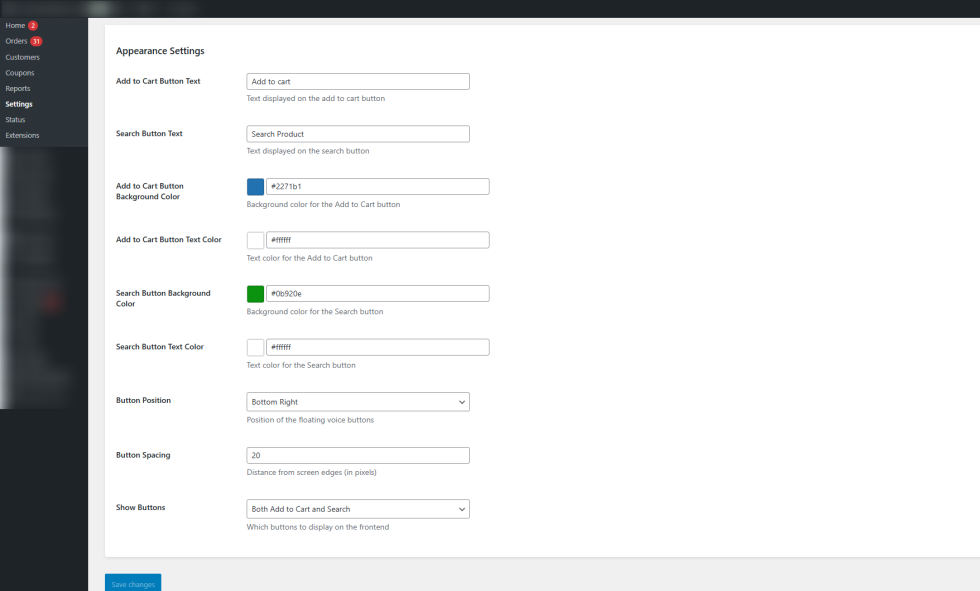
Appearance and Other Settings
↑ Back to topThe Search and Buy by Voice extension offers comprehensive customization options to ensure the voice command buttons blend seamlessly with your store’s design and provide an optimal user experience.

Button Appearance
↑ Back to top- Professional Gradient Backgrounds: Choose from modern gradient color presets or define your own custom gradient for both Voice Search and Add to Cart buttons, giving your buttons a polished and contemporary look.
- Individual Button Colors: Customize background and text colors separately for each button to match your site’s color scheme and branding.
- Text Styling: Modify button text labels and font sizes to make the buttons clear and attractive to your customers.
- Button Animations: Enable smooth animations on hover or click for better interactivity and user engagement.
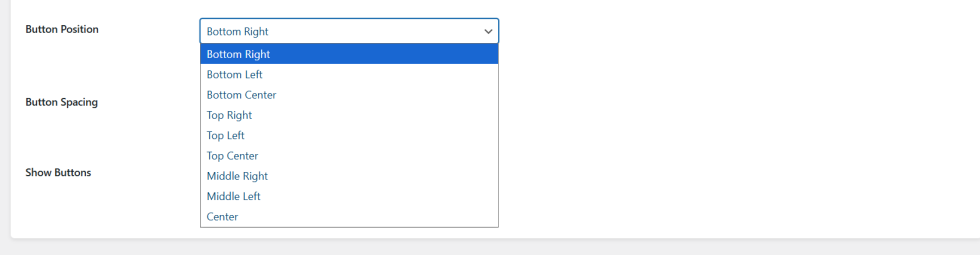
Button Positioning
↑ Back to top- Flexible Placement Options: Choose from 9 predefined positions for each button on the screen:
- Top Left, Top Center, Top Right
- Middle Left, Middle Center, Middle Right
- Bottom Left, Bottom Center, Bottom Right
- Display Location Control:
- Floating Buttons: Buttons float over page content and remain visible as users scroll.
- Product Pages Only: Show buttons only on individual product pages.
- Shop/Category Pages Only: Show buttons only on shop or category listing pages.
- Both: Display buttons on both product and shop pages for maximum visibility.

Button Display Control
↑ Back to top- Choose to display both Voice Search and Add to Cart buttons together, or show only one type of button according to your store’s requirements.

Voice Command Configuration
↑ Back to top- Customizable Phrases: Define your own voice trigger phrases for search and add to cart commands to better fit your target audience’s language and shopping habits.
- Confidence Threshold: Set the minimum confidence level required for voice commands to be accepted, reducing false triggers and improving recognition accuracy.

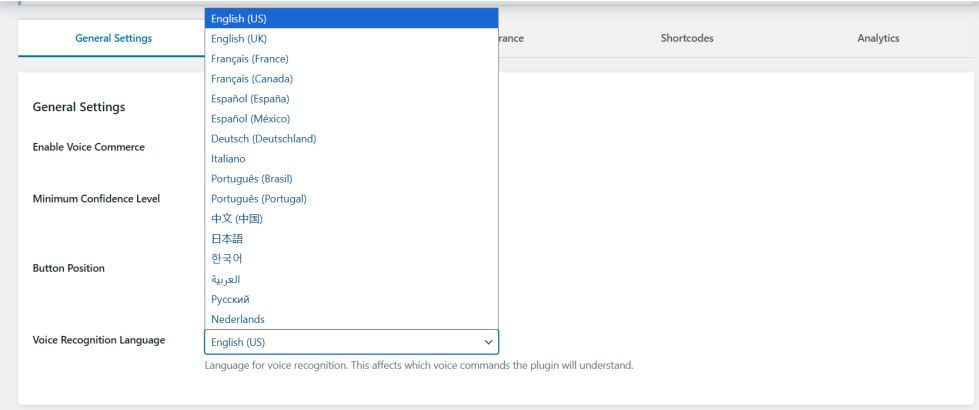
Language Settings
↑ Back to top- Select from 16 supported languages including English (US/UK), Spanish, French, German, Italian, Portuguese, Japanese, Korean, Chinese, Arabic, Russian, and Dutch.
- Language settings determine the speech recognition API’s locale, improving accuracy for your store’s primary customer base.
Analytics Dashboard
↑ Back to topTrack and analyze voice command usage with the built-in analytics dashboard available in the extension settings:
- Enable or disable analytics tracking according to your privacy policy and preferences.
- Configure data retention periods and export settings.
- Access detailed real-time usage statistics directly from the admin dashboard
- Total voice commands issued.
- Success rate of voice recognition.
- Popular voice commands.
- Average confidence score.
- Recent command history with pagination.
- CSV export of analytics data.
This allows you to optimize voice interactions and improve user experience.

Using Voice Search and Add to Cart Blocks
↑ Back to topYou can easily add voice command functionality to any page or post using Gutenberg blocks.
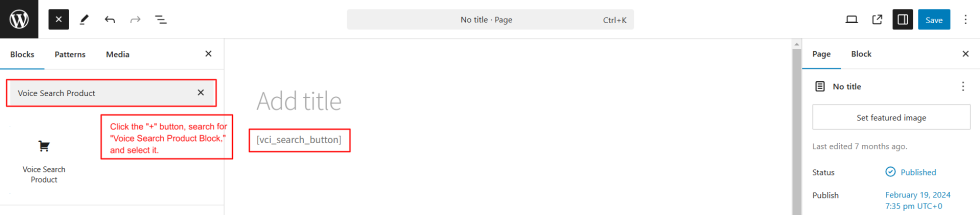
Voice Search Product Block
↑ Back to top- Open the WordPress page or post editor where you want the voice search feature.
- Click the + button to add a new block.
- Search for Voice Search Product Block and select it.
- Save or update the page.
Voice Add to Cart Button Block
↑ Back to top- Open the editor on the page, product, or sidebar where you want to add the voice-enabled add to cart button.
- Click the + button to add a new block.
- Search for Voice Add to Cart Button Block and select it.
- Save or update the page.

Using Shortcodes
↑ Back to top- If you prefer to use shortcodes instead of blocks, you can add the following shortcodes to your page content:
- Voice Search Product:
[voice_search_product] - Voice Add to Cart Button:
[voice_add_to_cart_button] - Simply paste these shortcodes into the desired location on your page, and update or publish the page.
