NOTE
This product is no longer available on WooCommerce.com. This document has been left available for existing users, but will no longer be updated.
Supplier Management for WooCommerce helps you manage all your supplier from the dashboard. With this extension, you can link each product to a supplier and get their information in your inbox with each low stock / out-of-stock email notification.
Overview
↑ Voltar Para o TopoWith Supplier Management for WooCommerce, you can:
- List all your suppliers with extra information ( email, address, contact, etc. )
- Link each WooCommerce product with a supplier
- Follow product stocks for each supplier
- Manage Personal notes and comments for each supplier
- Get all supplier information in low stock / out of stock admin emails
- Send low stock/ out of stock emails to multiple recipients
- Automate the process of sending low stock alerts to your suppliers
Installation
↑ Voltar Para o Topo- Download the .zip file from your WooCommerce account.
- Go to WordPress Admin > Plugins > Add New.
- Click Upload Plugin at the top.
- Choose File and select the .zip file you downloaded in Step 1.
- Click Install Now and Activate the extension.
Adding New Supplier
↑ Voltar Para o TopoTo add a new supplier:
- Go to WooCommerce > Suppliers > Add New Supplier.

- Add all the required information of your supplier
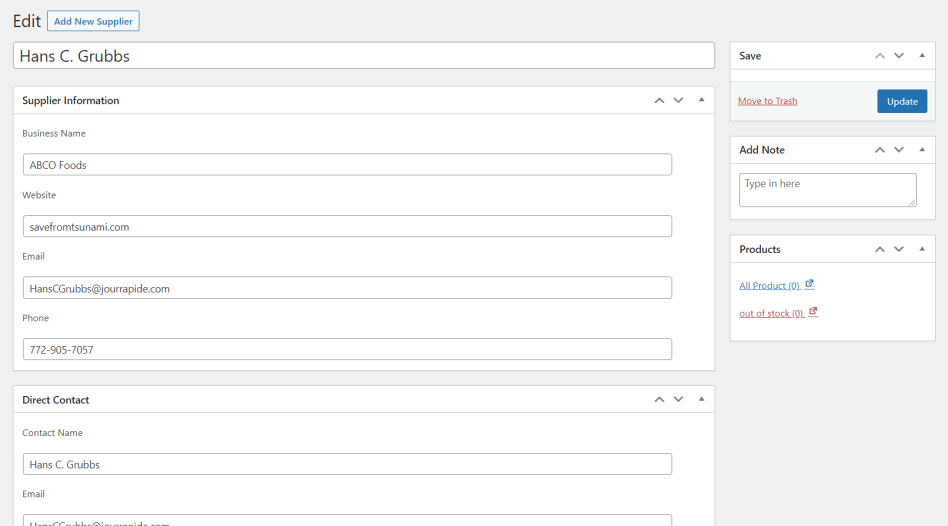
- Once you are done. Click Save.
Adding a supplier to a product
↑ Voltar Para o TopoThere are two ways you can assign a supplier to a product.
From single product edit window – Assigning single supplier to a single product
↑ Voltar Para o Topo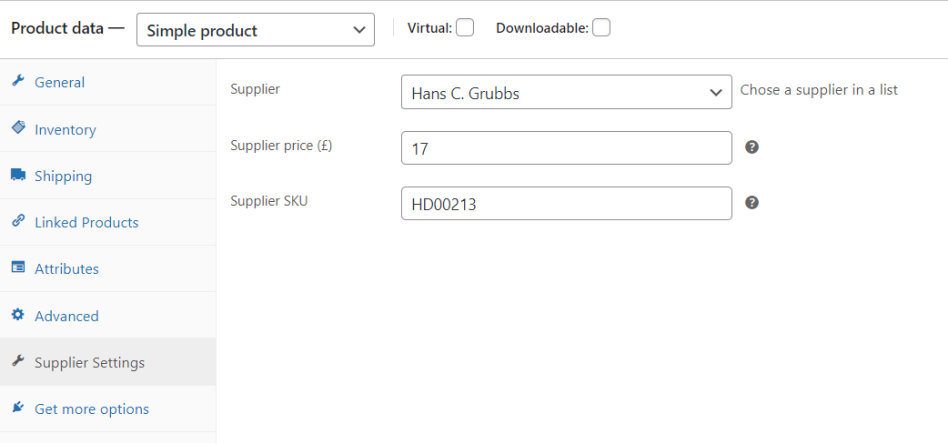
To add a supplier from a single product edit window;
- Go to Single product edit window > Product Data panel.
- Go to the Supplier settings tab.
- Select the supplier from the drop-down
- Set supplier price for the respective product
- You also have an option to assign a separate supplier SKU to each product
From all products window – Assigning products in bulk to a single supplier
↑ Voltar Para o Topo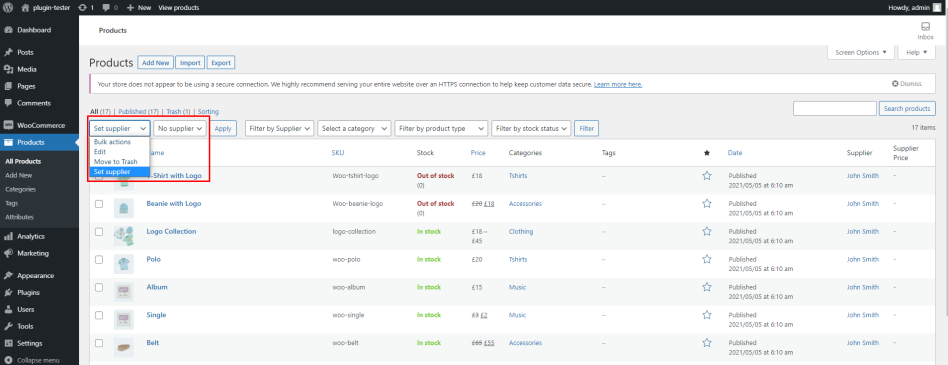
To Assign multiple products to a supplier.
- Go to Products > All Products
- Select products
- From Bulk actions drop-down, select Set supplier
- Select Supplier, you want to assign the selected products to
- Click on Apply
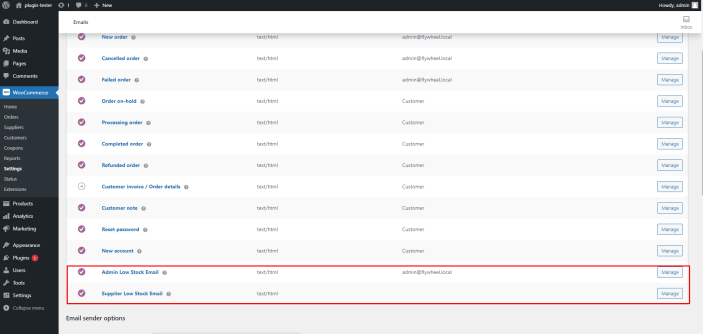
Managing Email Templates for Admin and Suppliers
↑ Voltar Para o TopoTo access settings for low stock / out-of-stock email notification settings.
- Go to WooCommerce > Settings > Emails
- You will find the following two new email settings to manage;
- Admin low stock email
- Supplier low stock email
Admin low stock email
↑ Voltar Para o TopoOnce you click on Manage for Admin low stock emails, you will view the following screen;

From here you can manage the following settings;
- Enable/disable low stock and out of stock emails for admin
- Add additional recipients
- Add your subject
- Select email type
- Add additional content to be sent in the admin email notification
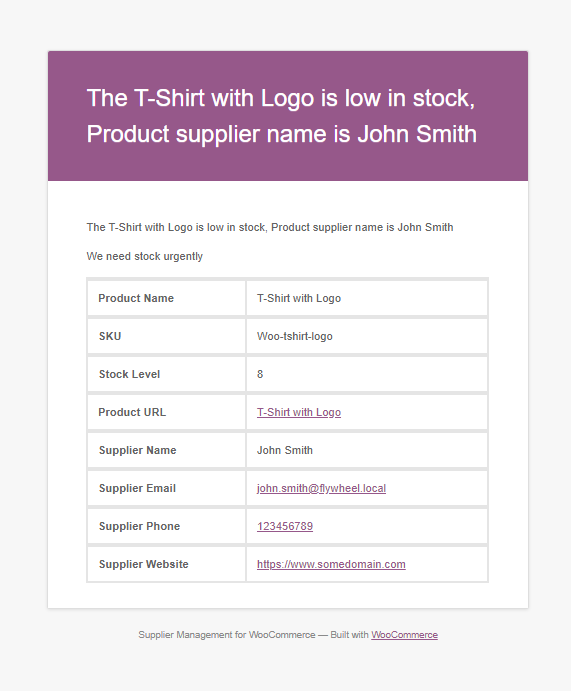
Here is an example screenshot of the admin low stock email with respective supplier information.
Supplier low stock email
↑ Voltar Para o TopoIf you click on Manage for Supplier low stock emails, you will view the following screen;
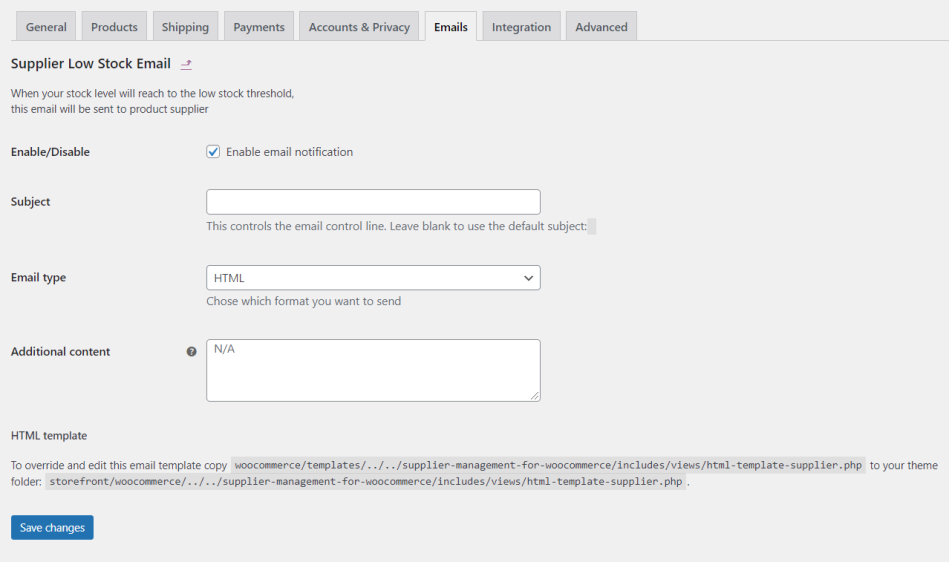
From here you can manage the following settings;
- Enable/disable low stock and out of stock emails for supplier
- Add your subject
- Select email type
- Add additional content to be sent in the supplier email notification
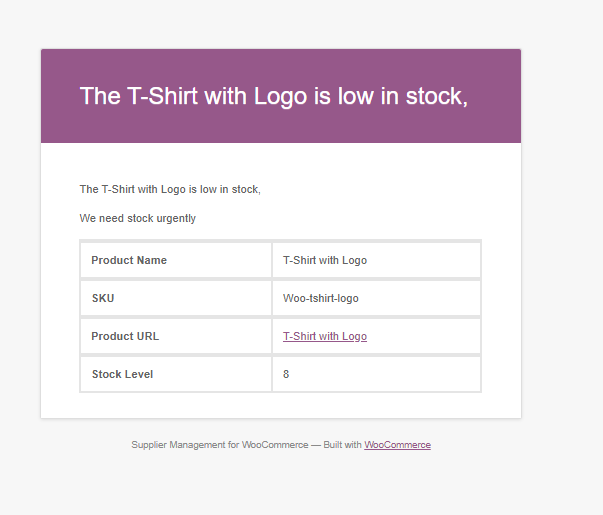
Here is an example screenshot of the admin low stock email with respective supplier information.
Questions & Support
↑ Voltar Para o TopoHave a question before you buy? Please fill out this pre-sales form.
Already purchased and need assistance? Get in touch with us via the Help Desk!