This document may contain outdated information. It was originally written for Order Delivery for WooCommerce prior to version 4 and is retained here for reference.
For the latest documentation, please click here.
Order Delivery allows you to charge additional costs (fees) to the customers for choosing a specific day of the week or a delivery time frame.
Some examples of applicable fees are:
- A $7,5 extra cost for delivering orders on Saturdays.
- A $5 fee for Monday’s early morning (8 am – 10 am) deliveries.
Add a fee
↑ Back to topTo add a delivery fee:
- Go to WooCommerce > Settings > Delivery > Delivery scheduling.
- Scroll down to the setting Delivery days.
- Select a delivery day or one of its time frames.
- Add a value to the option Fee amount.
Note: When a delivery day is split into time frames, the fees must be specified within those time frames.
A delivery fee is represented by the following data:
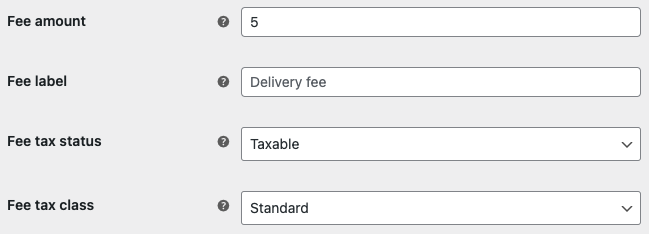
Fee amount
A fixed amount to charge the customer. The field only supports valid prices without the currency symbol.
The price format may vary depending on your store configuration. For example, if your store is using a comma as a decimal separator, then you’ll need to add a price formatted like this: 4,50.
This is the only info required to create a fee. Once you enter a non-zero value, the rest of the fee options will appear.
To remove a fee from a delivery day/time frame, just set the option to zero or an empty value.
Fee label
The label to use in the Order details. Use a descriptive text like Saturday delivery fee.
If you leave this field empty, the label Delivery fee will be used.
Fee tax status
This option defines if the fee is taxable or not. This setting will only appear if the WooCommerce > Settings > General > Enable taxes setting is turned on.
The fee amount entered previously is always before tax, but you can apply taxes to the fee. Just select the option Taxable.
Fee tax class
This option is only available for taxable fees and allows you to define the class used to apply different tax rates, such as standard or reduced rate.
This setting will only appear if the WooCommerce > Settings > General > Enable taxes option is enabled.
Checkout
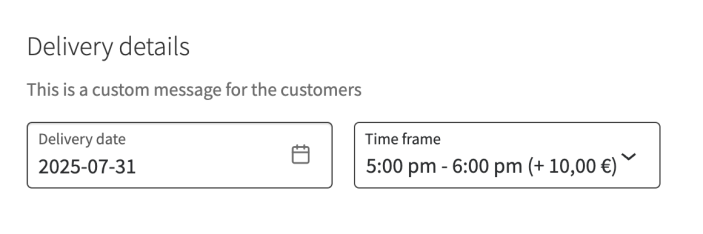
↑ Back to topDuring checkout, when a customer selects a delivery day or time frame that incurs a fee, this amount will be automatically applied to the Order total and displayed in the Order review table.
Additionally, to simplify the process of choosing a time frame for the customers, when a time frame has additional costs, this info will appear in the selector.
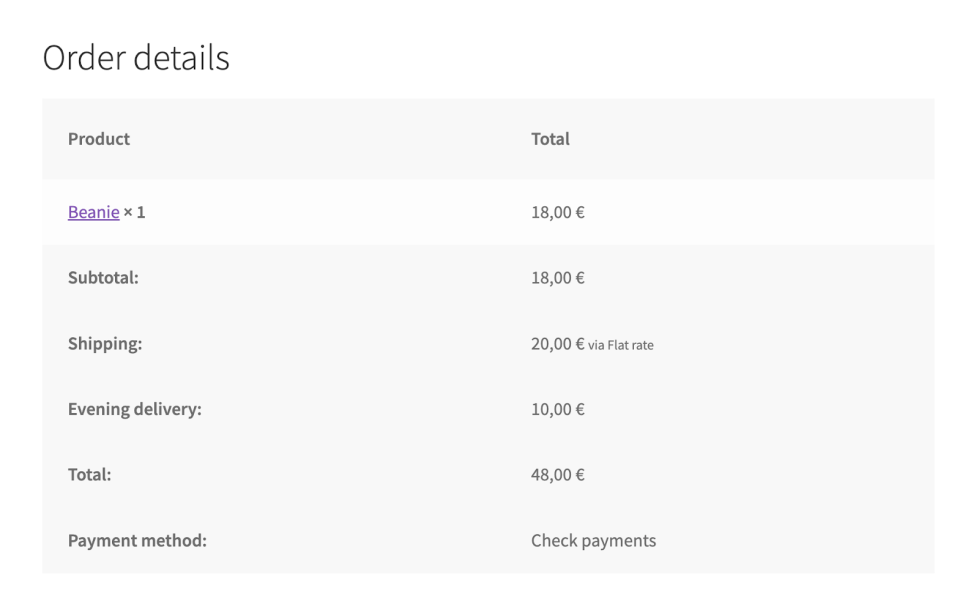
Order details
↑ Back to topOnce the order has been placed, the delivery fee is reflected in the Order balance and the Total row.

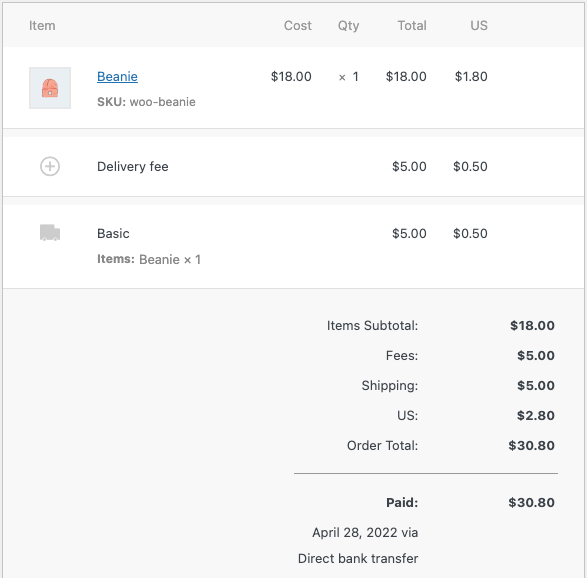
Of course, the delivery fee also appears when editing an order:
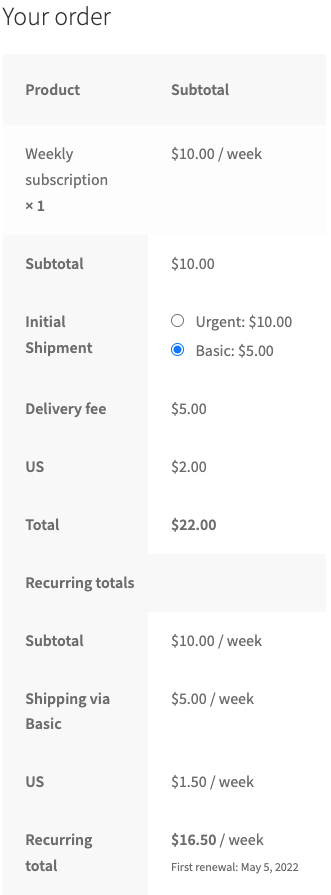
Subscriptions
↑ Back to topWhen working with subscriptions, the delivery fee is only applied to the initial order, and not to the recurring cart. This is due to the delivery fee is an extra charge for the chosen delivery details, and these details only apply to the initial order.
The delivery details of a subscription are automatically updated for each renewal. Our extension assigns the first available delivery date based on the customer preferences.
If the renewal is automatic, no delivery fees are applied to the renewal orders, even if the assigned delivery details have an extra charge. Some reasons for this behavior are the following:
- The customer didn’t really choose these delivery details.
- The delivery day and time frame assigned might not be the same as the one chosen in the initial order. For example, it’s possible that the delivery date/time frame is completed and doesn’t accept more orders.
- Not all payment gateways support changing the subscription amount for every renewal.
Note: To apply an extra cost to subscriptions renewed automatically, we recommend including the cost in the shipping method.
On the other hand, for manual and early renewals, the customer needs to make use of the checkout form. At this point, they can choose the delivery details, so the delivery fees are applicable again and only for this renewal.
Conclusion
↑ Back to topYou now can apply delivery fees based on specific conditions while using Order Delivery for WooCommerce. Are you looking for more information on how to use our extension? Then you can check the rest of our documentation here.
Do you have more questions we can help you with? You can reach out to our support team, and we’d be happy to assist you!