Create and Send Multiple Email or SMS Reminders Automatically
↑ Back to topEnsuring a smooth post-booking experience is just as crucial as securing the booking. That’s why sending Emails or SMS reminders to keep your customers informed is vital to a seamless process.
With our Booking and Appointment Plugin for WooCommerce, you can effortlessly keep your customers in the loop and ensure they stay updated on their confirmed bookings.
Let’s walk you through setting up and sending multiple Email or SMS reminders for a doctor’s appointment.
Rest assured, these steps apply to any product, service, or appointment type, making staying connected with your customers easier than ever.
A. Creating Booking Reminders
Create a Booking Reminders by going to WooCommerce > Booking and Appointment > Reminders > Add Reminder.
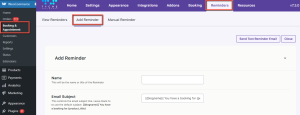
Your Reminder Dashboard will look something like this day-to-day
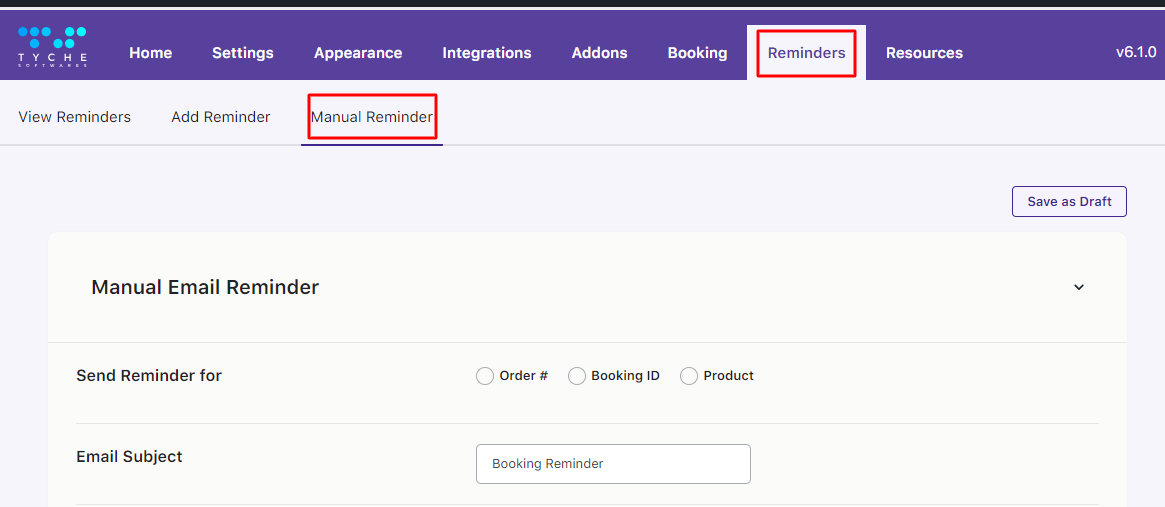
Note: You can also create and send manual reminders, but you’ll have to draft and send these the old-fashioned way by getting to the Manual Reminder tab, as shown below.
Now to set automatic email reminder, clickiing on the Add Reminder tab will open a page enabling you to edit your Email Reminder and Email Settings.
It’s recommended to create a Name or Title for your Booking Reminder to help keep track of reminders when there are several of them.
Here, a title corresponding to a Doctor’s Appointment is added.
You can customize the Email Reminder by adding an Email Subject and an Email Heading.
You can add your Email Content and booking details using merge codes for the following:
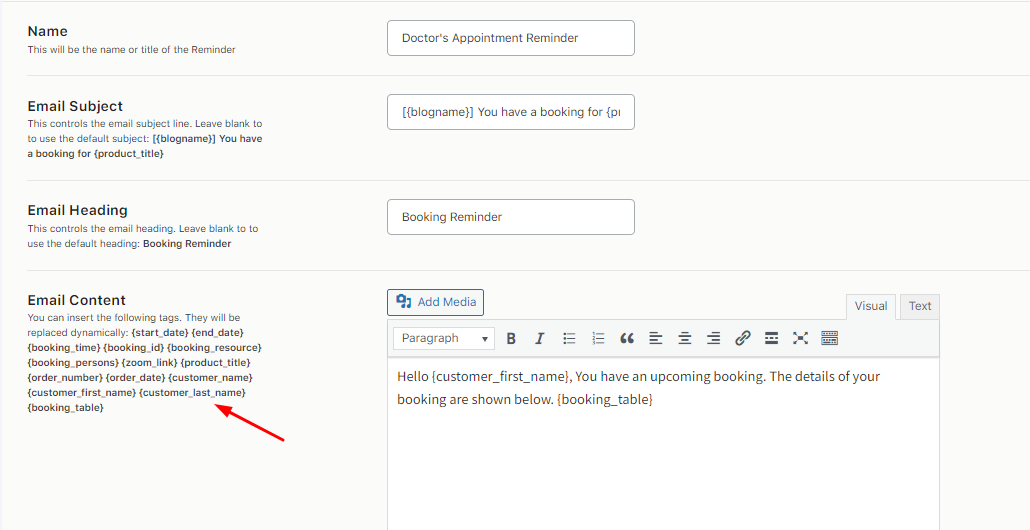
Edit your email reminder content here
Note: Email Content, Subject, and Heading are set automatically to default messages. If you choose not to customize these fields, emails will be sent to customers with this default messaging.
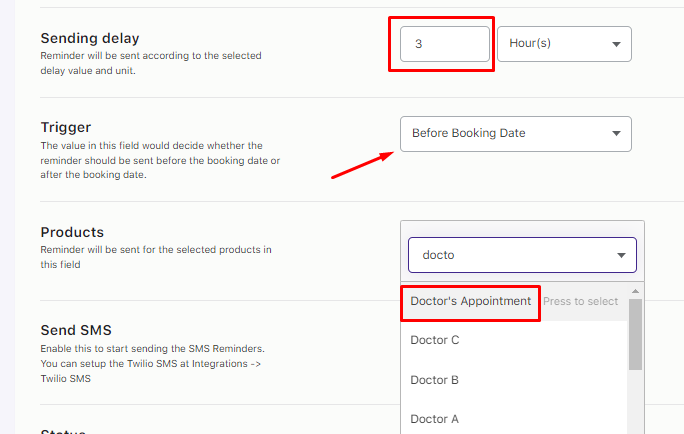
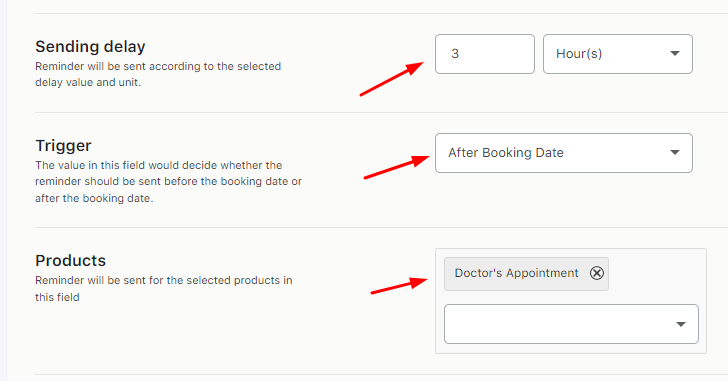
Next, select a value for Sending Delay. This determines the period between the booking date and the sending of the reminder emails.
You can also configure your reminders to be sent Before or After the Booking Date. This is found under the Trigger setting.
Select the product for which you want these reminders sent. Since we’re taking the example of a doctor’s appointment, it has been selected from the dropdown list.
For instance, we have chosen a Sending delay of 3 Hours before the Booking Date for a Doctor’s Appointment. This means the Reminder Email will be sent 3 hours before the customer is expected at the doctor’s office.
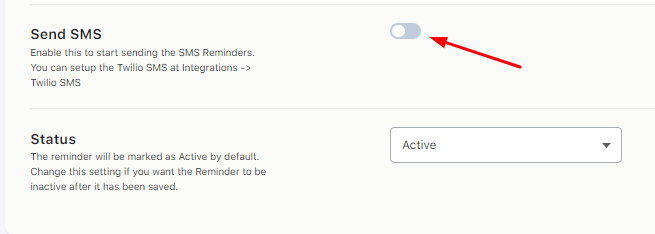
Following this, enable a Reminder SMS.
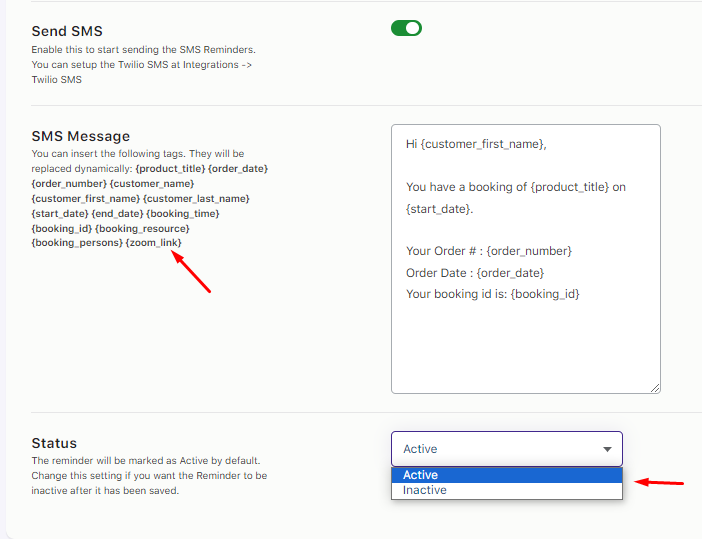
Similar to Reminder Emails, the content of your SMS can be modified using certain tags.
The Email/SMS Reminder Status will be marked Active by default. You can set it to Inactive if you wish to change the default email reminder status.
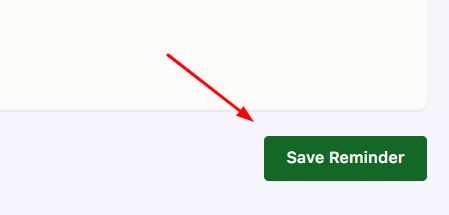
Finally, click the Save Reminder button.
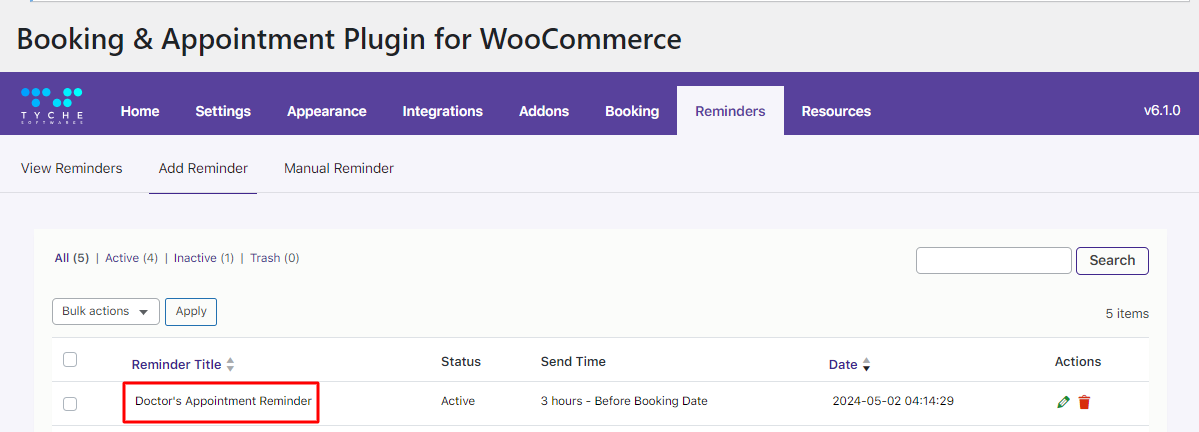
The created Reminder will be added to the table as shown below:
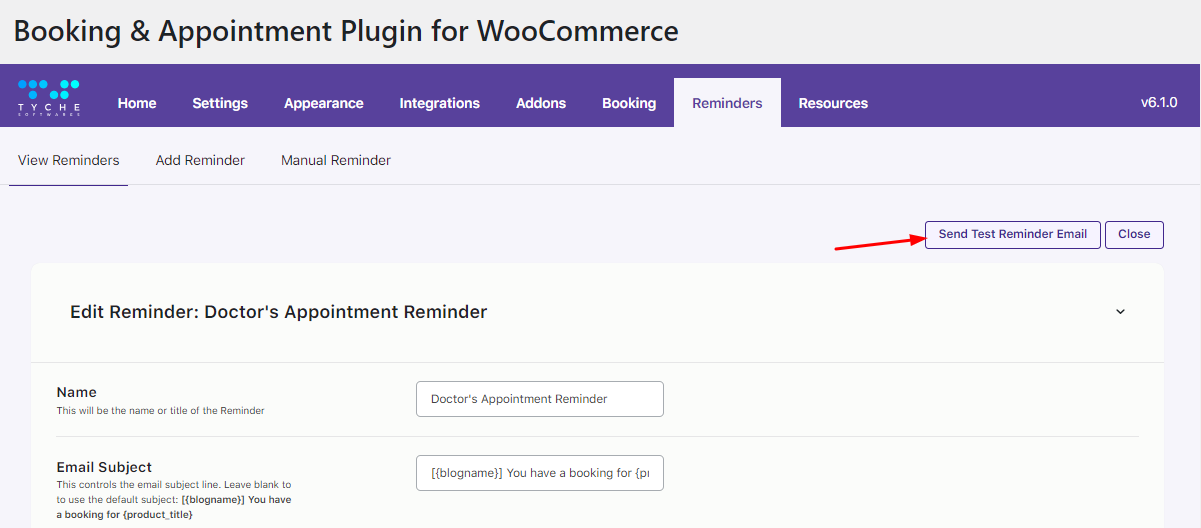
You can also send a test reminder email to your chosen email address to check whether it works properly by clicking the ‘Send Test Reminder Email’ button.
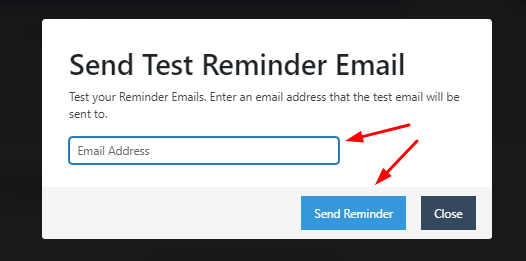
Enter the email address in the pop-up window and click the Send Reminder button.
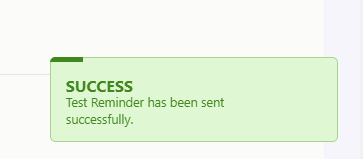
Once it is sent to the address, you will get the following Success message:
B. Creating Multiple Email And SMS Reminders
You have created one Email/SMS Reminder. But if the user wants, they can set two or more for the same product, service, or appointment.
Another Booking Reminder for a doctor’s appointment is usually set to ensure your customers don’t miss it. This time, it is set for a day before the Booking date. Here is how:
Fill in the following details as shown in the screenshot below:
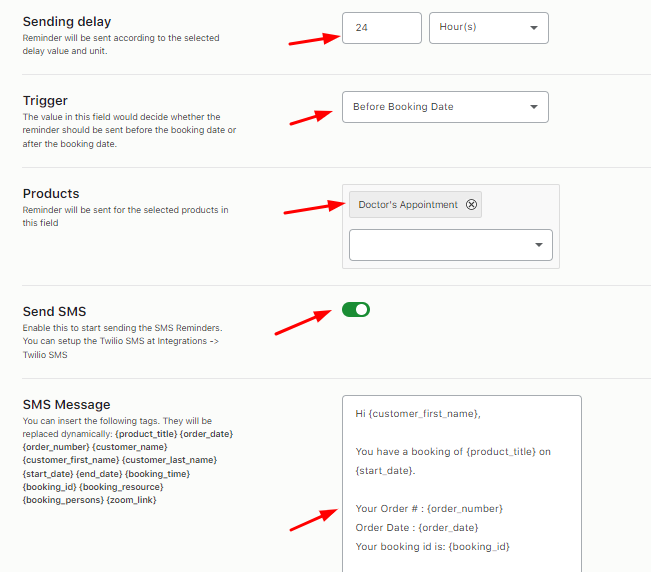
Enable the SMS reminder in the same way as before.
The Reminder should be set to Active, and settings should be saved.

You can add more Email/SMS reminders based on your customer base’s persona or nurturing strategy.
For instance, you can send automated Email/SMS reminders after the booking date to solicit feedback, cross-sell, or upsell.
This is done by setting the Trigger to After Booking Date
Setting the Time Delay to a negative number and the Trigger to Before Booking Date will work like the After Booking Date option. This means if you set it to -3 hours before the booking date, the Email/SMS will be sent 3 hours after the booking date.
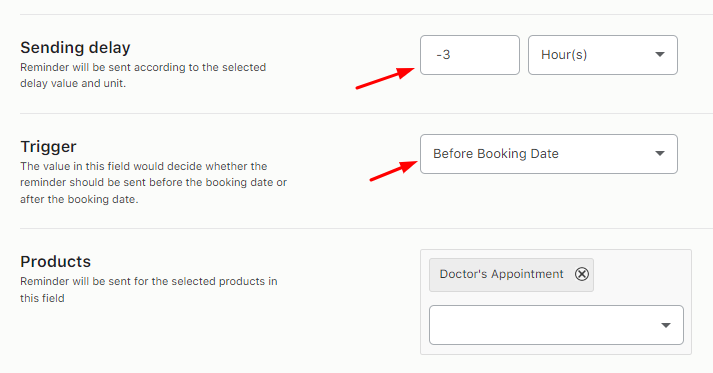
Another way to set an “After Booking” reminder
Toe disable Booking Reminders, set the Status to Inactive and press Update Reminder to save this setting.

You can also delete reminders by clicking the Delete button under the Actions column on the right.
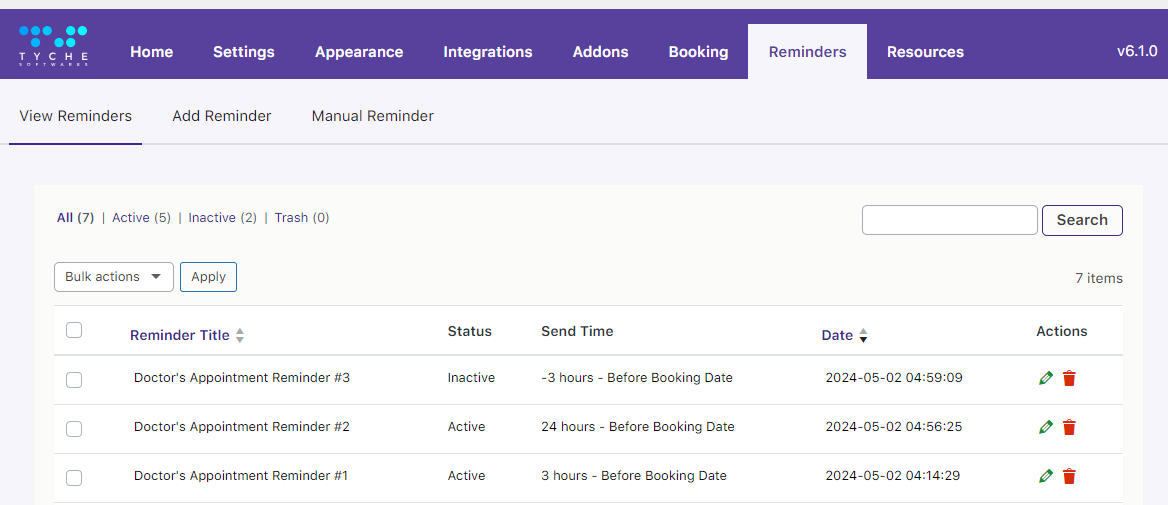
Here, you can view all your reminders along with the Reminer Title, Status, Send Time & Date, and Time Delay for each reminder you’ve created.
Sending multiple reminders before and after their booking date helps keep customers informed and ensures that the customer’s appointments & bookings are fulfilled.
Using the Booking and Appointment Plugin for WooCommerce, create a seamless and automated post-booking process by setting multiple Email/SMS reminders.
Create and Send Reminder Emails Manually
↑ Back to topThe Booking and Appointment Plugin for WooCommerce provides a post-booking system to keep your customers informed about their confirmed bookings by allowing them to create and send reminder emails manually.
This is quickly done using reminder emails for customer’s booked products or services before the booking date.
Here is how it can be set.
A. Enabling Reminder Emails
When customers book any product or service online, they get a confirmation email for the booking.
However, when you enable this feature, another email notification will be sent to the customer to remind them of the upcoming booking from the plugin.
To enable sending such reminder emails, go to WooCommerce > Settings > Emails tab:
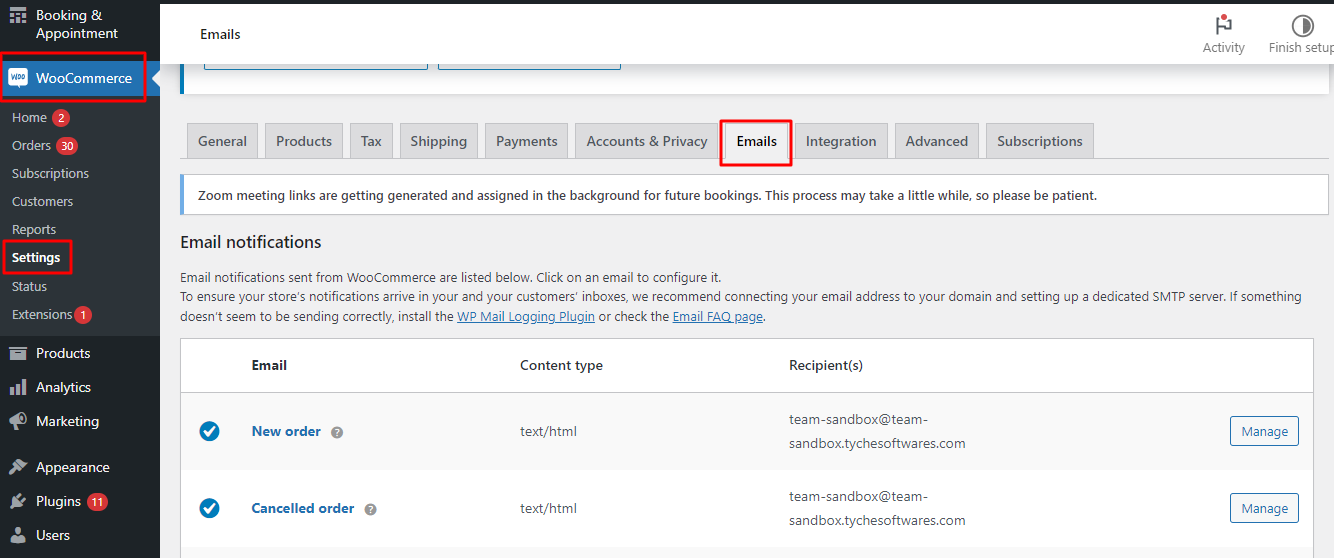
Find the Booking Reminder option and click its Manage button as shown below:

You will be taken to the Booking Reminder settings page, as shown below.
Here, tick the Enable/Disable checkbox to enable email notifications to be sent to customers.
In the Subject field, you can add the email subject according to your requirements. If you leave it blank, the default subject will be used.
Similarly, the Email Heading field will display the main heading of the email and can be set to anything as per the business requirement. If left empty, the email notification will use the default heading.
Email Type will be the format of the email to be sent. It can be either Plain text, HTML, or Multipart. By default, it is set to HTML.
Click on the Save Changes button to save all the changes in the settings made.
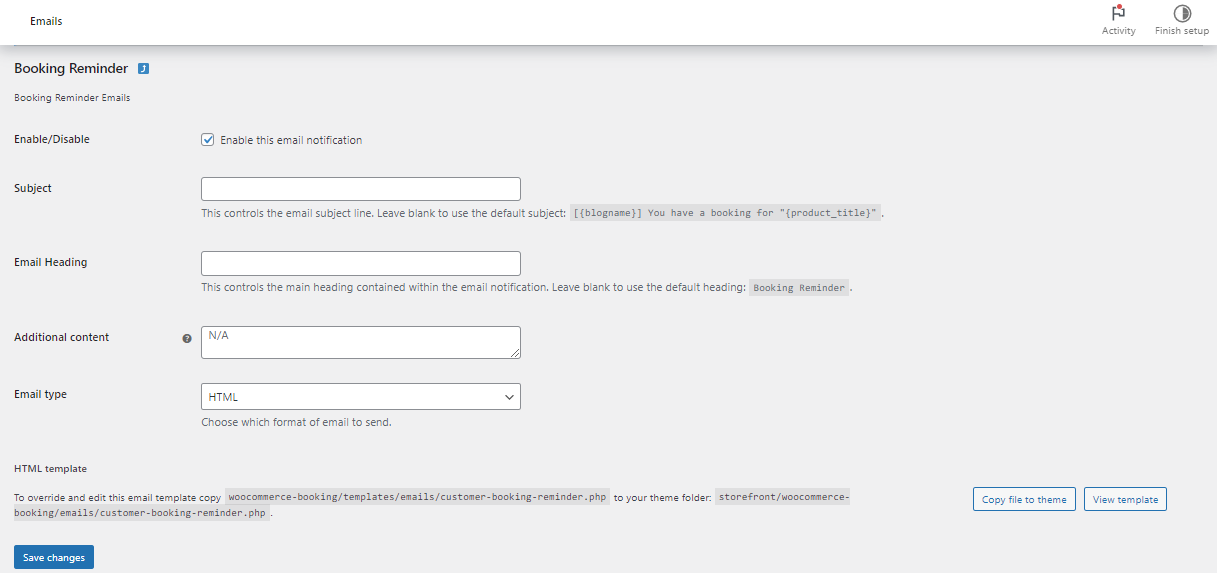
Booking Reminder page
Now, navigate to the WooCommerce > Booking and Appointment > Reminders page.
You can add Automatic reminders by going to the Add Reminder tab. Learn more about it here.
Or
You can go to the Manual Reminder tab to create and send reminder emails manually, as shown below.
Note that the template used for sending automatic reminder emails is the same as the one used for manual reminders, but you can add more content to the message here.
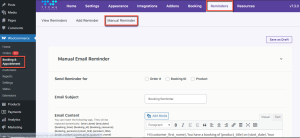
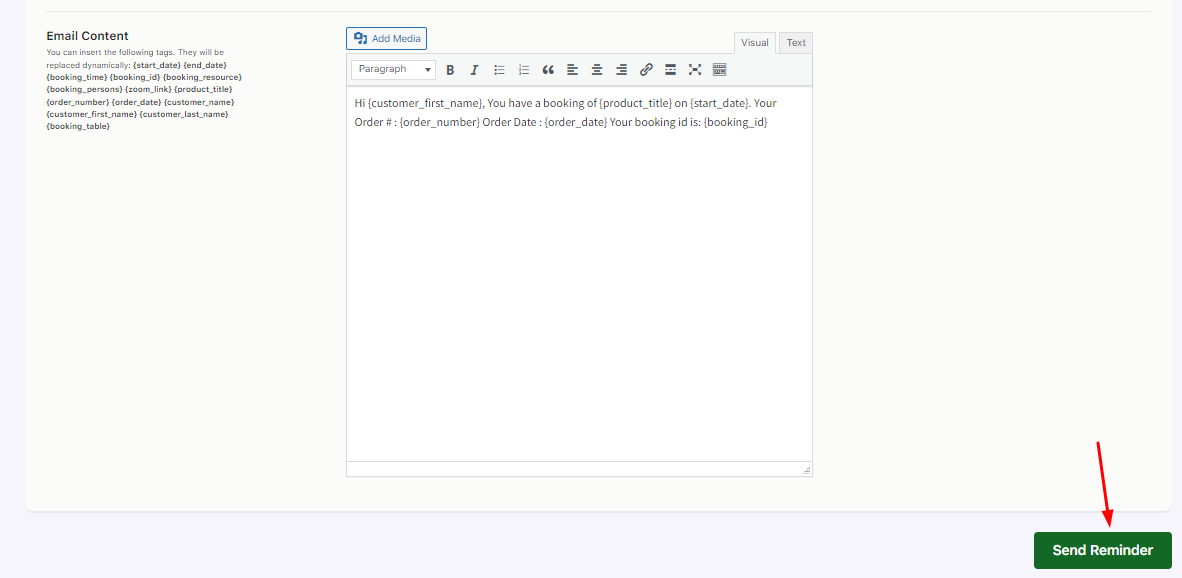
Manual Reminder section
Here, you can send reminders for:
- Specific Order #
- Booking ID
- Product
This can be done by selecting the respective radio button in the Send Reminder for section shown in the image above.
If you select Order # in the ‘Send Reminder for’ option, a section with the list of Order IDs will appear. On clicking the Order IDs field, you will be able to see all the order IDs in a dropdown, as shown below.
Now select from the list of displayed Order IDs.
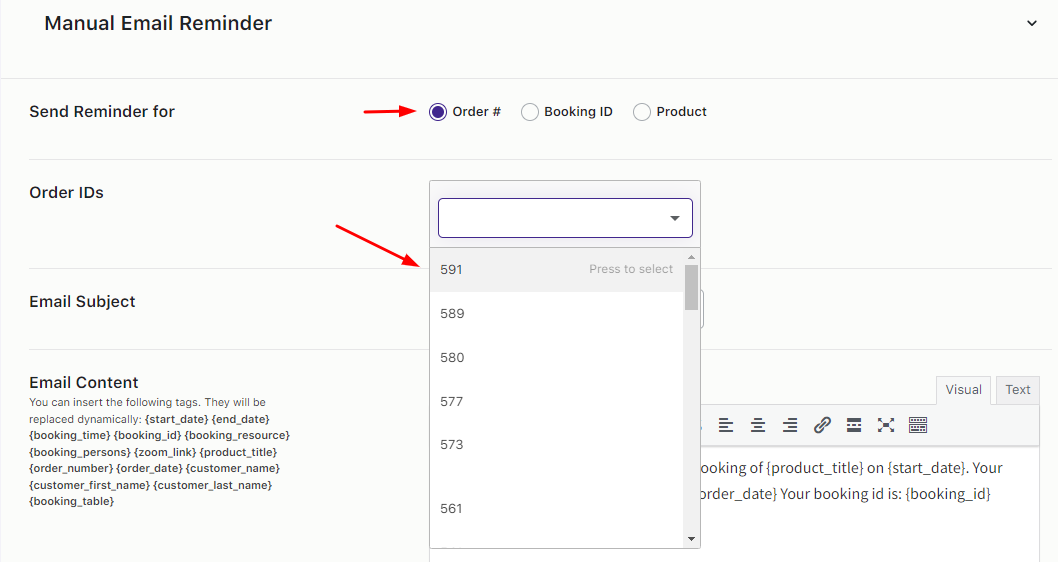
List of Order IDs
You can choose multiple Order IDs to send the reminder email to from the dropdown:
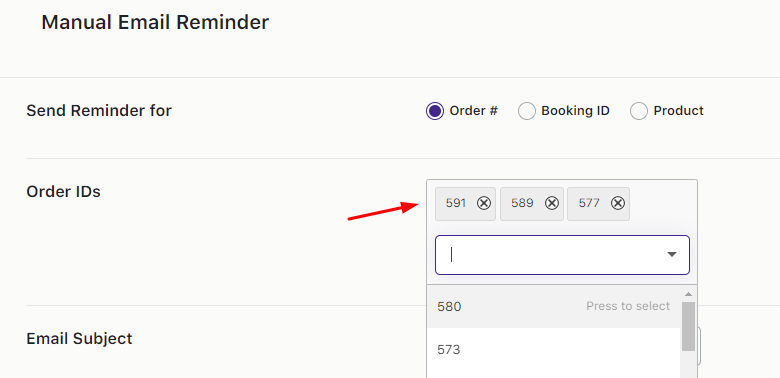
More than one order ID selected
The reminder email will be sent to the selected Order IDs together.
Similarly, you can select the Booking ID from the ‘Send Reminder for” option to send reminder notifications by selecting the booking IDs from the dropdown:
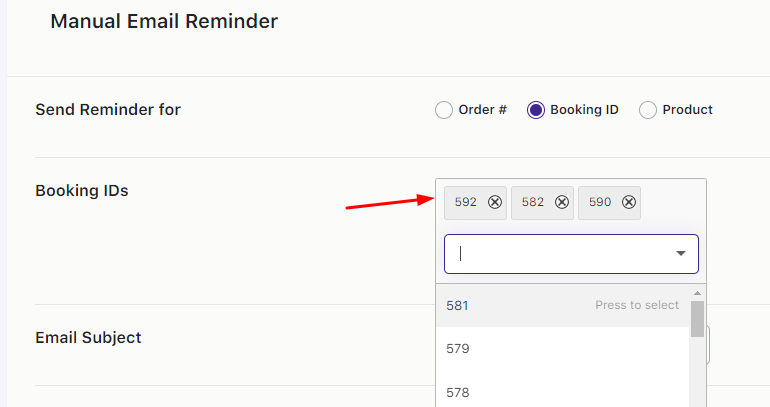
Booking Ids selected
Likewise, when you select the Product radio button, all the Booked Products are displayed in the dropdown.
You can select a single product or multiple products from the list to send reminder emails together, as shown below:
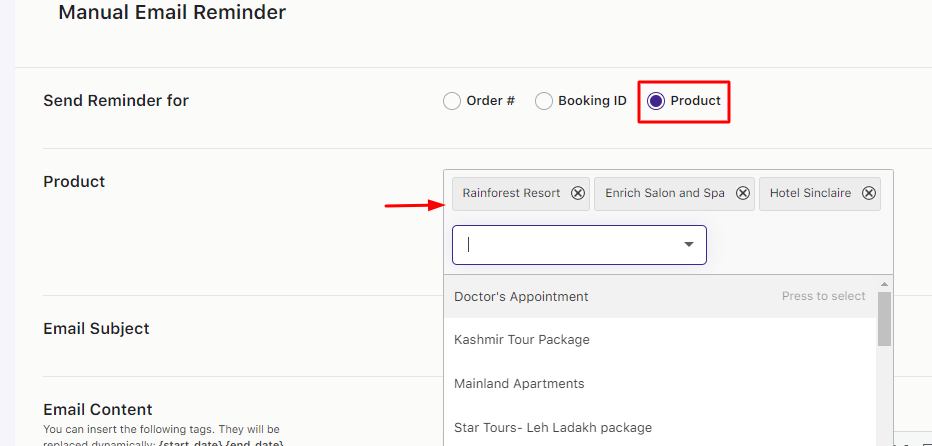
Selecting products for sending reminder emails
Once you have selected the Order # or Booking ID or Product to send reminder emails, you need to add the Subject and Message to the email.
For instance, you want to send a reminder email to the customer for their booking at Hotel Sinclaire.
You will select the product Hotel Sinclaire and add the Email Subject as Booking Reminder – Hotel Sinclaire.
Compose or add your desired email message in the text field of the Email Content section as shown below:
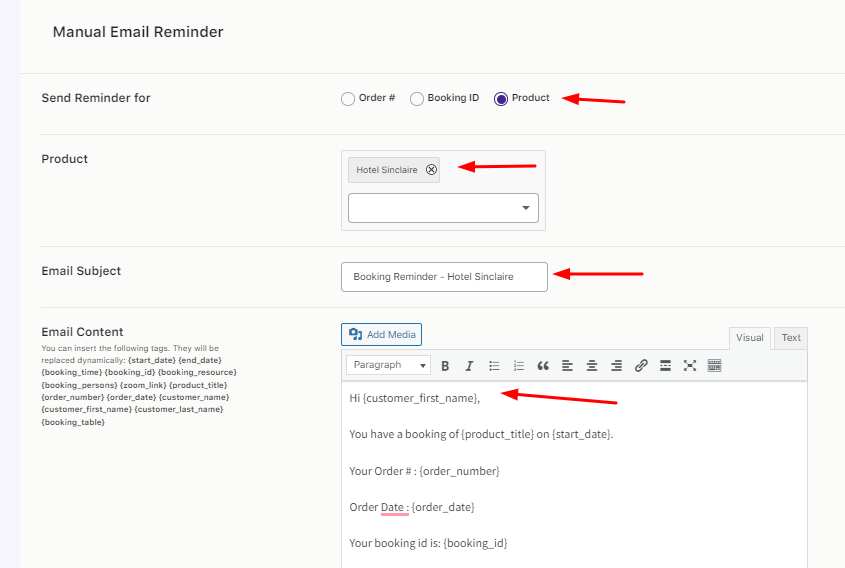
Adding details for the reminder email
Once the message is composed, you can click the Save Draft button to save it as a draft and send the email later.
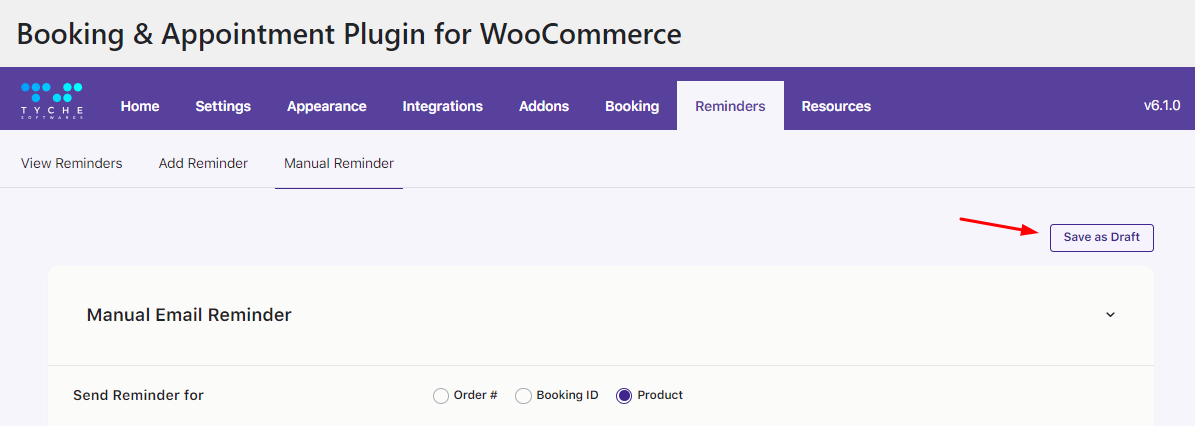
Or you can click on the Send Reminder button to send the reminder email immediately.
When you click it, an email reminder will be sent for all future bookings of Hotel SInclaire as this was the product that was selected above.
This is how the reminder email sent to the customer will look:
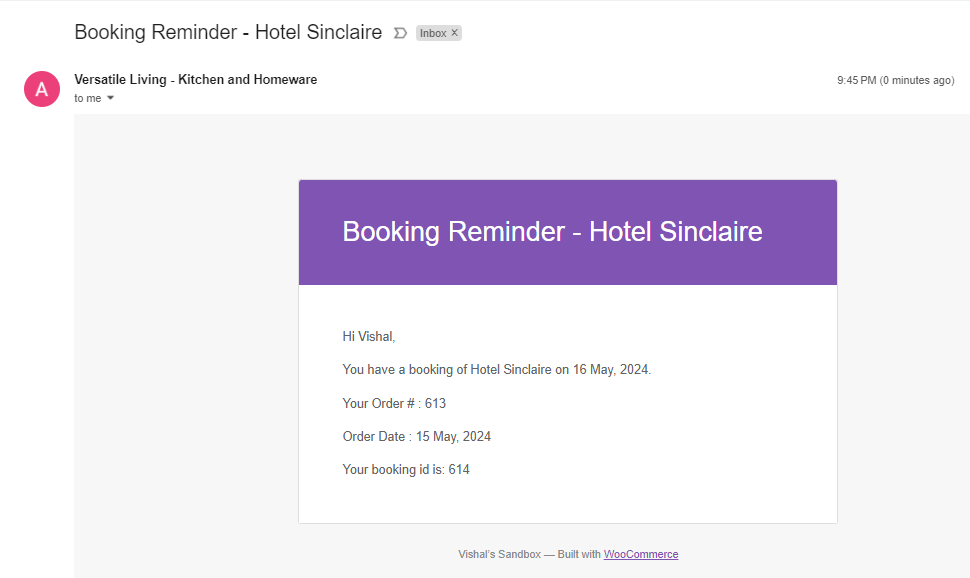
Reminder email sent to the customer
The Booking and Appointment Plugin for WooCommerce reminds your customer about their upcoming bookings with personalized email! Being able to create multiple custom email reminders and send them to your customers’ inboxes with their booking and appointment-related messages enhances their trust and reliability in your business to a great extent.
So, utilize this feature effectively to improve the experience of your customer’s booking and appointment journey from your WooCommerce store.
