This documentation is for the premium Product CSV Import Suite extension. If you’re looking for documentation about the product importer built-in in WooCommerce 3.0+, check out the documentation here.
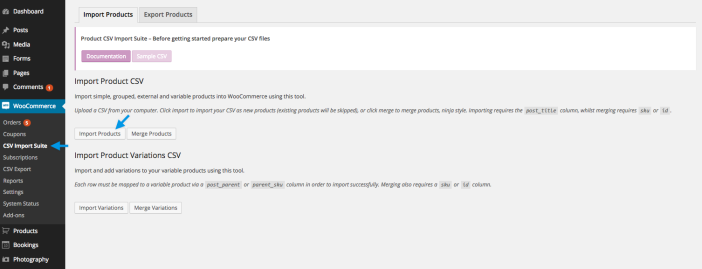
Importing your products can be as nice and simple as creating a CSV file and importing that into WooCommerce.
Create Your CSV
↑ Back to topIf you plan to add product variations, including a SKU will make it easier to map your variations onto your parent product.
Import Your CSV
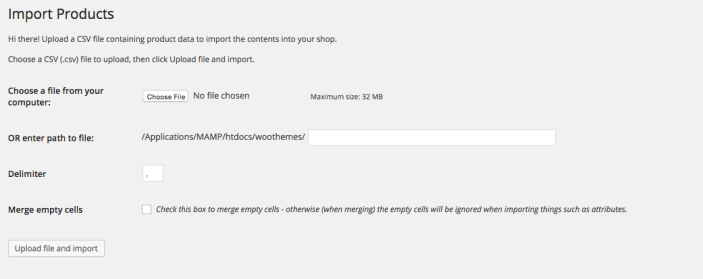
↑ Back to top Select Choose File, and upload a file from your computer or from wherever your CSV is located.
 The delimiter is the character that separates the values, in this case a comma.
Select Upload file and import.
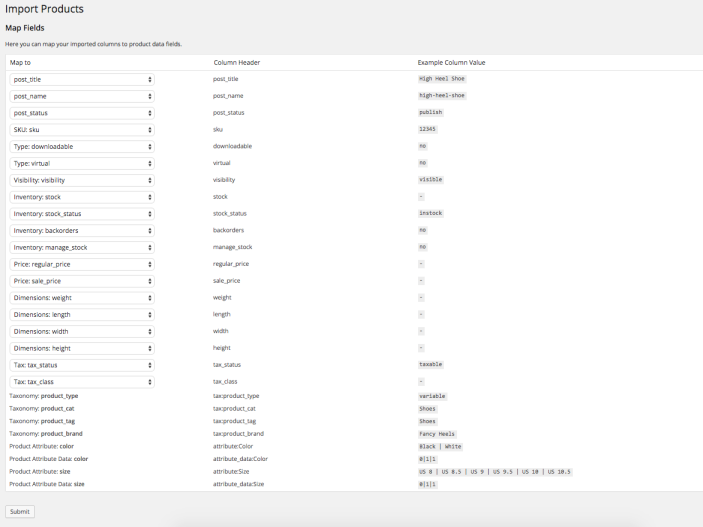
Map Fields
↑ Back to top When you’re happy, click Submit.
Your Products will be imported, and you’ll be provided with a real-time view of what is successfully imported and what products, if any, fail.

