Smart Coupons provide a powerful, “all-in-one” solution for gift cards, gift certificates, store credits, discount coupons, and vouchers extending the core functionality of WooCommerce coupons.
This doc article explains how using Smart Coupons, you can import coupons in bulk using a structured CSV file.
A sample.csv file is included in the Smart Coupons plugin folder within your WordPress install. You can use this as a starting point to create an import file.
Important: If you’re importing coupons on a site having a different language, make sure the discount_type column of your CSV file has the translated value of the corresponding discount type.
Steps to Import Coupons
↑ Back to top- Go to your WordPress Admin dashboard. Under Marketing > Coupons, click on the ‘Import Coupons‘ tab.
- Click the ‘Choose a CSV file’ button and upload your file.
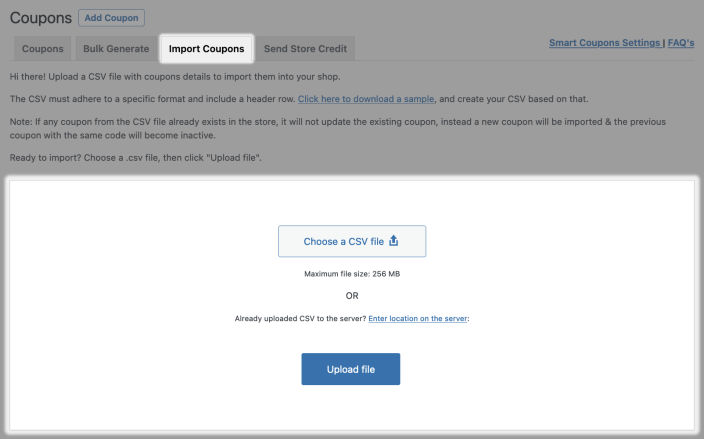
- Click on the ‘Upload file’ button.
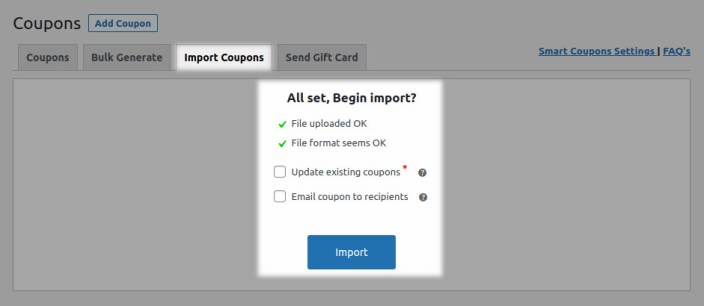
- You can also send the generated coupon code to the respective customer at the time of import. This works with the Usage restrictions > Allowed emails option. Any email address you entered will receive the coupons once they are imported.
- Click Import and wait for a message about importing.
How to Import Coupons with Categories
↑ Back to topSmart Coupons provides a feature using which you can set a category or multiple categories to a coupon or multiple coupons.
Categories help you identify a group of coupons based on certain requirements and usage. For example, holiday season coupons, deal sites coupons, etc.
Steps to import coupons with categories
↑ Back to top- Go to your WordPress Admin dashboard. Under Marketing > Coupons, click on the ‘Import Coupons‘ tab.
- Download the
sample.csvfile as shown in the image below.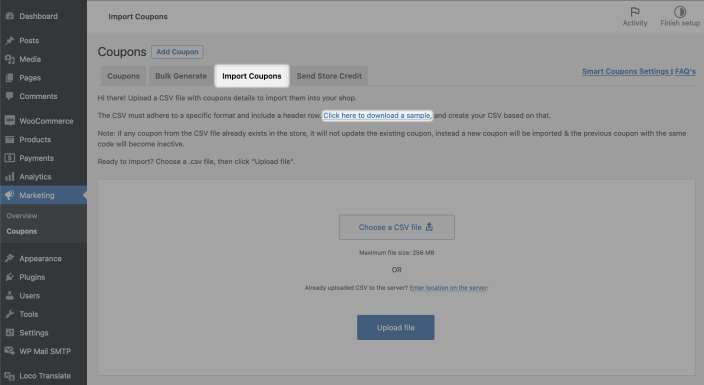
- Give a name to your CSV file. Make sure your CSV file contains the column “sc_coupon_category” as shown in the image below.

- Now, go to your WordPress Admin dashboard. Under Marketing > Coupons, you will see the “Manage Coupon Categories” button. Click on it & you’ll be redirected to a page from where you can manage (add, update, delete) coupon categories. Refer to this doc on how to create and manage coupon categories.
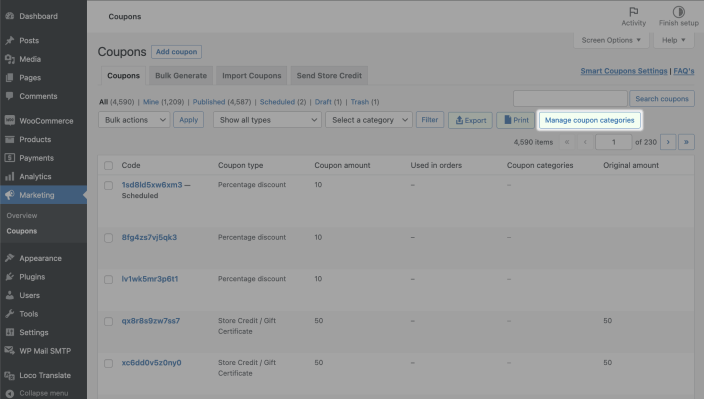
- Add your preferred categories and note down the coupon category ID. These ID’s will be used under the “sc_coupon_category” column in the CSV file.
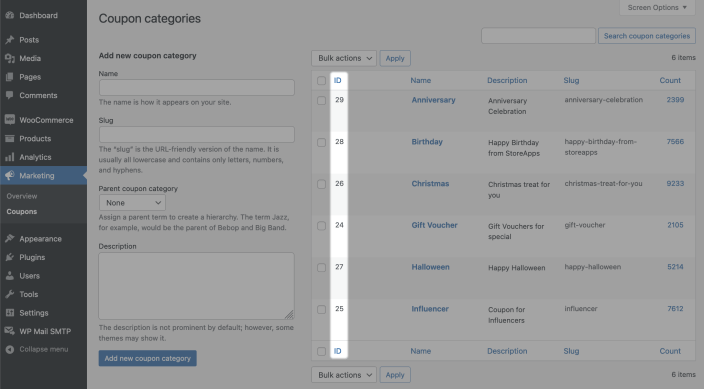
- Add the noted category IDs under the column “sc_coupon_category” in your CSV file along with other coupon data. Save your CSV file. If you want to set multiple categories then you can separate the category ids with a pipe (|). For example, 38|37|36.

- Go to Marketing > Coupons > Import Coupons
- Refer to the above-mentioned steps to know how you can upload this CSV file to import coupons.
Additionally, if you find it difficult to create and edit values from the sample.csv file, you can also use the “Export to CSV” feature after adding your preferred coupon values. Go to your WordPress Admin dashboard. Under Marketing > Coupons, click on the “Bulk Generate” tab. Enter the coupon values and click on “Export to CSV“. Then, follow the steps mentioned above.
