NOTE
This product is no longer sold on WooCommerce.com. This document has been left available for existing users, but will no longer be updated.
The 2Checkout API Gateway plugin extends WooCommerce allowing you to take payments directly on your store via the 2Checkout API.
Installation
↑ Back to top- Download the .zip file from your WooCommerce account.
- Go to: WordPress Admin > Plugins > Add New and Upload Plugin with the file you downloaded with Choose File.
- Install Now and Activate.
More information at: Install and Activate Plugins/Extensions.
Requirements
↑ Back to top- A 2Checkout account – go to www.2checkout.com and Sign Up or Log In if you have an existing account
Setup and Configuration
↑ Back to top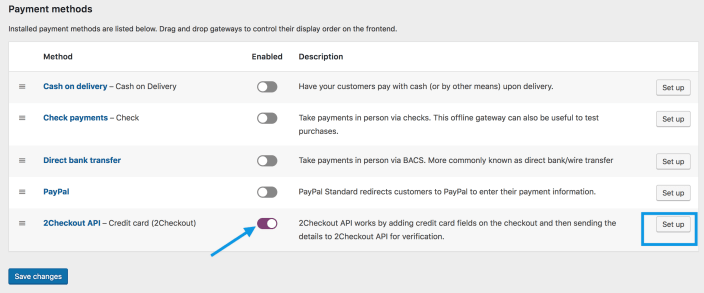
- Go to: WooCommerce > Settings > Payments.
Note: ‘Payments’ formerly called ‘Checkout’ prior to WooCommerce 3.4. - Use the toggle under Enabled to select 2Checkout API.
- Select Set Up. You are taken to the 2Checkout API settings.
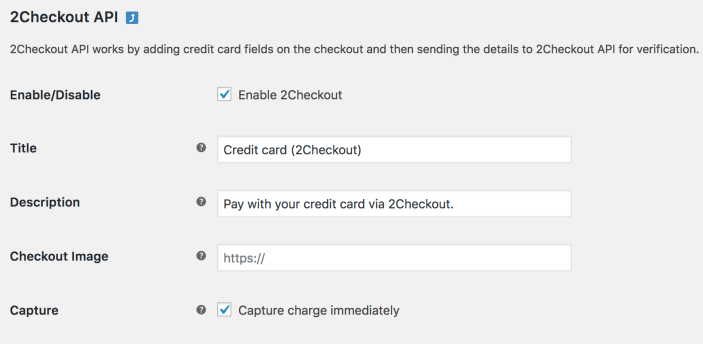
- Configure your settings:
- Enable/Disable – Enable to use. Disable to turn off.
- Title – Choose the title shown to customers during checkout
- Description – Add info shown to customers if they choose 2Checkout
- Checkout Image – URL to a logo you want shows in checkout (optional)
- Capture – Now or within 7 days
- Enter your Seller ID/Account Number, Private Key and Publishable Key, found in your 2Checkout account. All of these are Live credentials.
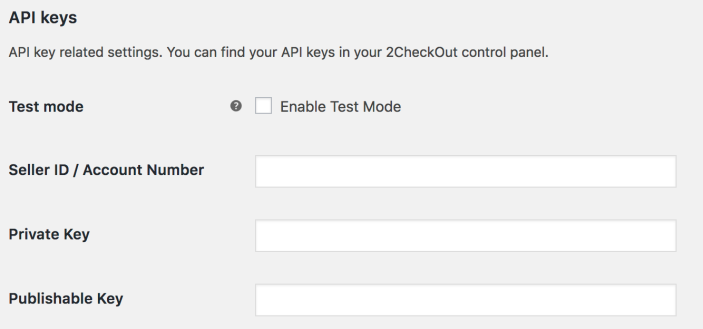 If you tick the box for Enable Test Mode to test payments, the screen changes and Test credentials from your 2Checkout account must be entered. Remember to turn off Test Mode when ready to go live.
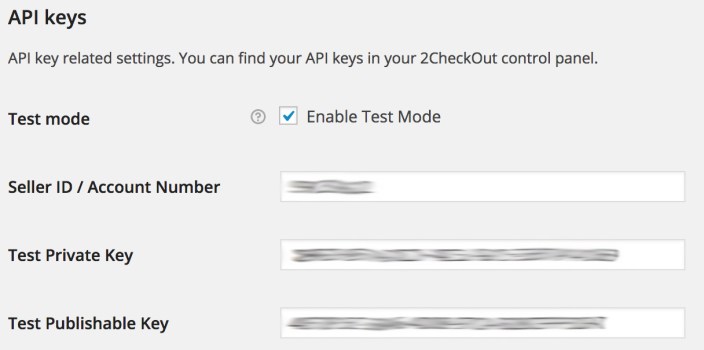
Integrated refunds from within your WooCommerce admin panel require login credentials of an API user. You can’t use your main 2Checkout account for this. For more information, visit: http://help.2checkout.com/articles/How_to/How-to-Add-a-Username/. Make sure you check the “API Access” checkbox while creating the user. After creating the user, fill in the login credentials in your WooCommerce website at the 2Checkout settings page. - Enter your API Username and Password to integrate refunds.
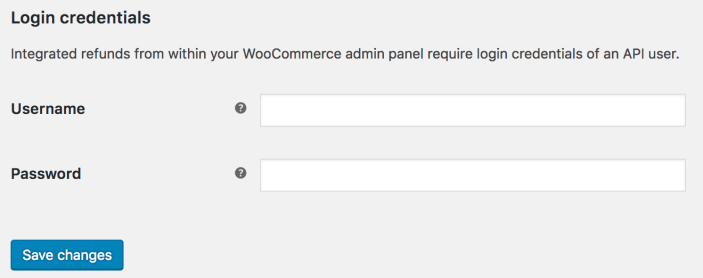
- Save changes.
Usage
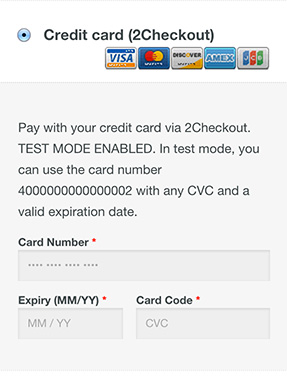
↑ Back to topCustomers pay on the checkout page. After selecting the 2Checkout payment gateway, credit card fields will appear.
Troubleshooting
↑ Back to topRoot Relative URLs
↑ Back to topThere are known issues with the Root Relative URLs plugin. You will not be able to use this with 2Checkout.
Sandbox mode and limited currencies
↑ Back to topThe Sandbox environment has limited resources and the only supported currencies are USD, EUR, GBP. Any other currencies will result in failed transactions.
I’m getting an API error
↑ Back to topEnsure you have input the correct keys and that if you are in live mode, you have entered live keys (not test keys).
I get an error when placing an order telling me to enable JavaScript
↑ Back to topThis error can be caused by non-standard/poorly coded themes and JavaScript issues – common issues include:
- JavaScript errors on the checkout page – To view the error, open up your browser error console (in chrome, view > developer > javascript console) and look for red errors. This should indicate where the error is and lead you to the problem, for example, loading jQuery wrong
- Failing to load scripts – 2Checkout loads a JavaScript file which it needs to function. If this is not loaded you will see errors. The most common reasons for these not loading include:
- A theme missing wp_head() or wp_footer() calls
- Old overridden template files from WooCommerce inside your theme
- Loading headers/footers in a non-standard way. WooCommerce uses get_header()’s get_header action to init the checkout and load scripts. If you are not using get_header() you either need to do so, or you need to trigger the get_header action manually using: do_action( ‘get_header ); in your custom header loader.
Frequently Asked Questions
↑ Back to topWhy is the method not showing?
↑ Back to topIn live mode, SSL must be enabled in order to use 2Checkout API.
Is phone number a required field?
↑ Back to topYes. The 2Checkout API requires the phone number as a required field, so make sure this is set in Appearance > Customizer > WooCommerce > Checkout.
