Conditional Logic allows you to control when specific input fields appear on the product page. You can choose to show or hide fields based on Product categories, Specific products or tags, Product variations, and Other field selections (e.g., radio buttons, dropdowns)
Conditional Logic settings are available in each input field’s configuration panel, both at the per-product level and in the All Products (Global) tab.
To configure Conditional Logic:
- For individual product fields:
Navigate to Products > [Edit Product] > Product Input Fields. - For global input fields:
Go to Product Input Fields > All Products > [Field Name] (e.g., Product Field #1, Product Field #2, etc.).
Scroll to the bottom of any input field configuration, and you’ll see a section titled Conditional Logic.
Enable it to start configuring the logic rules for that field.
How Conditional Logic Works Globally
↑ Back to topThe Conditional Logic feature allows you to dynamically show or hide input fields based on predefined rules. When configured at the global level, these rules apply to all products where the input field is used, subject to the specific conditions set (e.g., specific product, category, or value).
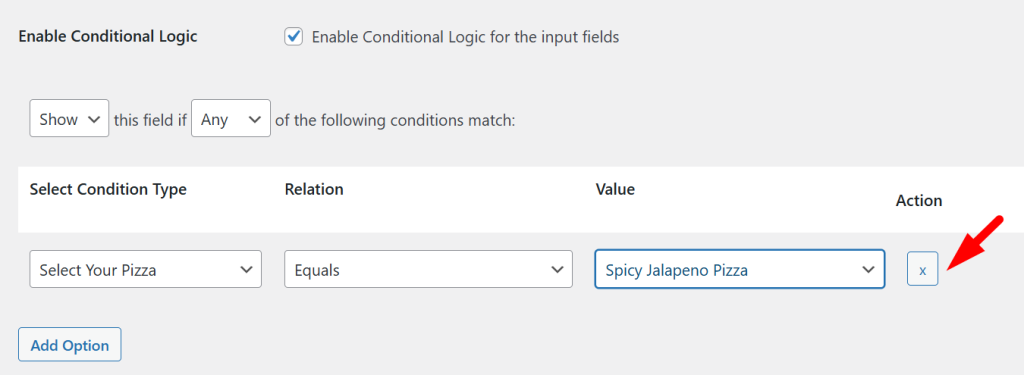
1. Condition Type (Source)
↑ Back to topThis dropdown lets you choose from:
- Product-Based:
All Products, Specific Products, Product Categories, Product Tags, etc.
- Other Input Fields:
You can choose a field like: All Products: Field #1, All Products: Field #2 (e.g., “Choose your preference”). Scroll down to the conditional logic section and the custom labels you’ve defined will also appear in the contition type dropdown dynamically.
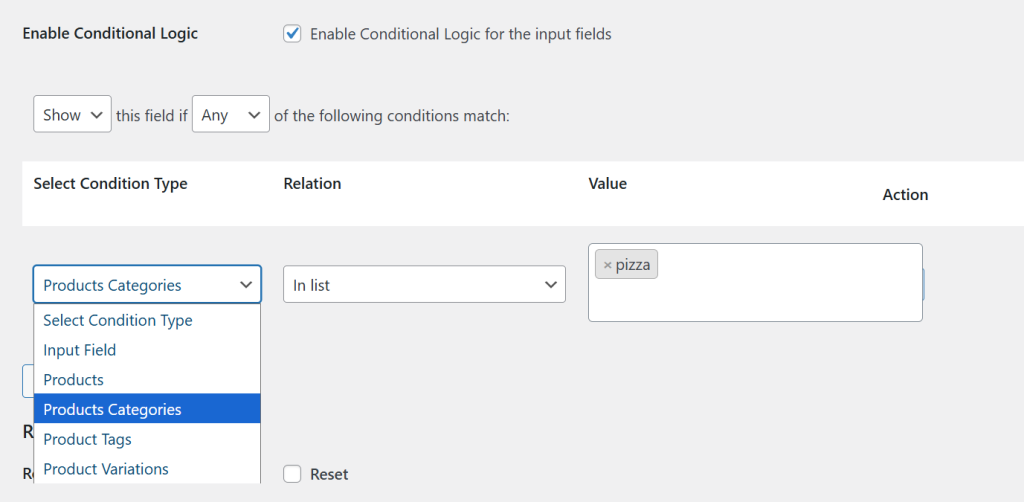
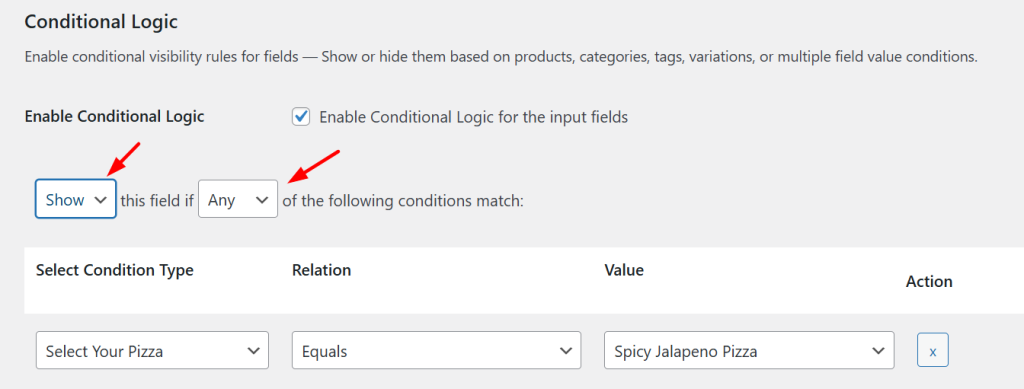
2. Show or hide fields if any or all of the following conditions match
↑ Back to topThis options allows you to control the field’s visibility based on one (Any) or all (All) of the specified conditions being true. Choose whether to show or hide the field when these conditions are met.
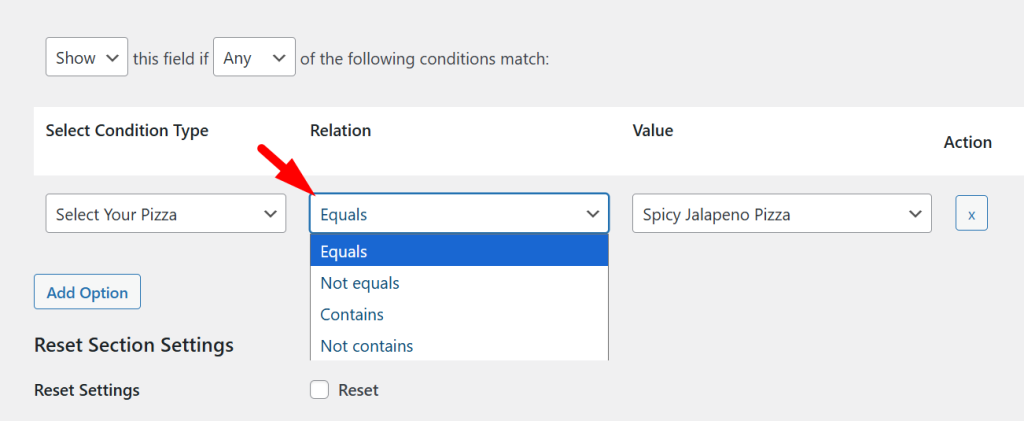
3. Relation
↑ Back to topThe Relation defines how the condition compares one value to another. For example, you can show or hide a field only when the customer selects a specific option.
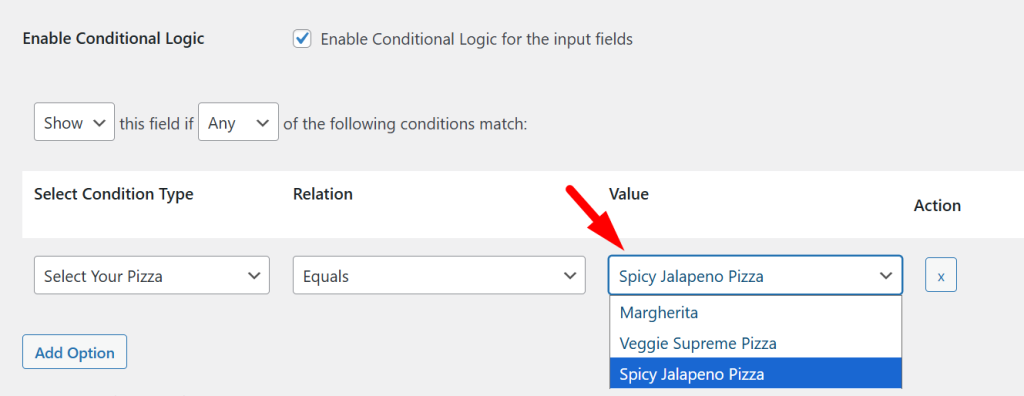
4. Value
↑ Back to topThe Value field lets you define what the condition should match against. Depending on the selected condition type:
- For Products, Categories, Tags, or Variations, it allows you to manually enter or select specific items.
- For other input fields (like dropdowns, radio buttons, etc.), it automatically populates with the respective options set for that field.
5. Action (× icon)
This simply allows you to delete the conditional logic rule you’ve added.
Applying Conditional Logic Based on Product Details and Input Fields
↑ Back to topYou can dynamically show or hide input fields based on Products, Categories, Tags, Variations, or even other Input Fields.
1. Products
↑ Back to topWhen you set the condition type to products, it applies the logic based on specific products in your store.
Example Scenario:
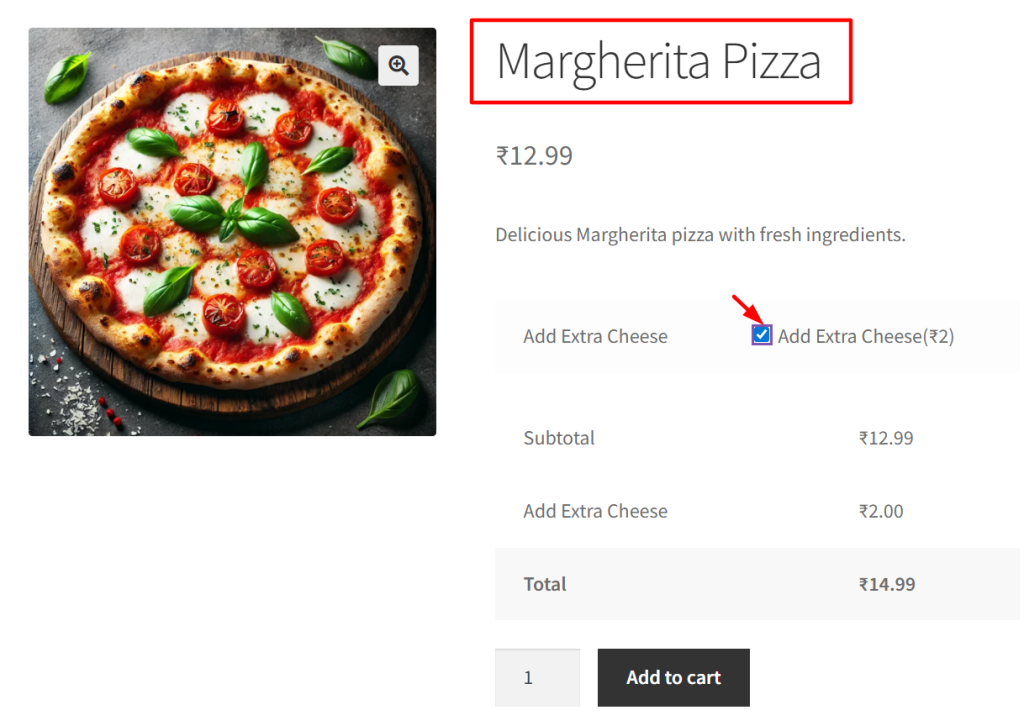
To show a field only for a specific product, choose Condition Type: Products, set the Relation to In list, and enter the product name (e.g., Margherita Pizza).

For instance, you might want to display an “Extra Cheese” checkbox only for Margherita Pizza. When customers visit that product page, they’ll see this checkbox. It will remain hidden for all other pizza types.
2. Categories
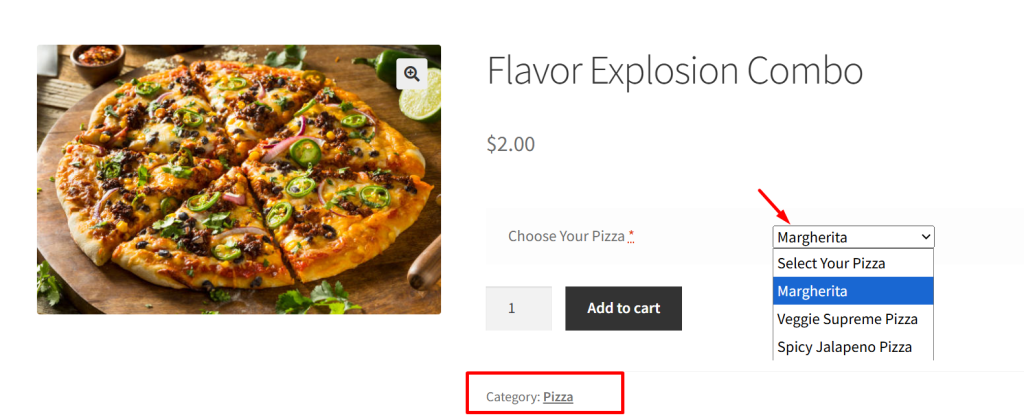
↑ Back to topYou can display fields based on product categories. Set Condition Type to Product Categories and choose a category like Pizza.
For example, you may add a dropdown titled “Select Your Pizza Type” with values like Margherita, Veggie Supreme, Spicy Jalapeno. This dropdown will only appear on products assigned to the Pizza category.
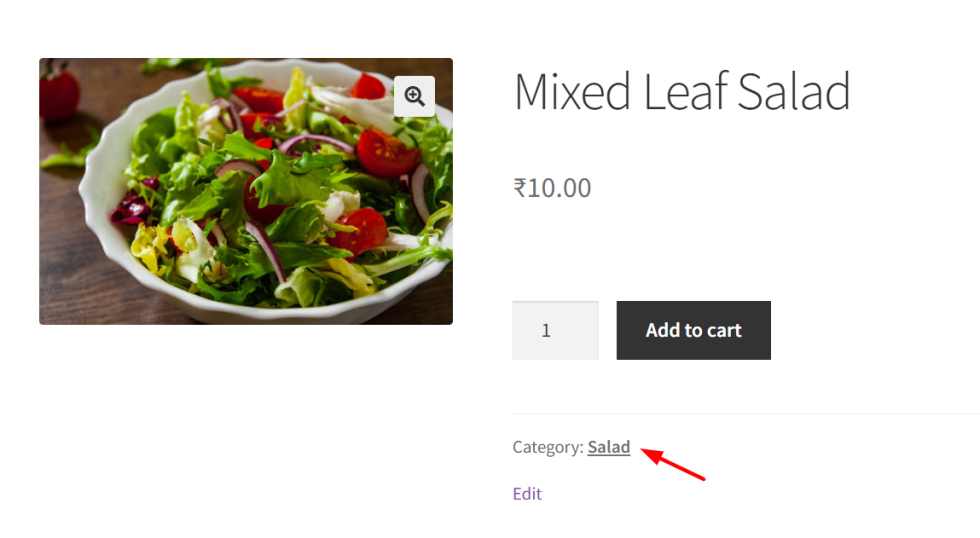
If a customer is viewing a Dessert or salad category items, the dropdown won’t be shown, keeping the product page relevant.
3. Tags
↑ Back to topConditional logic can also be applied using product tags. Select Condition Type to Product Tags, set the Relation to In list,, and enter a tag such as Spicy.
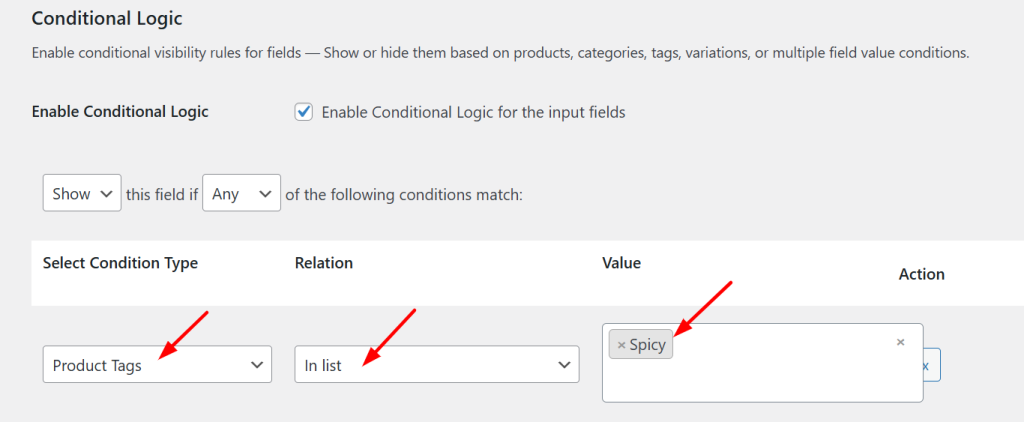
If you want to show a “Spice Level” selector (Mild, Medium, Hot) only for spicy dishes, this setup ensures it only appears for products tagged “Spicy” like Spicy Jalapeno Pizza. On a product like Classic Margherita, the field remains hidden.

4. Variations
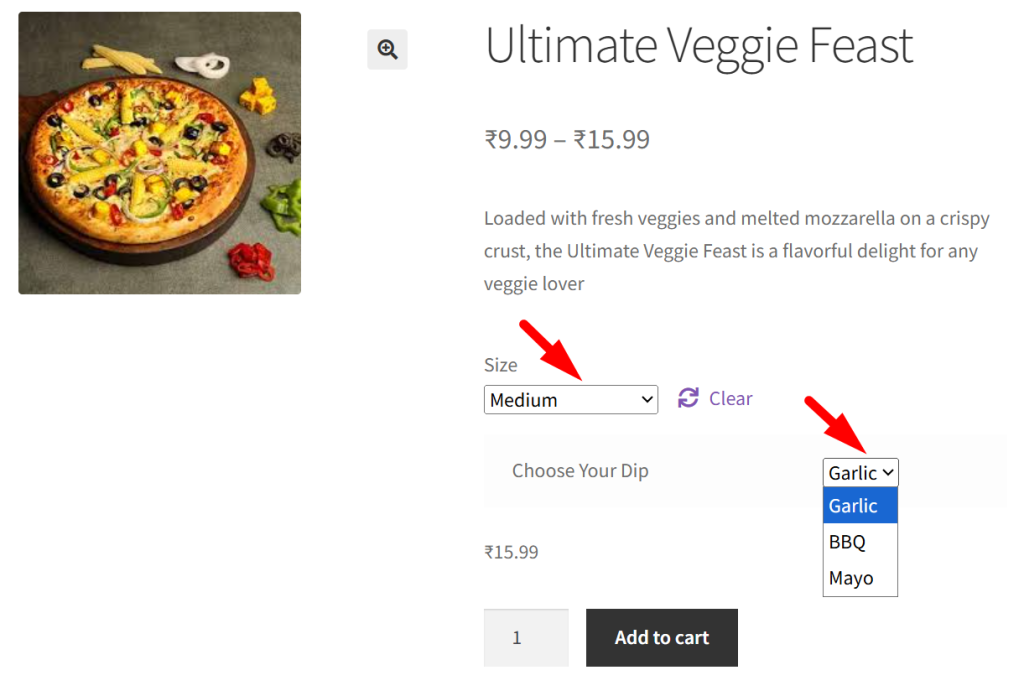
↑ Back to topTo show fields based on selected variations, use Condition Type to Product Variations with a value like Large Pizza.
For example, if a customer selects the Large variation, you can display an input field labeled “Choose Your Dip” offering Garlic, BBQ, or Mayo. This option won’t appear if the customer selects Small or Medium sizes.
4. Input Fields
↑ Back to topYou can also apply logic based on customer inputs. Use Condition Type to Input Field, and create a condition to show the text when the radio option ‘yes’ is selected.
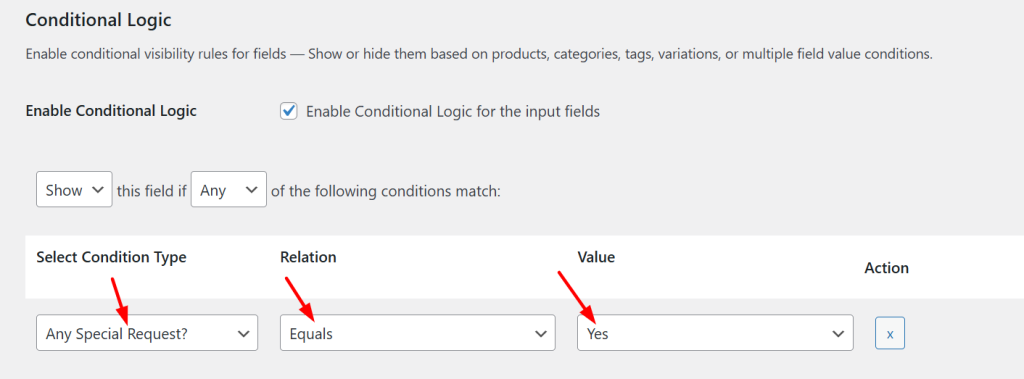
If the customer selects “Yes” for “Any special request?”, a new text area labeled “Special Instructions” appears.
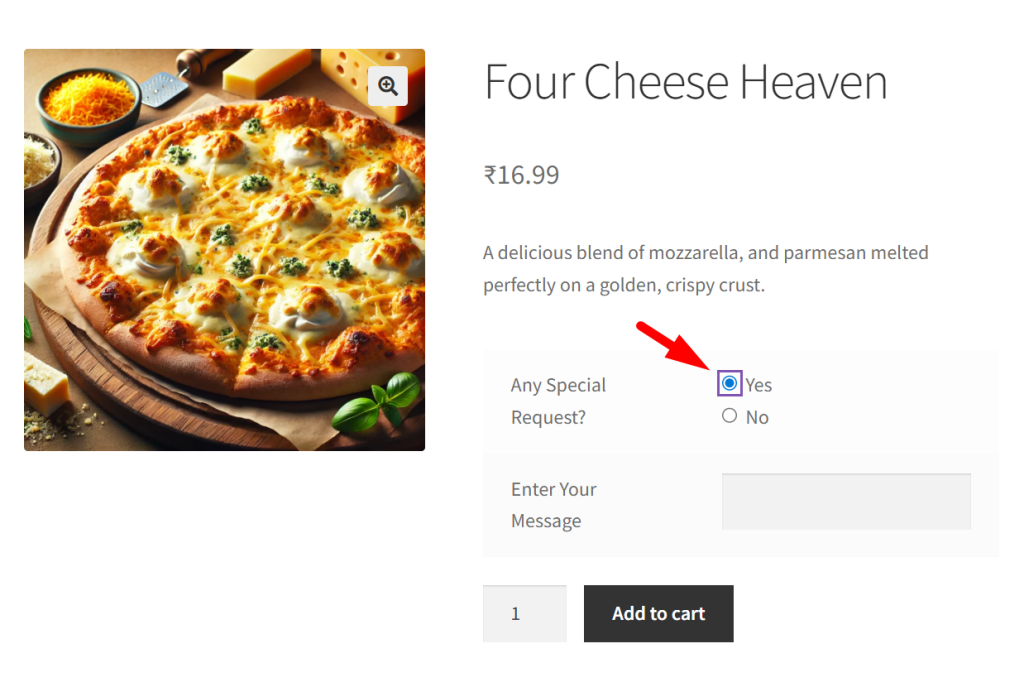
If they choose “No”, the field stays hidden, making the form cleaner and more user-friendly.
Applying Conditional Logic Per Product
↑ Back to topThe Product Input Fields plugin supports applying conditional logic at the per-product level. This allows you to display or hide input fields on a product page based on specific conditions set within that product’s configuration. Conditional logic enhances the user experience by showing relevant fields only when they are needed, keeping the product form clean and context-sensitive.
To apply Conditional Logic at the per-product level:
- Go to Products > All Products > [Select Product] > Edit
- Scroll down to the Product Input Fields section.
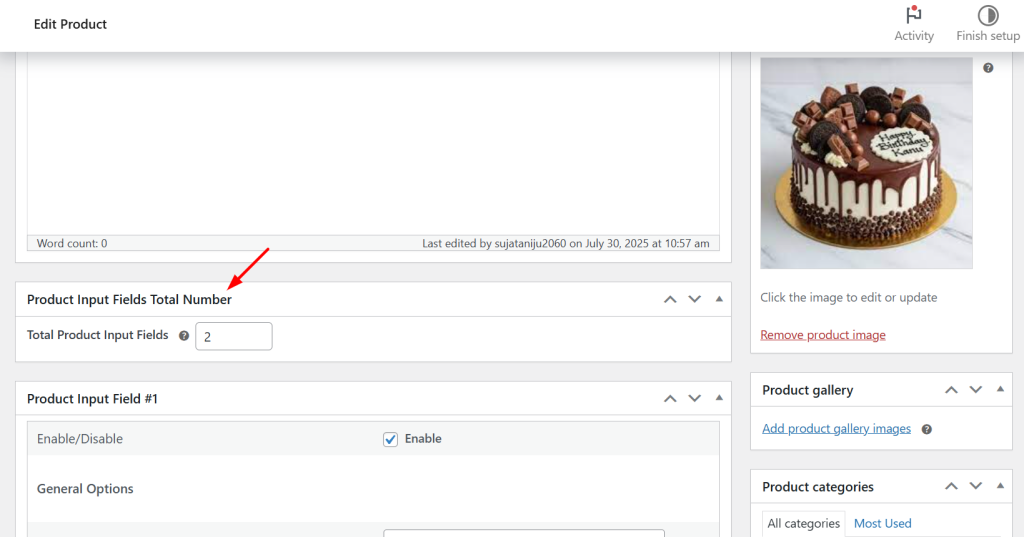
3. In the field configuration panel, scroll to the bottom and enable the “Conditional Logic” toggle. Add or edit the input field you want to apply logic to.
Applying Conditional Logic to a Specific Product
↑ Back to topConsider a product titled “Birthday Cake” that offers an option for customers to add a personalized message.
This product includes two input fields configured through the Product Input Fields plugin:
- The first input field is a Radio Button labeled “Add a personalized message?” with two selectable options: Yes and No.
- The second input field is a Text Field where customers can enter their personalized message.
The goal is to display the Text Field only when the customer selects “Yes” in the Radio Button field.
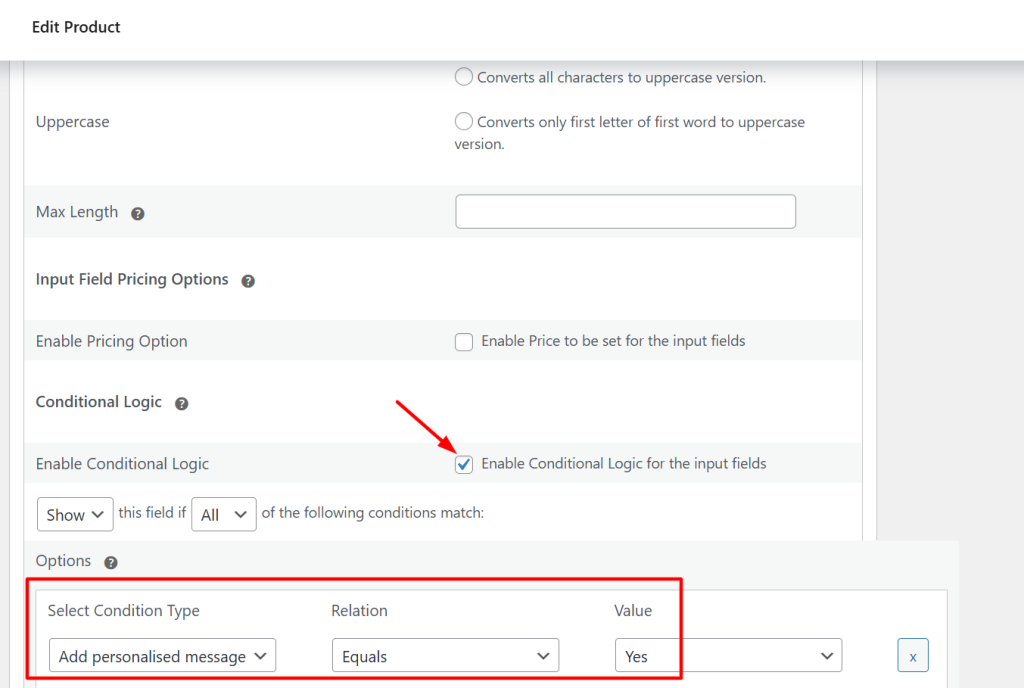
To achieve this, conditional logic must be configured on the Text Field. Within the field’s configuration panel, scroll to the Conditional Logic section and enable the feature. Once enabled, define the following logic rule:
- Condition Type should be set to Input Field.
- The Select Field dropdown must reference the Radio Button labeled “Add a personalized message?”.
- Set the Relation to Equals.
- Define the Value as Yes.

This configuration ensures that the Text Field will only appear when the customer selects “Yes” in the Radio Button.
On the frontend, the Birthday Cake product page will initially display only the radio button. If the user selects Yes, the message input field becomes visible. If No is selected, the message field remains hidden.
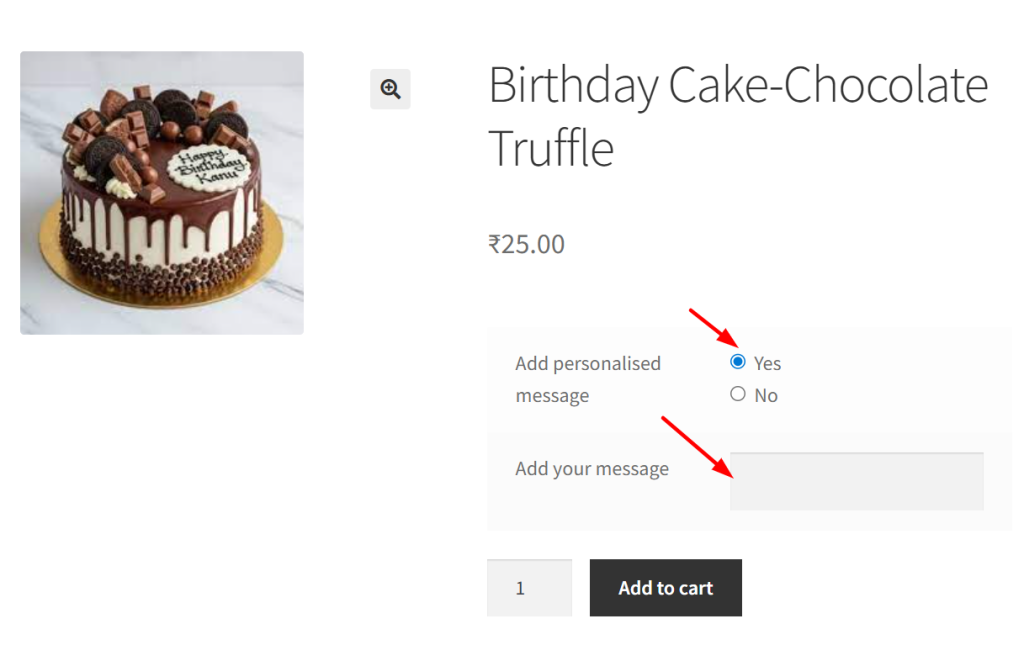
By using Conditional logic, you show or hide product fields automatically depending on what the customer picks, so they only see the options that are useful for them, creating a smarter, cleaner, and more intuitive product page experience.
