NOTE
This product is no longer sold on WooCommerce.com. This document has been left available for existing users, but will no longer be updated.
Installation
↑ Back to topContact Details is a free plugin for displaying contact details on your website. You can install it through your WordPress admin dashboard in Plugins > Add New.
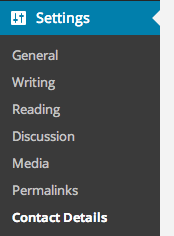
After installing the plugin, you will see a new menu item in your WP dashboard under the Settings -> Contact Details.

Adding Contact Details
↑ Back to topTo add contact details, go to Settings > Contact Details:
- Add general contact details under the Contact Details tab
- Click Save
- Add map contact details under the Map Details tab
- Click Save
If you leave any of the contact details blank, they will simply not display on the frontend.
Usage
↑ Back to topYou have 3 options for displaying your contact details, you can insert them with a shortcode, widget or insert them directly into a php template file or custom plugin using a template tag/action.
Widget
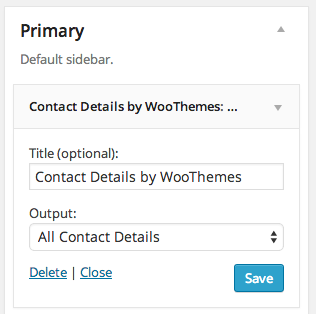
↑ Back to topTo add your contact details as a widget go to: Appearance > Widgets to find the Contact Details by WooThemes Widget. With this you can modify the following settings:
- Title (optional)
- Output
- All Contact Details
- Location Details
- Social Media links
- Google Map

Shortcode
↑ Back to topTo insert contact details into a post or page with a shortcode use the following example as a guide:
[contact_details display="all"]You can find all of the available parameters listed below. You can simply include these in your shortcode as well.
PHP
↑ Back to topTo display your contact details via a theme or a custom plugin, please use the following code:
<?php do_action( 'contact_details' ); ?>Additional Parameters
↑ Back to topTo add arguments to this, please use any of the following arguments, using the syntax provided below:
- ‘display’ => ‘all’ (outputs all 3 contact details areas)
The various options for the “display” parameter are:
- ‘all’
- ‘details’ -> outputs general location details
- ‘social’ -> outputs links to Twitter and Facebook profiles
- ‘map’ -> outputs a Google Map of your location
<?php do_action( 'contact_details', array( 'display' => 'details' ) ); ?>The same arguments apply to the shortcode which is [contact_details] and the template tag, which is <?php contact_details(); ?>.
Usage Examples
↑ Back to topAdjusting the display output, using the arguments in the 2 possible methods:
do_action() call:
<?php do_action( 'contact_details', array( 'display' => 'details' ) ); ?>contact_details() template tag:
<?php contact_details( array( 'display' => 'details' ) ); ?>FAQ
↑ Back to topThe plugin looks unstyled when I activate it. Why is this?
↑ Back to top“Contact Details by WooThemes” is a lean plugin that aims to keep it’s purpose as clean and clear as possible. Thus, we don’t load any preset CSS styling, to allow full control over the styling within your theme or child theme.
We have a basic tutorial which will help you getting started with styling by applying layout to the contact details output
I need to add my own output to the contact details. How do I do that?
↑ Back to topYesiree! You can add in your own custom code before and after each contact details area. Here is a list of the places you can do that:
Before actions
– pre_contact_details_output
– pre_contact_details_location_output
– pre_contact_details_social_output
– pre_contact_details_map_output
After Actions
– post_contact_details_output
– post_contact_details_location_output
– post_contact_details_social_output
– post_contact_details_map_output
Example: To add a custom message before the map area on the frontend, add the following to your themes functions.php file:
add_action( 'pre_contact_details_map_output', 'my_contact_details_map_message' );
function my_contact_details_map_message() {
    $message = '<p>' . __( 'Use this map to visit us!', 'contact-details-by-woothemes' ) . '</p>';
    echo $message;
}
Done!
How do I contribute?
↑ Back to topWe encourage everyone to contribute their ideas, thoughts and code snippets. This can be done by forking the repository over at GitHub.
