Update your plugin, import/export booking settings, and manage bookings freed up through cancellations.
- Updating the Plugin
- Import and Export Booking Settings
- Opening Booking Slots Through Admin’s Order Cancellations
Updating the Booking and Appointment plugin
↑ Back to topThere are two ways of updating the Booking and Appointment Plugin for WooCommerce. You can either update it from your WordPress Plugins page or do it manually.
- Below are the guidelines to update the plugin automatically from within your WordPress Plugins page:
To automatically update the Booking and Appointment Plugin from the WordPress Plugins page, you must have an active license.
If the license key is active, you will receive the update notification under the plugin on the Plugins page automatically as shown below.
If the license key is not active, then you can follow the instructions given in the last post, Installation Guide for Booking and Appointment Plugin for WooCommerce to make it active.

You can view the details for the new version by clicking on the “View version details” link on the update notification.
Clicking on the “Update Now” link will automatically update the new version of the plugin and once the updating process is completed, you can see a message as shown below.
This indicates that your Booking and Appointment Plugin for WooCommerce has been updated successfully.

You can also update the plugin manually if you don’t want to follow the automatic update process.
This could be needed in cases, if you have done some modification in one of our plugin’s files or if the one-click update is not working for you for some reason.
Below are the guidelines for updating Manually:
- Login to: http://www.tychesoftwares.com/wp-login.php
- Go to: http://www.tychesoftwares.com/purchase-history
- Download the .zip file for the latest version of the plugin.
- Unzip the Downloaded file.
- Upload the unzipped WooCommerce-booking folder to the wp-content/plugins directory on your web server. Overwrite the old files. You can use FileZilla or any other FTP software to do this.
Once the plugin is updated, you can configure the settings for the new features added in the update.
Import and Export of Booking Settings
↑ Back to topOur Booking and Appointment Plugin for WooCommerce v5.15.0 lets you easily import or export your bookable products from one store to another.
This feature can be extremely useful when you need to share your plugin’s settings with our Support Team in case there’s some issue. This will help us create a replica of your setup at our end & help you out faster!
Go to Products > All Products Page.
Right next to the ‘Add New’ button, you will find the Import and Export buttons:

1. Exporting Products
↑ Back to topExporting bookable products allows you to share the booking details with another site/person.
Exporting products mostly comes in handy when you want to move the booking details to another app, or staging site or when you need to explain an issue & get help from our support team.
Go to Products > All Products and select the Export button:

Once you click on it, the following page will be displayed:
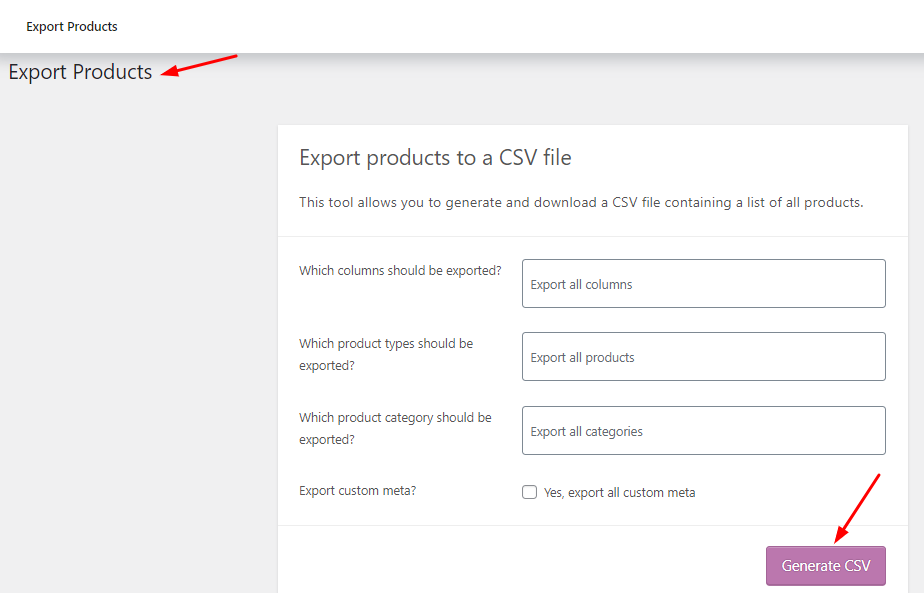
You can choose specific columns, product types, categories, and custom meta to export.
For instance, if you wish to export only Boat Tour and Bookings, from your bookings site, you can select those two bookable products alone and export them.
You can choose to export all custom metadata, you can tick the checkbox for it. This setting is optional.
Once done, go ahead by clicking the ‘Generate CSV’ button:
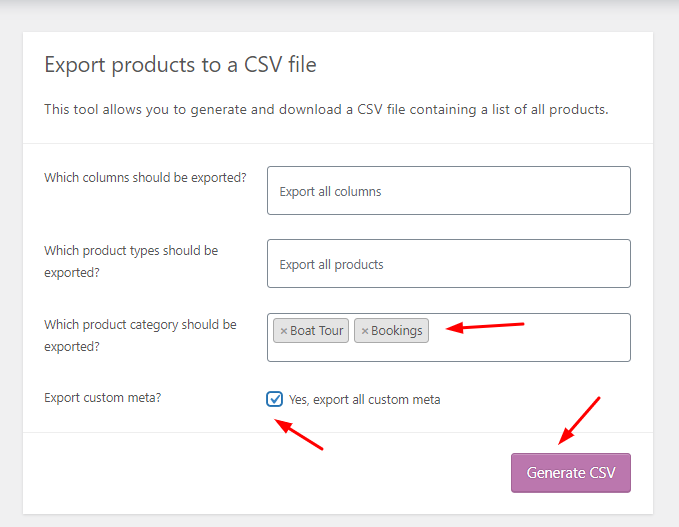
Your file will be downloaded:
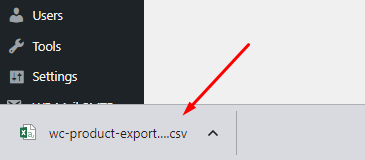
You can now import this data to any other WooCommerce store.
2. Importing Products
Let’s say, you have been working on your staging site with our plugin.
You can then easily import those bookable products to your live site.
Go to Products > All Products and select the Export button:

After clicking on the Import button, it will take you to the following page:
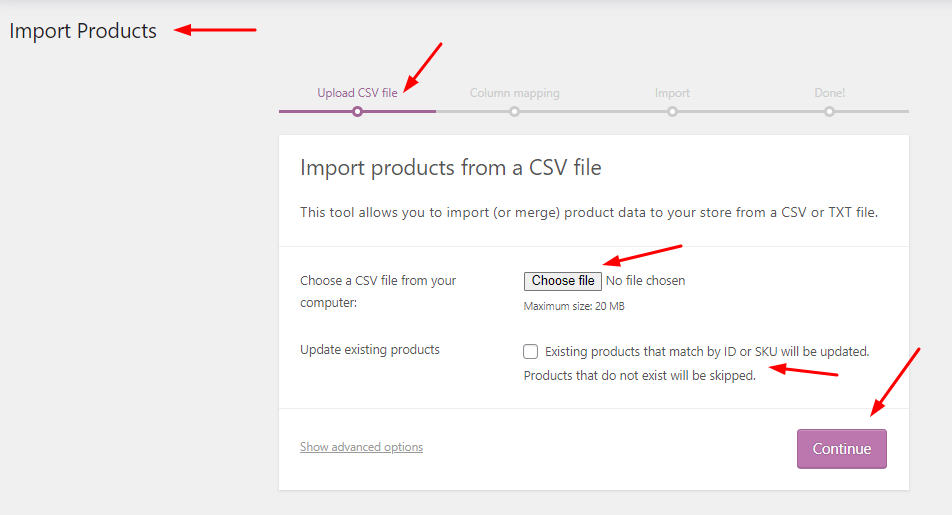
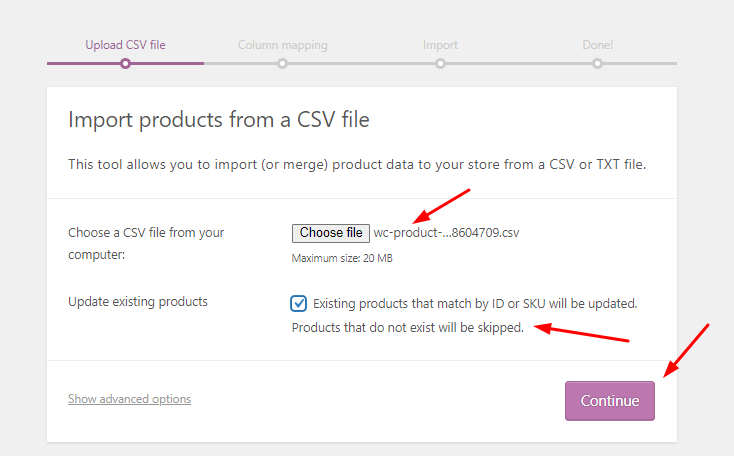
Here, you upload the .csv or .txt files of the bookable products you wish to import.
You can update the booking settings for existing products by ticking the checkbox for the ‘Update existing products’ setting.
If you choose to go with this, please note that new products which do not exist will not be imported.
Once the file has been uploaded, you should click on the ‘Continue’ button:
Once you’ve done this, you will be asked to select fields to map them.
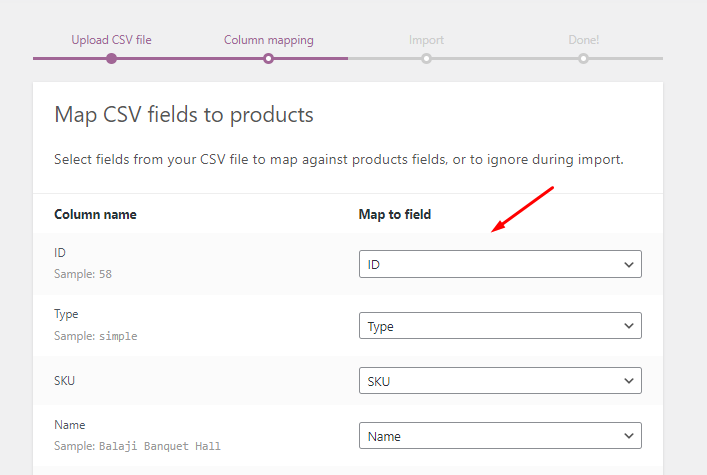
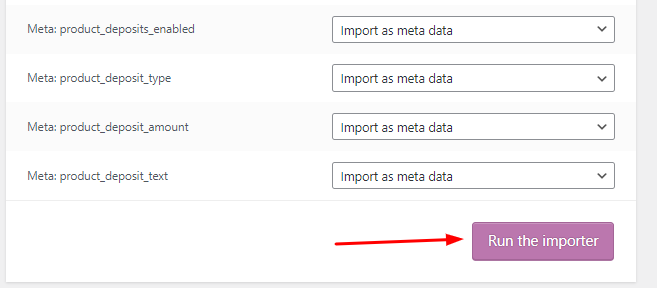
You can choose to ignore them and click on the ‘Run the Importer’ button:
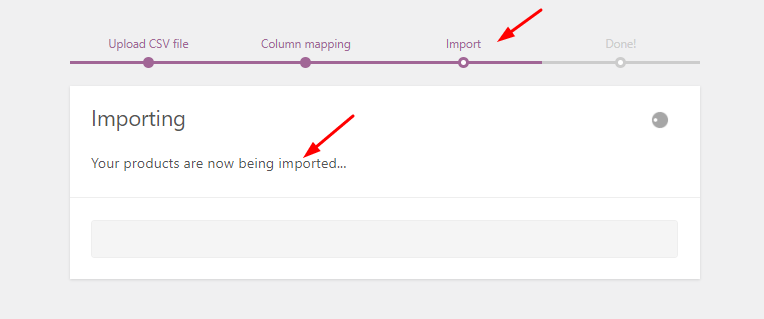
Once the importing process begins, the following screen will be displayed to you:
Once the import process is completed, a ‘Done’ message will be displayed along with the information on how many products have been updated:
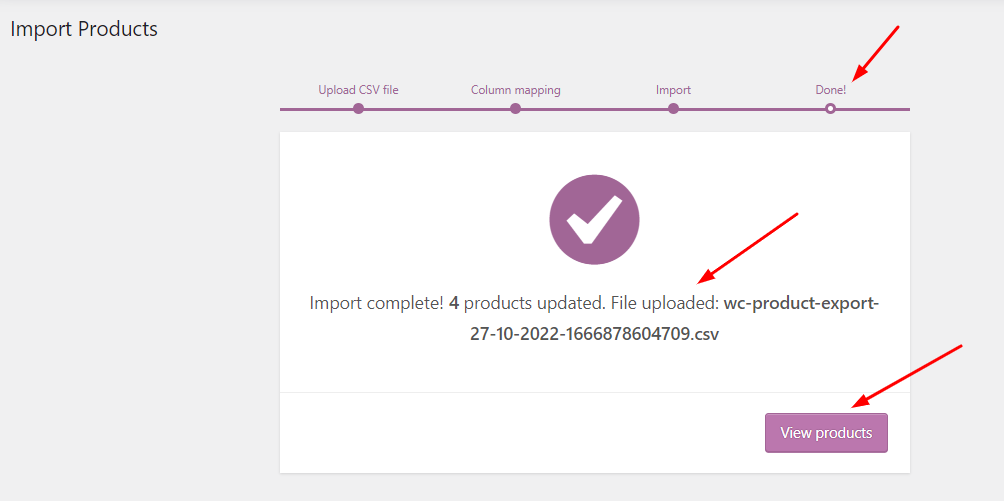
You can click on ‘View Products’ to see them.
Please note that the imported products will have the booking settings as they were in the CSV/txt file.
Thus, in this manner, you can export or import bookable products with the Booking and Appointment Plugin for WooCommerce.
Opening Booking Slots Through Admin’s Order Cancellations
↑ Back to topCanceling bookings is a common issue for businesses like hotels, tours, tutorials, or medical appointments where reservations are made in advance. Whether from the shop owner’s or customer’s side, cancellations happen for various reasons.
In such situations, the admin needs to free up the booking date and time so that others can book for that slot.
Let’s explore how bookings can be canceled, deleted, or trashed for a specific date, and how those canceled dates are made available for further bookings.
For instance, you run a tour business and have a Kashmir Tour Package.
You can set it up using the Booking and Appointment for WooCommerce plugin’s Multiple-day booking method.
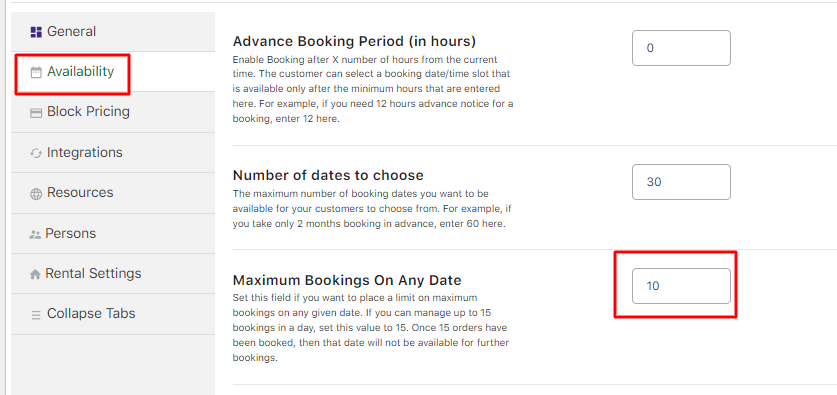
In the Availability Tab of the Booking meta box, you have set the maximum number of bookings to 10 since you wish to allow only 10 bookings on a particular date.
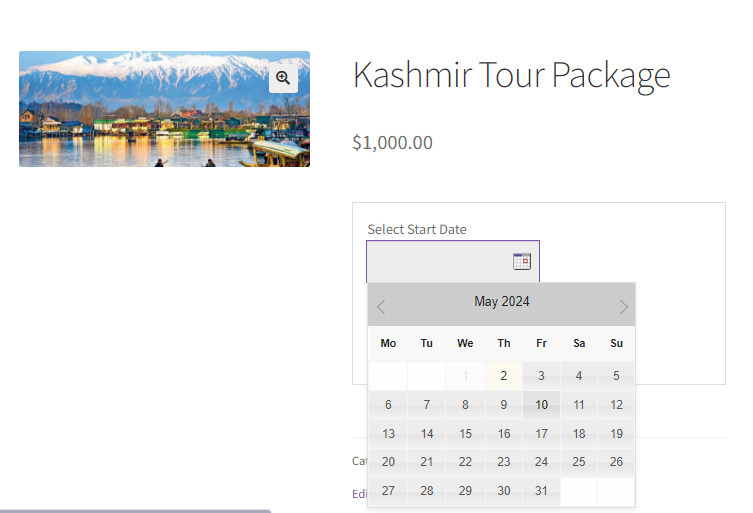
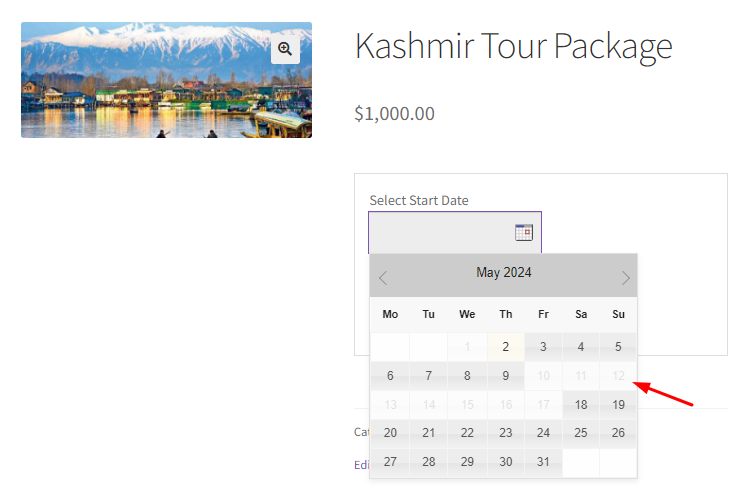
This is how your “Kashmir Tour Package” will appear with all the dates available for booking to the customer:
Let’s say that a customer books your tour from 10th May 2024 to 17th May 2024 for 10 people.
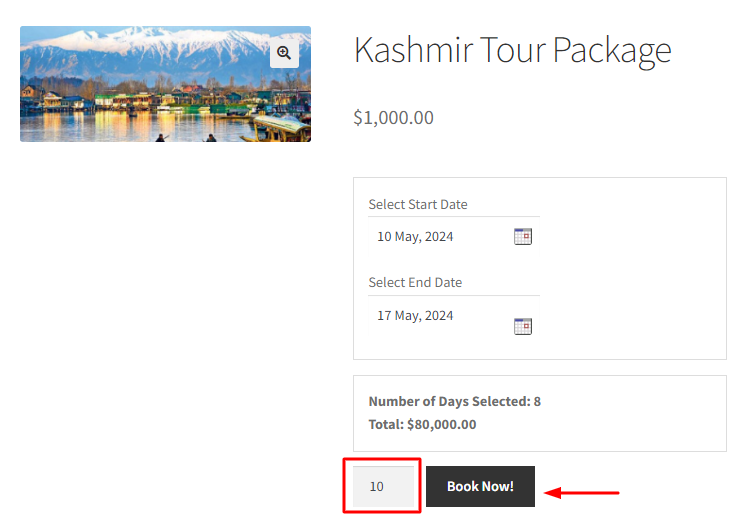
Those dates will be blocked for further bookings as the maximum bookings field was set to 10.
To view your orders, go to WooCommerce > Orders sub-menu in the WordPress Admin menu section.
On the Orders page, all your order details will be listed in table form as shown here:
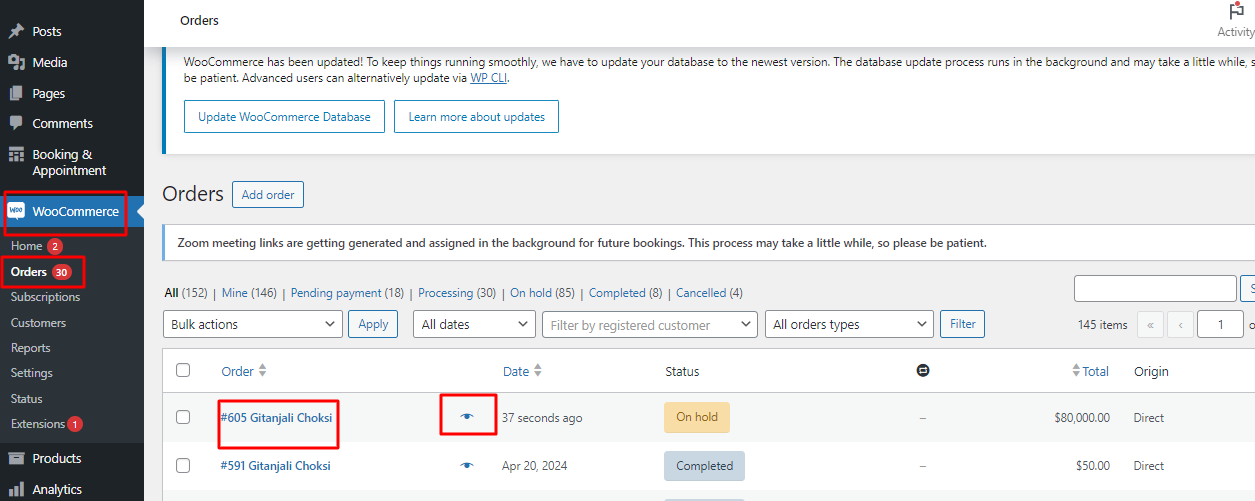
To see a preview of the order, click the ‘eye’ icon.
To see the complete details of that particular order, click the Order name.
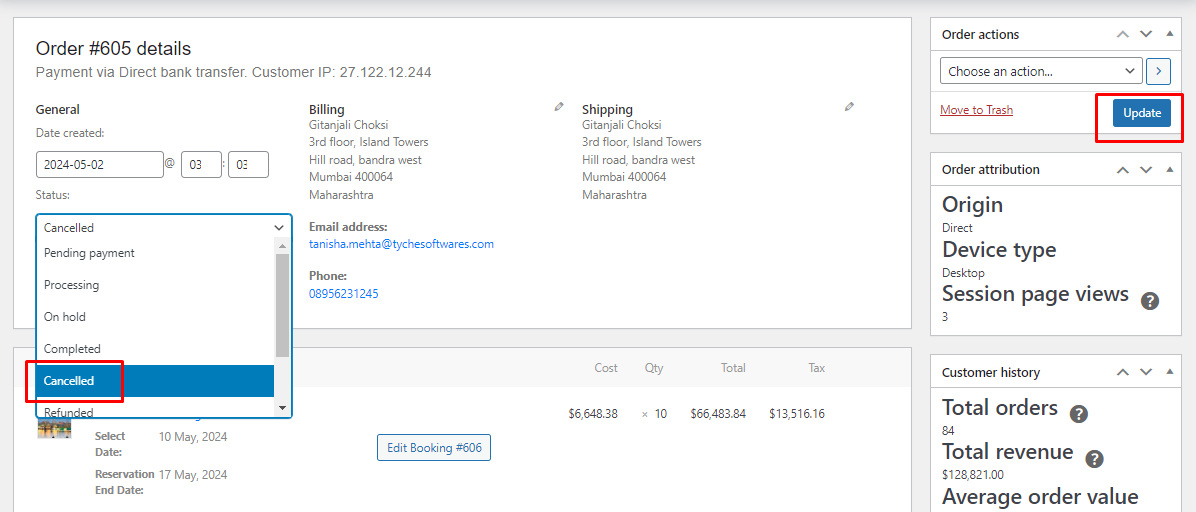
A new Order details page opens. To cancel the order, click on the Status dropdown.
You will find a drop-down list from which you will select “Cancelled” as the Order Status. Click the Update button to save the changes.
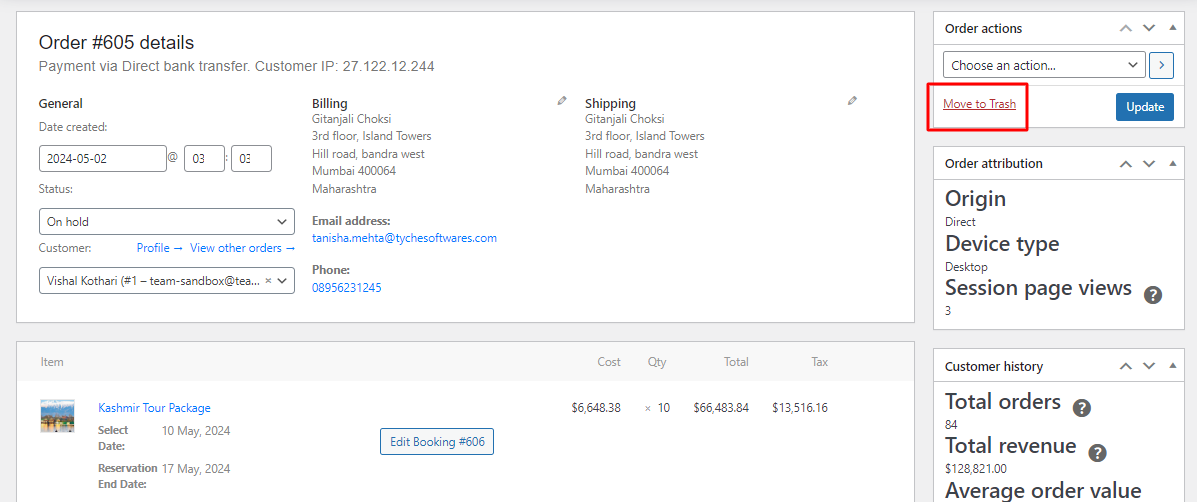
The Move to Trash tab moves the order to trash from this page. It will re-allocate your canceled dates for bookings.
When the order is canceled or moved to trash from the Admin side, the booking dates become available to book.
This means that you can now accept new bookings for the same dates:
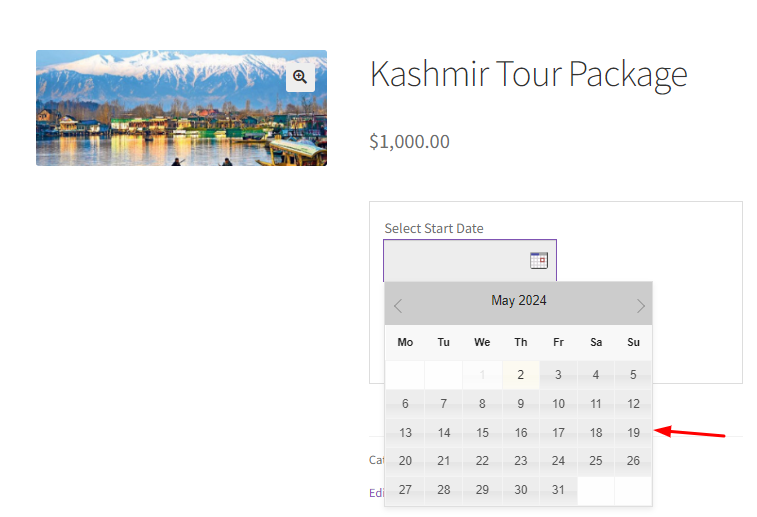
Thus, in a few easy steps, admins can easily cancel bookings and open up booking slots for their products!
