Installation
↑ Back to topTo start using a product from WooCommerce.com, you can use the “Add to store” functionality on the order confirmation page or the My subscriptions section in your account.
- Navigate to My subscriptions.
- Find the Add to store button next to the product you’re planning to install.
- Follow the instructions on the screen, and the product will be automatically added to your store.
Alternative options and more information at:
Managing WooCommerce.com subscriptions.
Once you’ve installed and activated the plugin, you’ll need to get the Google Ads conversion ID and the conversion label. You will find both values in the Google Ads conversion tracking code.
To find this, log in to your Google Ads account and go to Tools and Settings > Measurement > Conversions.

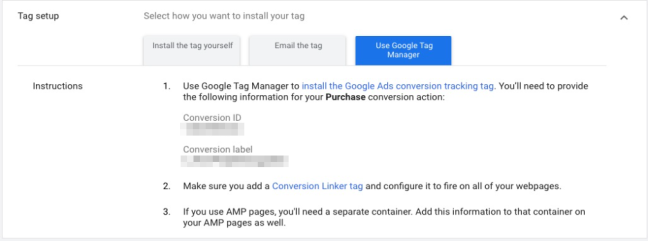
6. Select your existing Purchase Conversion Action and under Tag setup, select Use Google Tag Manager. In there you will see the Conversion ID and Conversion Label.

7. In the WordPress admin panel, go to WooCommerce > Pixel Manager > Google Ads Conversion Tracking menu and enter the Conversion ID and the Conversion Label into their respective fields.


