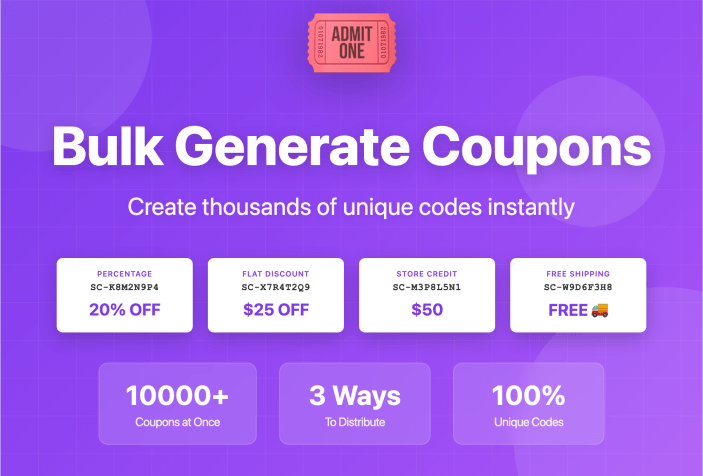
Need to create hundreds or thousands of unique coupon codes at once? Smart Coupons’ bulk generation tool lets you create, customize, and distribute large batches of coupons in minutes – perfect for promotional campaigns, affiliate programs, event giveaways, or wholesale distribution.
What You’ll Learn
↑ Back to topThis guide covers how to bulk generate coupons and distribute them through three methods:
- Add to Store – Generate and store coupons in your WooCommerce database for future use
- Export to CSV – Generate coupons as a downloadable file for external distribution
- Email to Recipients – Generate coupons and automatically send them to specific customers
When to Use Bulk Coupon Generation
↑ Back to topCommon Use Cases:
- Marketing campaigns: Create 1,000 unique codes for a flash sale promotion
- Affiliate programs: Generate unique tracking codes for each affiliate partner
- Event giveaways: Create 500 codes to hand out at a trade show or conference
- Wholesale orders: Generate bulk store credit codes for B2B customers
- Influencer partnerships: Create trackable codes for social media collaborations
- Customer loyalty: Generate personalized discount codes for VIP customers
- Seasonal promotions: Pre-create holiday or sale season codes in advance
Important to Know:
- Each coupon generated will have a unique code automatically created
- All coupons in a batch will share the same settings (discount amount, expiry date, restrictions, etc.)
- Bulk generated coupons can be managed individually after creation if needed
Method 1: Add to Store (Generate and Save)
↑ Back to topUse this method when you want coupons created and stored in WooCommerce for distribution later through your own channels.
When to use this Method
↑ Back to top- You’ll manually share codes via social media, physical cards, or your own email system
- You need to review or modify individual codes before distribution
- You want to integrate codes into a custom system or third-party marketing platform
- You’re creating codes in advance for future campaigns
Setup Steps
↑ Back to topStep 1: Access Bulk Generator
- Go to Marketing > Coupons
- Click the Bulk Generate tab
Step 2: Configure Generation Settings
- Number of coupons to generate: Enter the quantity you need (e.g., 500)
- Choose action: Select Add to store
Step 3: Set Coupon Properties
All coupons in this batch will share these settings:
General Settings:
- Discount type: Choose the type (percentage discount, fixed cart discount, store credit, etc.)
- Coupon amount: Enter the value (e.g., 10 for 10% off or $10 fixed discount)
- Allow free shipping: Check if applicable
- Coupon expiry date & time: Set when codes should stop working (optional but recommended)
Usage Restrictions:
- Minimum spend: Set if coupon requires a minimum cart total
- Maximum spend: Set if coupon has a spending cap
- Individual use only: Check to prevent stacking with other coupons
- Exclude sale items: Check to prevent use on already-discounted products
- Products: Specify which products the coupon applies to (leave blank for any product)
- Exclude products: Specify products that cannot use this coupon
- Product categories: Limit coupon to specific categories
- Exclude categories: Exclude specific categories from discount
- Allowed emails: Leave blank (unless using email distribution method)
Usage Limits:
- Usage limit per coupon: How many times each individual code can be used (e.g., 1 for single-use codes)
- Usage limit per user: How many times one customer email can use any code from this batch (typically 1)
- Limit usage to X items: Maximum number of items in cart that can be discounted
Step 4: Add Categories (Optional)
Coupon categories help organize bulk-generated codes for easier management:
- In the Coupon categories section, select existing categories or click Manage coupon categories to create new ones
- Example categories: “Affiliate Codes 2025”, “Trade Show Giveaways”, “Holiday Flash Sale”
- Learn more: How to categorize coupons
Step 5: Generate
Click Apply to create your coupons.
After Generation: Managing Your Coupons
↑ Back to topWhere to find your codes:
- Go to Marketing > Coupons to see all generated codes in your coupon list
- Use the category filter to view only your bulk-generated batch
- Each code will have a unique alphanumeric identifier (e.g., “SC-ABC123XYZ”)
Exporting your codes later: If you generated codes with “Add to store” but now need to export them:
- Go to Marketing > Coupons
- Filter by the coupon category you assigned
- Select all coupons (or use bulk selection)
- Use WooCommerce’s export functionality or a CSV export plugin
Tip: Name your coupon category descriptively with dates (e.g., “Q1-2025-Affiliate-Codes”) so you can easily locate specific batches months later.
Method 2: Export to CSV (Generate Without Saving)
↑ Back to topUse this method when you want a downloadable file of coupon codes without adding them to your WooCommerce database.
When to use this Method
↑ Back to top- You’re distributing codes through a third-party platform or CRM
- You want to review codes before importing them into your store
- You need codes for offline distribution (print, mail, packaging inserts)
- You’re testing coupon configurations before final generation
- You have storage or performance concerns with thousands of database entries
Setup Steps
↑ Back to topStep 1-3: Same as Method 1 (Access Bulk Generator and set coupon properties)
Step 4: Choose Export Option
- Choose action: Select Export to CSV
- Configure all the same settings as Method 1 (discount type, amount, restrictions, limits)
Step 5: Generate and Download Click Apply. Your browser will immediately download a CSV file containing all generated coupon codes.
Understanding Your CSV File
↑ Back to topWhat’s included in the CSV:
- Column A: Unique coupon codes
- Subsequent columns: All coupon properties (discount amount, expiry date, usage limits, etc.)
File format:
- Standard CSV compatible with Excel, Google Sheets, and most systems
- Can be imported back into WooCommerce later using Smart Coupons’ import feature
Importing Later
↑ Back to topIf you want to add these exported codes to your store at a later time:
- Go to Marketing > Coupons > Import Coupons
- Upload the CSV file you previously exported
- Click import.
This gives you the flexibility to generate codes in advance, review them, modify the CSV if needed, and then import when ready.
Method 3: Email to Recipients (Generate and Auto-Send)
↑ Back to topUse this method to generate unique coupons and automatically email them to specific customers.
When to Use This Method
↑ Back to top- Personalized customer rewards or loyalty programs
- Birthday or anniversary discounts
- Welcome codes for new subscribers
- Compensation or apology coupons
- Post-purchase thank-you coupons
- VIP or exclusive member benefits
Setup Steps
↑ Back to topStep 1-3: Same as Method 1 (Access Bulk Generator and set coupon properties)
Step 4: Configure Email Distribution
- Choose action: Select Email to recipients
- Configure all discount settings as usual (type, amount, restrictions, limits)
- Critical step – Allowed emails field:
- Scroll to Usage Restrictions > Allowed emails
- Enter email addresses comma separated
- Number of emails MUST match number of coupons being generated
Example: If generating 5 coupons, enter exactly 5 email addresses:
john@example.com,sarah@example.com,mike@example.com,emma@example.com,lisa@example.comWhat happens:
- Each recipient gets a unique coupon code
- That code is restricted to their specific email address (prevents sharing)
- Code is automatically emailed to them using your WooCommerce email template
- Code is also saved in your store for tracking
Step 5: Generate and Send
Click Apply. Coupons are created and emails sent immediately.
Distribution Strategies
↑ Back to topOnce you’ve generated your coupons, here’s how to effectively distribute them:
Physical Distribution
↑ Back to top- Print as QR codes on flyers, packaging inserts, or business cards
- Include in product packaging for customer loyalty
- Hand out at events like trade shows or pop-up shops
- Mail as postcards for special promotions
Digital Distribution
↑ Back to top- Email campaigns using Method 3 or by exporting CSV and importing to Mailchimp/Klaviyo
- Social media posts with unique codes for tracking platform performance
- Influencer partnerships where each influencer gets trackable codes
- Affiliate programs where partners get their own unique codes
- Website banners displaying limited-time codes
- SMS campaigns for mobile-first audiences
Smart Distribution Tips
↑ Back to top- Stagger releases: Don’t release all codes at once to maintain urgency
- Track by channel: Use different coupon categories for each distribution channel
- Test first: Send 10-50 codes as a test before full campaign launch
- Monitor redemption: Track which channels perform best and adjust strategy
- Set expiry dates: Create urgency and prevent indefinite coupon sharing
Related Smart Coupons Features
↑ Back to topEnhance your coupon strategy with these complementary features:
- Import Coupons from CSV – Bring in codes from external sources
- Coupon Categories – Organize and manage large coupon lists
- Gift Certificates – Sell store credit as products
- Coupon Restrictions – Advanced rules for when codes can be used
- URL Coupons – Apply codes automatically via links