Use an AutomateWoo workflow to welcome customers after their first completed order. You can personalize the message with customer and store variables, recommend related products, or simply thank them for choosing your store.
Create the welcome workflow
↑ Back to top- Go to AutomateWoo > Workflows.
- Select the Browse presets tab.
- Find New Customers: Welcome email and select Create workflow.
- Leave the workflow Disabled while you review its settings and preview the email.
The preset uses the Order Completed trigger and the Order – Is Customer’s First rule set to Yes. The preset waits one hour after the order reaches Completed, then rechecks the order status and rule before sending.
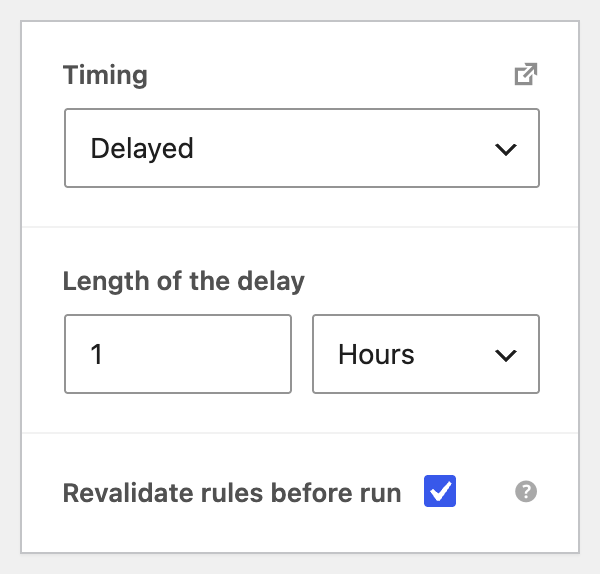
The first-order rule considers earlier non-draft orders associated with the billing email or customer account, including orders in other statuses. If your store does not move orders to Completed automatically, make sure your fulfillment process changes the order status when the order is complete. You can choose a different AutomateWoo order trigger when the message should be sent at another point in the order lifecycle.
Customize the email
↑ Back to topOpen the Actions section and edit the Send Email action. The preset is non-transactional; review your store’s marketing opt-in and unsubscribe settings before activation. Review each field:
- To: Keep
{{ customer.email }}to send the message to the customer who placed the order. - Email subject, heading, and preheader: Write a clear welcome that fits your store’s voice.
- Template: Use WooCommerce Default to match your transactional email styling, or select None.
- Email content: Replace the preset copy with your message and check every AutomateWoo variable.
Preview, test, and enable the workflow
↑ Back to top- Select Preview in the email action and review the message with test data.
- On a staging store, activate the workflow, then place a test order using a customer account and billing email without earlier non-draft orders. A disabled workflow will not queue events.
- Move the test order to Completed.
- Check AutomateWoo > Queue for the delayed event. After it runs, check AutomateWoo > Logs and the test email’s recipient, content, links, and related products.
- When the test succeeds, configure the workflow on your live store, set its status to Active, and select Save.
Monitor the workflow’s first live runs to confirm that customers receive one welcome email at the intended point in your fulfillment process.
Questions and support
↑ Back to topSomething missing from this documentation? Still have questions and need assistance?
- If you have a question about a specific extension or theme you’d like to purchase, contact us to get answers.
- If you already purchased this product and need some assistance, get in touch with a Happiness Engineer via our support page and select this product’s name from the Product dropdown.