We recommend to use the latest version of Groups and its group-based access control model. Legacy support for capability-based access control has been discontinued and capability-based access restrictions supported in Groups 1.x will be removed completely in upcoming releases of Groups.
Use the Migration Guide to switch to the group-based access control model today.
Set up a Premium group
↑ Back to topBelow we are giving an example using a group named Premium and its associated capability premium. Note that you can use any group and capability name, we just use Premium here because it underlines a pretty common use case.
2.1 The Quick Way
This is the recommended way. It generates our Premium group on the fly while you create your protected content.
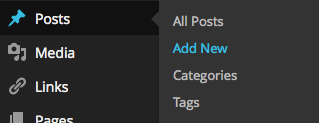
Go to Posts > Add New, give your new post a title and some content.
Now input Premium in the field provided under Access restrictions.
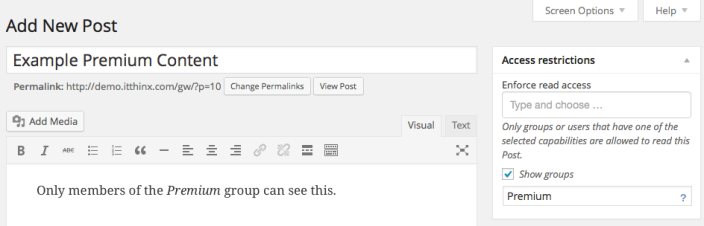
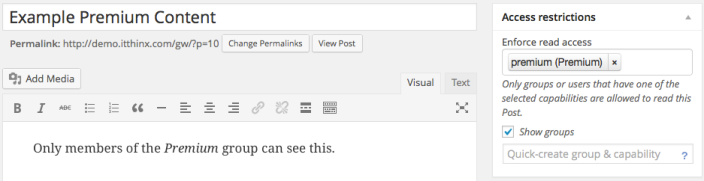
Next publish your post and the Access restrictions will show that this post is protected so that members of the Premium group only can view it.
2.2 Step by Step
If you have already created a protect post using the quick way above, you can skip this section and head on to 3. Set up a Premium Membership Product. Another example is provided under 4. Set up a page for “Tutorials” members only
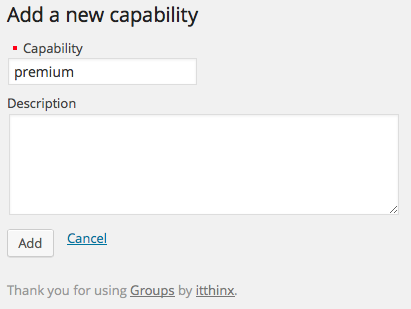
Go to Groups > Capabilities and click New Capability. Enter premium in the Capability field and click Add.
Go to Groups > Groups and click New Group. Enter Premium in the Name field and choose the premium capability, create the group by clicking Add.

Go to Groups > Options and choose the premium capability under Access restrictions > Capabilities and click Save at the end of the page. You will now be able to protect your posts with the premium capability. Only members of the Premium group will have access to these.

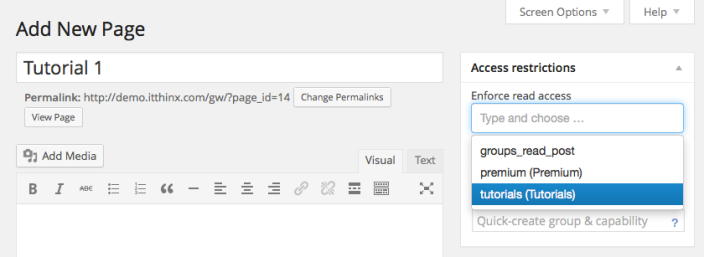
Set up a page for “Tutorials” members only
↑ Back to topGo to Pages > Add New to create a new page:
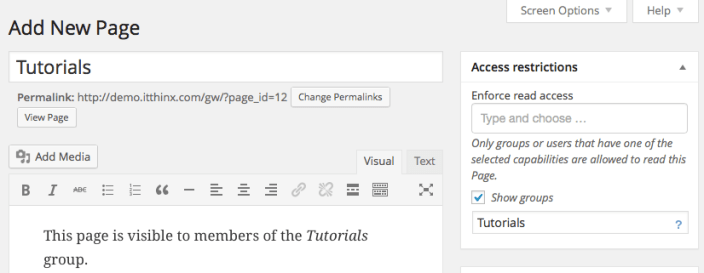
In the Access restrictions tab enter Tutorials so that the Tutorials group and capability are created automatically and click Publish to create the page.
This page is now only accessible to members of the Premium group.
If you want to restrict access to a page based on an existing group, select it under Access restrictions.
For more options to protect your content please refer to the Groups and its Documentation.