
This guide takes you from activating Affiliate and Referral Program for WooCommerce to your first paid commission: create the affiliate pages, decide how affiliates join, set a commission rule, and follow one referral all the way to a payout. Every other guide in the Affiliate and Referral for WooCommerce documentation builds on these steps.
What activation sets up for you
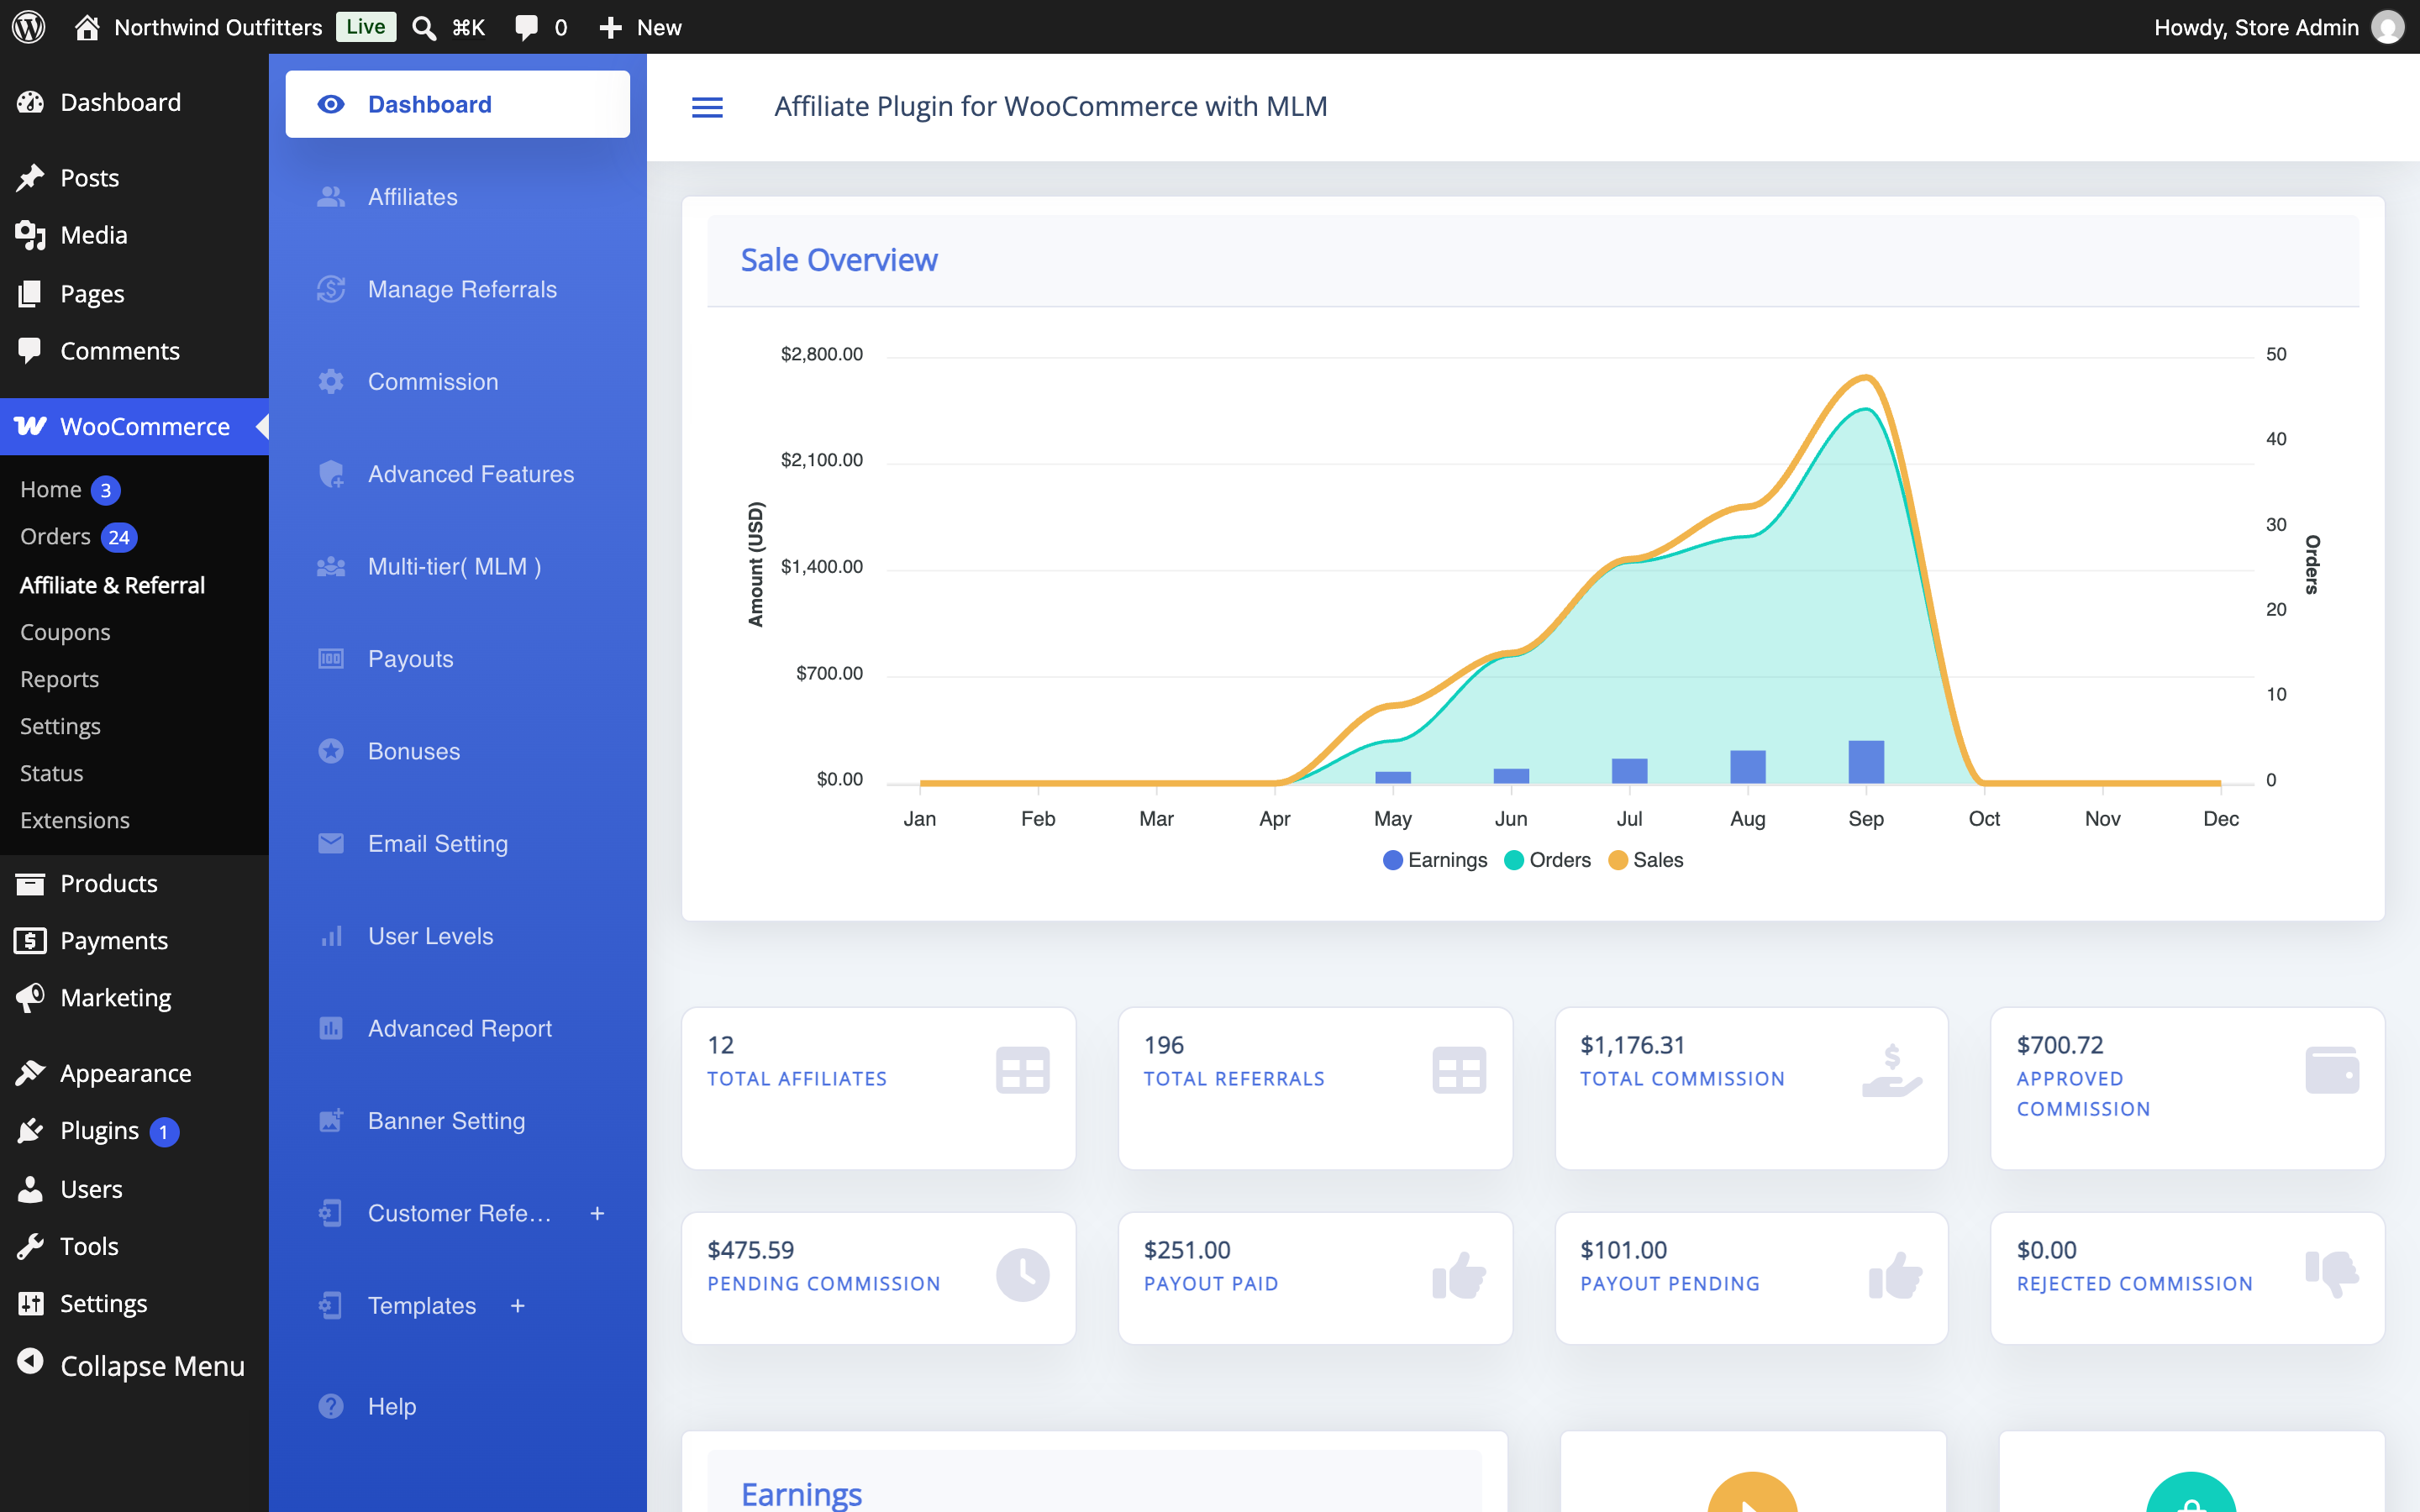
↑ Back to topOn activation the plugin creates an Affiliate Dashboard page containing the [rtwapwcm_affiliate_page] shortcode — the page your affiliates will log in to — and adds an Affiliate & Referral item under WooCommerce in your admin menu. All configuration happens there, in one screen with its own left-hand menu.
Step 1: Confirm your affiliate pages
↑ Back to top- Go to: WooCommerce > Affiliate & Referral > Advanced Features > General.
- Select Affiliate Page: choose the page that carries the [rtwapwcm_affiliate_page] shortcode — usually the auto-created Affiliate Dashboard page.
- Affiliate Signup page: optionally choose a separate page carrying the [rtwapwcm_aff_reg_page] shortcode if you want registration on its own URL. Leave it unset to show the registration form on the affiliate page itself.
- Save Changes.
Step 2: Decide how affiliates join
↑ Back to topAnyone can apply from the registration form, and logged-in customers see a Become an Affiliate button on the affiliate page. You control what happens next:
- Affiliate Verification (on Advanced Features > General) – turn this on to review every application yourself. New affiliates wait until you approve them on the Affiliates screen. Leave it off and affiliates are active immediately.
- Automatically register user as affiliate on purchase – turns every new buyer into an affiliate. Useful for stores that want every customer promoting from day one.
Step 3: Set your store-wide commission
↑ Back to topCommission is set with commission rules, checked from top to bottom. A new store starts with one rule, the Store default, pinned at the bottom of the list and paying 0 until you set it.
- Go to: WooCommerce > Affiliate & Referral > Commission.
- On the Rules tab, open the Store default rule from its Actions column.
- Under Commission, choose the Type — for example Percentage of item total — and enter the rate.
- Click Save rule.
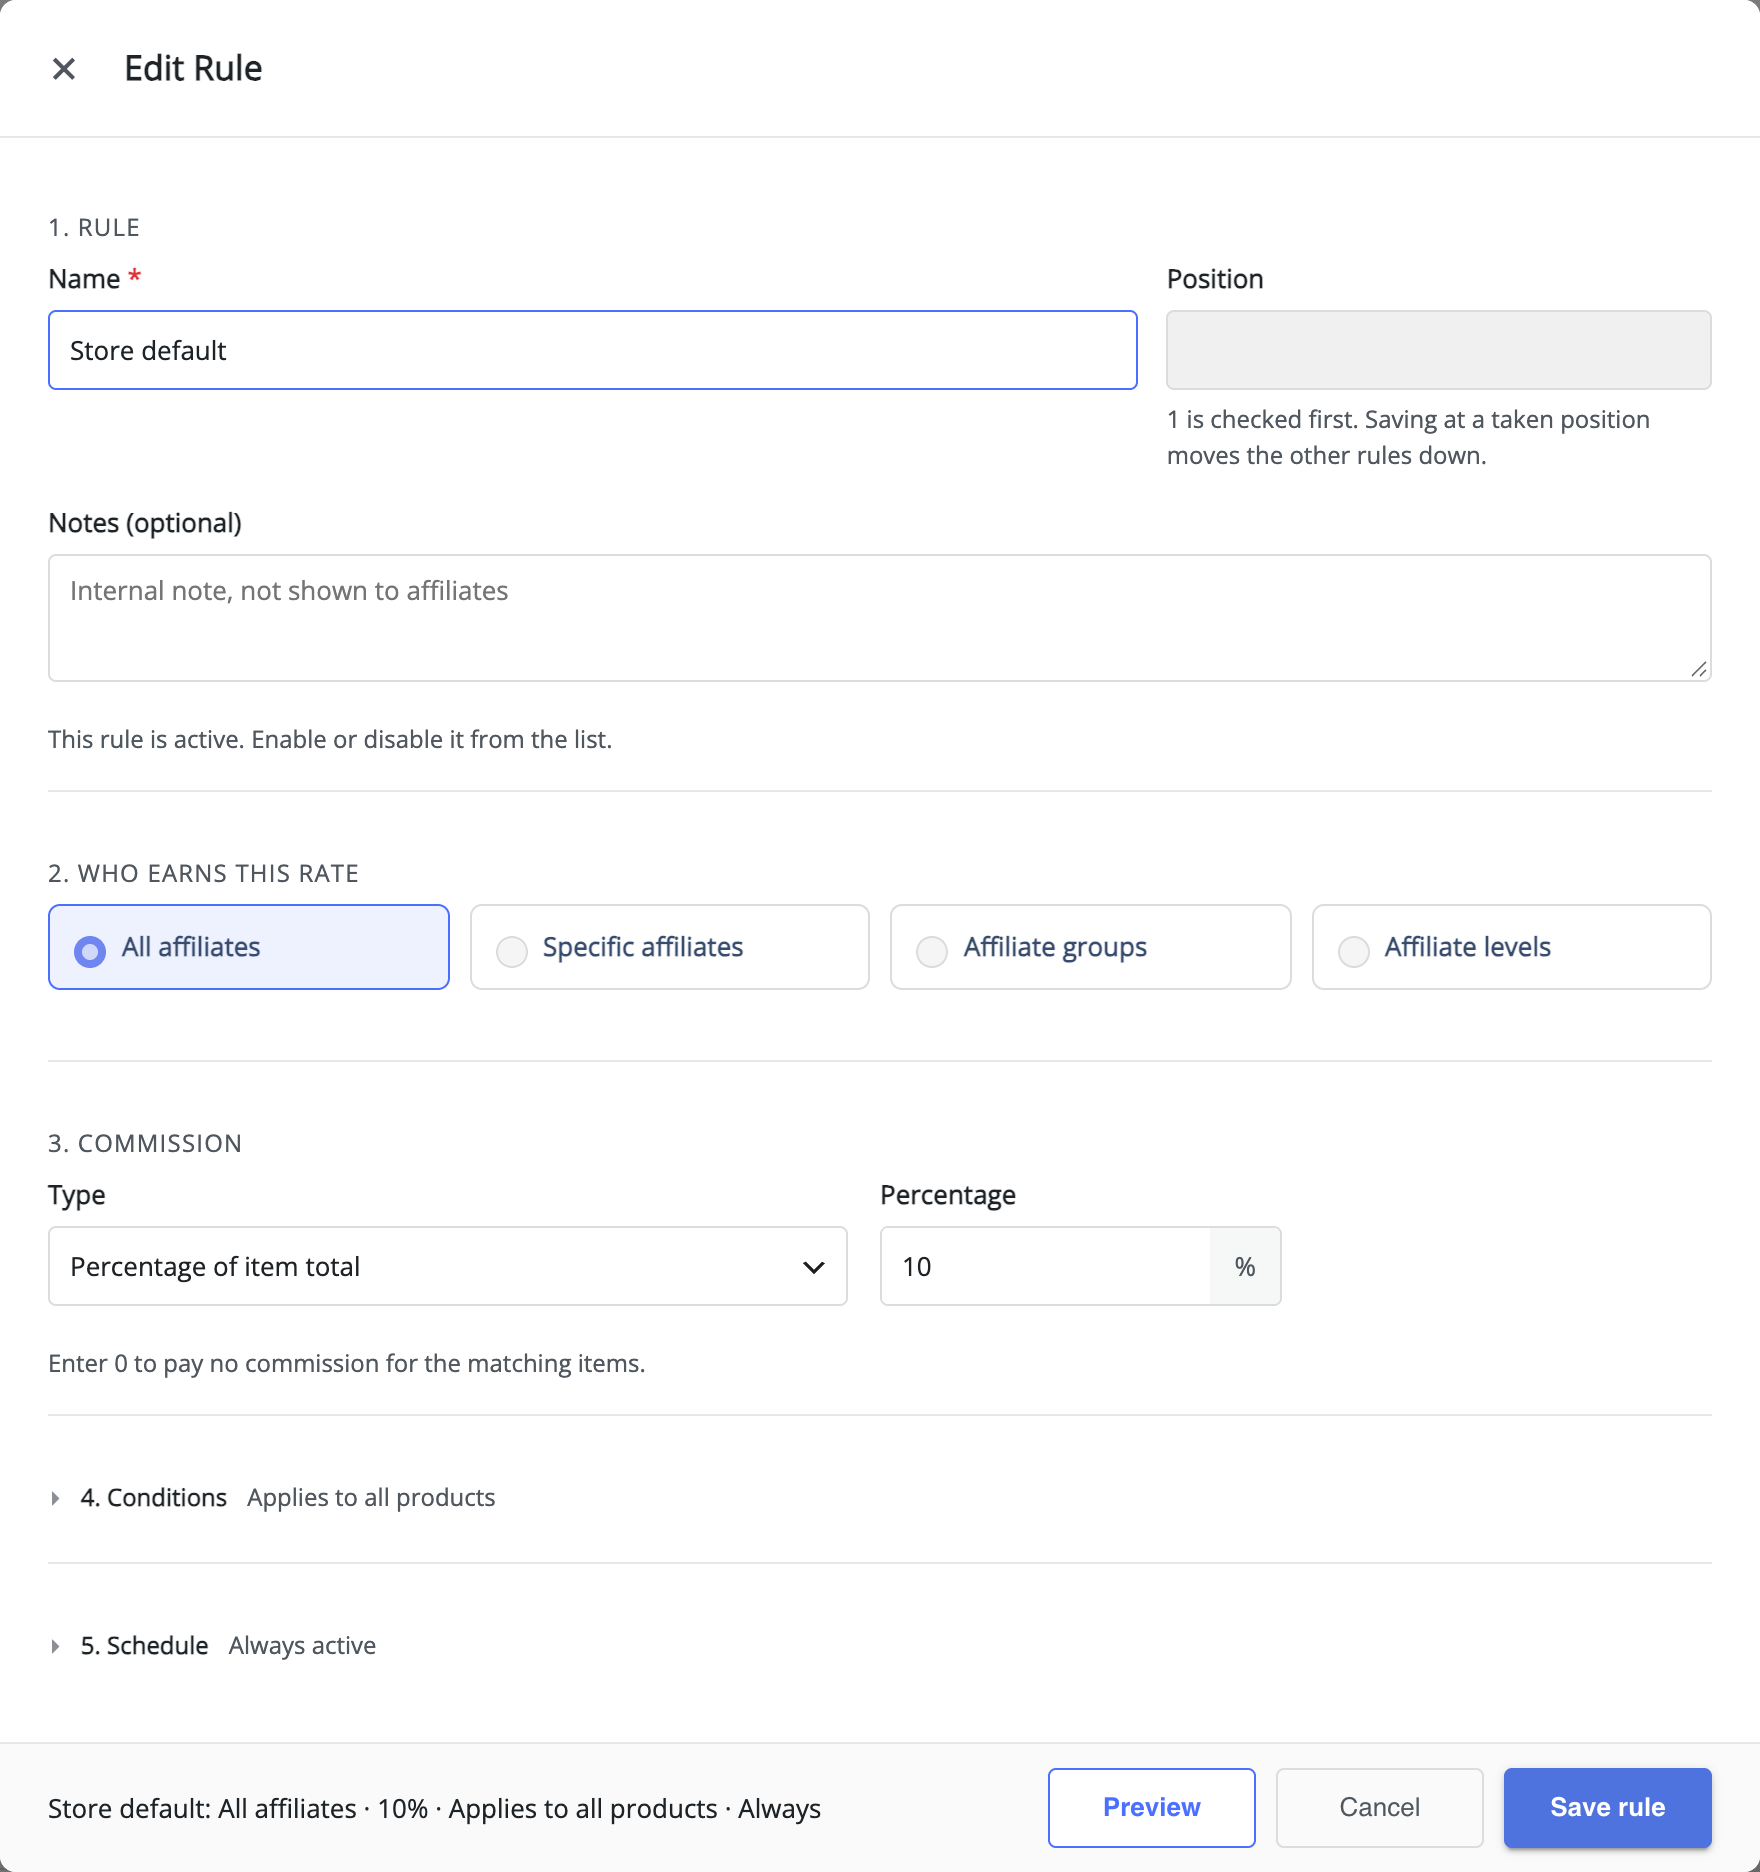
That one rule pays every affiliate the same rate on every product. When you are ready for product rates, deals for chosen affiliates or groups, level-based rates, or dated promotions, add more rules with + Add New Rule — How to Set Up Referral Commission Rules explains each part and which rule wins.
Updating a store that already used an earlier version? Its previous commission settings keep working until you convert them — see Upgrading to Version 3.0.0 and Converting to Commission Rules.
Step 4: Follow the first referral
↑ Back to top- An approved affiliate logs in to the affiliate page and copies their referral link.
- A customer opens that link and places an order. The visit and the sale are recorded automatically.
- Go to: WooCommerce > Affiliate & Referral > Manage Referrals — the commission appears as a pending row, with a badge that says what happens next.
- Approve the row. Approval is the moment the commission is credited to the affiliate’s wallet.
You can skip manual approval: on the Settings tab of the Commission screen, set Affiliate Referral Automation to Completed or Processing, and commissions approve themselves when the order reaches that status. To wait out your returns window first, set a return period — see Refunds, Return Periods and Commission Recovery.
Step 5: Pay your affiliates
↑ Back to topApproved commissions accumulate in each affiliate’s wallet. Affiliates request withdrawals from their dashboard, and you send the money from WooCommerce > Affiliate & Referral > Payouts — in bulk via PayPal, through the free Stripe add-on, or as recorded bank transfers. The Pay Affiliates via PayPal, Stripe and Bank guide covers each method, and Pay Affiliates with Store Credit and Wallets explains the wallet itself.
Where to go next
↑ Back to top- Reward the customers who bring their friends — Set Up a Refer a Friend Program in WooCommerce runs alongside your affiliate program without mixing the two.
- Let affiliates recruit affiliates — How to Set Up MLM in Your Affiliate Program.
- Give every affiliate their own coupon — How to Track Affiliate Sales with Coupon Codes.
- Reward progress with better rates and one-time bonuses — Performance-Based Affiliate Commission with Affiliate Levels and Performance Bonuses and Rank Rewards for Affiliates.
- Restyle the dashboard your affiliates use — Affiliate Dashboard and Affiliate Area Guide.
FAQ
↑ Back to topDo my affiliates need a special user role?
↑ Back to topNo. Affiliates are ordinary WordPress customer accounts with affiliate status attached, so an existing customer can become an affiliate without a new account.
When exactly does an affiliate get their money?
↑ Back to topIn two moments: the commission is credited to the wallet when you (or the automation) approve the referral, and it leaves the store when you send a payout. Nothing is paid out automatically.
Can I test the flow myself?
↑ Back to topYes — register a test affiliate, open its referral link in a private browser window, and place a small order. The pending row in Manage Referrals confirms tracking end to end. Note that by default an affiliate ordering through their own link also earns commission; turn on Restrict commission on own referral on the Settings tab of the Commission screen to prevent that in production.
Referral tracking runs in the visitor’s browser with JavaScript. Aggressive script blockers or cache configurations that strip query strings can prevent a visit from being recorded — worth knowing before you promise affiliates every click will count.

