Affiliate for WooCommerce plugin helps you to add, manage affiliates, and track performance from a single place – commissions, sales, payouts, leaderboard, etc. Earn money without hard work. Increase your brand outreach, and get potential customers.
The Affiliate for WooCommerce plugin works with Contact Form 7, allowing you to create custom affiliate registration forms for your site.
Requirements
↑ Back to topBefore you begin, make sure you have these two free plugins installed and activated on your site:
Steps to create an affiliate registration form using Contact Form 7
↑ Back to topCreate a new form
↑ Back to top- Go to WordPress Admin > Contact > Add New.
- Enter a suitable form title.
Set up Additional Settings
↑ Back to top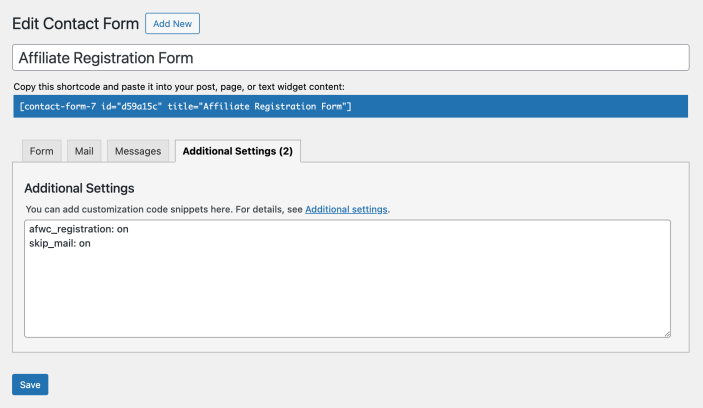
- Click on the Additional Settings tab, and add the following:
- afwc_registration: on – This setting enables the form to be an affiliate registration form.
- skip_mail: on – This setting disables the emails sent by Contact Form 7 upon form submission. We recommend enabling this to ensure that only the emails related to the affiliate program go to the store admin and affiliates upon form submission. You can learn more about the emails sent by the affiliate program from here.
- Click on Save.
Customize the form
↑ Back to top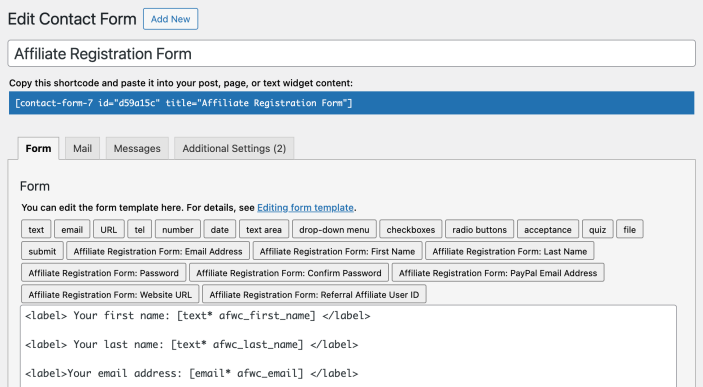
- Go to the Form tab.
- Now you will see eight (8) new form tags (learn more) to add all the default affiliate registration fields.
- Default affiliate registration form tags:
- Affiliate Registration Form: Email Address (Field name: afwc_email) – The affiliate’s Email address (Required/mandatory field).
- Affiliate Registration Form: First Name (Field name: afwc_first_name) – Affiliate’s first name.
- Affiliate Registration Form: Last Name (Field name: afwc_last_name) – Affiliate’s last name.
- Affiliate Registration Form: Password (Field name: afwc_password) – Password for registration (Required/mandatory field).
- Affiliate Registration Form: Confirm Password (Field name: afwc_confirm_password) – This field is used to prevent errors caused by typos or unintentional mismatches during the initial password entry in the Affiliate Registration Form: Password field (Required field).
- It’s related to the initial password field and works only when that field is present.
- Affiliate Registration Form: PayPal Email Address (Field name: afwc_paypal_email) – Affiliate’s PayPal email address for payout.
- Affiliate Registration Form: Website URL (Field name: afwc_website) – Affiliate’s website link.
- Affiliate Registration Form: Referral affiliate user ID (Field name: afwc_parent_id) – The user ID of the affiliate who referred.
- This is useful in multi-level affiliate programs, and this tag appears only when the Multi-tier affiliate program setting is enabled.
- The affiliate who referred the user will become the parent affiliate.
- This field takes numbers as input. We recommend keeping 1 as the minimum value. It can take 0(zero) as input too.
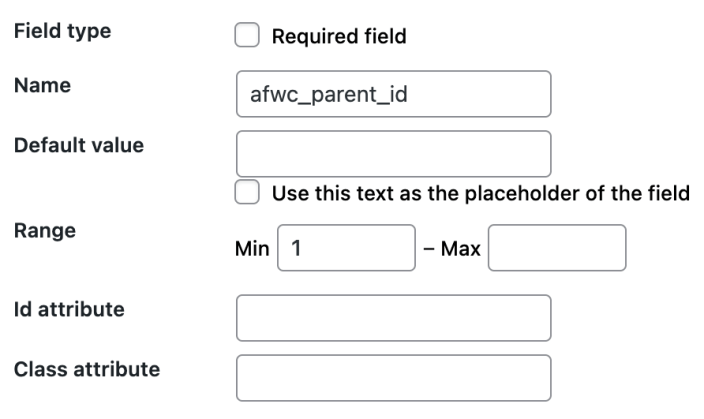
- If someone tries to add a user ID that does not exist on your site, it will show an error.
Important note
- Enable the Required field for Field type where the input is mandatory/required.
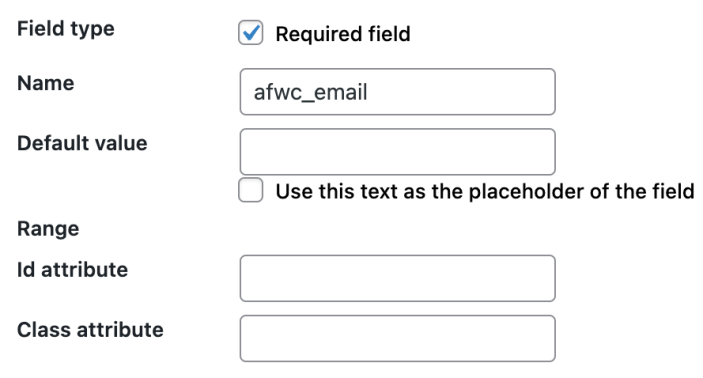
- Do not change the Field Name (the name attribute) for default affiliate registration form fields.
Tip for Custom Fields
- You can add as many custom fields as you want. Learn more about adding form fields from this documentation.
- For custom fields, we recommend adjusting the default Contact Form 7 field names to something relevant:
- For example, when adding a text field for an affiliate address using the form tag generator, the default field name will be something like text-121. We recommend changing it to a more meaningful name, such as street-address, to clearly reflect its purpose. This way, the field will appear as Street Address instead of Text 121 during the approval process(learn more) and under the Profile tab of the affiliate on WordPress Admin > WooCommerce > Affiliates > Dashboard, as well as in the email.
- The hyphen’s ( – ) in the field name converts to a space when viewing the input on the Profile tab of WordPress Admin > WooCommerce > Affiliates > Dashboard (i.e. street-address as the name for the Street Address field).
Configure the messages
↑ Back to top
Under the Messages tab, you can configure messages to show to affiliates after they submit the form.
The plugin adds five editable messages – in addition to response messages provided by Contact Form 7 in the following scenarios:
- The user’s request has been successfully submitted and is awaiting approval as an affiliate.
- The user is successfully registered as an affiliate.
- The user has already signed up and their request is pending for review.
- The user’s request to sign up for an affiliate program was rejected previously.
- The user is already registered as an affiliate.
You can edit these messages to fit your needs.
Save and display the form
↑ Back to top- Once you’ve finished customizing the form, click Save.
- Use the shortcode provided to add the affiliate registration form to any page or post on your site – to preview/test the form.
Existing/logged-in users
↑ Back to topLearn more from here.
Actions after affiliate submits form
↑ Back to top- Approve/reject affiliate requests and see what details they have entered in the form
- Email notifications
Feature request
↑ Back to topHave a feature request or enhancement suggestion for Affiliate For WooCommerce? Submit a feature request or send it to us from here.