The following use cases have been documented to save as a guide for using the Google Listings & Ads attribute mapping functionality.
Use Case 1 : Adding a unique brand “Acme” attribute for all the products in the Store.
↑ Back to topTo create an attribute mapping rule, go to Marketing > Google Listings & Ads, and click “Create Attribute Rule” button. A modal window will show and we will select the Target Attribute Brand

Since we want to have a global value for all our products, the brand “Acme”. We can select “Set a fixed value” in the Assign value section. Once there, we can just type Acme in the input box.

Since we want this rule to apply to all the categories, we can leave Categories selector as is “Apply to All categories”
Now we can click on Save rule and the rule will be ready for syncing.

We can check in WooCommerce – Status – Action Scheduler how the re-sync task is pending

Use Case 2 : Adding a unique brand “Acme” attribute for all the products in the Store but with a single unique Product with the brand “Woo”
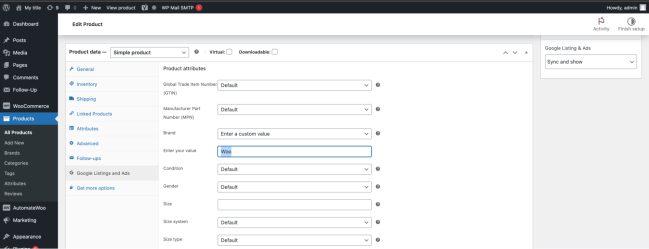
↑ Back to topFor this case, we should first add the Brand “Woo” for that Single Product by going to the Product edition page under WooCommerce -> Products. Then in the Google Listing And Ads section, we should populate the brand for this single product.

Now we can create a new rule exactly as we did in Use Case 1. After saving, this rule will apply to all the product but, since Single Product Google Listings & Ads Attributes has priority, the “Woo” brand in this product will be synced for this product instead of the “Acme” brand in the rules.
Note: Another option for doing this would be to create a new category for this product in assigning a rule ONLY for this category with the value “Woo” and the other rule for ALL the categories with the value “Acme”
A third option for doing this would be to use WooCommerce Brands extension and adding the brands to each product. Then, in the rule use Existing Product Field -> WooCommerce Brands (for ALL the categories)
Use Case 3 : Adding a brand attribute based on WooCommerce Brands
↑ Back to topIn case we have WooCommerce Brands installed we can create a new rule, and selecting the target Brands.

Once doing this, we will select Taxonomies – Brands under “Use value from existing product field” selector.

After saving, the rule will automatically get the brand for each product in the syncing task.
Use Case 4 : Adding a YOAST GTIN in GTIN attribute for all the categories
↑ Back to topIf Yoast WooCommerce SEO is installed, we can map MPN or GTIN from Yoast to Google Listings & Ads. For this use case, we’ll be mapping the GTIN. To do this, we’d need to create a new rule and select GTIN as a target dep. After that, we can simply select “Yoast SEO – GTIN” as a field under “Use value from existing product field” selector:

After saving, the rule will automatically get the Yoast SEO defined GTIN for each product in the syncing task.
Use Case 5 : Adding “Product Size” attribute in the “clothing” categories and leave it empty in non “clothing” categories.
↑ Back to topThis use case assumes we have the Size Attribute created in Product > Attributes. Otherwise, the attribute should be created first. We can then create a new rule selecting Size as target attribute. Then, under “Use value from existing product field” selector, we should select Global Attributes – Product Size

In the category selector, we can choose ONLY those categories that are under Clothing


After saving, this rule will get Size attribute per each product under Hoodies or Clothing category on the syncing task.
Use case 6: Adding “Age: Adult” for “Men” and “Women” categories and “Age: Kids” for “Kids” category
↑ Back to topFirst, we need to have our categories Women, Men and Kids created in WooCommerce.

We can then create a new Rule, selecting the attribute target Age Group. After that, we will select Adult under the “Select default value” selector.

For the categories selector, we will select “Apply ONLY to these categories” and then select “Men” and “Women”. If we have a lot of categories we can also type the category name in the selector for filtering.

We will save this category and create a new rule selecting Age group as a target. But this time we will select “Kids” under the “Select default value” selector. For the category, we should select ONLY apply to “Kids”.

We can see what all of our rules look like:

So, on each product sync, the Attribute Adult will be “adult” for Men and Women categories, and “kids” for the Kids category.
Use case 7: Mapping Custom Fields to Google Attributes
↑ Back to topCurrently, the Google Listings & Ads extension doesn’t support showing all the custom fields available in a shop when mapping attributes. This is to avoid noise due to the huge quantity of Custom Fields in a shop. However, custom fields support can be enabled for attribute mapping using a code snippet.
In this use case, we want to add an ISBN number as a custom field in our Book Shop and use it as a GTIN field in Google Shopping.
First, we need to create our custom ISBN number field, we can do that in the Custom Field box on the product editing screen:

After that, we can save our product and add a code snippet to show the custom field as a data field in the attribute mapping screen. You can add this snippet to your functions.php file or through a plugin such as Code Snippets.
Code snippet example for “isbn field:
add_filter(
		'woocommerce_gla_attribute_mapping_sources_custom_attributes',
		function( $values ) {
			return array_merge( $values, ['isbn']);
		}
	);
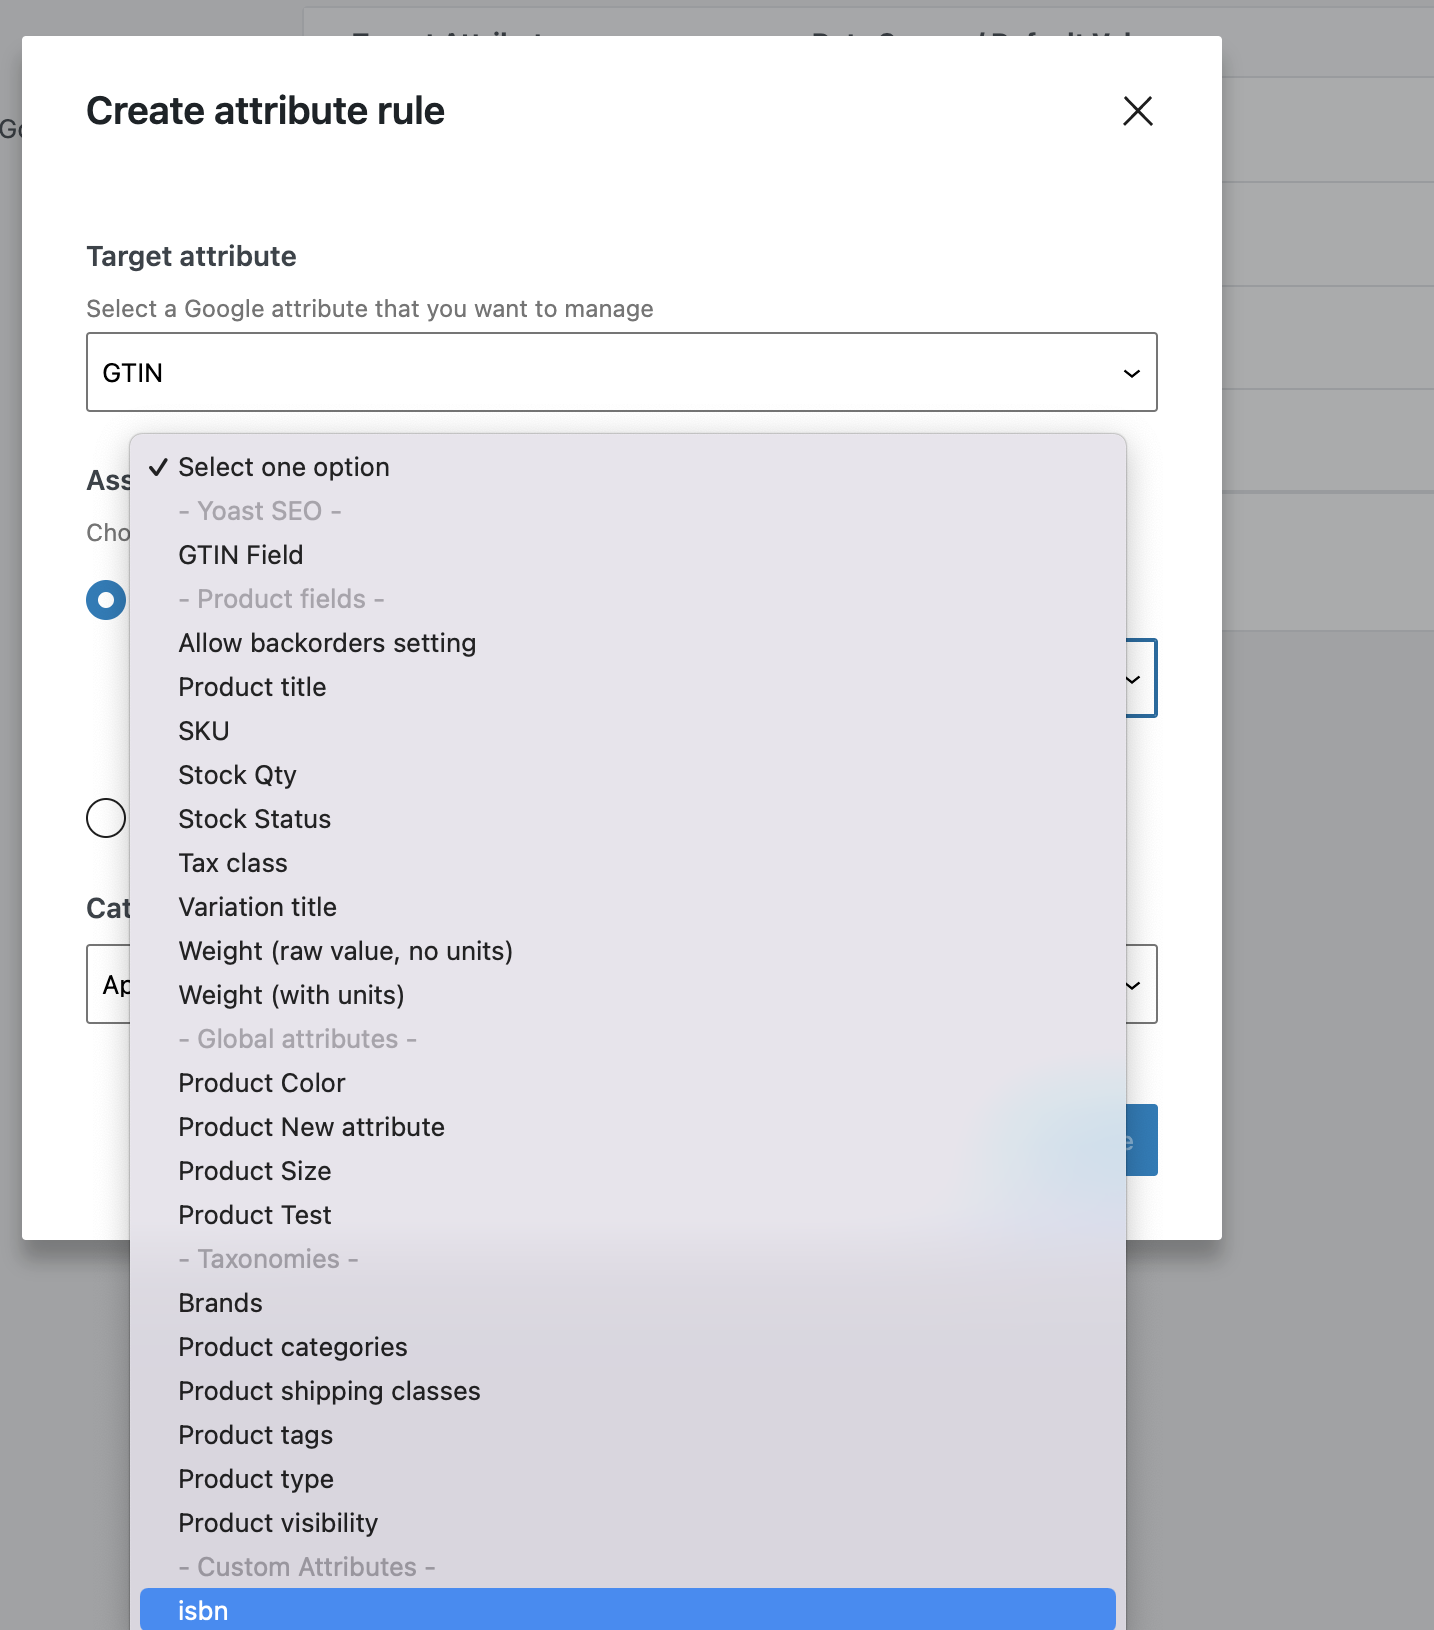
Once this step is completed. In the Attribute Mapping, we can add a new Rule and select GTIN. Then, we can select the newly available “isbn’ field as a source under Custom Attributes.
