Pro Add-on for WooCommerce Dropshipping, an add-on plugin, extends the functionality of WooCommerce Dropshipping adding the following features to existing WooCommerce Dropshipping powered stores:
- Provides additional options to customize emails sent to dropshipping suppliers
- Adds more customization options to customer packing slips
- Adds analytics and reporting capabilities to gather data from affiliate shops
Requirements
↑ Back to topPro Add-on for WooCommerce Dropshipping requires WooCommerce Dropshipping to be installed and activated.
Installation
↑ Back to top- Download the .zip file from your WooCommerce account.
- Go to: WordPress Admin > Plugins > Add New and Upload Plugin . With the file you downloaded, Choose File.
- Install Now and Activate Plugin.
More information at: Installing and Managing Plugins.
Configuration
↑ Back to topAfter installation and activation of Pro Add-on for WooCommerce Dropshipping, the Recent Affiliate Clicks menu will be accessible from the WordPress admin panel under the WooCommerce nav menu along with additional settings under WooCommerce > Settings > Dropshipping > Customised Supplier Emails.
Usage
↑ Back to topSuppliers’ Email
↑ Back to topThe WooCommerce Dropshipping plugin allows you to create emails, labels and a dedicated account for local dropshipping suppliers. This helps suppliers to prepare and send products to your customers. Additionally, suppliers can update tracking numbers, shipping dates, shipping company names and other notes using their dedicated dashboard on your website.
Pro Add-on for WooCommerce Dropshipping offers extended styling options and customization features giving merchants more control in designing supplier emails. Customization options include:
- Align logos, order numbers, and headings
- Add, set thickness, color, and style of borders
- Change the size and color of fonts
- Customize the signature block
- Add additional custom HTML or text-based information under the company, billing, and shipping address section
Merchants can conveniently set the design they prefer.
Setting Up Suppliers’ Email
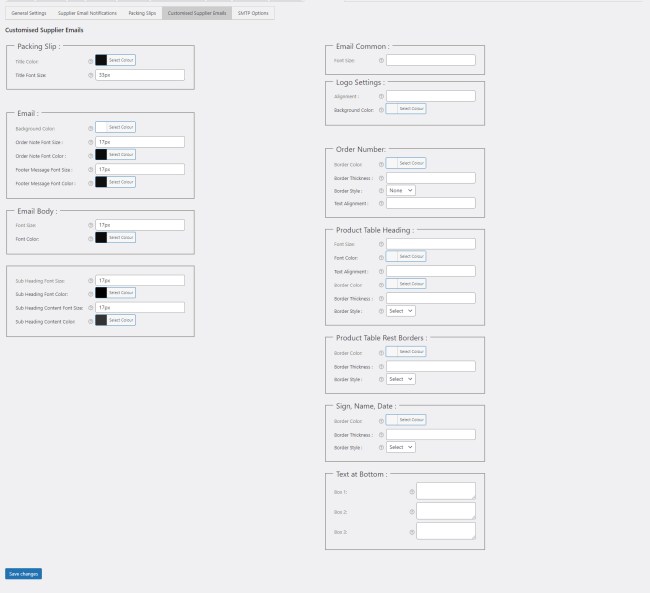
↑ Back to topTo set up suppliers’ emails, navigate to WooCommerce > Settings > Dropshipping and click Customised Supplier Emails.
You’ll see the following settings in the additional right column:
Email Common
Here, you can set the common font size of suppliers’ email and the PDF label. Enter the font size in pixels. For example, if you want the overall font size to be 12 pixels, enter 12px.

Logo Settings
You can set the logo position and background color:
- Alignment – Options include left, center, or right to align your store logo.
- Background Color – Set the background color of your choice. Enter hex code, for example, #000 or #000000 for white or select from the palette.
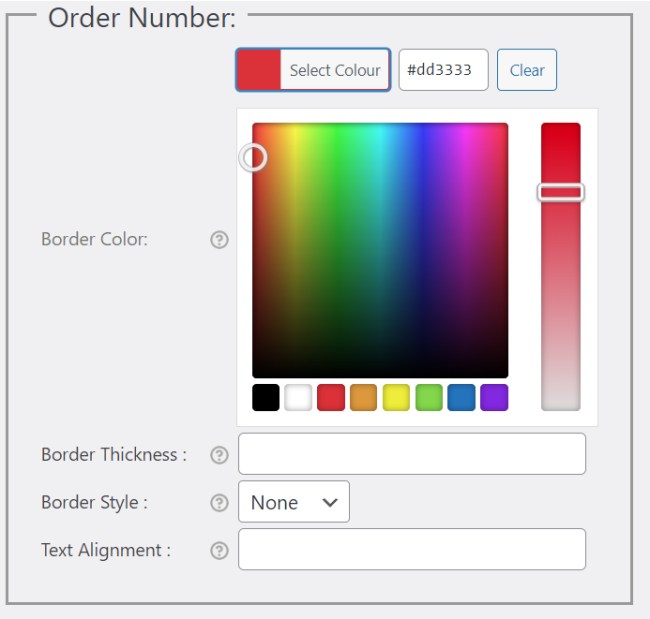
Order Number
Further customize the styling of order numbers:
- Border Color – Set the border color of your choice around the order number. Enter hex code, for example, #fff or #ffffff for black or select from the palette.
- Border Thickness – Set the border thickness in pixels. For example, 1px for 1-pixel thickness
- Border Style – Set border style from the drop-down. You can choose Dotted, Solid, Outset, Inset, Double Groove, Ridge or None
- Text Alignment – Enter left, center, or right to align text.
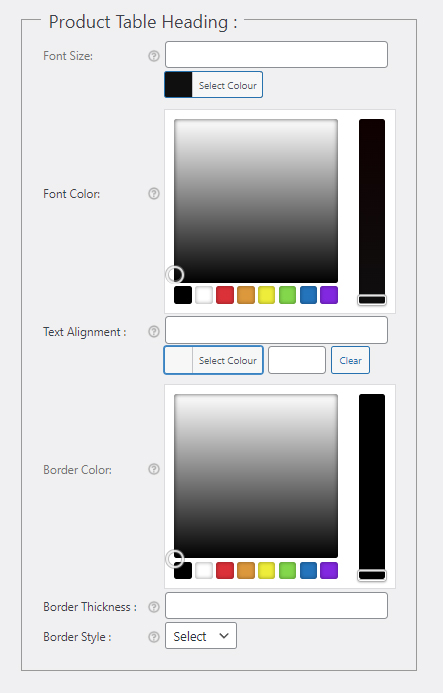
Product Table Heading
Set the styling of product table headings and labels:
- Font Size – Set font size of product table headings/labels. Enter font size in pixels. For example, if you want an overall font size should be 12 pixels, enter 12px.
- Font Color – Set font color of product table headings/labels. Enter hex code, for example, #fff or #ffffff for black, or select from the palette.
- Text Alignment – Choose left, center, or right to align text.
- Border Color – Set the border color for product table headings/labels. Enter hex code, for example, #fff or #ffffff for black, or select from the palette.
- Border Thickness – Set border thickness. For example, 1px
- Border Style – Select border style from the drop-down. You can choose Dotted, Solid, Outset, Inset, Double Groove, Ridge, or None.
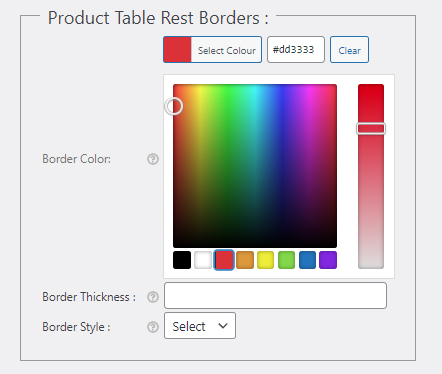
Product Table Rest Borders
You have the option to set the rest of the borders within suppliers’ email and PDF.
- Border Color – Set the border color of your choice. Enter hex code, for example, #fff or #ffffff for black, or select from the palette.
- Border Thickness – Set the border thickness in pixels. For example, write 1px for the border of thickness1 pixel.
- Border Style – Select border style from the dropdown – choose from Dotted, Solid, Outset, Inset, Double Groove, Ridge, or None.
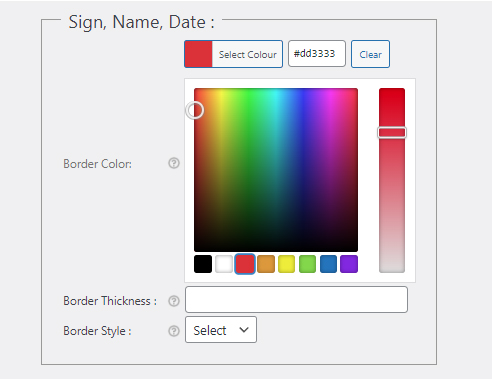
Sign, Name, Date
You can further customize the signature block:
- Border Color – Set the border color of your choice around Sign, Name, and Date area. Enter hex code, for example, #fff or #ffffff for black or select from the palette.
- Border Thickness – Set border thickness in pixels. For example, write 1px for border of thickness1 pixel.
- Border Style – Set border style from the drop-down. You can choose from Dotted, Solid, Outset, Inset, Double Groove, Ridge, or None.
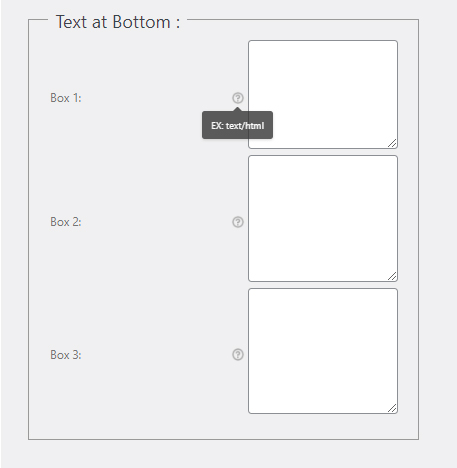
Text at Bottom
This is a text area for additional content related to your store, for example, Disclaimer, Policy, etc. In the 3 boxes provided, you can input simple text or HTML which will display in the shipping and billing address area.
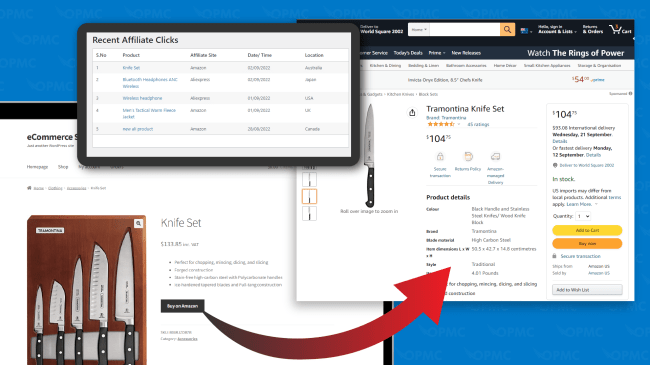
Recent Affiliate Clicks
↑ Back to topThe Recent Affiliate Clicks dashboard displays information related to your affiliate stores such as the affiliate website. name of the product clicked on, location of the customer who clicked on your affiliate link as well as the date and time of the click.
To view your recent affiliate click data, go to WordPress Dashboard > WooCommerce and click Recent Affiliate Clicks.

Monitor affiliate activity
↑ Back to topWhen customers visit and click on affiliate products on your WooCommerce website, the click is registered in the affiliate clicks dashboard. Click data includes:
- Location customers are coming from
- Most visited affiliate site’s products
- Affiliate sites that are the center of attraction for customers