Cashier is an all-in-one WooCommerce checkout optimization plugin. You can set up one-page checkout, direct checkout with Buy Now buttons, checkout field editor and other enhancements.
This doc explains how you can create special pages or turn any page into a one-page checkout page on your WooCommerce store. Customers can add or remove products, fill in checkout details and payment details…all from a single page.
No need to go to different pages and screens. Big-time savings for users and reduced abandonment for you.
Three ways of using one page checkout
↑ Back to topCashier plugin allows you to enable one-page checkout for:
- Pre-selected products
- Product Ids
- Product categories
You can enable one page checkout for simple, variable products (including variations) and subscriptions.
You have the flexibility to enable/disable the one page checkout option anytime based on your requirements.
To enable one page checkout for any of the three ways, go to WooCommerce > Cashier > Settings. Enable the ‘One Page Checkout’ option using the toggle, if it’s not enabled already. To disable, turn off the toggle.
One page checkout for pre-selected products
↑ Back to topYou can create a special page wherein all the products you tick the One page checkout option for will automatically be eligible for one page checkout.
Here’s how:
- Go to WordPress admin panel > Pages > Add New.
- Give a title, say ‘One Page Checkout’ to this page.
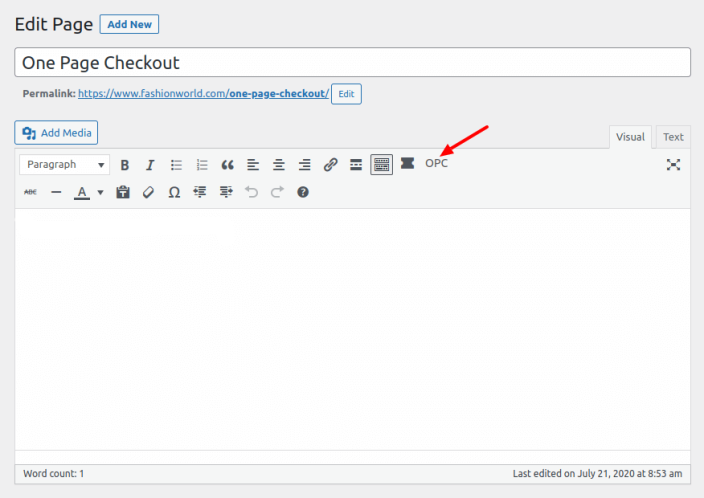
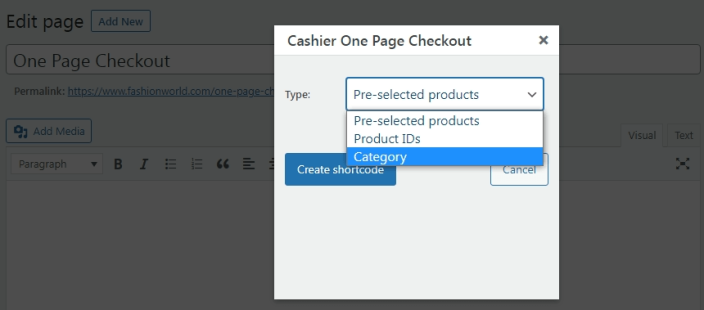
- On the menu bar of the WordPress / Classic editor, locate and click the ‘OPC’ option.
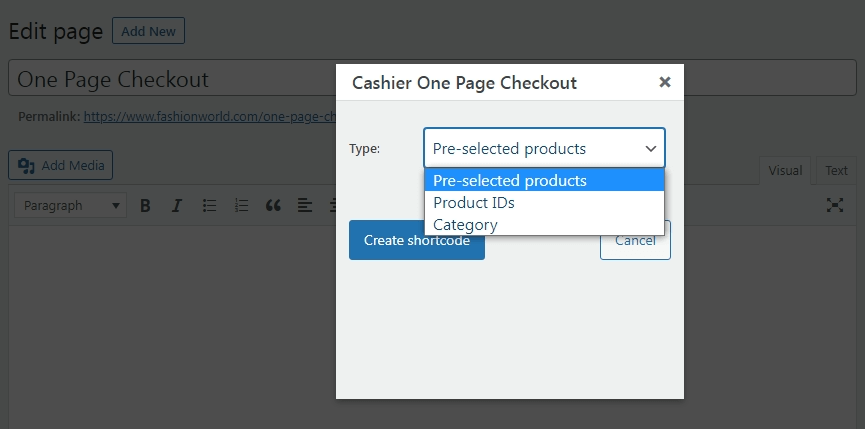
- Choose ‘Pre-selected products’ from the dropdown.
- Click on the ‘Create shortcode’ button.

- Publish the page.
Note – If you are using Gutenberg editor, you may not find the OPC option. In this case, go to any product. On the Classic editor menu, you’ll find the OPC option. Choose ‘Pre-selected products’ from the dropdown, click on the ‘Create shortcode’ button. Paste the shortcode on the ‘One Page Checkout’ page in the Gutenberg editor.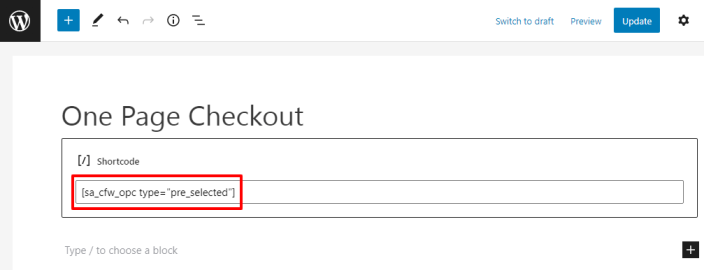
- Once your page is published, select products for one page checkout.
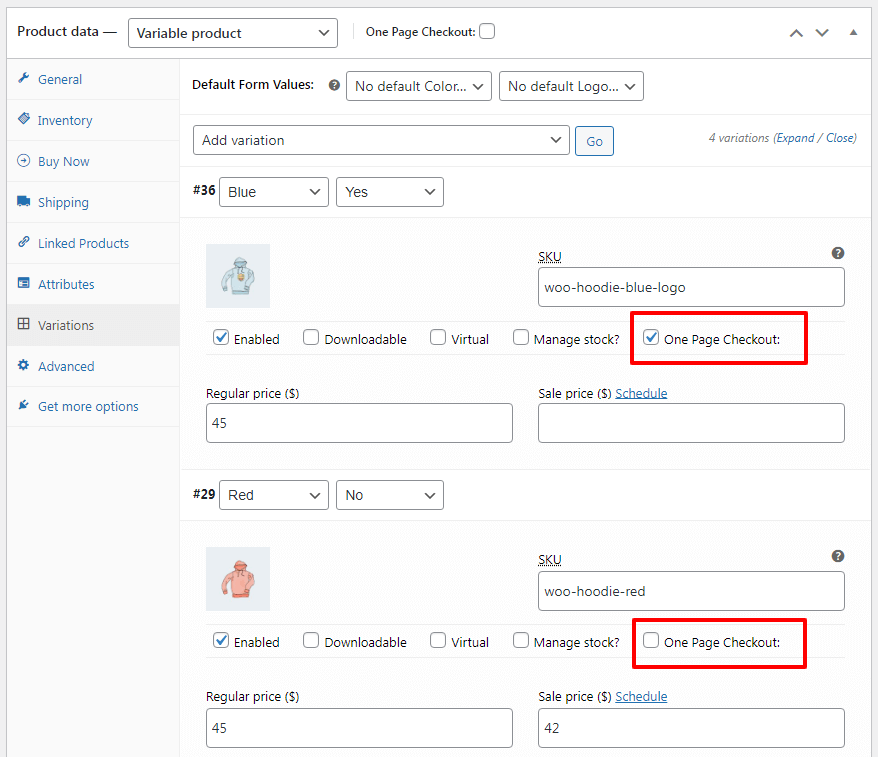
- Go to Products. Select a product to edit it. Tick the One page checkout box. Update the product.
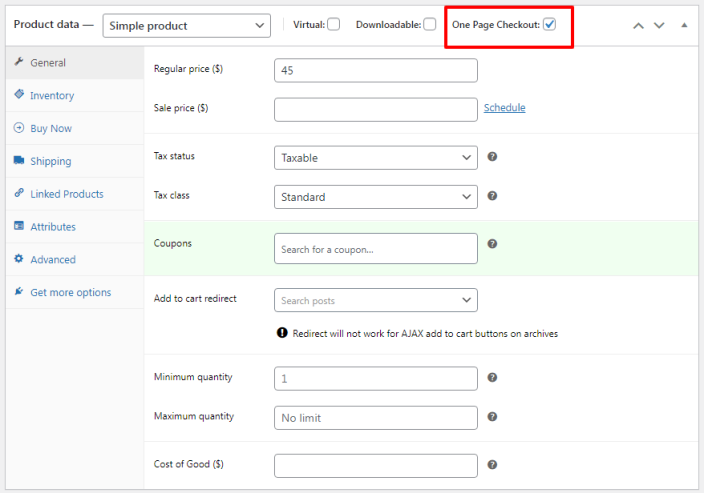

Note – Enabling the One page checkout option will enable it for the simple and variable products (all variations). To enable it only for specific variations, click on Product data > Variations. Click on the ‘Expand’ option. Tick the One page checkout box only for the variations you want to. Update the product. - Repeat step 8 for the products you want to enable one page checkout.


That’s it.
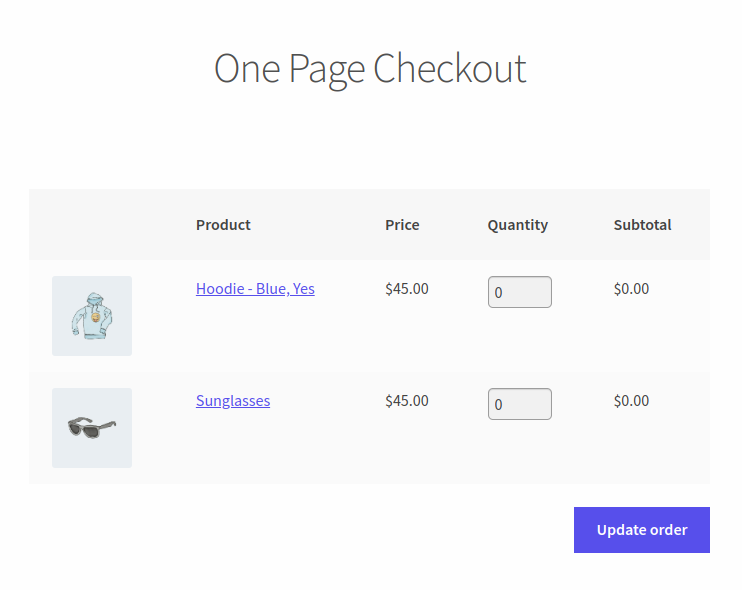
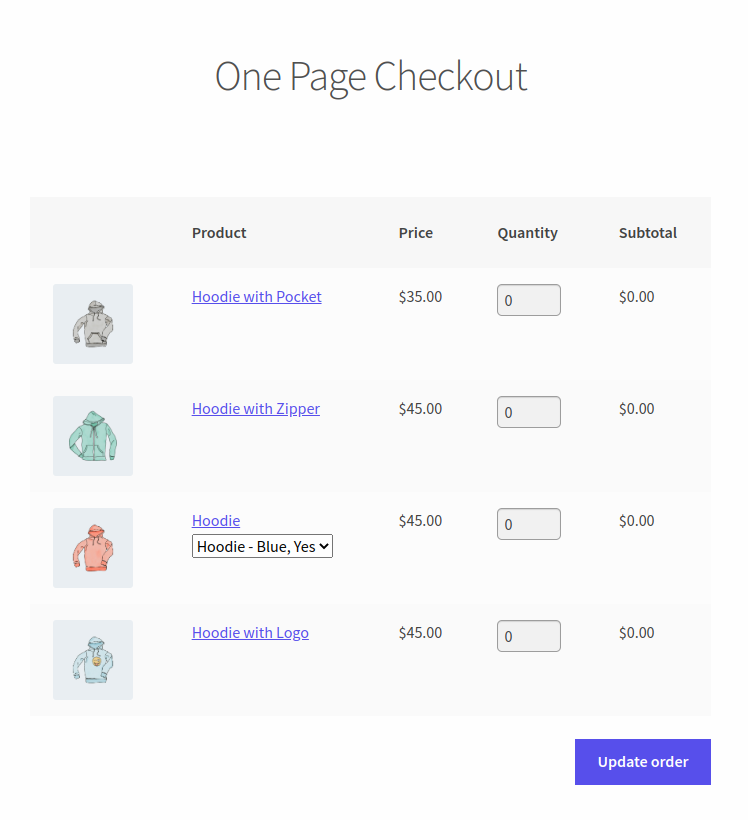
Here’s how the one page checkout page with pre-selected products will appear on your website.

Note – If you sell very limited products and you want to show only one page checkout and not the default WooCommerce cart page and checkout page, you can put those pages in Drafts.
One page checkout for product ids
↑ Back to topInstead of pre-selected products, if you want to set one page checkout for specific products, you can select product names and the shortcode with the ids will be auto generated.
- Go to WordPress admin panel > Pages > Add New.
- Give a title, say ‘One Page Checkout’ to this page.
If you have already created a page titled ‘One Page Checkout’, simply open that page to edit. - On the menu bar of the WordPress / Classic editor, locate and click the ‘OPC’ option.
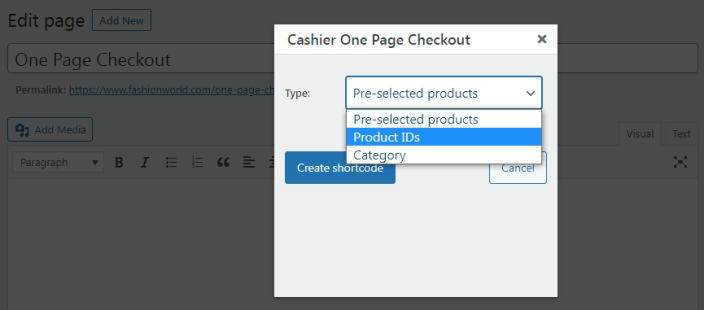
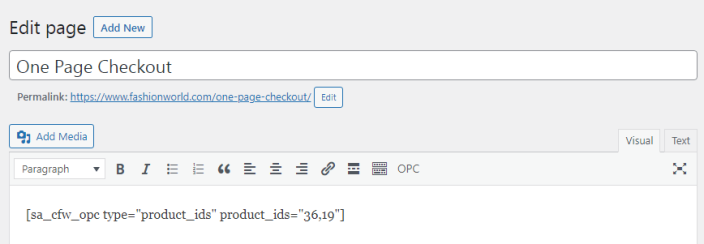
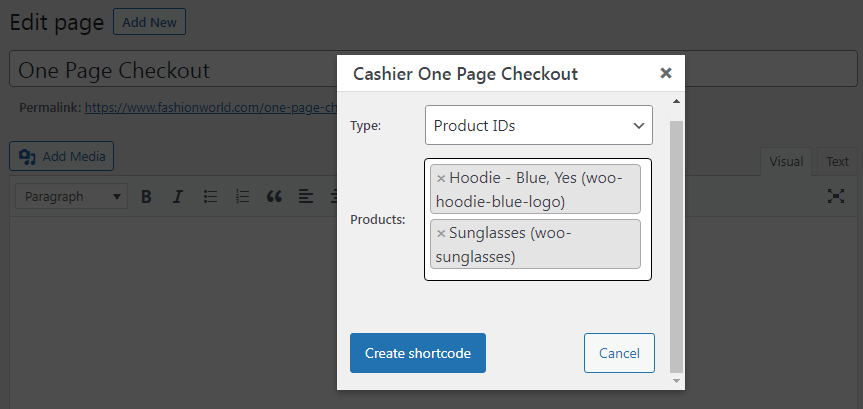
- Choose ‘Product IDs’ from the dropdown.
- Search and select the required products.

- Click on the ‘Create shortcode’ button.
- Publish/Update the page.


Note – If you are using Gutenberg editor, you may not find the OPC option. In this case, go to any product. Choose ‘Product IDs’ from the dropdown, search and select the products, click on the ‘Create shortcode’ button. Cut the generated shortcode & paste the shortcode on the ‘One Page Checkout’ page in the Gutenberg editor.
That’s it.
A special page with all the product ids you selected will be shown for one page checkout.
One page checkout for product categories
↑ Back to top- Go to WordPress admin panel > Pages > Add New.
- Give a title, say ‘One Page Checkout’ to this page.
If you have already created a page titled ‘One Page Checkout’, simply open that page to edit. - On the menu bar of the WordPress / Classic editor, locate and click the ‘OPC’ option.
- Choose ‘Product Category’ from the dropdown.
- Search and select the category.
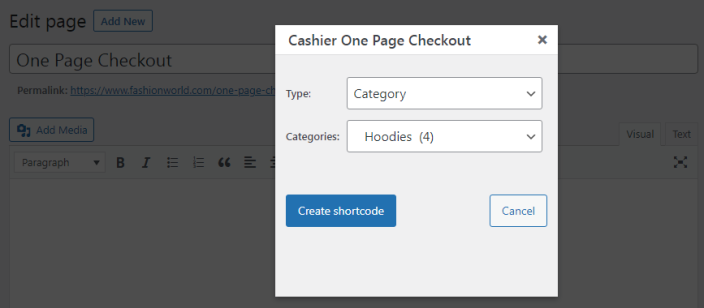
- Click on the ‘Create shortcode’ button.

- Publish/Update the page.


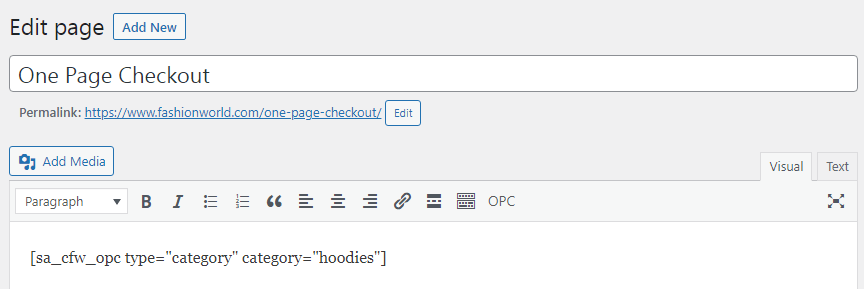
That’s it.
A special page with all the products based on categories selected will be shown for a one page checkout option.
How to turn a product page into one page checkout?
↑ Back to topAlternatively, if you do not want to create a special page for one page checkout, but directly show a one page checkout on a product page, you can do that as well with Cashier.
Open any product page, click the ‘OPC’ option, choose ‘Product IDs’ from the dropdown, search and select the same product you are currently editing.
When a visitor lands on that product page, a one page checkout option will be shown below the product details.
This is suited only for those stores that sell limited products or where product description requirements are less like books, audio files, etc.