When selling products by the unit (volume, area, weight), it is fairly common to offer multiple retail and bulk packages. For example, foods and beverages are often available in retail packages and bulk packages.
The Composite type provides a practical solution when there is a need to group multiple bulk packaging options of the same product. In contrast to the Variable type, it allows you to keep individual SKUs visible in your catalog (or hide them) and does not restrict you to the functionality provided by variations. When working with projects that involve product grouping, it is a good idea to remember that Composite Products support bundles, in addition to simple and variable products. In some cases, Product Bundles can be an essential companion to Composite Products. For instance, bundles can be very handy if you need to create multiple bulk packages that “consume” stock from a single SKU.
An Example: Selling Wine
Wineries often manage the inventory of their labels in bottles, using a SKU for each wine label they produce. However, they commonly offer bulk packages of various sizes, such as bottle boxes or bottle pallets, which “consume” stock from the bottles inventory.
In this case, the box and pallet products of each wine label would be created using Product Bundles, while Composite Products could be used to group the bottles, boxes and pallets in configurable products – one for each wine label. The shopping experience could be further streamlined by hiding the individual bottle, box and pallet products from the shop catalog.
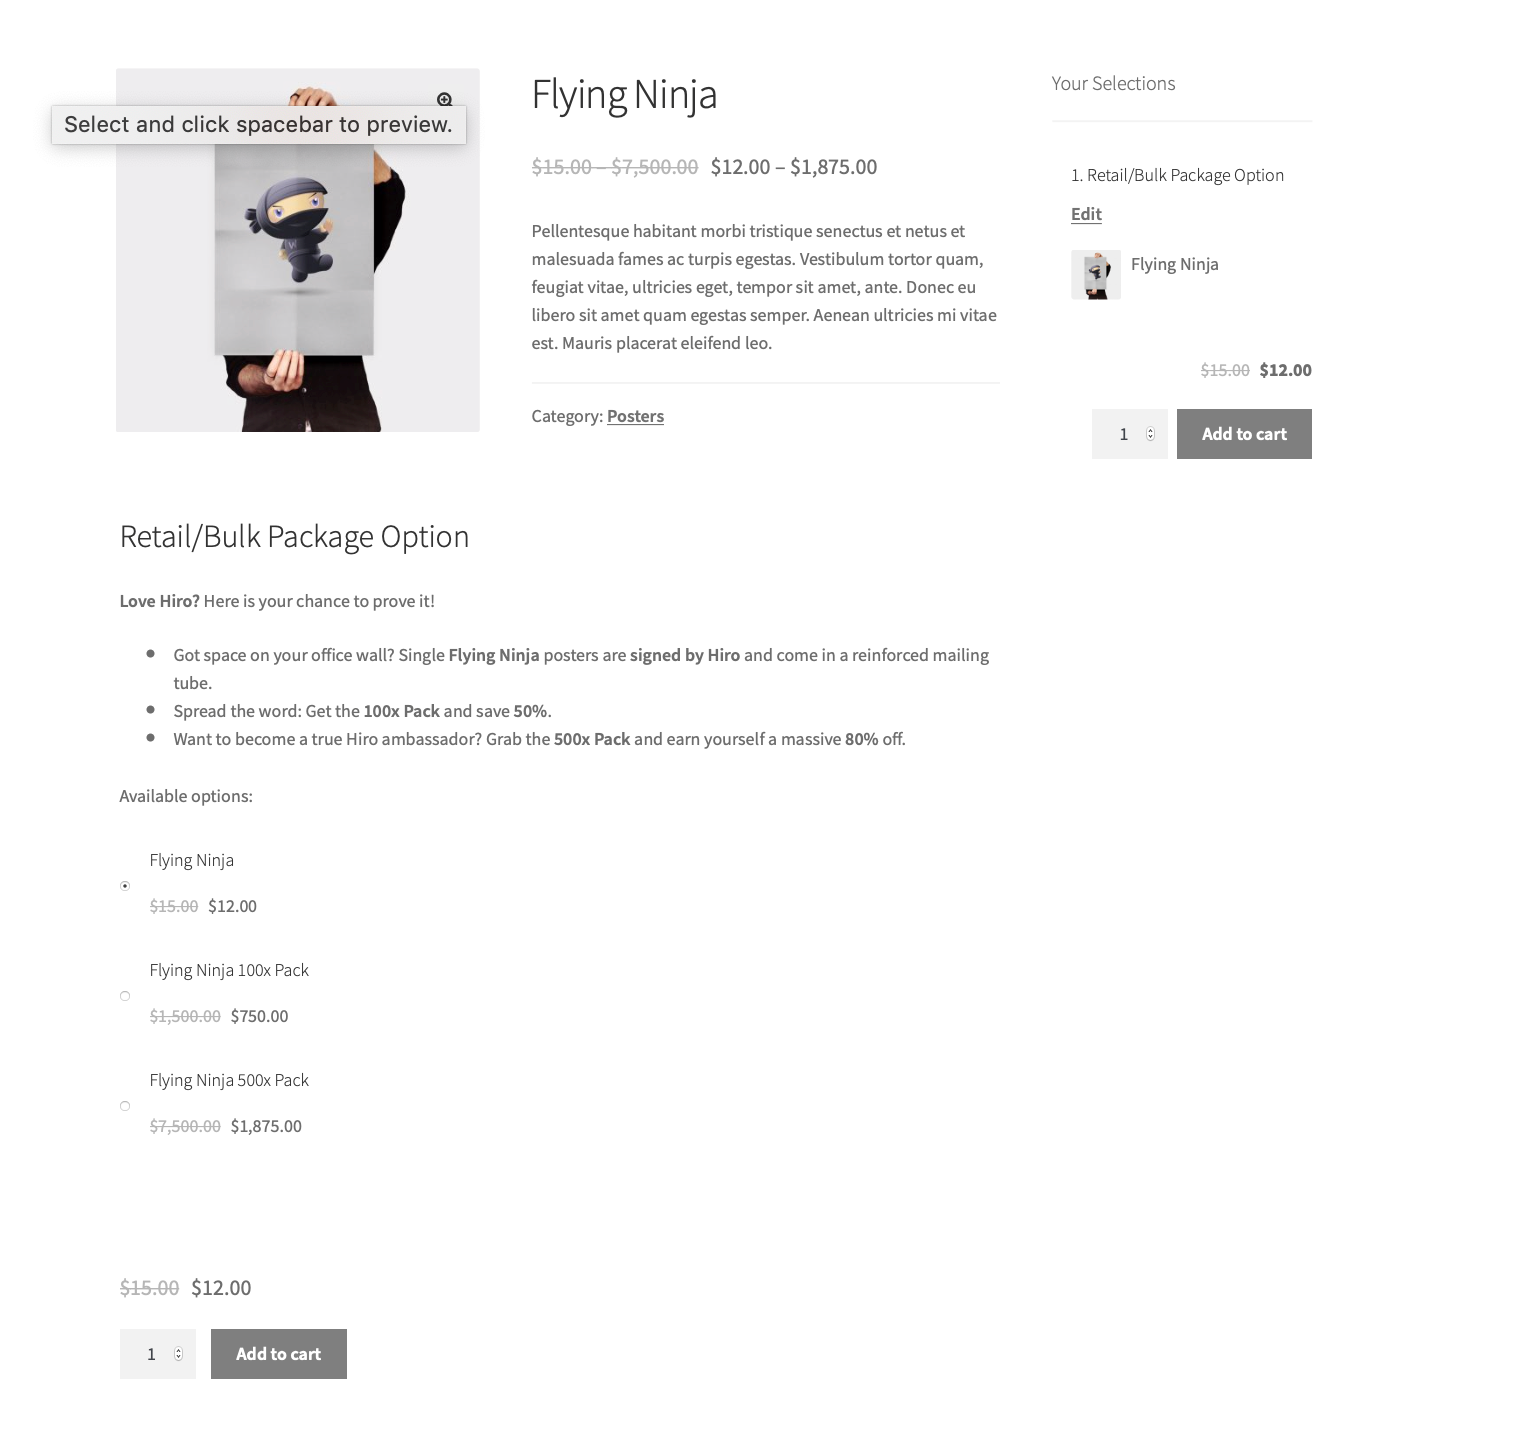
The use case presented in this guide is based around a poster: The Flying Ninja. You will learn how to create the Flying Ninja poster as a composite product that offers multiple bulk packaging options:
- A standard option associated with the existing Flying Ninja simple product.
- A Flying Ninja 100x Pack bundle option.
- A Flying Ninja 500x Pack bundle option.
Plugins/Extensions Used
↑ Back to topConfiguration
↑ Back to topTo configure the Flying Ninja composite product, follow these steps:
- Create the Composite
- Go to Products and click Add New.
- Enter a Title, Description and Short Description.
- Locate the Product Data panel and select the Composite product type.
- Define Components and Component Options
- Locate the Product Data panel and go to Components.
- Click Add Component to create a Component and name it Retail/Bulk Package Option.
- Locate the Component Options field, choose Select products in the drop-down and use the search field to find the Flying Ninja poster — then select it.
- Assuming that you have already created 100x and 500x bundles of the Flying Ninja poster with the Product Bundles extension, repeat the previous step to add the Flying Ninja 100x Pack and Flying Ninja 500x Pack bundles.
- Configure Pricing Options
The price of the composite product is identical to the price of the chosen package option:
- In the Components tab, expand the Retail/Bulk Package Option Component and check the Priced Individually box.
- Go to the General tab and ensure that the Regular Price and Sale Price fields are blank.
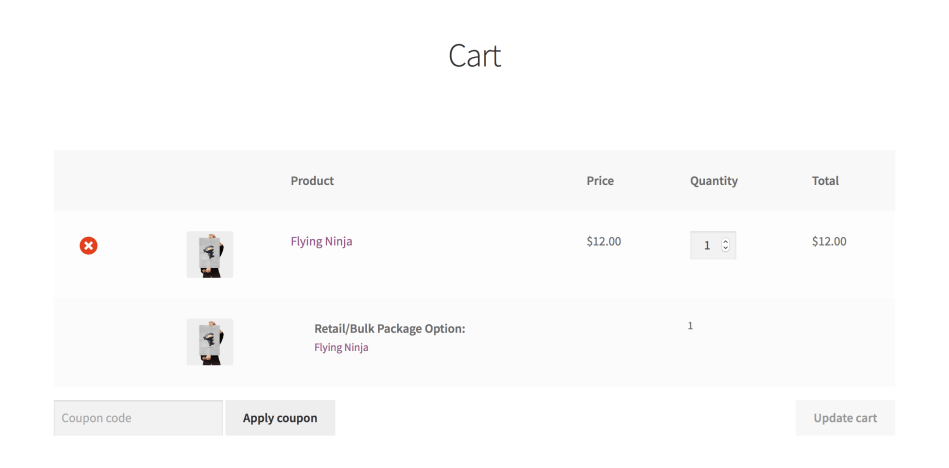
- Configure Shipping Options
The retail/bulk product options included in the Flying Ninja composite are not assembled in any container — they are shipped individually and must retain their shipping properties:
- Locate the Product Data > Shipping panel .
- Choose the Composite Type > Unassembled option.
- Configure Layout Options
- Go to the Components tab.
- Select the Stacked layout.
- Open the Retail/Bulk Package Option Component, locate the Options Style drop-down and select Radio Buttons.
- Configure Component Settings
- Go to the Components tab and expand the Retail/Bulk Package Option Component.
- To prevent multiple quantity fields from being displayed, enter 1 in the Min Quantity and Max Quantity fields.
- In the Default Option field, choose the Flying Ninja poster.
- Go to the Advanced Settings tab.
- Un-check the Title, Description, Thumbnail and Price boxes.
- Un-check all Subtotal Visibility boxes.
- Add Finishing Touches
Choose a Product Image, add some Gallery items and, finally, tweak the layout of the product page.
Layout Tweaks
Most WooCommerce-compatible WordPress themes default to a two-column product page layout: The first column contains the main product image and gallery, while the second one is reserved for product details and options. This space-conserving approach works well for Simple and Variable products, which usually contain only a few form elements.
In contrast, Composite products tend to have longer forms requiring multiple steps/interactions to complete. Sometimes you may find that your theme’s two-column layout makes Composite products look space-constrained and hard to interact with. Some themes allow you to modify the layout of individual product pages to display product details and options in a single column. For example, if you are using Storefront, the Storefront Powerpack plugin includes options for:
- allocating more width to product form content, or
- stacking product form content below the main product image and gallery.
If you are experiencing layout issues with a Composite Product and your theme does not provide any per-product layout options:
- Navigate to Product Data > Components.
- Locate the Form Location option.
- Choose Before Tabs to stack form content after the product image and summary.
In most cases, choosing Before Tabs will allocate the entire page width to the form contents of your Composite. However, note that the Before Tabs option is not guaranteed to work reliably with all themes!
A similar result can be achieved with the free WooCommerce Stacked Product Layout plugin.
Result
↑ Back to top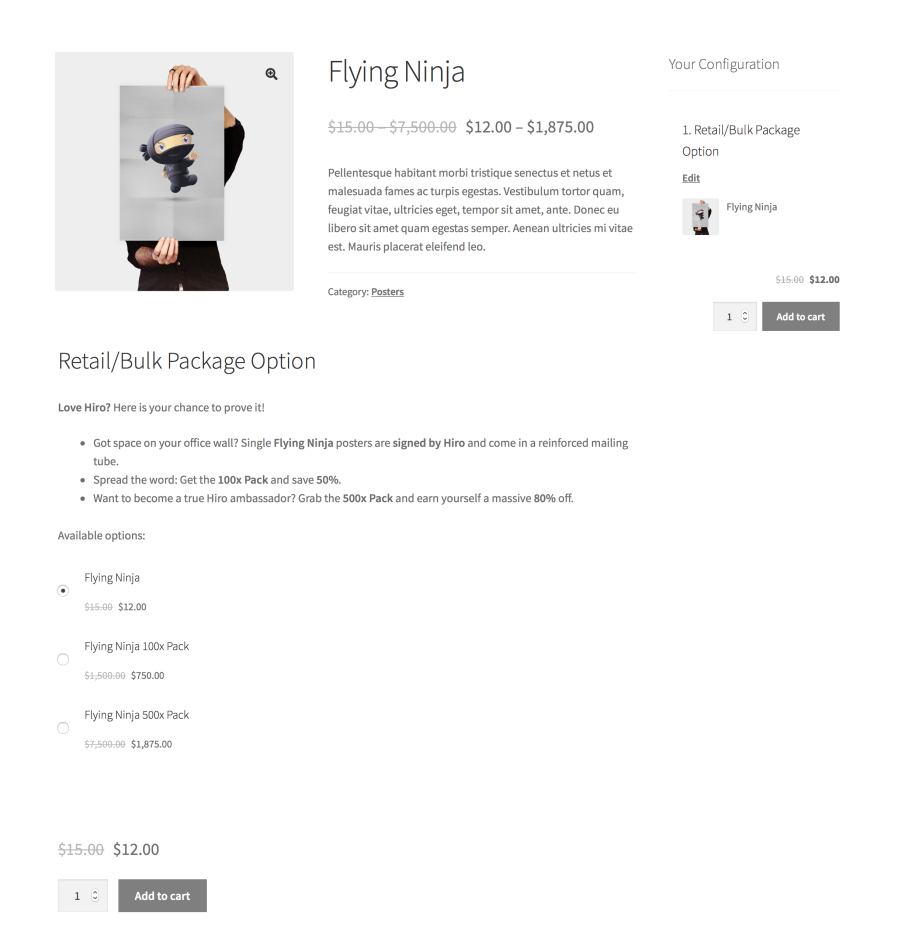
Questions & Support
↑ Back to topHave a question? Please fill out this pre-sales form.
Already purchased and need assistance? Get in touch with us via the Help Desk!