NOTE
This product is no longer available on WooCommerce.com. This document has been left available for existing users, but will no longer be updated.
Dwolla is a plugin that extends WooCommerce to allow you to process payments via Dwolla. Since Dwolla is a cash-based payment network, fees are nominal and security is easy since you don’t have to worry about PCI Compliance. An SSL is recommended to protect sensitive data, but is not required.
Installation
↑ Back to top- Download the extension from your dashboard
- Go to Plugins > Add New > Upload and select the ZIP file you just downloaded
- Click Install Now, and then Activate
- Go to WooCommerce > Settings > Checkout > Dwolla and read the next section to learn how to setup and configure the plugin.
Setup and Configuration
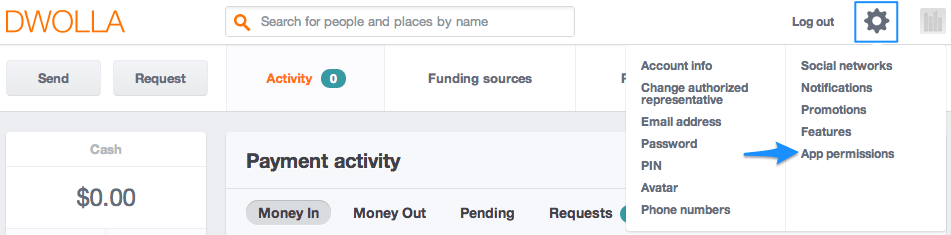
↑ Back to topFirst you’ll need to get some information about your Dwolla account to integrate with WooCommerce. Log into your Dwolla Account and click on “App Permissions” under the Settings menu (gear icon):
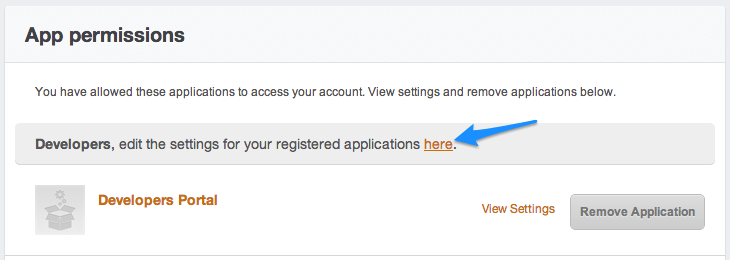
You will see this page. Click on the link to edit registered applications as pictured:
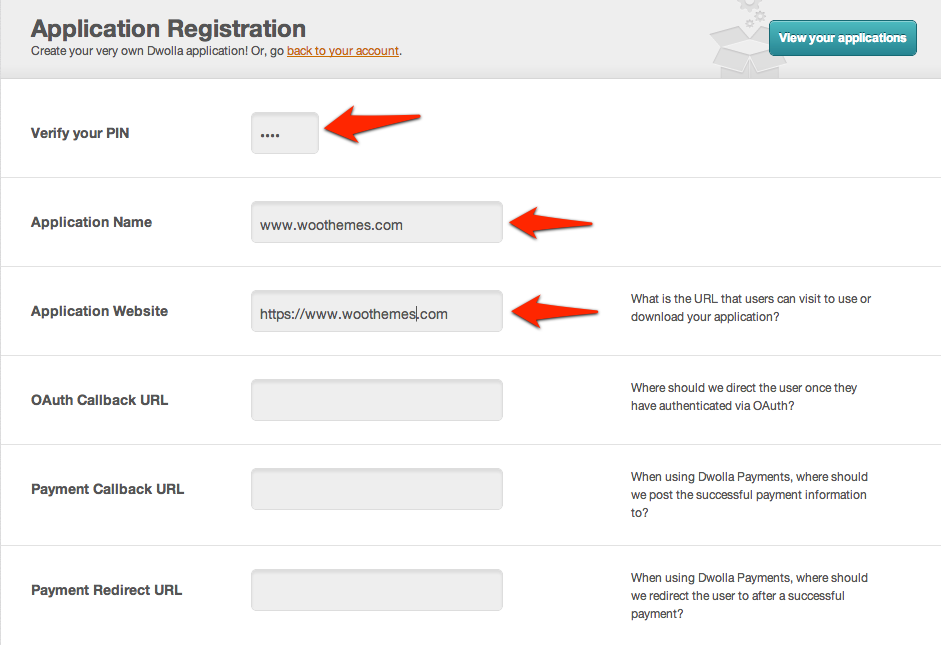
Click on “Create Application” at the top:

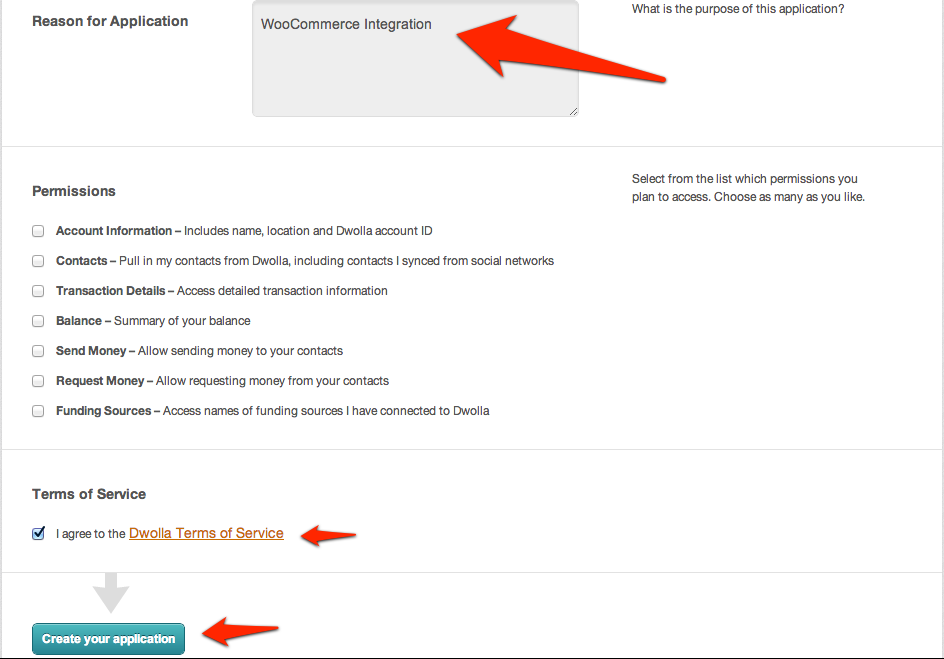
Enter your PIN number and use your website URL (e.g. woothemes.com) as the application name and application website. You’ll also want to enter “WooCommerce Integration” for “Reason for Application”, check the box for the terms of service, and click “Create your Application”.
Copy the App Key and the App Secret provided to the settings page inside WooCommerce:

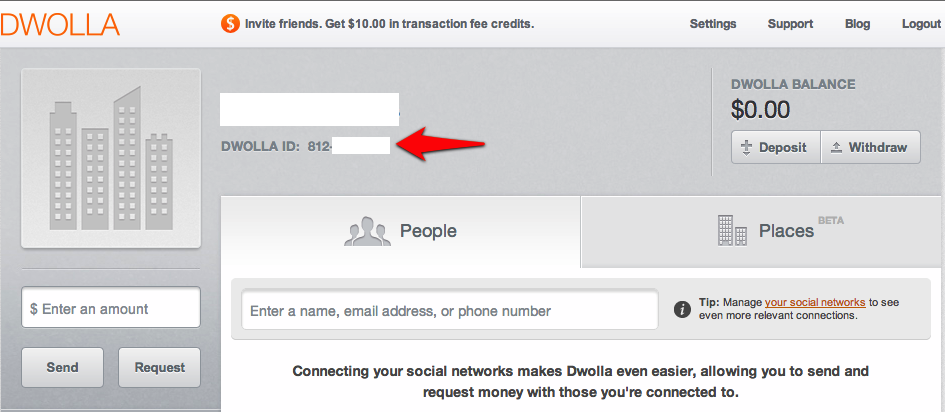
Finally, grab your Dwolla ID from the Dwolla homepage and copy this to the settings page inside WooCommerce:
You are now ready to start accepting payments using Dwolla. If you want to tweak settings and customize the checkout process, keep reading.
Extension Settings
↑ Back to topConfigure the plugin by going to WooCommerce > Settings > Checkout > Dwolla.
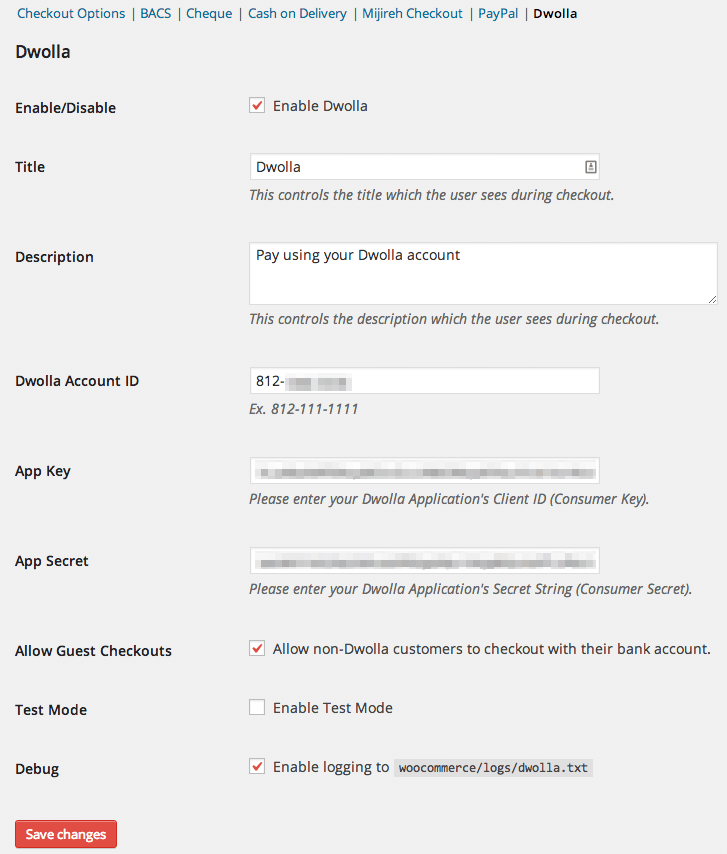
- Enabled – This will enable the gateway to be used by customers to checkout.
- Title – This is the text shown for the payment during checkout and on the Order Received page.
- Description – This is the text shown under the title during checkout. Limited HTML is allowed.
- Dwolla Account ID – This is your Dwolla Account ID, follow the instructions above to find this.
- App Key – This is the App Key for the application you created in Dwolla, follow the instructions above to find this.
- App Secret – This is the App Secret for the application you created in Dwolla, follow the instructions above to find this.
- Allow Guest Checkouts – Enable this to allow customers who do not have a Dwolla account to checkout using Dwolla. There is no fee for this feature, so it’s recommended that you enable this.
- Test Mode – Enable this to turn on Test Mode for all transactions. Every transaction will return as accepted.
- Debug Mode – Enable this to turn on logging to the WooCommerce error log (found under WooCommerce > System Status > Logs). As a best practice and to maximize performance, please only enable this if you are having issues.
Troubleshooting
↑ Back to topHaving trouble? Follow these steps to make sure everything is setup correctly before posting a support request:
- Check that your App Key/Secret and Dwolla ID are correct.
- Double-check that your App Key/Secret and Dwolla ID are correct.
- Enable debug mode and review the information provided in the log file (under WooCommerce > System Status > Logs) for information on what is not working.
- Submit a support ticket with the debug log as an attachment.
Other Information
↑ Back to topTesting
Dwolla does not have a proper sandbox for testing, but you may change your Dwolla ID to their reflector account, which will return whatever money you send directly back to you. See Dwolla’s testing documentation for more information on how this works.