This document may contain outdated information. It was originally written for Order Delivery for WooCommerce prior to version 4 and is retained here for reference.
For the latest documentation, please click here.
Allowing your customers to choose their order delivery date and time is a game-changer for online shops. You can now achieve this by using Order Delivery, which allows you to define delivery time frames or time slots.
That means you can divide a delivery day into multiple time ranges. For example:
- Morning: 8:00 am – 12:00 pm
- Afternoon: 3:00 pm – 6:00 pm
- And more
Note: To customize the time format, use the global WordPress setting Settings > General > Time Format.
By configuring delivery time frames for your shop, customers can select a delivery time frame in addition to the delivery date when making a purchase in the checkout form.
Add time frames
↑ Back to topYou can add a time frame from the Delivery days setting. Just click on the button located in the bottom-left corner of the table.
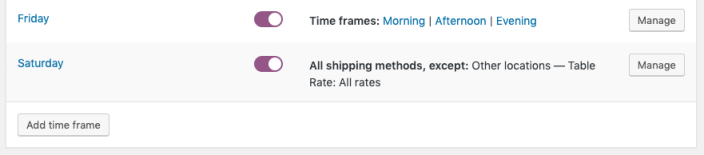
When adding a time frame from this location, all the enabled delivery days will be selected by default in the Delivery days field. This allows you to add the same time frame to multiple delivery days at once. You are free to modify the delivery days for which the time frame will be added.
A time frame is represented by the following data:
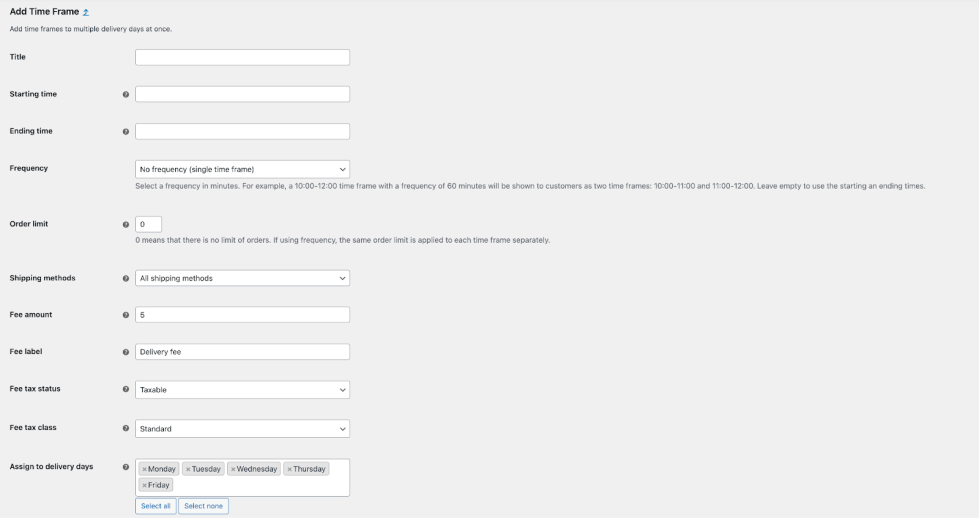
- Title: A title to identify the time frame.
- Starting time: The starting hour.
- Ending time: The ending hour.
- Frequency: The frequency of the available time frame, either in 30-minute or 60-minute increments. For example, a 10:00-12:00 time frame with a frequency of 60 minutes will be displayed to customers as two time frames: 10:00-11:00 and 11:00-12:00. Leave this field empty to use the default starting and ending times.
- Order limit: The number of orders that can be delivered in the time frame. Once reached, it won’t appear to be selected by the customer.
- Shipping methods: The available shipping methods for this time frame.
- Fee amount: An additional fee, which will be charged to the customer for choosing this specific time frame.
- Fee label: The label of the fee that will be charged to the customer. It will be added to the total order details. This setting will only appear if the Fee amount is set to a value over 0.
- Assign to delivery days: Select the delivery days for which this time frame is available.
Note: You can manually edit the Starting time and Ending time values after selecting an option from the list to define an interval lower than 30 minutes. Kindly note that the Ending time will only show valid values that start after the Starting time setting.
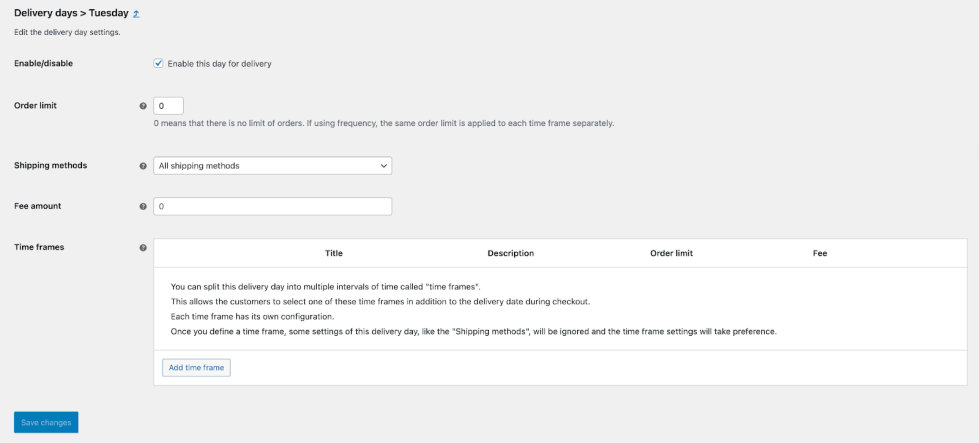
You can also add a time frame to a specific delivery day directly from its settings form:
Checkout
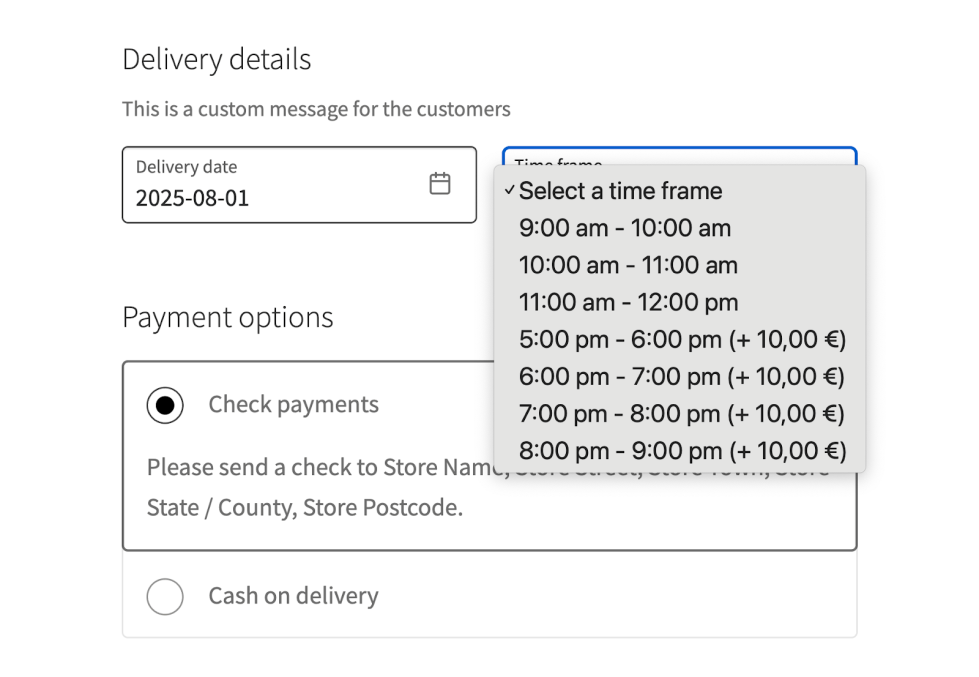
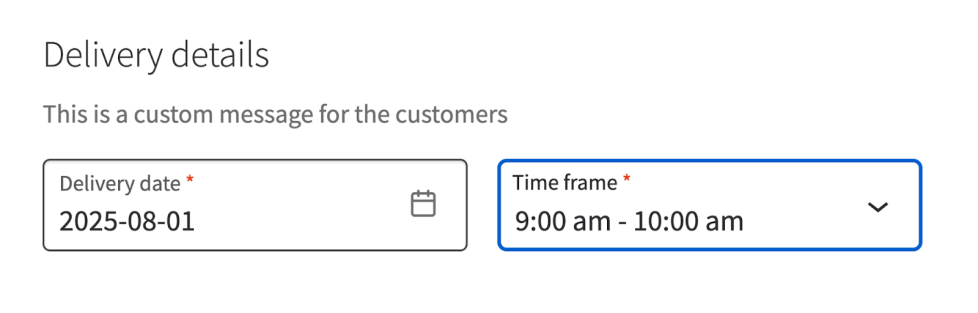
↑ Back to topAfter defining the delivery time frames, the customer can select one of them in the checkout form.
Note: The extension uses the WordPress Time Format global setting, which can be found in the General > Settings > Time Format page.
Depending on the selected option in the Calendar fields setting, the behaviour of the Time frame field in the checkout form may vary.
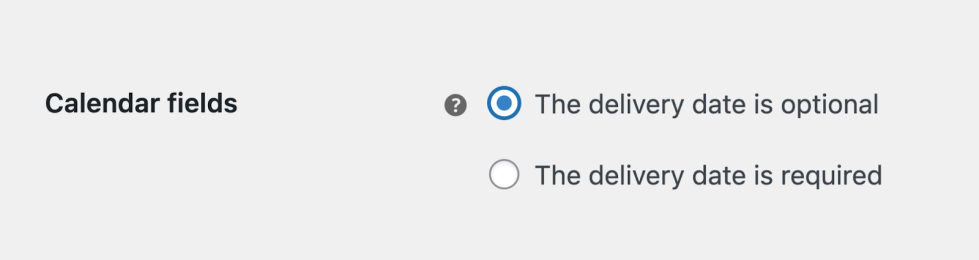
By default, the Time frame field is optional. That means, if the customer doesn’t select one, the Order Delivery extension assumes that the delivery time isn’t important to the customer, and this information won’t be saved with the order. It’s up to you to assign one manually if necessary.
Note: If a single delivery time frame is available, it will be assigned by default.
Otherwise, if the calendar fields are required, this field will be required as well, similar to the delivery date.
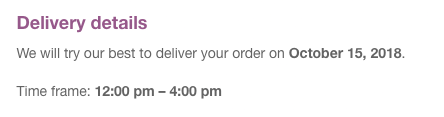
Delivery details
↑ Back to topThe delivery information will appear on every page related to the order, like the Thank you page, emails, etc.
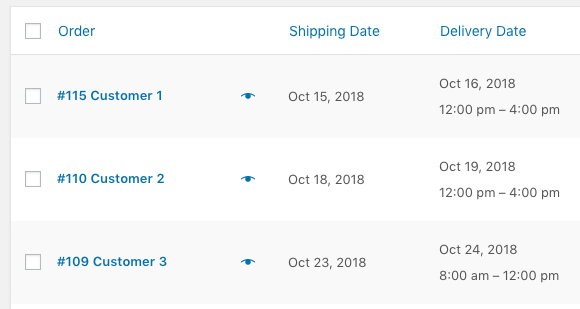
It will also appear in the order list, WooCommerce > Orders, as additional information under the Delivery Date column.
Edit order
↑ Back to topWhen editing an order in the admin dashboard, you will find a meta box in the right sidebar called Delivery details. Here you will find the delivery details for the current order. You can modify it as you wish.
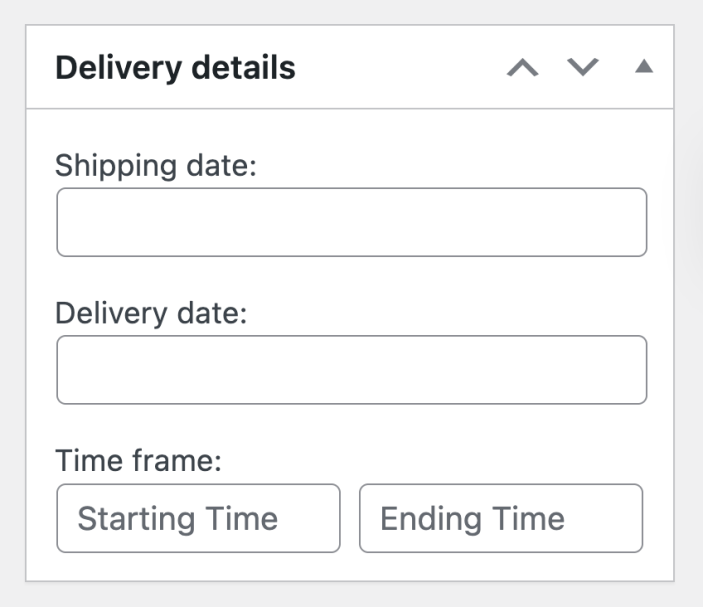
You will notice the Time frame has two input fields instead of a select field. This is due to the delivery time frame of the order being a copy of the selected time frame at the moment of the purchase. In this way, if you change the plugin configuration, the previous orders will keep their data unaltered.
There is no restriction on assigning hours at this point. Select what you want and notify the customer about the changes with a note.
Conclusion
↑ Back to topYou can now configure delivery time frames for your store so that you can better fine-tune your store’s order delivery availability. If you’d like more information on how to use our plugin, you can review the rest of our documentation.
Do you have any questions about Order Delivery for WooCommerce? Our support team would be happy to assist you with them.