Note:
This payment gateway has been merged into the CyberSource SA SOP payment gateway to support eChecks, and the eCheck gateway is no longer offered as a stand-alone plugin.
Overview
↑ Back to topCyberSource eCheck Silent Order Post (SOP) is an electronic check payment gateway that allows full customization of checkout, receipt and error pages, yet simplifies ACH compliance by posting checking data directly to secure CyberSource servers.
Installation
↑ Back to top- Download the extension from your dashboard
- Go to Plugins > Add New > Upload and select the ZIP file you just downloaded
- Click Install Now, and then Activate
- Click the Configure link and read the next section to learn how to setup and configure the plugin.
Setup and Configuration
↑ Back to topYou must have an active gateway account with CyberSource in order to make use of this plugin. Once you have contacted CyberSource and set up an account with Silent Order Post/Hosted Order Page enabled and eCheck processing, you will be able to configure the plugin.
Generate Shared Secret/Serial Number
You must have an active gateway account with CyberSource in order to make use of this plugin. Once you have contacted CyberSource and set up an account with Silent Order Post/Hosted Order Page and eCheck processing enabled, you will be able to configure the plugin. Note that if you are also using the CyberSource SOP credit card payment gateway, you only need to perform these steps once, you may use the same security keys for both plugins. To generate:
Step 1: Log in to CyberSource business center with the merchant id provided to you by CyberSource.
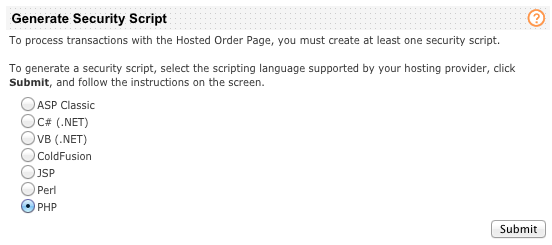
Step 2: Go to Tools & Settings > Hosted Order Page > Security. Under ‘Generate Security Script’ select PHP and click ‘Submit’:
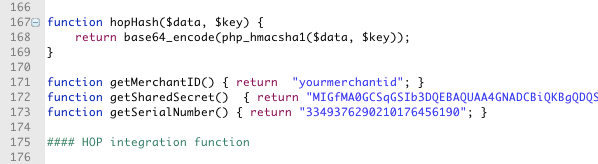
Step 3: Save, and then open the resulting file HOP.php, and search for ‘function getSharedSecret()‘ to get the value. Copy all the letters/numbers in between the double-quotes: this is your Shared Secret Key. Make sure to keep a copy of this key in a safe place as it can not be re-generated.
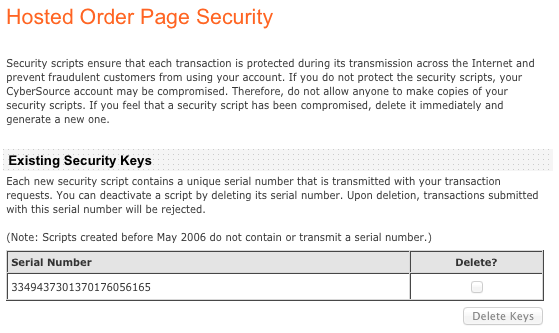
Step 4: The Hosted Order Page Security page will now contain a ‘Serial Number’, which you will use along with the shared secret to configure the plugin
Extension Settings
↑ Back to topTo configure the plugin, go to WooCommerce > Settings > Checkout. You should see “CyberSource eCheck” as an option at the top of the screen. Click CyberSource eCheck to see the settings:
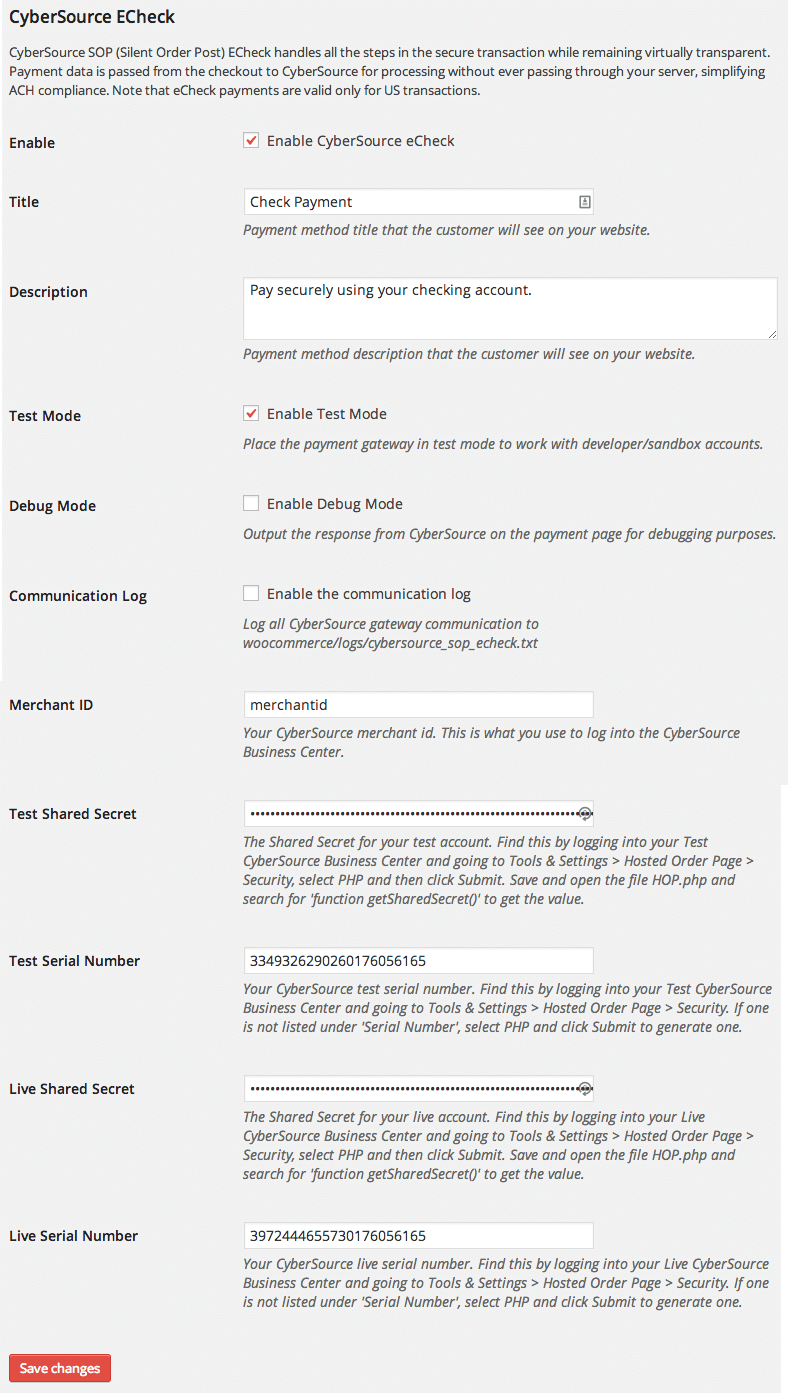
- Enable/Disable – Enable or disable the payment method.
- Title – Lets you set the title of the gateway shown on the checkout.
- Description – This is the text shown under the title during checkout. Limited HTML is allowed. If you enable test mode, this section will also display a notice along with test credit card numbers.
- Test Mode – Enable this if you are using a developer/test account from CyberSource. Be sure to disable this prior to going live.
- Debug Mode – Enable this to place the gateway in debug mode, which will output the full response from the CyberSource servers on the payment page, for debugging purposes. Be sure to disable this prior to going live. For best performance, please do not enable this unless you are having issues with the plugin.
- Communication Log – Enable this to log all CyberSource gateway communication to
woocommerce/logs/cybersource_sop_echeck.txtfor debugging purposes - Merchant ID – This is the id assigned to you by CyberSource, which you use to log into the Business Center.
- Test Shared Secret – Enter the full shared secret for the test account, which can be obtained by following the instructions above under “Generate Shared Secret/Serial Number”.
- Test Serial Number – Enter the serial number for the test account, which can be obtained by following the instructions above under “Generate Shared Secret/Serial Number”.
- Live Shared Secret – Enter the full shared secret for the live account, which can be obtained by following the instructions above under “Generate Shared Secret/Serial Number”.
- Live Serial Number – Enter the serial number for the live account, which can be obtained by following the instructions above under “Generate Shared Secret/Serial Number”.
Testing
↑ Back to topTo perform test transactions, first configure the plugin for test mode, as described above in Setup and Configuration.
Use the following information at checkout:
- Account Number – 4100
- Routing Number – 121042882
- Drivers License Number – any string, ie 1234
- Drivers License State – any state
View the full CyberSource testing documentation: Testing the Electronic Check Services
Troubleshooting
↑ Back to topTransaction Errors
If you get errors, enable debug mode, or view the order notes in the WooCommerce Order admin and compare the provided reason code against the CyberSource reason codes:
Note that sometimes more detailed error information/messages can be found by logging into your CyberSource Business Center and viewing transaction Reports.
Browser not Redirecting
↑ Back to topWhen functioning properly, this gateway should automatically redirect the client browser back to your server and display the “Thank You” or “Error” page, and update the order status. If this isn’t happening in your test or live transactions, follow the steps below to manually configure the redirect URLs in CyberSource. Note that if you are also using the CyberSource SOP credit card payment gateway, you only need to perform these steps once as they will apply to both gatewayws.
- Log in to your CyberSource Business Center
- Go to Tools & Settings > Hosted Order Page > Settings
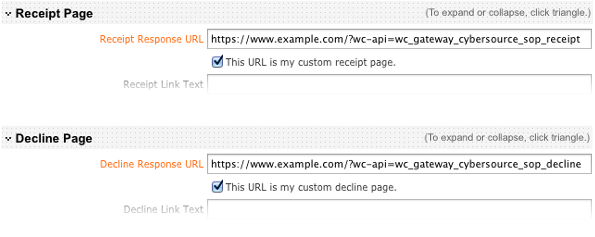
- Find the field named “Receipt Response URL” under the title “Receipt Page” and set the value to: https://<domain name>/?wc-api=wc_gateway_cybersource_sop_receipt where domain name is your site name
- Check the box next to “This URL is my custom receipt page.”
- Find the field named “Decline Response URL” under the title “Decline Page” and set the value to: https://<domain name>/?wc-api=wc_gateway_cybersource_sop_decline where domain name is your site name
- Check the box next to “This URL is my custom decline page.”
- Click “Update” to save the settings, and perform a transaction to verify the expected behavior
Pending Orders
↑ Back to topIf you see “pending” orders in your WooCommerce order admin, there are a couple of different things to consider and check. First, a bit of terminology, a “pending” order indicates an order that has been placed, but not paid for. WooCommerce redirect gateways, such as this CyberSource eCheck SOP, will create “pending” orders as part of the checkout process, then the customer is prompted for their checking account information. This means that if a customer chooses not to pay at that point, the order will be left in a “pending” state until/if they return to complete payment; this result is different from a standard “remote” payment gateway where the pending order record is not created as part of the checkout process. Still, a large number of pending orders with no “processing” or “completed” ones can indicate a configuration or communication issue with the gateway. To diagnose:
- Log into your WooCommerce admin and check for any order notes attached to the pending order in question
- If there are no notes, log into your CyberSource Business Center and check for completed or failed transactions. If you see records for the pending orders in your Business Center, this probably indicates an issue with the automatic redirection, and you should configure redirects manually as explained above.
- If you see no record of the transactions, ensure that both the WooCommerce CyberSource eCheck SOP plugin and CyberSource Business Center are properly configured
- Perform a test live transaction, to verify that the transaction completes and the redirect occurs
Frequently Asked Questions
↑ Back to topQ: I have an order that was processed twice by CyberSource with two distinct request IDs but the same order number, resulting in my customer being double-charged. What happened?
A: CyberSource SOP is a redirect gateway, which means that to pay the client browser posts the order and payment data directly to the CyberSource processing server, and then is redirected back to WooCommerce to the “thank you” page. From the “Thank You” page the customer has the ability to hit the “back” button or otherwise return to the CyberSource processing page through their browser history, and once there if they accept their browser’s warning about re-submitting the post data, the transaction will be re-posted and potentially be successfully run a second time, third time, etc. Unfortunately there’s currently no solution for this problem: it’s not possible to disable the “back” functionality of a client’s browser. Furthermore, CyberSource has no transaction validation checks to guard against this besides a simple check of the age of the transaction request, meaning that this problem can’t occur for an “older” transaction, but certainly can within the first few minutes of a transaction being placed.