The payment form that our Stripe extension generates and places on the checkout page is actually hosted on a separate PCI-compliant server. As such, applying styles to the payment form using custom CSS will not work as expected.
To modify the styling of the payment fields, you will need to insert some custom PHP code using your theme’s functions.php file or a plugin like Code Snippets.
NOTE: We are unable to provide support for customizations under our Support Policy. If you need to customize a snippet beyond what is shown on this page, we suggest Codeable or a Certified WooExpert.
Clearing transients
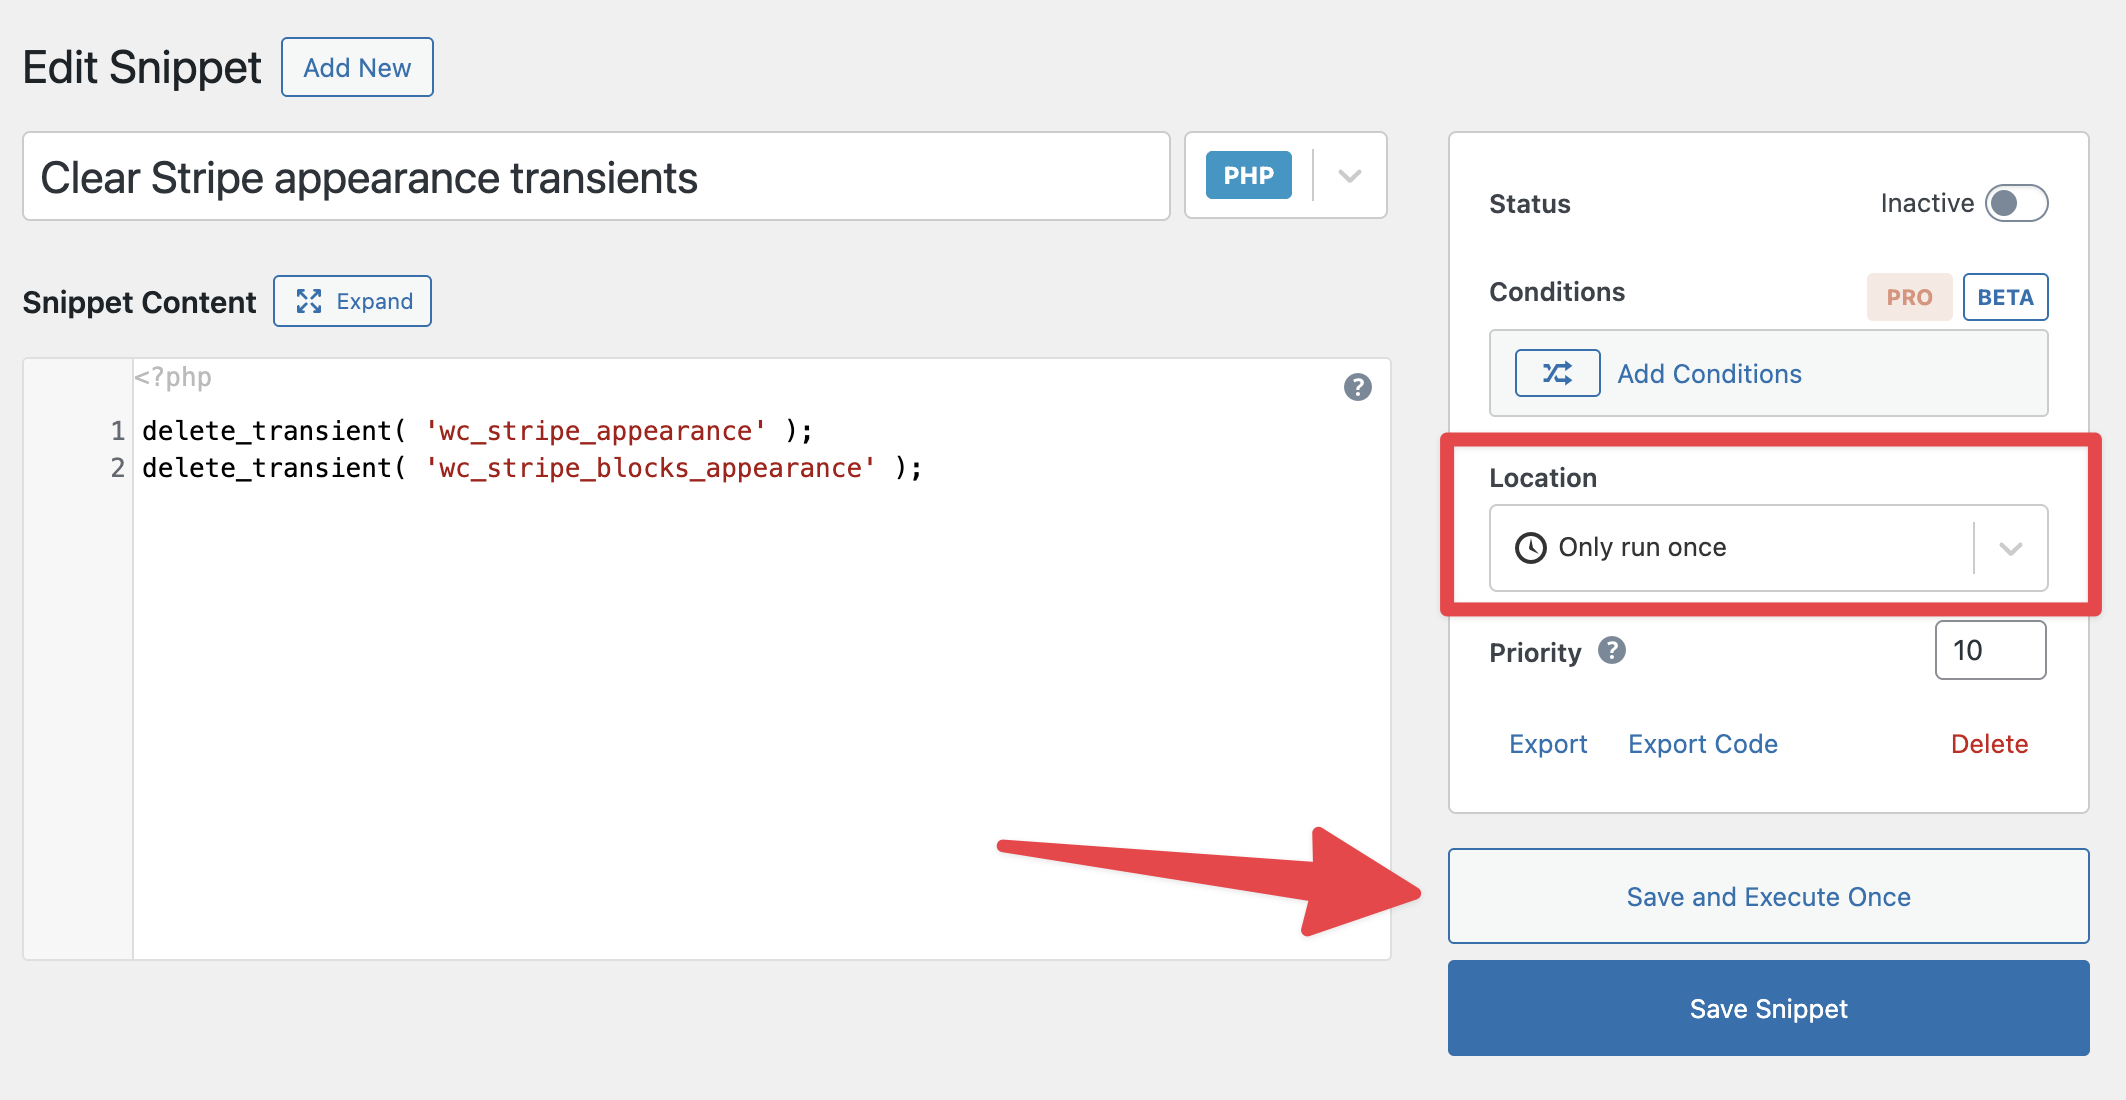
↑ Back to topOur Stripe extension uses transients to cache the payment form styles. For that reason, if you make adjustments to the styling, you will need to clear those transients afterward in order to actually see your changes on the frontend.
You can force the transients to clear by executing the following PHP:
// Shortcode checkout
delete_transient( 'wc_stripe_appearance' );

// Block checkout
delete_transient( 'wc_stripe_blocks_appearance' );
You can do this using the Code Snippets plugin like so:
The Elements Appearance API
↑ Back to topAs noted above, the form fields shown by our Stripe extension are actually embedded from Stripe’s servers. You’ll need to use their Elements Appearance API to alter the styling of the fields. This API is implemented via the wc_stripe_upe_params filter.
There are three levels of customization available:
- Themes: Three basic, pre-built styles that may suit your website immediately.
- Variables: Allows you to control the appearance of many components at once.
- Rules: These provide complete control over every individual component.
Themes are the easiest to implement in a brief snippet, but they may not match the exact look and feel of your site. To do that, you will likely need to use rules, although doing so involves a higher degree of complexity.
Themes
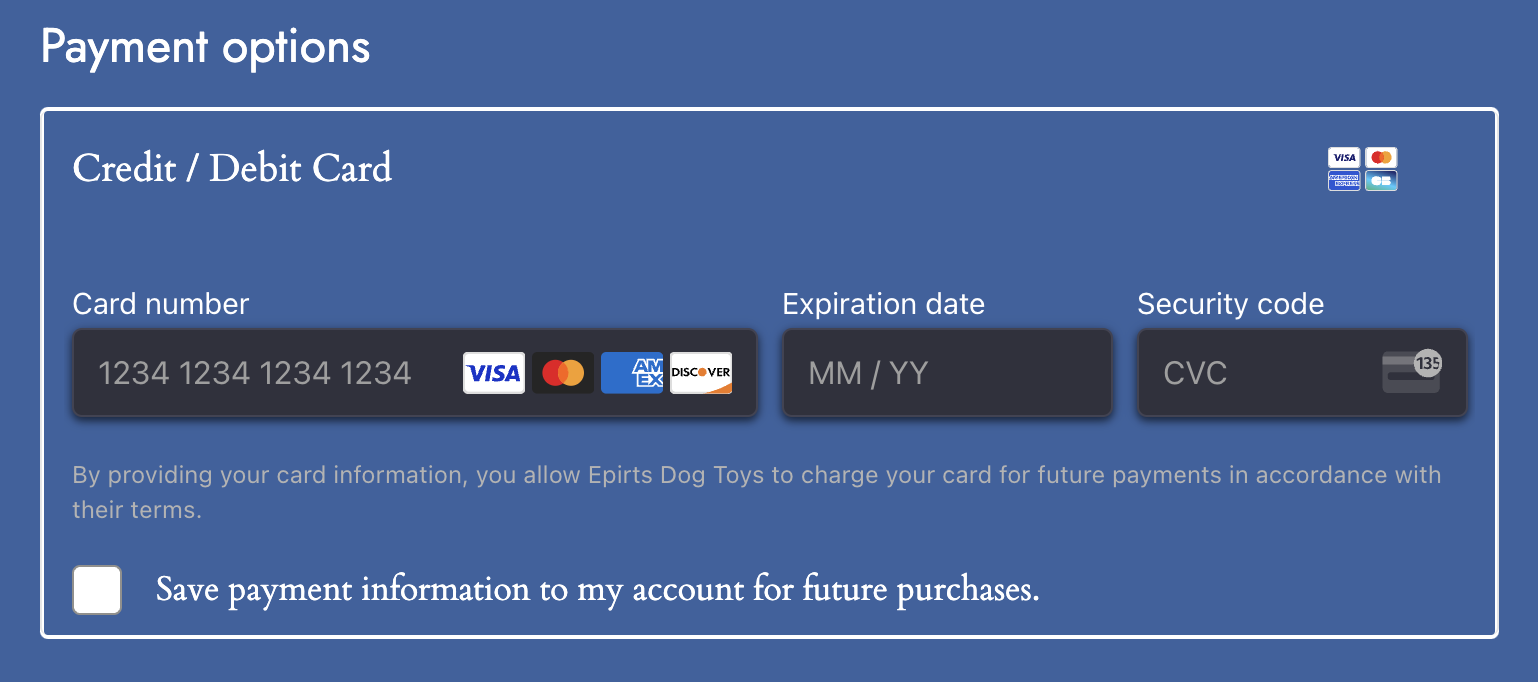
↑ Back to topStripe’s Elements Appearance API provides three pre-built themes as shown near the top of that page: stripe, night, and flat. These are good for quickly altering the appearance of the entire form.
For example, if your site has a darker background color, the night theme might work pretty well without further customization needed.
add_filter( 'wc_stripe_upe_params', function ( $stripe_params ) {

	// Affects block checkout
	$stripe_params['blocksAppearance'] = (object) [ 'theme' => 'night' ];

	// Affects shortcode checkout
	$stripe_params['appearance'] = (object) [ 'theme' => 'night'	];

	return $stripe_params;
} );
Here’s what that would look like:
Variables
↑ Back to topVariables affect the appearance of many components at once.
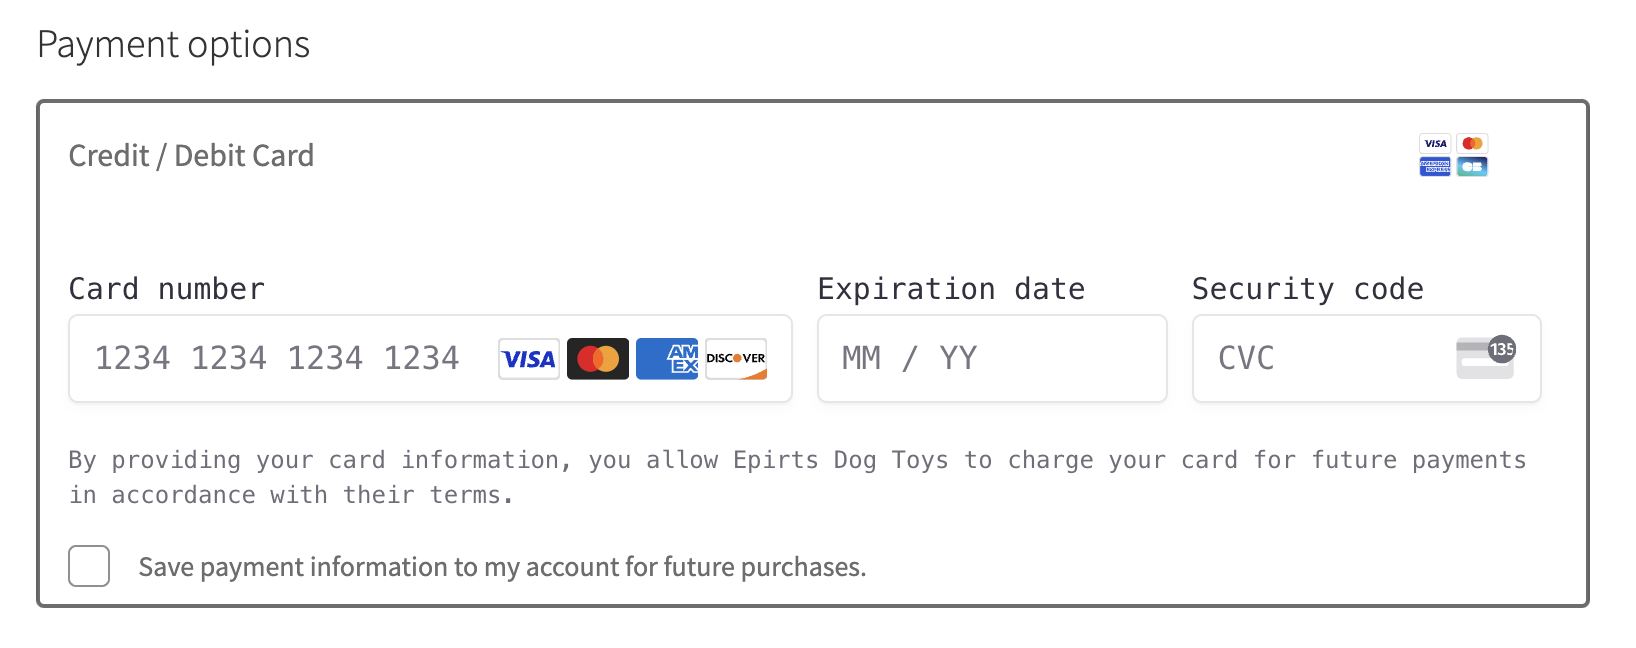
As an example, consider the following snippet, which changes all fonts to monospace.
add_filter( 'wc_stripe_upe_params', function ( $stripe_params ) {

	// Block checkout
	$stripe_params['blocksAppearance'] = (object) [
		'variables' => (object) [
			'fontFamily' => 'monospace',
		],
	];

	// Shortcode checkout
	$stripe_params['appearance'] = (object) [
		'variables' => (object) [
			'fontFamily' => 'monospace',
		],
	];

	return $stripe_params;
} );
The result is as you’d expect:
Rules
↑ Back to topThe rules method is very similar to CSS, in that you need to assign properties to certain selectors (form components, in this case) to achieve the desired outcome. This allows for very granular customization.
Once you have determined which component you want to modify, you can use the following snippet as a template for your own code. Simply replace COMPONENT, PROPERTY, and VALUE with your desired modifications.
add_filter( 'wc_stripe_upe_params', function ( $stripe_params ) {
	$stripe_params['blocksAppearance'] = (object) [
		'rules' => (object) [
			'.COMPONENT' => (object) [
				'PROPERTY' => 'VALUE',
			]
		],
	];
	return $stripe_params;
} );
For example, this snippet changes the color and weight of the label fonts:
add_filter( 'wc_stripe_upe_params', function ( $stripe_params ) {

	// Block checkout only
	$stripe_params['blocksAppearance'] = (object) [
		'rules' => (object) [
			'.Label' => (object) [
				'fontWeight' => 'bold',
				'color' => 'blue'
			]
		],
	];

	return $stripe_params;
} );
The result is like so:

You can expand on that by using the states, pseudo-classes, and pseudo-elements shown in Stripe’s documentation. They also have a list of available properties.
For example, to change the border of an invalid input, you could use this:
add_filter( 'wc_stripe_upe_params', function ( $stripe_params ) {
	$stripe_params['blocksAppearance'] = (object) [
		'rules' => (object) [
			'.Input--invalid' => (object) [
				'border' => 'thick double',			]
		],
	];
	return $stripe_params;
} );
The result being:

Other options
↑ Back to topThere are two additional options you can set that affect the behavior of the form fields: labels and disableAnimations.
labels: eitheraboveorfloatingaboveshows the field labels (e.g. “Card number”) above the fieldfloatingshows the field labels inside the field itself
disableAnimations: eithertrueorfalsefalsedoes exactly what it sounds like: turns off instances of animated movement in the payment form.