
Offer Subscriptions to Mix and Match Products
↑ Back to topTo offer your mix and match product as a subscription, you will need:
WooCommerce Subscriptions – 9.0.0 or newer
Mix and Match Products – 2.9.0 or newer
WooCommerce Subscriptions lets you attach subscription plans to a Mix and Match product, so customers can subscribe to a build-your-own assortment. You can also let customers choose between a one-time purchase and a subscription.
Subscriptions are configured on the Subscriptions tab of the Product data panel. When a customer subscribes, the container and all of its items are billed together on the schedule you set.
Set up a Mix and Match subscription
↑ Back to topThis is the basic setup. Each customization further down builds on these steps.
- Open the Mix and Match product you want to sell on subscription. (If you have not created one yet, see How to Set Up Your First Mix and Match Product.)
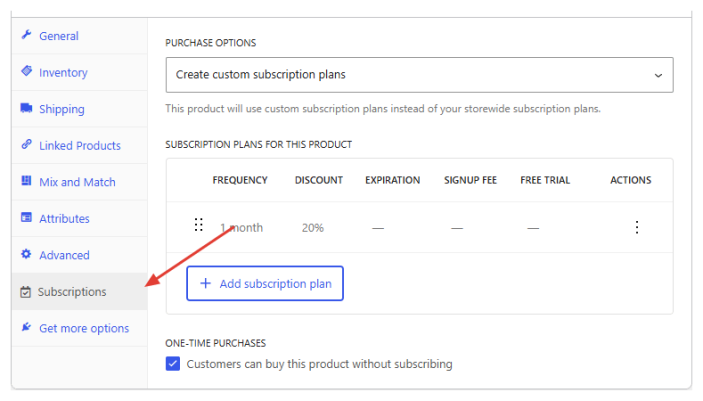
- In the Product data panel, click the Subscriptions tab.
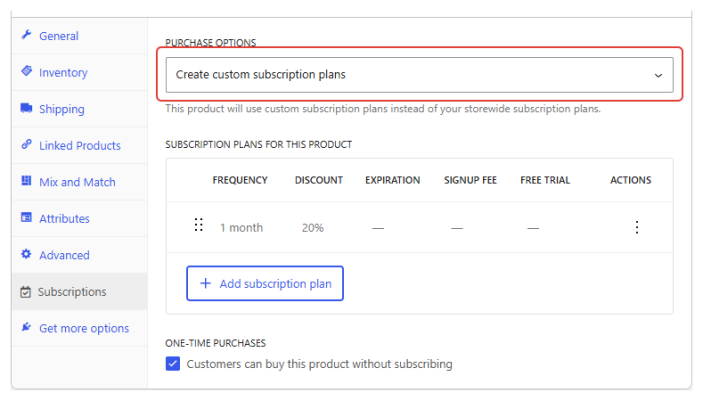
- Set Purchase options to Create custom subscription plans.
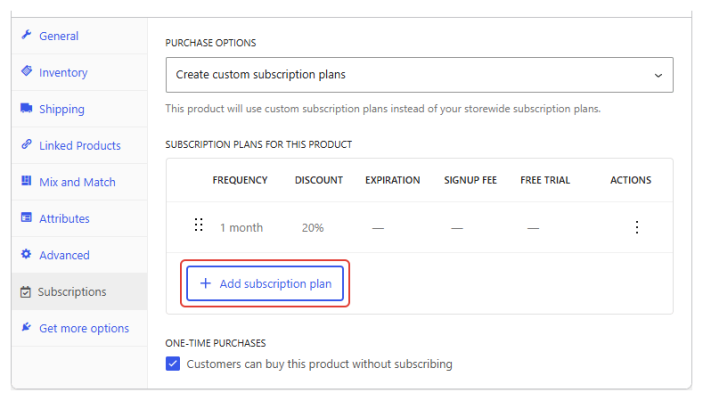
- Click Add subscription plan.
- Set the Frequency and period — for example,
1and Month for a monthly subscription.
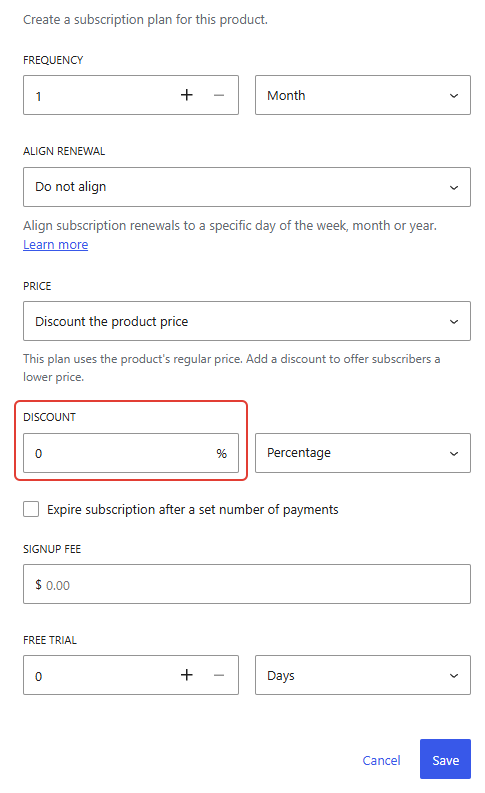
- Click Save to add the plan.
- Click Update to save the product.
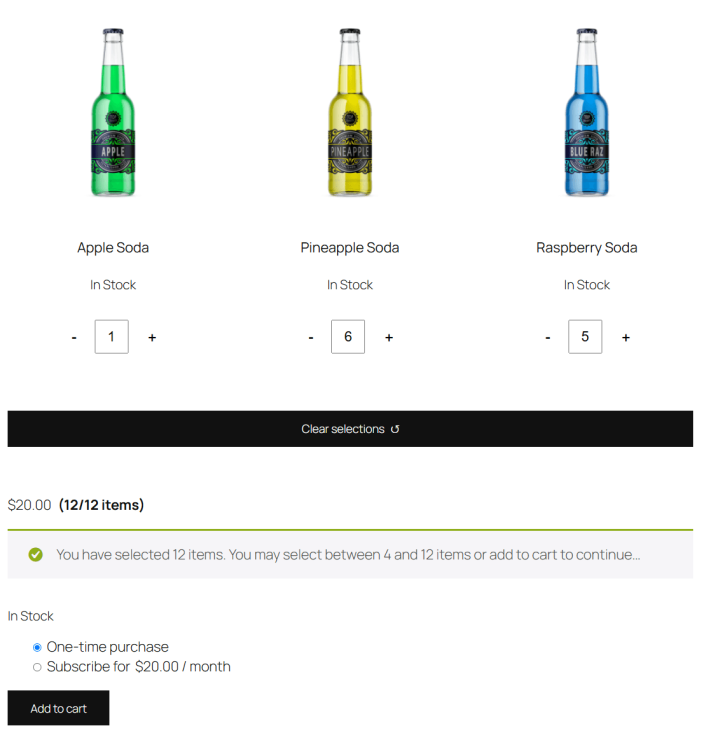
That is the whole setup. On the product page, the customer builds their assortment and can subscribe to it on the schedule you chose:
Customizations
↑ Back to topThe following options each build on the basic setup above.
Offer a discount
↑ Back to topOffering the subscription at a discount encourages customers to subscribe instead of buying once. A one-time purchase is charged the full price, so a lower recurring price gives shoppers a clear reason to choose the subscription — and gives you steady, repeat revenue.
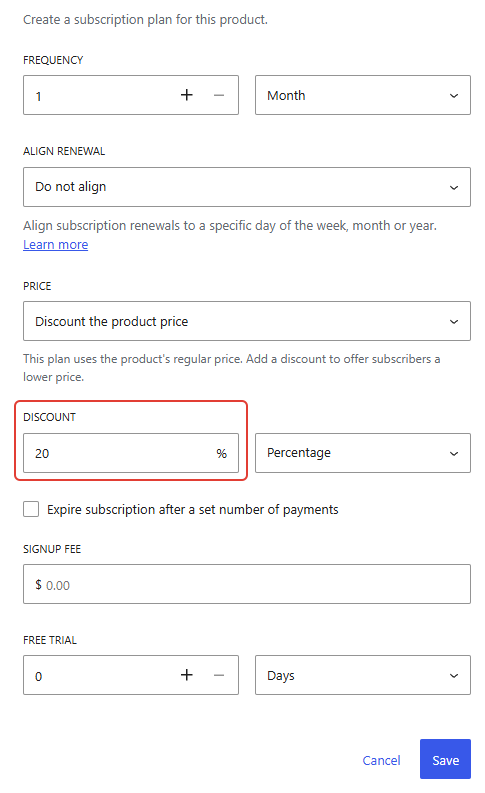
At step 6, enter a Discount — for example, 20 for 20% off. The recurring price is your product’s price minus the discount.
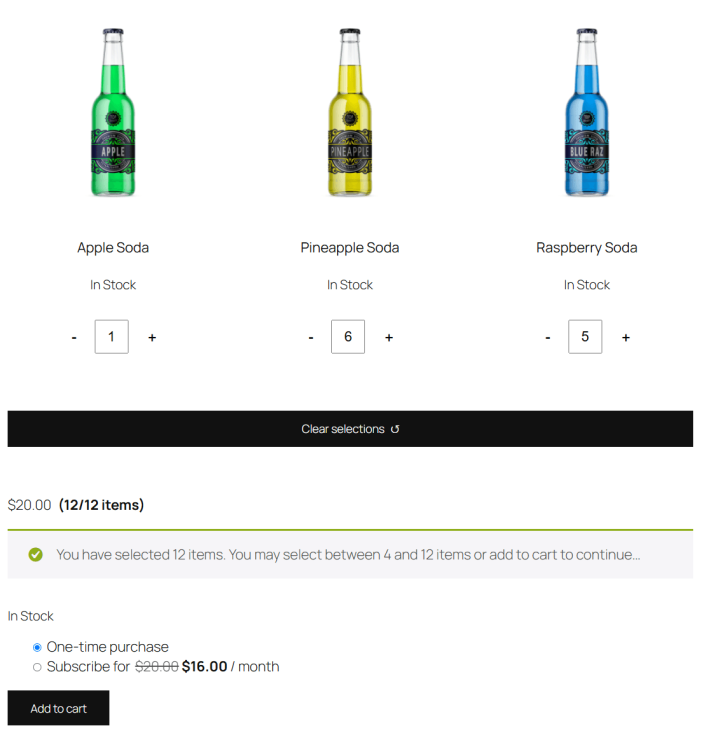
On the product page, the customer builds their assortment and then chooses between a one-time purchase and the subscription. The discount is shown right on the subscribe option — the full price struck through next to the lower recurring price — so the saving is clear:
Charge a custom price
↑ Back to topA custom price sets the subscription’s price directly, rather than as a percentage off. What it produces depends on how the Mix and Match container is priced:
- On a fixed-price container, the custom price is the flat subscription price — one set amount per period, no matter which items the customer chooses. This is the setup for a flat-rate subscription box, and keeps your recurring revenue predictable.
- On a container priced per item, the custom price sets the subscription’s base price, and the per-item charges are still added on top. The subscription total is your custom base plus the items the customer selects.
- Click Save, then Update the product.
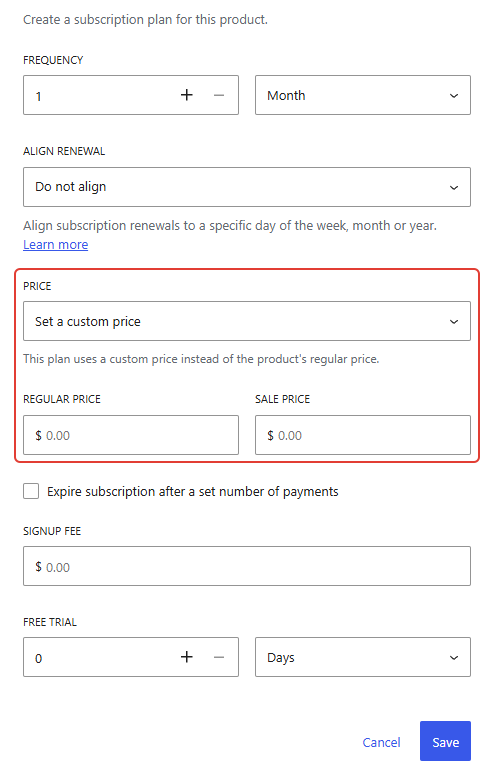
- In the plan dialog, set Price to Set a custom price.
- Enter a Regular Price, and optionally a Sale Price.
On the product page, the one-time and subscription prices appear together, matching whichever pricing your container uses.
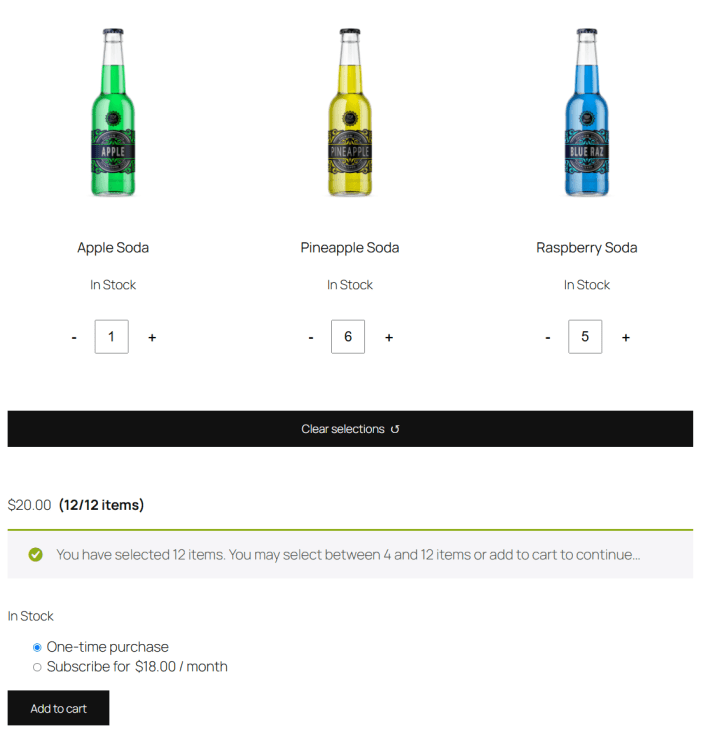
On a fixed-price container, the subscription is your flat custom price — $18.00 per month here, against a $20.00 one-time price:
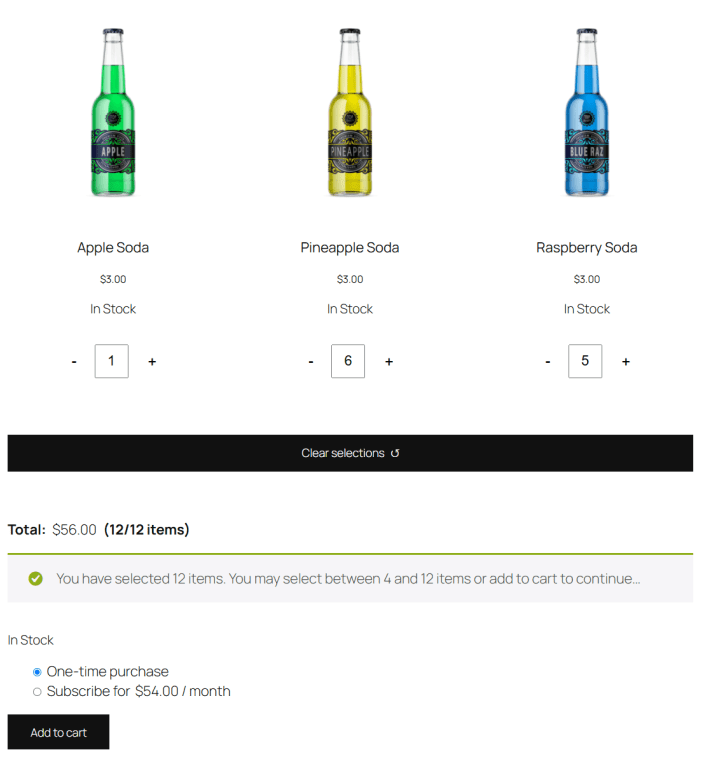
On a per-item container, each item shows its own price and those charges are added to your custom base, so the subscription is not flat. The same selection is $56.00 one-time and $54.00 per month on subscription — your $18.00 base plus $36.00 of items:
Let customers choose one-time or subscription
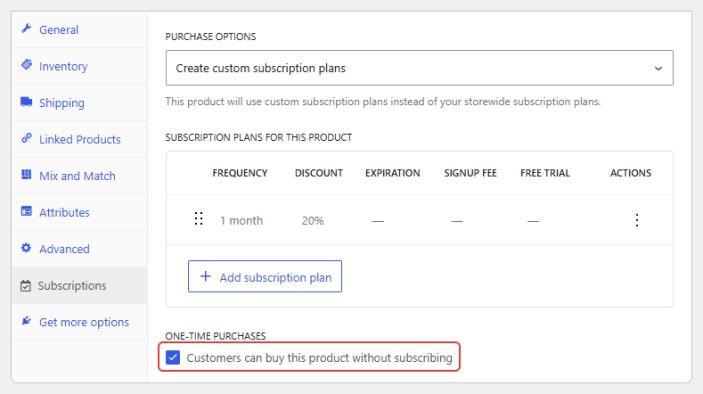
↑ Back to top- Under One-time purchases, check Customers can buy this product without subscribing.
- Click Update the product.
On the product page the customer chooses between a one-time purchase and your plan(s). Uncheck the box to sell the product on subscription only.
Offer several plans
↑ Back to topOffering more than one plan lets customers subscribe on the schedule that suits them — weekly for some, monthly for others — so you capture shoppers who might not commit to a single option. You can also set a different discount on each plan to steer the choice, for example a bigger saving on the plan you would rather sell.
Click Add subscription plan once for each option — for example, a weekly plan and a monthly plan, each with its own discount or price. Drag the handle on the left of a plan row to reorder them.
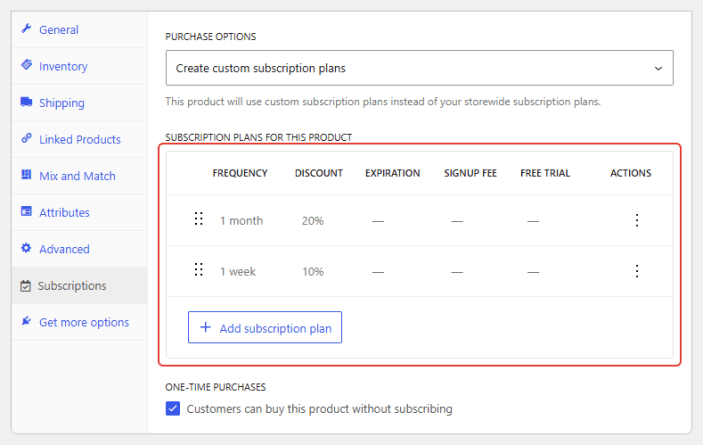
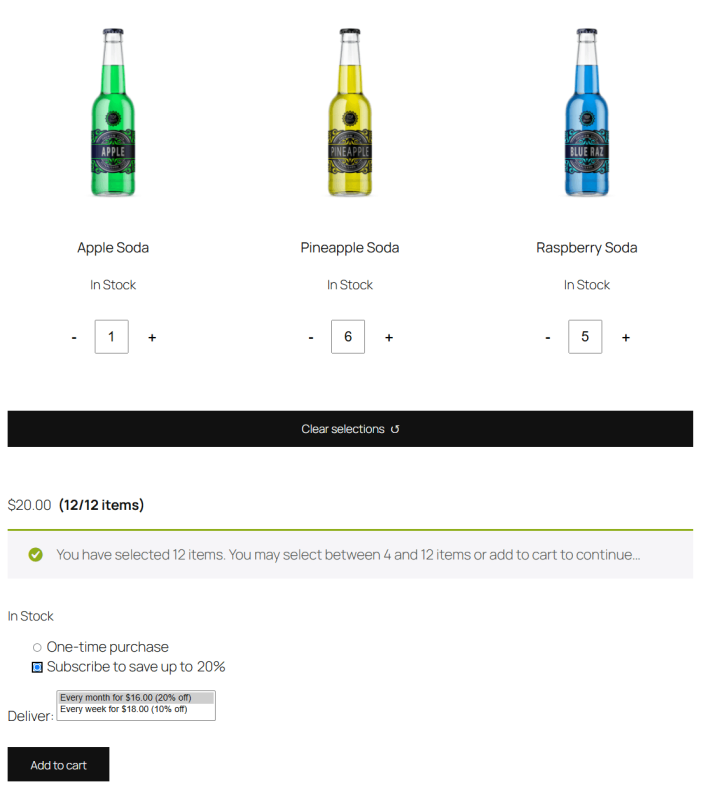
On the product page, the customer selects Subscribe and then picks a plan from the Deliver menu — here, monthly at 20% off or weekly at 10% off:
Use storewide plans
↑ Back to topIf you use the same subscription discounts across your catalog — say, monthly at 15% off on everything — storewide plans let you set them up once and apply them to any product, instead of recreating the same plan on each one. Change a plan in one place and every product using it updates with it.
- Set Purchase options to Use storewide subscription plans.
- Choose Use all storewide subscription plans (new plans are added automatically) or Select storewide subscription plans to pick specific ones.
- Click Update the product.
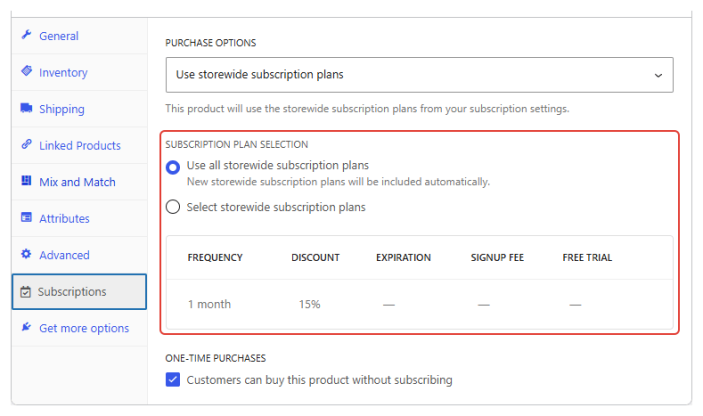
Storewide plans offer a discount off the product’s price — they do not set a custom price. The discount comes off the whole container price, so a 15%-off storewide plan takes 15% off a fixed-price box and 15% off a per-item box’s built total alike.
Storewide plans are created in WooCommerce → Settings → Subscriptions, under Storewide subscription plans. Create them there first if you have not already.
Add a sign-up fee, free trial, or expiration
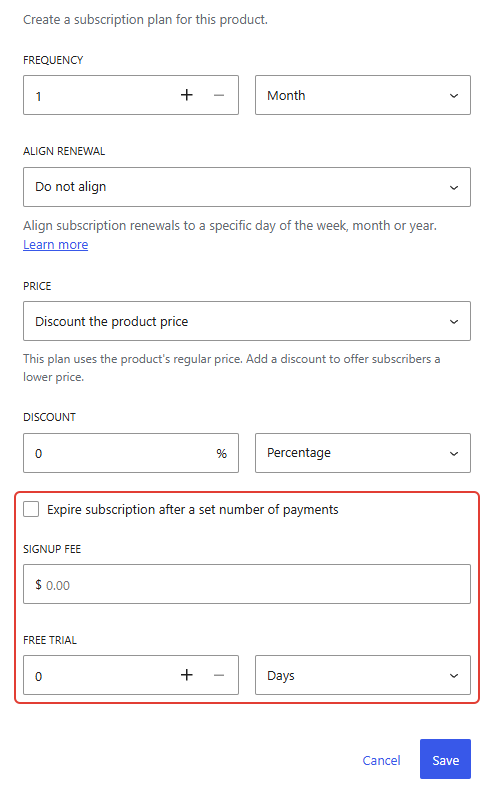
↑ Back to topWhen adding or editing a plan, you can also set:
- Sign-up fee — a one-time charge added to the first payment.
- Free trial — a period (days, weeks, or months) before billing begins.
- Expiration — end the subscription automatically after a set number of payments, for a limited-run subscription.
- Align renewal — line up all renewals on a chosen day of the month instead of the sign-up date.
Let customers change their selection
↑ Back to topSubscription switching lets a customer change the contents of an active Mix and Match subscription.
- Go to WooCommerce → Settings → Subscriptions.
- Under Allow Switching, enable Between Mix and Match Configurations.

Once enabled, when the customer views the subscription in My Account → Subscriptions, an Update selections button appears in the Mix and Match product’s row (for an editable subscription — that is, one that is active and paid through a gateway that supports switching). This button text is configurable at WooCommerce → Settings → Subscriptions → Mix and Match Configuration Switch Button Text.
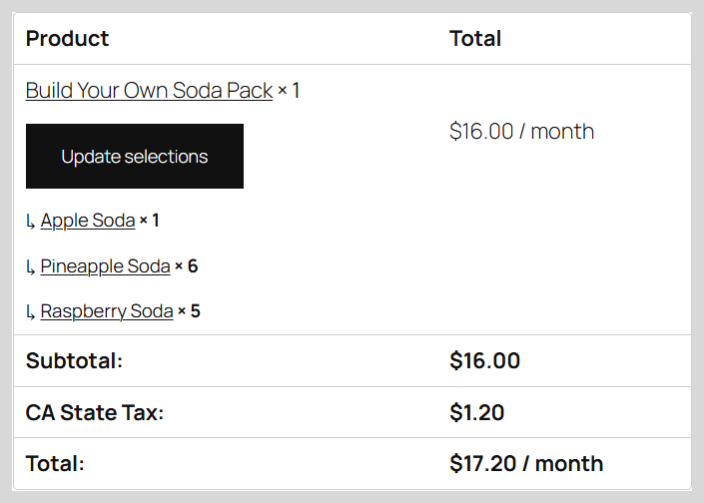
Clicking Update selections takes the customer back to the Mix and Match product’s page, where they can edit their configuration. They then go back through the cart/checkout process, as required by WooCommerce Subscriptions.