Google For WooCommerce attribute mapping functionality is designed to map existing WooCommerce product attributes to Google Merchant Center feed data. It allows merchants to create attribute rules at the category level and systematically apply them to Google Merchant Center product data that has no attribute values defined — thereby assigning Google product attributes to all products in the specified category.
With attribute mapping, you can:
- Map existing WooCommerce product attributes to Google product attributes.
- Map from available values (Adult, Age Group, Condition, Gender, Is Bundle, Size System, Size Type).
- Map items based on fixed values.

See common attribute mapping use cases.
Please note that individual product attributes assigned on the Google For WooCommerce tab of the product editing screen override global attributes rules. This means that global attribute rules won’t apply to fields with individual attributes assigned.
Available attributes
↑ Back to topAttributes currently available in Google For WooCommerce:
- Adult
- Age Group
- Brand
- Color
- Condition
- Gender
- GTIN
- Is Bundle
- Material
- MPN
- Multipack
- Pattern
- Size
- Size System
- Size Type
How to map existing WooCommerce product attributes to Google product attributes
↑ Back to topExisting global attributes can be mapped to Google product data attributes. Please note that individual product attributes created on the product page are not supported; these need to be created as global attributes.
To map an existing attribute to Google:
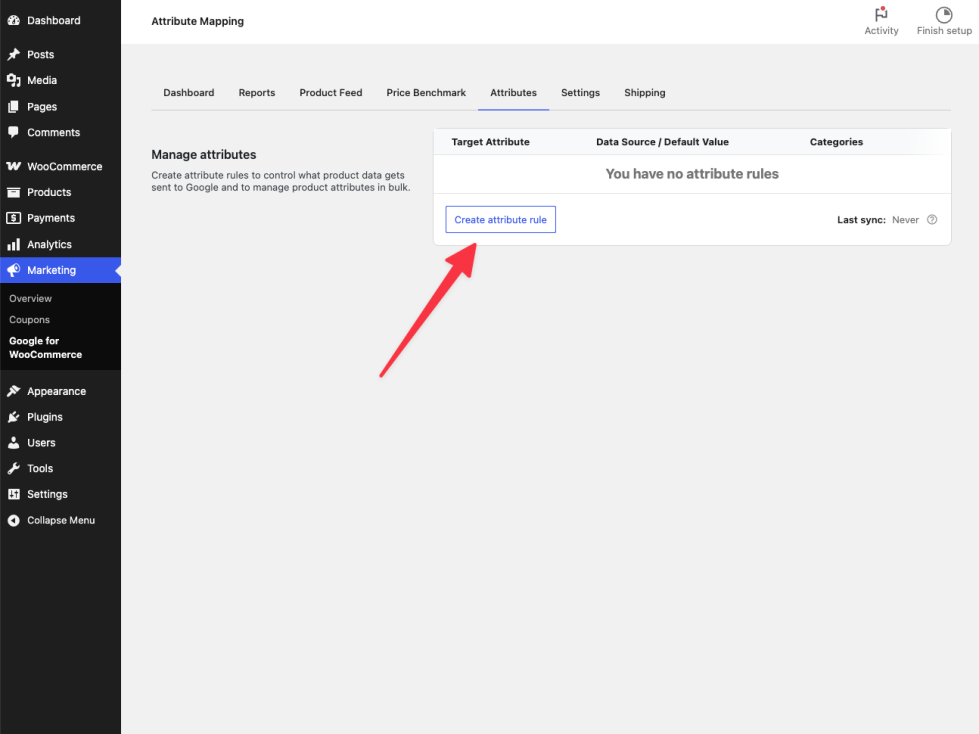
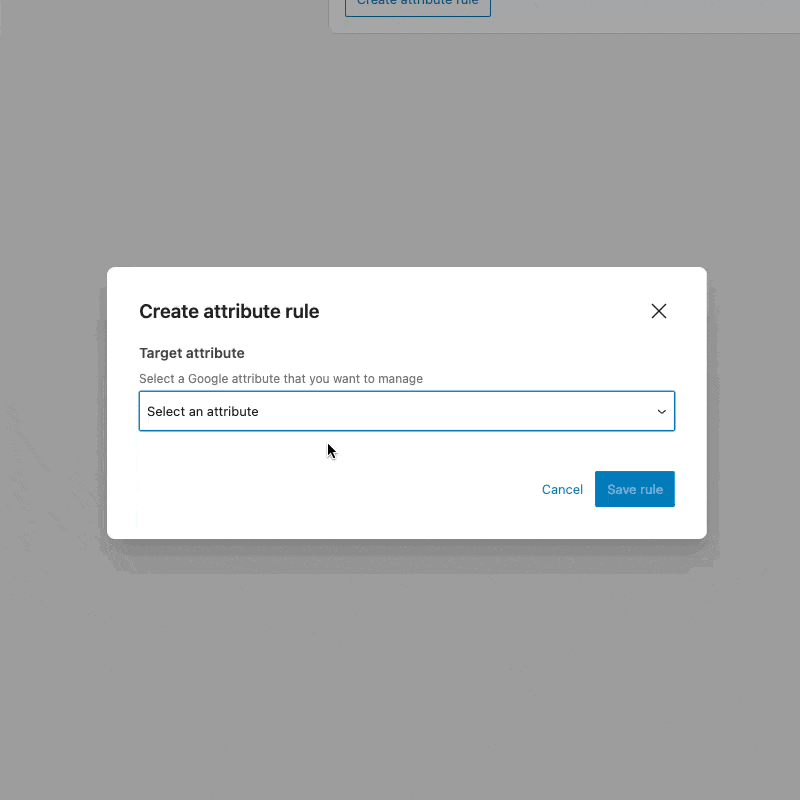
- In WP Admin, navigate to Marketing > Google For WooCommerce and click the Attributes tab.
- Click the Create attribute rule button.
- Select a Google attribute to manage (e.g. Color).
- Click Use value from an existing product field and select an existing attribute (e.g. Product Color).
- Select the category you want this rule to apply to:
- Apply to All categories: used when the attribute selected above should be populated for all items that have blank attributes.
- Apply to All categories EXCEPT: used to provide your attribute above to every category that is not selected.
- Apply ONLY to this category: used to assign the provided attribute to this specific category.
- To pick a category, select Apply to All categories EXCEPT or Apply ONLY to this category, click the search box, and choose your category.
- Click Save rule.
How to map items based on fixed values (Set a fixed value)
↑ Back to topIf all of your products have the same value for an attribute, you can create a fixed value and assign it to all Google product data. Be mindful of the attribute value requirements and case sensitivity.
To assign a fixed value to an attribute:
- In WP Admin, navigate to Marketing > Google For WooCommerce and click the Attributes tab.
- Click the Create attribute rule button.
- Select the target attribute (e.g. Brand) and input the fixed value.
- Next, select the category you want this rule to apply to:
- Apply to All categories: used when the attribute selected above should be populated for all items that have blank attributes.
- Apply to All categories EXCEPT: used to provide your attribute above to every category that is not selected.
- Apply ONLY to this category: used to assign the provided attribute to this specific category.
- To pick a category, select Apply to All categories EXCEPT or Apply ONLY to this category, click the search box, and choose your category.
- Click Save rule.
How to map items based on available values (Set default value)
↑ Back to topThis option is given when Google requires specifically listed values (i.e. ENUMs) for a field in Merchant Center.
To set a default value for an attribute:
- In WP Admin, navigate to Marketing > Google For WooCommerce and click the Attributes tab.
- Click the Create attribute rule button.
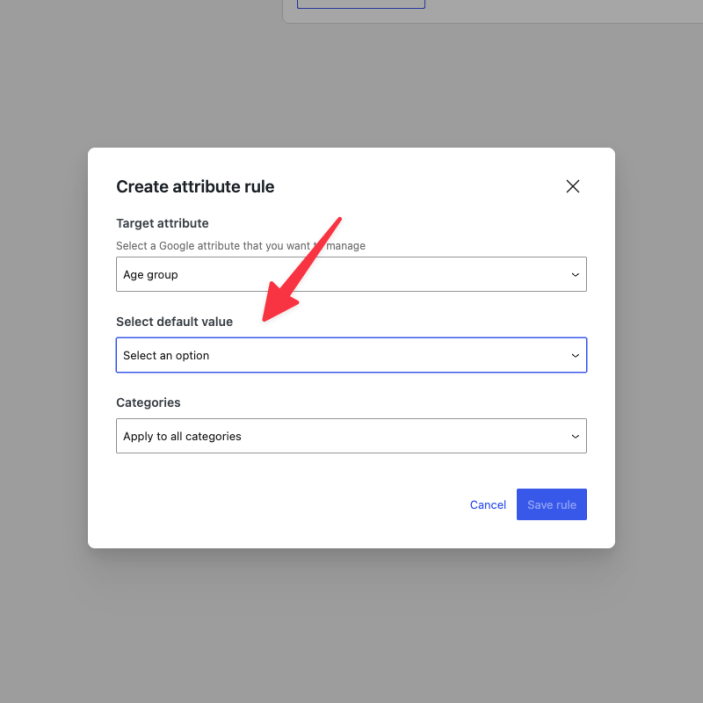
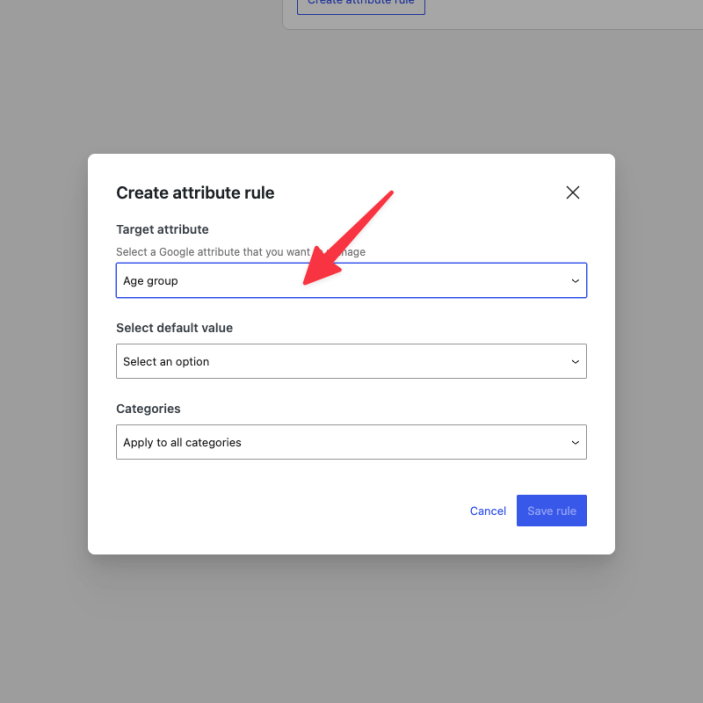
- Select the target attribute (e.g. Age group).
- Select a default value from the dropdown; this value sets the demographic your product is designed for. For example, the Age group attribute’s options are:
- Newborn: 0-3 months old. Sizes are often identified by the age range in months (0-3) or simply newborn.
- Infant: sizes are often identified by the age range in months (3-12).
- Toddler: sizes are often identified by the age range in months (12-24) or years.
- Kids: sizes are often identified by the age range in years (5-13).
- Adult: all sizes within this age group have been manufactured to fit an adult or teen.
- Next, select the category you want this rule to apply to:
- Apply to All categories: used when the attribute selected above should be populated for all items that have blank attributes.
- Apply to All categories EXCEPT: used to provide your attribute above to every category that is not selected.
- Apply ONLY to this category: used to assign the provided attribute to just this specific category.
- To pick a category, select Apply to All categories EXCEPT or Apply ONLY to this category, click the search box, and choose your category.
- Click Save rule.
How to Map Age Group
↑ Back to topSet the demographic that your product is designed for.
- In WP Admin, navigate to Marketing > Google For WooCommerce and click the Attributes tab.
- Click the Create attribute rule button.
- Select Age Group as the target attribute.
- Select a default value from the dropdown; this value sets the demographic your product is intended for. If your product is designed for all age groups, select Adult.
- Newborn: 0-3 months old. Sizes are often identified by the age range in months (0-3) or simply newborn.
- Infant: sizes are often identified by the age range in months (3-12).
- Toddler: sizes are often identified by the age range in months (12-24) or years.
- Kids: sizes are often identified by the age range in years (5-13).
- Adult: all sizes within this age group have been manufactured to fit an adult or teen.
- Next, select the category you want the rule to apply to.
- Apply to All categories: used when the attribute selected above should be populated for all items that have blank attributes.
- Apply to All categories EXCEPT: used to provide your attribute above to every category that is not selected.
- Apply ONLY to this category: used to assign the provided attribute to just this specific category.
- To pick a category, select Apply to All categories EXCEPT or Apply ONLY to this category, click the search box, and choose your category.

- Click Save rule.
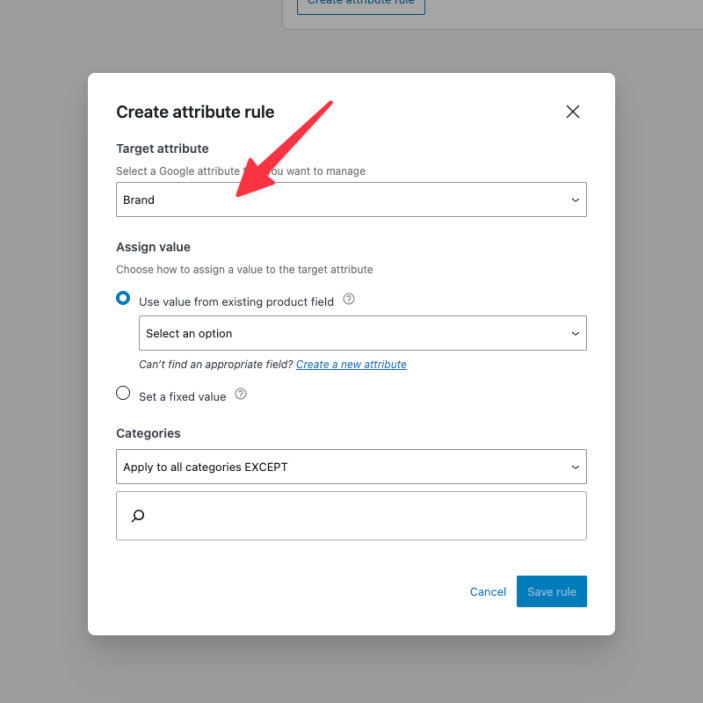
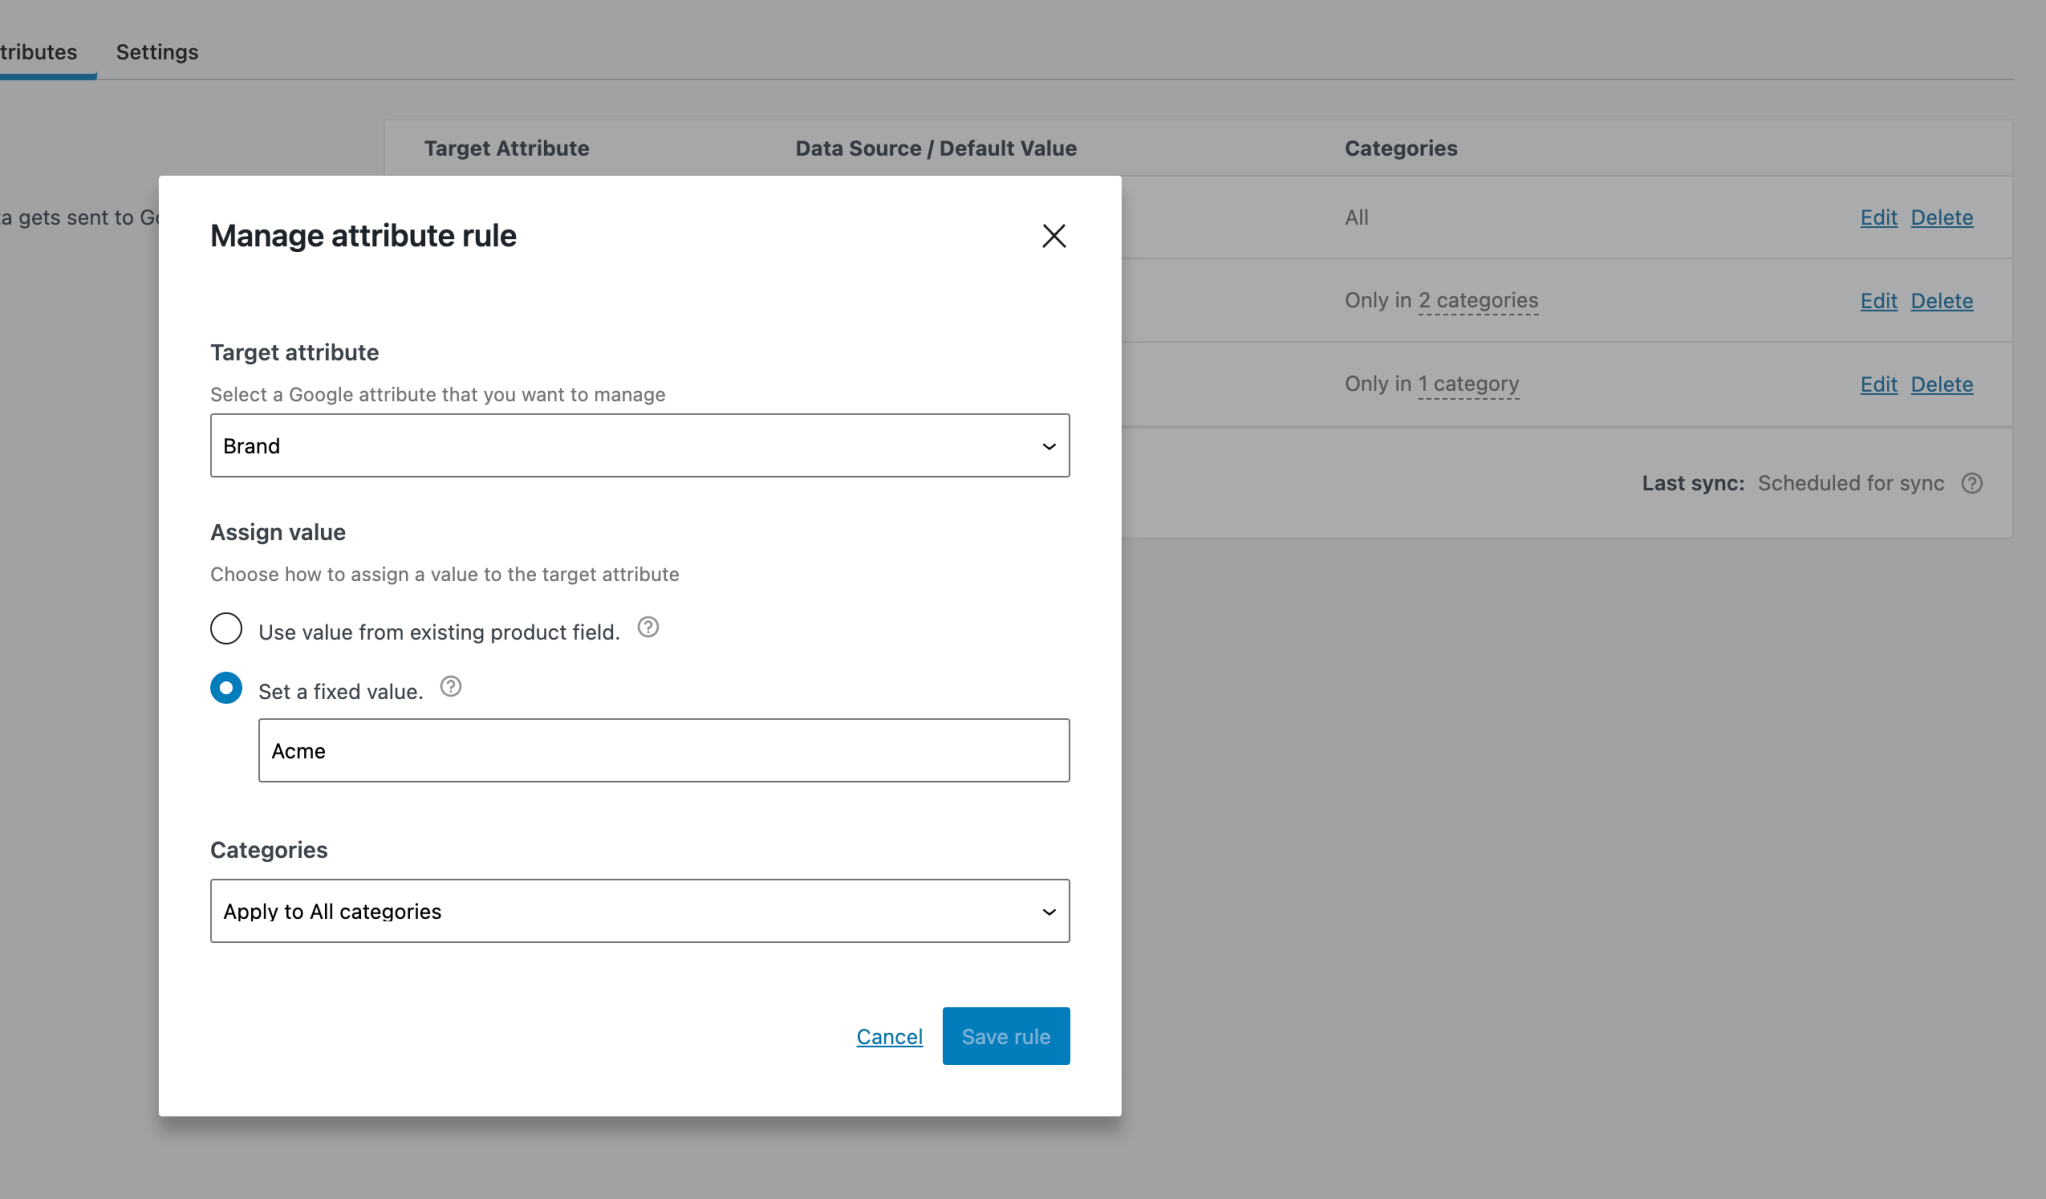
How to Map Brand
↑ Back to topThe Brand attribute is used to identify the brand name of a product to the customer. If you manufacture your own goods or have your own private label, insert your Store Name as the Brand. If you sell products from other manufacturers, enter the appropriate brand name for each item.
- In WP Admin, navigate to Marketing > Google For WooCommerce and click the Attributes tab.
- Click the Create attribute rule button.
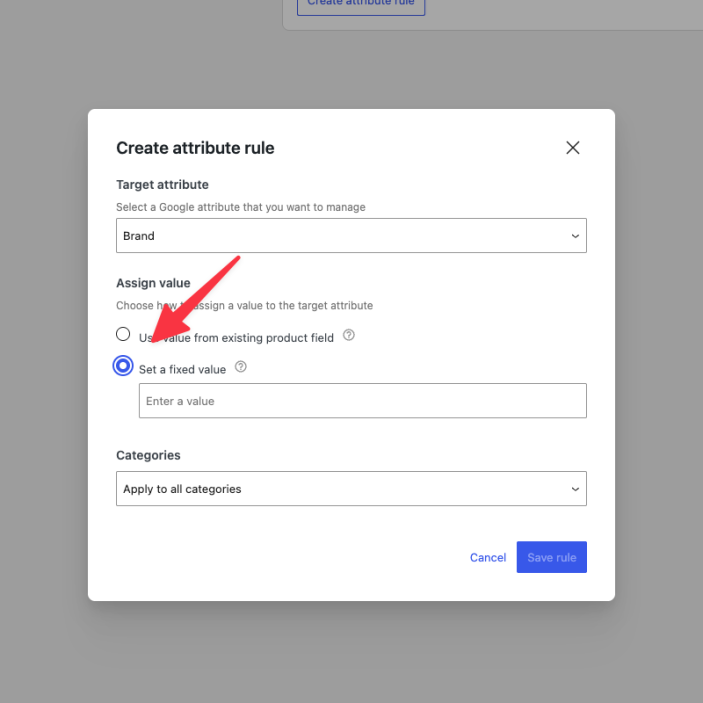
- Select Brand as the target attribute.
- Next, choose how you’d like to assign a value to this attribute:
- Use value from existing product field. If you have created product brands using WooCommerce Brand, you can map the brand attribute by selecting Brands under Taxonomies.
- Set a fixed value. This allows you to set a fixed value for products in a specific category or all products.
If you want to use a value from an existing product field, skip ahead to step 6 below. If you’d prefer to set a fixed value, continue to step 5.
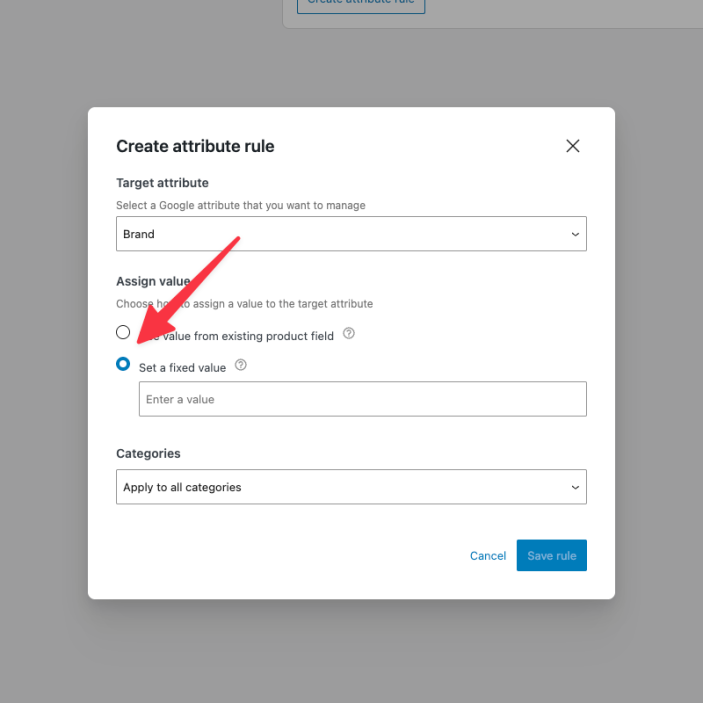
- Click Set a fixed value and enter the Brand in the field. If you’re selling custom products, enter your store name or domain name without
httpsandwww(e.g.example.com). - Select the category you want the rule to apply to:
- Apply to All categories: used when the attribute selected above should be populated for all items that have blank attributes.
- Apply to All categories EXCEPT: used to provide your attribute above to every category that is not selected.
- Apply ONLY to this category: used to assign the provided attribute to just this specific category.
- To pick a category, select Apply to All categories EXCEPT or Apply ONLY to this category, click the search box, and choose your category.
- Click Save rule.
How to Map Color
↑ Back to topThe color value will be used to help users identify the primary color of an item for filtering purposes. You may enter your proprietary color in this field or use standardized colors for example (Blue, Red, Yellow Green). If your item contains two colors, put the most dominant color first.
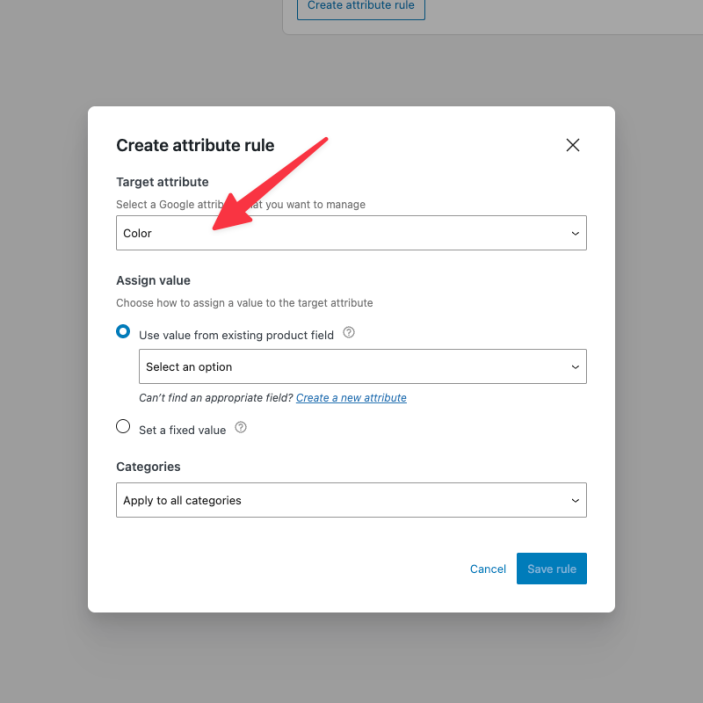
- In WP Admin, navigate to Marketing > Google For WooCommerce and click the Attributes tab.
- Click the Create attribute rule button.
- Select Color.
- Select an option:
- Use value from existing product field – This option will allow you to map color to WooCommerce global color attributes by selecting “Product Color” under “Global Attributes”.
- Set a fixed value – If all of your items have the same color, you can create your color at a bulk level by selecting “Set a fixed value” and inputting your color.
- Select the category to apply the rule to:
- Apply to All categories: used when the attribute selected above should be populated for all items that have blank attributes.
- Apply to All categories EXCEPT: used to provide your attribute above to every category that is not selected.
- Apply ONLY to this category: used to assign the provided attribute to just this specific category.
- Click Save rule.
How to Map Gender
↑ Back to topThe following value sets the gender your product is intended for. If your product is designed for all, select Unisex.
- In WP Admin, navigate to Marketing > Google For WooCommerce and click the Attributes tab.
- Click the Create attribute rule button.
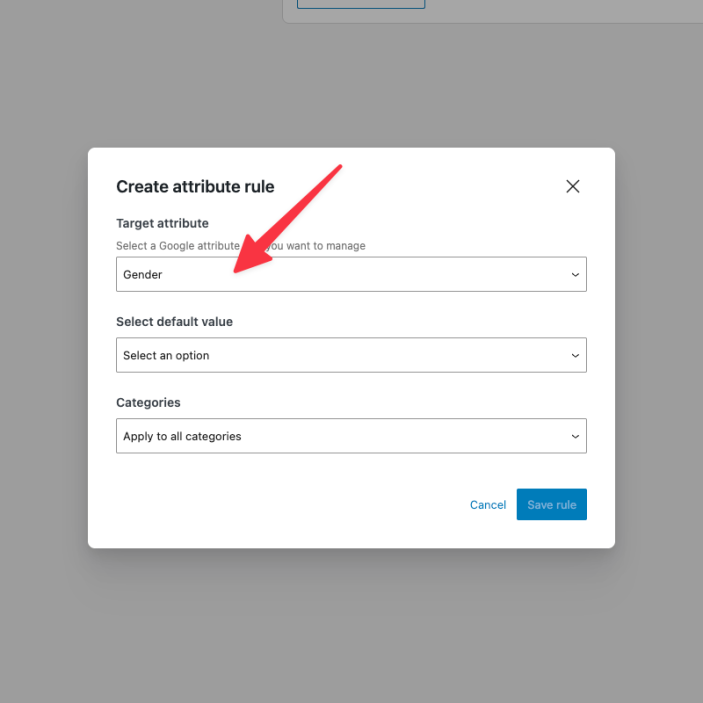
- Select Gender
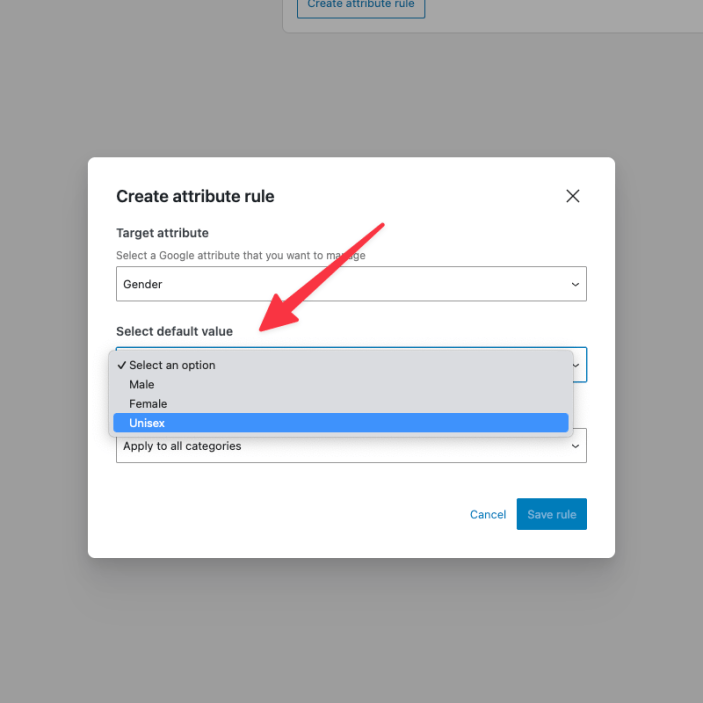
- Select an attribute to indicate the gender your product is designed for.
- Male
- Female
- Unisex
- Next, select the category you want the rule to apply to.
- Apply to All categories: used when the attribute selected above should be populated for all items that have blank attributes.
- Apply to All categories EXCEPT: used to provide your attribute above to every category that is not selected.
- Apply ONLY to this category: used to assign the provided attribute to just this specific category.
- Click Save Rule.
How to Map MPN
↑ Back to topAn MPN uniquely identifies your product. This specific number helps us make your ad or unpaid listing richer and easier for your customers to find. MPN codes are unique to each variant and SKU and cannot be reused. If you are the manufacturer of your own items you can use whatever unique identifier you use to distinguish your items as the MPN. You can also map your SKUs as MPN.
- In WP Admin, navigate to Marketing > Google For WooCommerce and click the Attributes tab.
- Click the Create attribute rule button.
- Select MPN.
- Select an option:
- Use value from existing product field – Selecting this will allow you to map existing value from product fields such as SKU.
- Set a fixed value – This will allow you to input your desired value.

- In the categories dropdown, select the category in which you want the rule to apply.
- Apply to all categories – Should be used when the attribute selected above should be populated for all items that have blank attributes.
- Apply to All categories Except – This is used to provide your attribute above to every category that is NOT the ones that are selected.
- Apply to Only to this category – This is used to assign the provided attribute to just this specific category.
- Click Save Rule
How to Map Size
↑ Back to topThe size attribute describes the standardized size of your product. When you use this attribute, your product can appear in results that are filtered by size.
- In WP Admin, navigate to Marketing > Google For WooCommerce and click the Attributes tab.
- Click the Create attribute rule button.
- Select Size.
- Select an option under Assign value
- Use value from existing product field – if you’re using a global size attribute for your products, you can map to it by selecting “Product Size” in the dropdown.
- Set a fixed value – This will allow you to type in your size name in the field (e.g Medium).
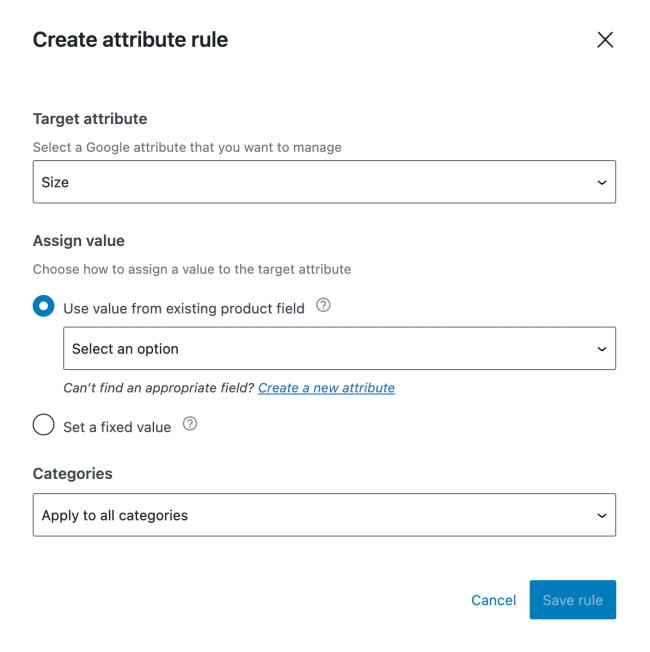
- In the categories dropdown, select the category in which you want the rule to apply.
- Apply to all categories – Should be used when the attribute selected above should be populated for all items that have blank attributes.
- Apply to All categories Except – This is used to provide your attribute above to every category that is NOT the ones that are selected.
- Apply to Only to this category – This is used to assign the provided attribute to just this specific category.
- Click Save rule
Editing attribute rules
↑ Back to topTo modify an existing attribute rule:
- Click the Edit link in the rule’s row; this will open the Manage attribute rule modal.
- Make the required changes and click the Save rule button.
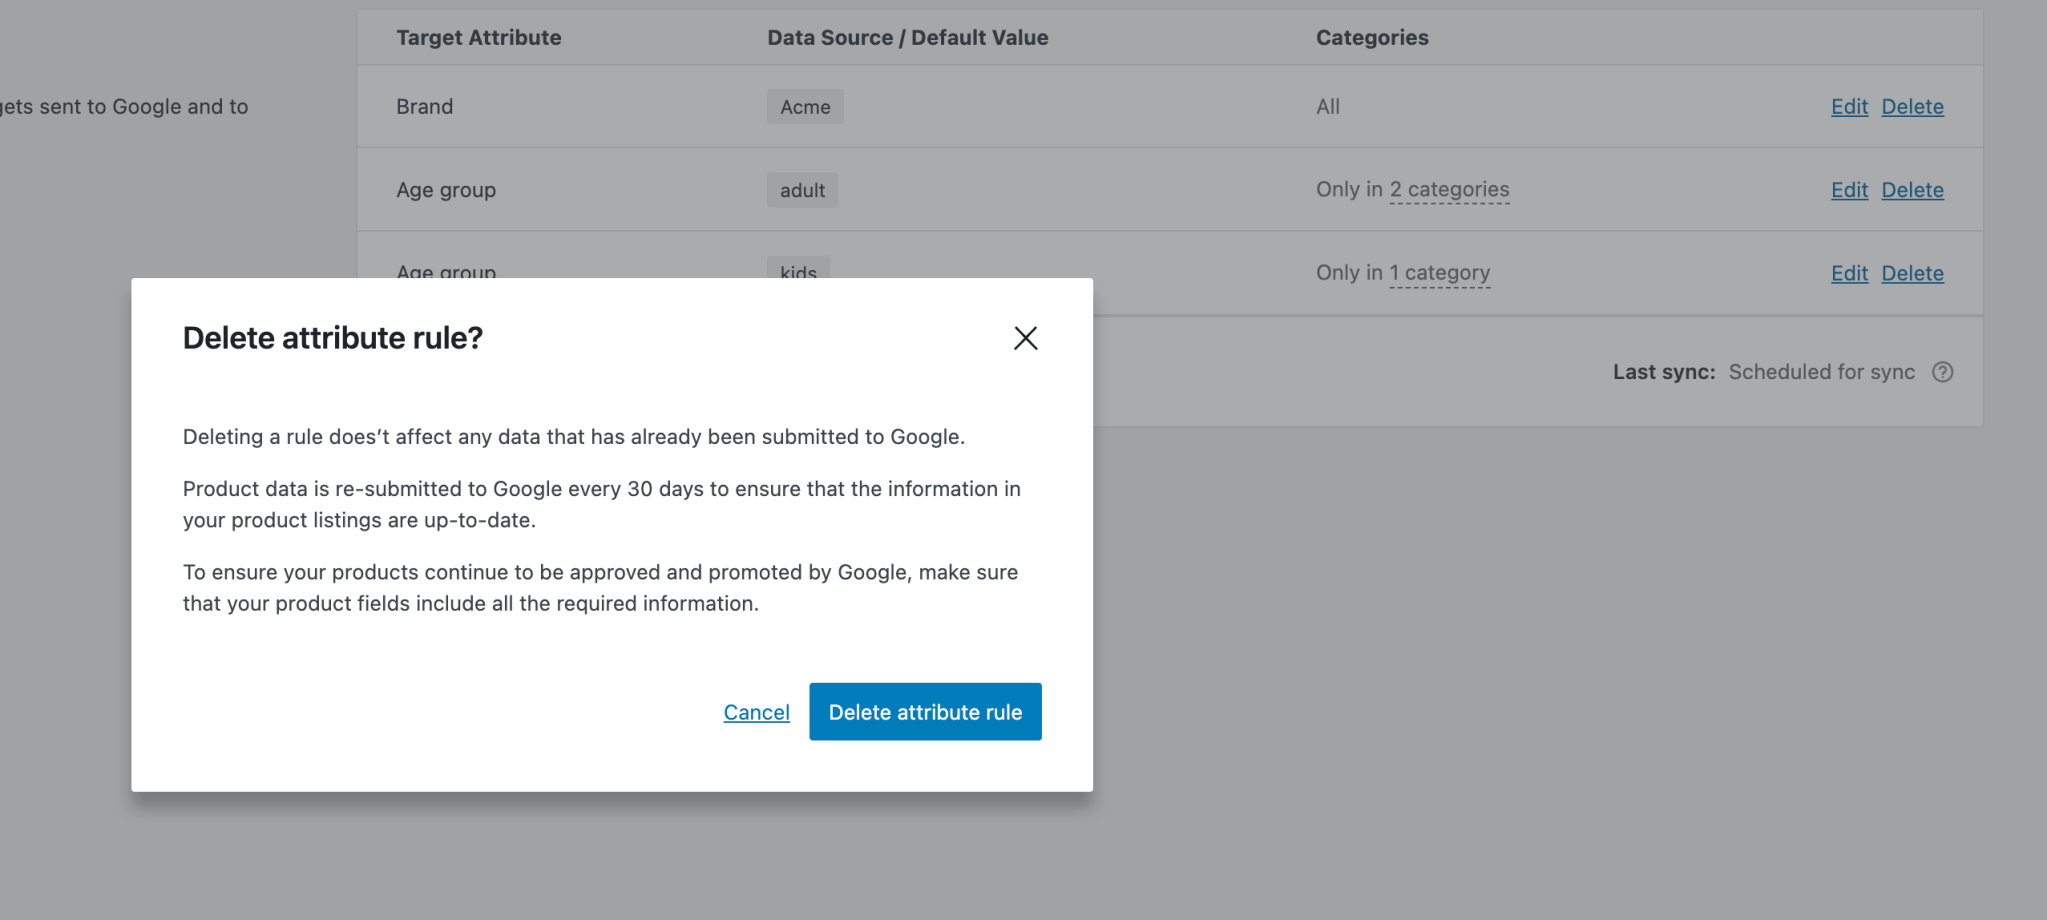
Deleting attribute rules
↑ Back to topTo delete an existing attribute rule:
- Click the Delete link in the rule’s row; this will open the Delete attribute rule? modal.
- Click the Delete attribute rule button to confirm deletion.
Attribute mapping use cases
↑ Back to topNew to attribute mapping? We’ve documented some common attribute mapping use cases to help.
Questions and support
↑ Back to topSomething missing from this documentation? Still have questions and need assistance?
- If you have a question about a specific extension or theme you’d like to purchase, contact us to get answers.
- If you already purchased this product and need some assistance, get in touch with a Happiness Engineer via our support page and select this product’s name from the Product dropdown.