The WooCommerce Name Your Price extension empowers you to offer flexible pricing for selected products. Perfect for user-determined donations, market testing, or innovative sales strategies, this extension allows customers to input the price they are willing to pay. You can suggest a price, enforce a minimum, or leave it entirely up to the customer, making it a versatile tool for engaging your audience and exploring dynamic pricing models.

Minimum Requirements
↑ Back to top- WordPress 6.2+
- WooCommerce 8.2+
- PHP 7.4+
Product Type Support
↑ Back to topName Your Price works with the following WooCommerce product types:
- Simple Products
- Variable Products – individual variations can be Name Your Price-enabled
- Subscriptions – Both simple and variable subscriptions are supported.
- Product Bundles – The entire bundle can be Name Your Price. Per-product pricing supports simple products that are Name Your Price-enabled. Note: The Bundle Sells feature does not support Name Your Price.
- Composite Products – same as Bundles
- Mix and Match Products – The entire package can be Name Your Price.
- WooCommerce Account Funds
Additionally, Name Your Price is also compatible with:
- WooCommerce Product Add-ons: Add-ons will detect the user-entered price and use it to calculate the product’s total price
- Gift Cards: Sell digital cards with customer-entered amounts.
- One Page Checkout: Product Table, Single Product, and Pricing Table templates
- PDF Product Vouchers – Sell customizable PDF site vouchers
- Bulk Shop – Display multiple products at once in a table for quick ordering
For more information about compatibility and integrations, please see here.
Download & Install
↑ Back to topDownloading
↑ Back to top- Go to your WooCommerce My Account > My Subscriptions dashboard.
- Locate the extension in the list.
- Click on the menu to the right of the extension, then select Download extension.

Installation
↑ Back to top- Log in to your site’s WordPress Administrative Dashboard.
- Navigate to the Plugins Dashboard from the left sidebar.
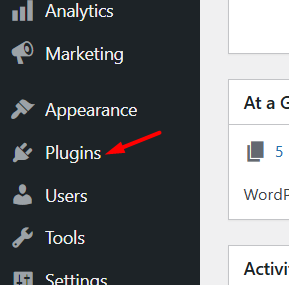
- Click on the Add New Plugin button.

- Click on the Upload Plugin button.
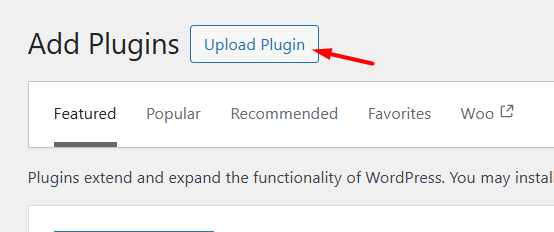
- Click on the Choose File button and select the extension file that was downloaded earlier.

- After the installation has completed, click on the Activate Plugin button.
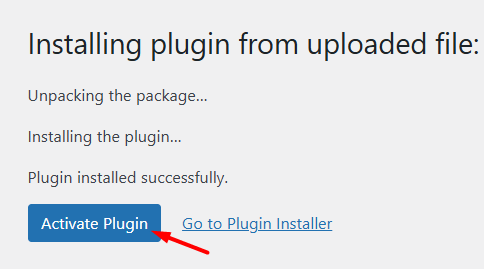
- Congratulations! The extension has been successfully installed, activated, and is ready for use!
Global Plugin Settings
↑ Back to topThe Name Your Price plugin has some Global Settings available, which affect how the plugin behaves across your entire site. These settings can be found by navigating to WooCommerce > Settings > Name Your Price.
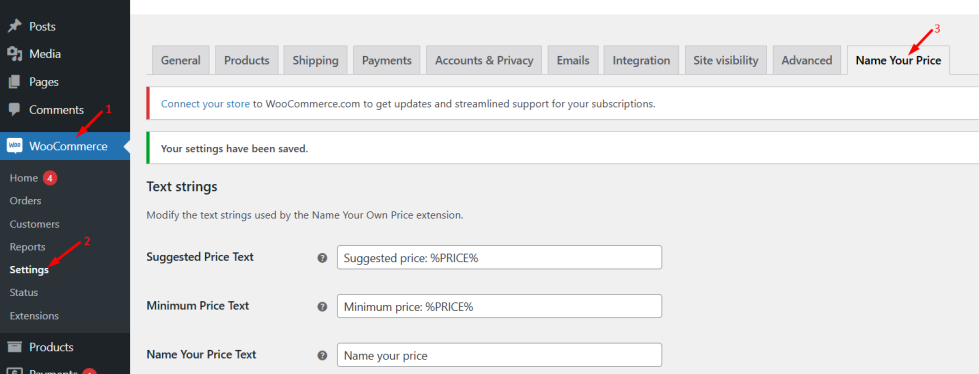
Text Strings
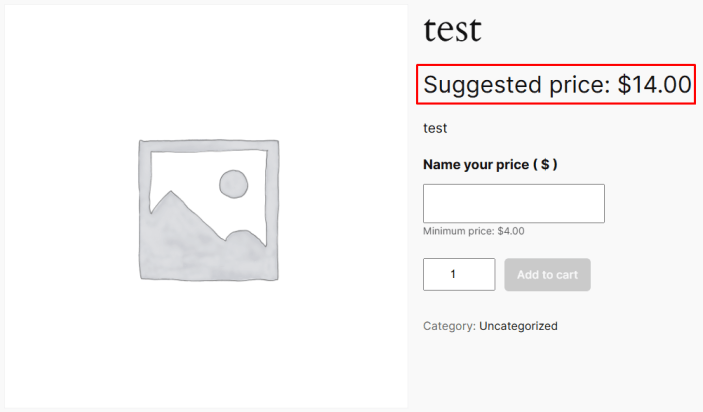
↑ Back to topThe “Text Strings” section allows you to adjust various phrases displayed on your Name Your Price-enabled products, ensuring they match your site’s tone and design. These strings include the labels for the “Suggested Price”, “Minimum Price”, and the “Name Your Price” displays.
Suggested Price Text
This setting allows you to customize the label displayed for the “Suggested Price” field on the product page. The text should guide users to consider the recommended price for the product while still allowing flexibility to set their own price. For example, you can use phrases like:
- “Recommended price: $15”
- “We suggest $20, but you can name your price!”
- “Suggested donation: $10”
To get results like the above, you would use values like:
Recommended price: %PRICE%We suggest %PRICE%, but you can name your price!Suggested donation: %PRICE%
The default value is: Suggested price: %PRICE%
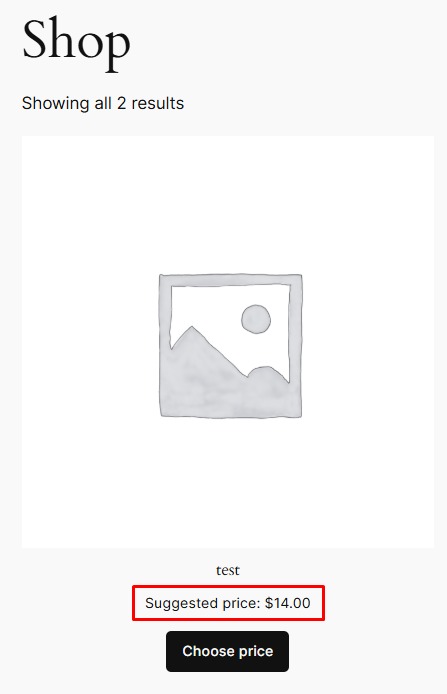
The %PRICE% placeholder will get its value from the product’s Suggested Price ($) field, which can be found in the product’s Product Editor meta-box > General tab.

This controls the text displayed on its product page here:
And the text displayed on its product card at your site’s Shop page here:
Minimum Price Text
This setting allows you to customize the label displayed for the “Minimum Price” field on the product page. The text should clearly communicate the minimum amount required while maintaining a welcoming tone. For example, you can use phrases like:
- “Set your price—minimum amount: $20.”
- “This product has a minimum price of $5.”
- “Name your price, starting at $15.”
To get results like the above, you would use values like:
Set your price—minimum amount: %PRICE%.This product has a minimum price of %PRICE%.Name your price, starting at %PRICE%.
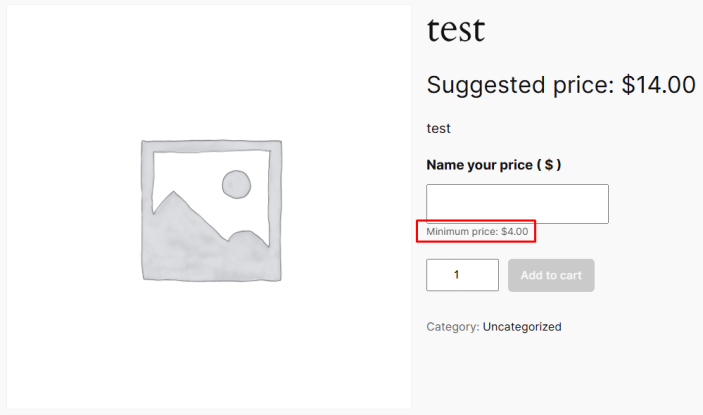
The default value is: Minimum price: %PRICE%
The %PRICE% placeholder will get its value from the product’s Minimum Price ($) field, which can be found in the product’s Product Editor meta-box > General tab.

This controls the text displayed on its product page here:
Name Your Price Text
This setting allows you to customize the label displayed for the “Name Your Price” input field on the product page. The text should encourage users to input their desired amount while emphasizing the flexibility of the pricing. For example, you can use phrases like:
- “Enter your price below.”
- “How much would you like to pay?”
- “Set your own price!”
- “Choose the price you think is fair.”
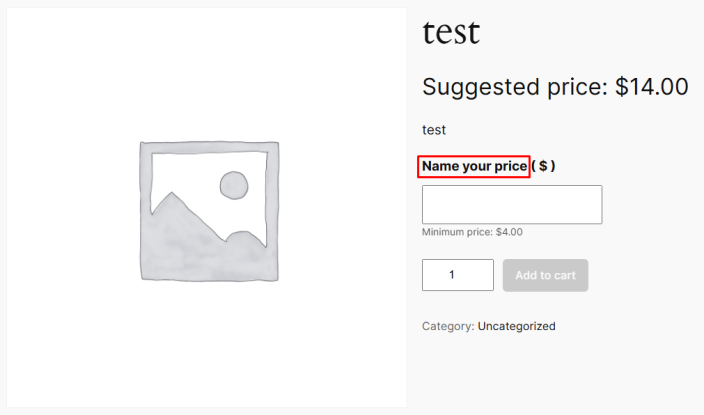
The default value is: Name your price
This controls the text displayed on its product page here:
Add to Cart Button Text for Shop
This setting allows you to customize the text of the “Add to Cart” button for the product on the shop archive page. The text should prompt users to engage with the product, encouraging them to add it to their cart. For example, you can use phrases like:
- “Set Your Price & Add to Cart”
- “Choose Your Price”
- “Customize & Add to Cart”
- “Name Your Price”
The default value is: Choose price
This controls the text displayed on its product card at your site’s Shop page here:

Add to Cart Button Text for Single Product
This setting allows you to customize the text of the “Add to Cart” button for the product on its individual product page. The text should clearly instruct users to add the product to their cart while reflecting the interactive nature of setting their own price. Examples include:
- “Add Your Custom Price to Cart”
- “Add to Cart at Your Price”
- “Choose Price & Add to Cart”
- “Set Price to Add”
The default value is empty which will leave the button to use the WooCommerce default “Add to cart” text.
This controls the text displayed on its product page here:

Styles
↑ Back to topThe “Styles” section gives you control over how the plugin’s elements are displayed on your site.
Disable Stylesheet
This setting allows you to disable the plugin’s default stylesheet. Enabling this option is helpful if you prefer to style the plugin’s elements manually or ensure better compatibility with your theme’s design. When the stylesheet is disabled, you can use custom CSS to control the appearance of fields, buttons, and other elements provided by the plugin. This approach is ideal for developers and designers who want full control over the plugin’s visual presentation.
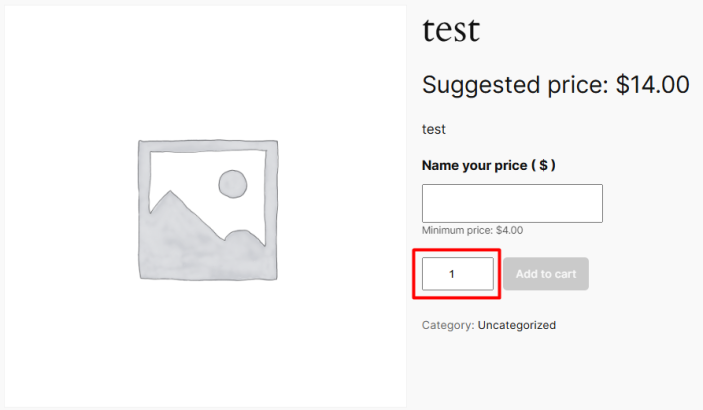
Hide Quantity Input
Remove the quantity input field from the product page, ideal for products that only allow single-item purchases or where quantity selection isn’t necessary.
How to Use
↑ Back to topHow to Use With Simple Products
↑ Back to top
To enable flexible, user-determined pricing on any simple product:
- Edit a product and look for the ‘Name Your Price’ checkbox in the Product Data metabox. Simple, subscription and bundle products will support customers naming their own price.
- Tick the checkbox to allow users to set their own price for this product. The suggested and minimum price fields will not be visible until this is checked. Note that this might not function properly if you have javascript disabled.
- Fill in the suggested, minimum, and maximum prices as desired.
- The suggested price prompts users to enter that amount. It is also the price shown on the product page and in the product loop.
- The minimum price prevents products from being sold for less than you are willing to accept.
- The maximum price prevents products from being sold for more than you are willing to accept.
- Save the product. When viewing the product on the front-end a text input will appear above the Add to Cart Button where the customer can enter what they are willing to pay.
A Few Notes
To not display a suggested price, you can simply leave the suggested field blank. Similarly to not enforce a minimum price, you can leave the minimum field blank.
How to Use With Variable Products
↑ Back to topAs of Name Your Price 2.0, you can now have name your price variations on variable or variable Subscriptions products. First you will need to set up a variable product. Once configured, within each variation look for a “Name Your Price” checkbox and follow the same rules as simple products for suggested and minimum prices for each variation.

On the front-end when a Name Your Price variation is selected, the Name Your Price price input will appear.

How to Use With Subscription Products
↑ Back to topNote: Use with Subscription products requires the WooCommerce Subscription Extension – users who do not have WooCommerce Subscriptions installed will not see a “Subscriptions” tab.
Subscription products work similarly to simple products. If you check the Name Your Price box, the subscription price box will be disabled in favor of the suggested and minimum price inputs. The subscription billing period inputs remain unchanged.
Let the customer change their subscription amount
A customer who decides to pay $10 per month may want to increase or decrease their amount.
To enable them to change their subscription amount directly from their My Account area you need to enable price switching support.
To do that you will navigate to WooCommerce > Settings > Subscriptions. Scroll down to Switching > Allowing Switching and check the box next to “Change Name Your Price subscription amount”. You can also customize the text of the switch button via the “Name Your Price switch button text” field.
Then be sure to click “Save Changes”.
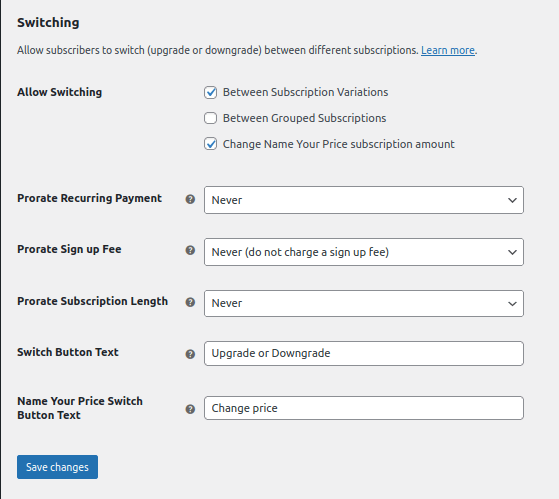
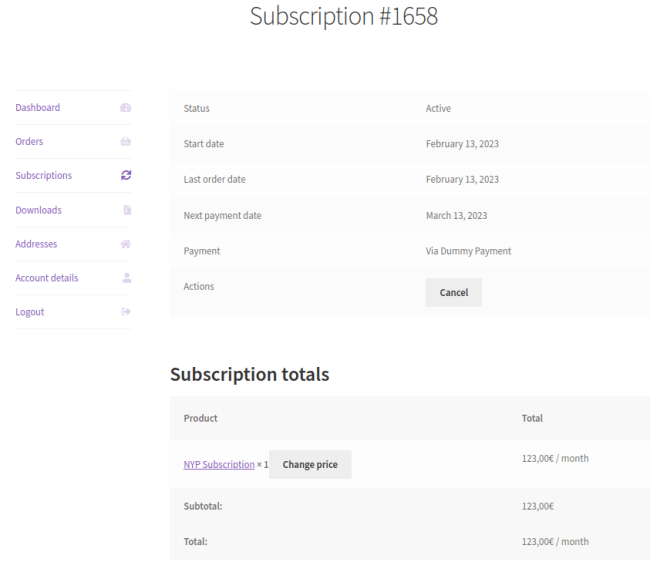
On the front-end, the customer can navigate to the My Account > Subscriptions page. When they view a specific subscription that was made via Name Your Price, they will now see a “Change price” button (or link depending on the theme styles) next to their subscription product.
Clicking that link will take the customer back to the product page where they can change the price.
The customer will need to go through the checkout flow again. This is a requirement of the Subscriptions plugin. But we will redirect the customer to the checkout page automatically. When they complete checkout the price for their subscription will be updated.
Let the customer choose their billing frequency
The best way to do this is to use Variable Subscriptions, which are similar to Variable Products.
Create a “Billing Period” attribute and define the terms as the periods you wish to allow, such as “Weekly” and “Monthly.”

Then create variations from these attributes and configure the variation’s billing period to match. Then set the variation to be “Name Your Price” and fill in the suggested and minimum prices.

Questions & Support
↑ Back to topHave a question before you buy? Please fill out this pre-sales form.
Already purchased and need some assistance? Get in touch the developer via the Help Desk.
For additional guidance and answers to common questions, please visit our FAQ page. It’s a great resource for troubleshooting and tips!
