The Stripe extension is very versatile. A part of this versatility is a dedicated way to perform test transactions on your WooCommerce site via the built-in test mode feature. This allows you to make purchases using Stripe test cards.
Performing test transactions while in test mode is a great way to simulate the customer experience or troubleshoot issues without having to charge real payment methods.
In this guide, you will learn how to configure the Stripe extension to enable test mode and accept test payments.
Configuring the Stripe extension for testing
↑ Back to topWhen you initially connect the Stripe extension to your Stripe account, it only connects in live mode. Connecting to your Stripe account in test mode is a separate process. To connect in test mode:
- Go to WooCommerce > Settings > Payments tab.
- Click the Manage button for the Stripe payment method.

- Click the Settings tab in the Stripe settings page.
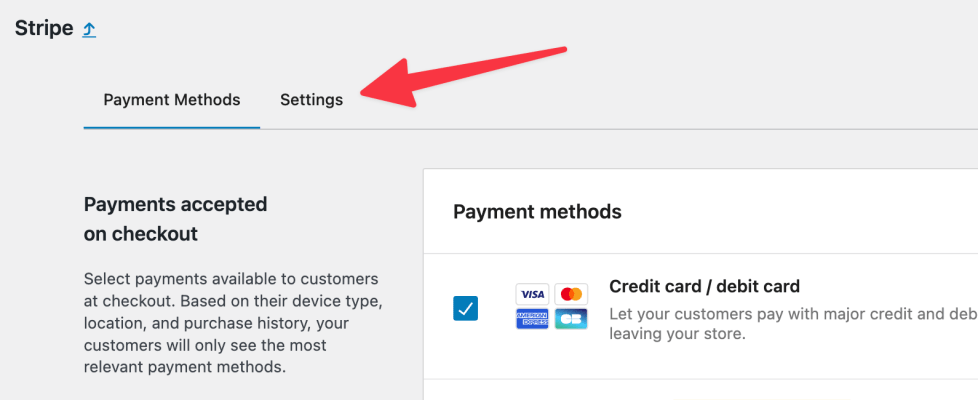
- In the Account details section, click the Configure connection button.

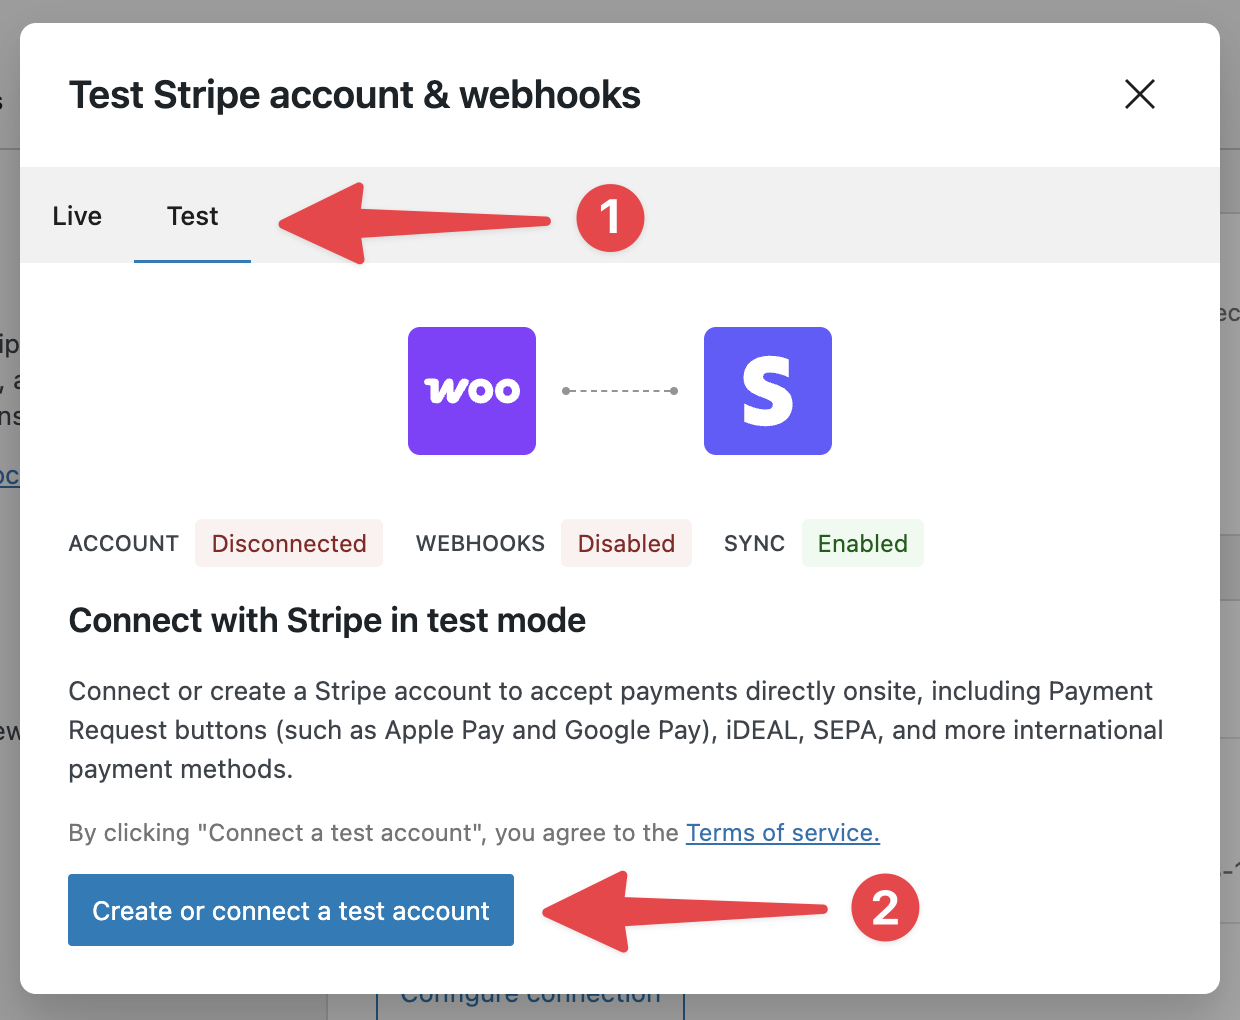
- Click the Test tab to view the connection status of test mode.
- If you haven’t configured test mode yet, the account status will say “Disconnected.”
- Click the Create or connect a test account button.
- You will be prompted to connect to your Stripe account in test mode. Click Connect to do so.

- You’ll be redirected back to the Stripe settings page in your WordPress dashboard.
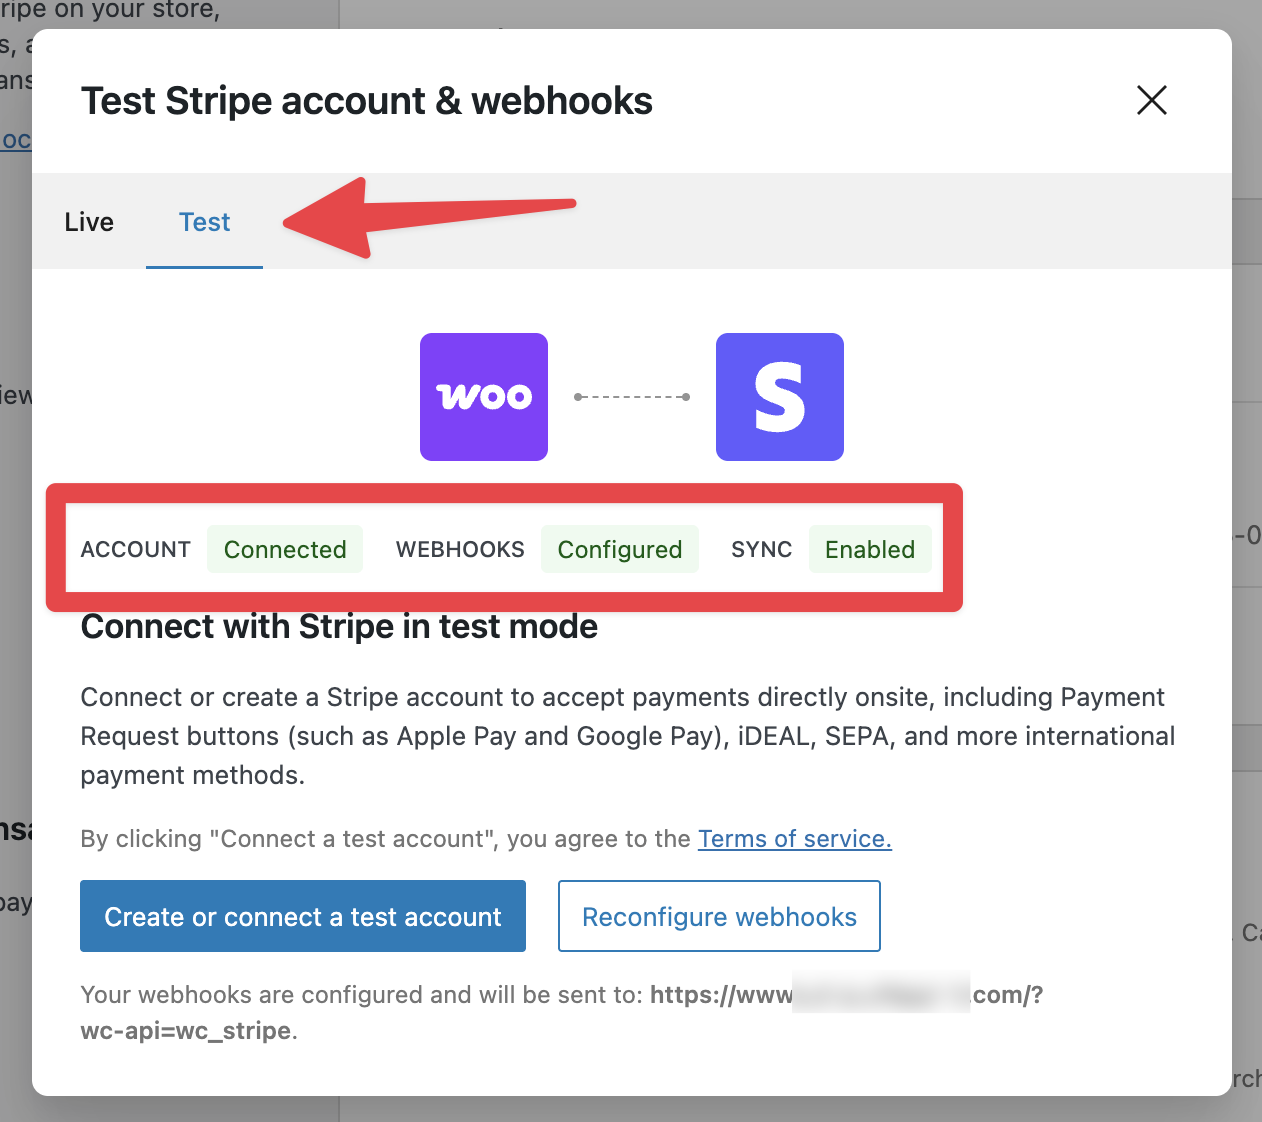
- Click the Configure connection button in the Account details section again.
- Confirm that the connection to your account’s test mode is working.
Now that you’ve connected to your Stripe account’s test mode, you can enable test mode and start using test cards.
Enabling test mode
↑ Back to topAfter you’ve connected to Stripe in test mode, you can enable test mode in the Stripe extension like so:
- Navigate to WooCommerce > Settings > Payments > Stripe > Settings.
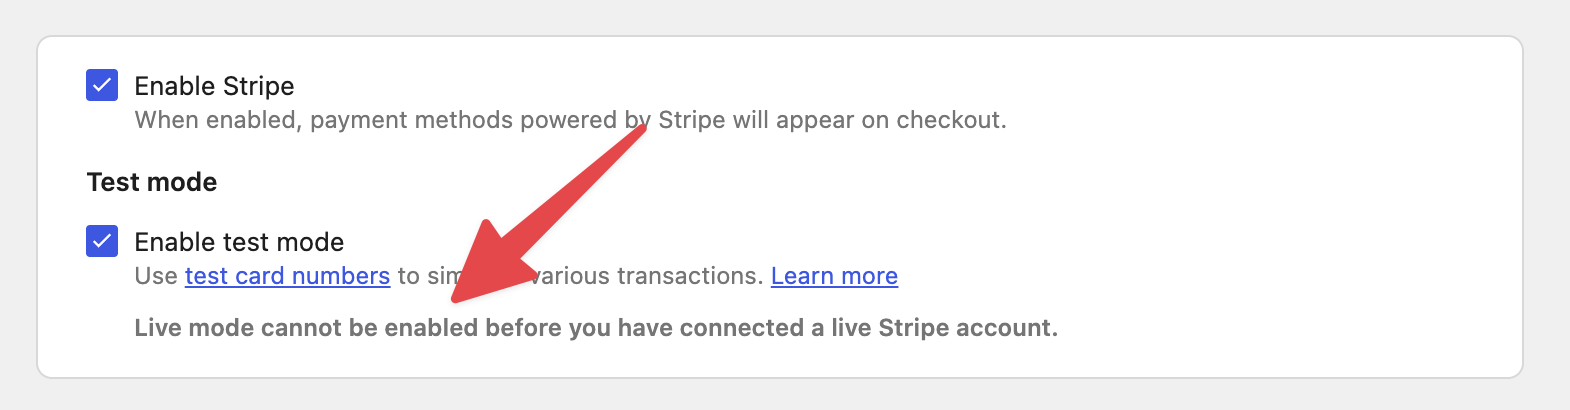
- Check the Enable test mode option in the General section.
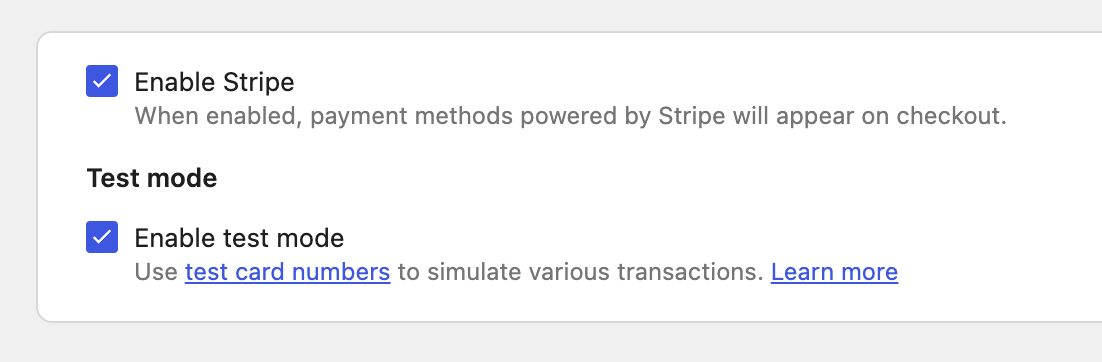
- Scroll to the bottom of the page and click Save Changes.
Using test mode
↑ Back to topOnce test mode is enabled, you can make a test purchase by:
- Navigating to your store’s shop page.
- Adding a product to your cart.
- Proceeding to the checkout page.
- Adding a Stripe test card as a payment method.
- There are numerous cards for testing different scenarios, such as successful payments, card declines, disputes, etc.
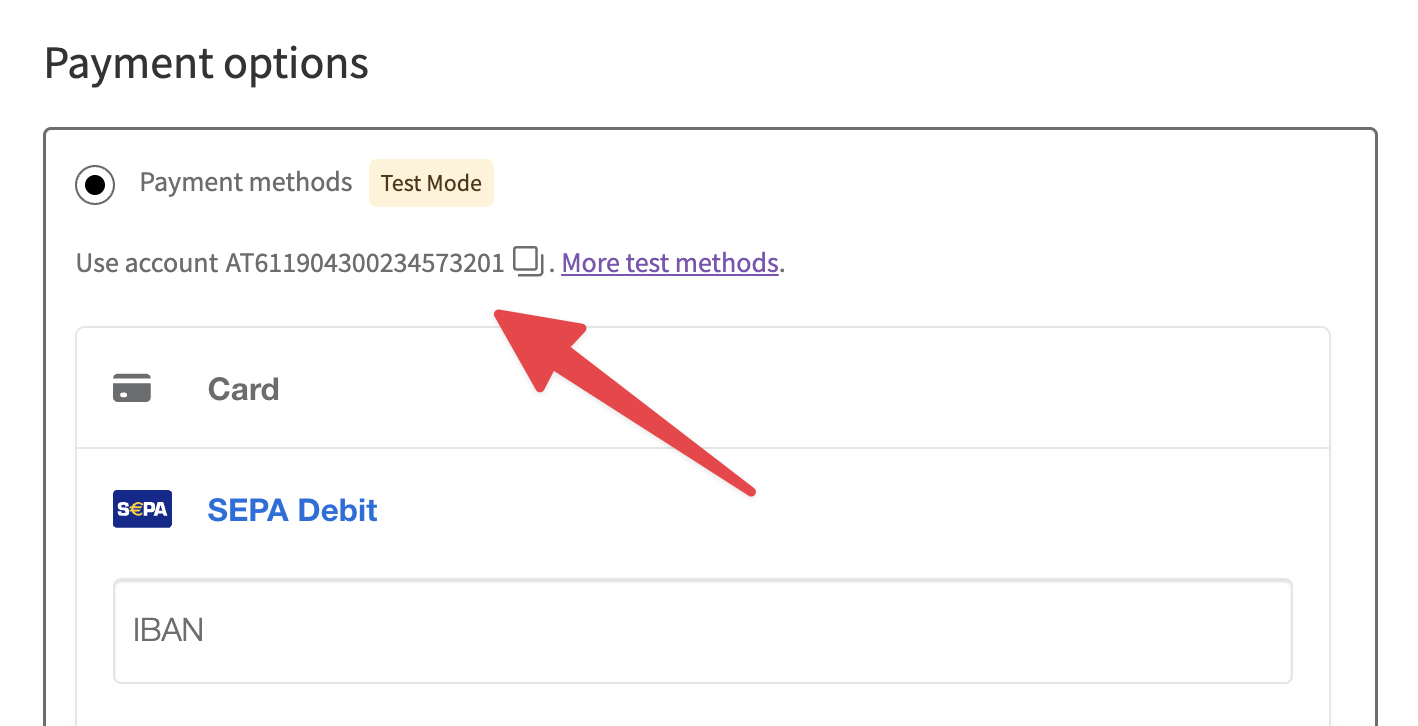
- Some payment methods may show basic test values you can use in the checkout form itself.
- Clicking the Place order button.
- If you used a card that resulted in a successful payment, you’ll be redirected to the “Order received” page just as if the transaction were real.
After completing a successful test payment, you can view its details in your Stripe dashboard by clicking the linked Charge ID beneath the order number at the top of the edit order page for your testing order.

Using test mode with express checkouts
↑ Back to topYou can also test the Stripe extension’s express checkout methods while in test mode.
For Google Pay, you’ll need to add one of the Stripe test cards to your Google account. If you’re testing Apple Pay, you simply use your real card information while in test mode. This of course will not actually place a charge on your card.
To test Amazon Pay, you will need to create a test buyer account for their sandbox environment as instructed in Amazon’s documentation.
To test Link by Stripe, follow the instructions here.
Using test mode with SEPA and other non-card payments
↑ Back to topSimilar to credit card payments, SEPA and other non-card payments can be tested using test data at checkout while in test mode. Mock payment information will appear at checkout while in test mode for supported payment methods. Stripe has specific payment method test data for different scenarios in their documentation.
Stripe.js testing assistant
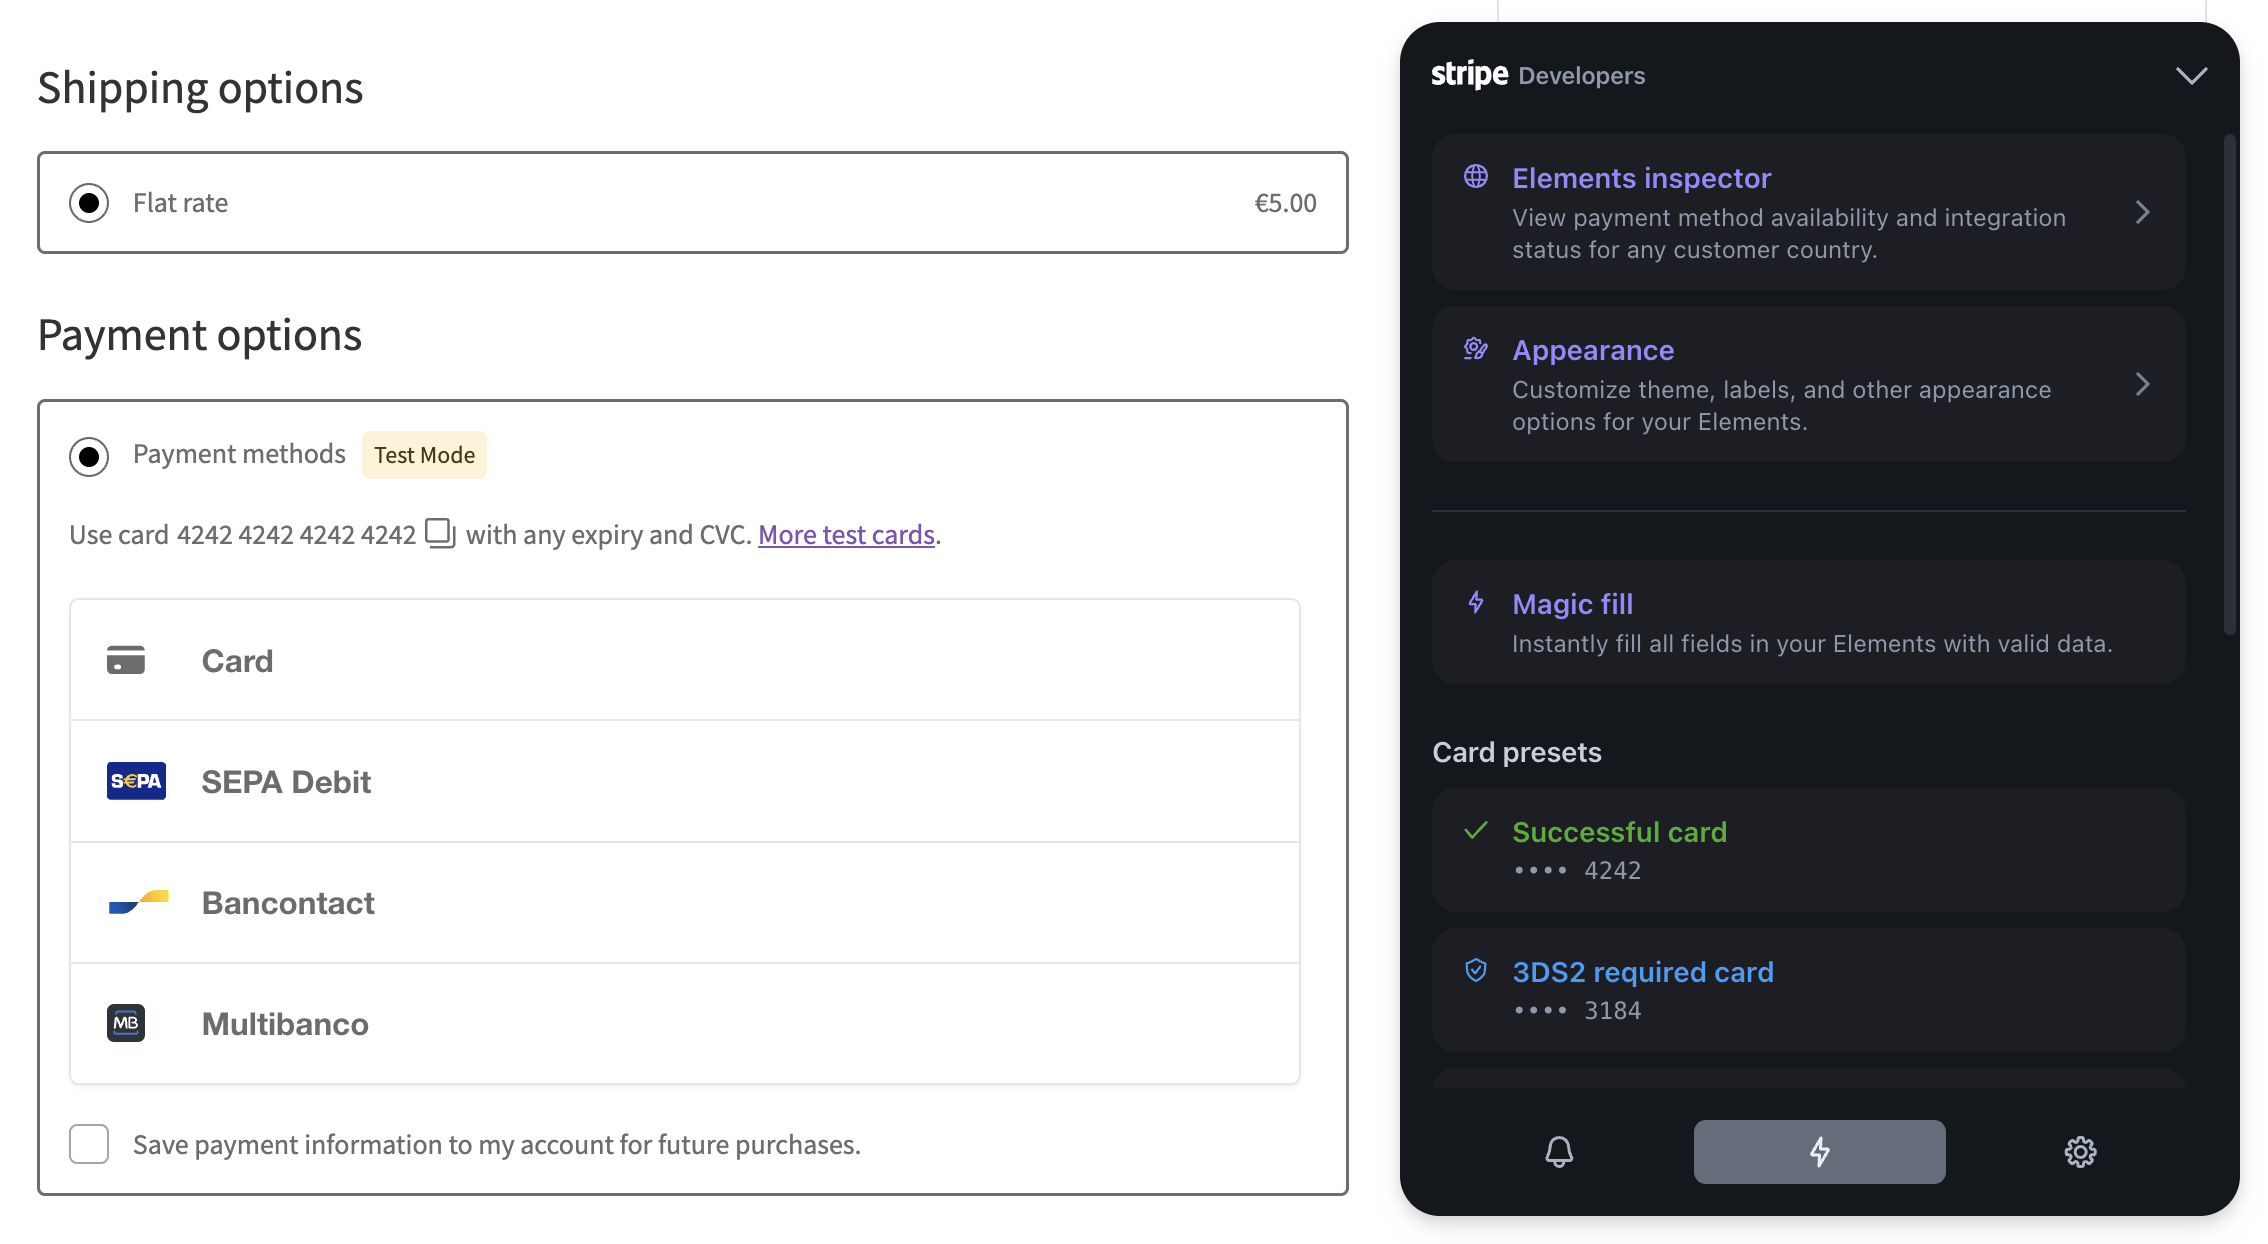
↑ Back to topThe Stripe.js file, which our Stripe plugin uses, includes a testing assistant/widget that can be configured to appear on the checkout page in test mode. When enabled, the testing assistant provides tools that allow you to:
- Autofill fields with test data for various scenarios
- Highlight errors, warnings, and optimizations
- Simulate potential customer locations
- Customize the form appearance in real time
To enable the testing assistant, use this code snippet:
add_filter( 'wc_stripe_show_stripe_developer_widget', function ( $show_widget ) {
	$current_user = wp_get_current_user();
	$current_login = $current_user ? $current_user->user_login : null;

	WC_Stripe_Logger::debug( 'wc_stripe_show_stripe_developer_widget', [
		'show_widget' => $show_widget,
		'current_username' => $current_login,
	] );

	if ( 'YOUR_USERNAME_HERE' === $current_login ) { // feel free to use another username
		return true;
	}

	return $show_widget;
}, 10, 1 );
Replace YOUR_USERNAME_HERE with any username from your site that you want to be able to see the testing assistant on the checkout page.
See the Stripe.js testing assistant page of Stripe’s documentation for more information about how you can use the assistant itself.
Connecting to a test only Stripe account
↑ Back to topIf you’ve created a Stripe account but not set it up yet (by entering your business information), you may wind up with a test-only account that looks like this:

If you’d like to connect our Stripe plugin to this account, you can do so by using the Create or connect a test account instead link on the connection screen.

You’ll be taken to Stripe.com to connect, but since your account is test-only, you can simply click the Skip this form button.

Doing so will return you to the WordPress dashboard with the Stripe plugin already in test mode and connected to your test-only Stripe.com account.
You can click the Configure connection button and then select the Test tab to verify that the plugin is working correctly.

Note that as long as your Stripe account is restricted to test mode only, you will not be able to disable test mode in the Stripe plugin settings.