Managing store inventory is crucial for the success of any WooCommerce business. The Easy Inventory and Stock Manager for WooCommerce plugin streamlines this process by consolidating and displaying all key inventory controls in a single, intuitive interface. You can efficiently manage the complete product inventory. You no longer need to open each product individually to update stock levels, prices, and other details.
Whether you run a small boutique or a large online store, this plugin saves you time, reduces errors, and helps maintain stock accuracy. Thus, resulting in happier customers and smoother store operations.
In this guide, we will help you install, configure, and use all the key features of the Easy Inventory and Stock Manager plugin.
Installation
↑ Back to topFollow these steps to get started with installing the Easy Inventory and Stock Manager plugin:
- Download the Plugin:
Log in to your WooCommerce official account and download the latest version of the ZIP file of the plugin.
- Access Your WordPress Dashboard:
Log in to your website and access the WordPress dashboard from the backend.
- Add New Plugin:
Go to Plugins → Add New, then click on the Upload Plugin button at the top.
- Upload the ZIP File:
Choose the downloaded ZIP file from your device and then click Install Now. The upload and installation will be completed in a few seconds.
- Activate the Plugin:
Once installed, click Activate Plugin to enable the plugin features.
- Verify Installation:
After activation, the plugin enhances your existing WooCommerce Products view by adding key inventory columns that allow you to edit and bulk manage them directly from the list view.
Accessing the Inventory Manager
↑ Back to topAfter installation and activation, the plugin integrates seamlessly into your WooCommerce product workflow:
- Go to WooCommerce → Products → All Products in your WordPress dashboard.
- You will notice that the default product table is now enhanced with additional columns for stock quantity, regular price, sale price, weight, height, and so on.
- Each column is editable inline (simply click on it), allowing you to quickly update product data without needing to open multiple product edit screens.
This design saves time and reduces the risk of inconsistencies by allowing you to manage and update necessary product inventory details from a single location.
Editing Inventory Inline
↑ Back to topOne of the plugin’s most convenient features is inline editing directly within the product list. This feature supports quick updates with instant saving, eliminating the need for page reloads.
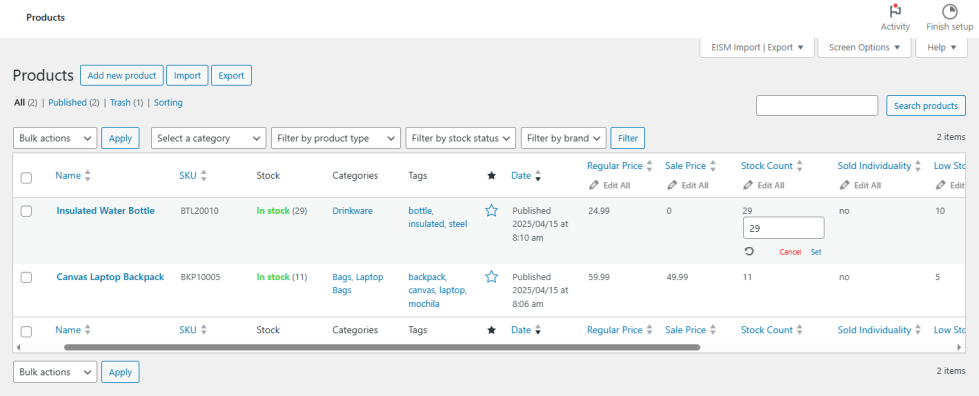
Updating Stock Quantity or Count
↑ Back to top- Hover over the Stock Count field for the product you want to update.
- Click the field to enable editing.
- Enter the new stock quantity.
- Press Set to save the value.
- The change is immediately reflected in WooCommerce stock data.
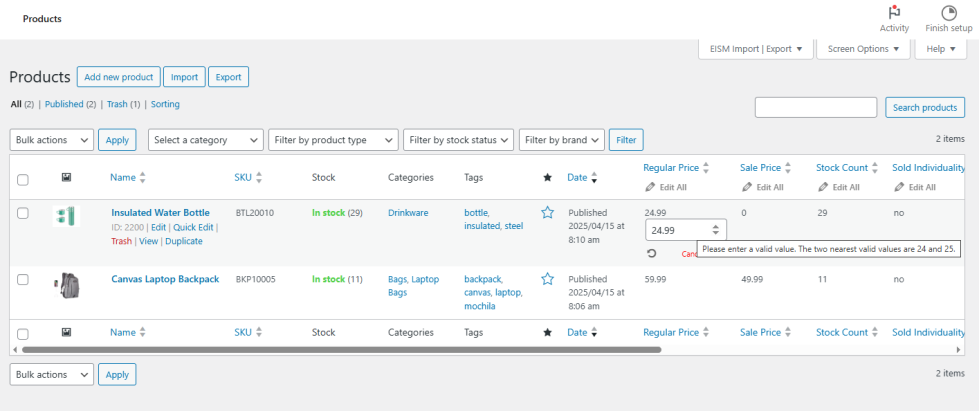
Editing Regular Price and Sale Price
↑ Back to top- Locate the Regular Price or Sale Price columns in the product list.
- Click the cell to edit the value.
- Enter the updated price.
- Press Set to save instantly.
Adjusting Height, Weight, Sold Individually, Low stock threshold, etc.,
↑ Back to top- The height, weight, length, width, sold individually, and low stock threshold columns are similarly editable inline.
- Update the values and click Set to save them immediately.
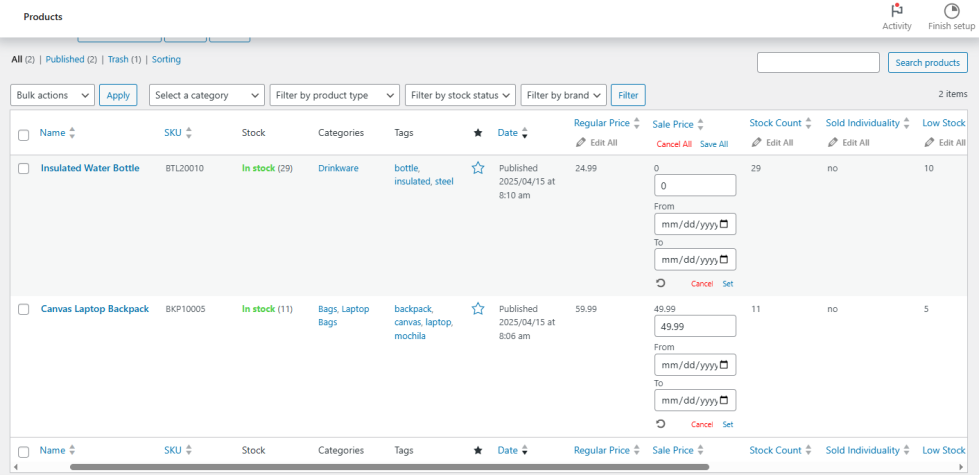
Bulk Edit Multiple Products’ Details
↑ Back to topManaging multiple products at once can be time-consuming if done individually by visiting their pages in detail view. This plugin’s bulk edit feature is designed to handle batch updates efficiently.
How to Bulk Edit Product Column Details:
↑ Back to top- The columns accessible for inline editing can also be edited in bulk using this plugin.
- Visit the field or column you want to edit and click the Edit All action text below the field name.
- Enter the new values for the corresponding product records you wish to change.
- Finally, click the Save All action text above to update all changes simultaneously.
- If you don’t want to save the changes, click Cancel All to reset them(Optional).

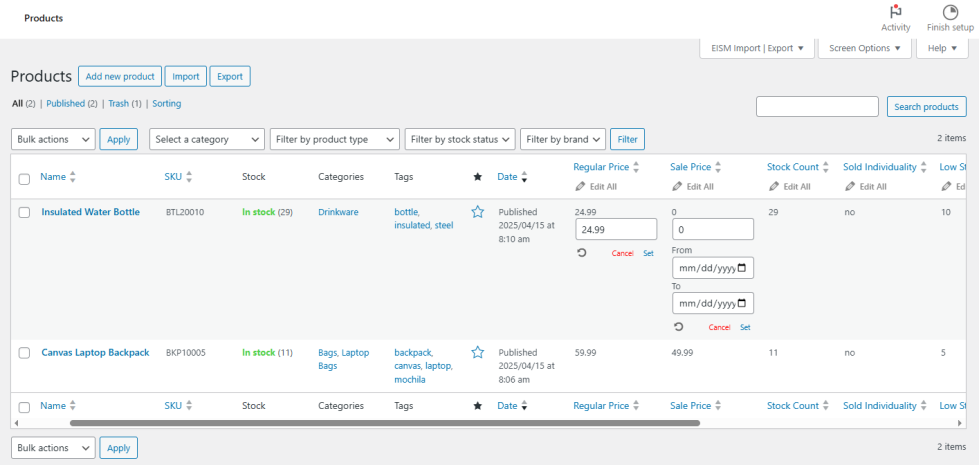
Schedule Sale Prices for Specific Dates
↑ Back to topWith the Easy Inventory and Stock Manager plugin, you can update sale prices in bulk and schedule them to run during specific date ranges. This allows you to set up promotions in advance and automate price changes without needing to revisit them later.
How to Set Sale Prices for a Date Range
↑ Back to top- Go to the Products List View
Navigate to your WordPress admin → Products. You’ll see the familiar product table enhanced by our plugin.
- Locate the ‘Sale Price’ Column
Find the Sale Price column in the table. Hit the pencil icon or the Edit All option to begin editing.
- Enter the Sale Price
Type the new sale price value in the input field for the desired product(s).
- Set the Sale Start and End Dates
Below the price input, you’ll see From and To date pickers:
- Select the start date when the sale should begin.
- Select the end date when the sale should end.
- Click ‘Set’ to Apply Changes
Once you’ve filled in the price and dates, click the Set link to apply the changes. The plugin will automatically update the sale price and schedule it to become active during the selected period.
- Use Cancel to discard unsaved changes or reset fields(Optional).
Track Inventory Changes with Logs
↑ Back to topTo help you maintain accountability and transparency, the plugin provides a dedicated log where you can track stock quantities and other product details.
Viewing Logs:
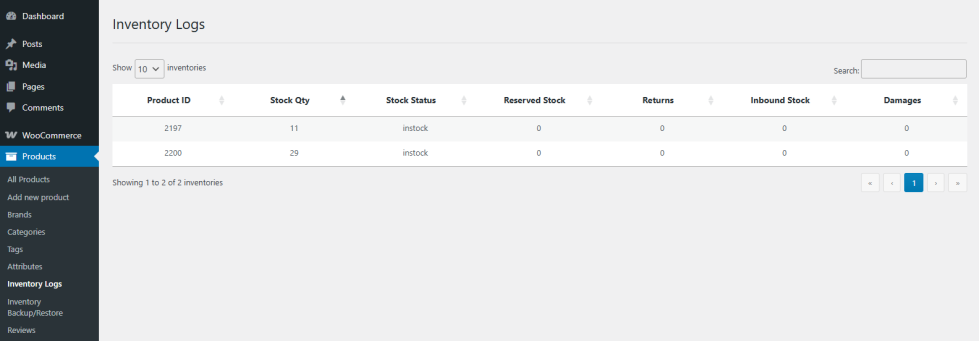
↑ Back to top- Navigate to Products → Inventory Logs.
- This screen displays an overview of current stock details per product, including:
- Product ID
- Stock Quantity
- Stock Status (e.g., instock)
- Reserved Stock
- Returns
- Inbound Stock
- Damages
Note: This table shows the current inventory state for each product, not a chronological list of past changes.
These logs are invaluable for managing inventory, from tracking current stock levels to planning restocks using inbound and damaged stock data and monitoring returned items separately.
Importing Inventory via CSV
↑ Back to topFor large inventories, manual updates can be overwhelming. The plugin supports the CSV import option to automate bulk stock and price updates.
How to Import:
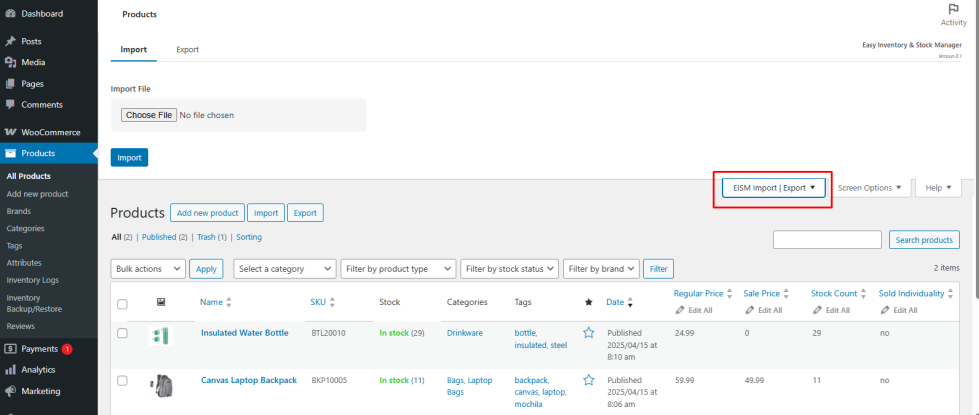
↑ Back to top- Go to Products → EISM Import | Export and click Import.
- Upload a CSV file containing product details like SKUs, stock quantities, prices, or other supported fields.
- Once the file is uploaded successfully, you’ll see a ‘successfully uploaded’ message.
- Click Import to start updating your inventory.
This method enables fast and accurate bulk updates of Products.
Exporting Inventory to CSV
↑ Back to topYou can export your entire inventory details to a CSV file with some clicks. This is ideal for creating offline records or preparing detailed product updates that can be later re-imported.
Steps to Export Your Inventory:
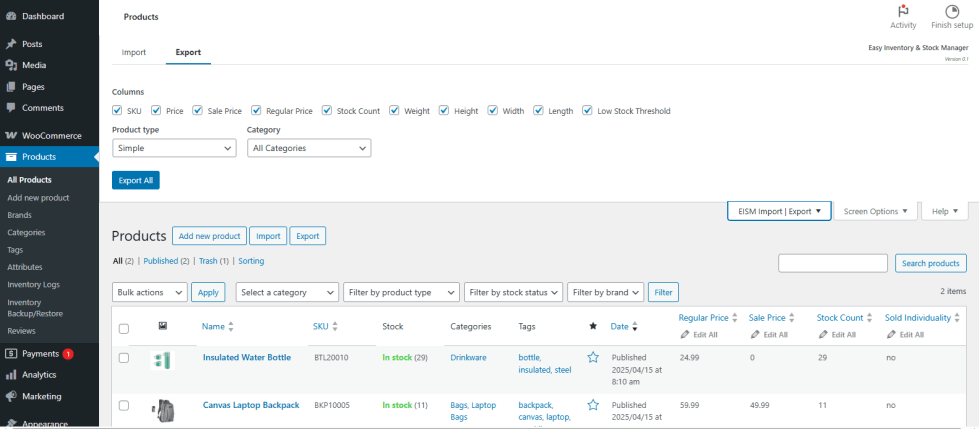
↑ Back to top- Go to Products → EISM Import | Export and click Export.
- Choose the specific fields/columns to export, such as SKUs, stock quantities, regular and sale prices, stock status, and more, by enabling their checkboxes. Uncheck the column to exclude from export.
- Choose the Product and Category type to export specific products and their categories. Otherwise, leave it as All by default to export all products and their categories.
- Click Export All to export your data as CSV.
- Please provide a name for the exported products file. Then, save it locally on your device.
Edit and Re-Import Anytime
Open the file in any spreadsheet editor (like Excel or Google Sheets). Make your changes, then re-import to update your WooCommerce store by following the above import steps.
Backup and Restore Inventory
↑ Back to topUnexpected changes happen — that’s why the plugin includes a Backup & Restore feature to help you safeguard your stock data.
Auto Backup Setup
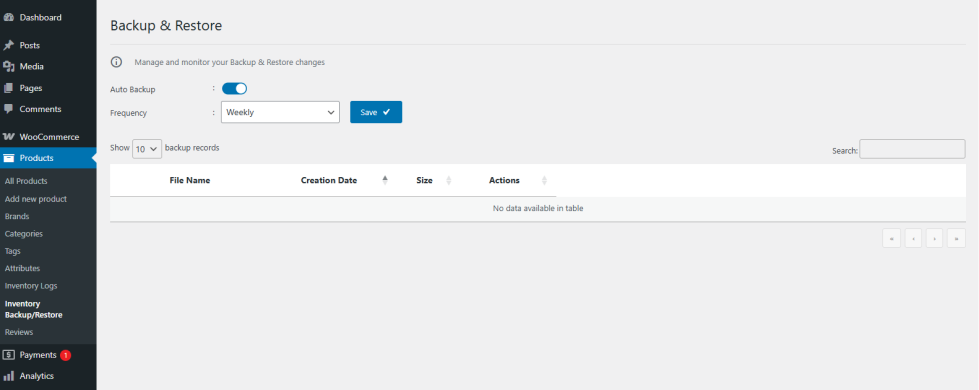
↑ Back to top- Go to Products → Inventory Backup/Restore.
- Enable Auto Backup using the toggle.
- Choose your backup Frequency (e.g., Weekly or Daily).
- Click Save to apply your settings.
Backups will be created automatically upon your selected schedule.
Viewing or Managing Backups
↑ Back to topOnce backups are generated, they will appear in a table with details like:
- File Name
- Creation Date
- Size
- Actions (like download or restore)
Restoring a Backup
↑ Back to top- In the same Inventory Backup/Restore page, locate the backup you want to restore.
- Click the Restore icon under the Actions column next to that file.
- Confirm the restoration to roll back your inventory to that saved state.