Coupon Campaigns will allow you to assign coupons to a campaign and track the performance of each. After activating the plugin on the WordPress plugins page, you’ll want to create your first campaign.
Creating Campaigns
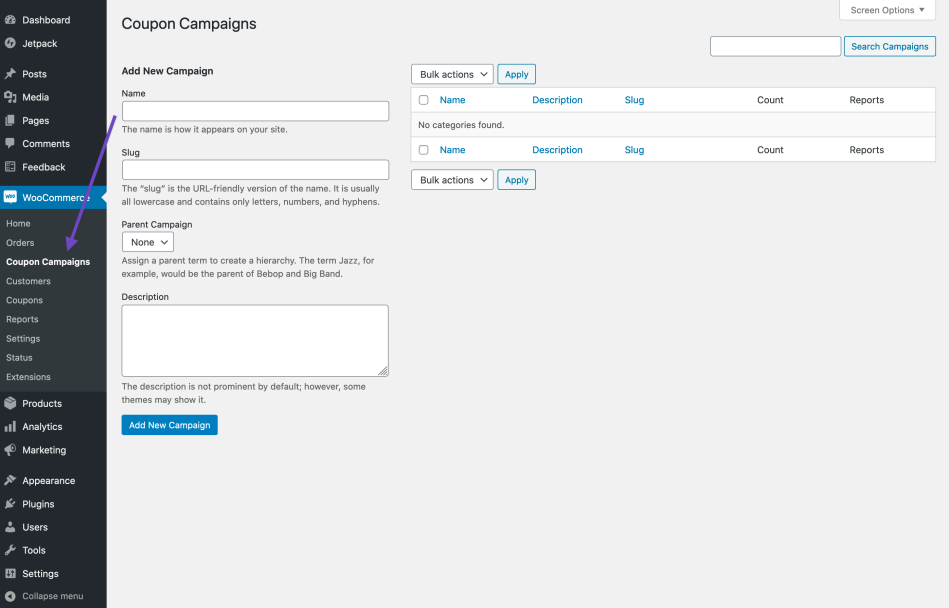
↑ Back to topClick on Coupon Campaigns in the WooCommerce menu.
Adding a new Campaign
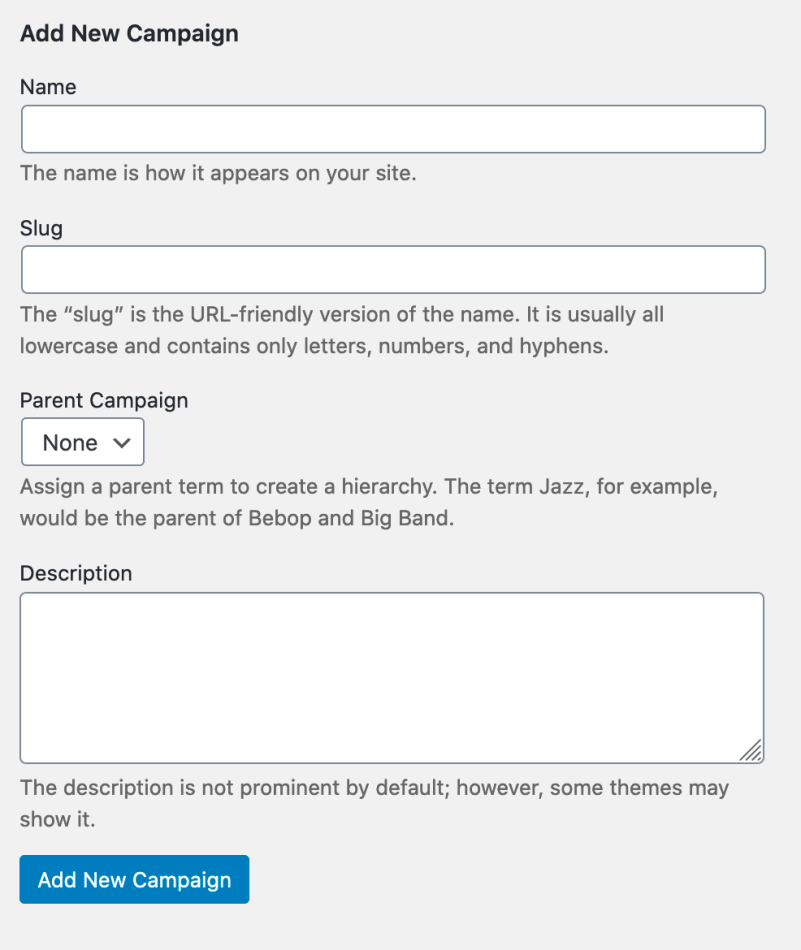
↑ Back to top- Add New Campaign – mandatory
- The name is how it appears on your site
- Slug – optional
- The “slug” is the URL-friendly version of the name. It is usually all lowercase and contains only letters, numbers, and hyphens.
- This is useful for developers who may want to style the page appearance
- Parent Campaign – optional
- Assign a parent term to create a hierarchy. The term Jazz, for example, would be the parent of Bebop and Big Band.
- It won’t affect reports.
- Description
- The description is not prominent by default; however, some themes may show it.
- Enter a description, which is a field to remind yourself of what this campaign is doing. The more campaigns you have running, the more you’ll want to use this field.
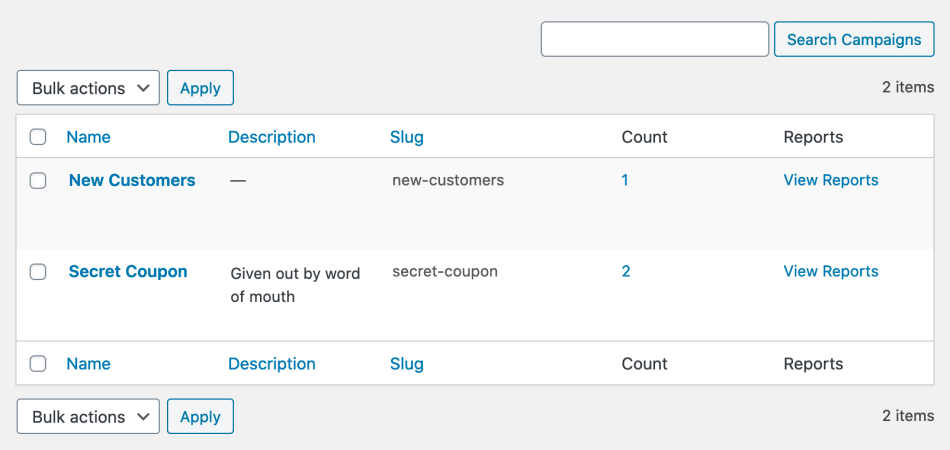
Once you add your campaigns, they’ll appear in the table to the right. You’ll also see how many coupons belong to each campaign in the Count column. Clicking into Count
Adding Coupons to a Campaign
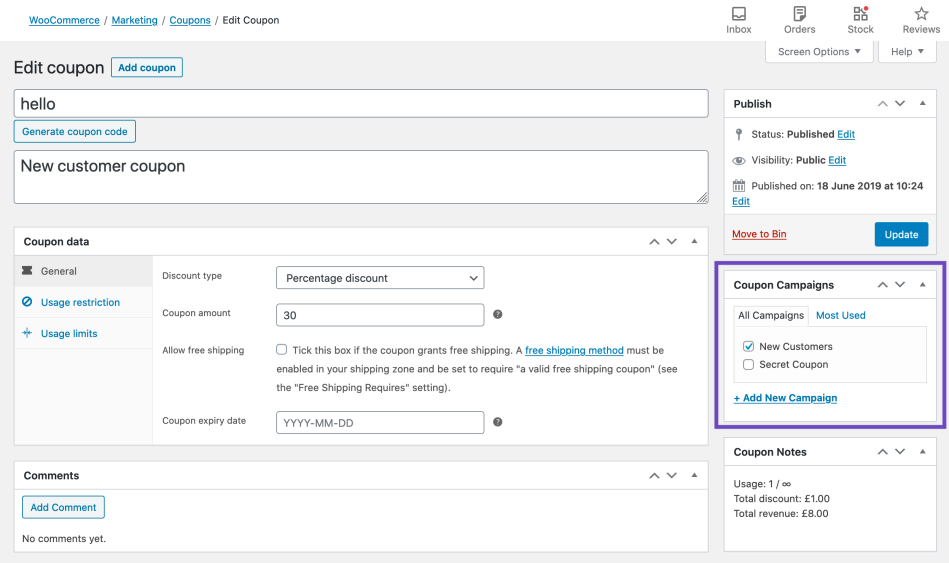
↑ Back to topNow that you’ve created a campaign, it’s time to add coupons. Create a coupon, and add the coupon to the correct campaign in the new meta box.
Viewing Campaign Reports
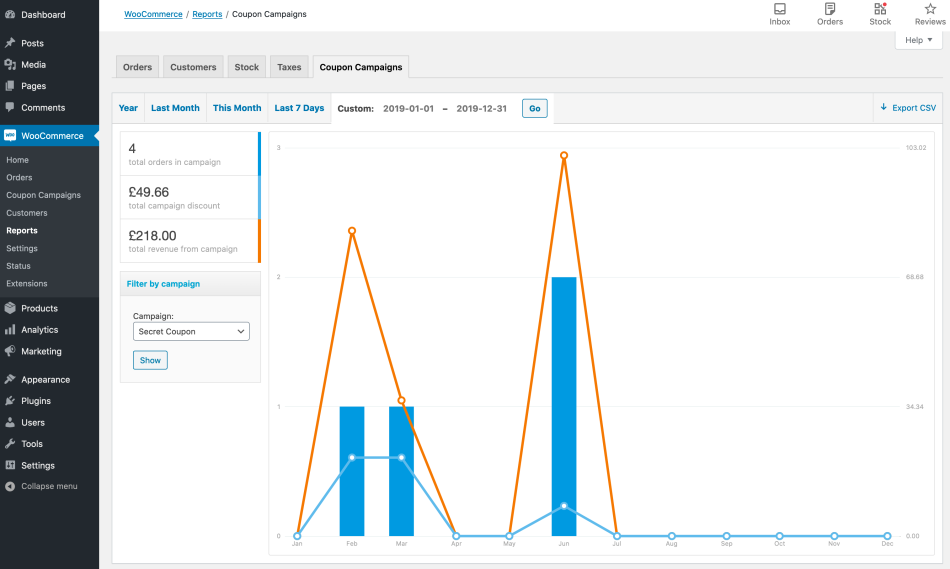
↑ Back to topWhen your campaign has been out in the wild for a while and you want to see how effective it is, you can use the reports. Go to: WooCommerce -> Reports -> Coupon Campaigns.
FAQ
↑ Back to topQ: Does this extension count old orders?
A: Yes and No. Older orders with coupons attached to a Campaign won’t show on reports unless the order is amended and updated in some way. For example, after installing and activating the extension, if an order is changed from Processing to Complete, this will show on the report on the original order created date. Without that update, existing orders won’t be included.

