The Crowdfunding for WooCommerce extension makes it possible to raise the funding or collect donations for the specific goals & meet the desired target through donations in a group. The extension is helpful to support the community by creating goals of desired target amount.
Installation
↑ Back to top
- Login to your WooCommerce.com account dashboard.
- Navigate to Plugins > Add New.
- Click the Upload Plugin button at the top of the screen.
- Upload the crowdfunding-woocommerce.zip file you’ve downloaded from WooCommerce.com dashboard.
- Install and Activate the plugin.
Setup and Configuration
↑ Back to topHow To Set Up Crowdfunding for WooCommerce
↑ Back to top
- Choose the product type to Crowdfunding.
- Click on the Crowdfunding product data tab to personalize your settings.
- Minimum Contribution: This options lets customers to enter the minimum amount for the contribution.
- Maximum Contribution: This option restricts customers to enter the maximum amount for the funding.
- Set Target Amount: Here you can enter the desired amount for the goal to raise the funding for.
- Amount Description: Here you can add the description for the created goal.
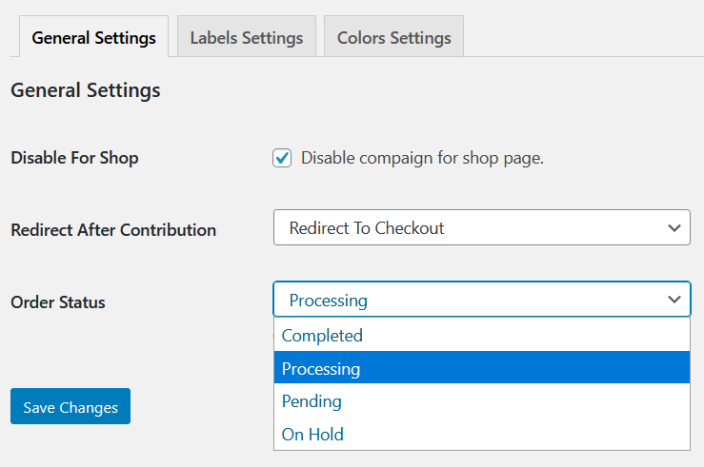
General Settings Of Crowdfunding
↑ Back to top Disable For Shop: The extension allows you to enable or disable the crowdfunding products’ visibility from the shop page.
Redirect After Contribution: If you want to redirect the customers after contribution, You have two options to apply either:
- Redirect to Cart page
- Redirect to Checkout page
- On Hold
- Completed
- Processing
- Pending
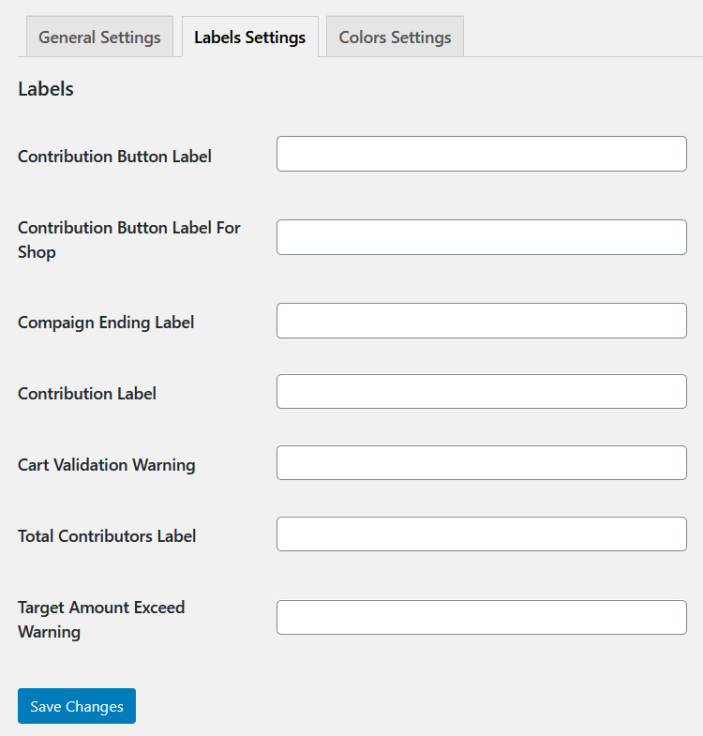
Crowdfunding Label Settings
↑ Back to top In the label settings, you can see the following settings.
Contribution Button Label: Admin can set the custom name for the contribution button label.
Contribution Button Label For Shop: You can add custom text for the shop page’s contribution button label.
Campaign Ending Label: Add the custom text for the campaign ending label.
Contribution Label: It allows the admin to add a custom name for the contribution label.
Cart Validation Warning: You can add custom text for the cart validation warning.
Total Contributors Label: Add the custom text for total contributors label.
Target Amount Exceed Warning: Add description for target amount exceed warning.
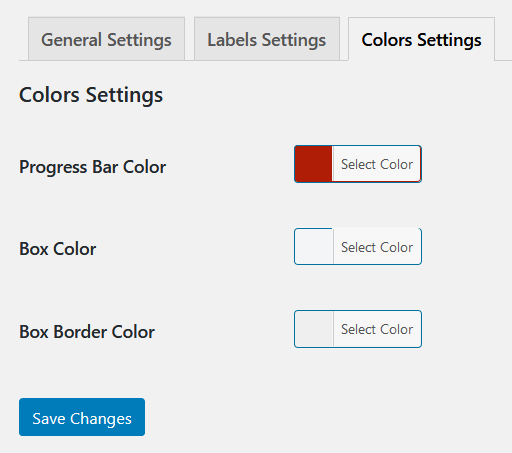
Crowdfunding Colors Settings
↑ Back to top In the colors settings, you can see the following settings.
Progress Bar Color: You can add a custom progress bar color.
Box Color: However, you can also select the box color.
Box Border Color: You can add a custom box border color.