Replace the featured image with a product video to create a more engaging, interactive shopping experience using the WooCommerce Product Video Plugin. Easily add videos to the product gallery via direct links or uploads, and enable a video bar on the product page for better visibility and seamless viewing.
Installation
↑ Back to topTo start using a product from WooCommerce.com, you can use the “Add to store” functionality on the order confirmation page or the My subscriptions section of your account.
- Download the Add Featured Video in Product Gallery for WooCommerce and have your .zip file
- Next, go to WordPress Admin > Plugins > Add New and Upload Plugin and install the plugin you recently downloaded
- Upload the .zip file to proceed with the installation.
- Wait until the plugin installs. After successful installation, activate the plugin, and move on to configuration settings.
Setup and Configuration
↑ Back to topAfter activating the WooCommerce Video Gallery plugin, you can see the “Featured Video” tab in the WooCommerce settings section. The plugin has both product-level and global settings. To configure global settings, go to WooCommerce > Settings > Featured Video and configure the following settings:
General Settings
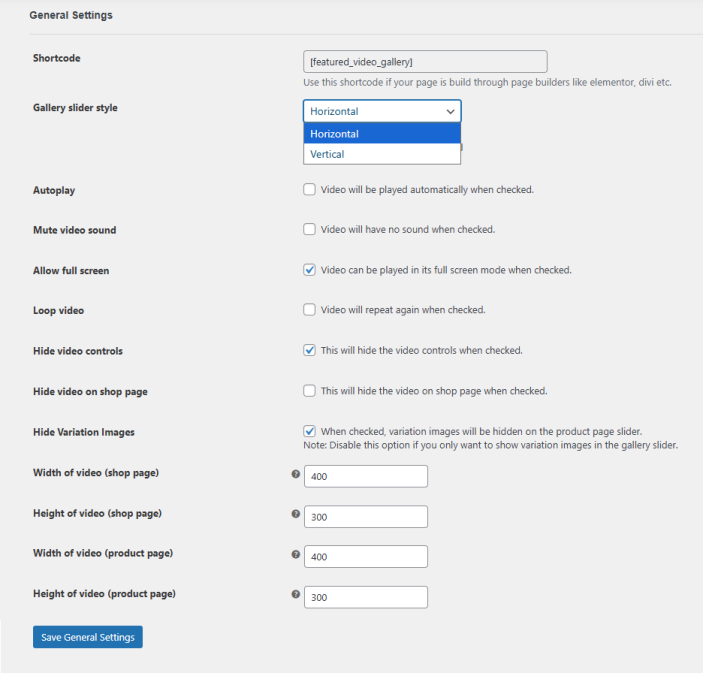
↑ Back to topIn this section, you can configure the general settings for the plugin. Go to WooCommerce > Settings > Featured Video > General Settings and configure the following:
- Shortcode: Use this shortcode if your page is built through page builders like Elementor, Divi, etc.
- Gallery Slider Style: Choose the preferred style for the gallery slider. You can choose between the following:
- Vertical
- Horizontal
- Autoplay: Enable the checkbox to autoplay the video.
- Mute Video Sound: Video sound will be muted when the checkbox is clicked.
- Allow Full Screen: Enable the checkbox to allow playing the video in full-screen mode.
- Loop Video: Click the checkbox if you want to repeat the video on a loop.
- Hide Video Controls: Hide video controls such as volume, full screen, etc.
- Hide Video On Shop Page: Check this option to hide the product featured video on the shop page.
- Hide Variation Images: Click the checkbox to hide the variation images on the product page slider. (Note: Disable this option if you only want to show variation images in the gallery slider.)
- Width of Video (Shop Page): Set the width of the product video.
- Height of Video (Shop Page): Enter the height of the product video.
- Width of Video (Product Page): Enter the width of the product video.
- Height of Video (Product Page): Set the height of the product video.
Click on the “Save General Settings” button to save and apply the configured settings.
Launch Video Button Settings
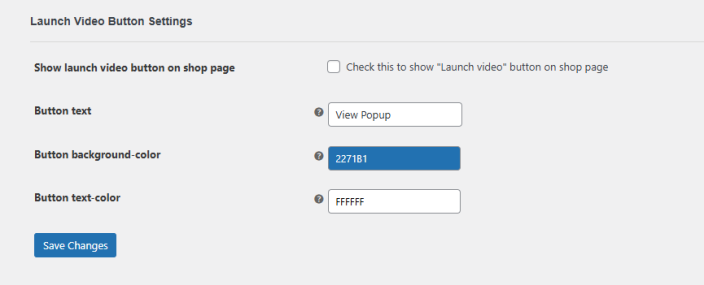
↑ Back to topIn this section, you can configure the settings for the “Launch video button”. Go to WooCommerce > Settings > Featured Video > Launch Video Button and configure the following settings:
- Show Launch Video Button On Shop Page: Click the check box if you want to show the “Launch video” button on the shop page.
- Button Text: Enter the text for the launch video button.
- Button Background Color: Select the background color for the launch video button.
- Button Text Color: Choose the color for the launch video button text.
Click on the “Save Changes” button to save and apply the configured settings.
Custom CSS
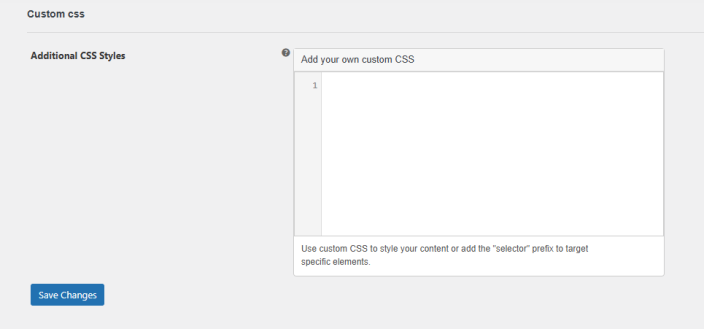
↑ Back to topThe plugin allows you to add custom CSS as well. This allows store owners to personalize the featured video to match their store’s overall theme. Go to WooCommerce > Settings > Featured Video > Custom CSS and add the add your own custom CSS to apply.
Click on the “Save Changes” button to save and apply the custom CSS stylings.
Product Level Settings for Product Video Plugin
↑ Back to topThe WooCommerce Product Video Plugin allows you to add videos to products on the product level. Go to Products > Specific Product > Product Data Section > Featured Video and configure the following settings:
Adding Product Featured Video
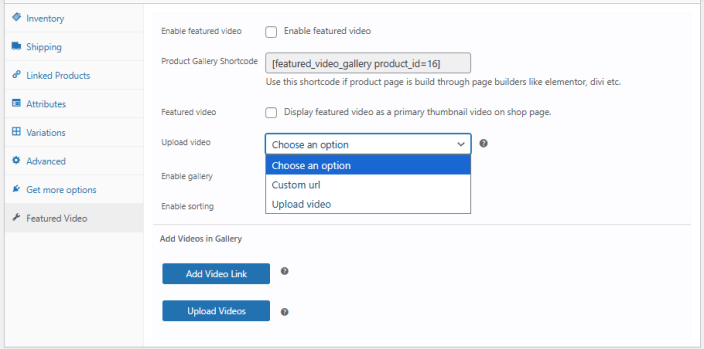
↑ Back to topTo add a featured video, go to Products > Specific Product > Product Data Section > Featured Video and configure the following:
- Enable Featured Video: Click the checkbox to enable featured video for the product.
- Product Gallery Shortcode: Use this shortcode if the product page is built through page builders like Elementor, Divi, etc.
- Featured Video: Click the checkbox if you want to display the featured video as the primary thumbnail on the shop page.
- Upload Video: Upload the featured video. You can choose between teh following two ways to upload a video:
- Custom URL (If “Custom URL” is selected, a field will appear where you can add a custom URL.)
- Upload Video (If “Upload Video” is selected, a field will appear where you can upload the video.)
If you choose the video upload option, you can simply upload the video by clicking the “Choose Media” button. In the case of a custom URL, place a video link of YouTube, Vimeo, or Dailymotion. This video will replace the default featured image.
Adding Video to WooCommerce Product Gallery
↑ Back to topTo add videos to the WooCommerce product gallery, go to the “Featured Video” section on the product edit page. You can add, edit, or remove product videos from here. While adding a video to the gallery, you choose to upload or embed a video from YouTube, Vimeo, Dailymotion, Metacafe & Facebook. You can also add multiple videos for a single product.
Follow the steps below to add videos to the WooCommerce Product gallery: Go to WooCommerce > Products > Edit Product > Featured Video Tab and configure the following:
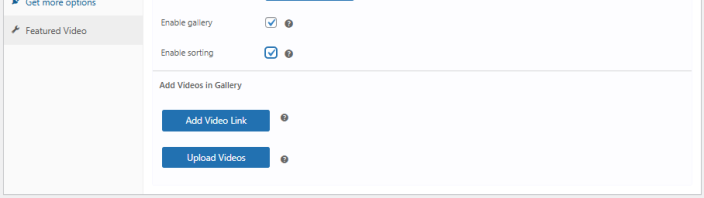
- Enable Gallery: Click the checkbox if you want to enable videos in the product gallery. When enabled, two buttons will appear to “Add Video Link” and “Upload Videos”.
- Enable Sorting: Click the checkbox if you want to enable sorting of videos in the product gallery.
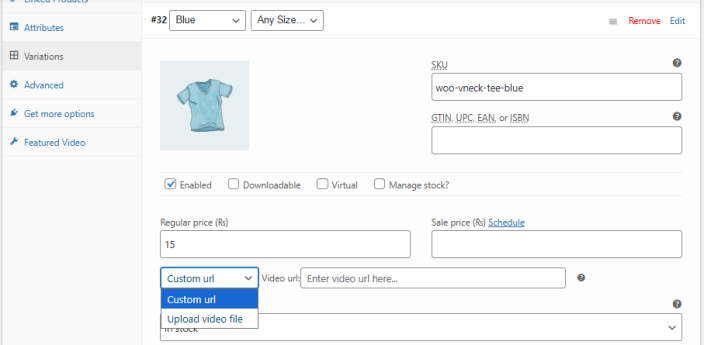
Add Videos for Product Variations
↑ Back to topTo add videos for each product variation, go to the WooCommerce > Products > Product Edit Page > Product Data > Variations and select the variation for which you want to add the product video. You can either upload the video or add a video link.
FAQs
↑ Back to top- Can the featured video replace the default product image?
Yes. Enable the “Featured Video” option under Product Data > Featured Video to display the video as the primary thumbnail on the shop page, replacing the default featured image. - What video sources are supported for featured videos?
You can upload a video file directly or add a custom URL from YouTube, Vimeo, or Dailymotion. - Can I add multiple videos to the WooCommerce product gallery?
Yes. Enable the Gallery option in the product’s Featured Video tab to add multiple videos using “Add Video Link” or “Upload Videos.” You can also enable sorting for gallery videos. - Can I control autoplay, mute, loop, full screen, and video controls?
Yes. From General Settings, you can enable autoplay, mute video sound, allow full screen, loop videos, and hide video controls. - Can I add videos for individual product variations?
Yes. Go to Product Data > Variations, select a specific variation, and either upload a video or add a video link for that variation. - Can I define custom video dimensions for shop and product pages?
Yes. You can set separate width and height values for both the Shop Page and the Product Page in the General Settings.