Description
↑ Back to topThe Bulk Variation and Swatches WooCommerce plugin simplifies product management by converting simple products into variable products. It automatically and manually creates variations based on predefined attributes. Additionally, it offers customization options for how variable products are displayed on the product page, enhancing the user experience and streamlining the process of managing product variations.
Features
↑ Back to top- Converting a simple product into a variable product using the Variations Collection.
- Attribute Types.
- Customization.
Installation
↑ Back to top- Download the .zip file from your WooCommerce account.
- Go to WordPress Admin Dashboard > Plugins > Upload Plugin > Choose File.
- Install Now and Activate Plugin.
Getting Started
↑ Back to topSimple Product to Variable Product
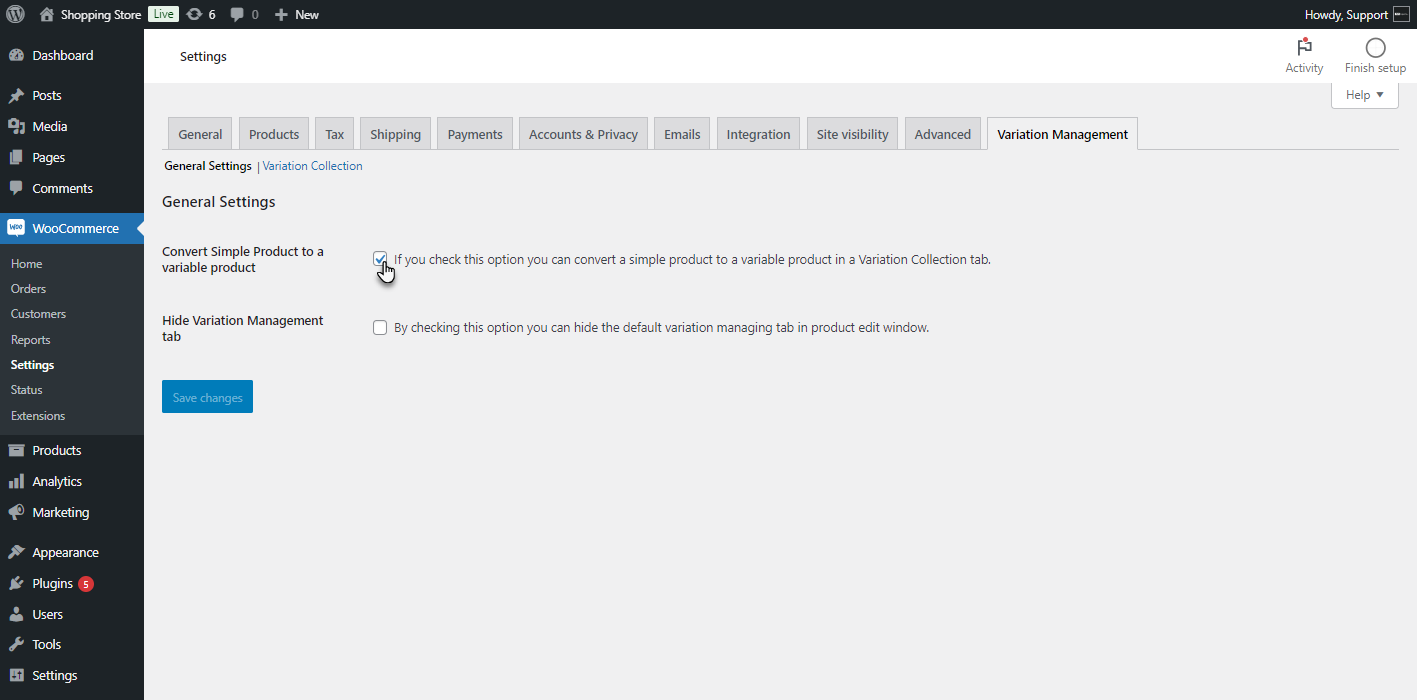
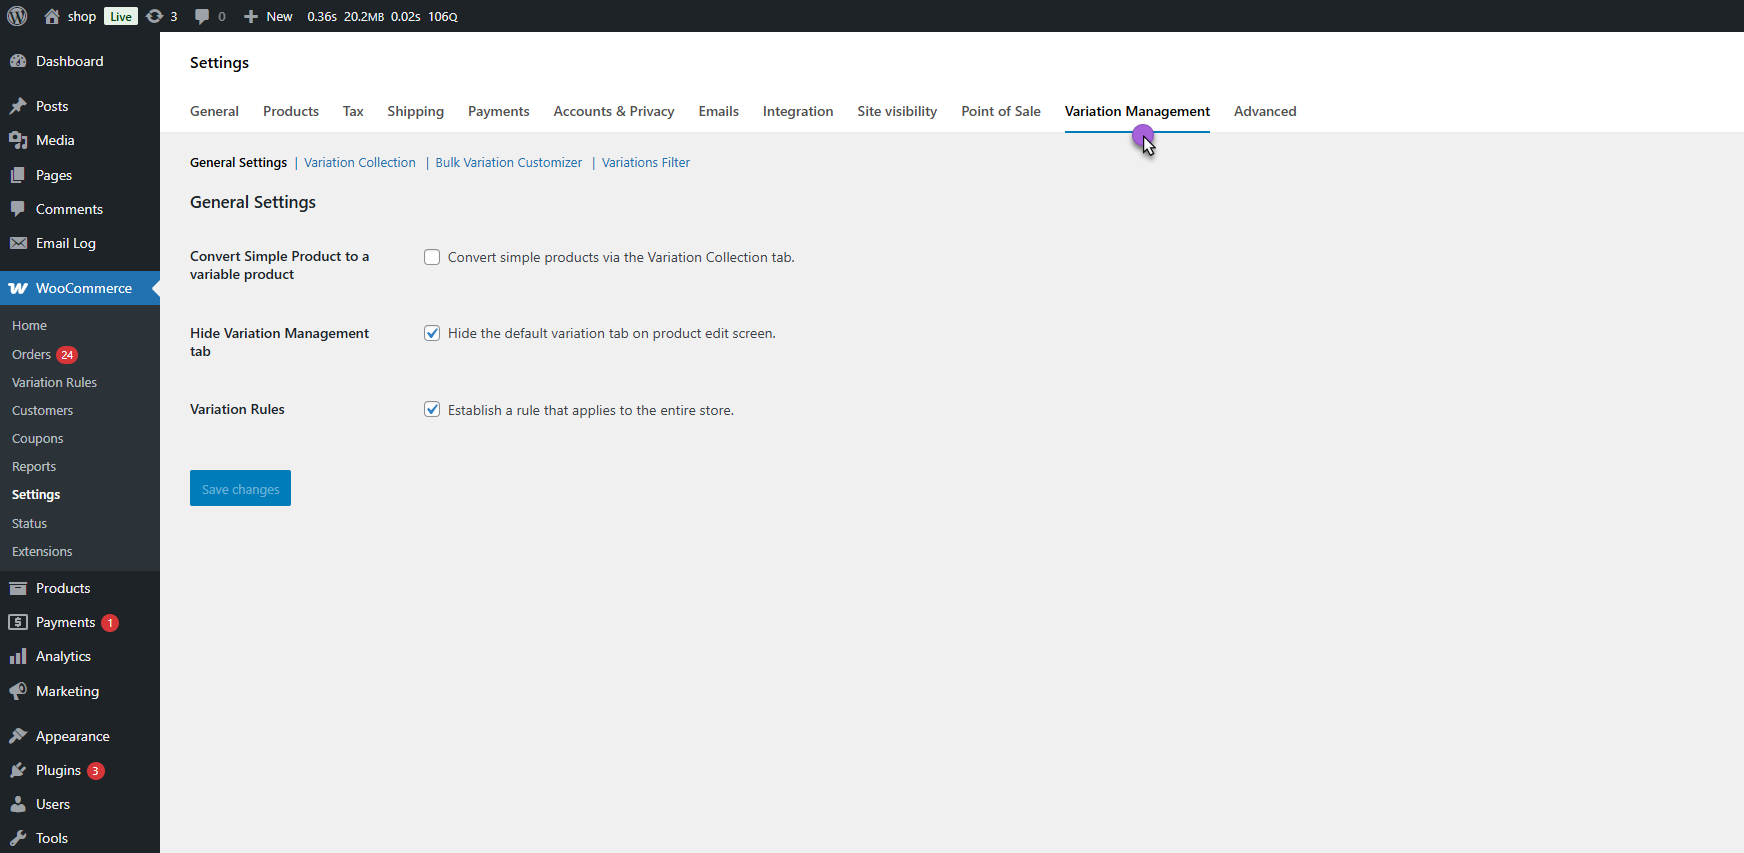
↑ Back to top- Go to WordPress Admin Dashboard > WooCommerce > Settings > Variation Management > General Settings.
- Enable the Convert Simple Product to Variable Product option from the General Settings tab.
- Navigate and click on the Variation Collection tab.
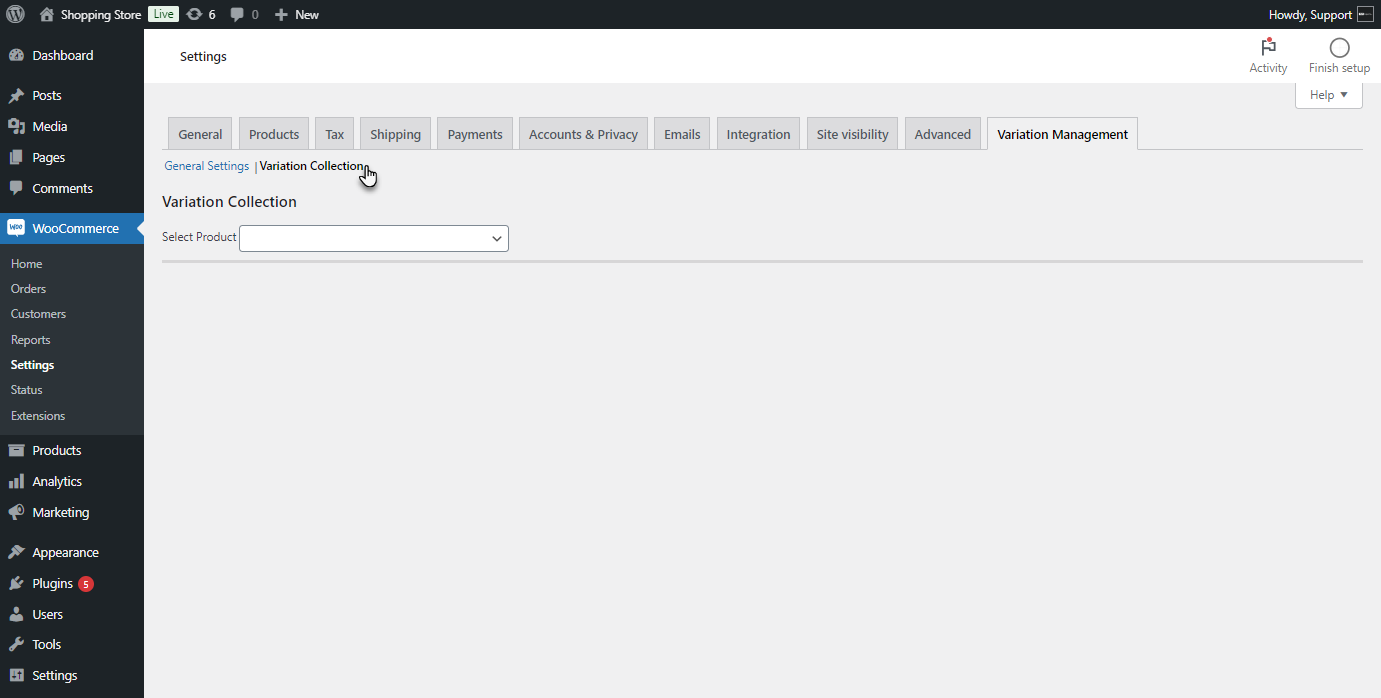
- Search for the Simple Product using the search box.
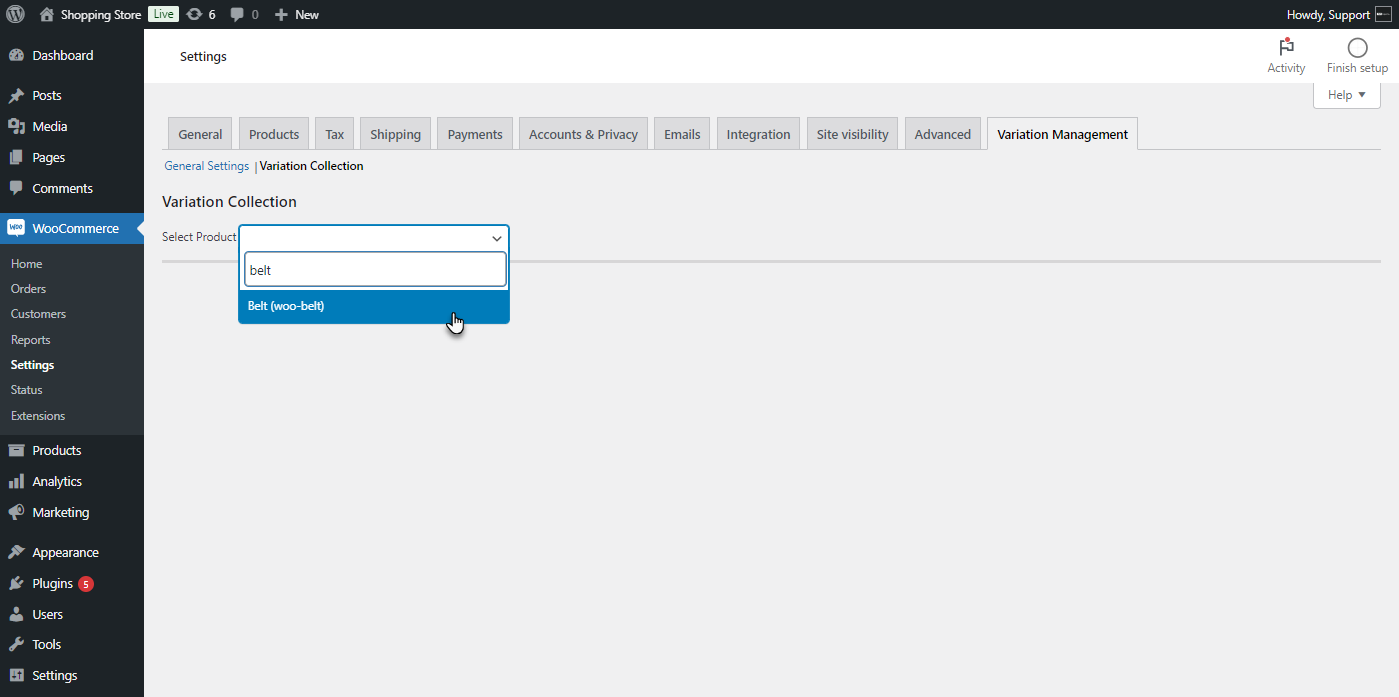
- The Simple Product will appear with its name and SKU.
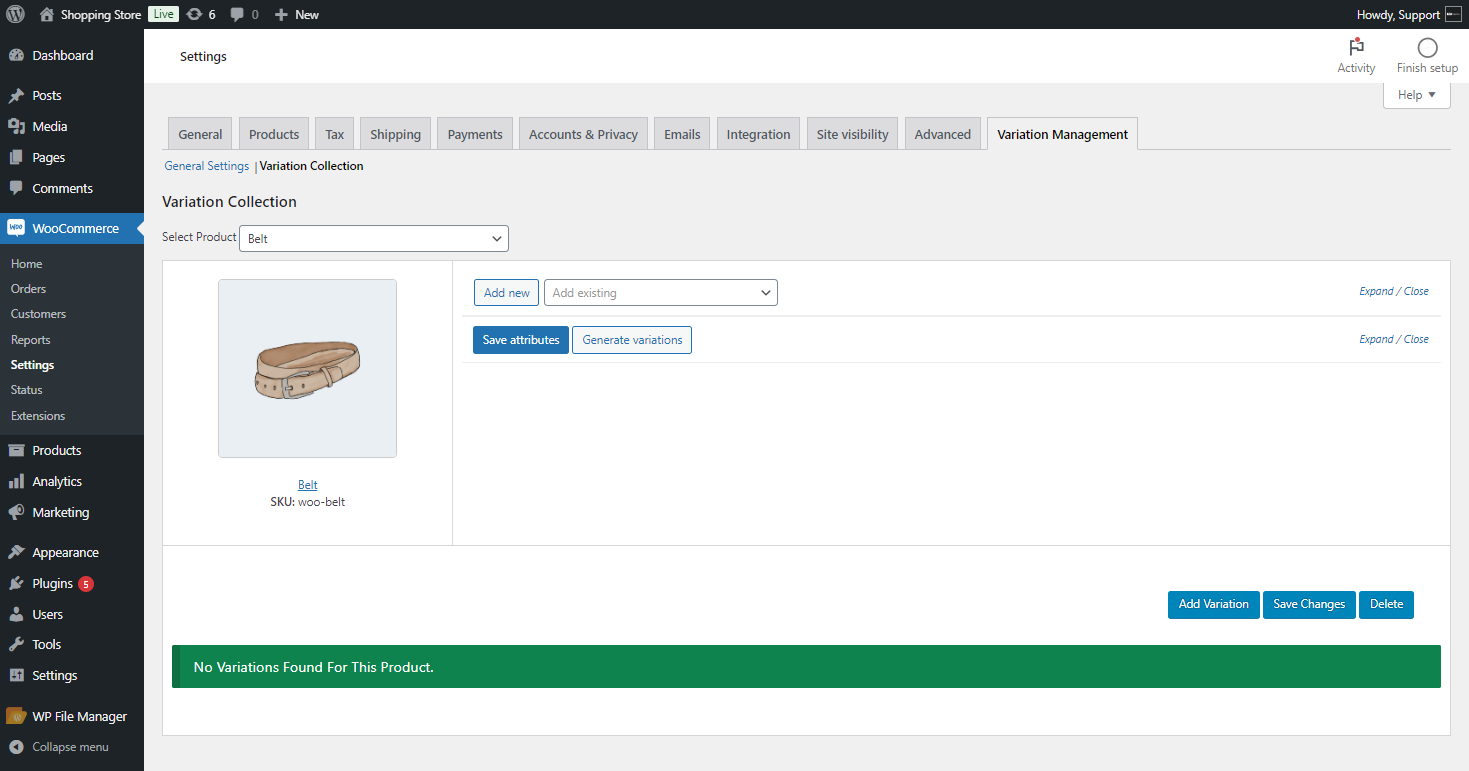
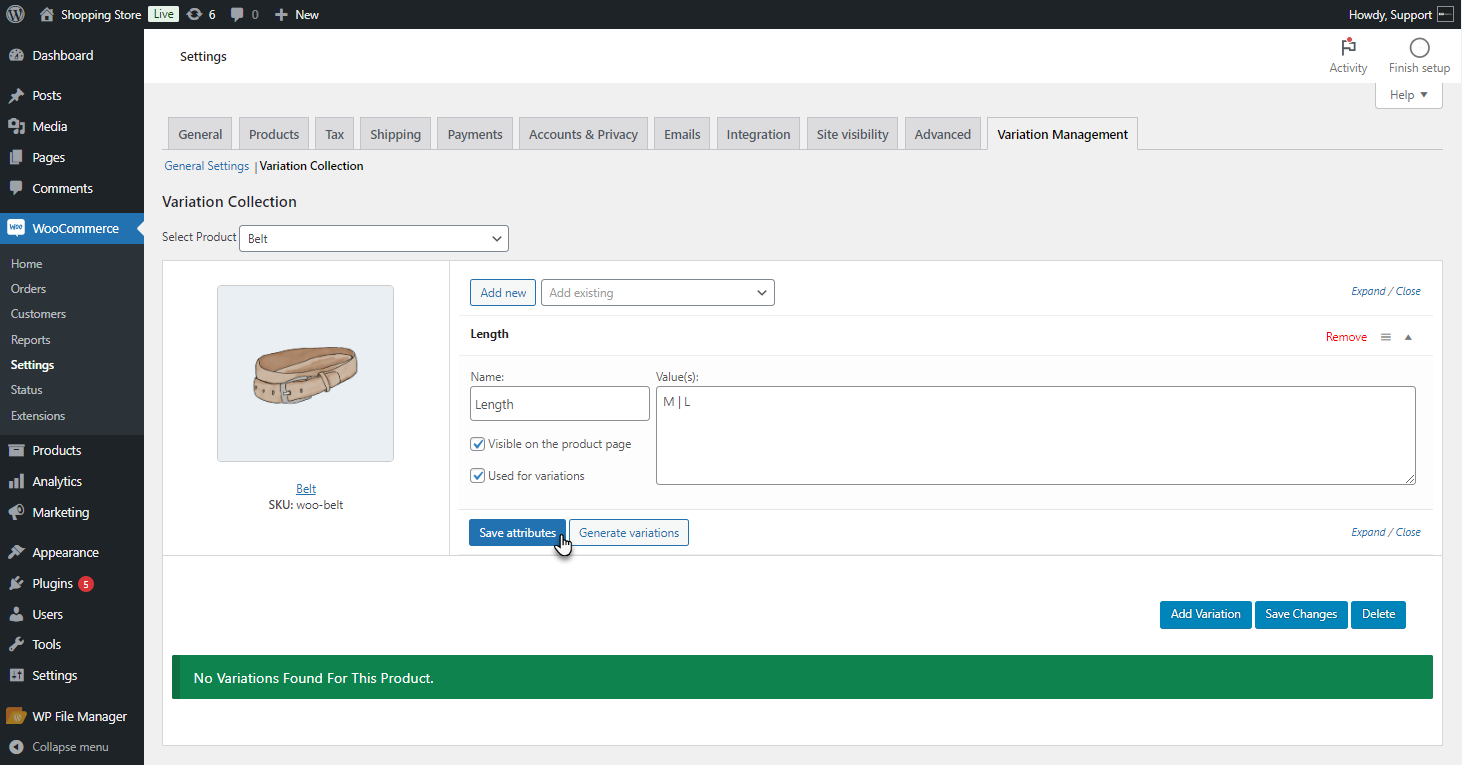
- Create an attribute for the product by clicking the Add New button.

- A new tab will appear for the attribute.
- Name the attribute, enter its values, and Click the Save Attribute button.
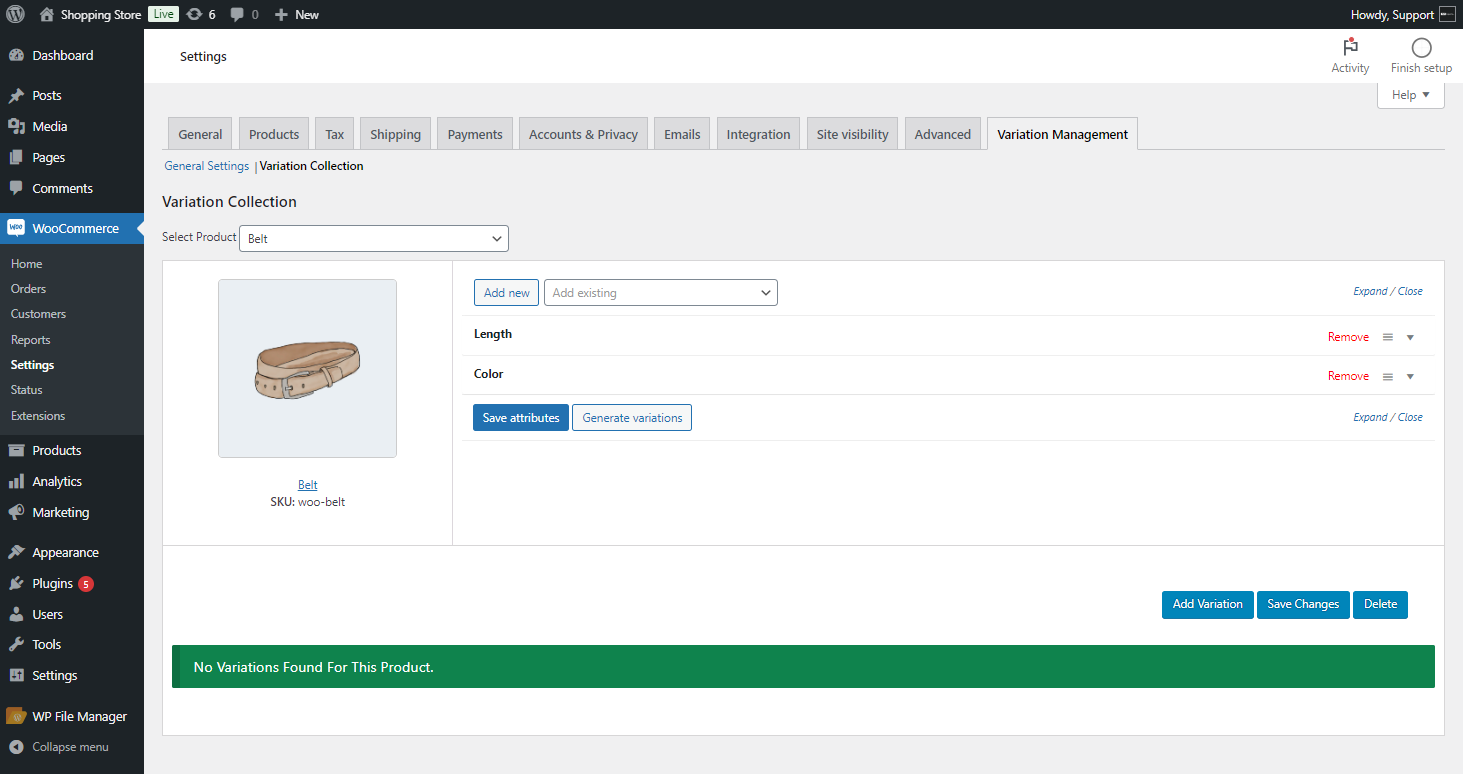
- The admin can add multiple attributes as needed.
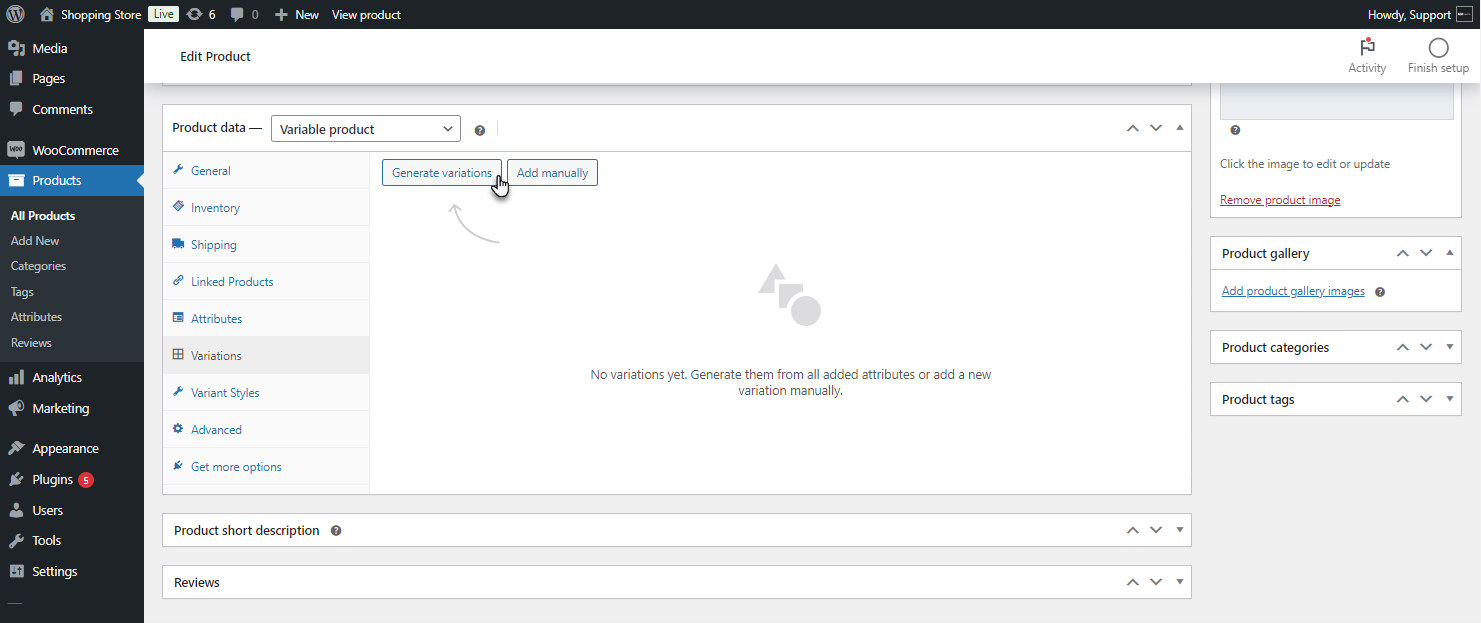
- Click the Generate Variations button to create variations for the product.
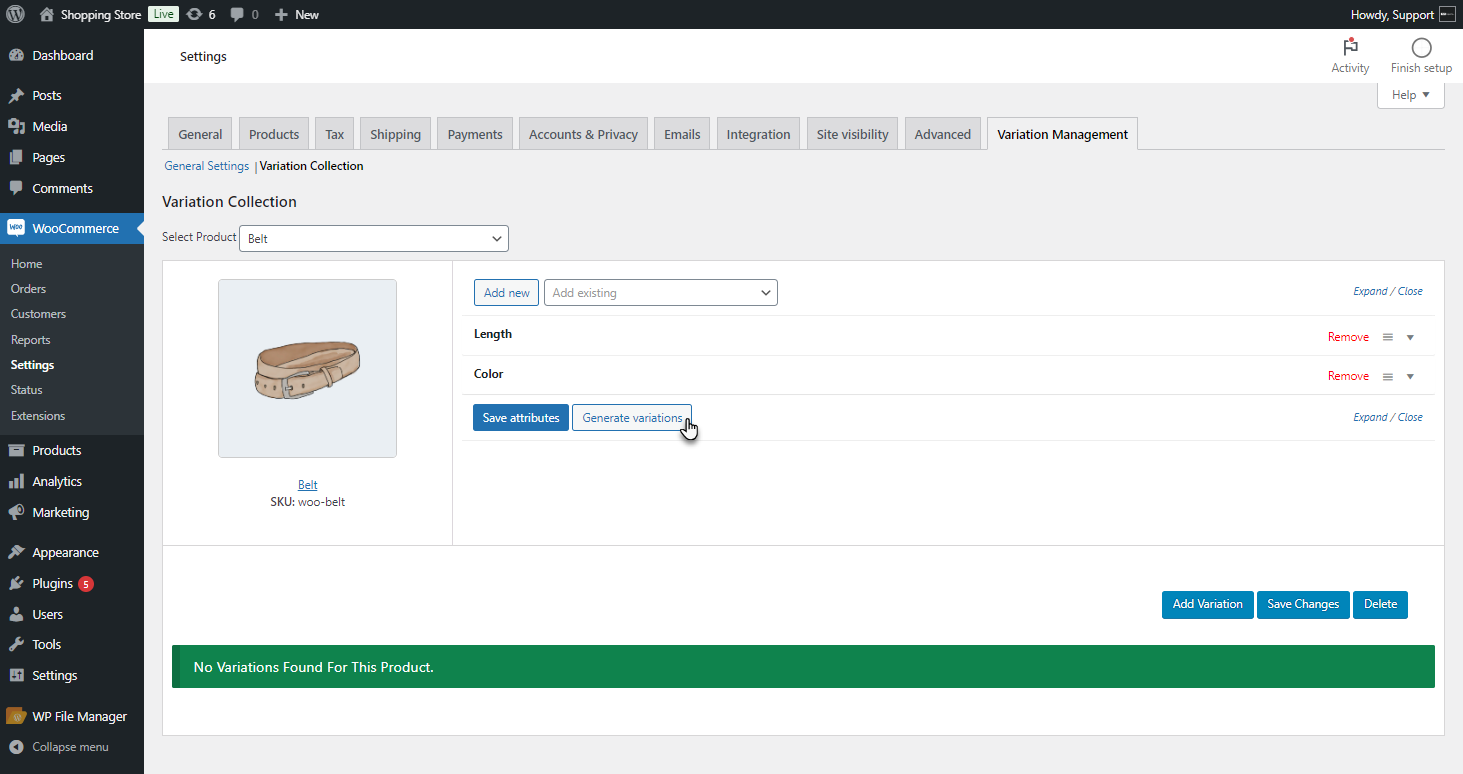
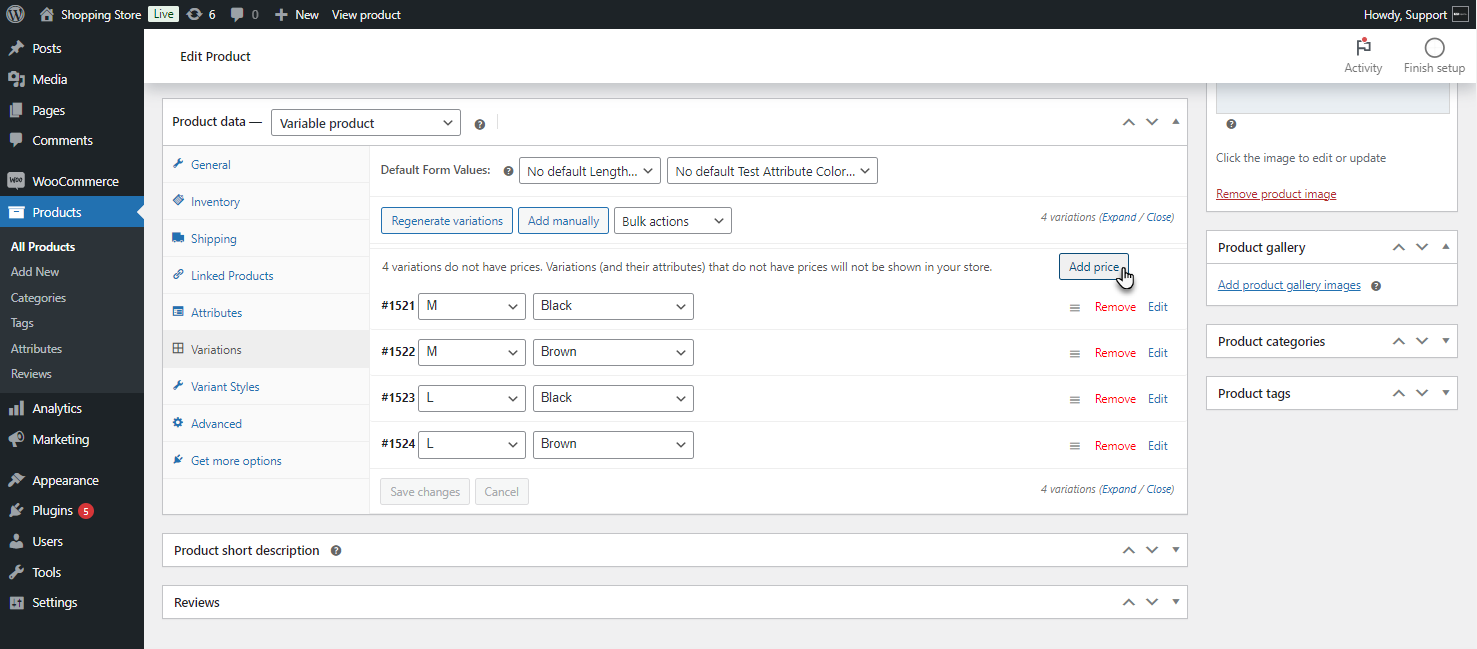
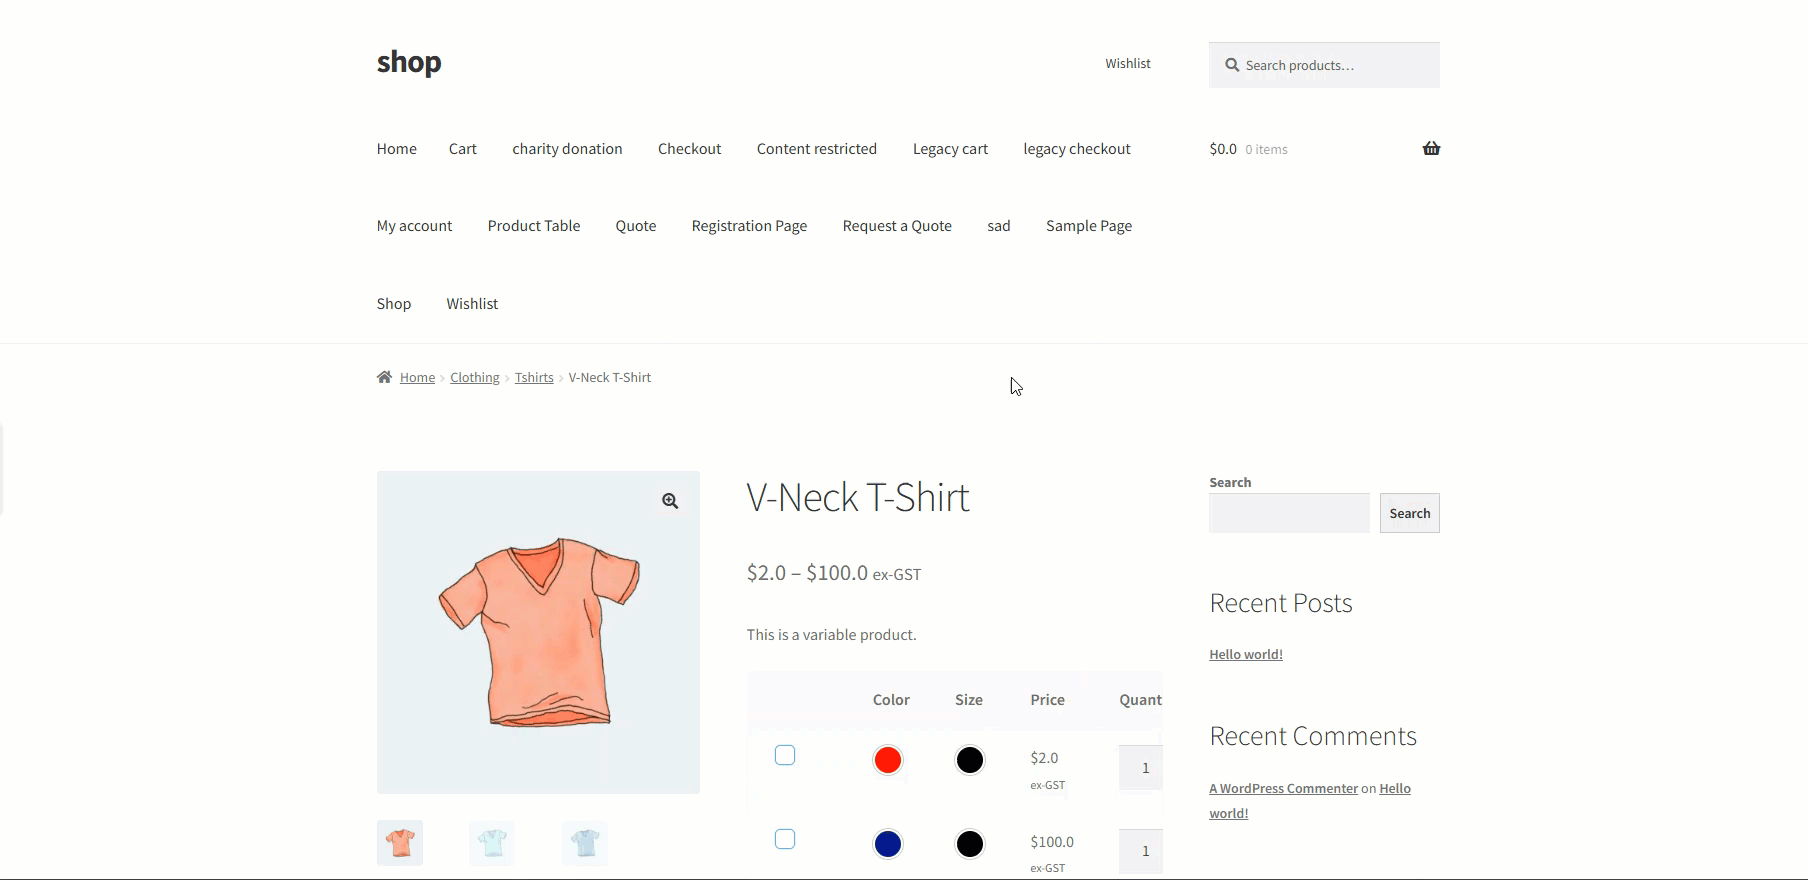
- The variations for the product following the attributes will be created.
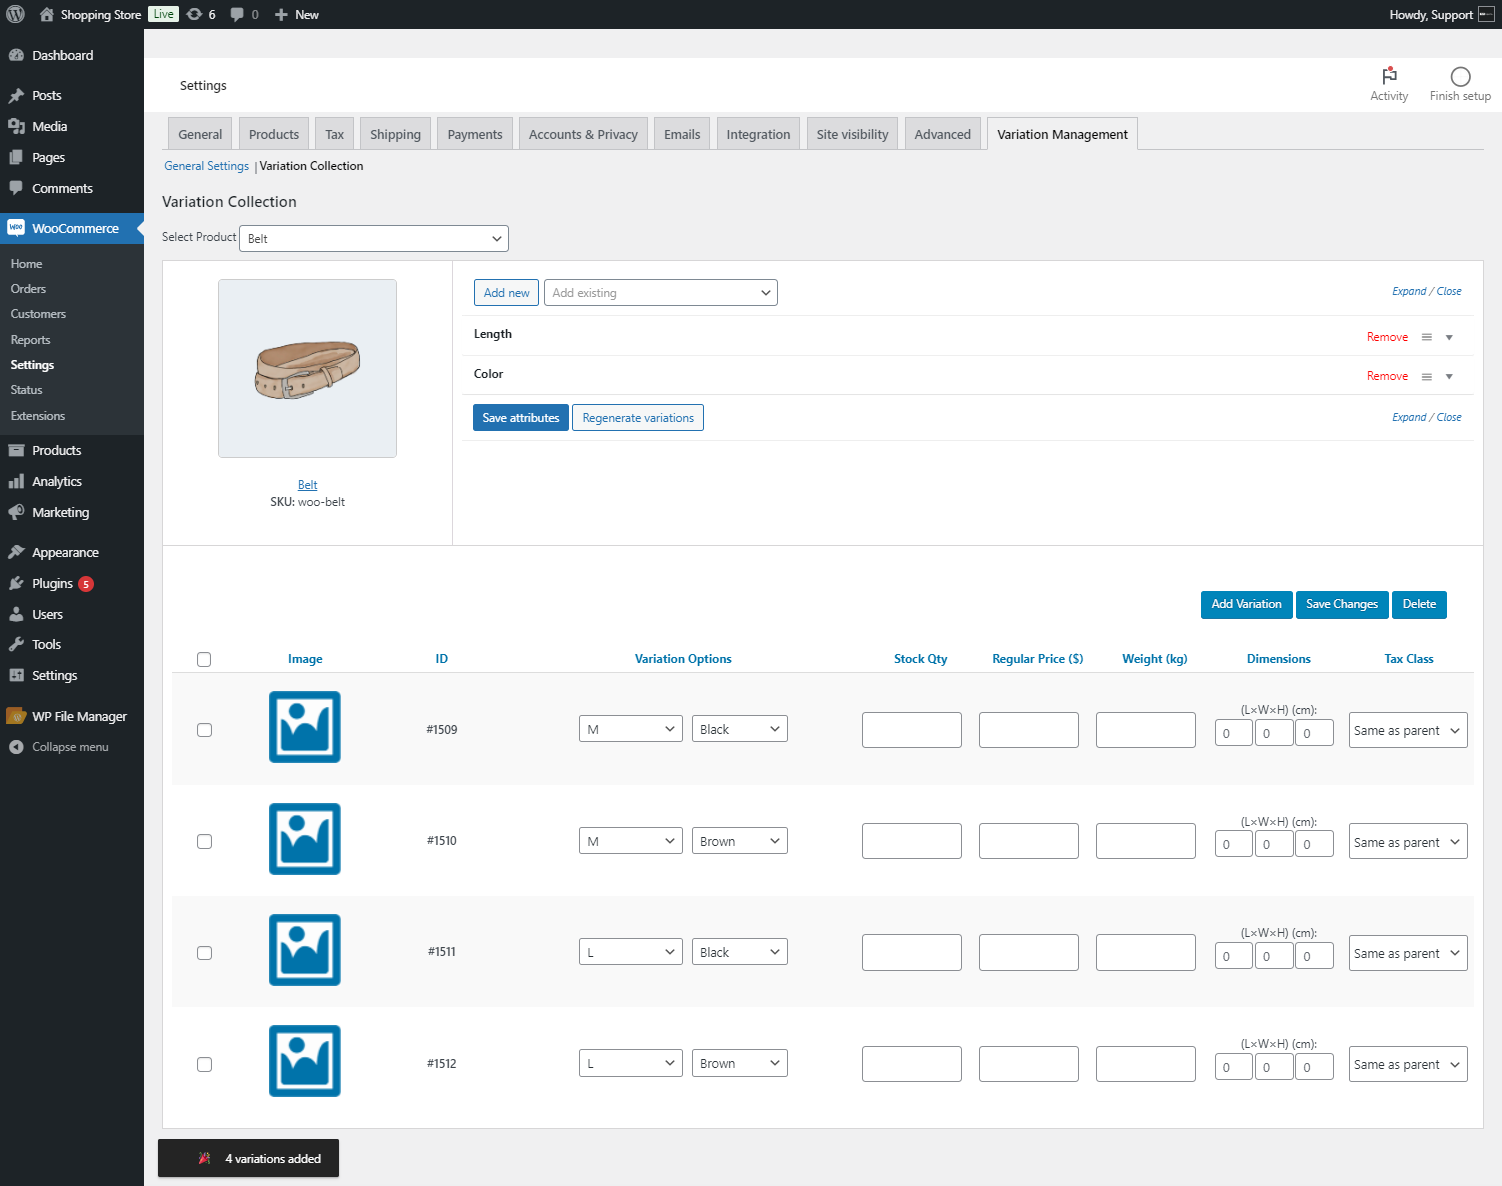
- Add the Stock Quantity, Regular Price, Weight, Dimensions, and Tax Class for the variation.

- Alternatively, the admin can add variations manually by clicking the Add Variation button.

- Use the Delete button to remove single or multiple variations by selecting the checkbox if required.

- Click Save Changes to save all settings.

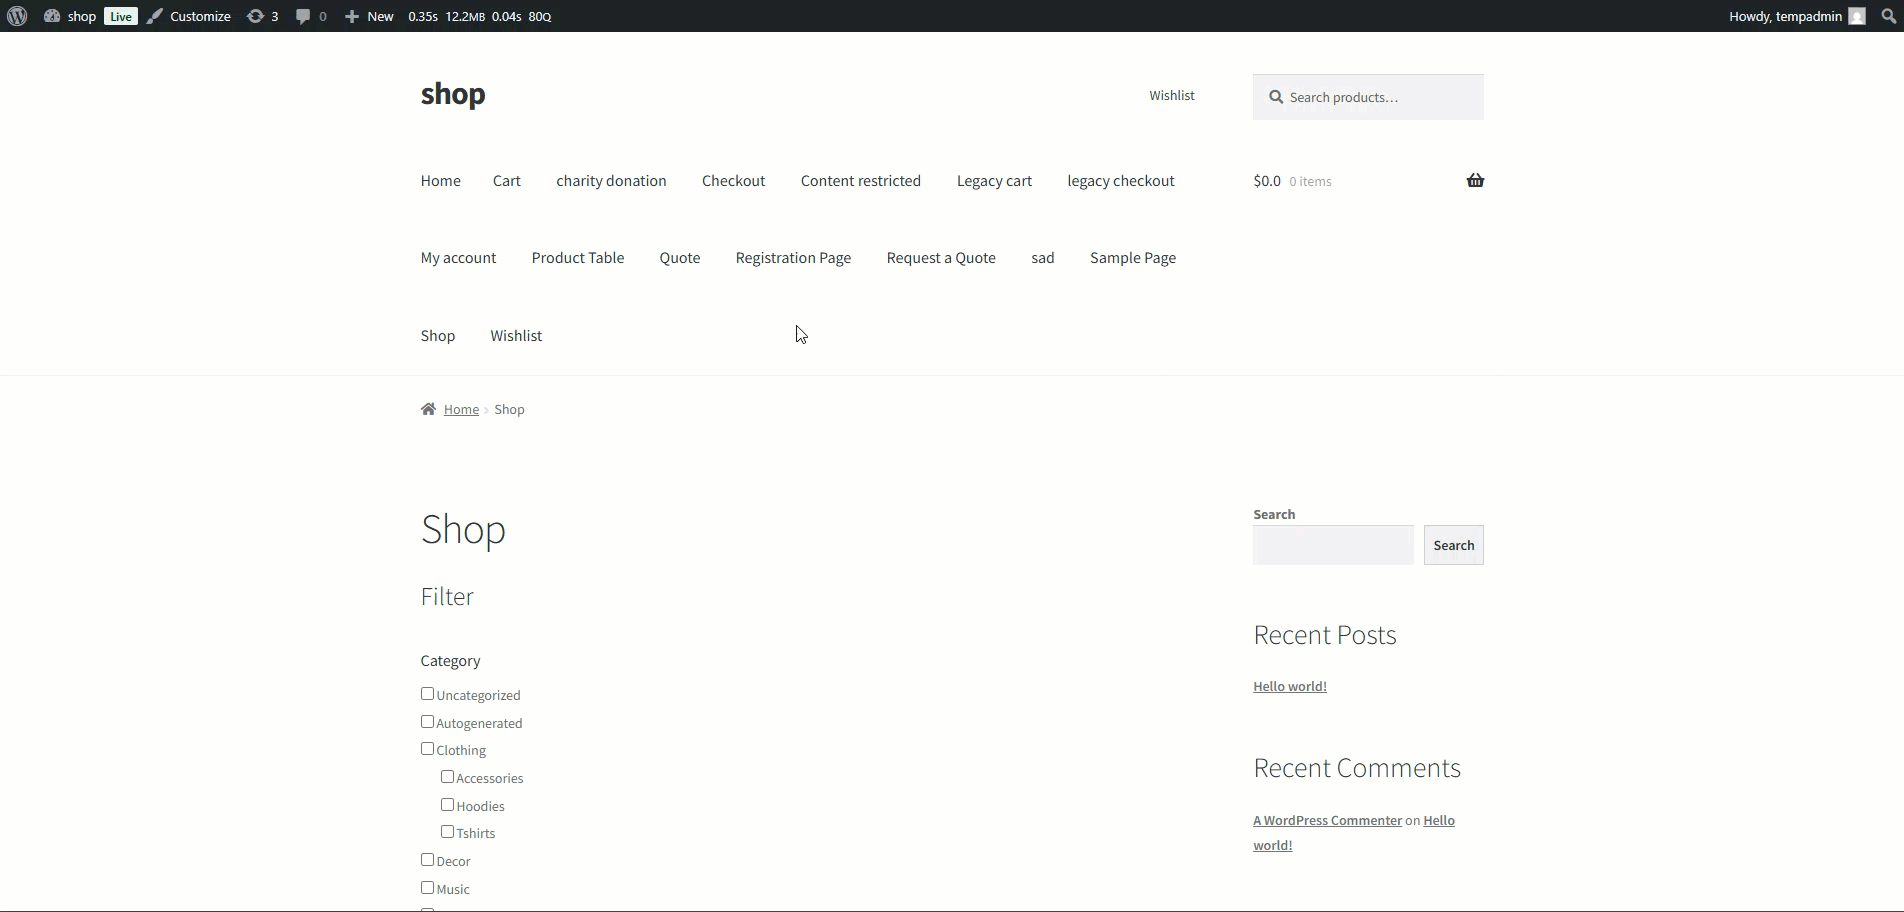
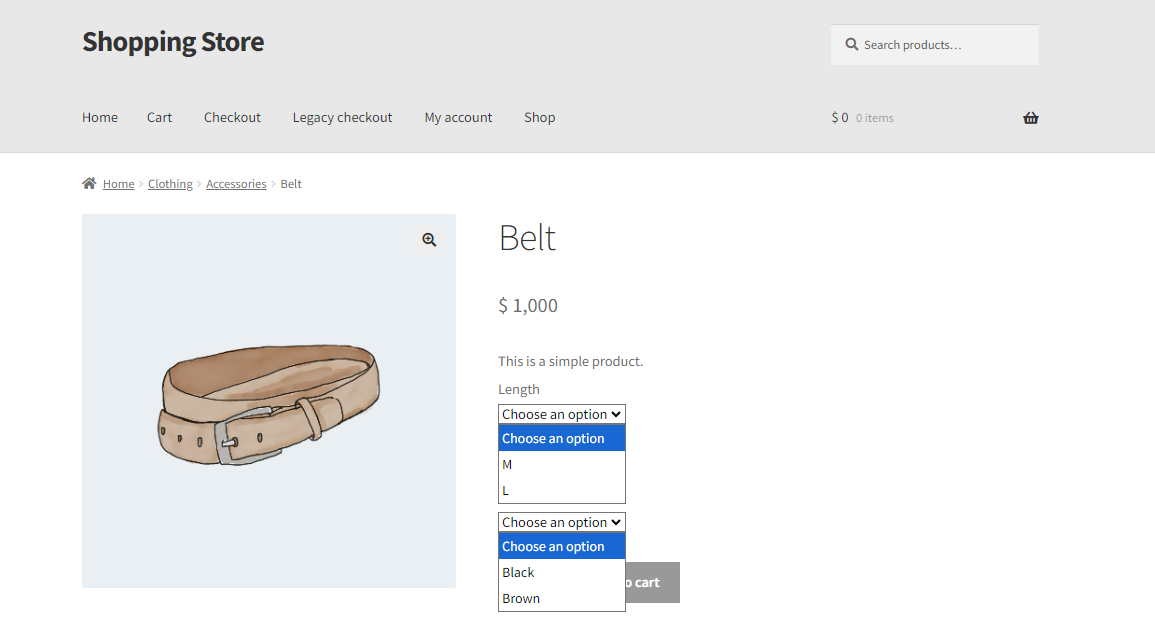
Front End Impact
- Login to your account.
- Go to the Product Page. Variations of the product will appear.
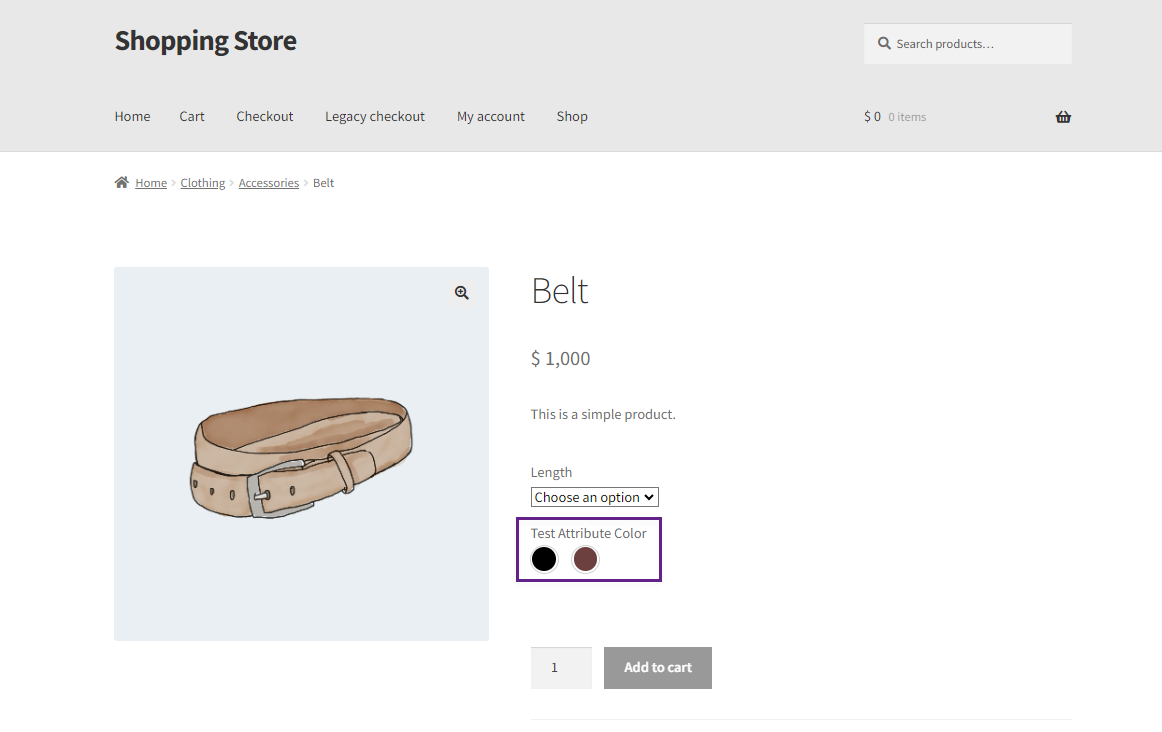
Attribute Type
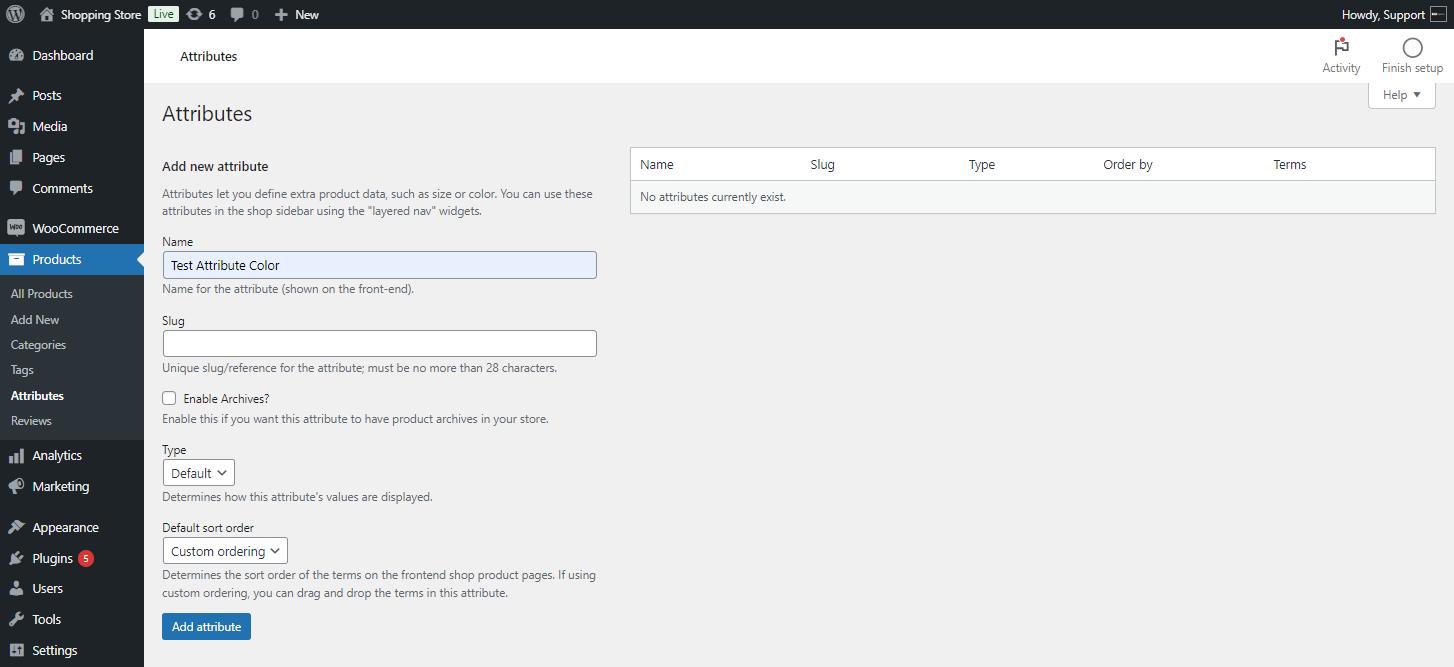
↑ Back to top- Go to WordPress Admin Dashboard > Products > Attributes.
- A new Add New Attribute screen will appear.
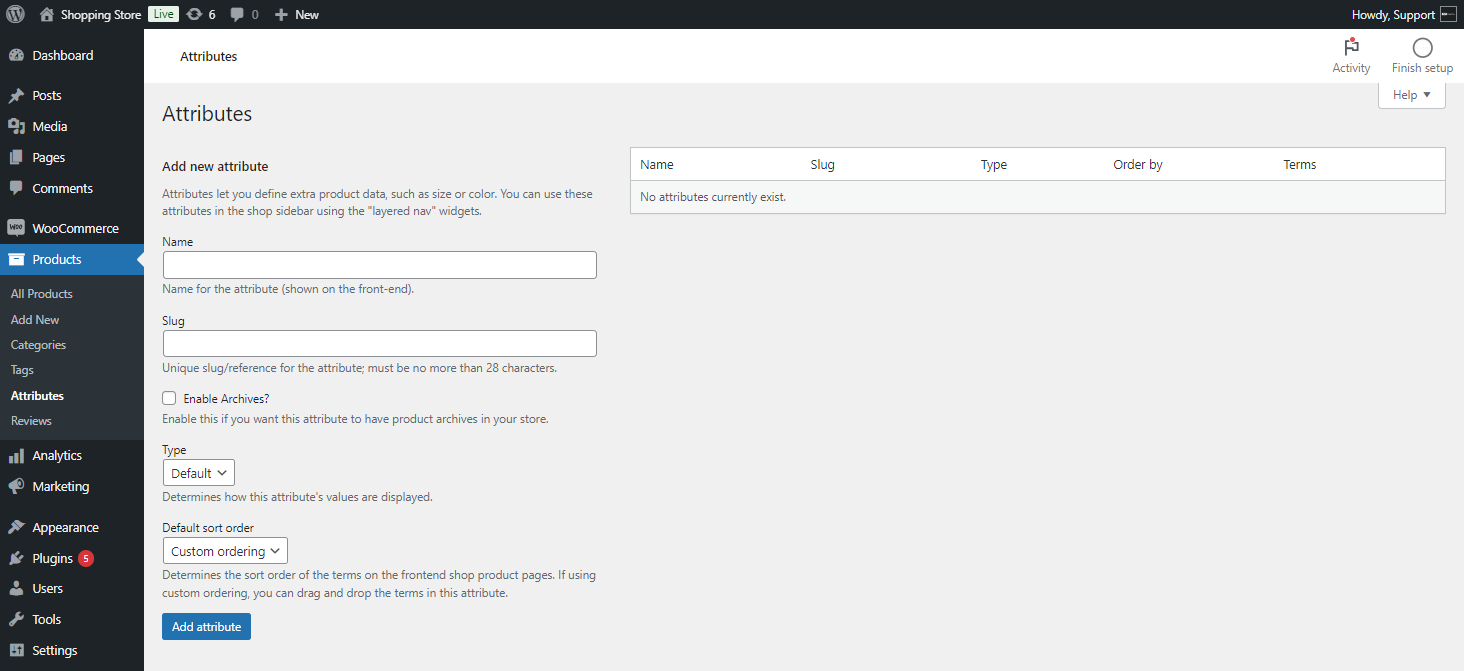
- Fill in the fields, including name and slug; otherwise, the slug will be created automatically.
- Select the attribute type from the dropdown menu. There are four types of Attributes.
- Default ( Select )
- Color
- Image
- Button
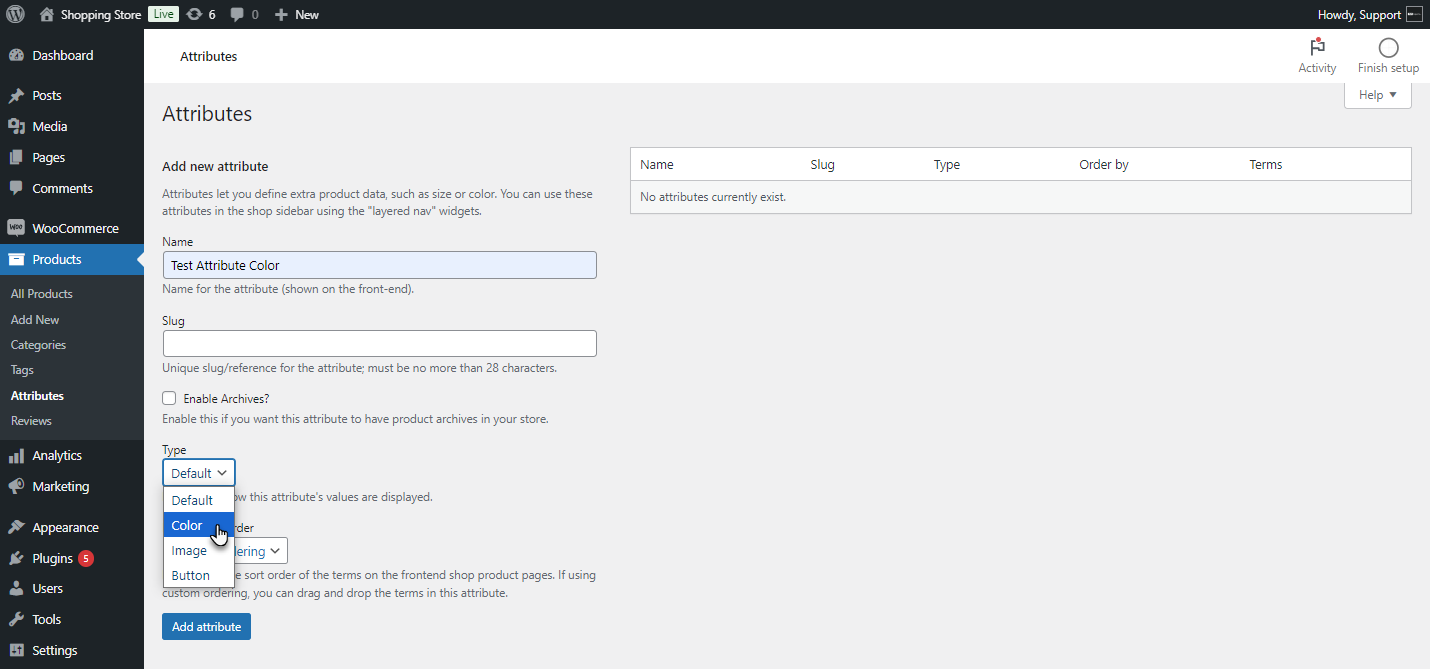
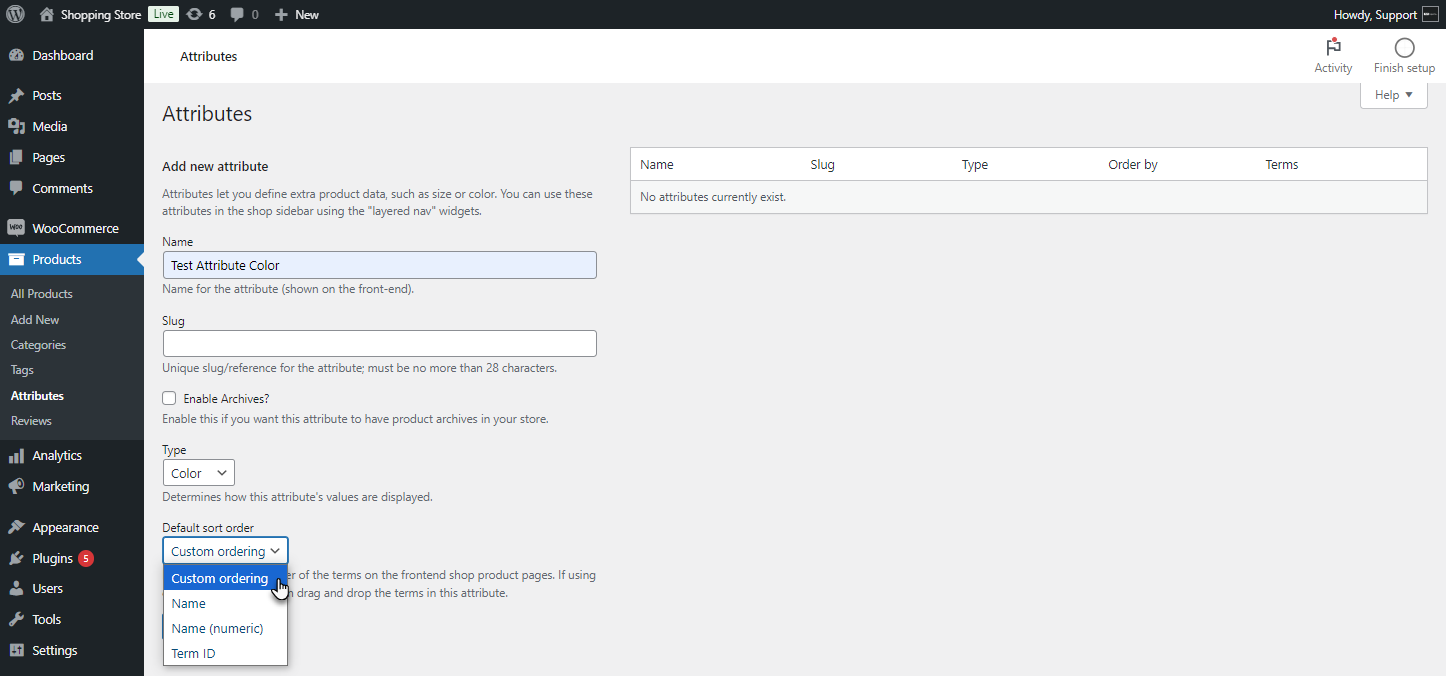
- Choose the sort order from the Default Sort Order dropdown list.
- Click the Add Attribute button.

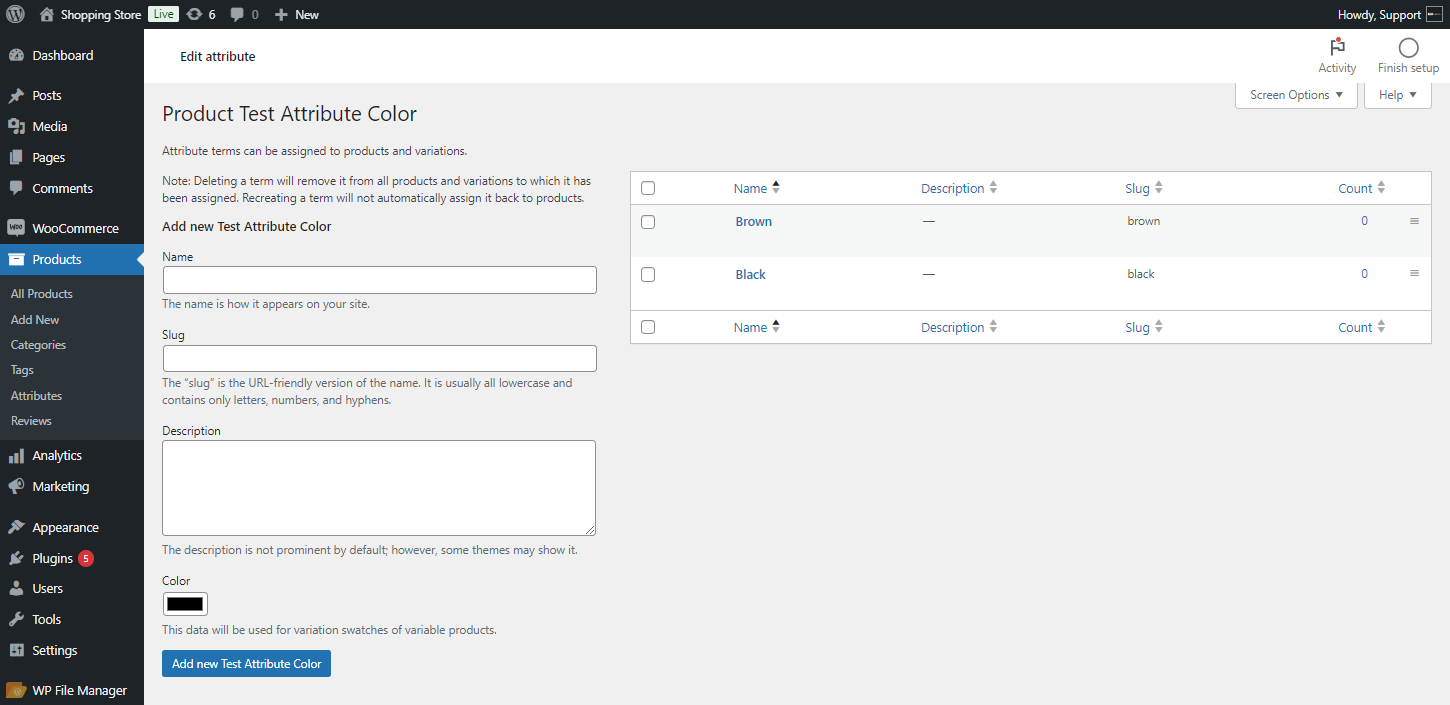
- The attribute will be created and listed in the attribute table.
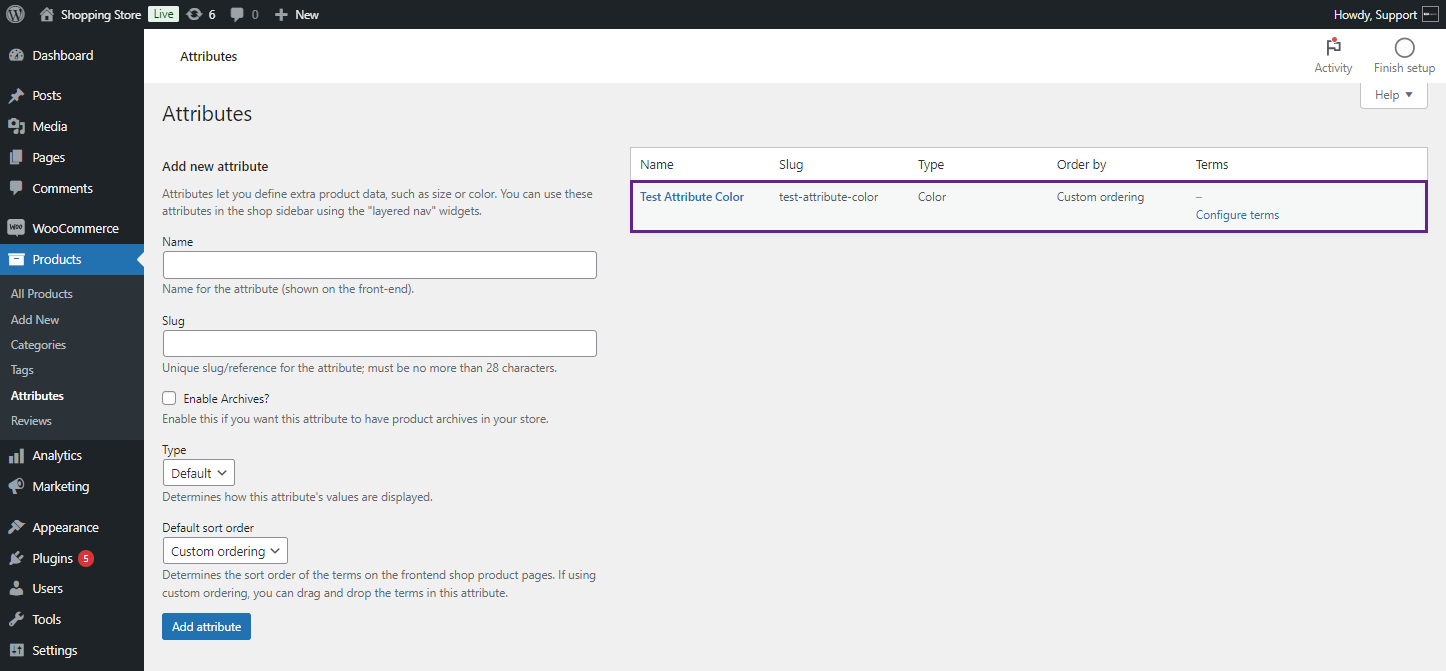
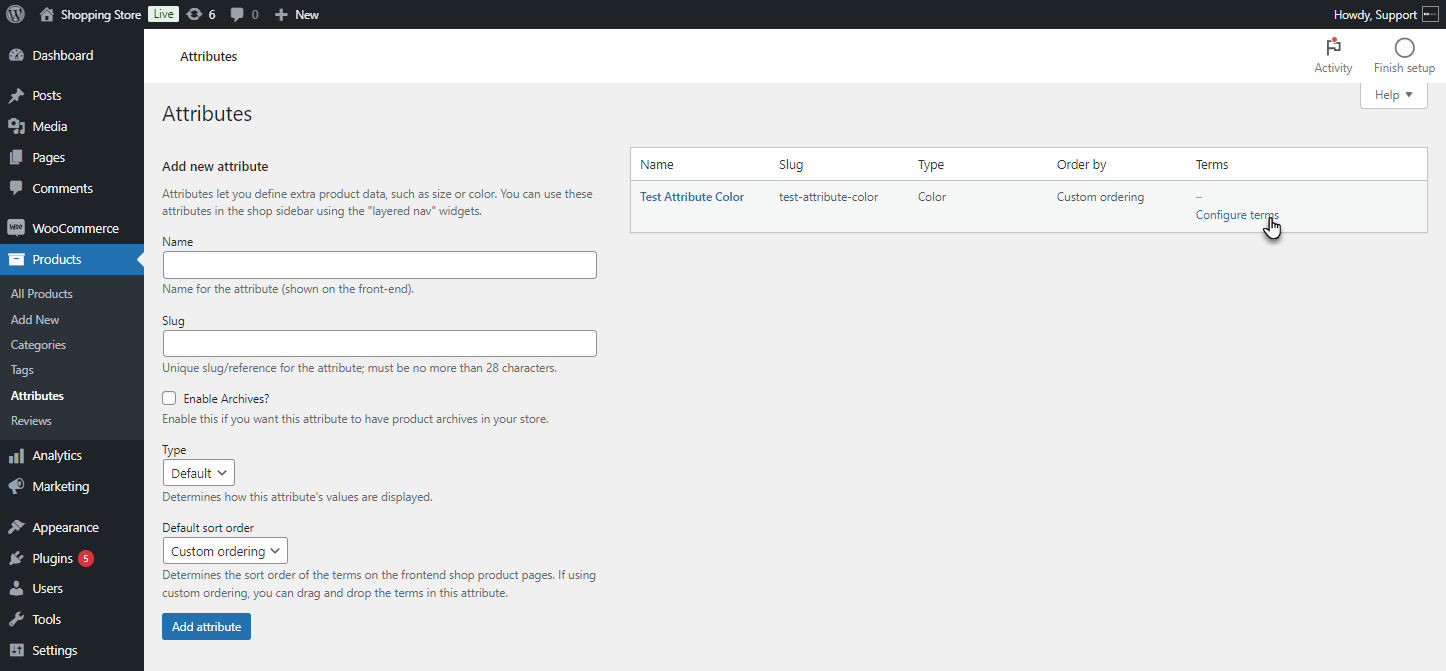
- In the Attributes table, under the Terms column, click on Configure Terms.
- If the admin chooses the color attribute type, a new window representing Add New Color will open. Fill in the fields, including name, slug if required, and description.

- Select the color from the color option.
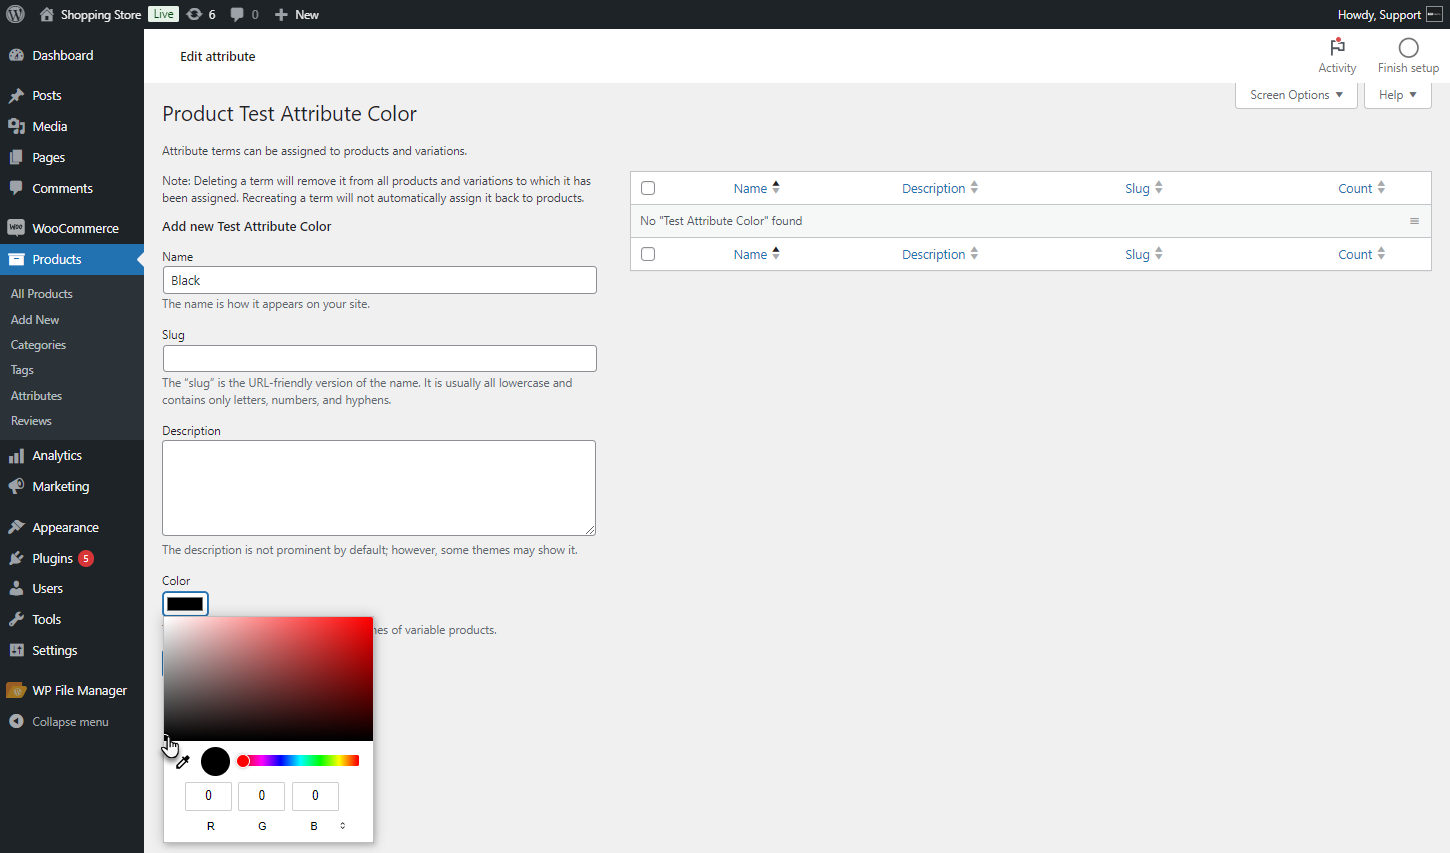
- Click on the Add New Attribute Button.
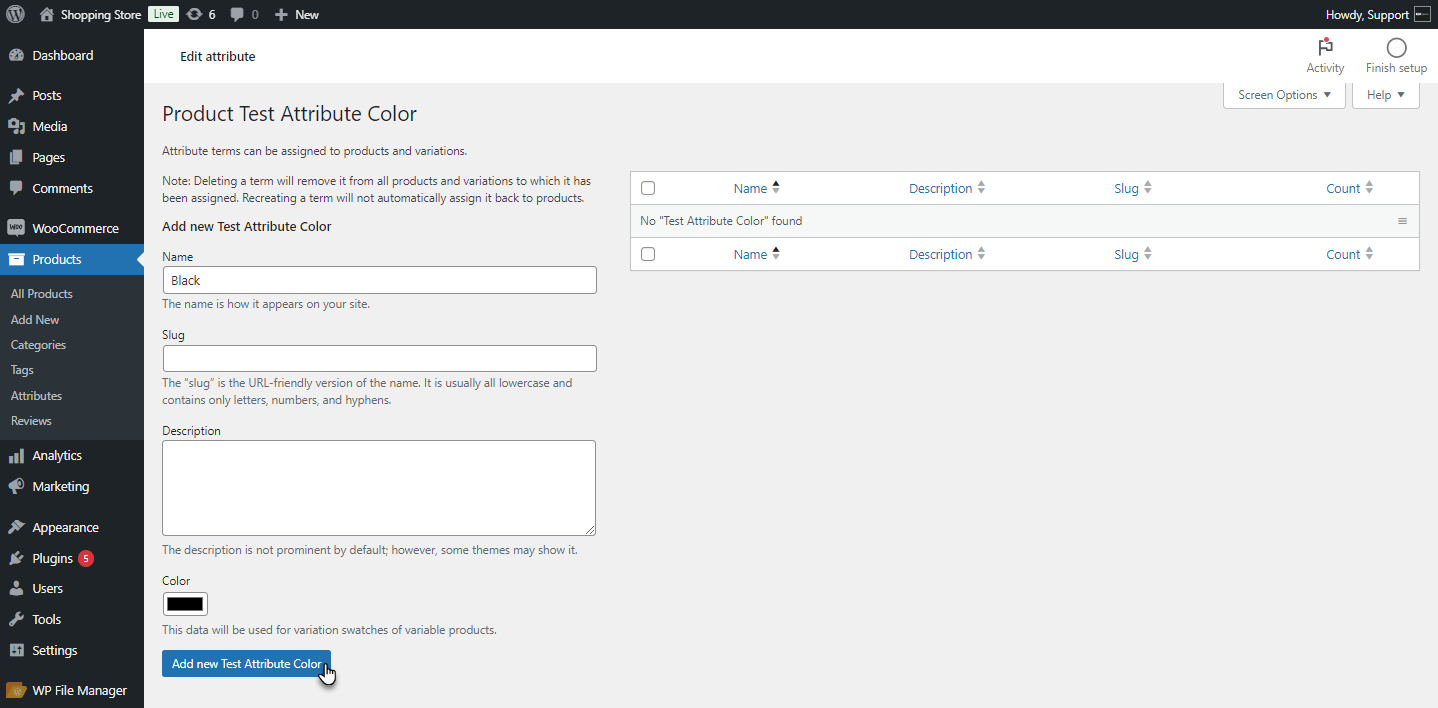
- The admin can add multiple options in the attribute.
- Now, Go to WordPress Admin Dashboard > Products > All Products > Variable Product.
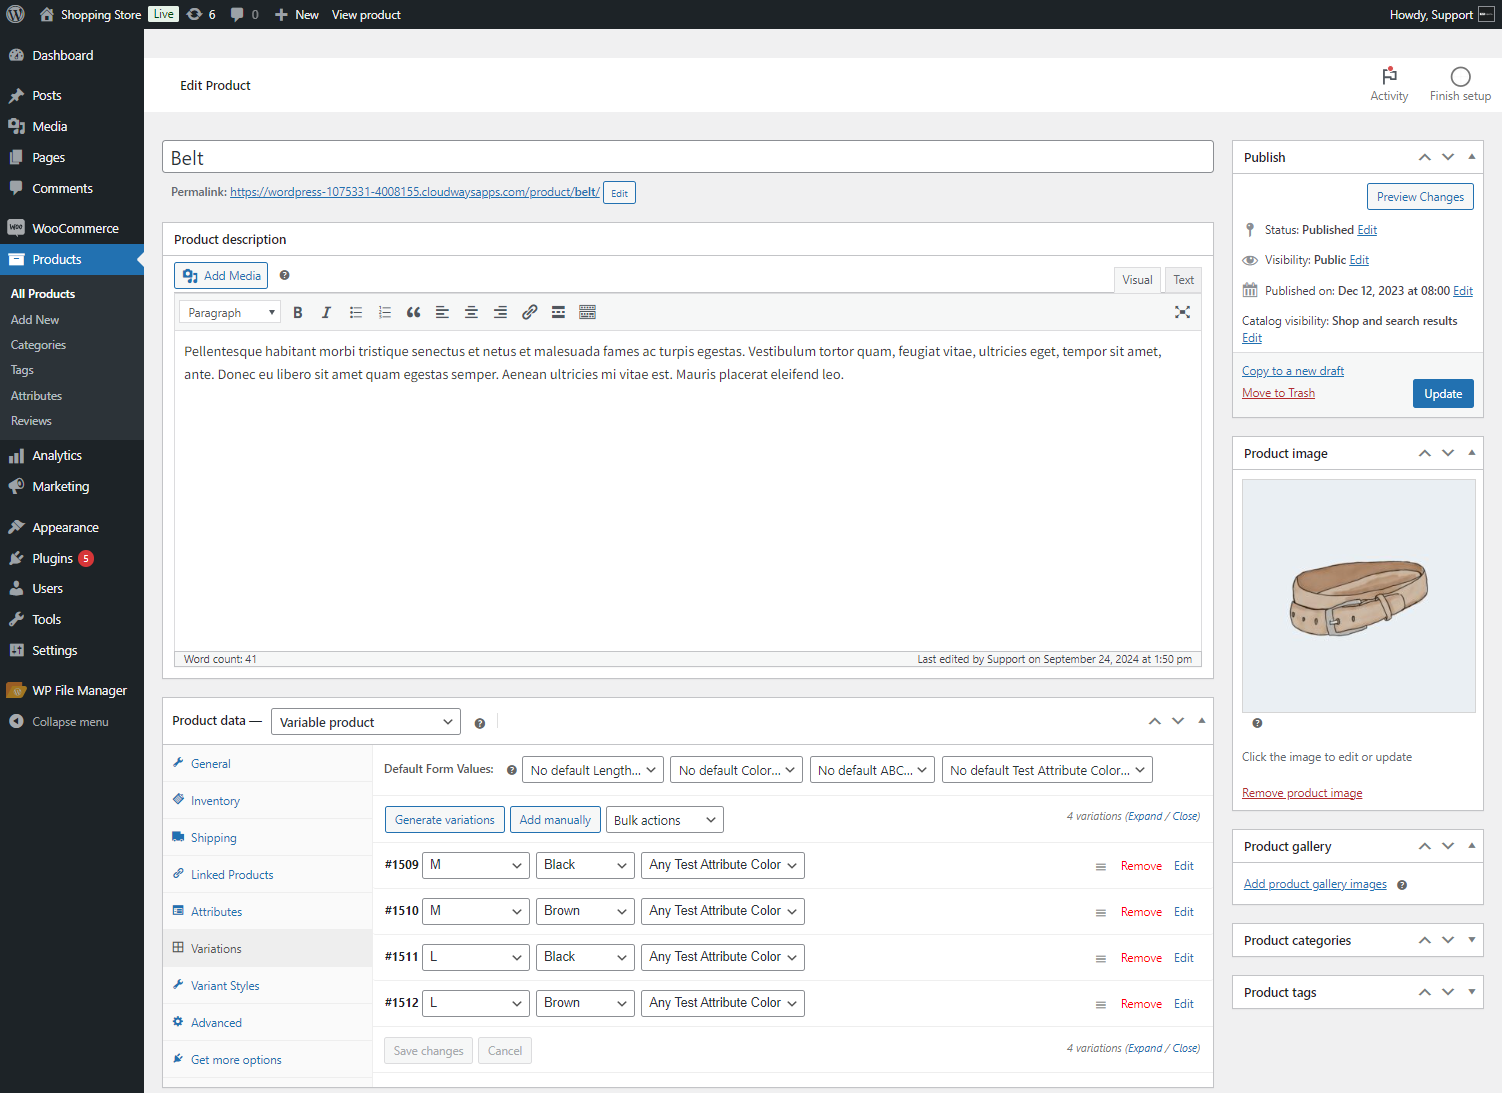
- In the Product Data section, navigate to Attributes.
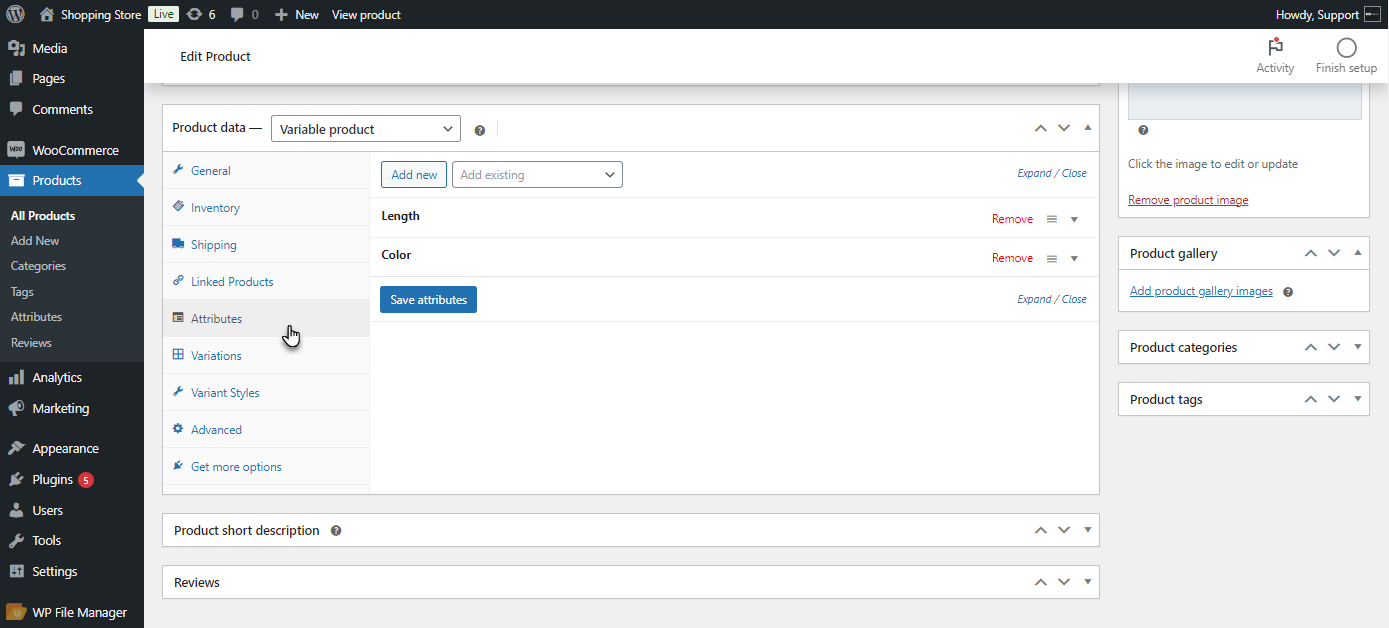
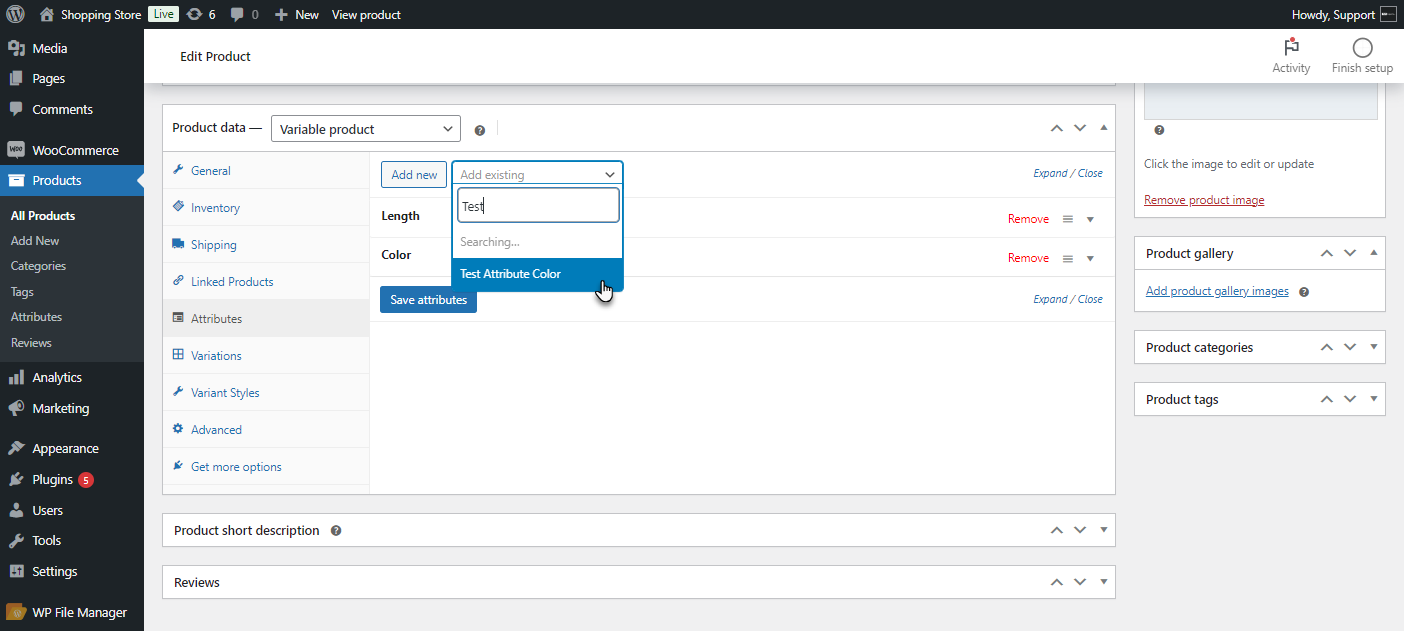
- The admin can add a new attribute or choose from existing ones. Search for the created attribute.
- Click on Select All to add values to the attributes that are created.
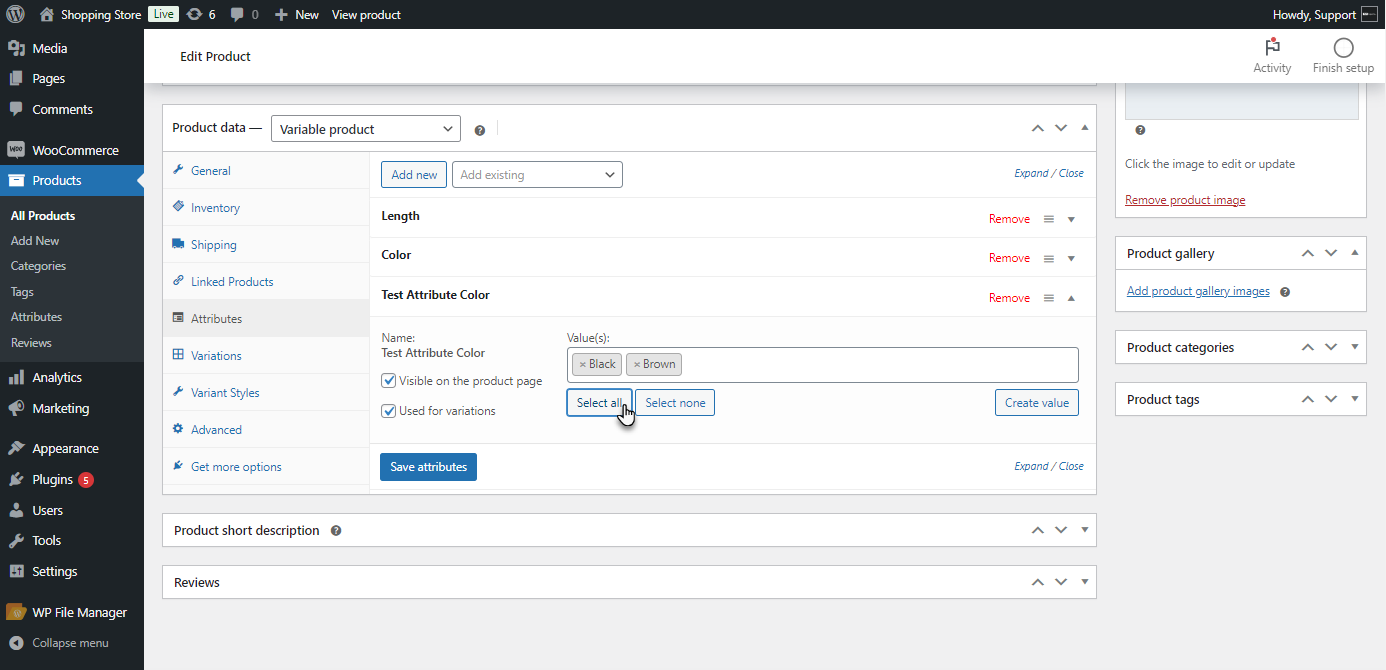
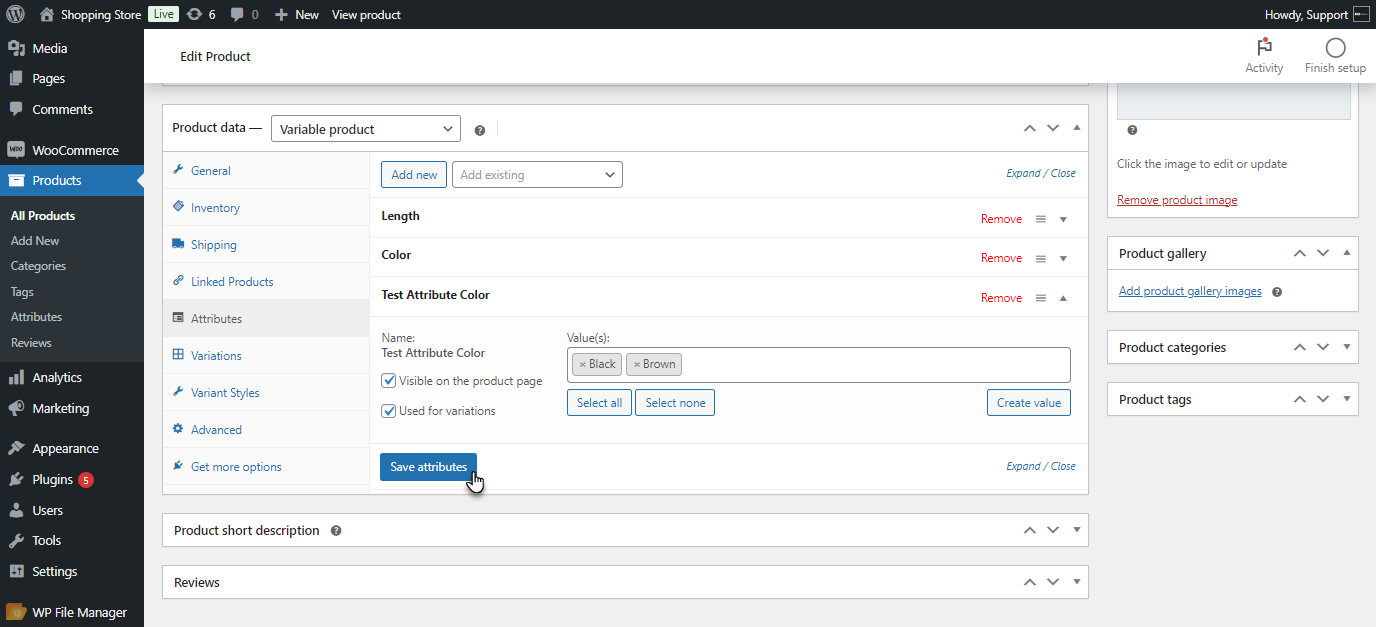
- Click on the Save Attribute button to assign the attribute to the product.
- Next, navigate to the Variations tab in the Product Data section and click on the Generate Variations button.
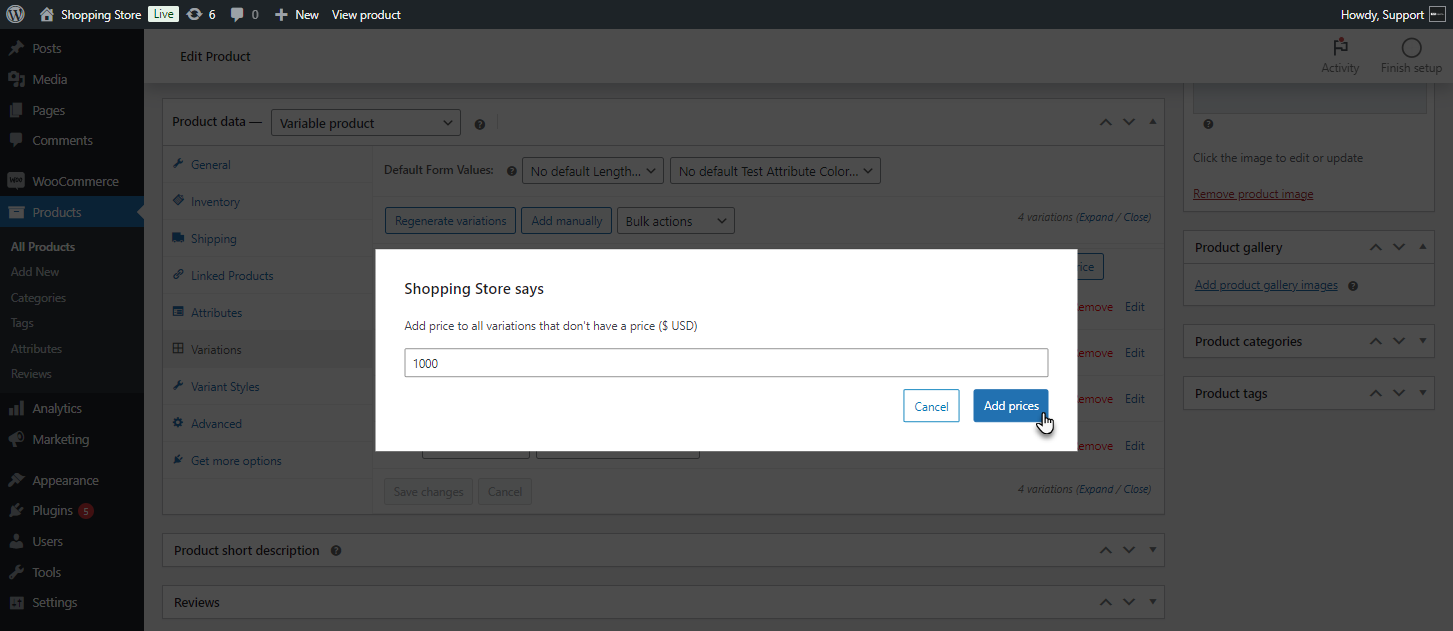
- Click on the Add Price button.
- Enter the price for variations and Click on Add Prices.
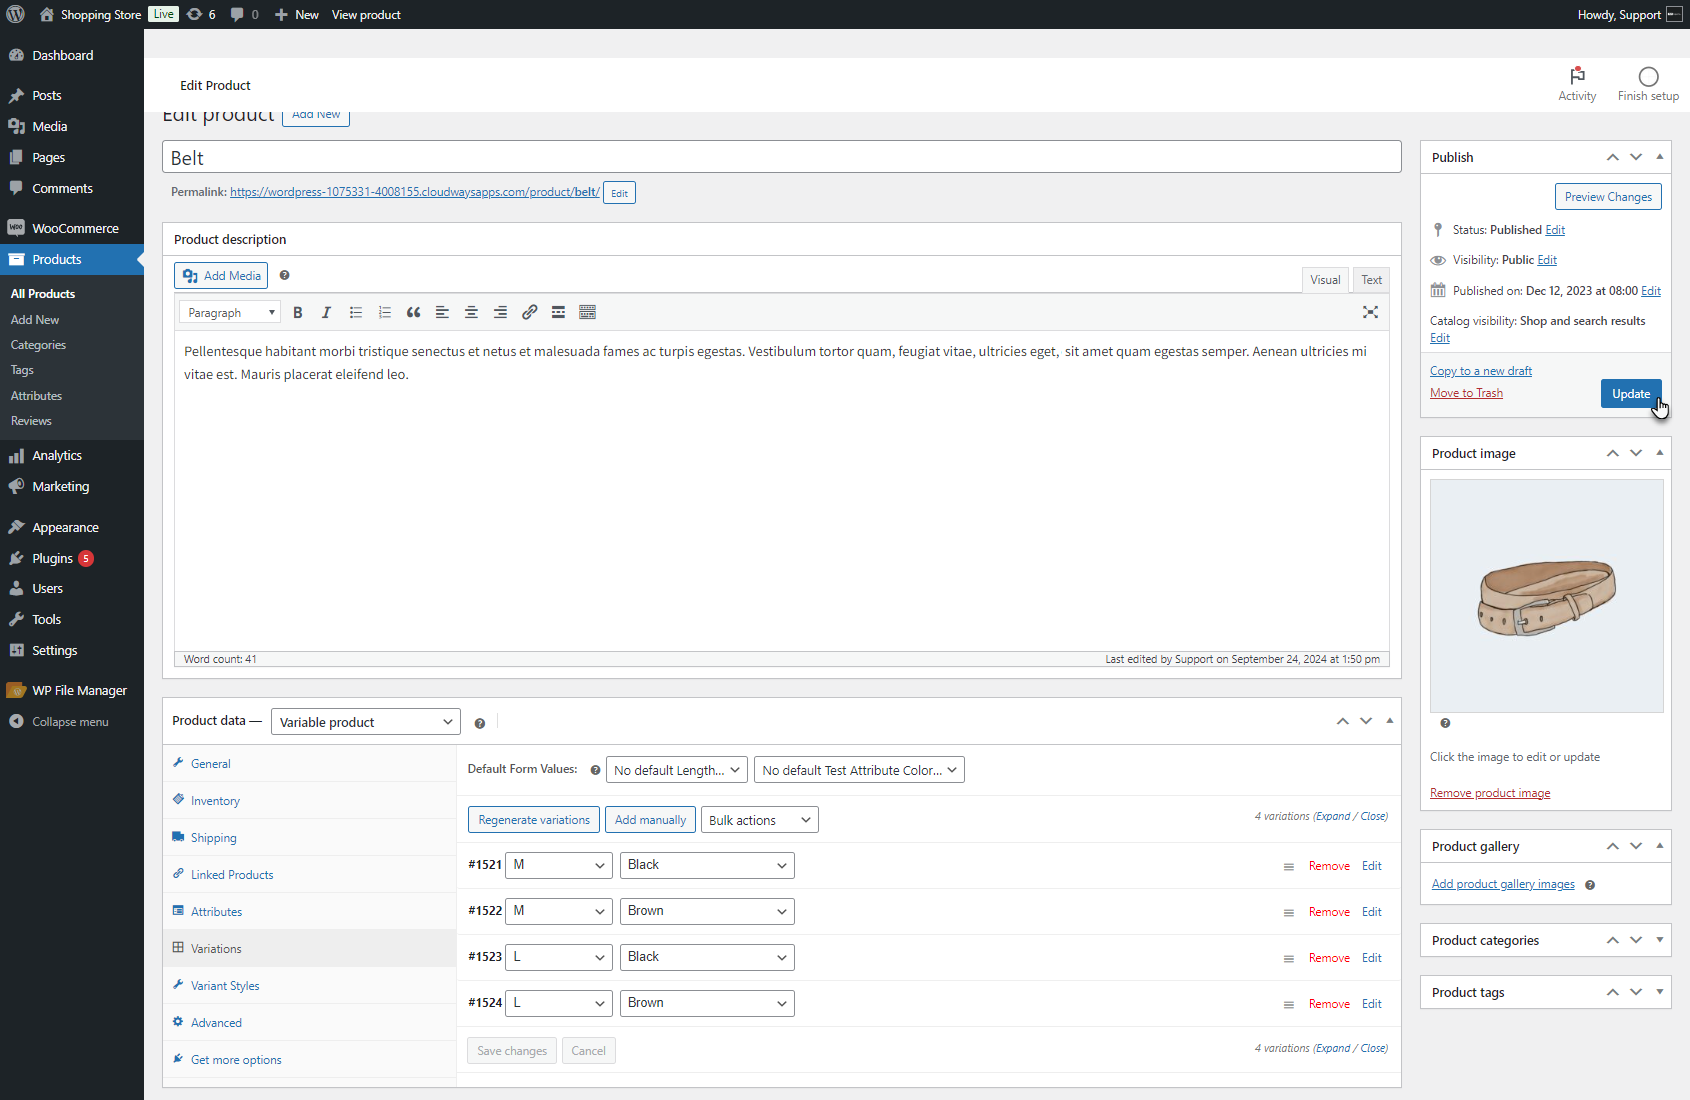
- Click the Update button.
Front End Impact
- Login to your account.
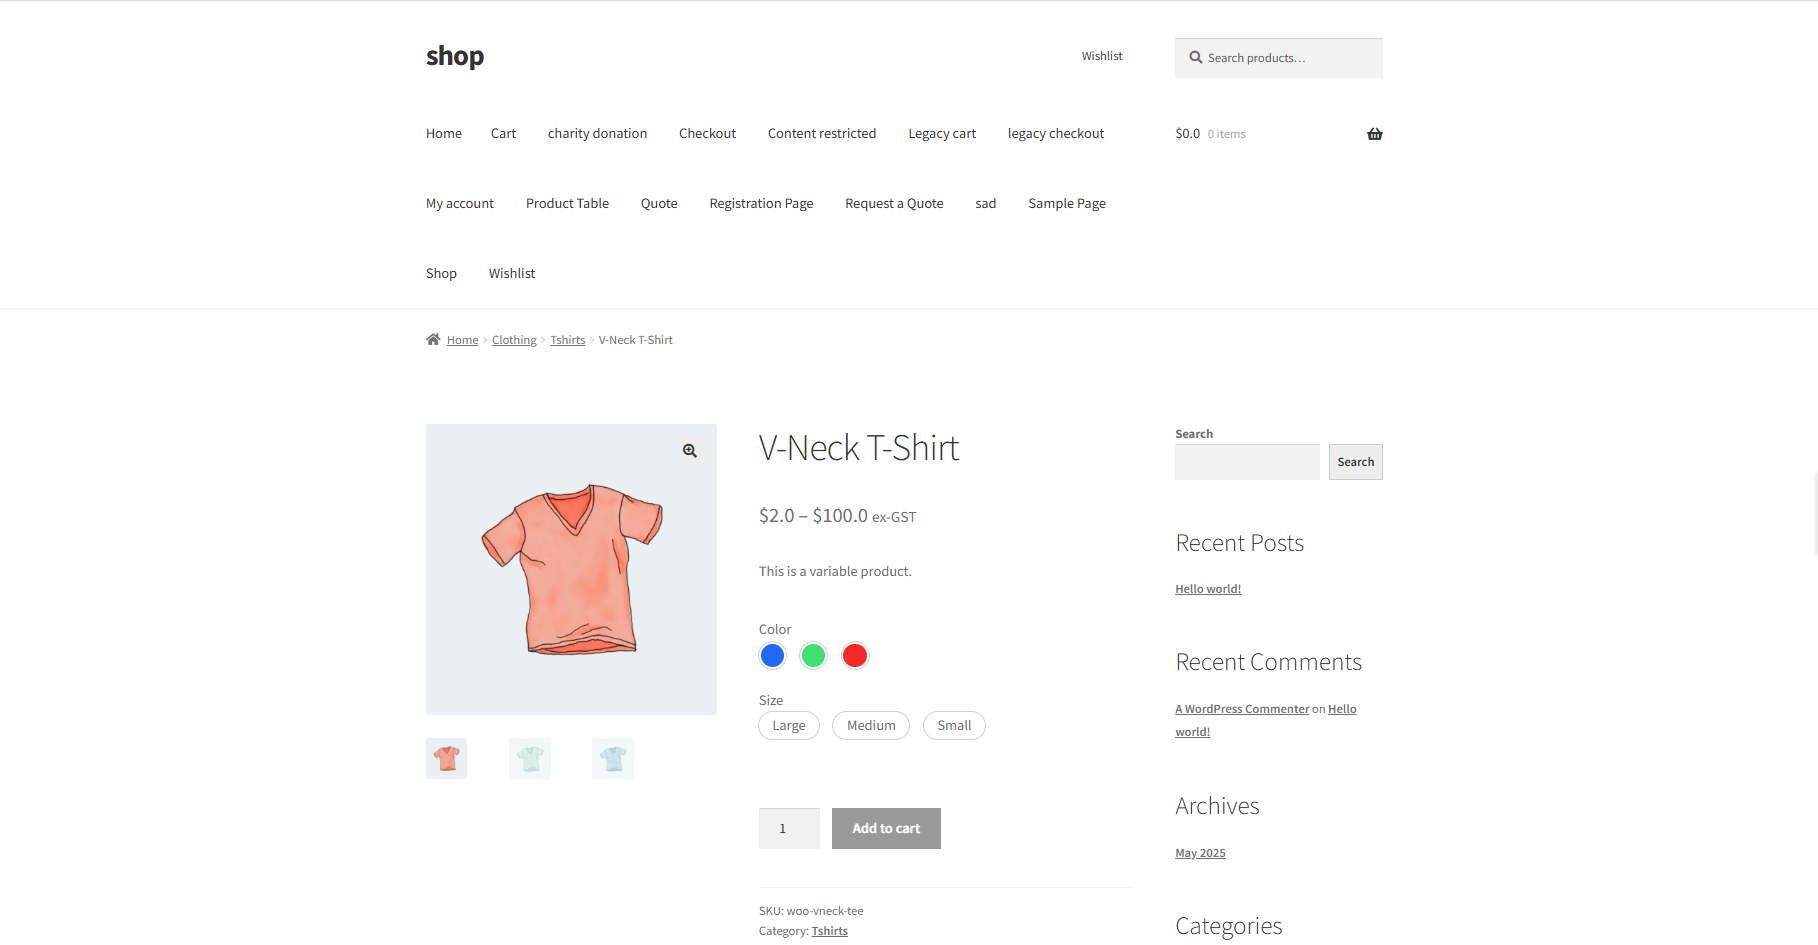
- Go to the Product Page. The Attribute of the Variations of the product will appear.
Customization
↑ Back to top- This feature allows the user to Customize the variation display on the front end.
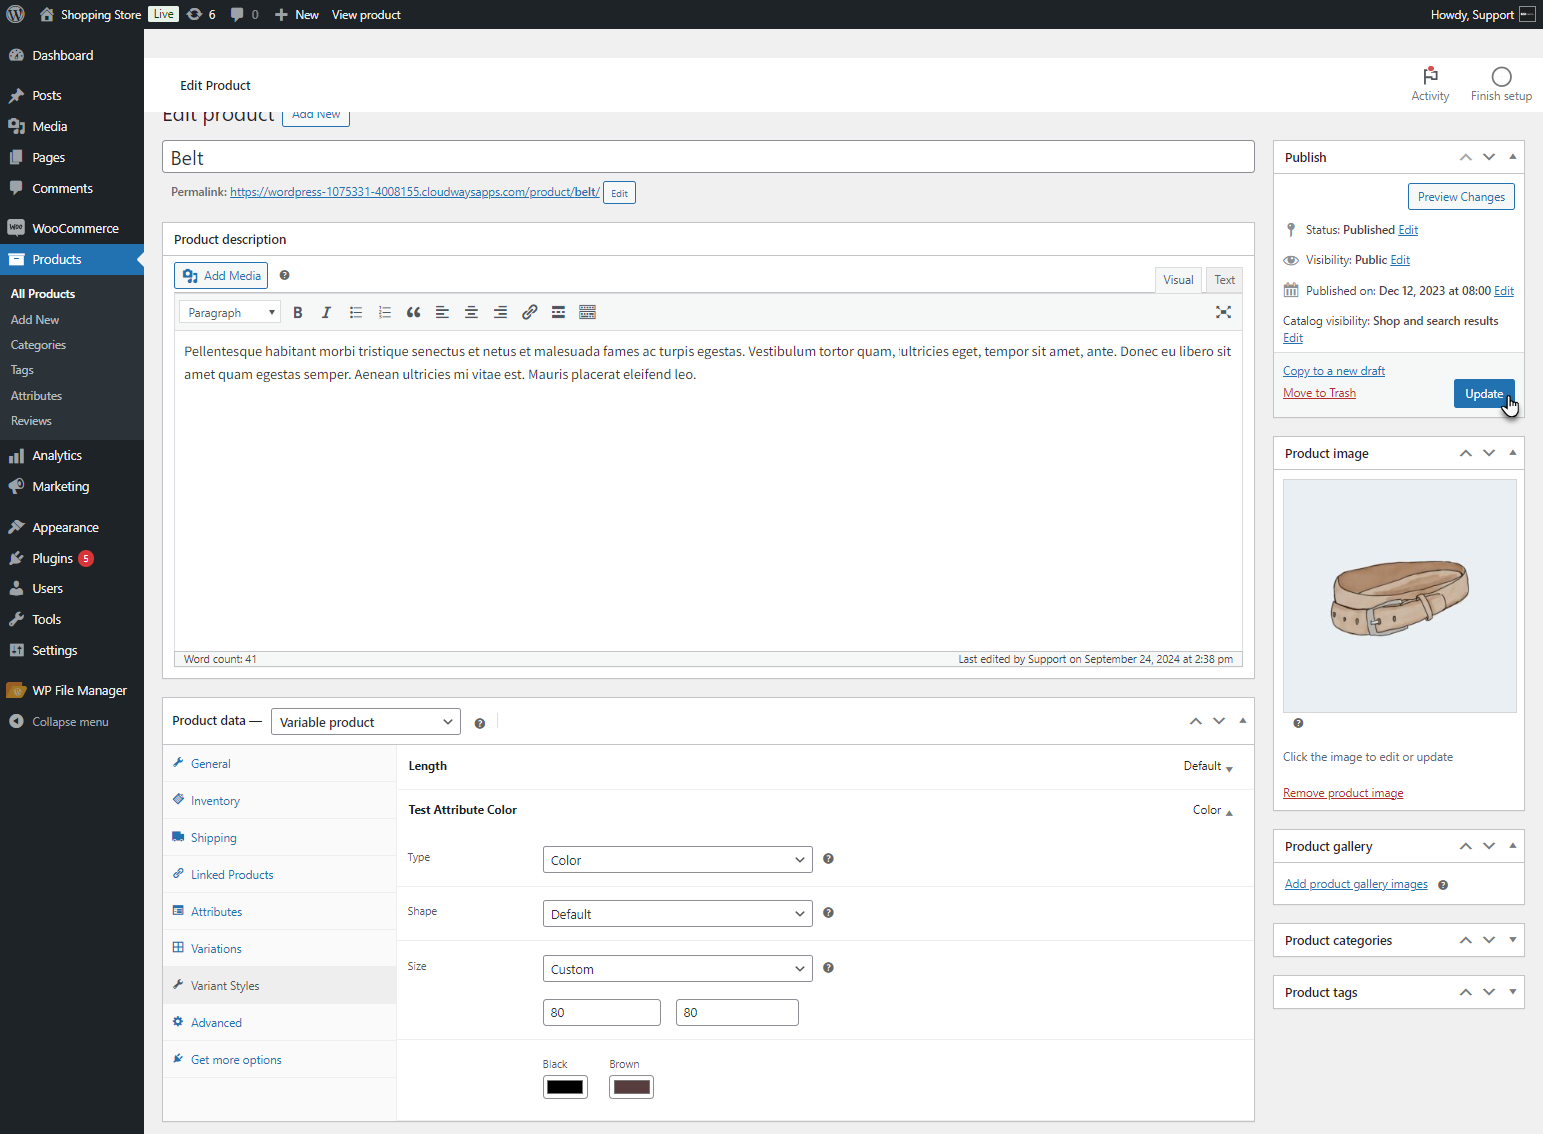
- Go to WordPress Admin Dashboard > Products > All Products > Variable Product.
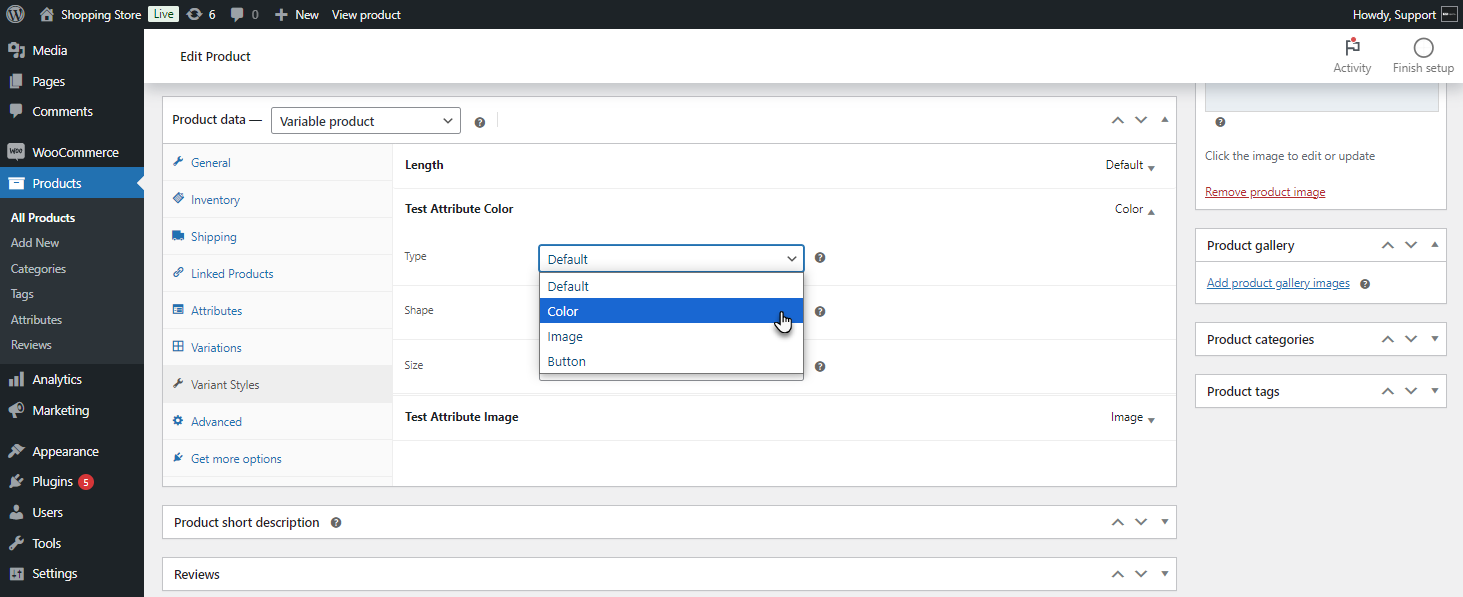
- In the Product Data section, navigate to Variant Styles.
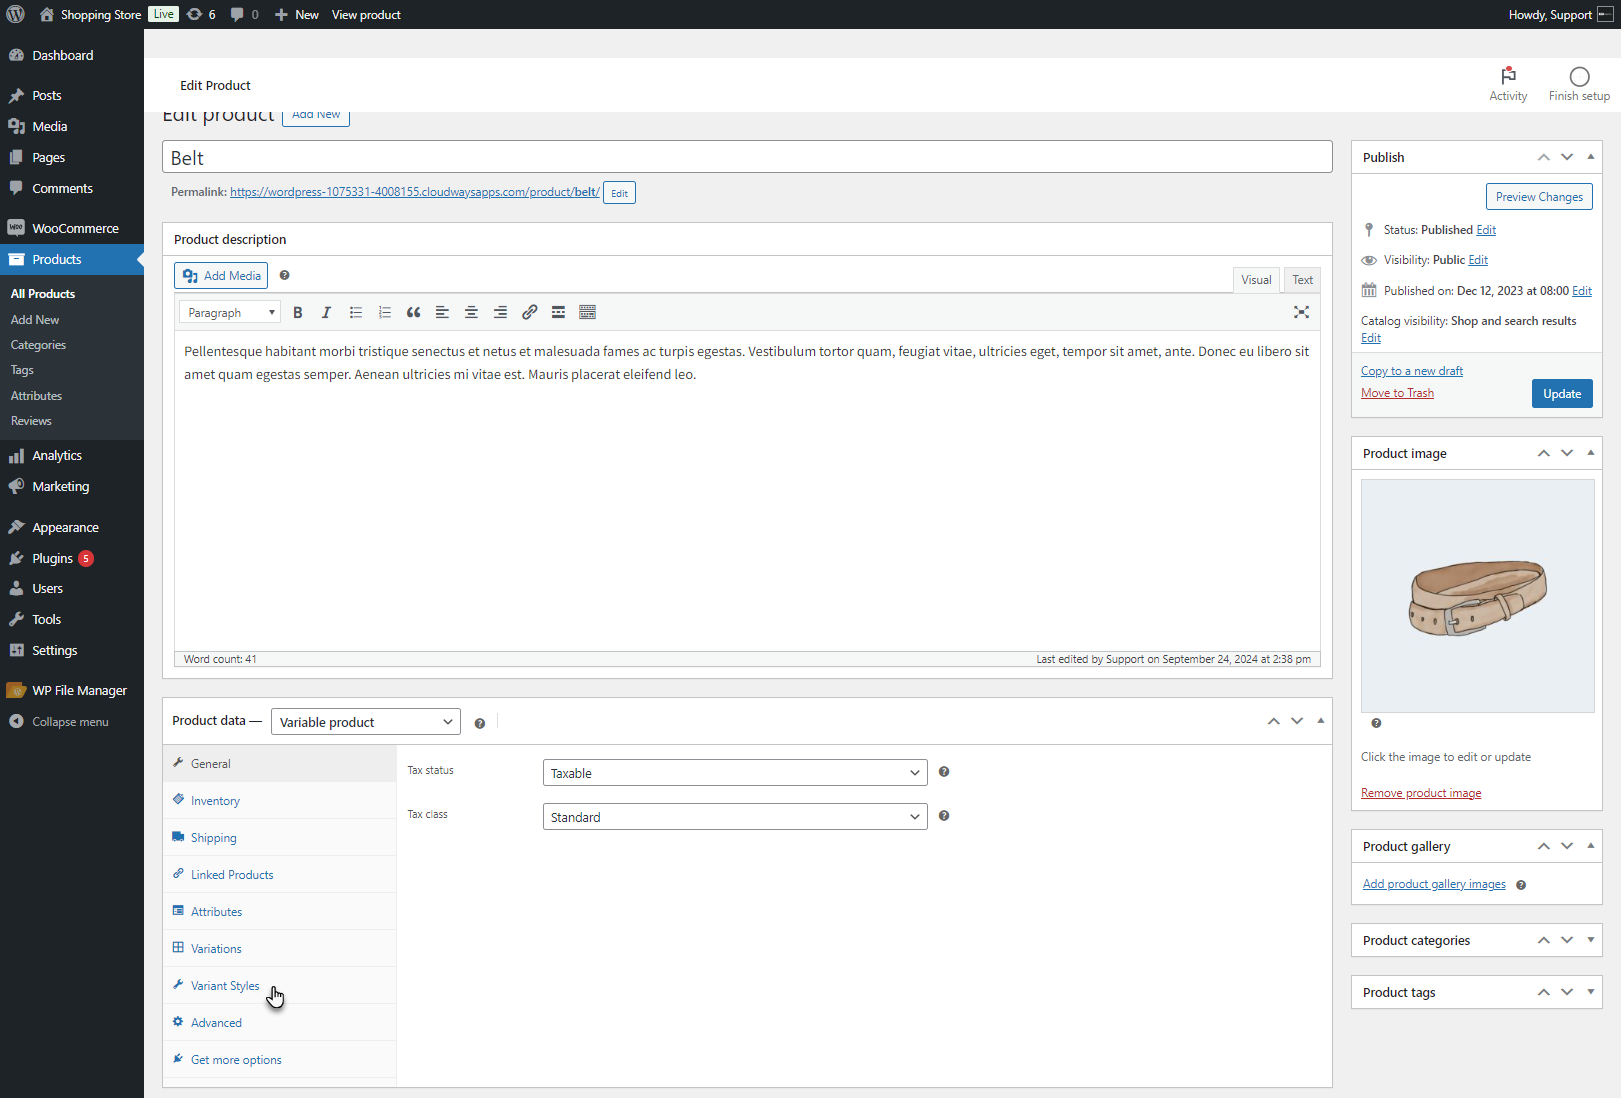
- The tab with available attributes will appear. Click on the attribute you want to customize.
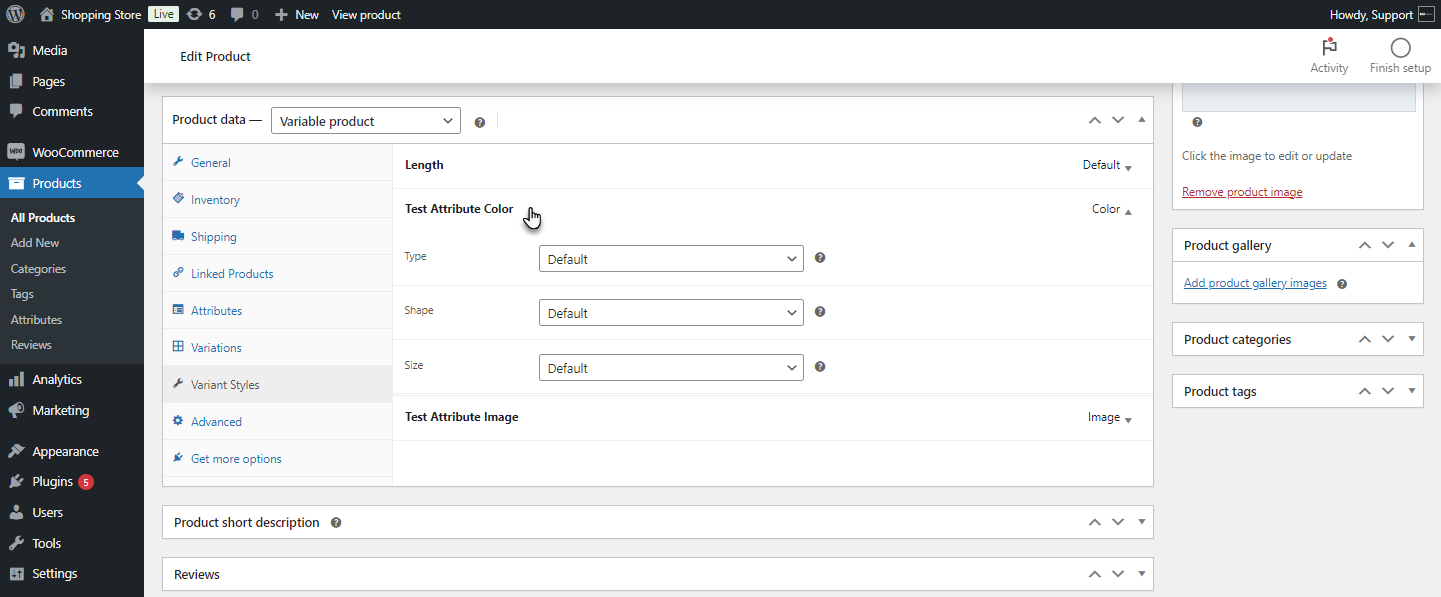
- Select the attribute type from the drop-down list.
- Select the attribute shape from the drop-down list.
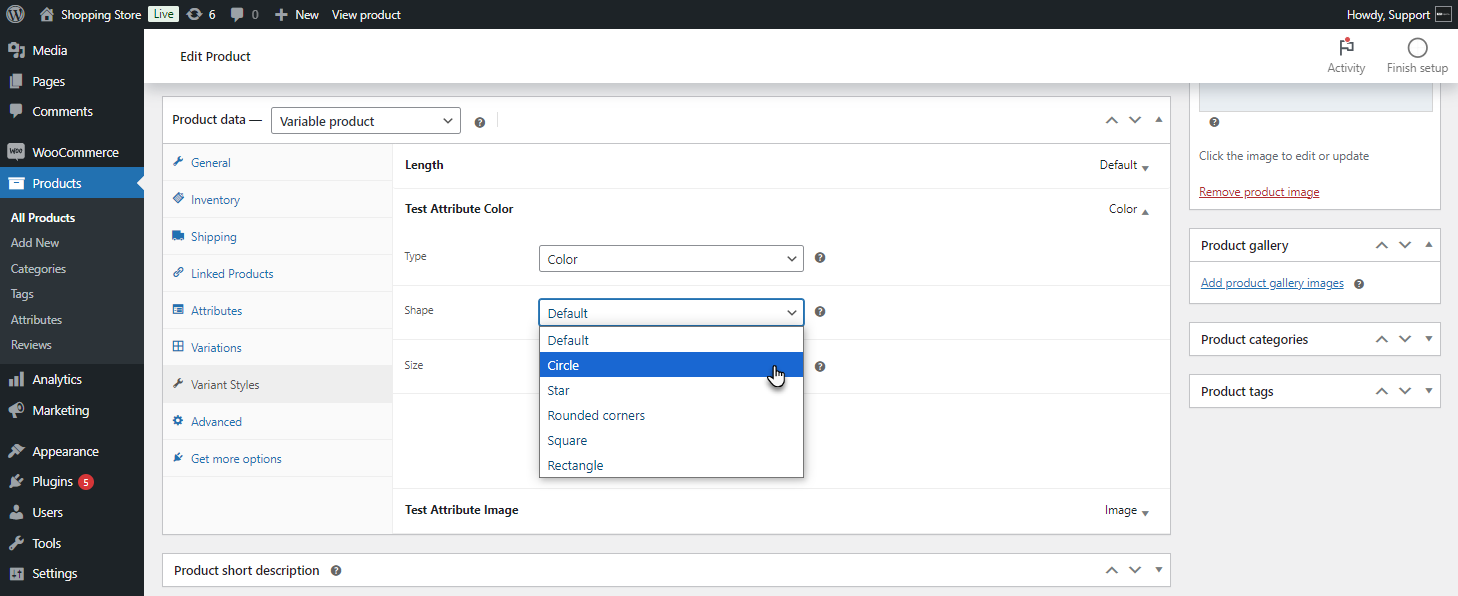
- Select the size for the attribute. Two options are provided: Default and Custom.
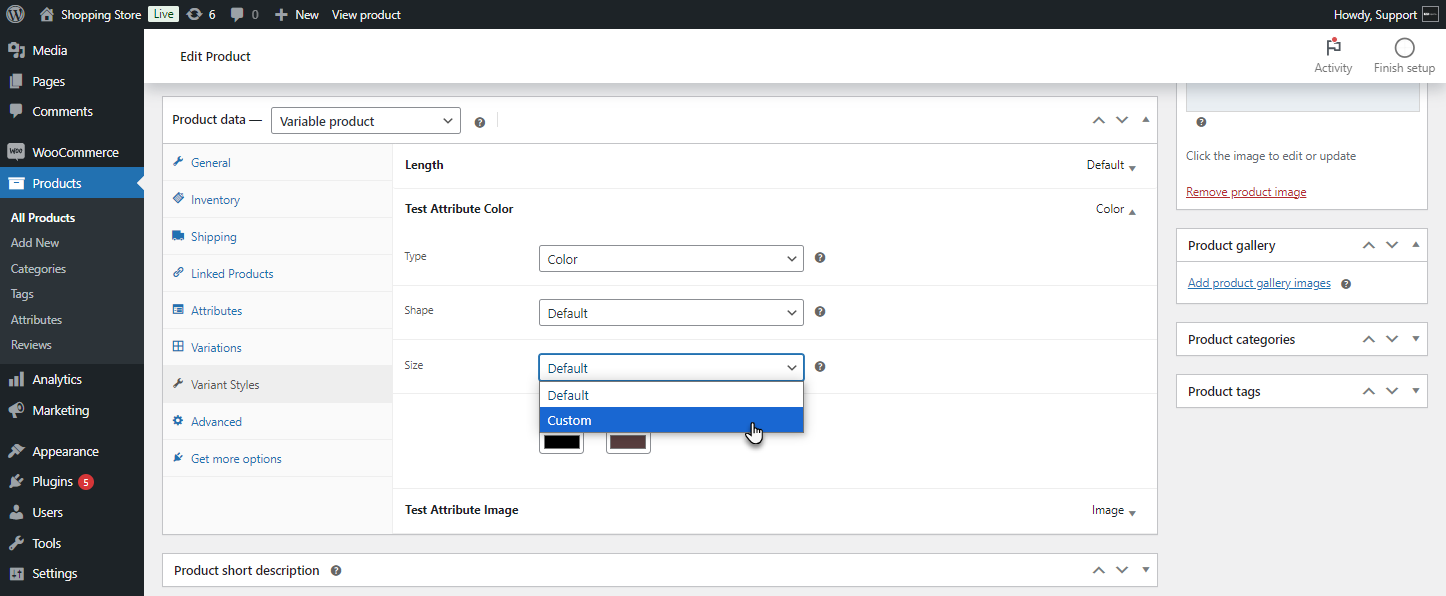
- If Custom is selected, the admin can size ( px ) the attribute as needed.

- Click on the Update button to save changes.
Front End Impact
- Login to your account.
- Go to the Product Page. The Customization will be applied to the Attribute of the Variations of the product.

Hide Variation Management Tab
↑ Back to top- Go to WordPress Admin Dashboard > WooCommerce > Settings > Variation Management.
- Enable the Hide Variation Management tab. This will hide the default variation managing tab in the product edit window.

- Go to WordPress Admin Dashboard > Products > All Products > Variable Product.
- The default Variation tab is hidden in the Product Data tab.
Variation Rules
↑ Back to topThe Variation Rules feature allows the admin to create and manage custom rules for product variations.Using these rules, the admin can apply specific variation styles, display formats, and user restrictions across multiple products or categories.
- Go to Dashboard > WooCommerce > Variation Management > General Settings
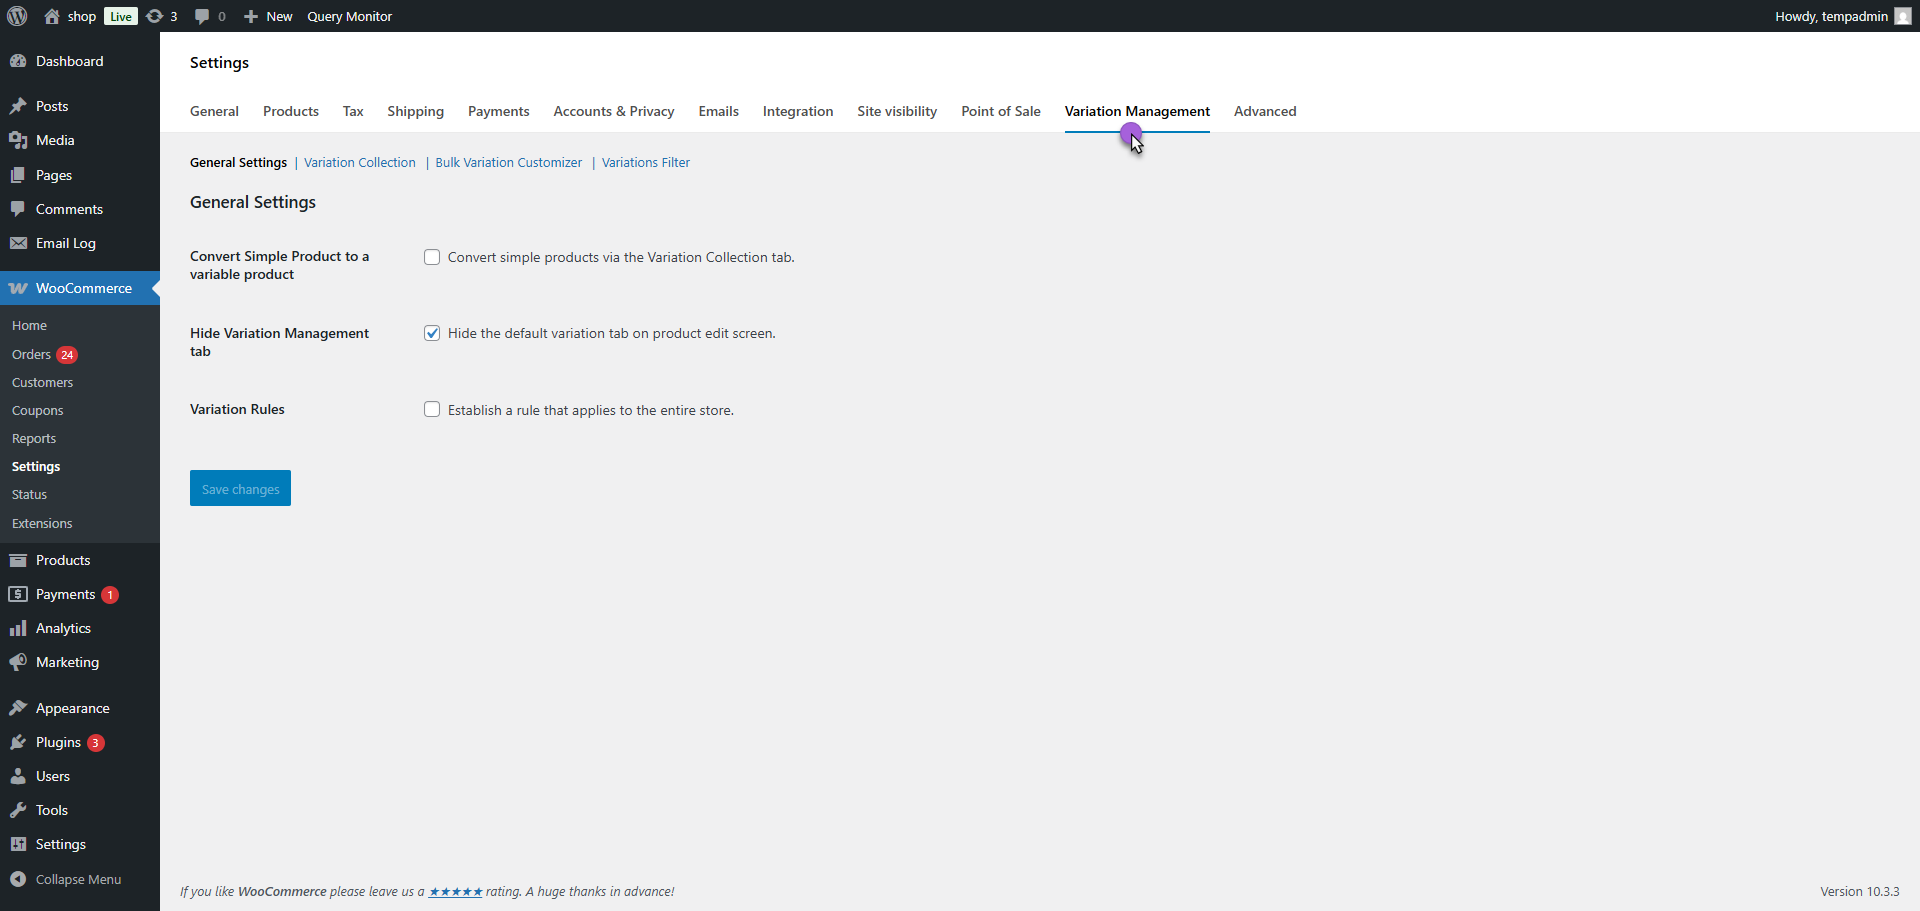
- Enable the Variation Rules option by checking its checkbox.
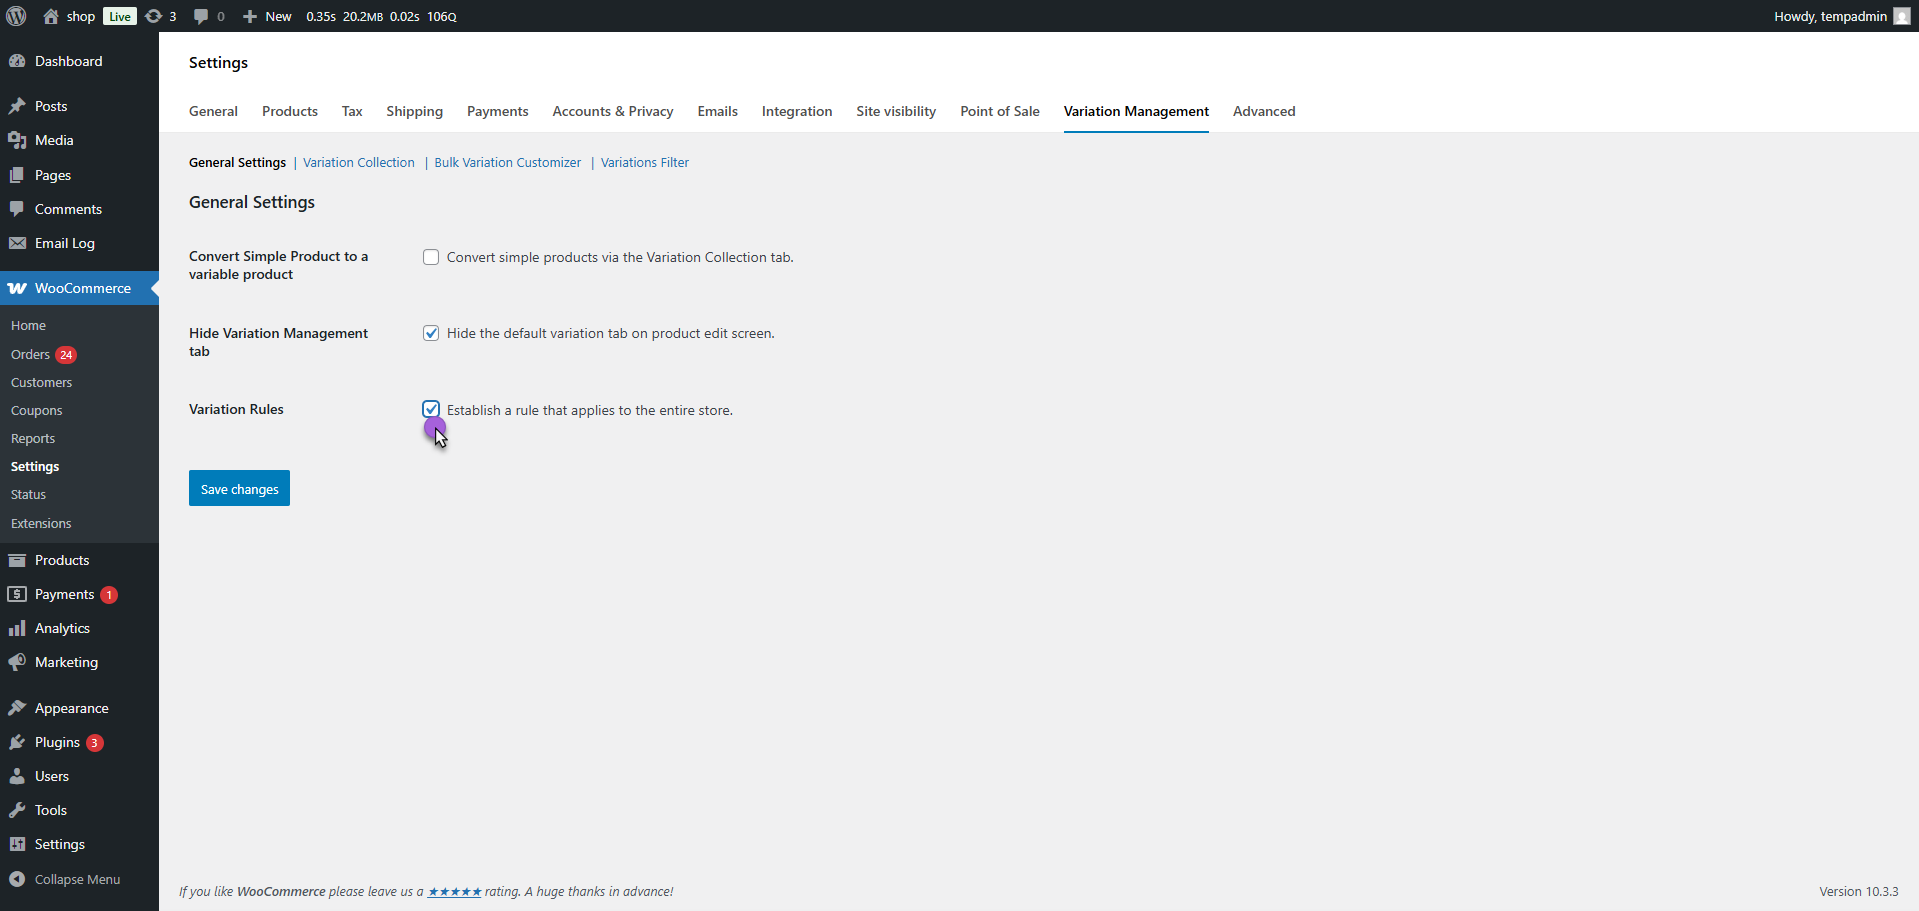
- After enabling, navigate to WooCommerce > Variation Rules to access the full settings page.

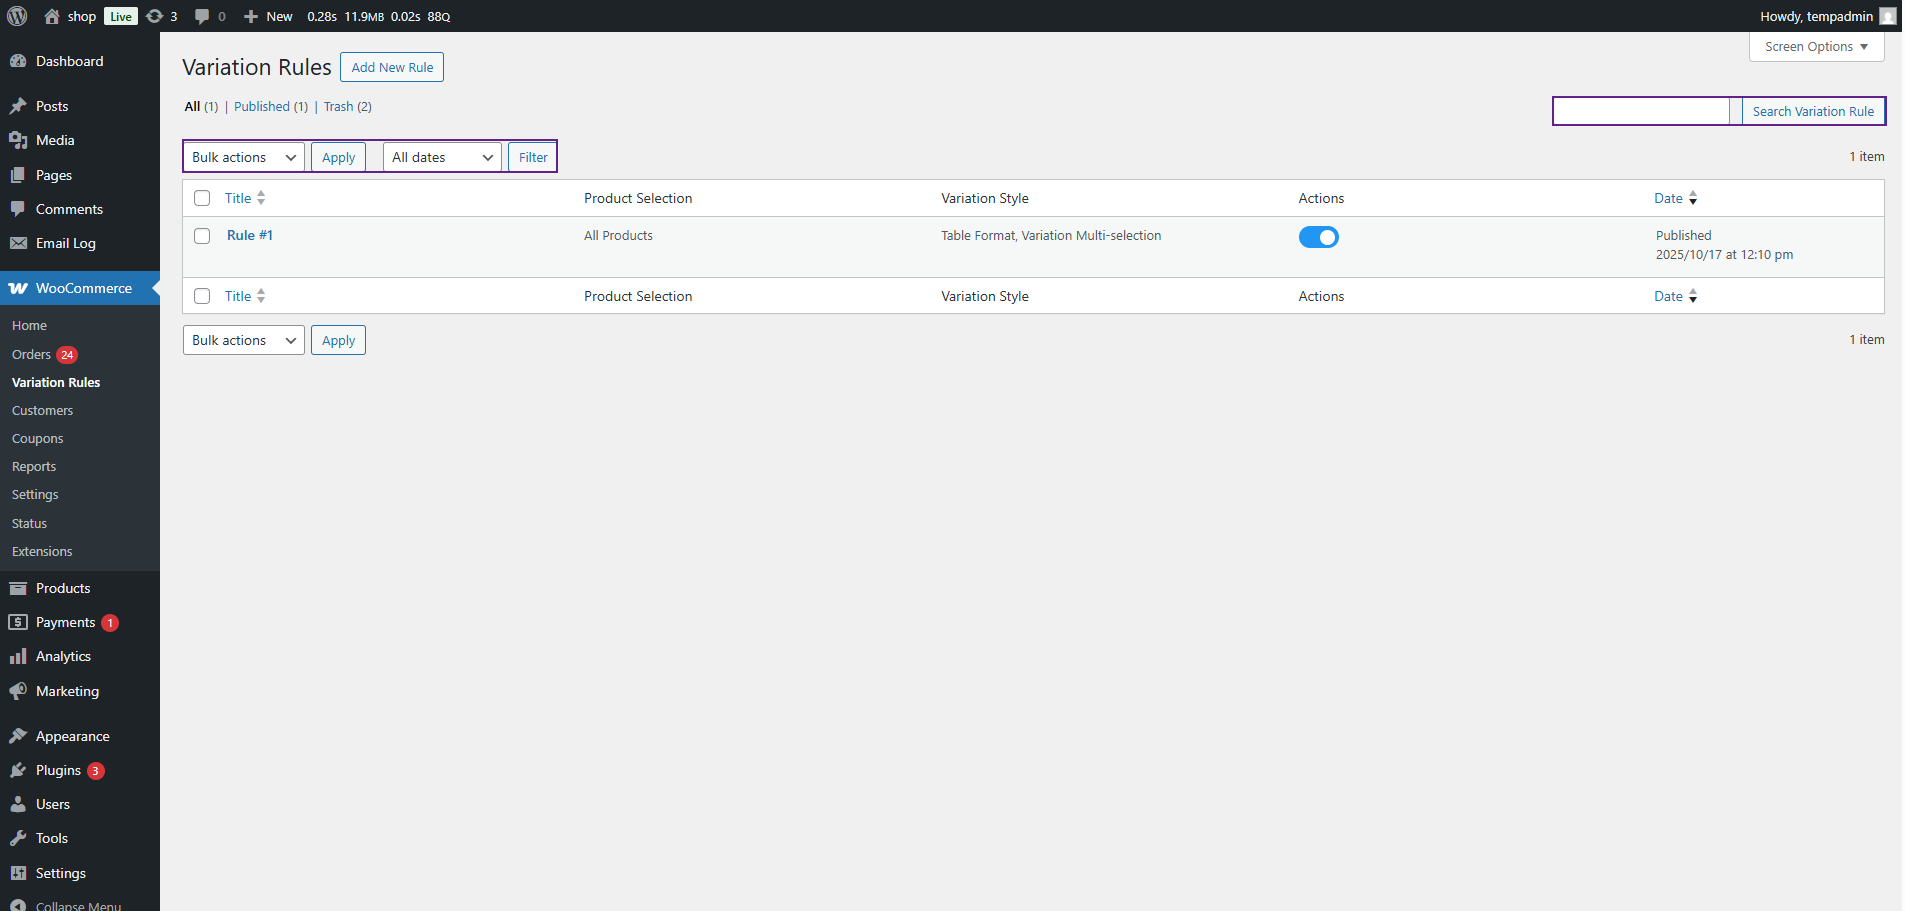
Variation Rules Table
↑ Back to topOnce you open the Variation Rules section, a table will appear showing all created rules.
You can use the following filters:
- Search by Rule Title
- Bulk Action Filter
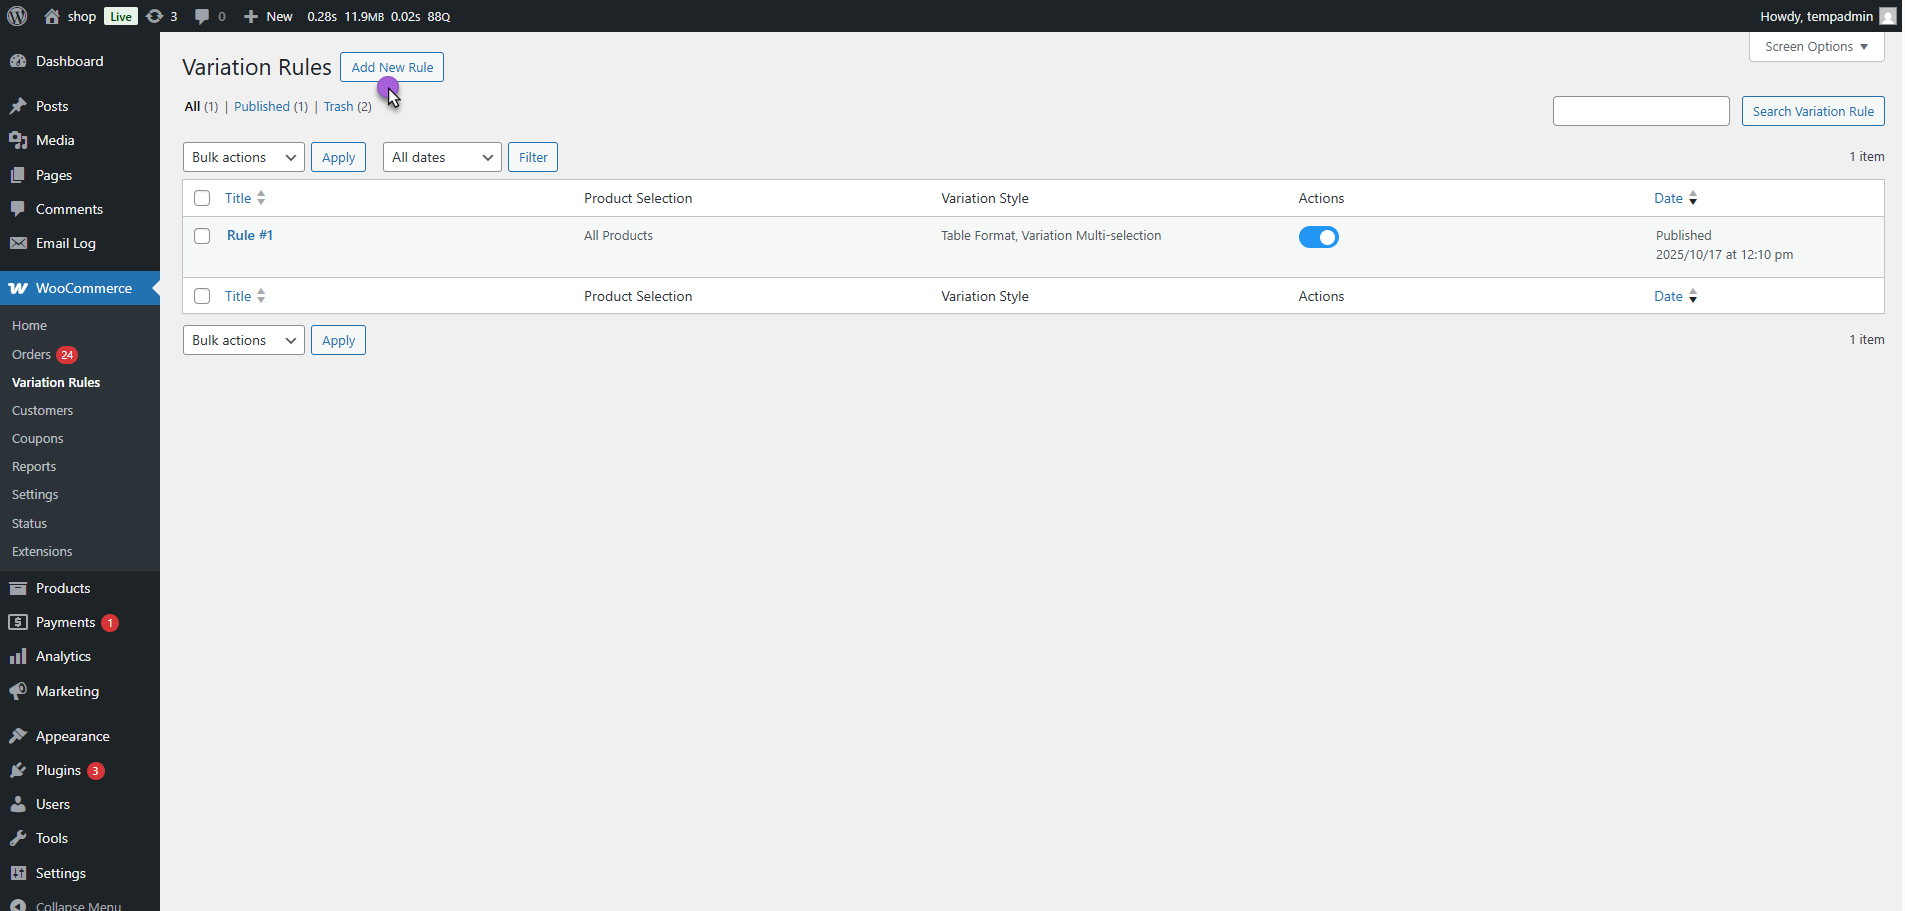
Add New Rule
To create a new variation rule:
- Now, click on Add New Rule at the top of the page.
- A new interface will open with the following fields and tabs:
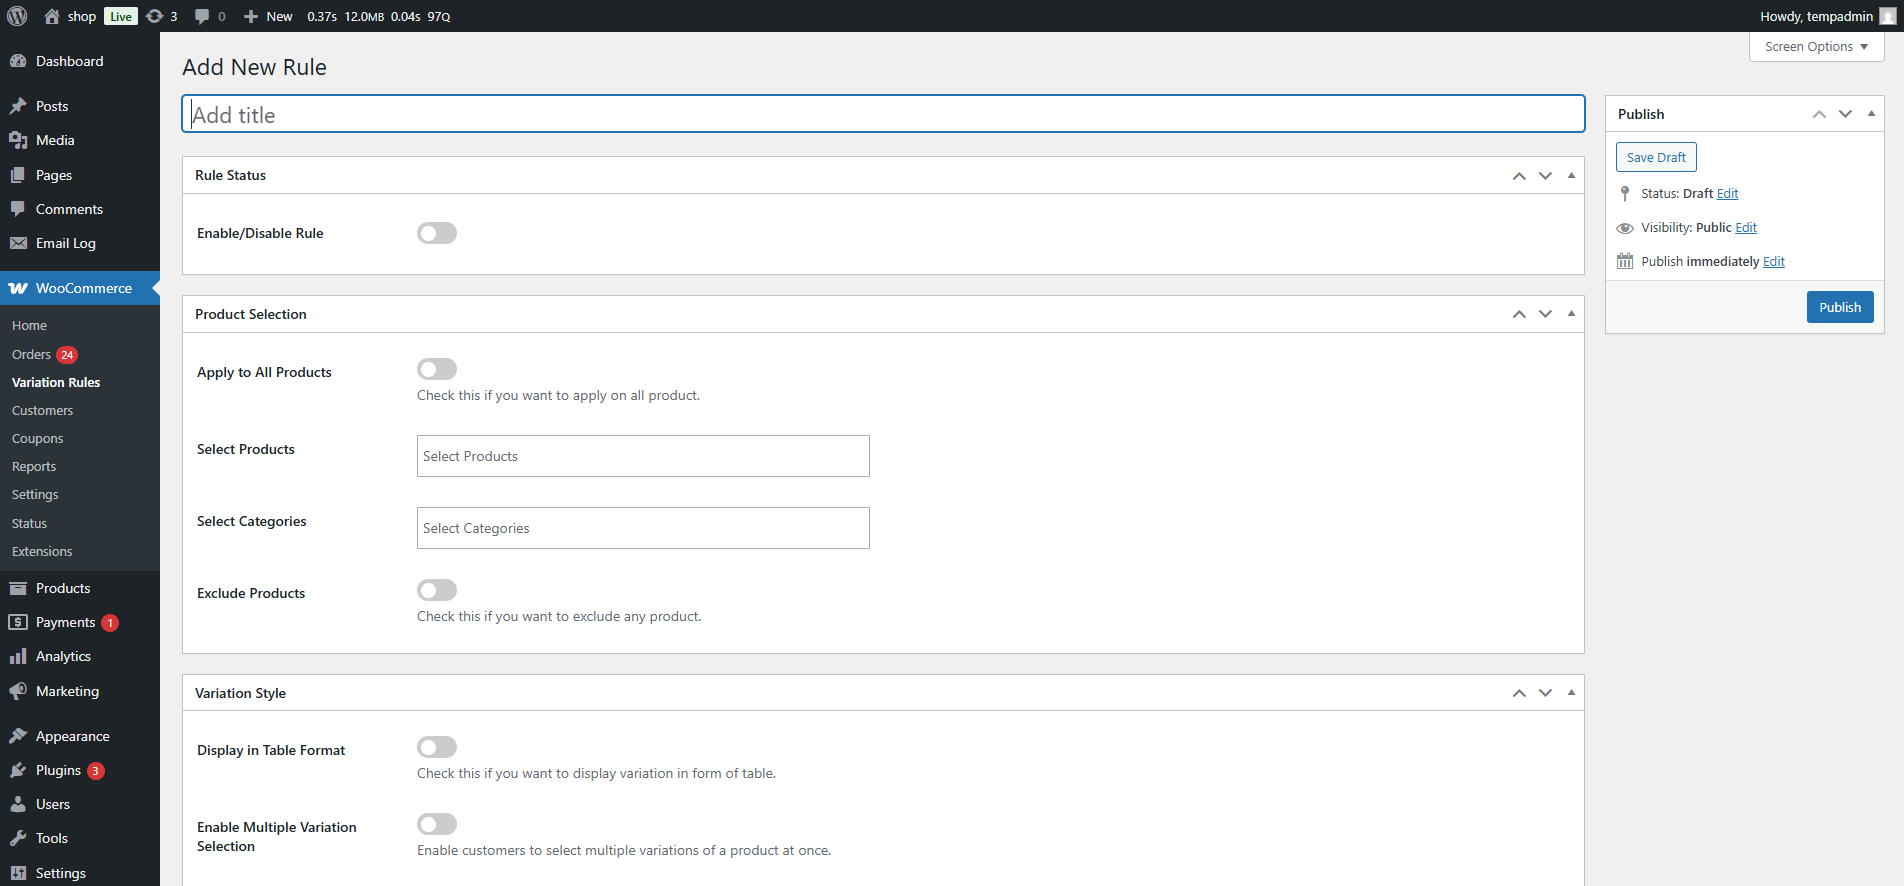
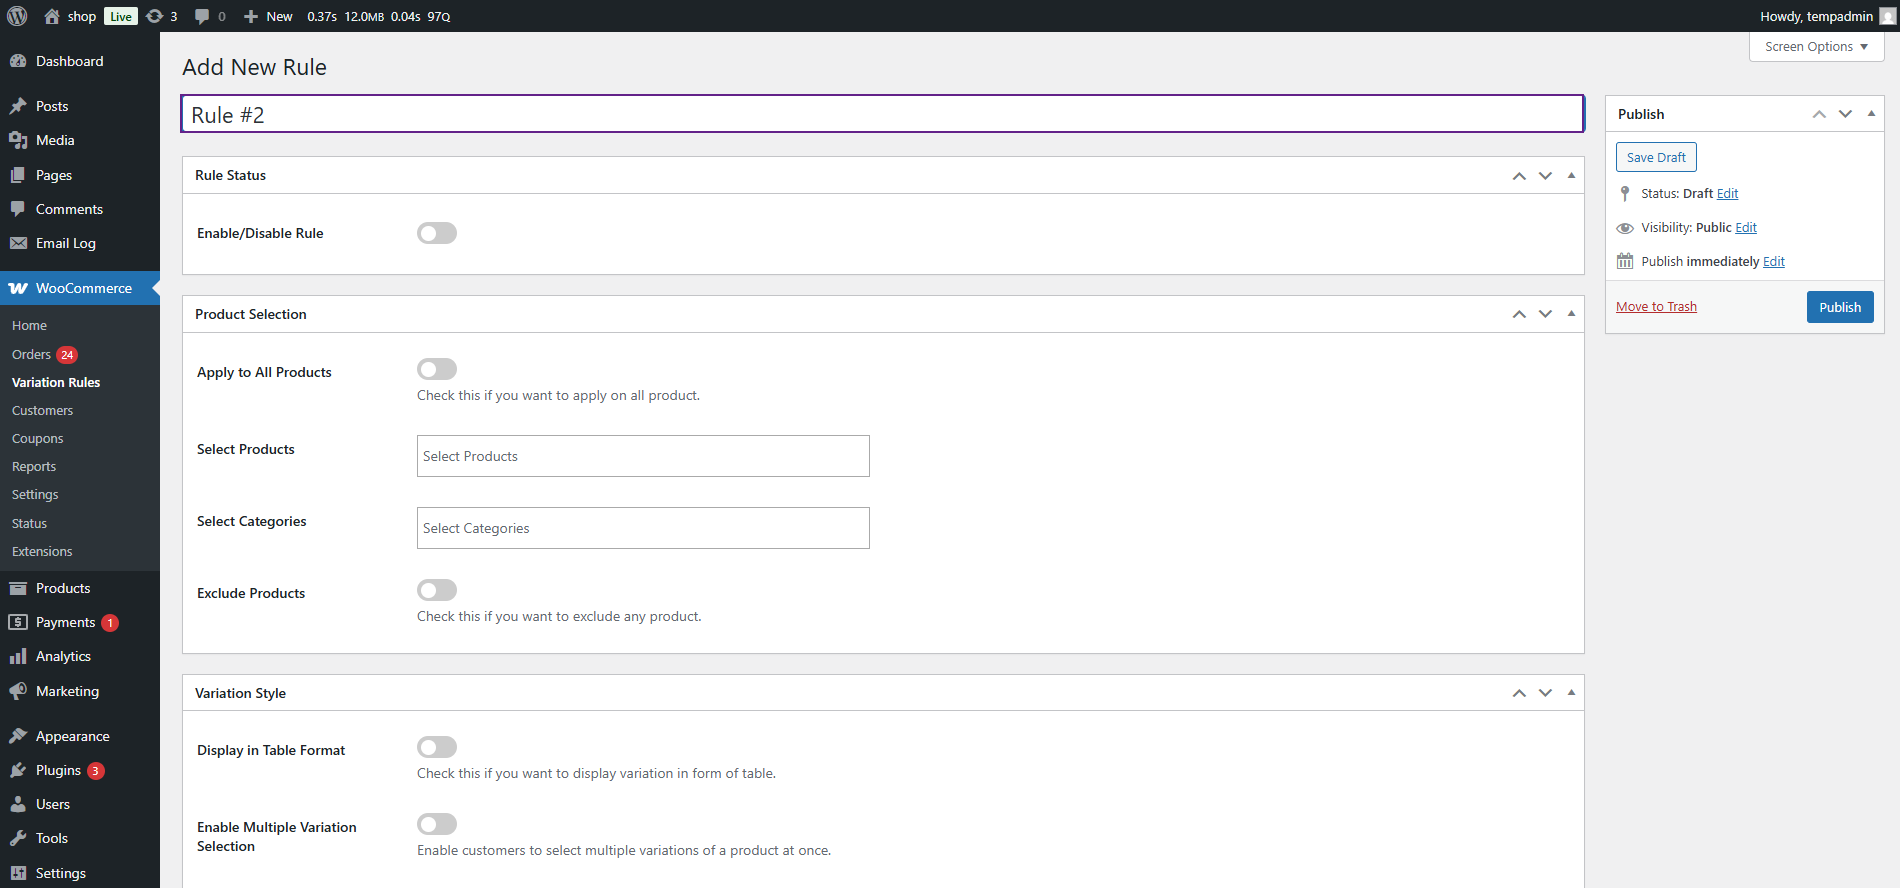
Title
- Enter the name of the variation rule.
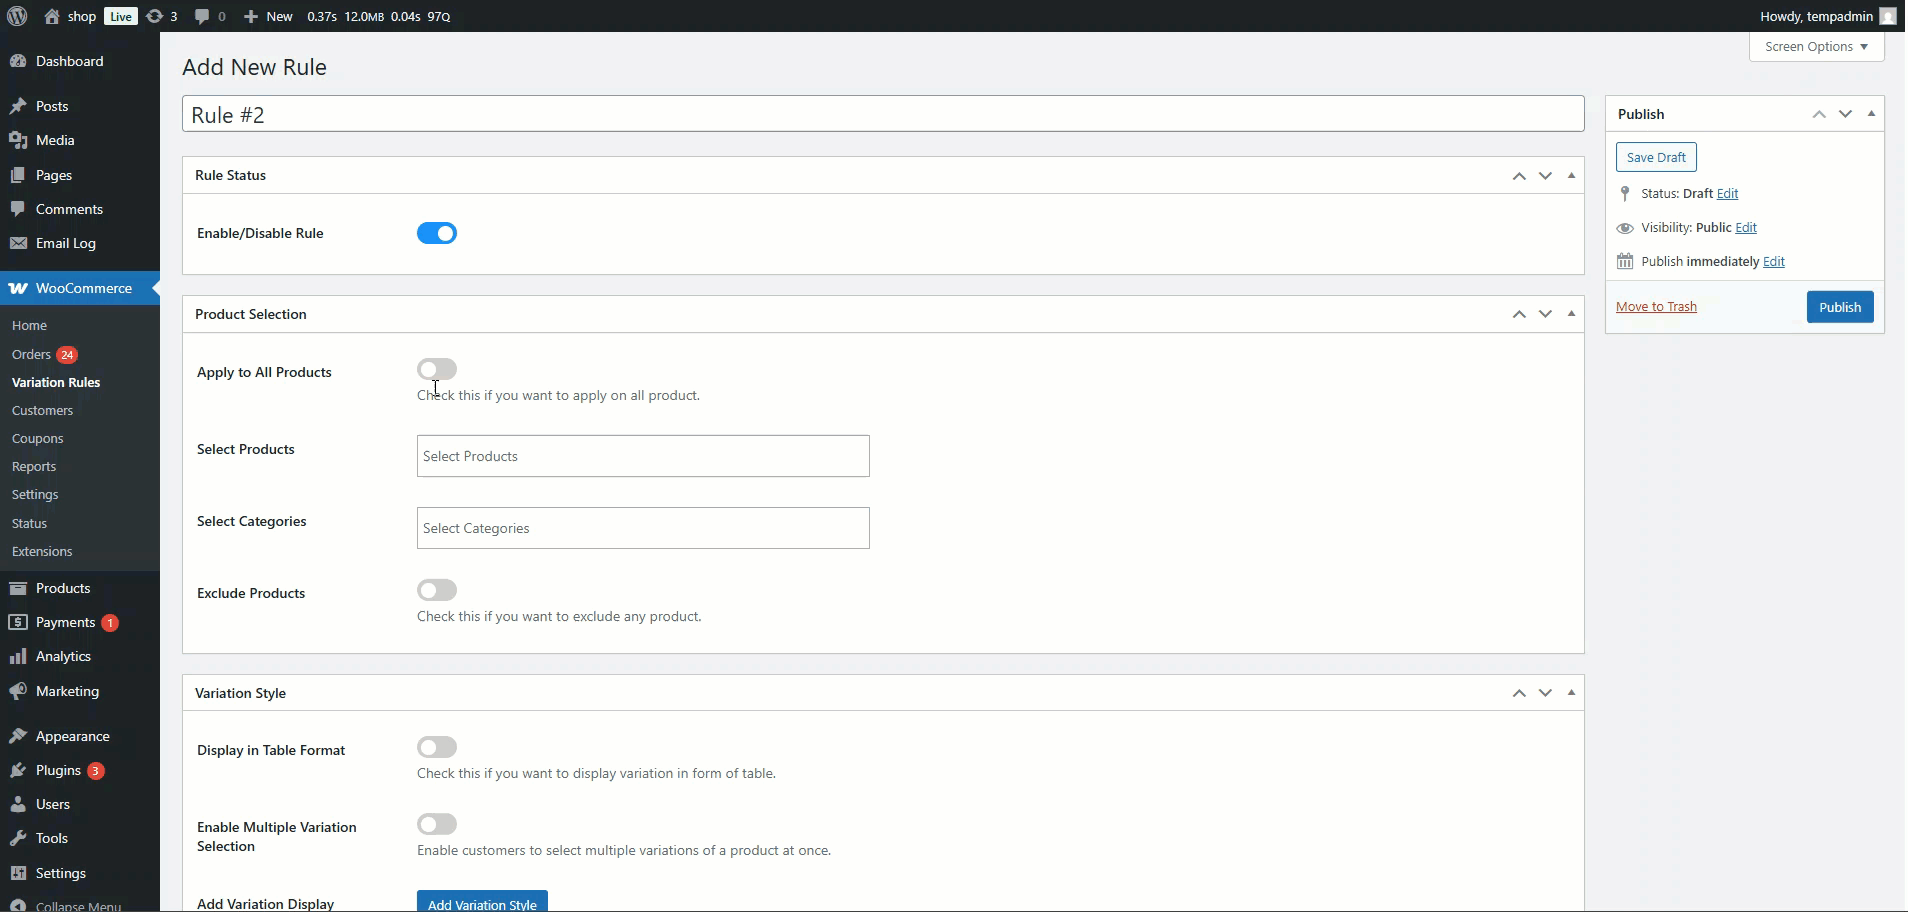
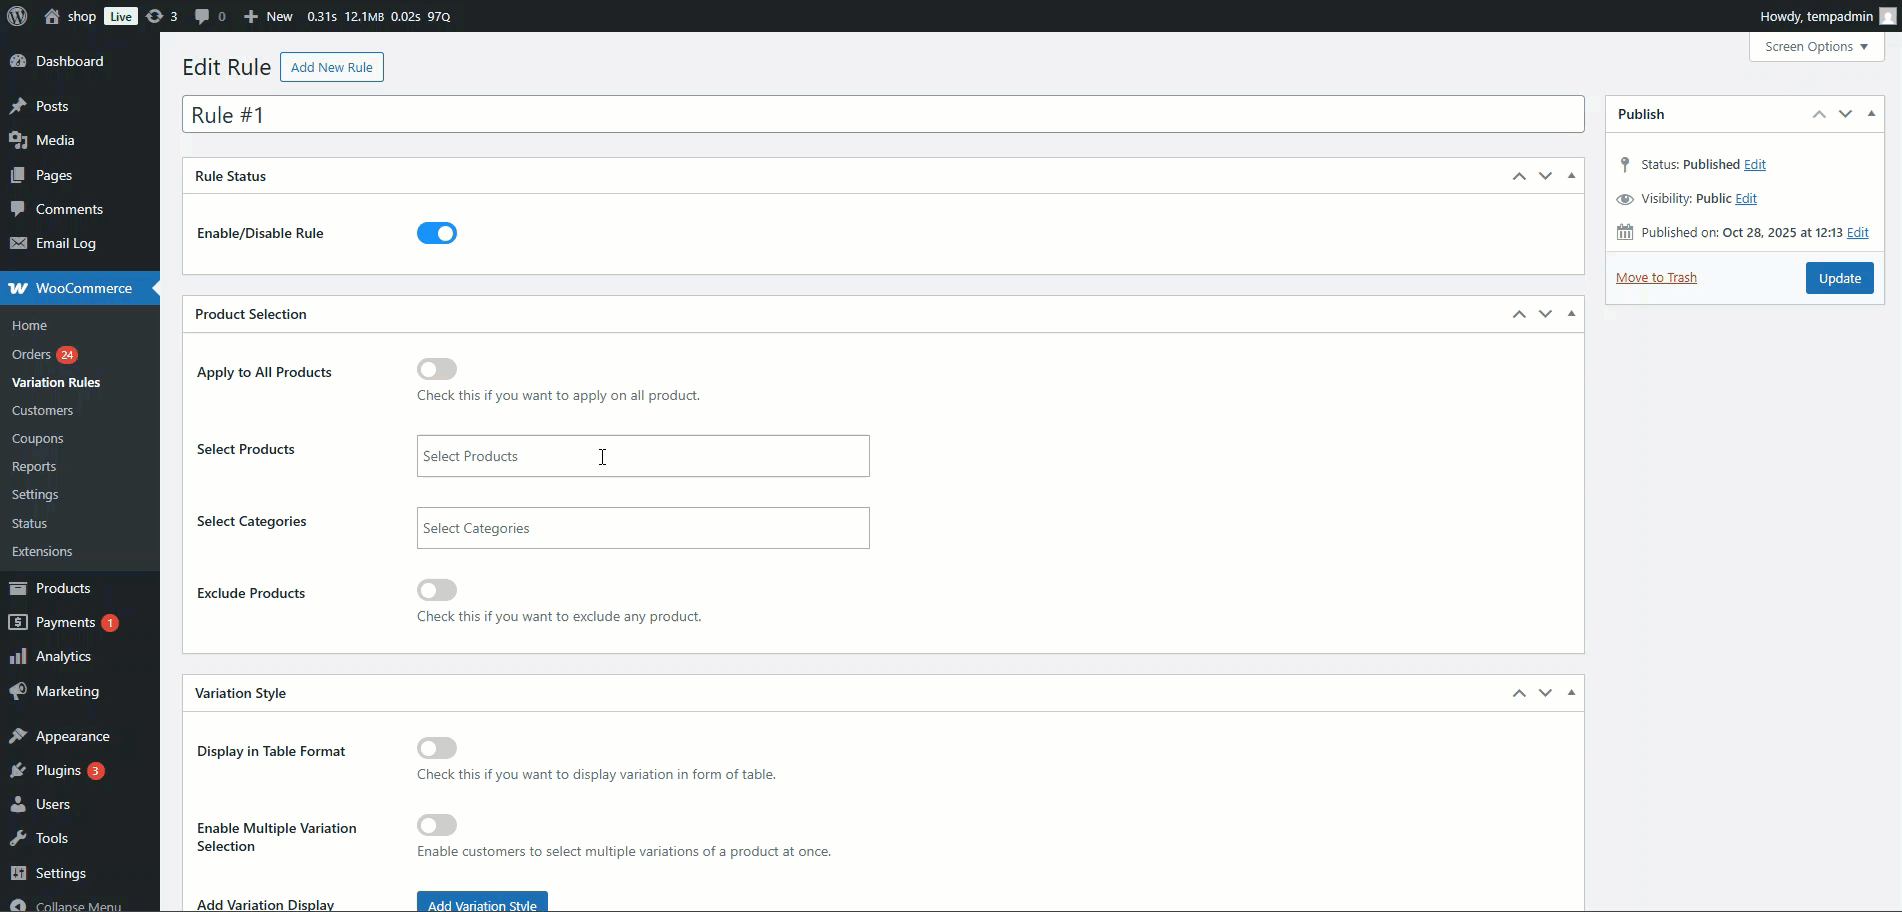
Rule Status
Toggle the Enable/Disable Rule switch to activate or deactivate the rule.
- Enabled: The rule will be applied to the selected products or categories.
- Disabled: The rule will not take effect even if published.

Product Selection
This section defines where the rule will apply. You can target all products, specific ones, or entire categories.
Apply to All Products
- Enable this toggle to apply the rule globally across all products in your store.
Select Products
- Use this field to search and select individual products where the rule will apply.
- You can select multiple products.
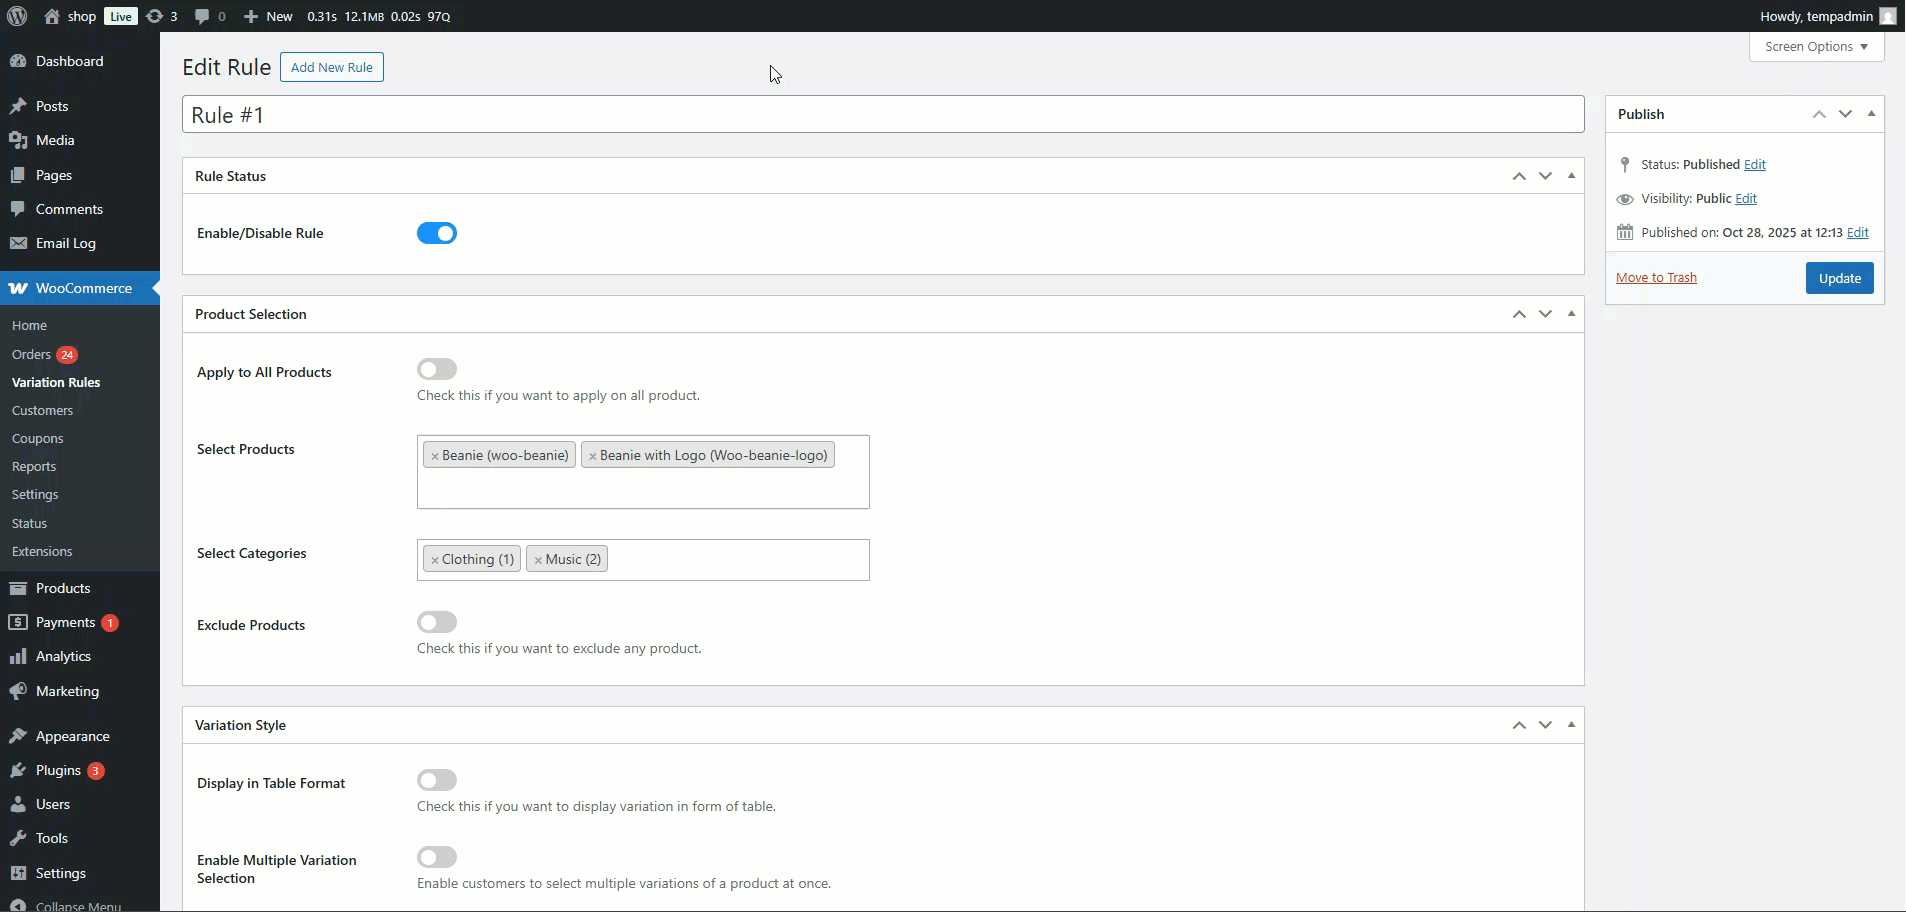
Select Categories
- Choose one or more product categories.
- All products within those categories will follow this rule.
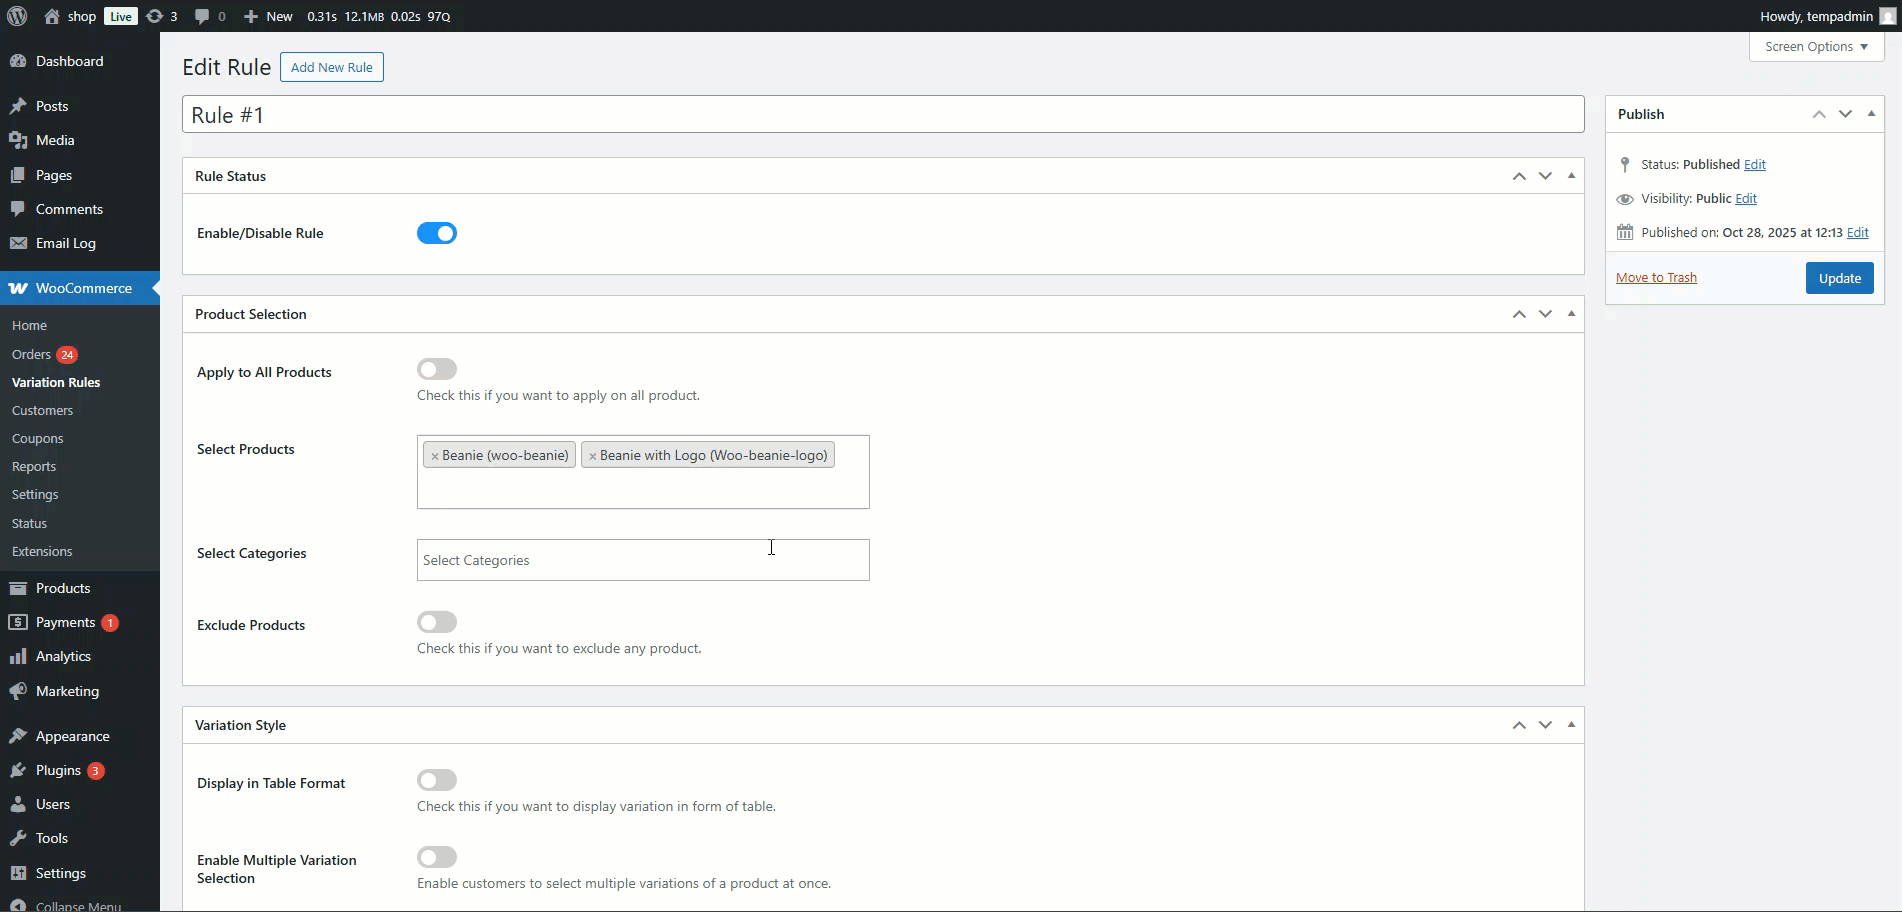
Exclude Products
- Enable this toggle if you want to exclude specific products from this rule.
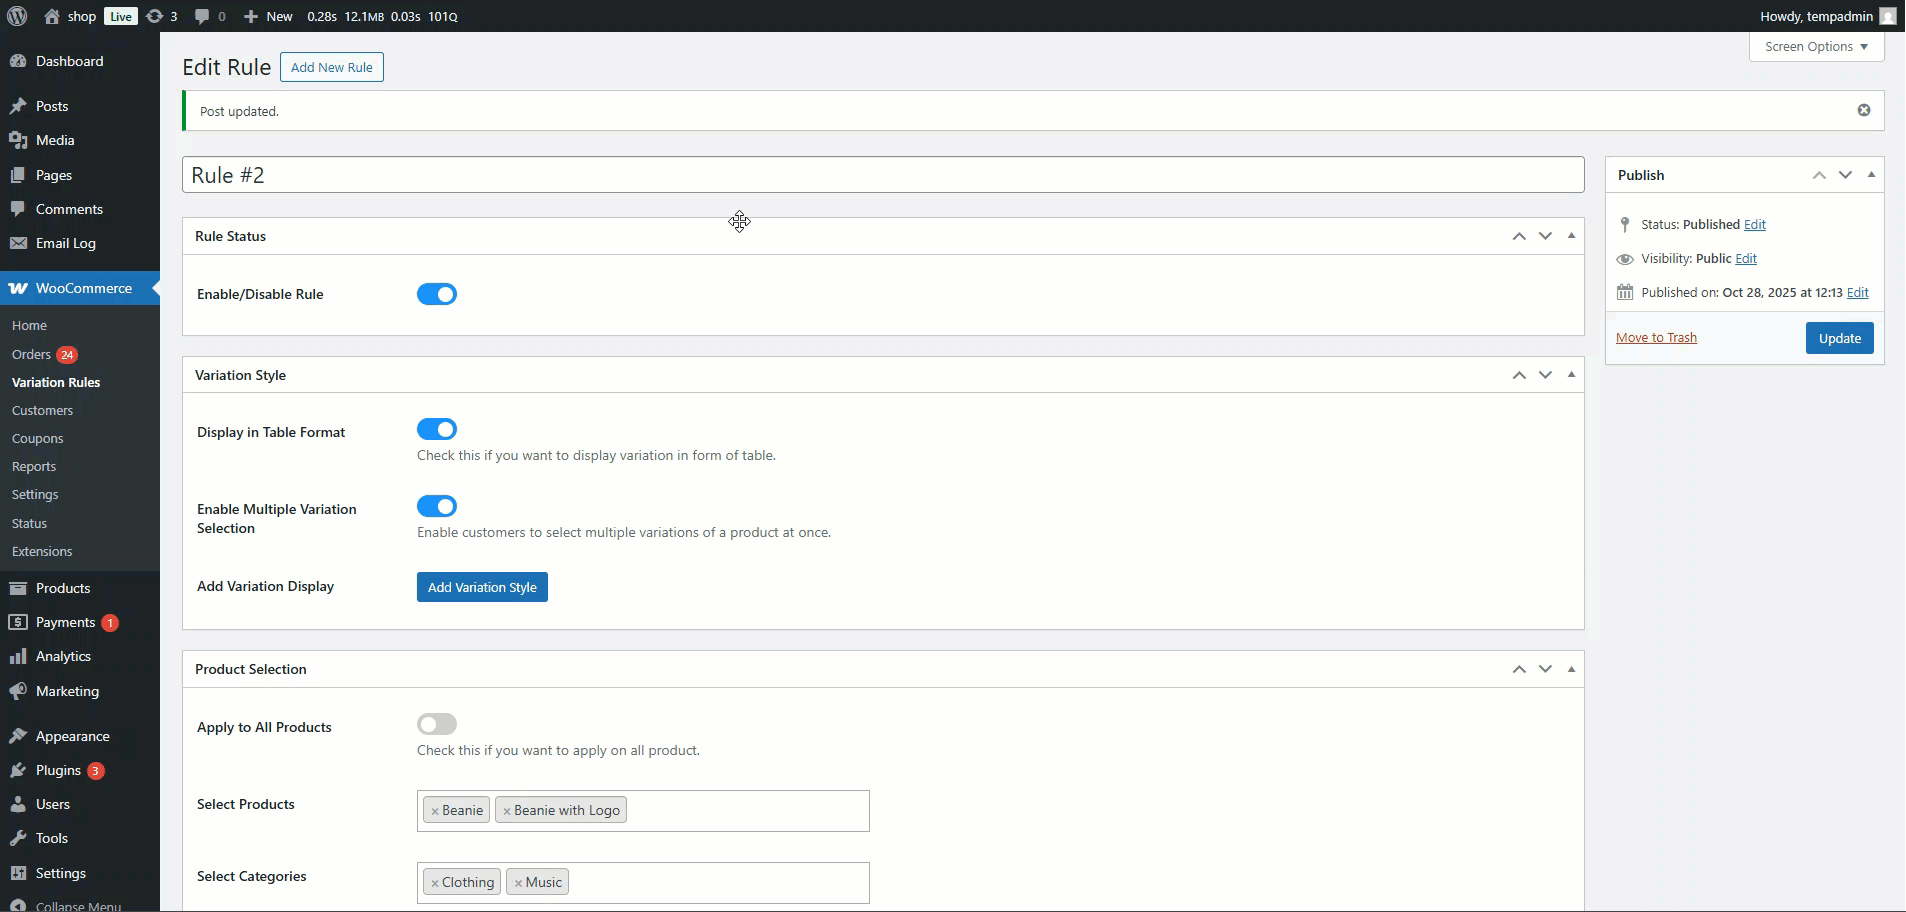
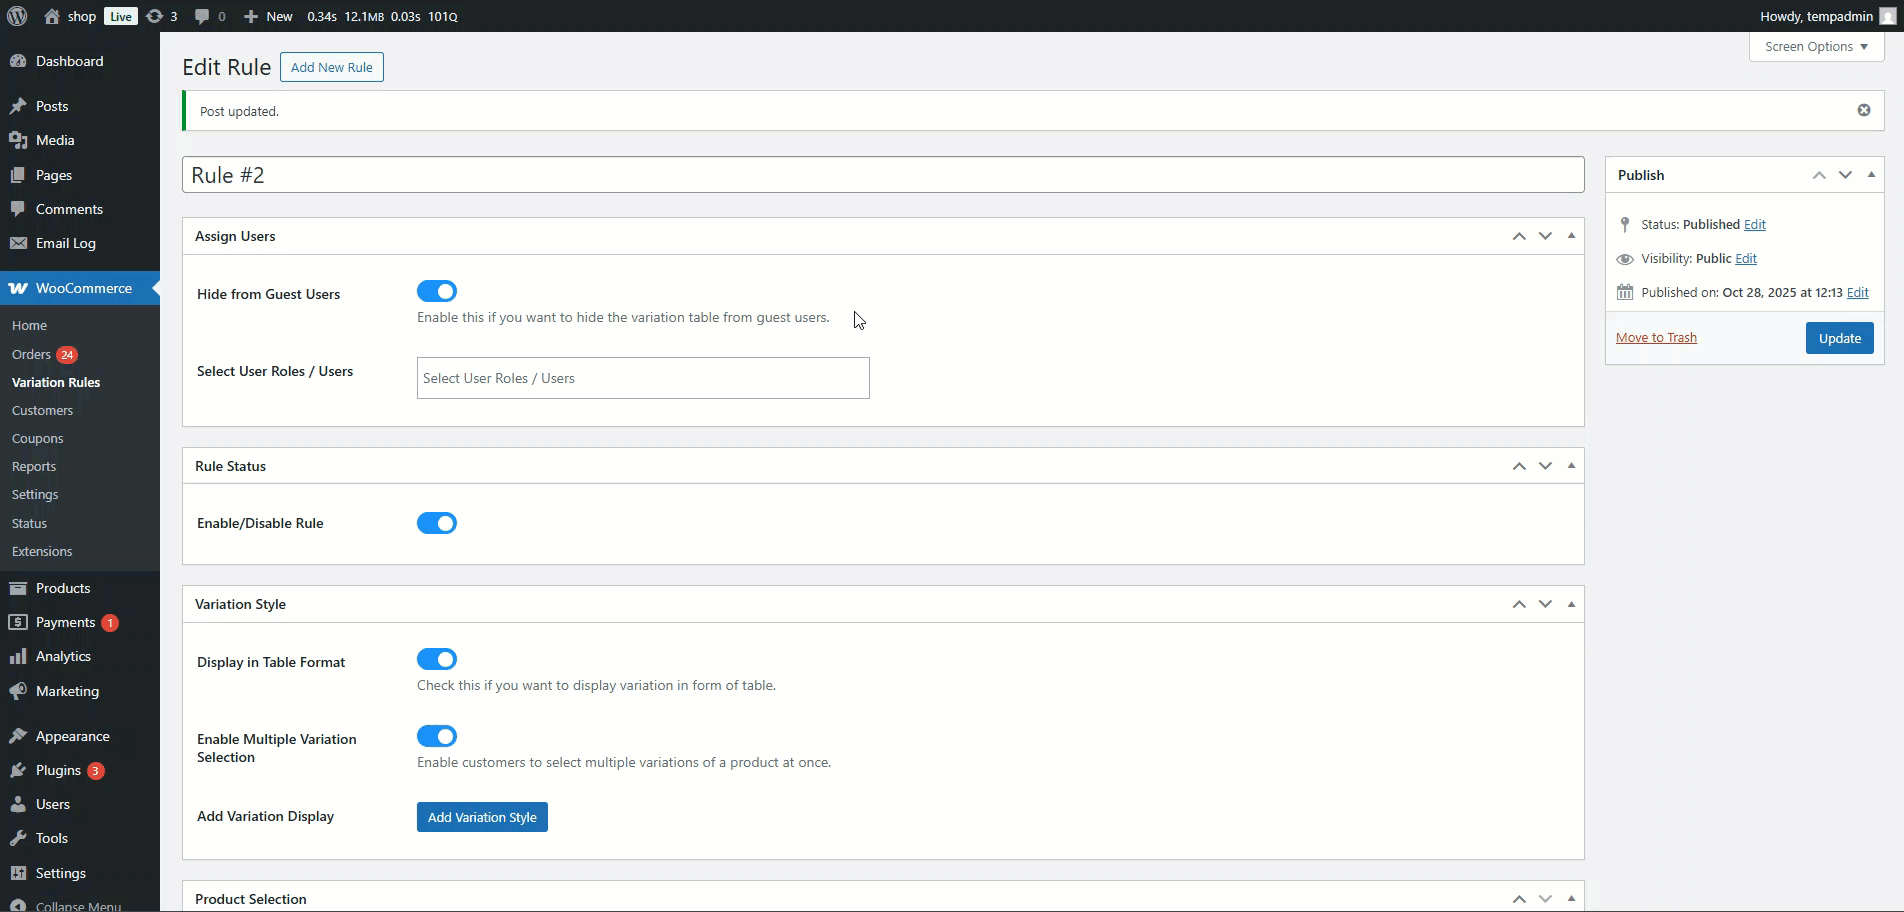
Variation Style
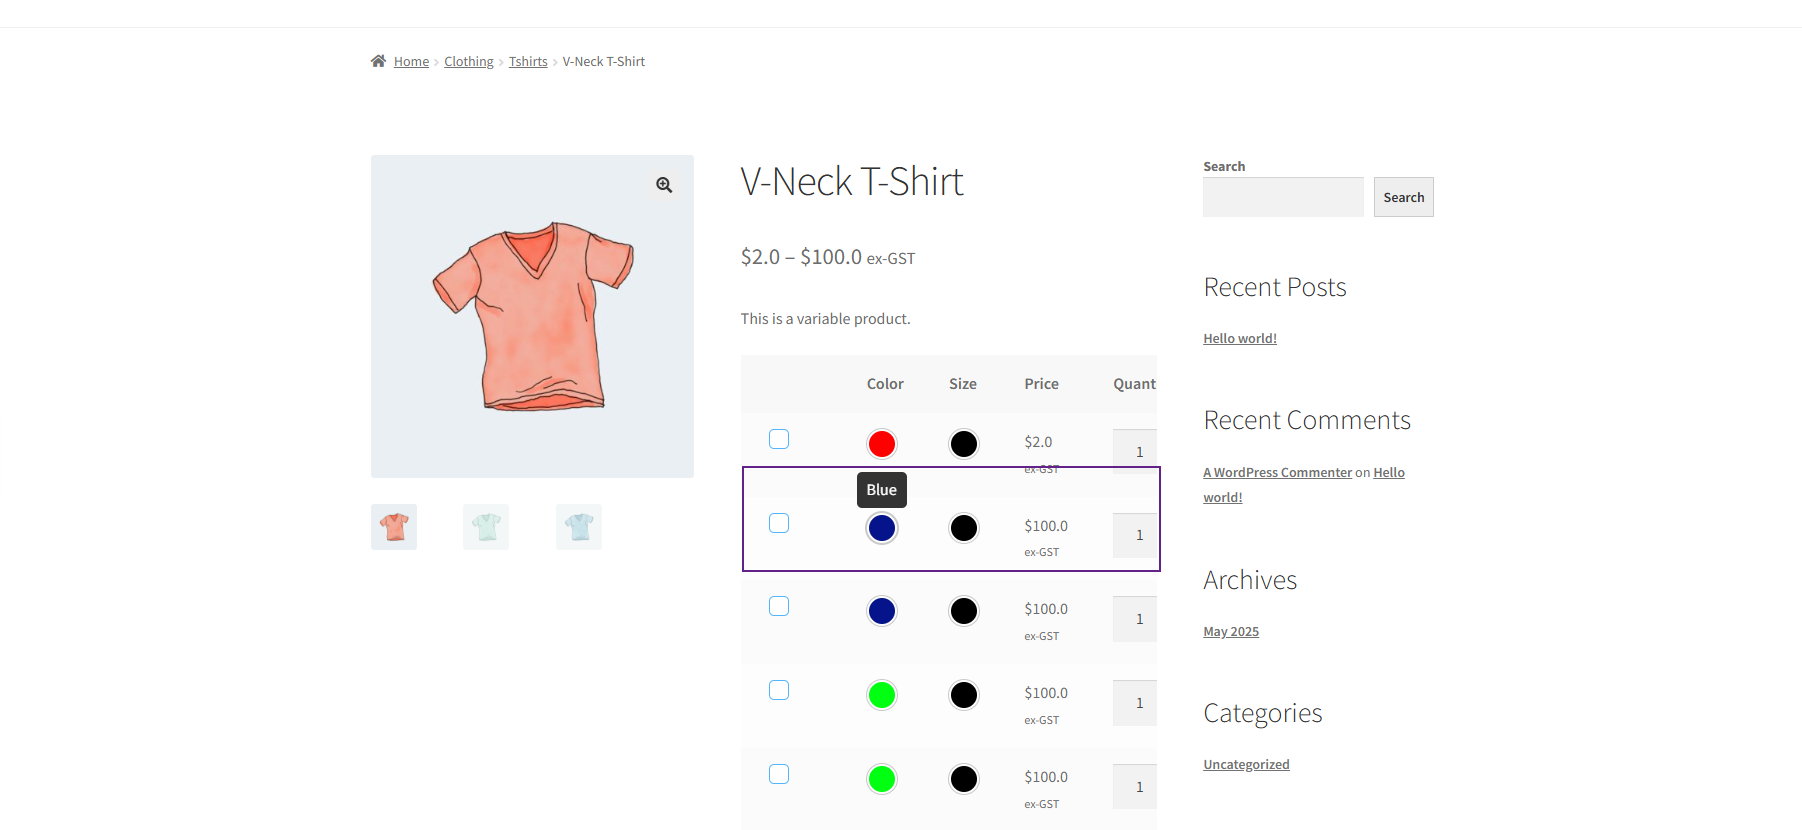
Display in Table Format:
- Enable this toggle to display all variations of a product in a table layout on the product page.

Enable Multiple Variation Selection:
- Enable this toggle to allow customers to select and add multiple variations to the cart at once.
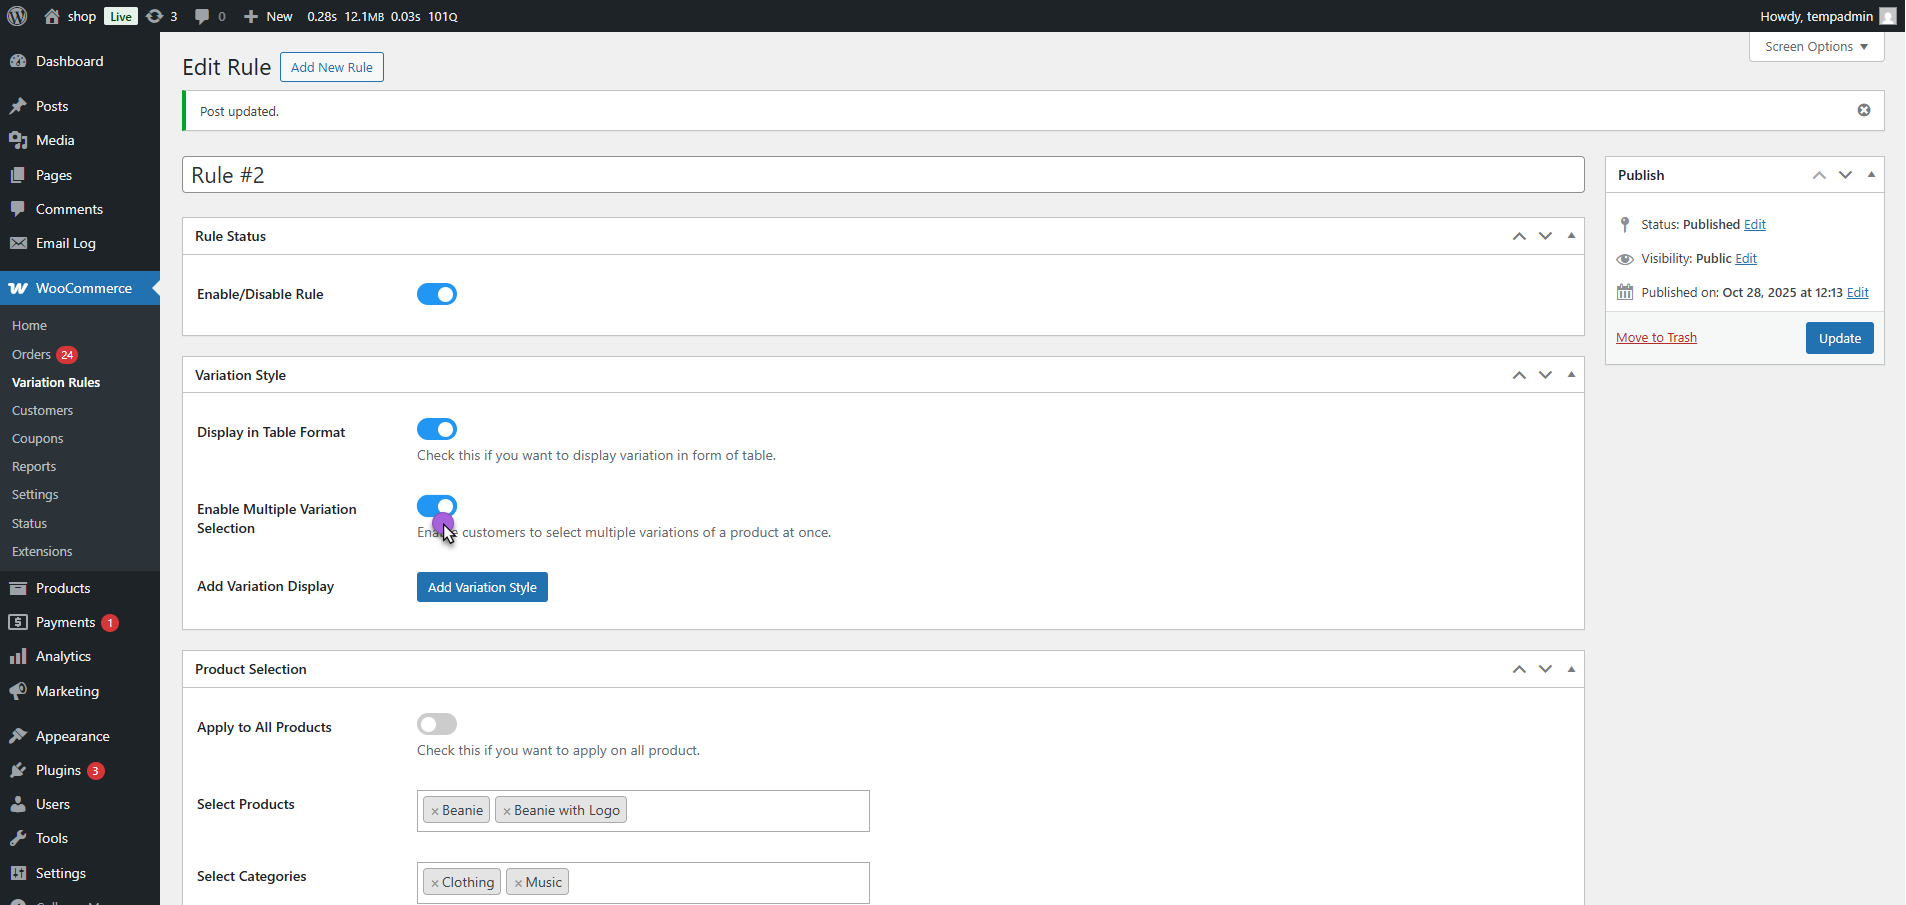
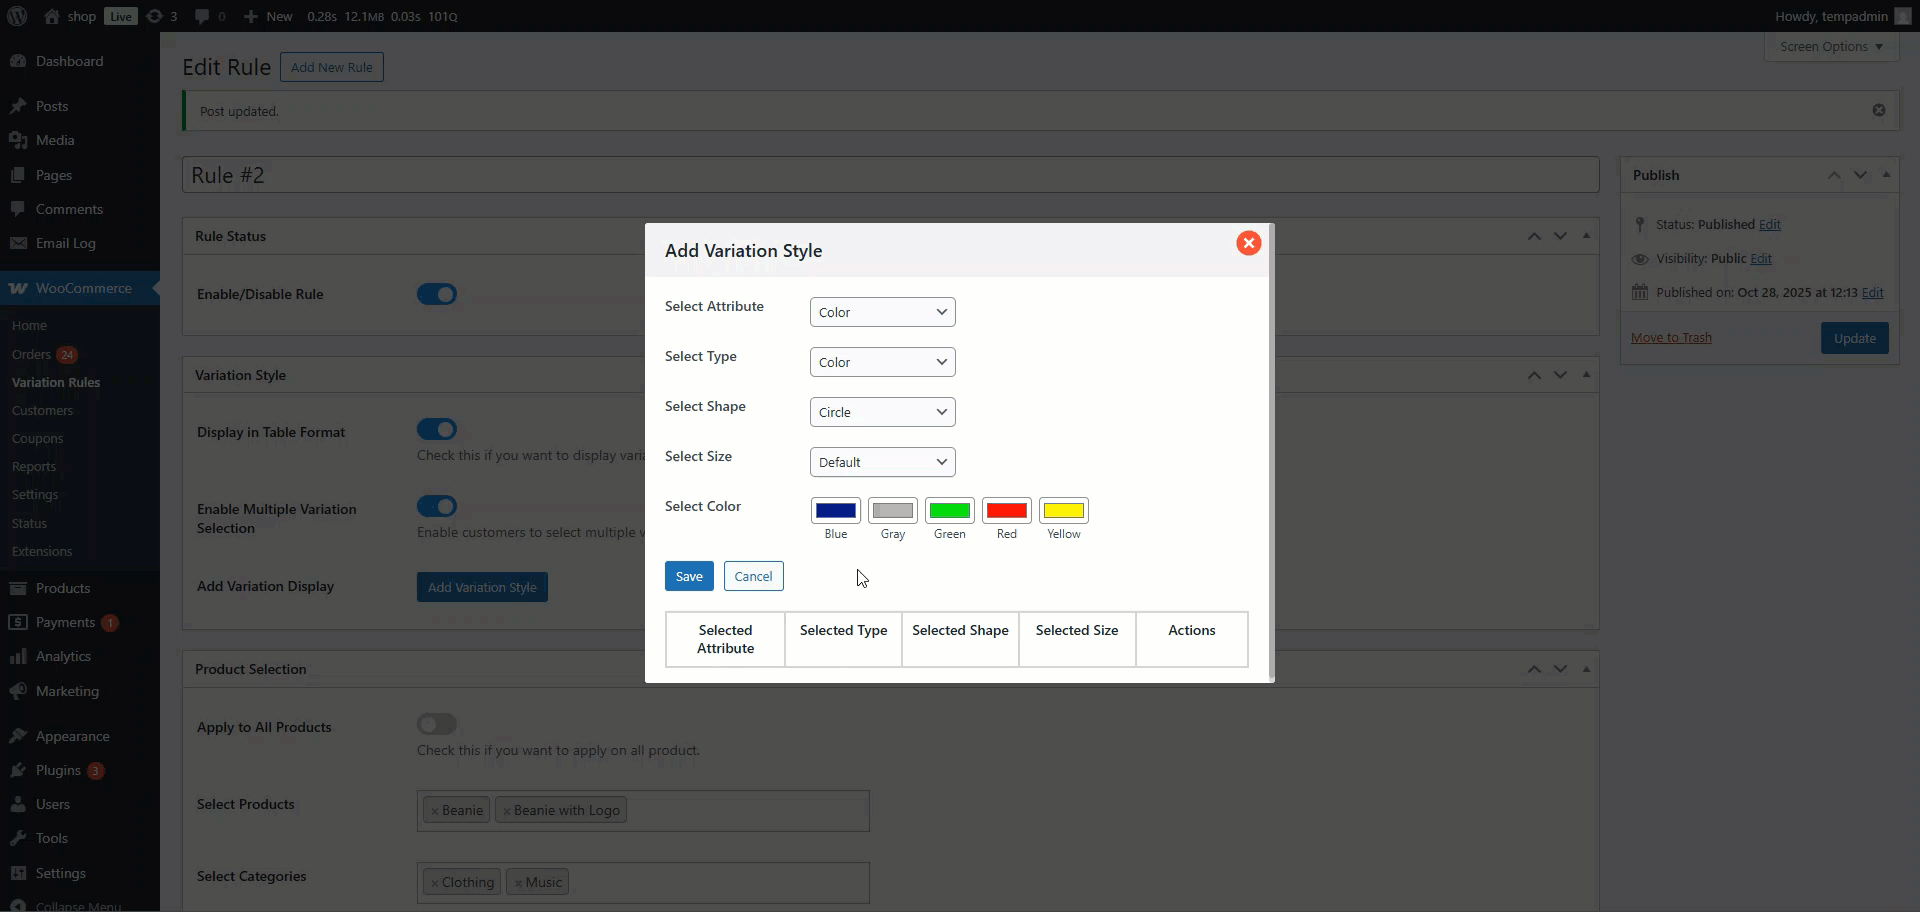
Add Variation Display:
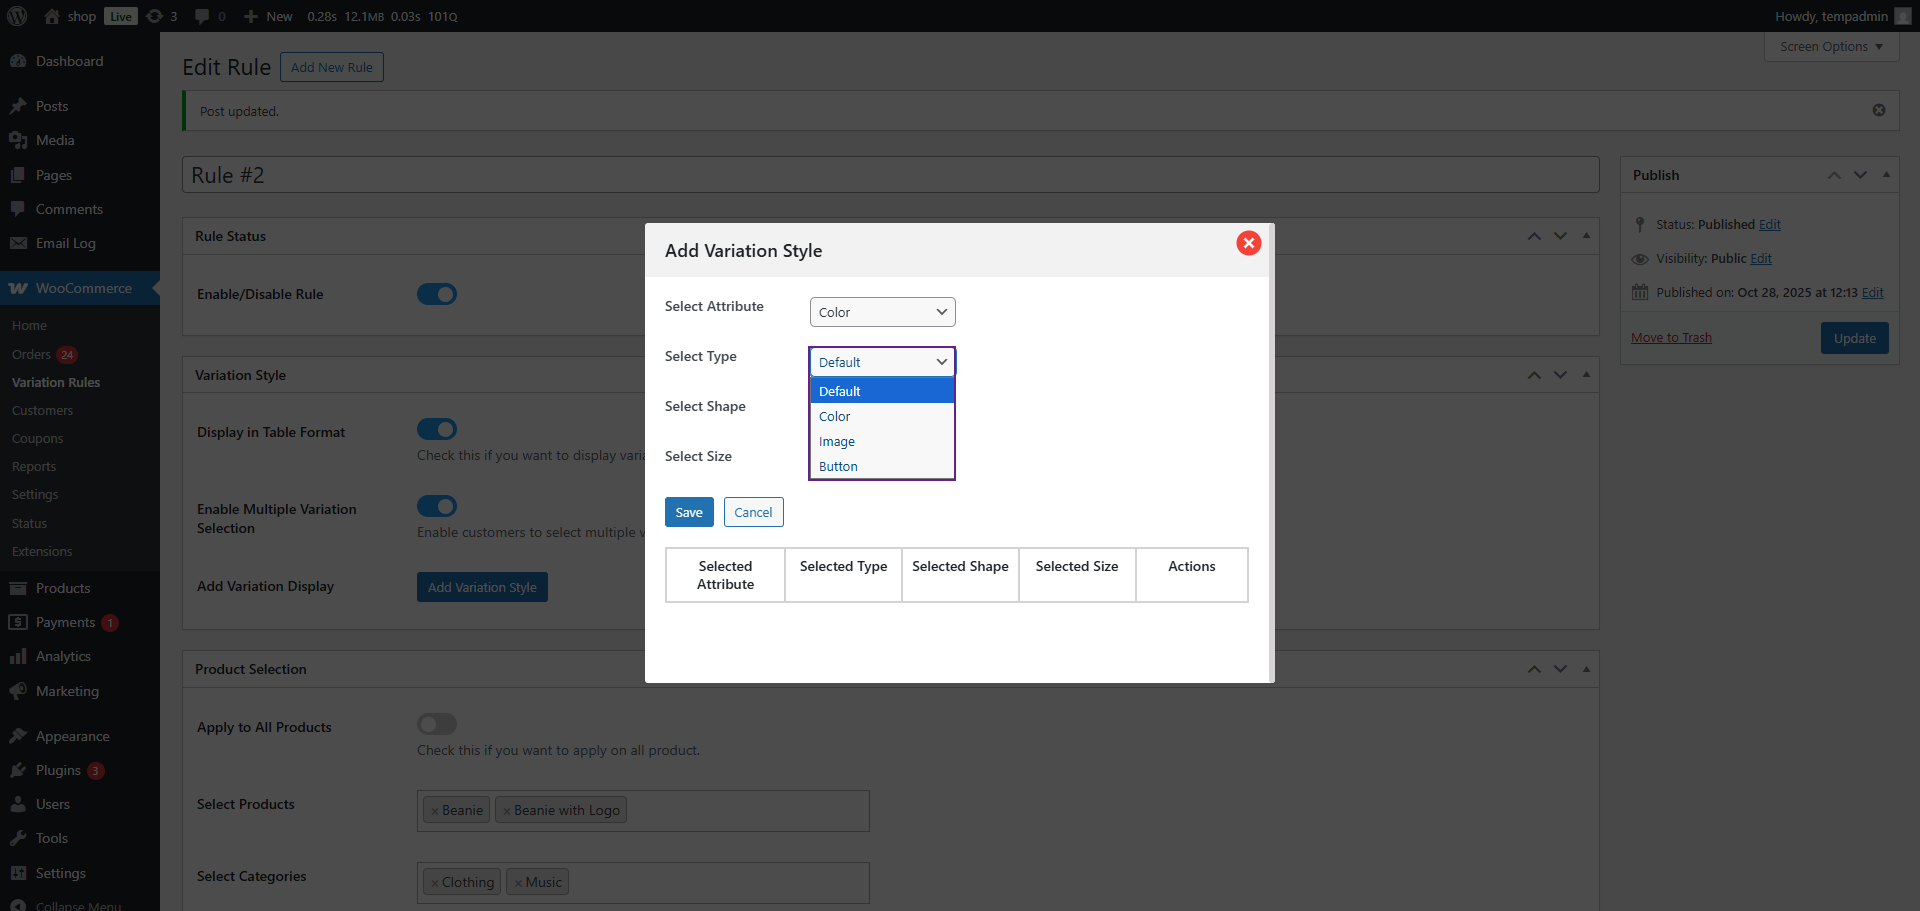
- Click on this button to open a pop-up where you can define the variation display layout.
Inside the pop-up, you can:
- Select Attribute – Choose which attribute (e.g., Color, Size) to display.

- Select Type – Now, choose how you want this variation to appear.
- When you select Color, a Select Color field will appear below. Here, all variation colors will be visible. You can click on any color to change or assign a new one.
- When you select Image, a Select Image field will appear. From here, you can upload or choose images for each variation.
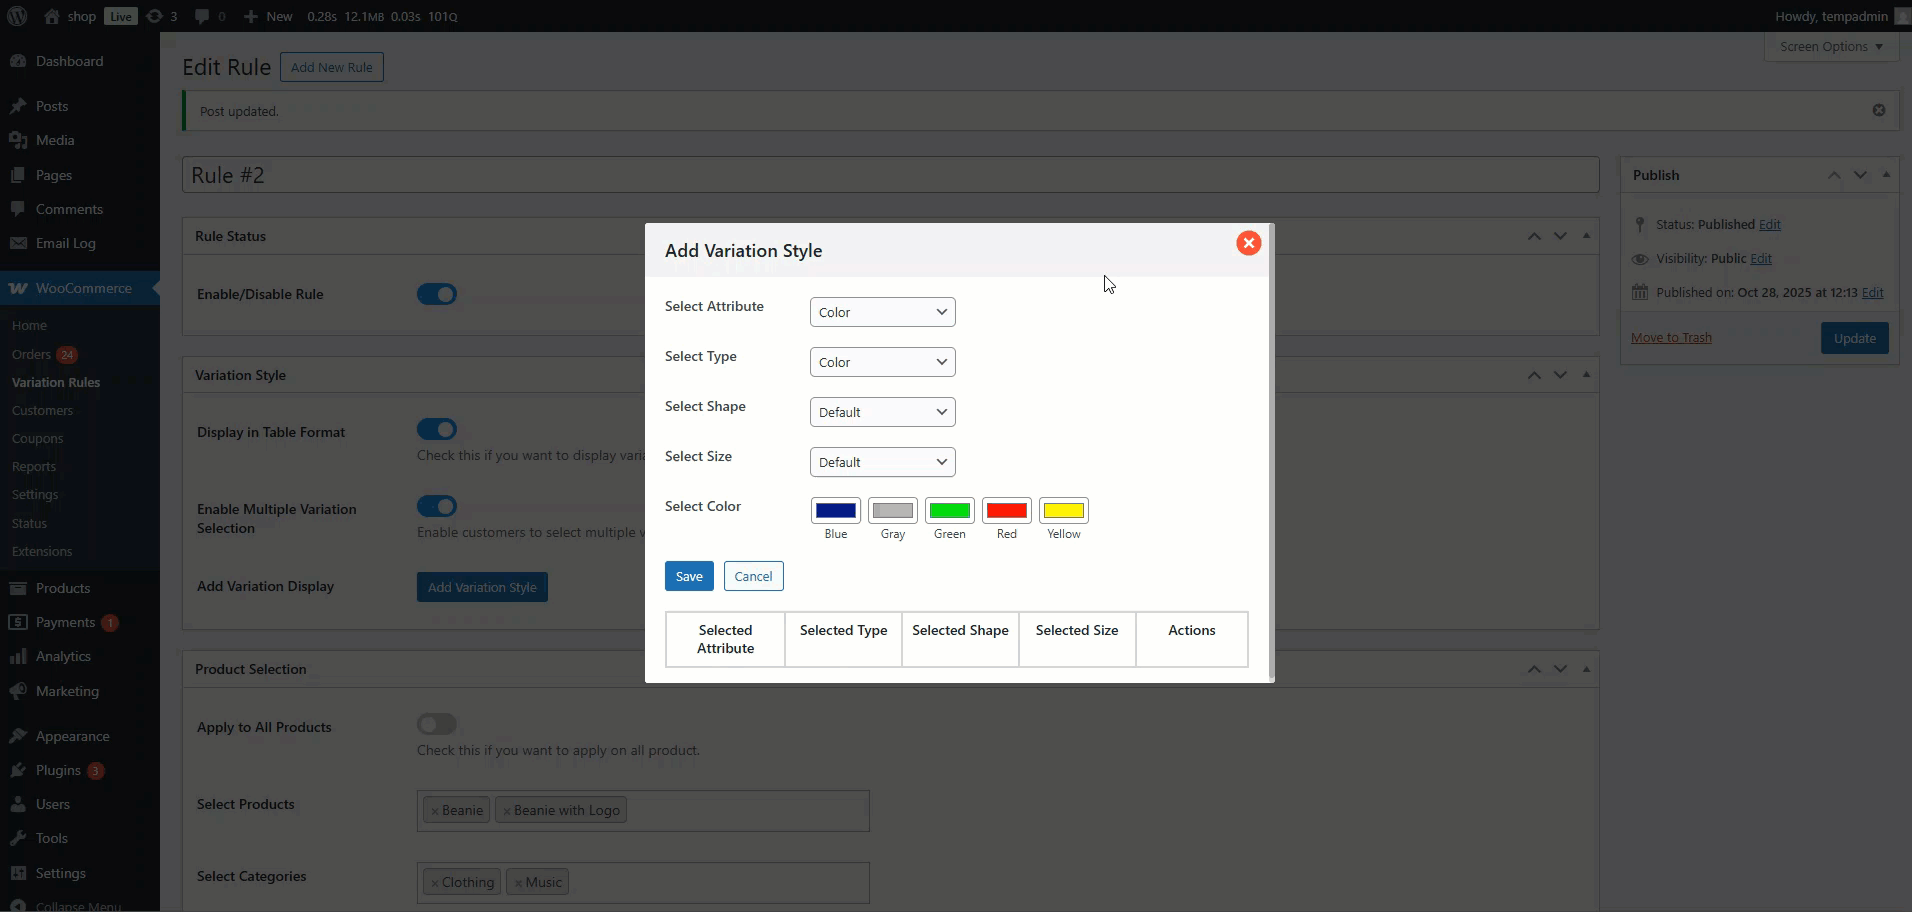
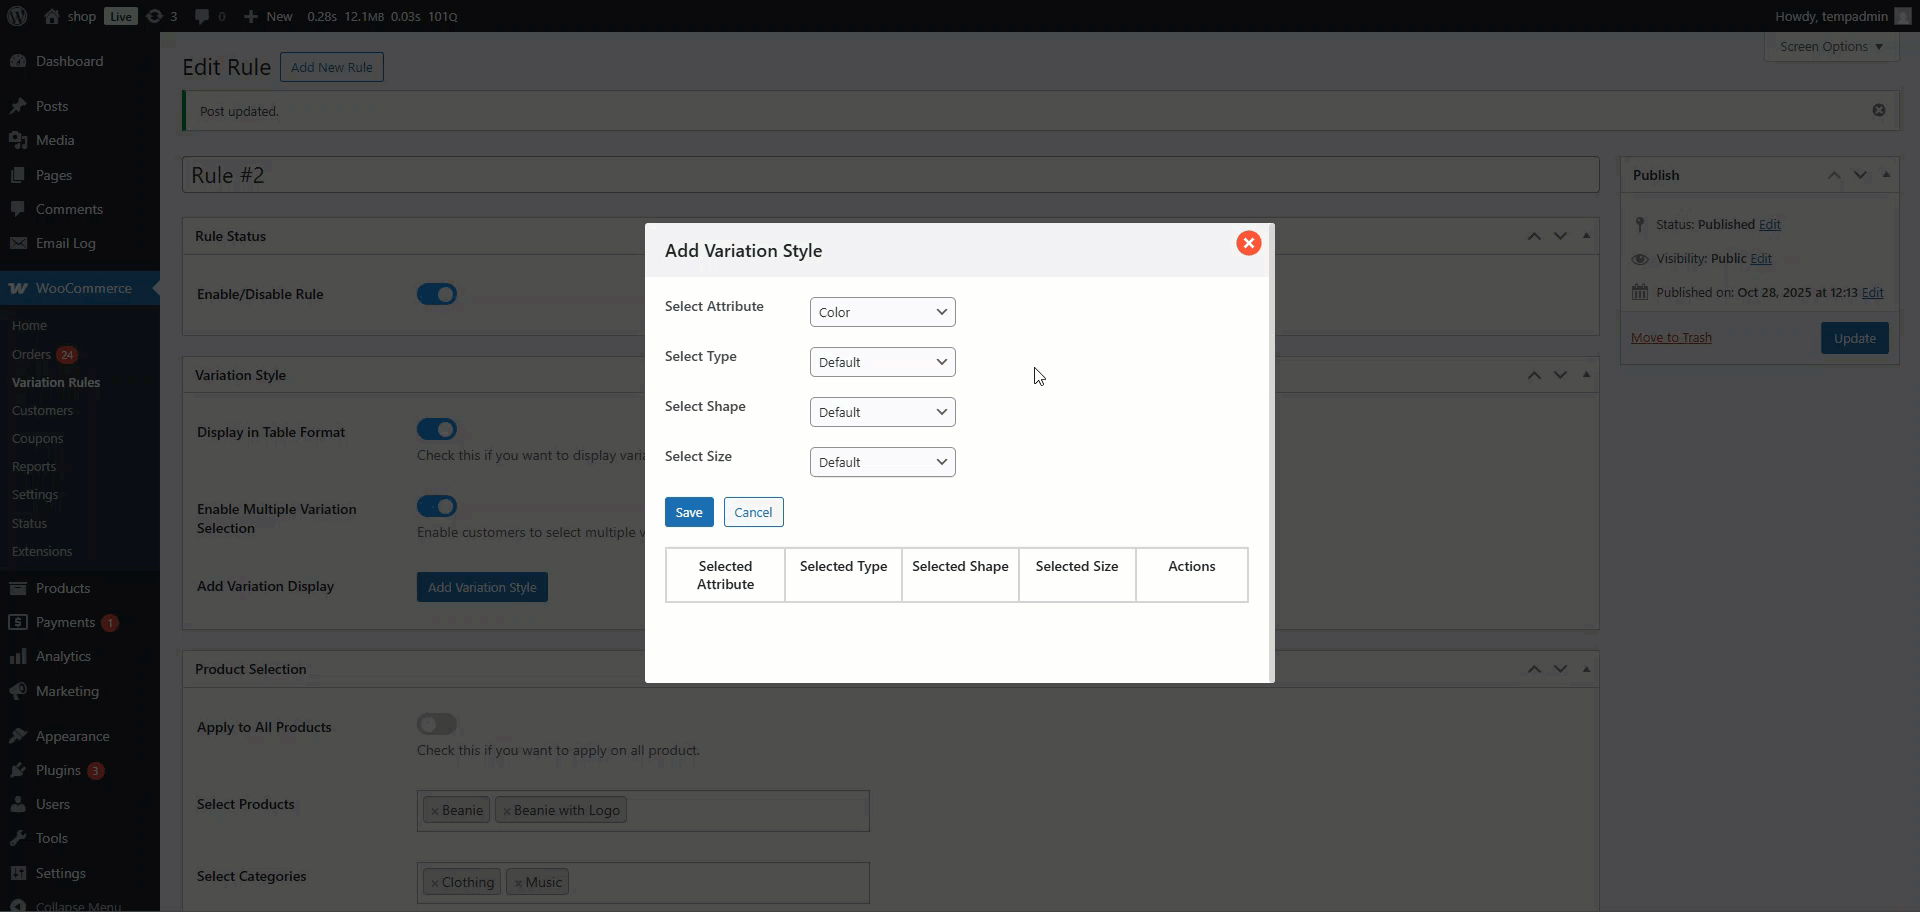
- Select Shape – Choose the shape for swatches (e.g., Circle, Square).

- Select Size – Here, you’ll see a dropdown with two options: Default and Custom.
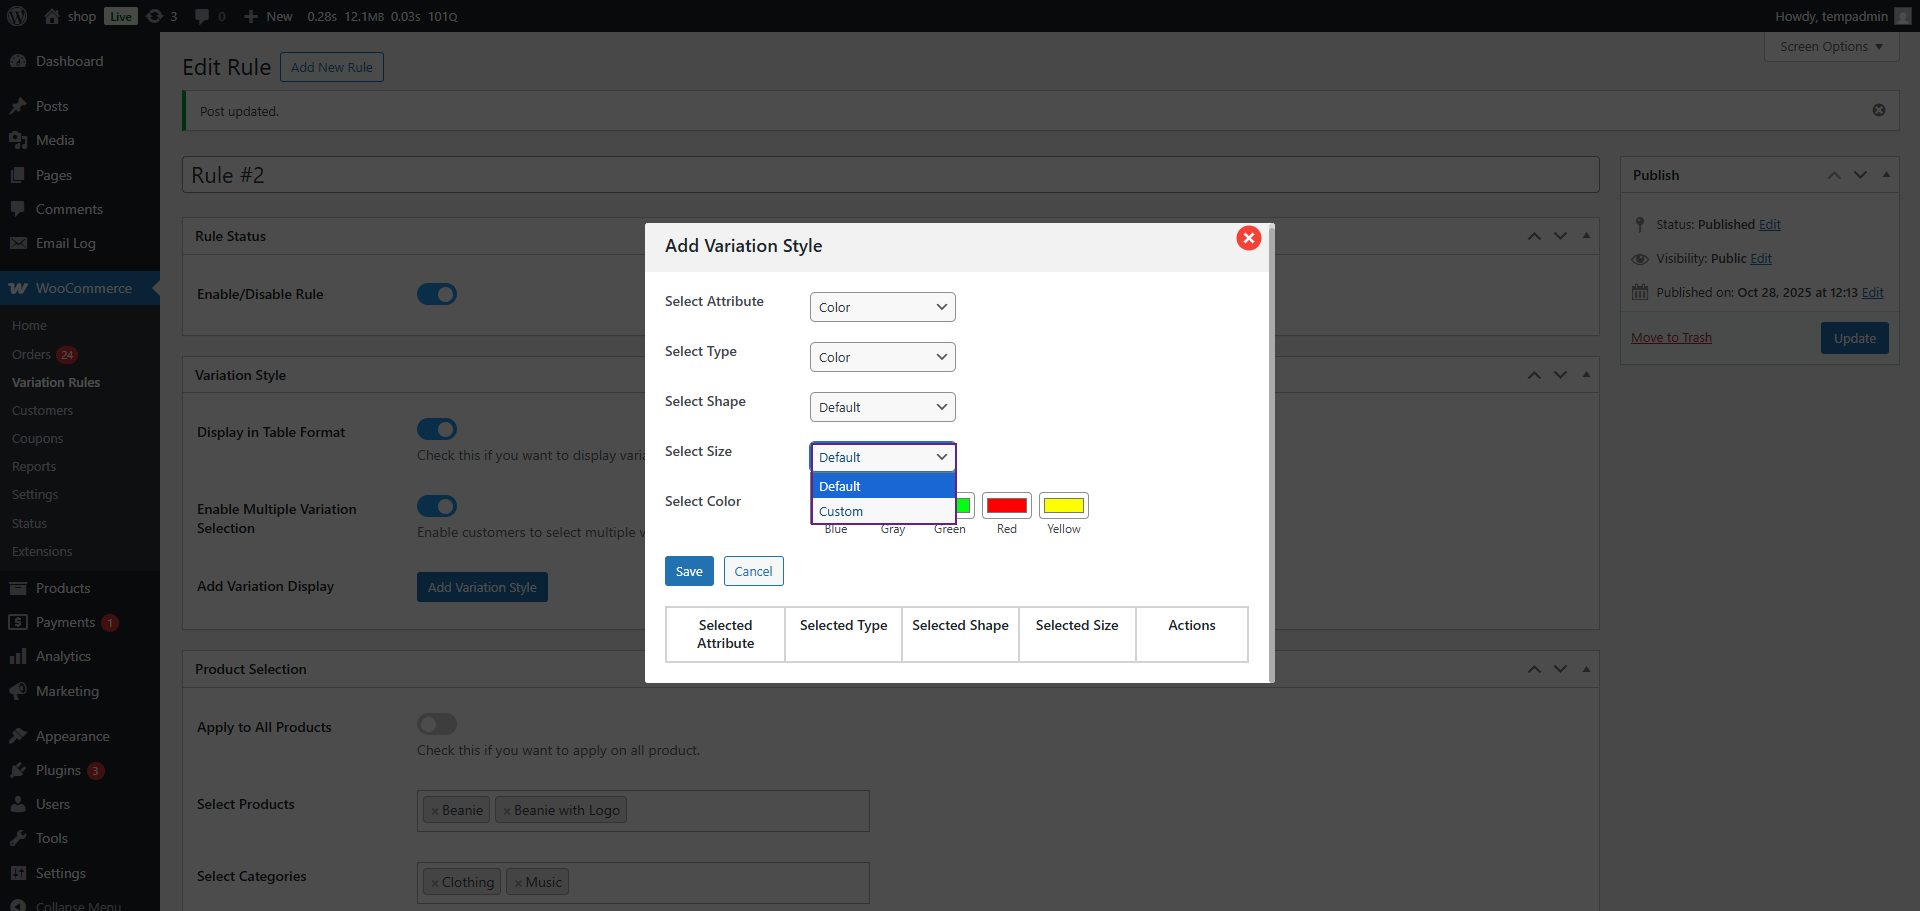
- If you select Default, the system will use the standard swatch size automatically.

- If you select Custom, two new input fields — Width and Height — will appear. Enter your preferred dimensions here to set a custom swatch size.

- After configuring the options, click Save to store your layout settings.
Note: You can open and configure the settings before publishing, but the saved layout will only be applied once the rule post is published.
Assign Users
This section allows you to control which users can view or interact with the variation display based on their login status or role.
Hide from Guest Users
- Enable this option to hide the variation table for visitors who are not logged in.
- Logged-in users will still be able to see and use the variation display normally.

Select User Roles / Users
- Choose specific user roles (e.g., Wholesale Customer, Retailer) or select individual users.
- Only the selected users or roles will have access to the variation display created under this rule.
- Once all settings have been configured — including Product Selection, Variation Style, and Assign Users — you can now publish/update the rule.

Front-End Impact
- Navigate to the Shop Page
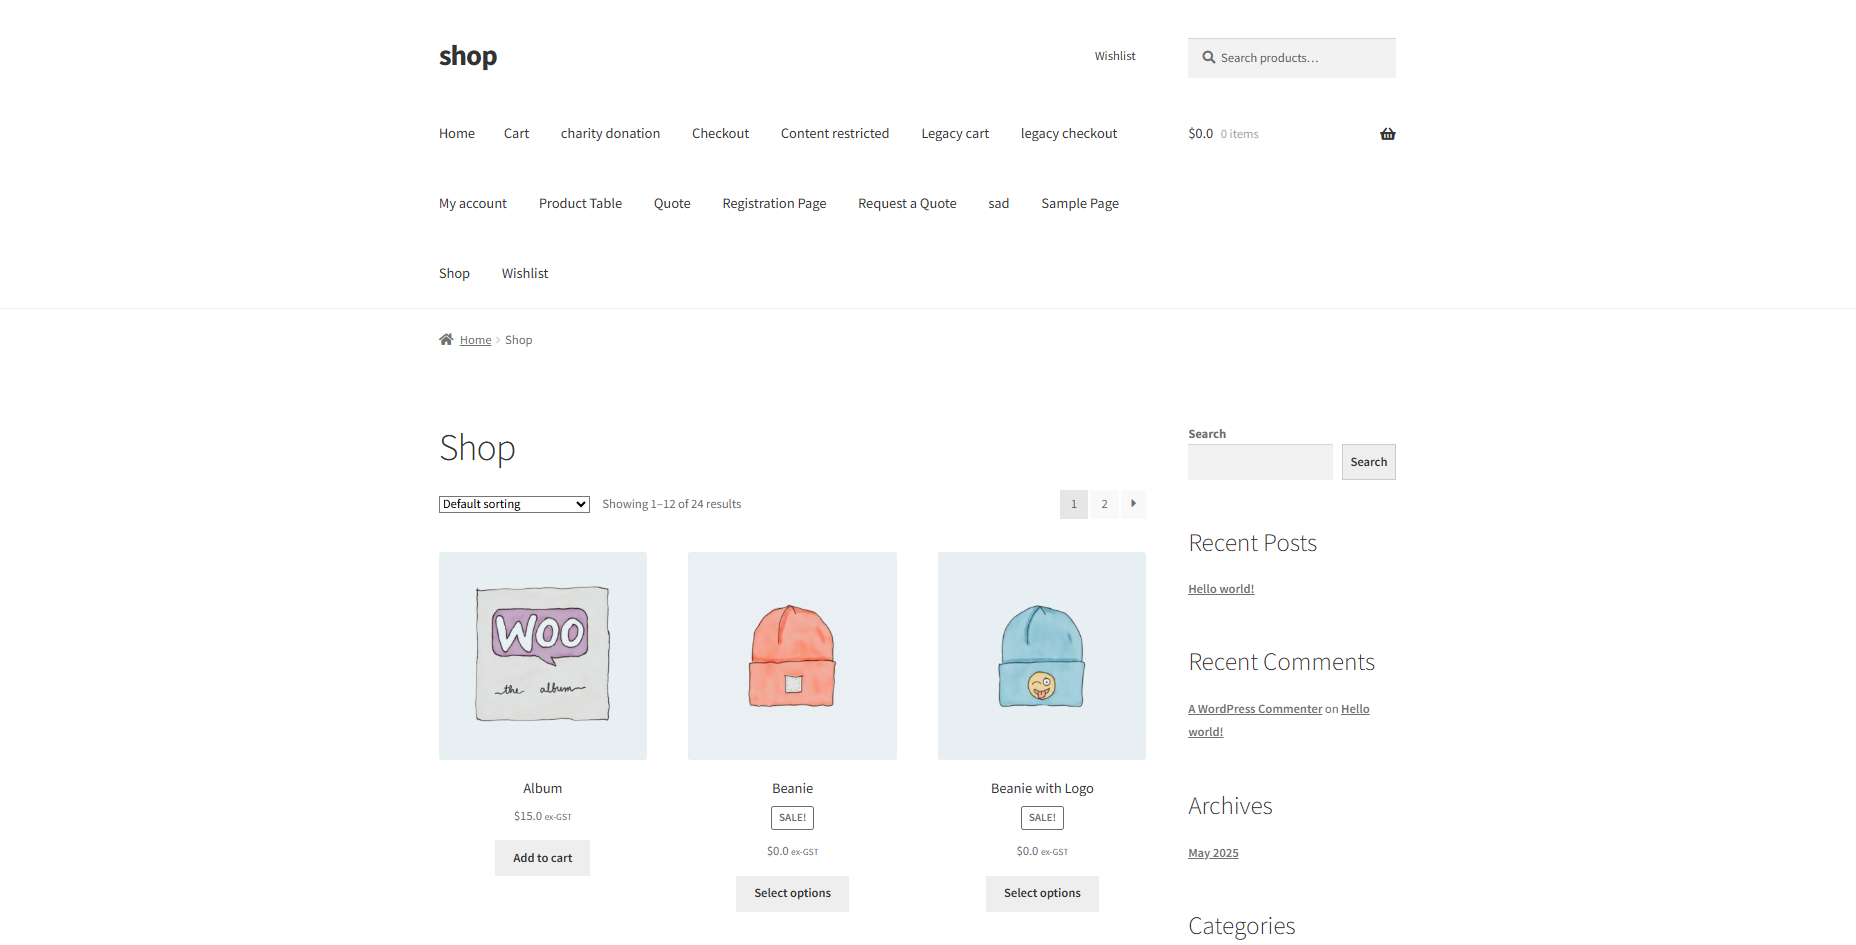
- Open any Variable Product.
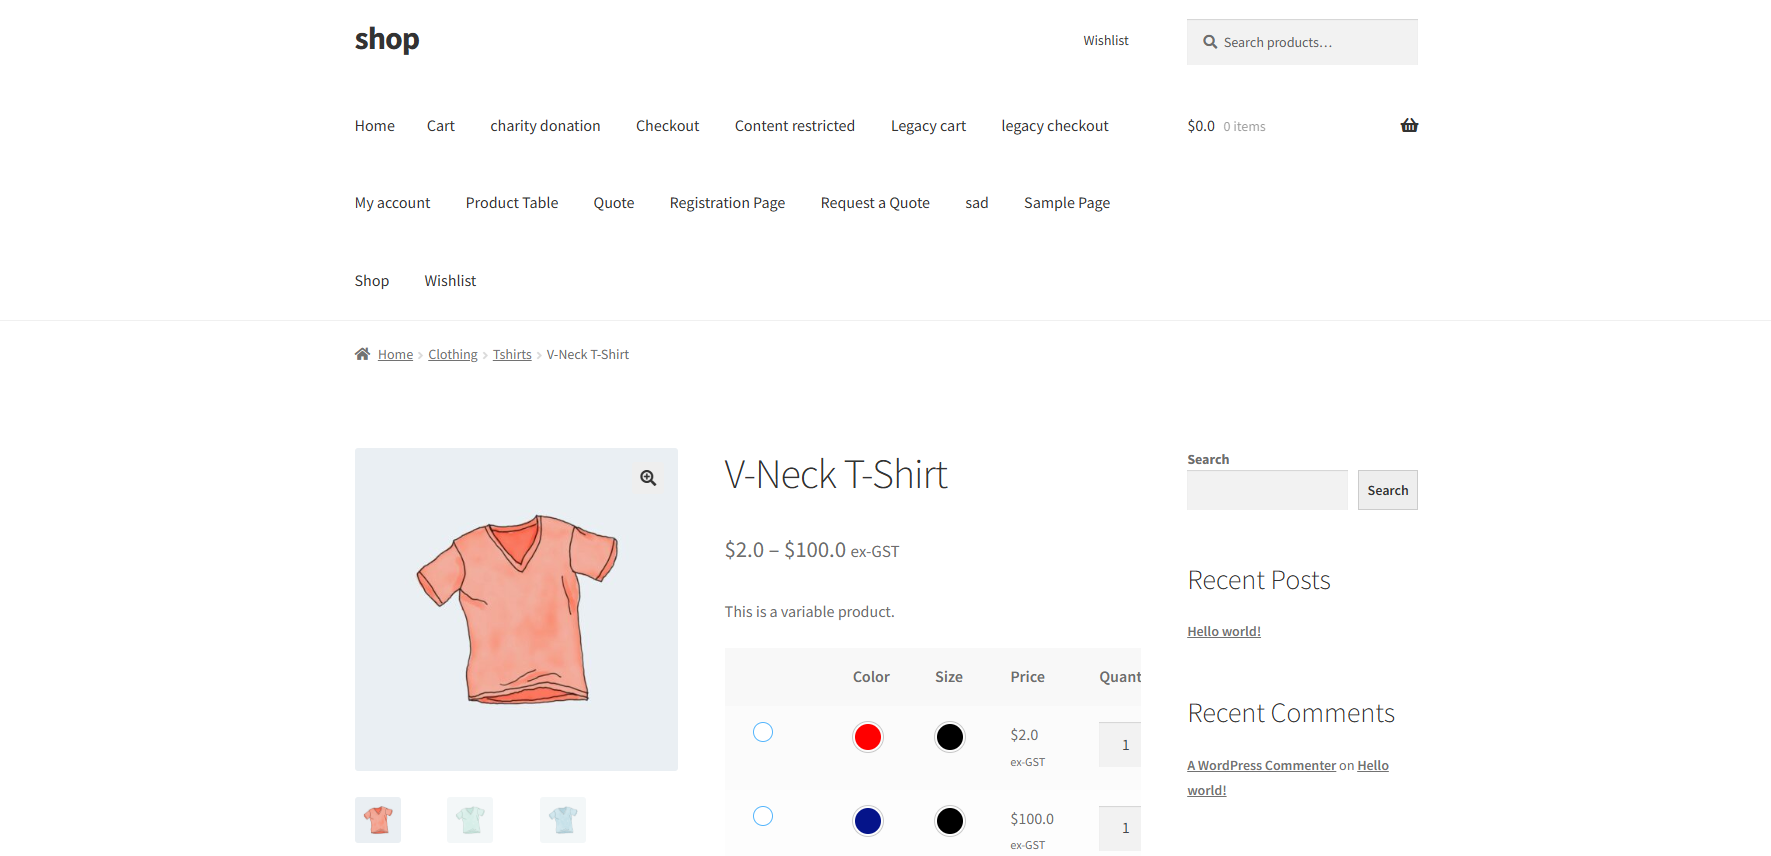
- The variation options will appear based on your configured rule.

- If Table Format is enabled, variations will be shown in a structured table with price and stock details.
- If Multiple Variation Selection is enabled, you can select and add multiple variations to the cart at once.
- Attribute styling (Color, Image, or Button) will appear according to your selected variation display type.
- If the rule is hidden from guests, only logged-in users will be able to see the variation section.
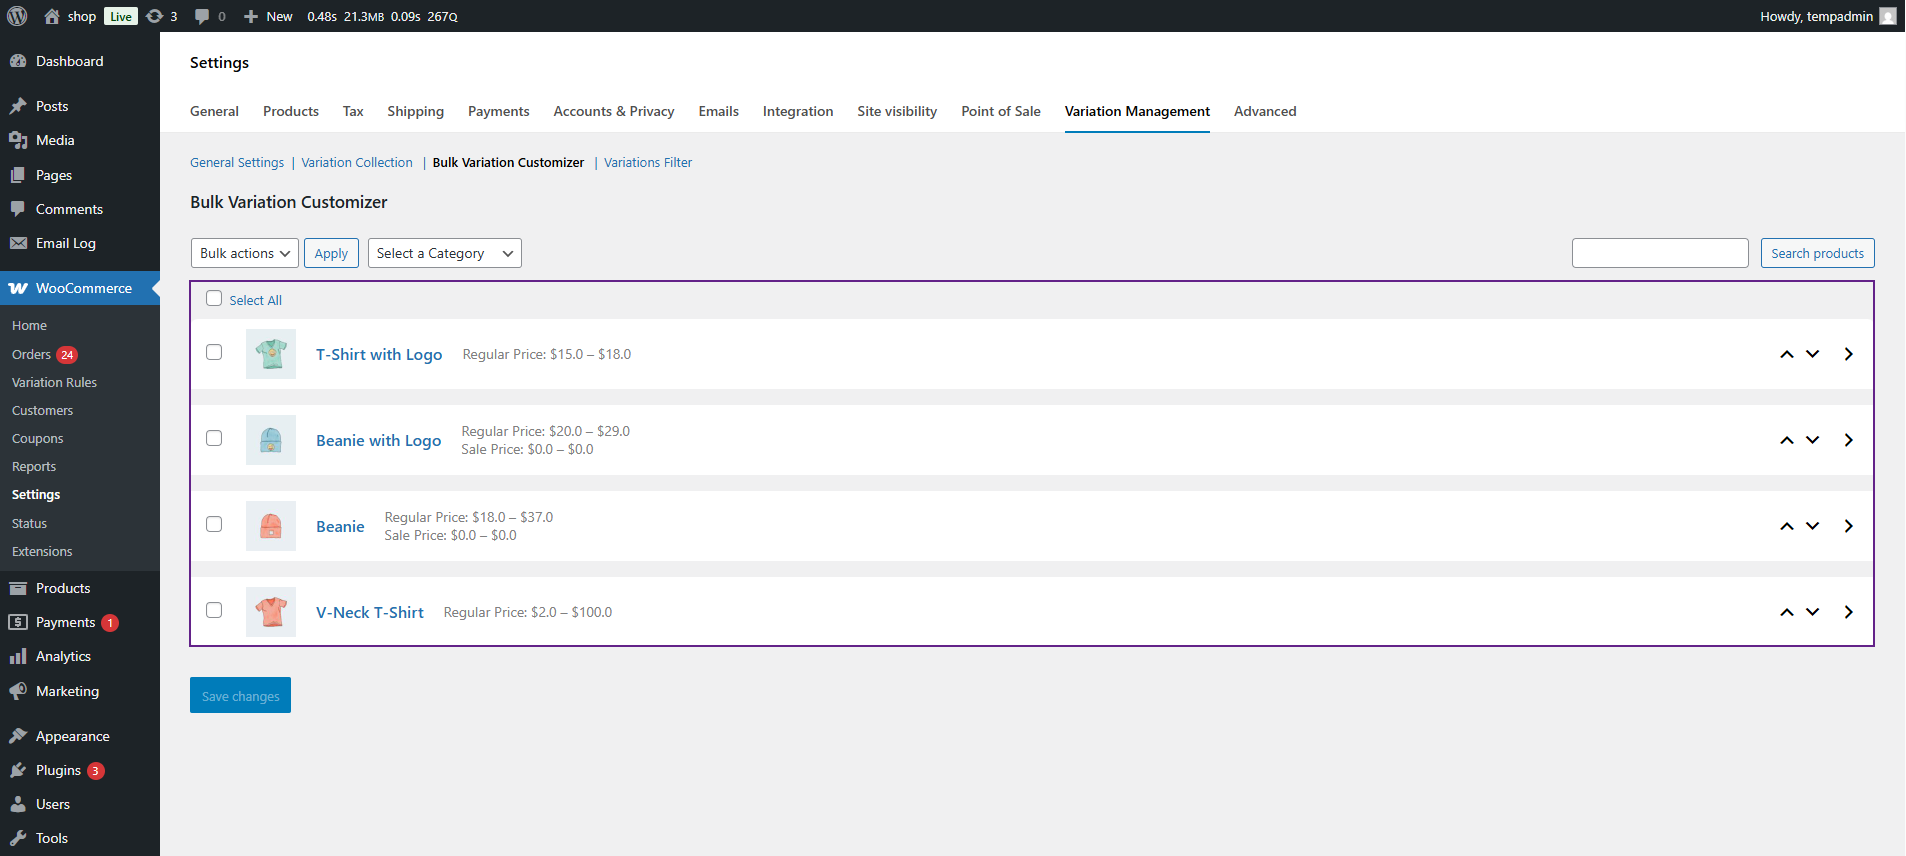
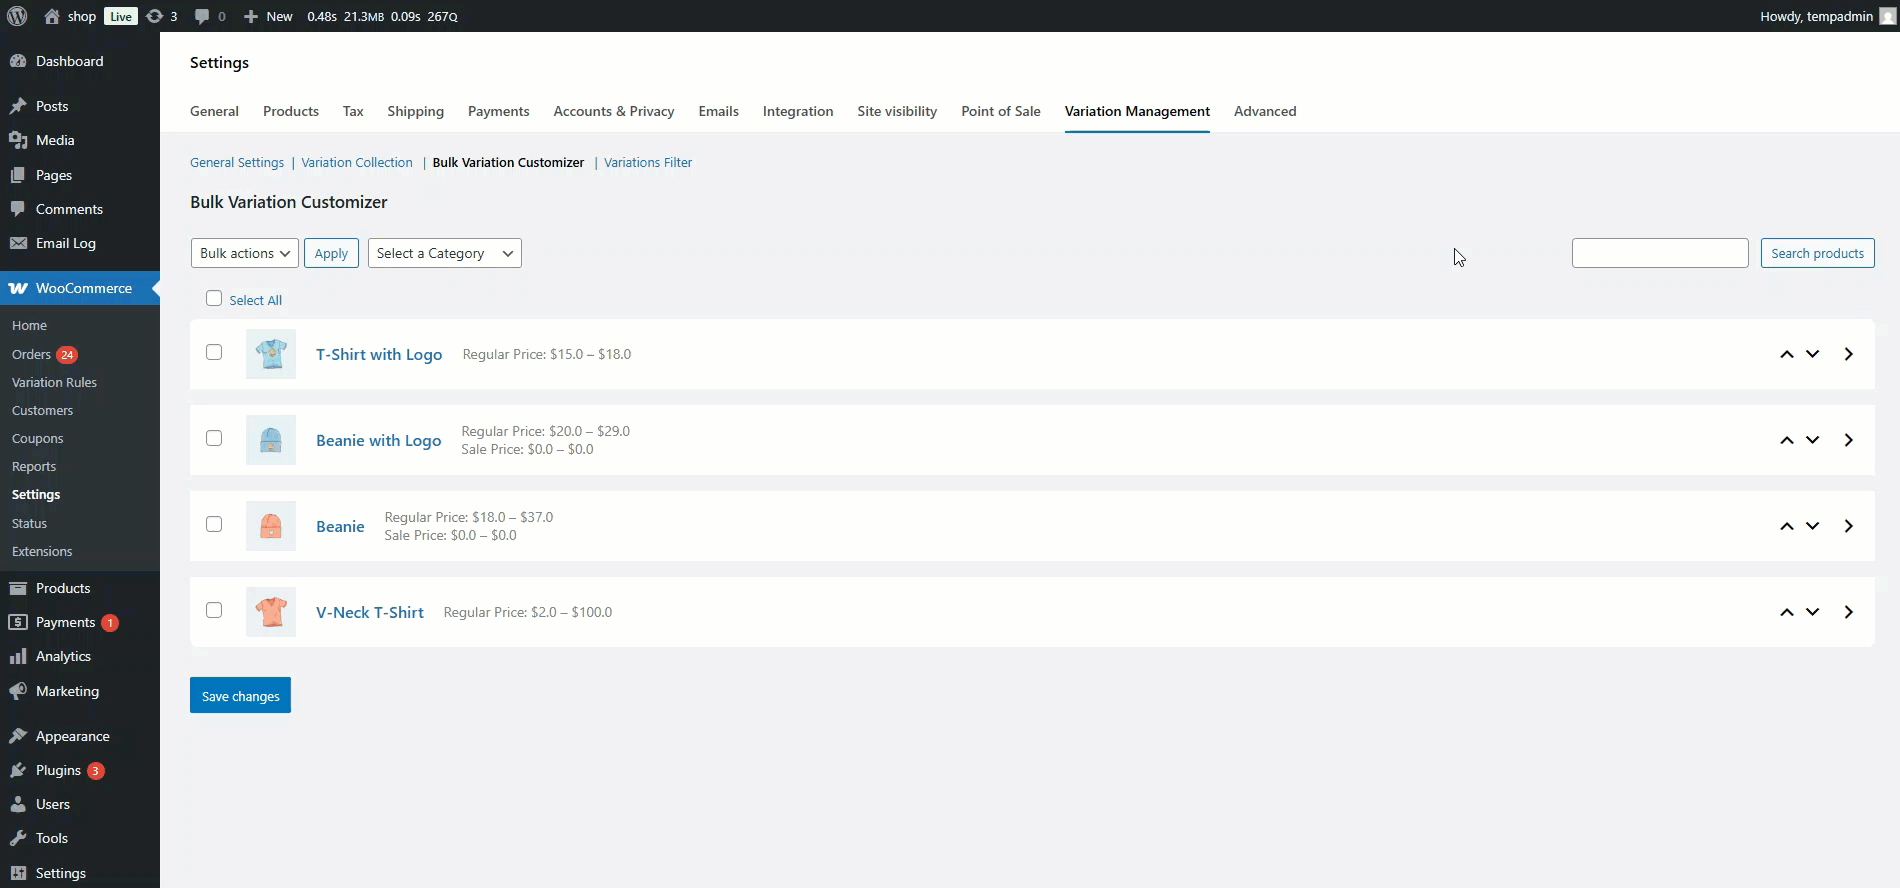
Bulk Variation Customizer
↑ Back to topThe Bulk Variation Customizer allows the admin to easily view and update all product variations from a single screen. Instead of editing variations one by one, the admin can make quick bulk changes to pricing and other attributes for multiple variable products.
- Go to Dashboard > WooCommerce > Variation Management.
- You will see the Bulk Variation Customizer table displaying all variable products.
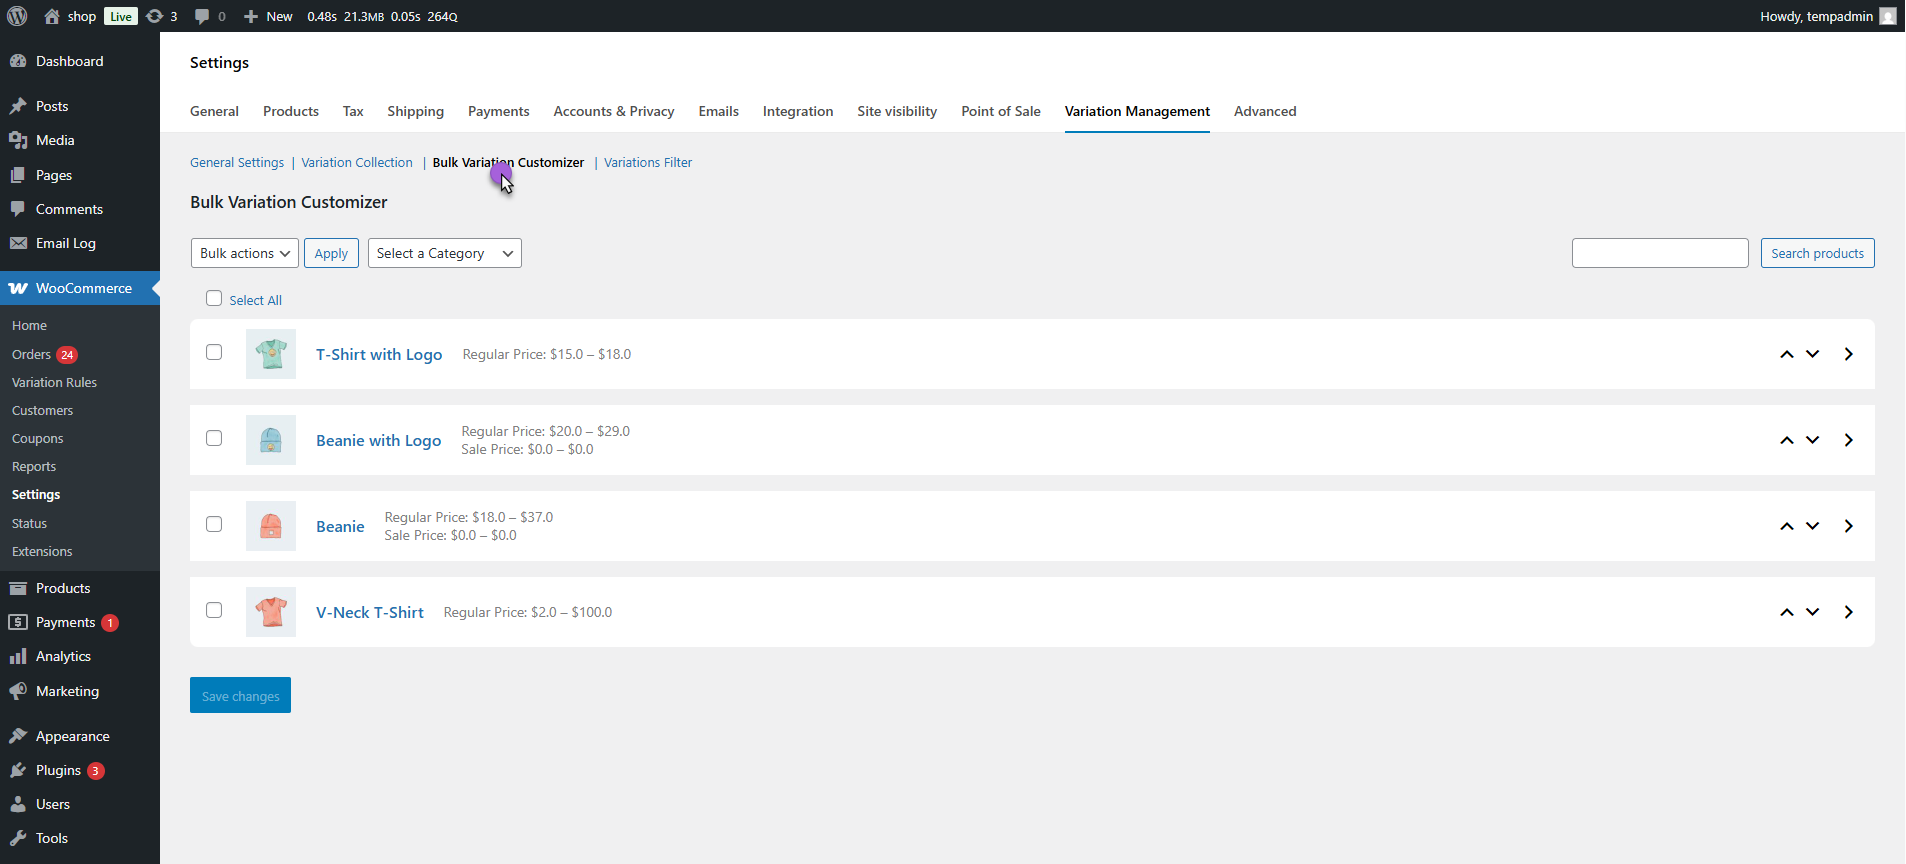
Filters
↑ Back to topAt the top of the table, you can use the following filters to locate specific products:

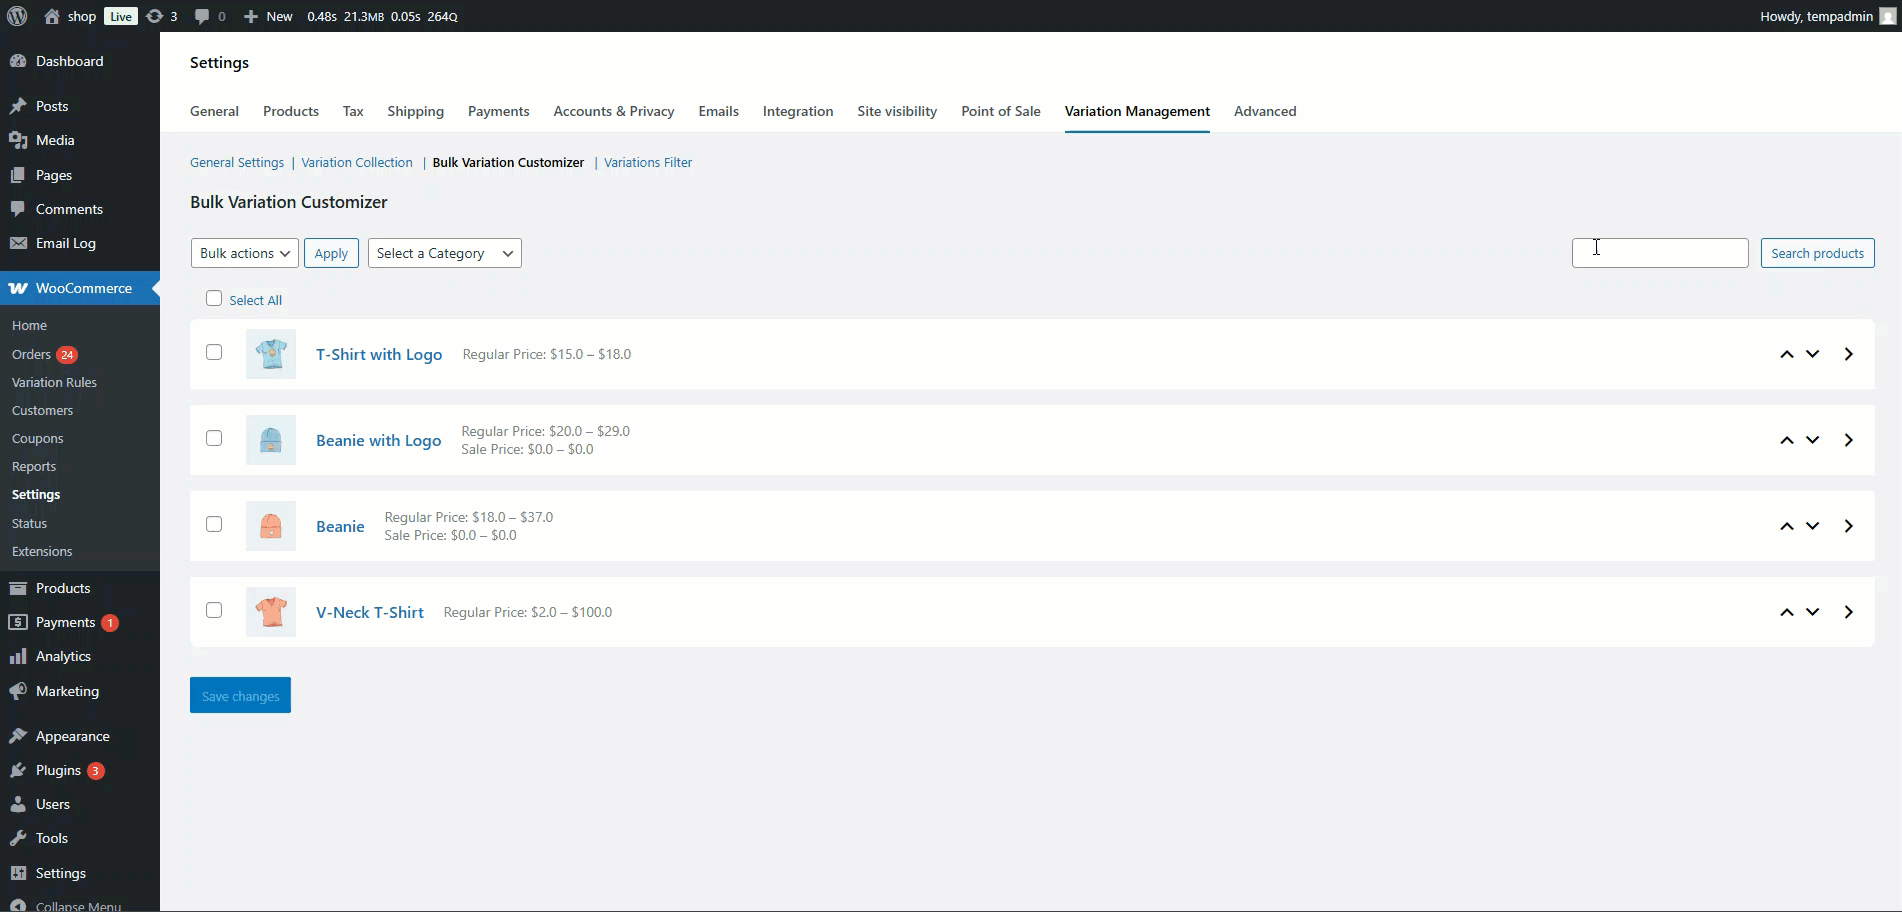
- Product Search Filter – Search products by name.
- Bulk Action Filter – Perform bulk actions on selected products.
- Category Filter – Filter products by their assigned categories
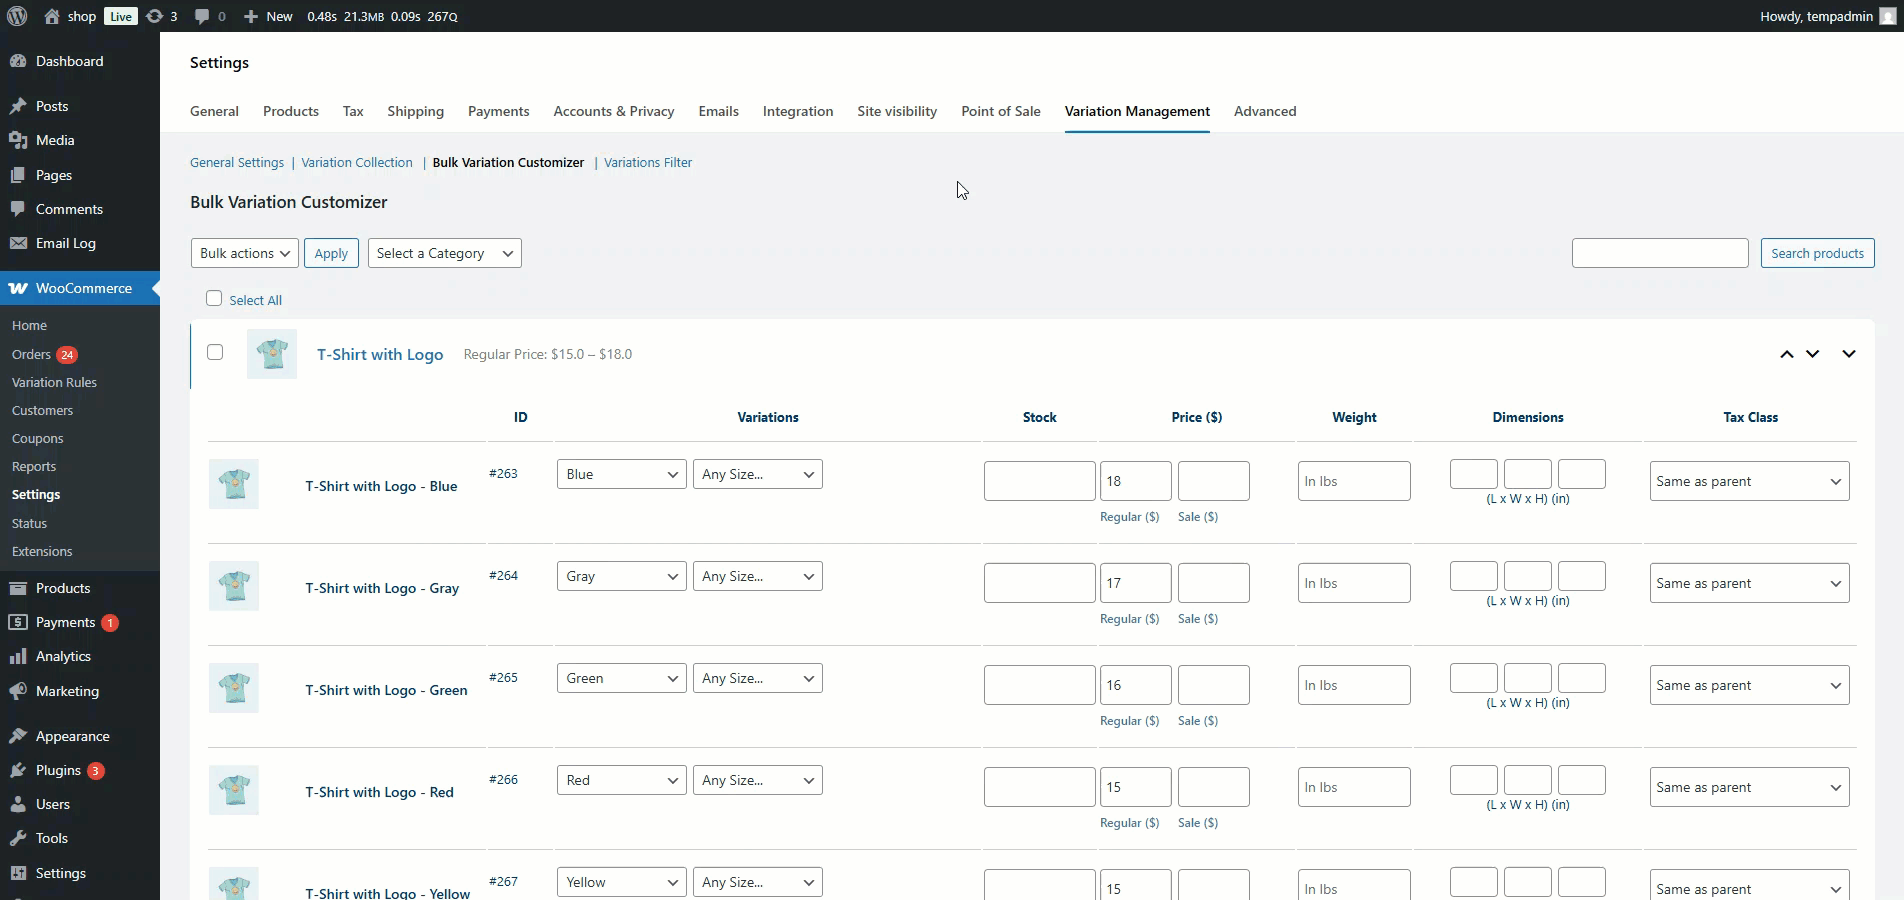
- Now, navigate to the variable product from the table.
- Click on the arrowhead icon beside the product to expand and view its variations.
- Each variation will display editable fields (like: ID, Variations, Stock, Price, Weight, Dimensions, Tax Class).
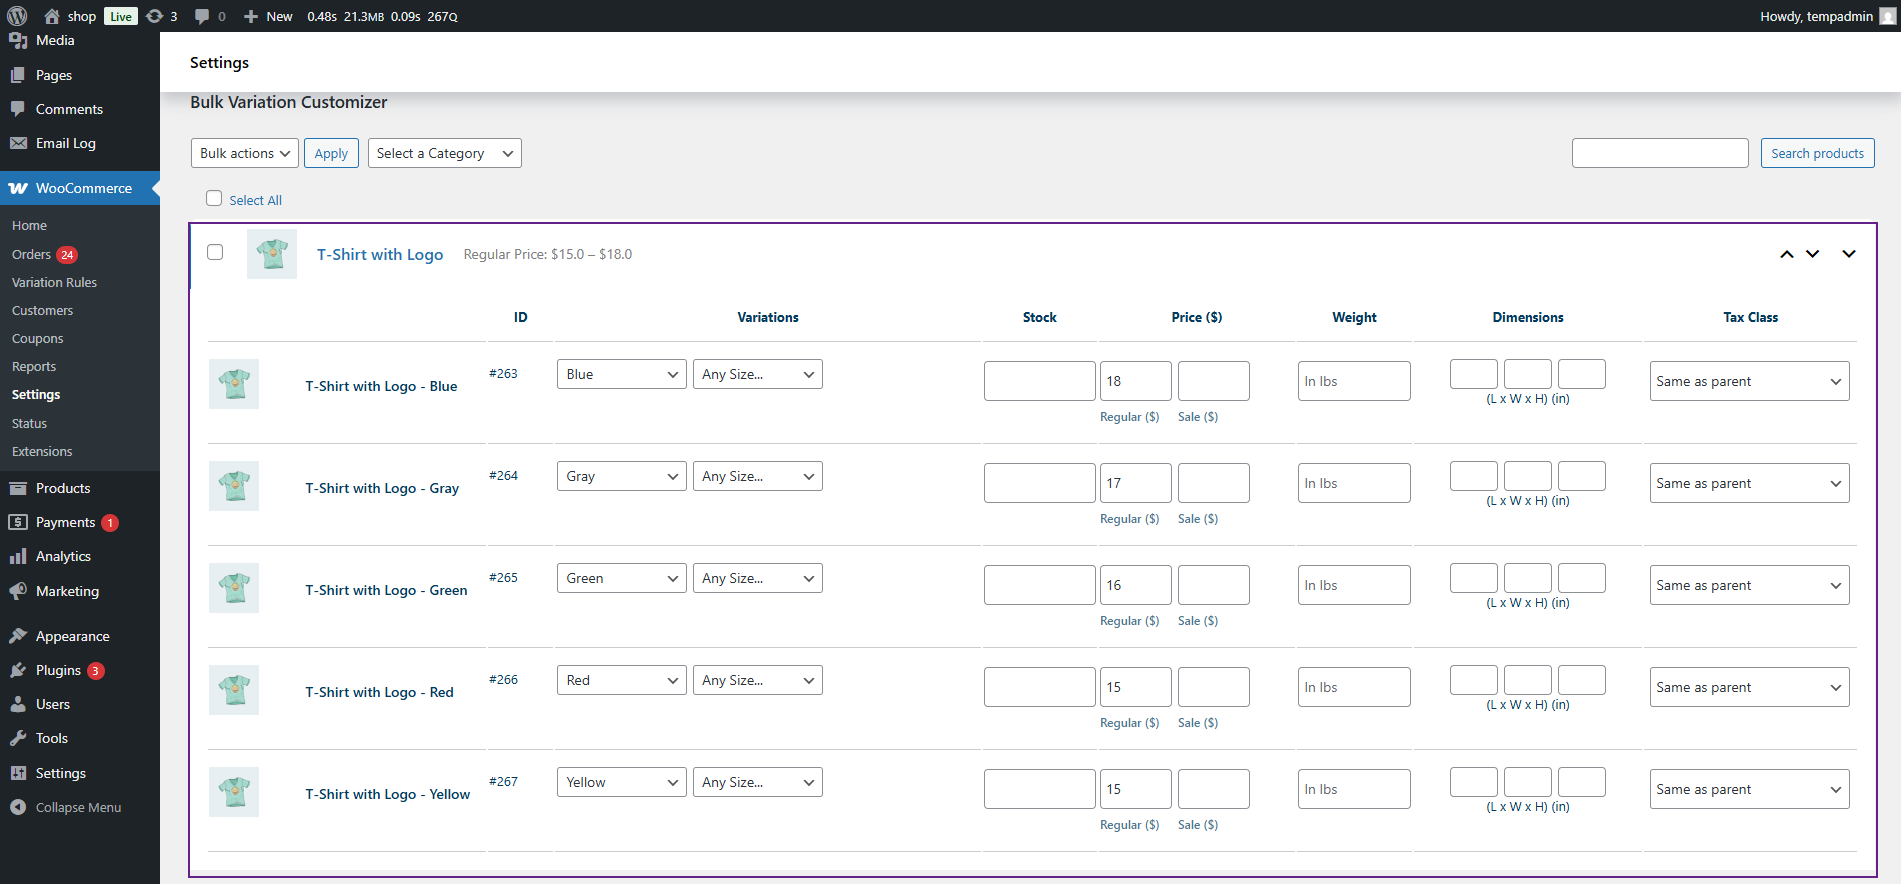
- Modify the variation details as needed.
- Click on the Save Changes button to update all variations at once.
Block Variation Filter
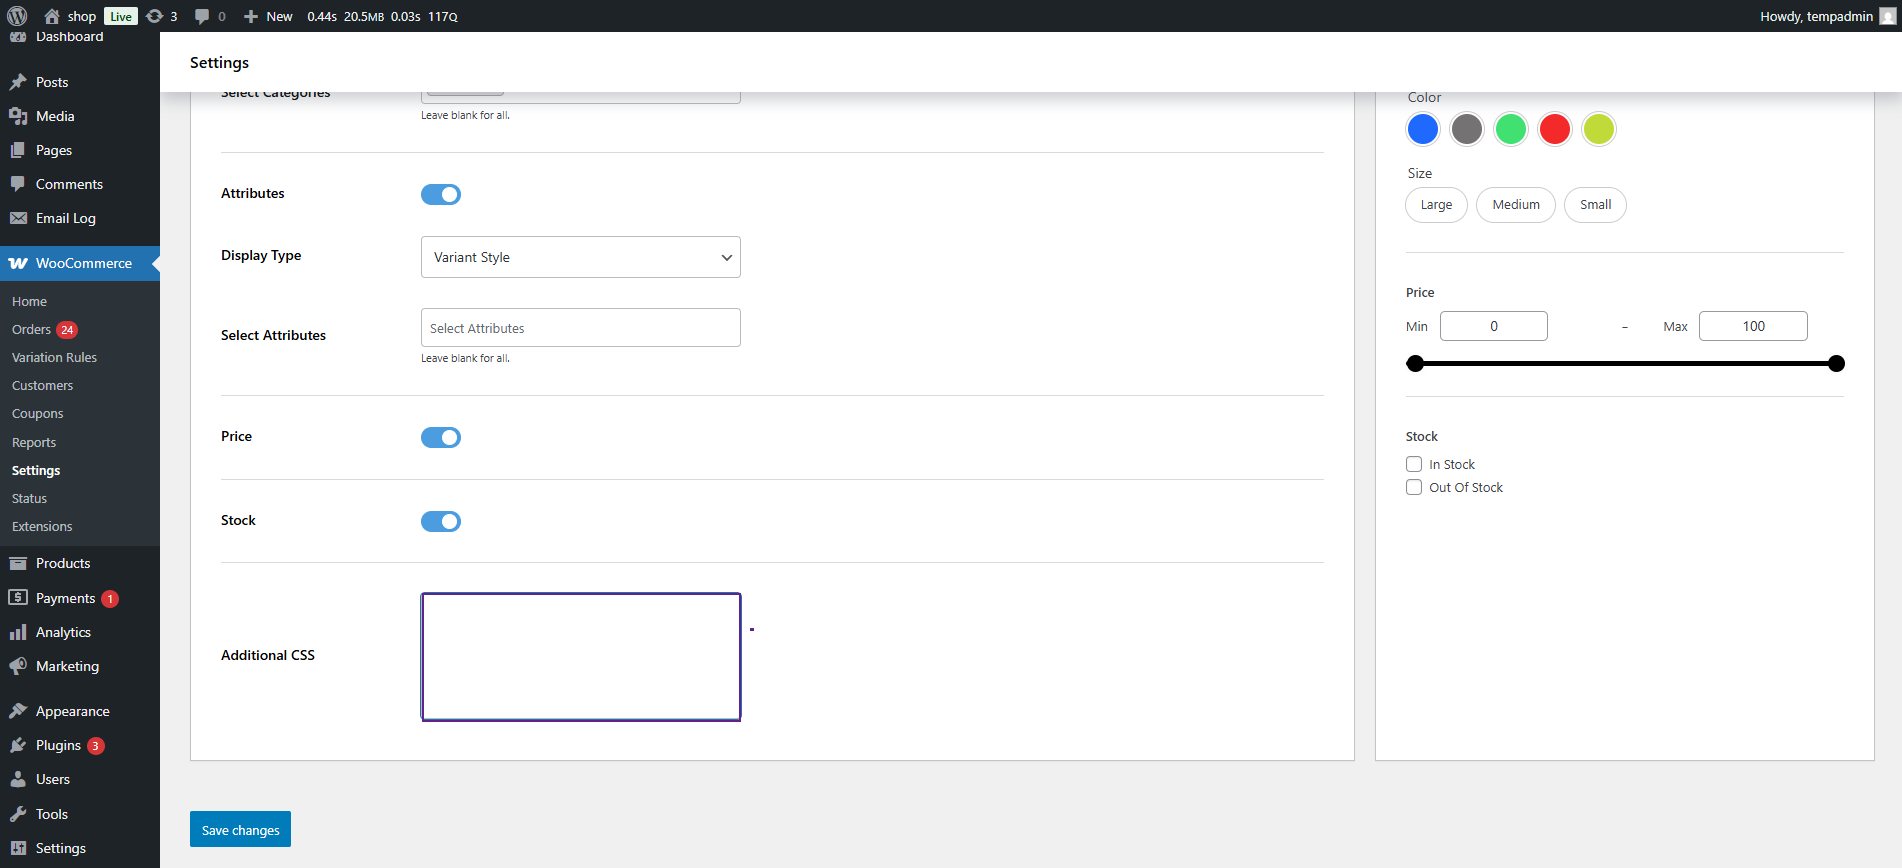
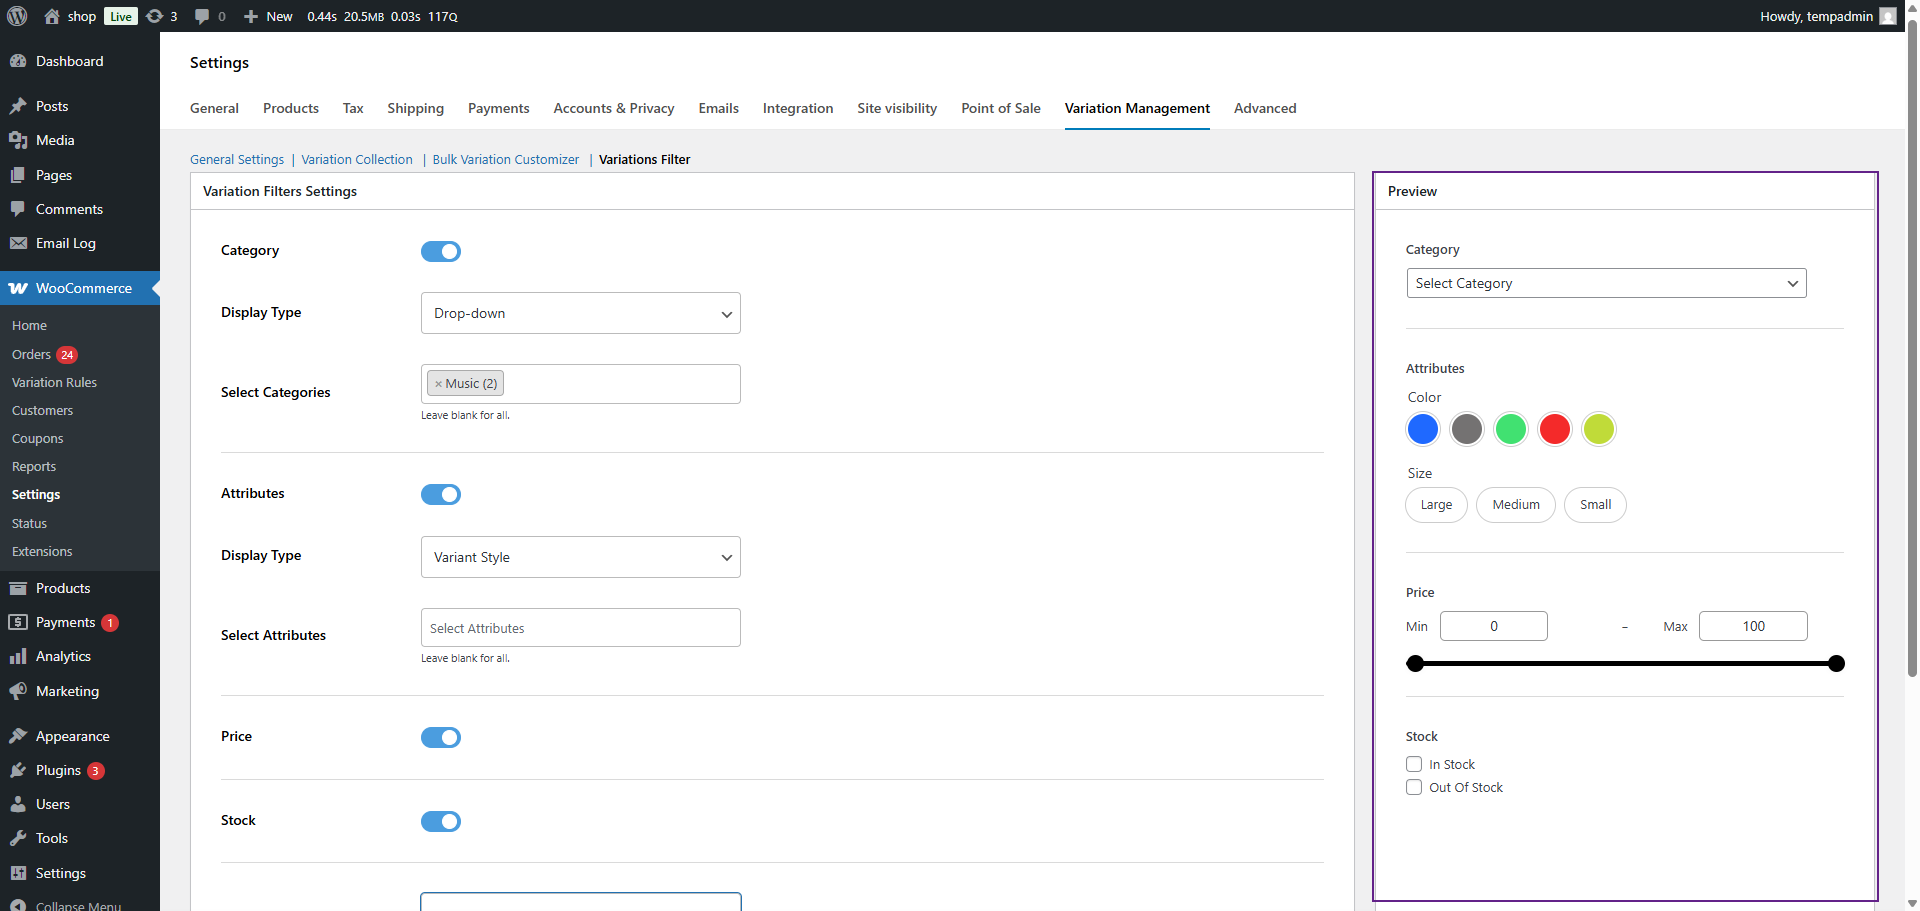
↑ Back to topThe Block Variation Filter feature enables administrators to add a powerful and dynamic filtering system for products. Using this feature, customers can filter and find products that best meet their requirements — based on category, attributes, price, and stock availability.
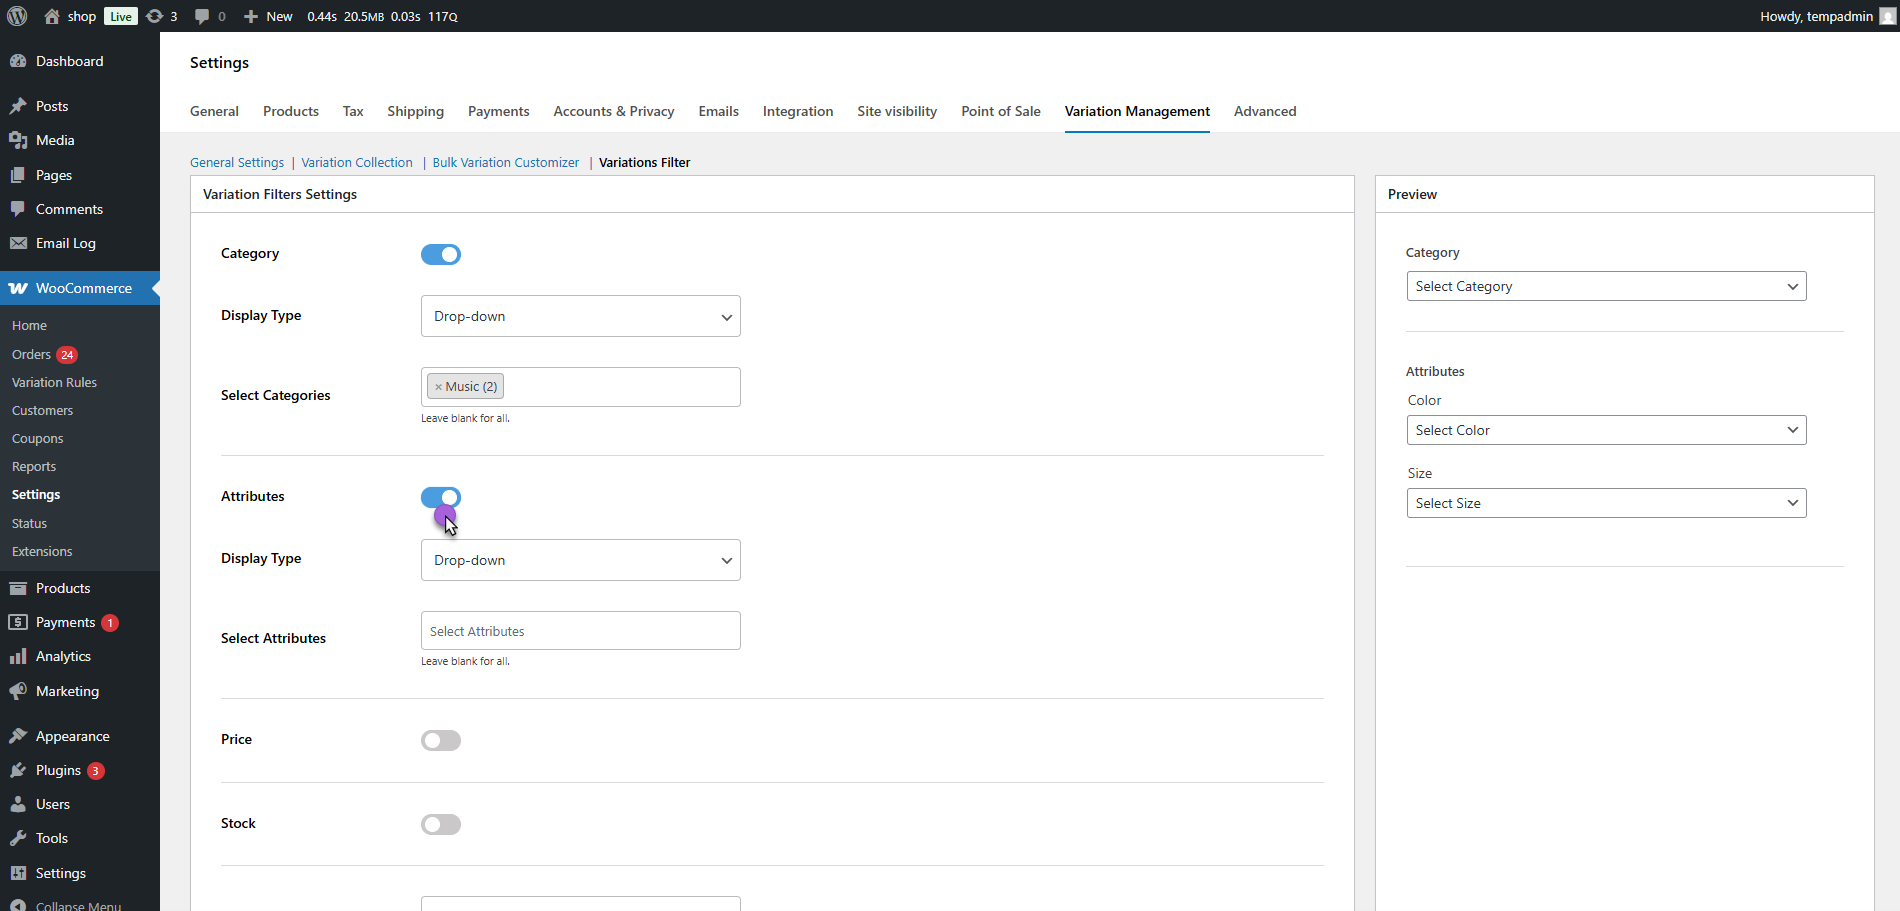
- Go to Dashboard > WooCommerce > Variation Management > Variation Filter.
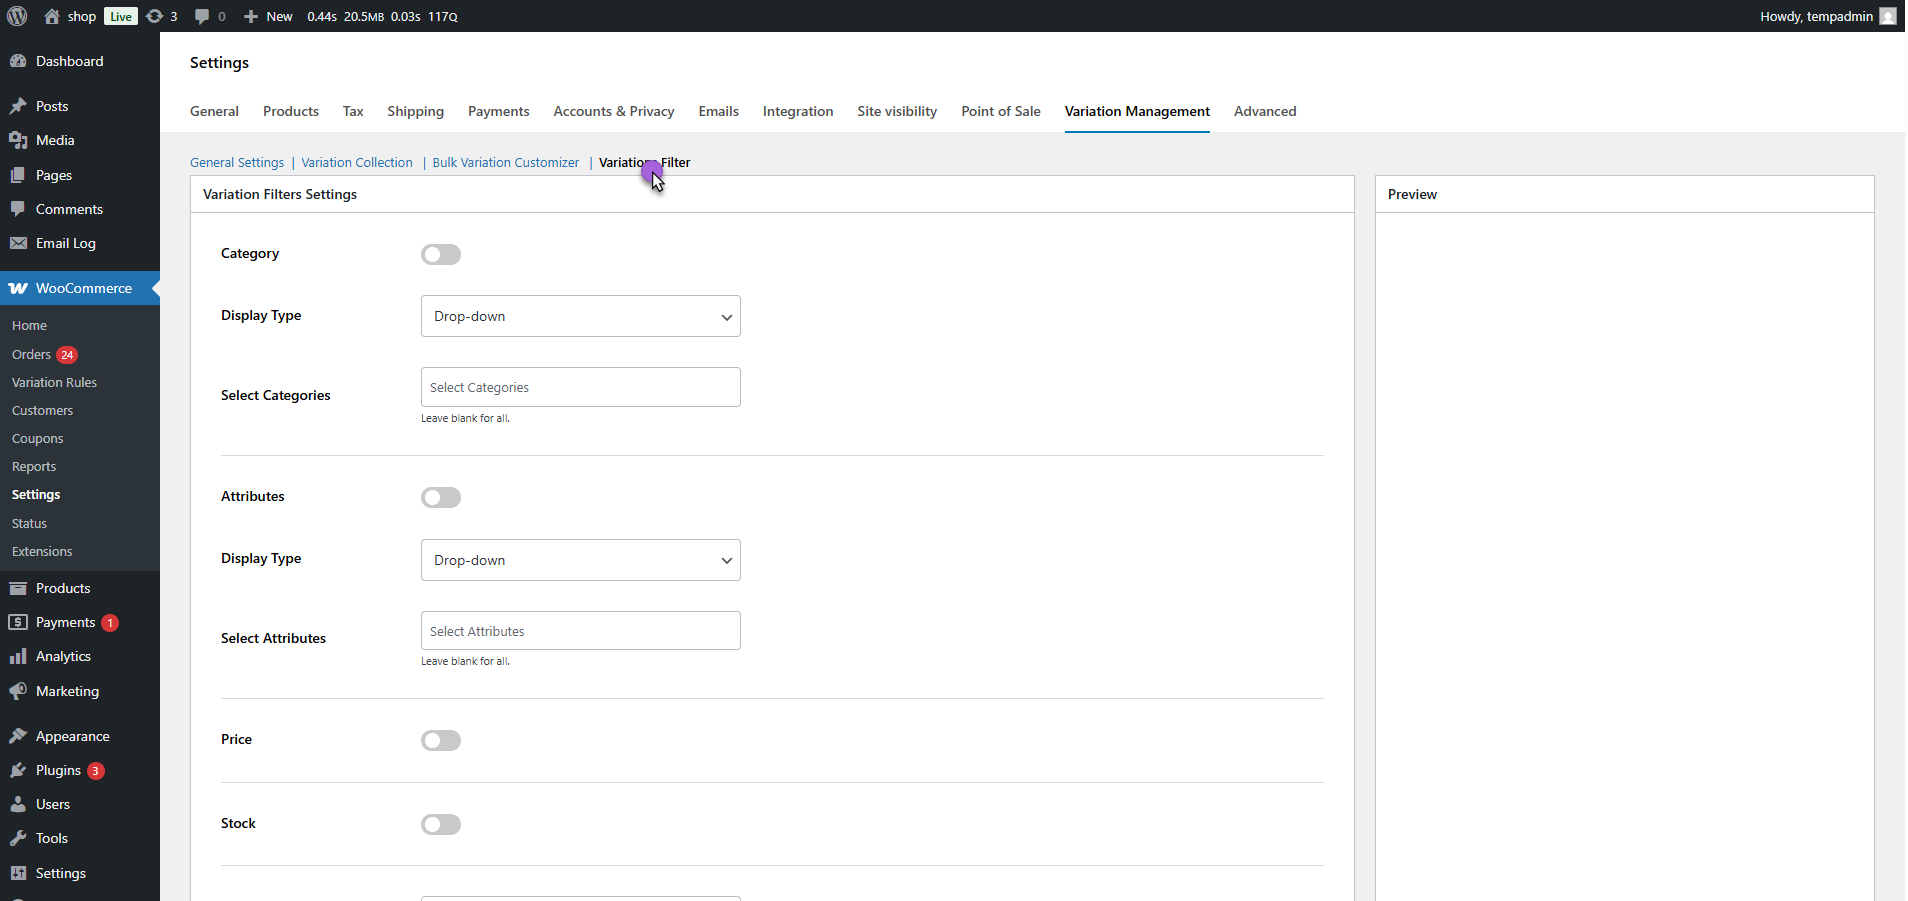
- Once you open the Variation Filter section, you’ll find a complete settings panel on the left and a live preview section on the right.
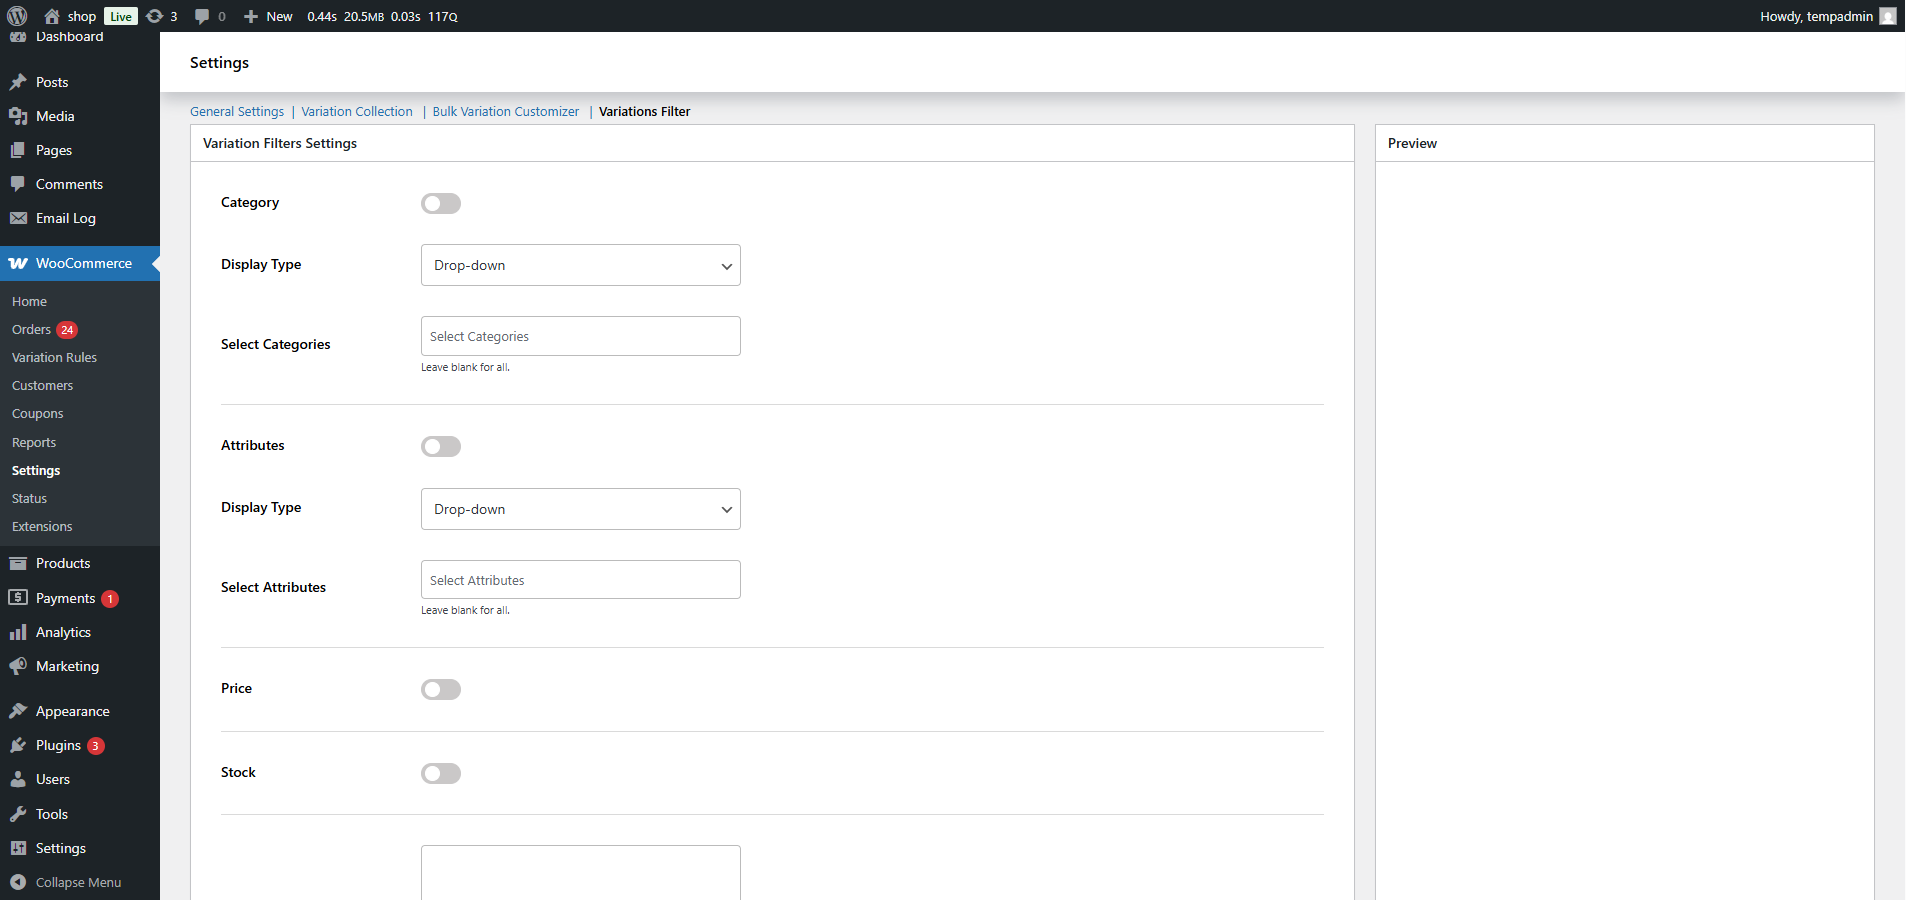
- This section allows the admin to configure which filters will appear, how they will look, and how customers will interact with them on the front end.
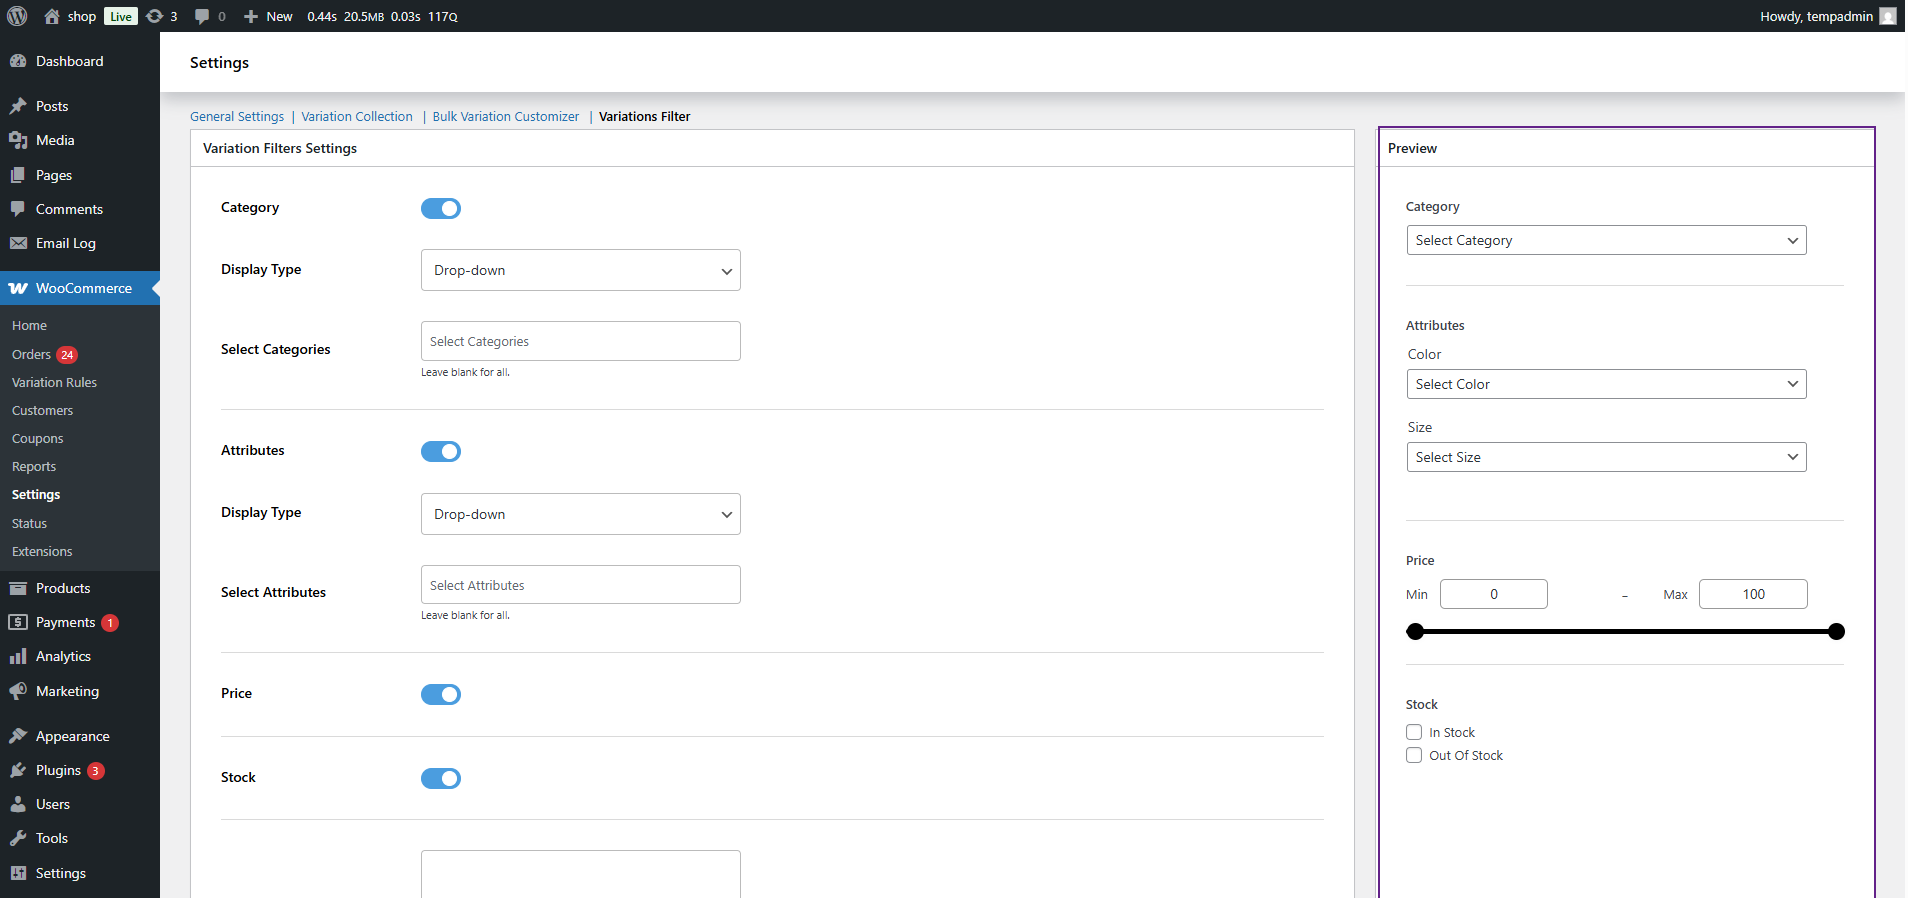
Filter Settings
↑ Back to topEach filter section includes different dropdowns, toggles, and fields to customize how customers will see the filters on your shop page.
Category Filter
Enable Category Filter – Turn ON this toggle to activate category-based filtering.

- Display Type – Click on the dropdown to select how categories should appear.
- You can choose between:
- Dropdown
- Checkbox List

- Select Categories – Click inside the field to view the list of all product categories.
- Select one or multiple categories you want to show in the filter.
- (If you leave it blank, all product categories will be displayed by default.)

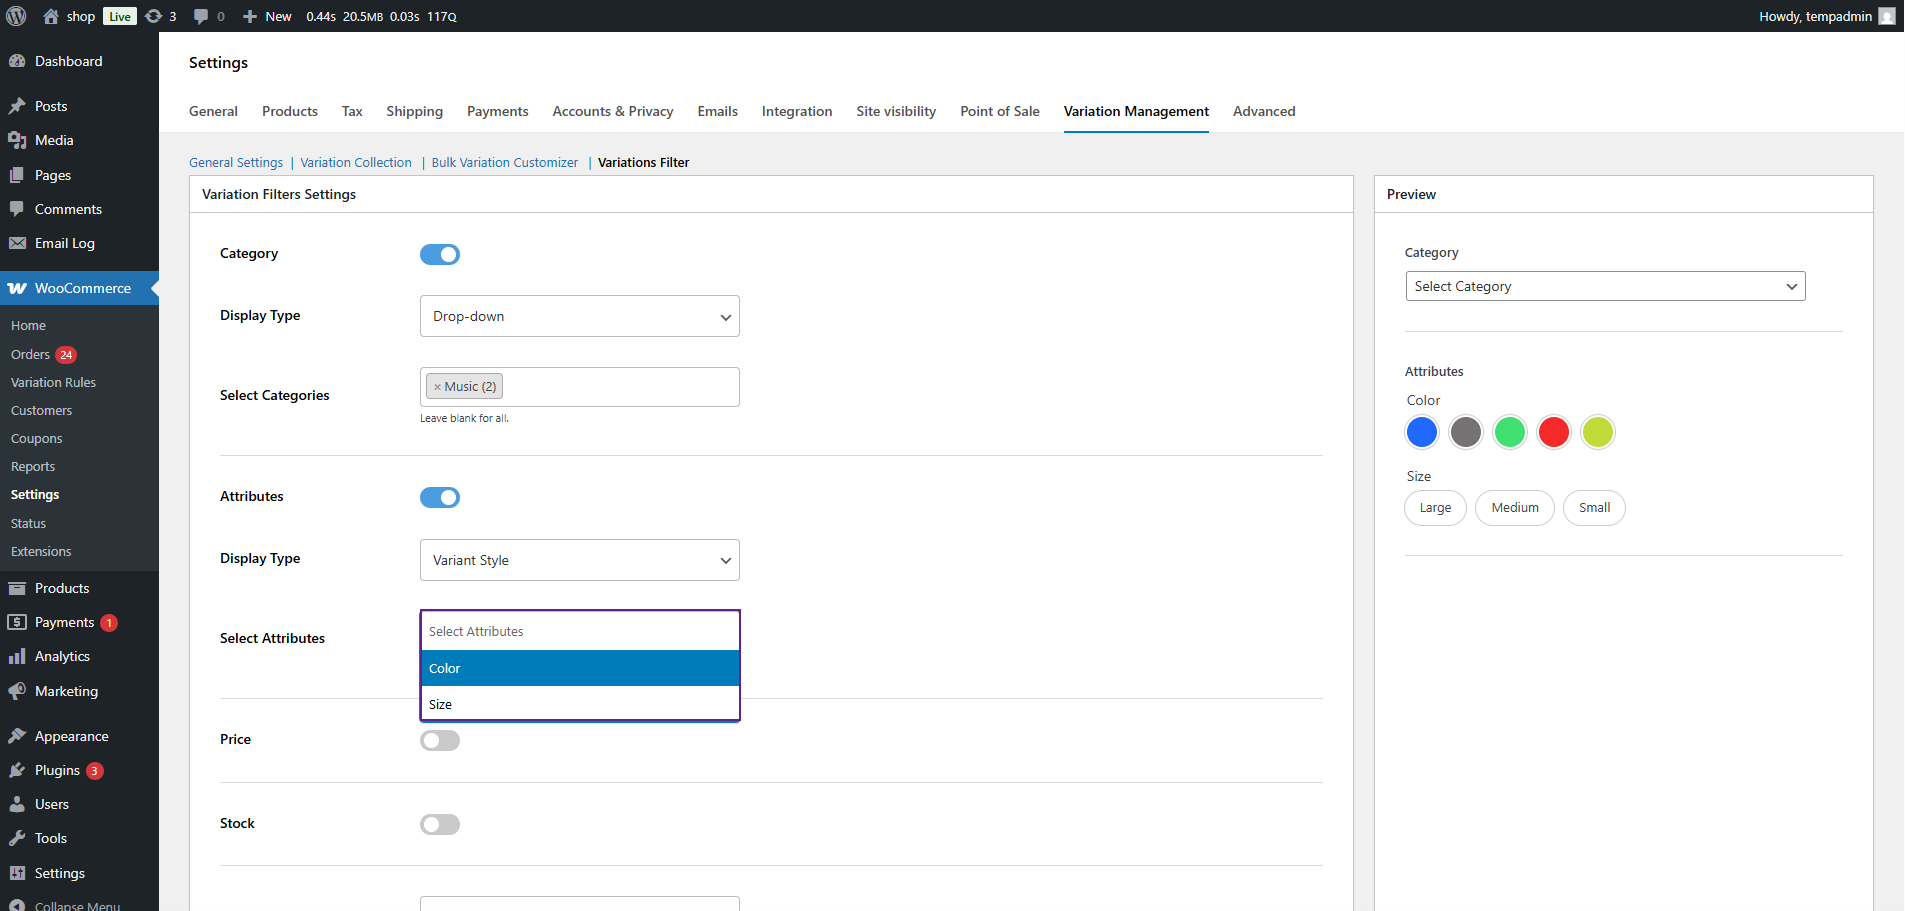
Attributes Filter
- Enable Attribute Filter – Activate this toggle to allow filtering through product attributes such as Color or Size.
- Display Type – Click on the dropdown and select your preferred display layout, such as:
- Drop-down
- Check-boxes
- Variant Style
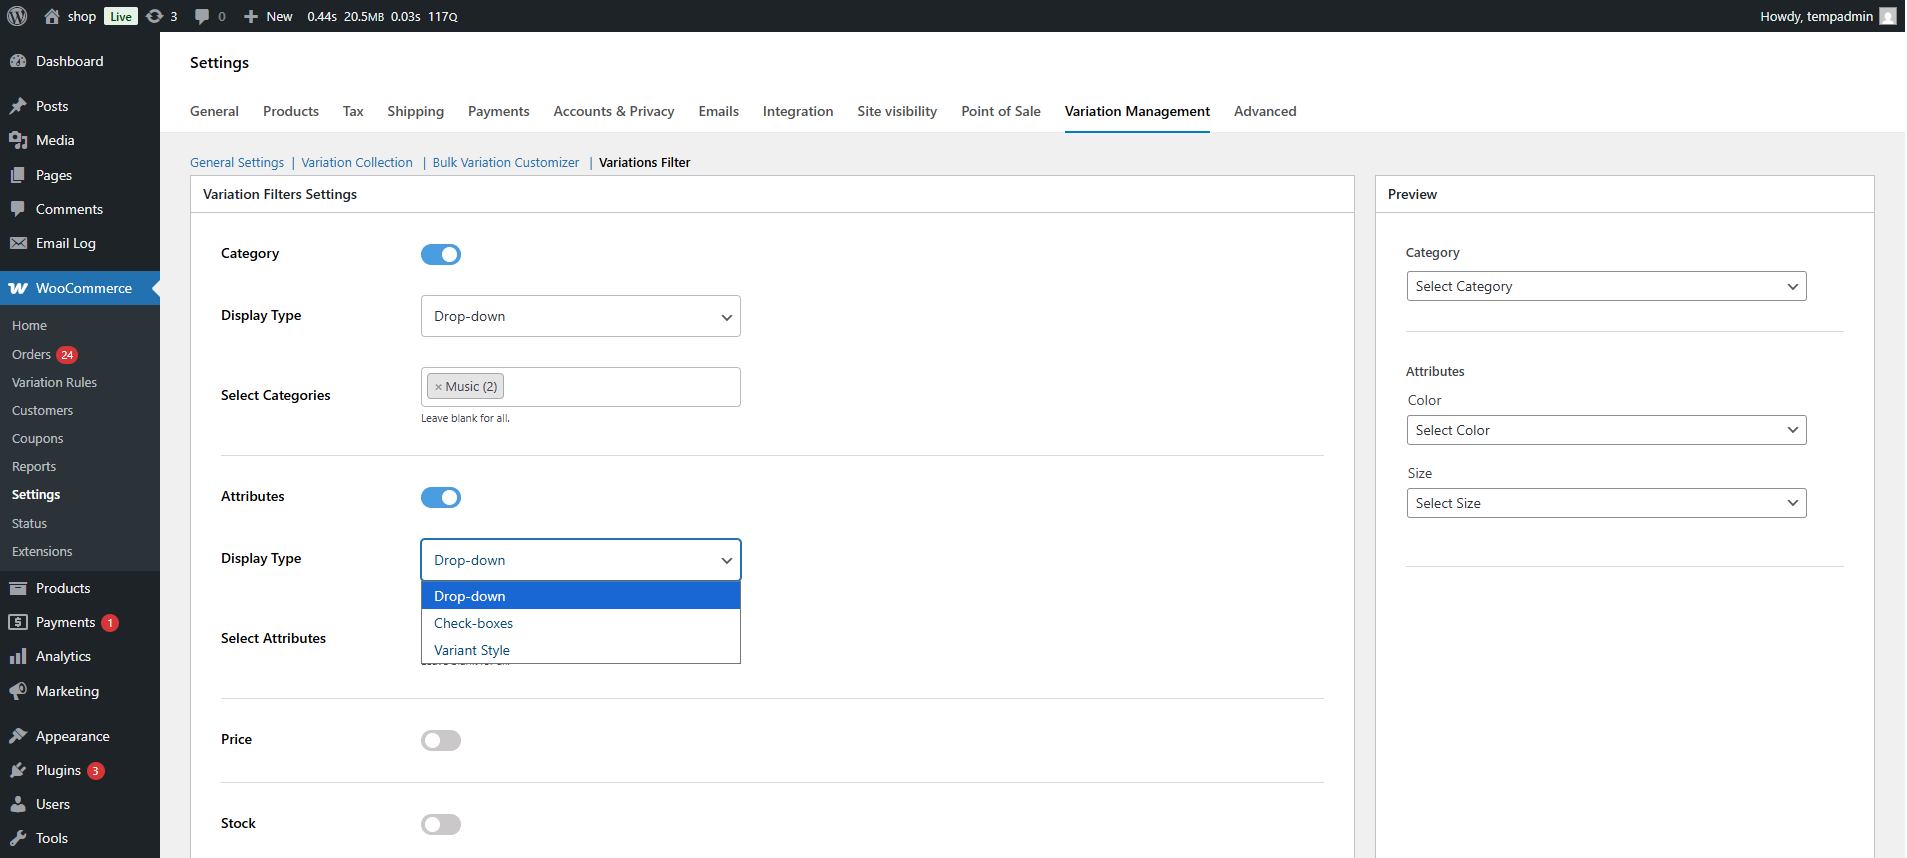
- Select Attributes – When you click inside this field, all available attributes will appear.
- Select one or more attributes to include in the filter.
- Once selected, you can preview them in the live preview section on the right.
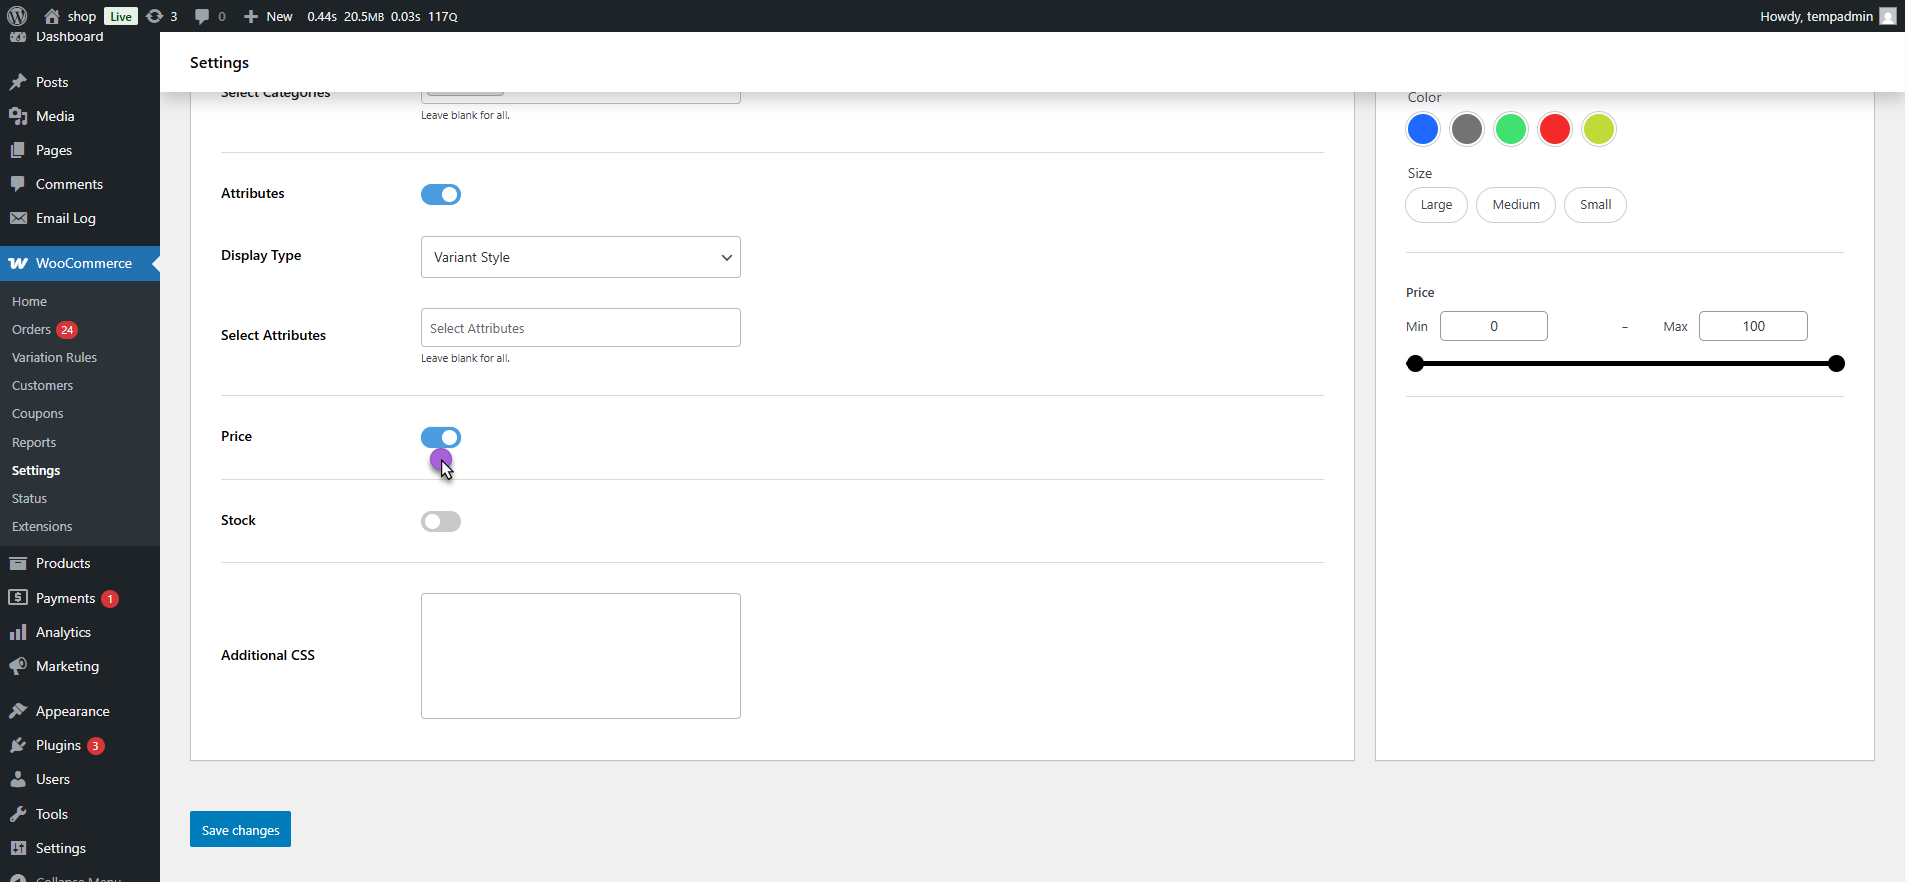
Price Filter
- Enable Price Filter – Turn this toggle ON to display a price range slider on the front end.
- This allows customers to drag the slider handles and filter products within a specific price range.
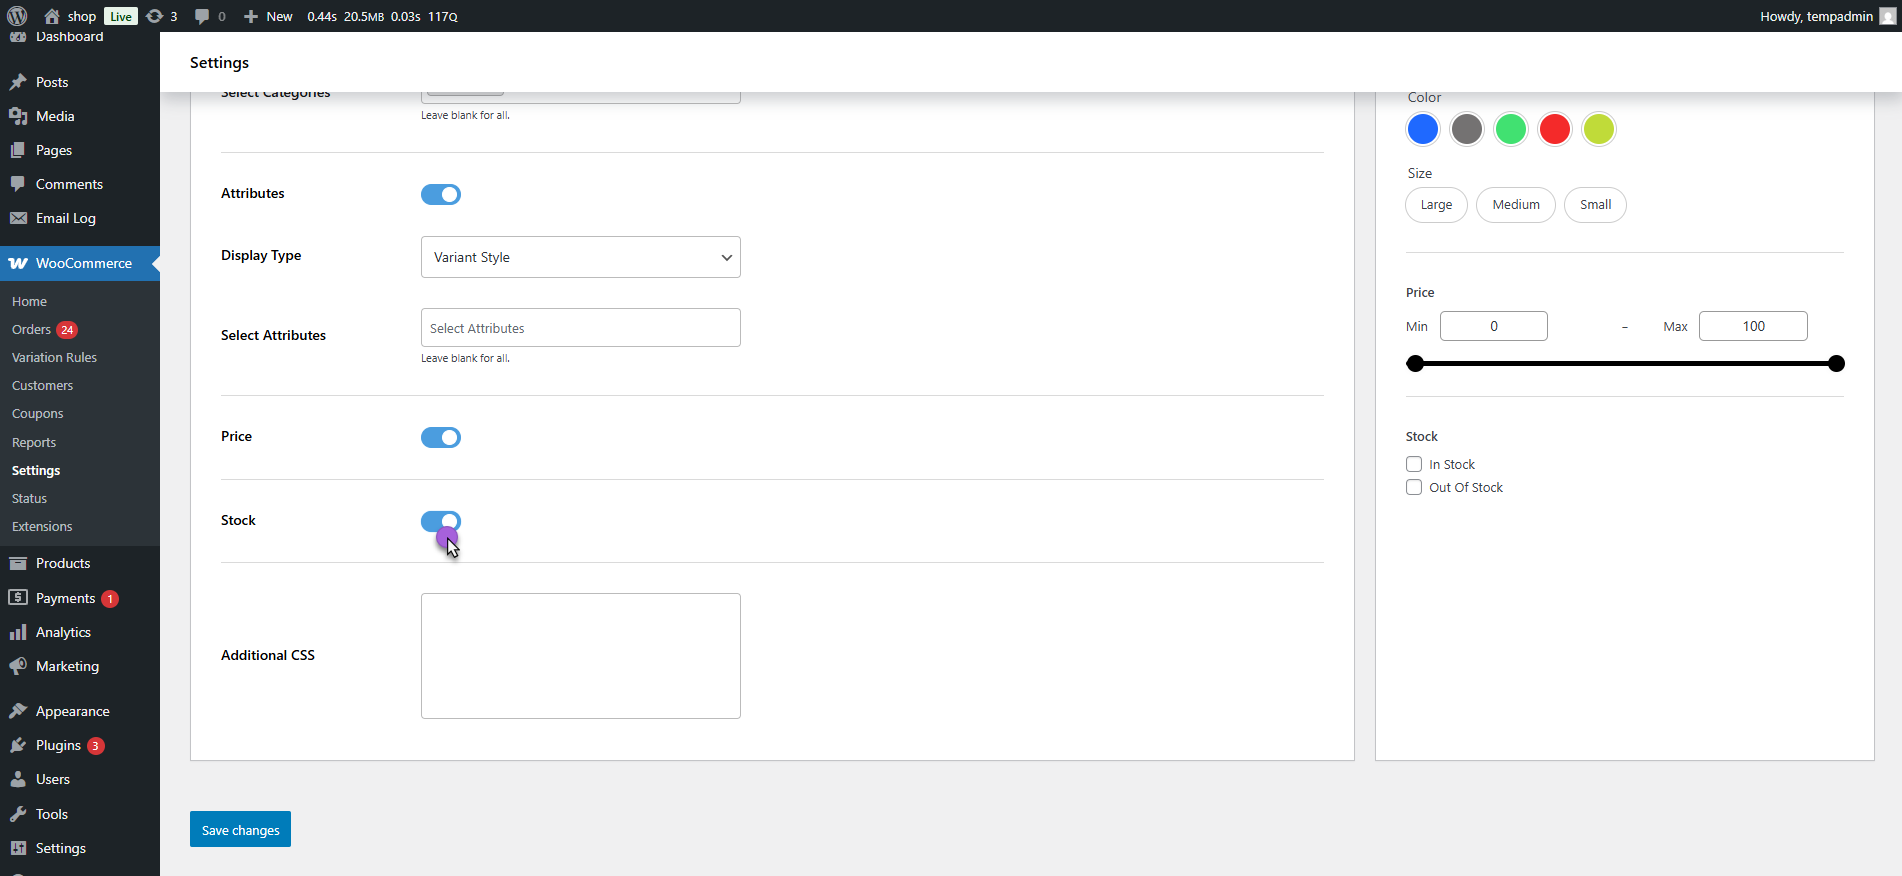
Stock Filter
- Enable Stock Filter – Turn this ON to show product availability options.
- After enabling, customers can filter products based on:
- In Stock
- Out of Stock
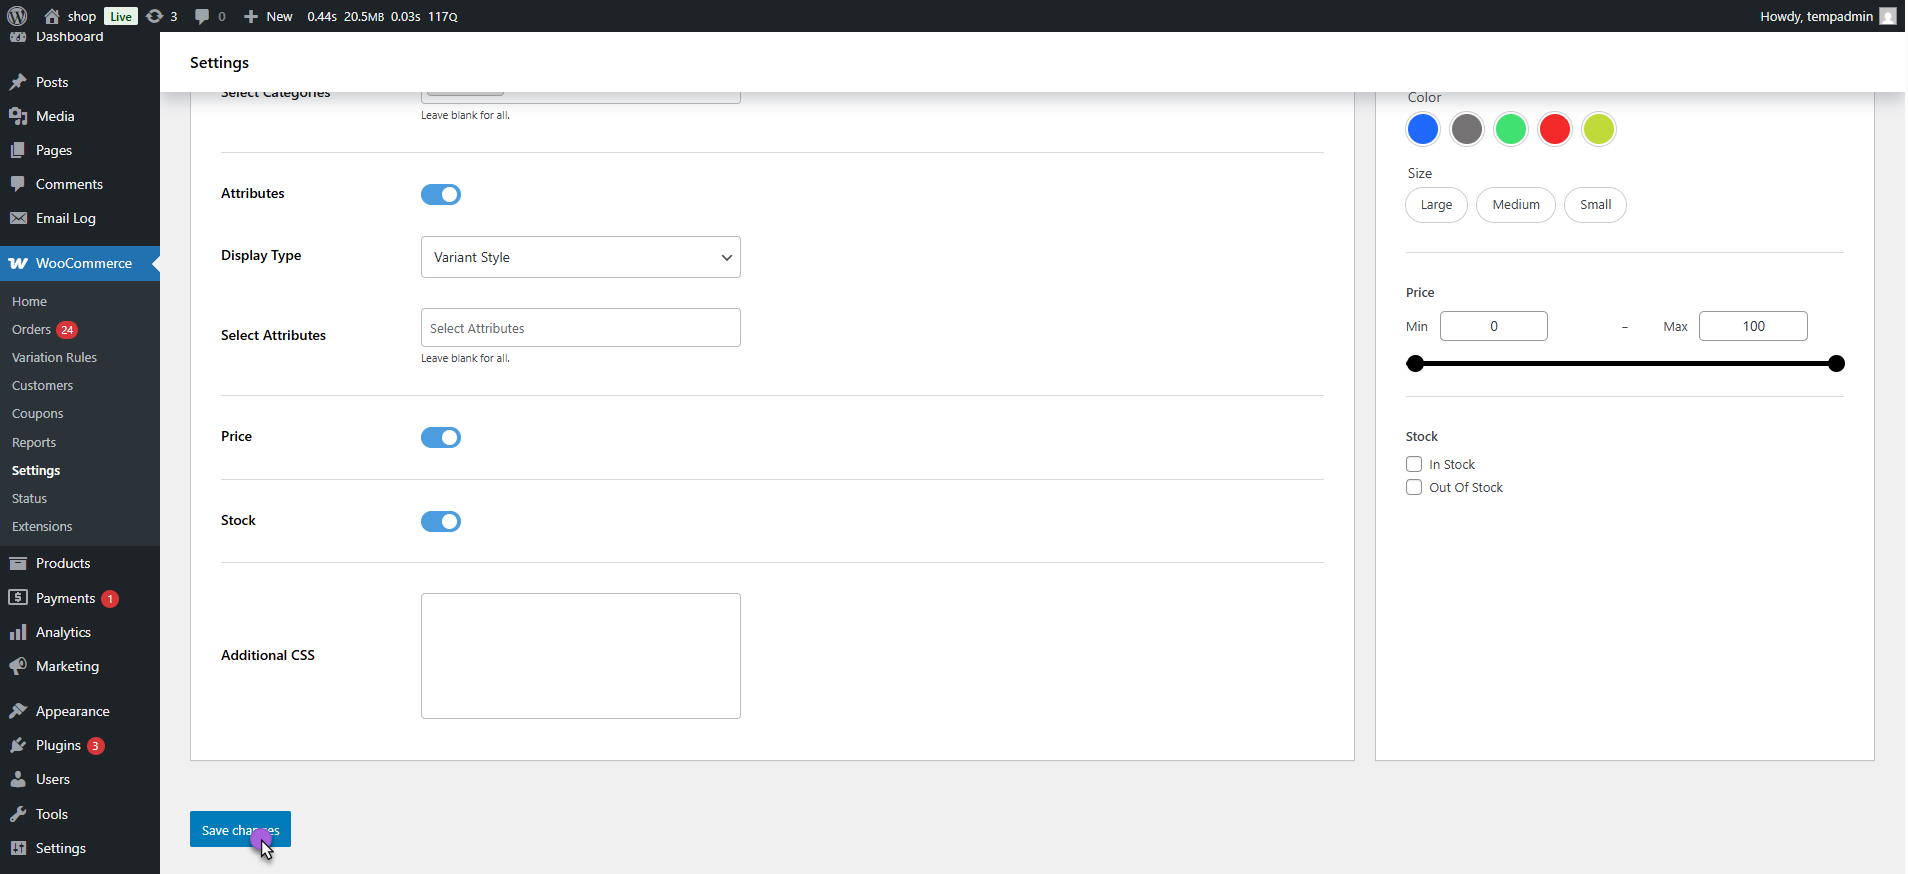
Additional CSS
- You can use this section to add custom CSS styles.
- Simply paste your CSS code in the box to match your site’s design.
Preview Section
- Navigate to the right side of the screen — here you’ll see a live preview of how your filters will appear on the shop page.
- As you enable or change any setting (like selecting attributes or adjusting the display type), the preview will update instantly.
- This helps you visualize and adjust layout, colors, and filter arrangement before saving.
- Now, click on Save Changes.
- Once all your settings are configured:
- Navigate to Dashboard > Pages > Shop
- Click on the + icon in the Gutenberg editor.
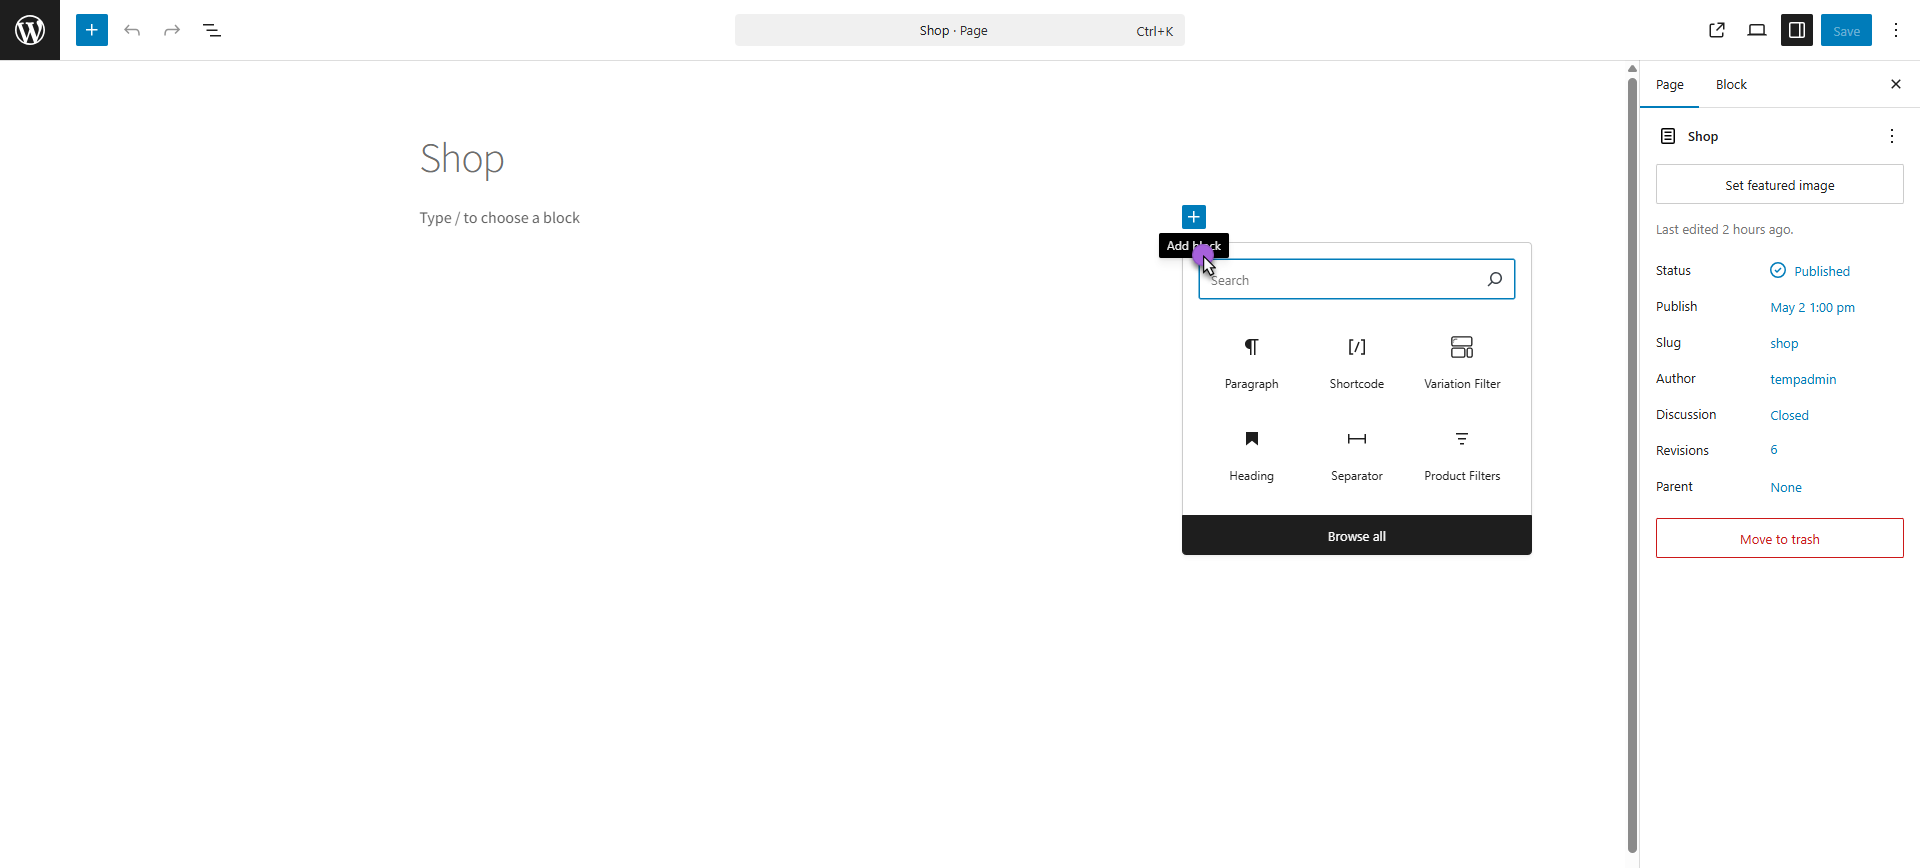
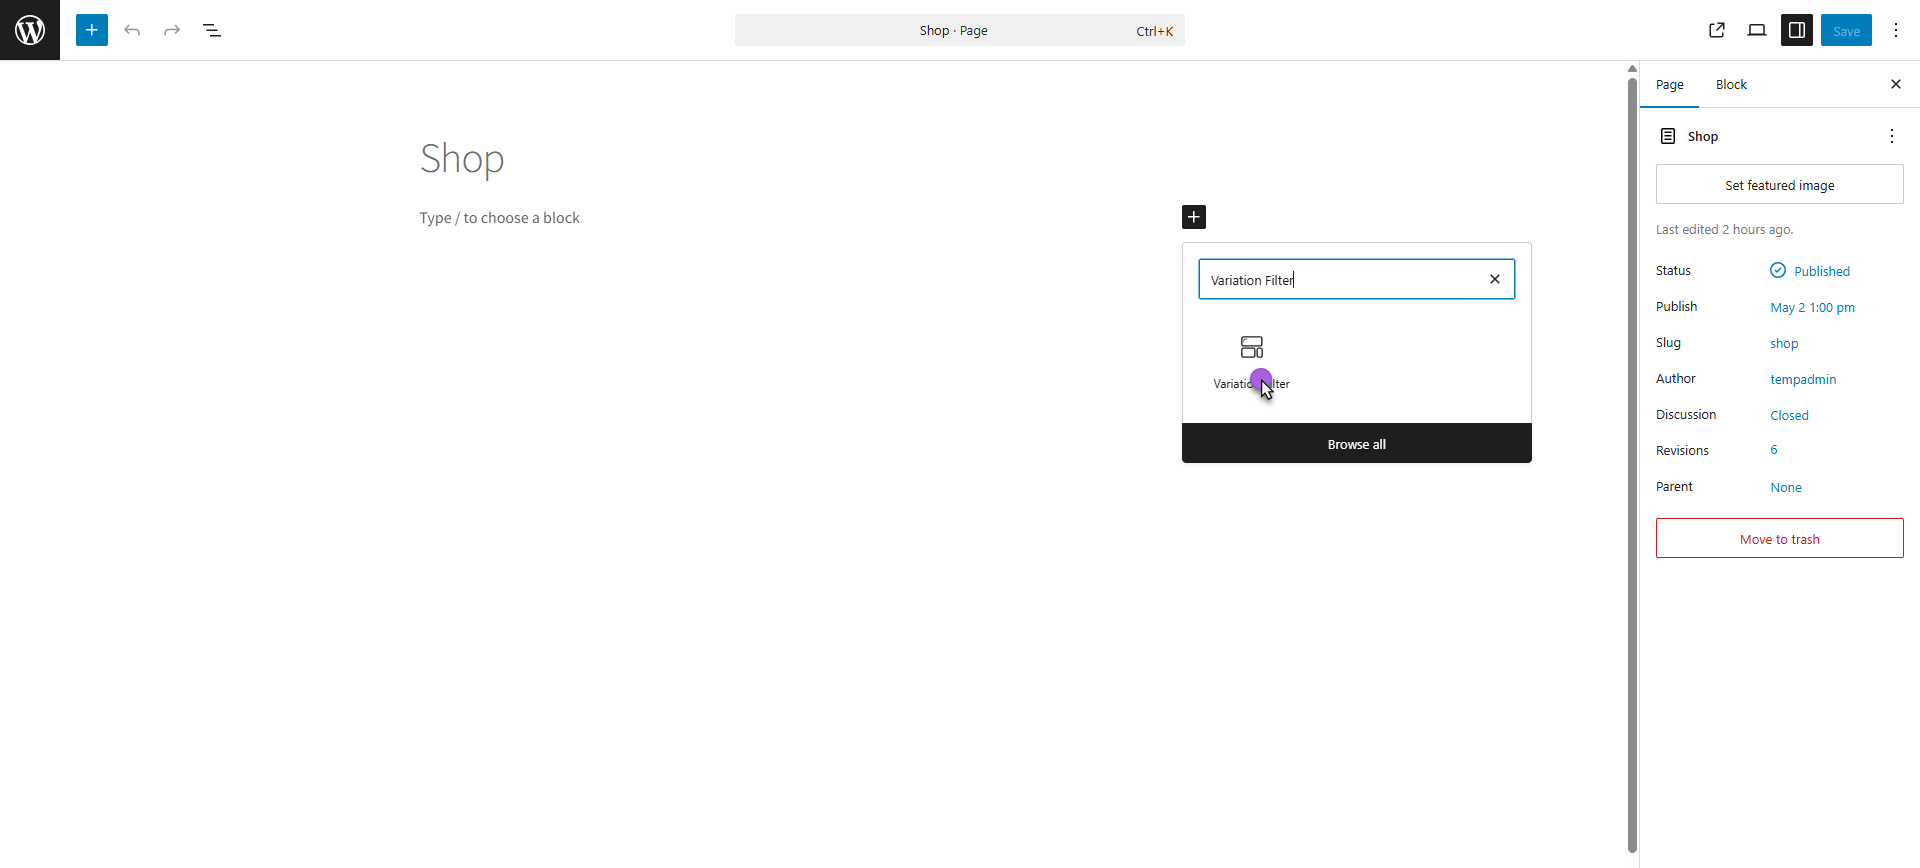
- Search for the block named Variation Filter.
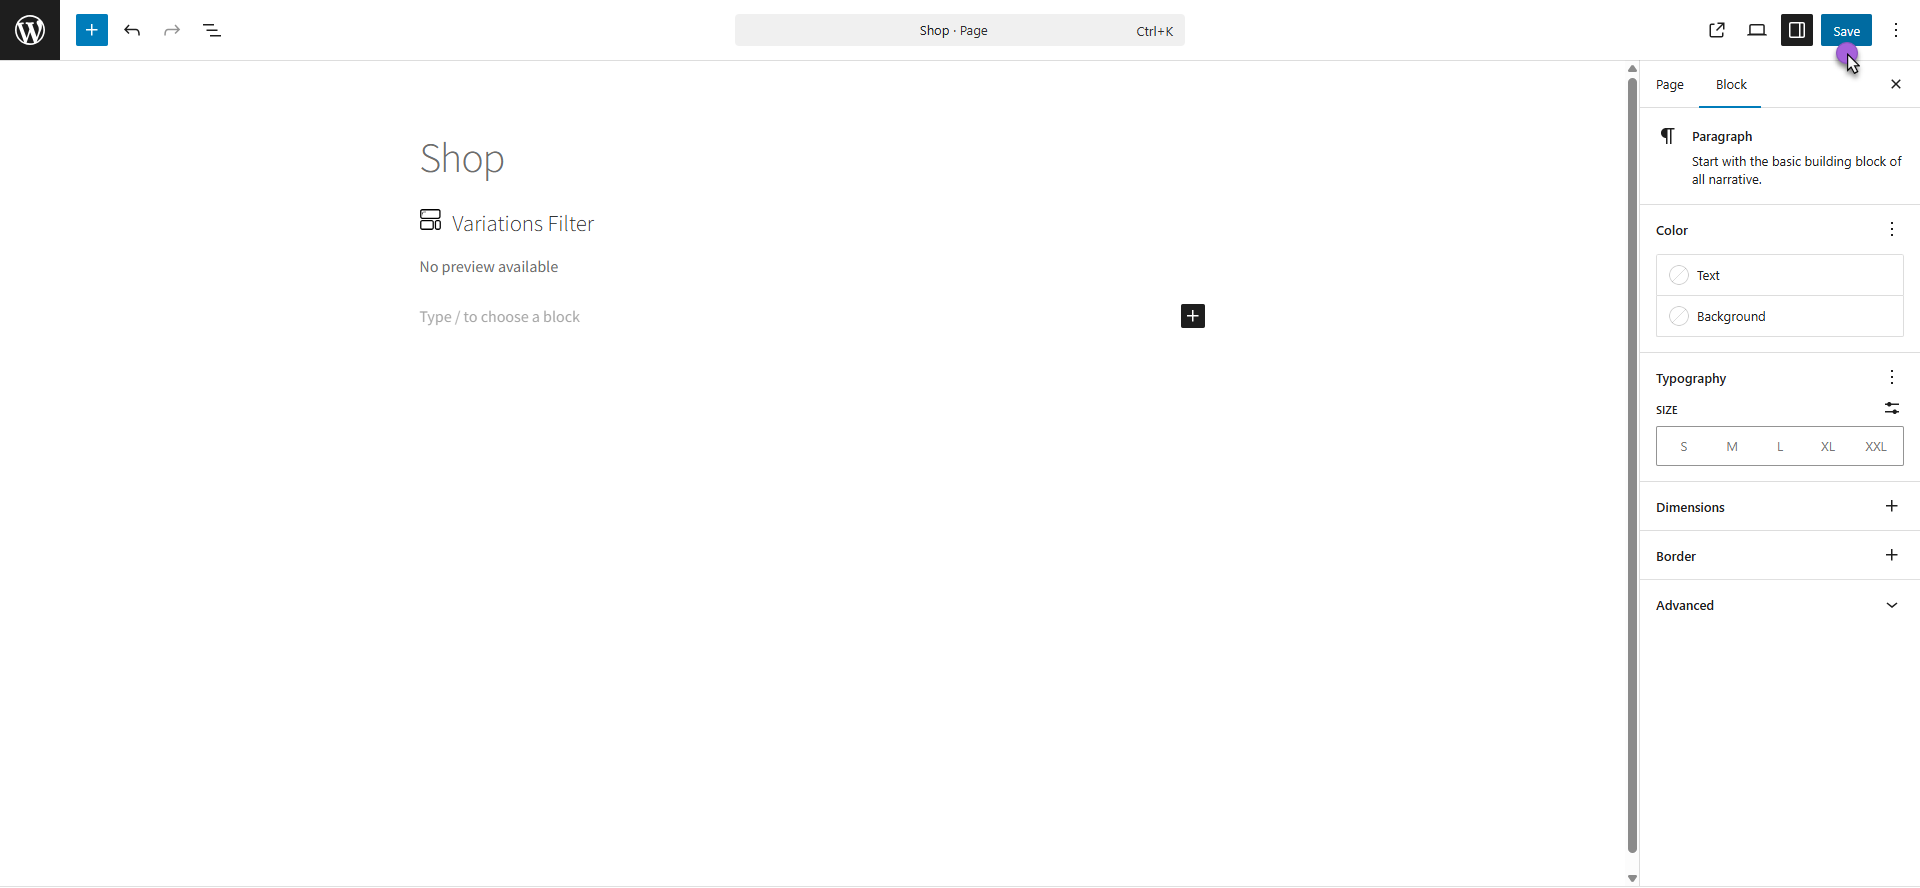
- Click on it to add it to your page.
- Click on Save Changes.
Front-End Impact
- Navigate to the Shop Page
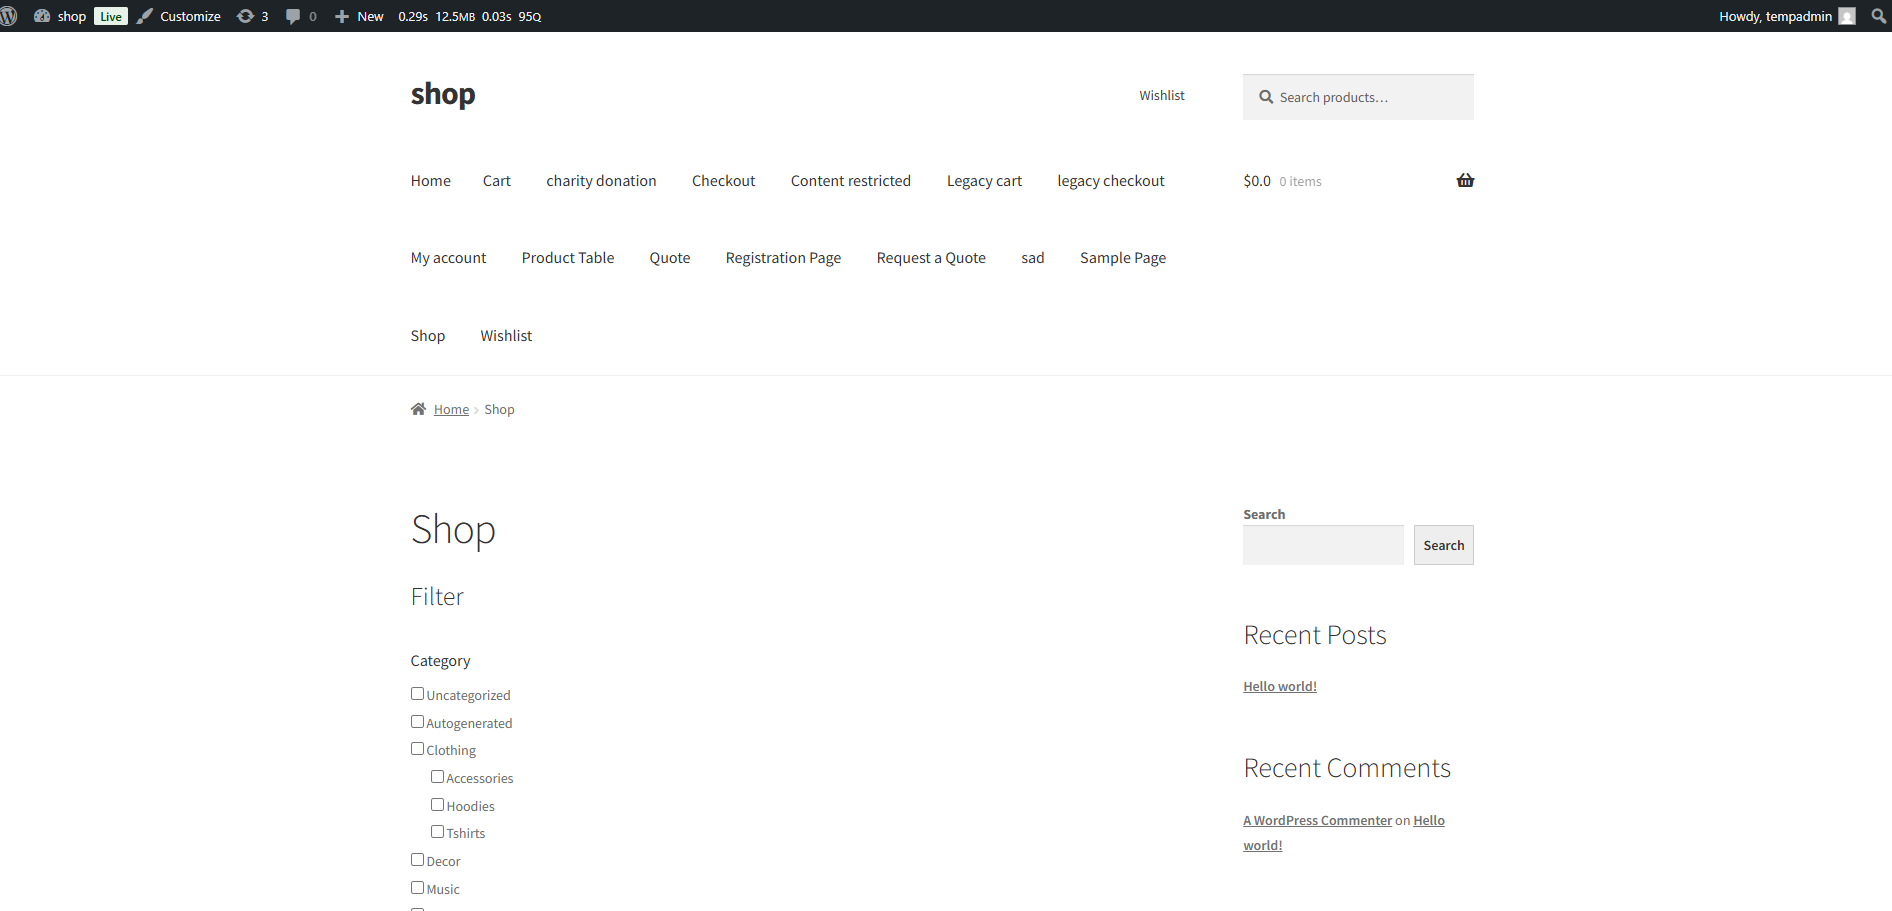
- You’ll see all products along with the filter section.

- Click on any Filter Option (like Category, Color, Size, or Price) to view available options.
- Select your desired filters — the product list will update instantly after clicking the Filter button.

- You can also reset filters anytime using the Reset button option.