The Gravity Forms Configurator for WooCommerce allows store admins to integrate and customize Gravity Forms with WooCommerce products. Using this plugin, admins can configure and display Gravity Form data (such as pricing, meta descriptions, and linked sub-products) on both per-product and post-type (global) levels.
Pre-requisites
↑ Back to topBefore using this plugin:
- Ensure the Gravity Forms plugin is installed and activated.
- Create or import a Gravity Form as needed.
- Configure basic settings under Forms > Settings in the WordPress Admin Panel.
- Next, proceed to set up the Gravity Forms Configurator.
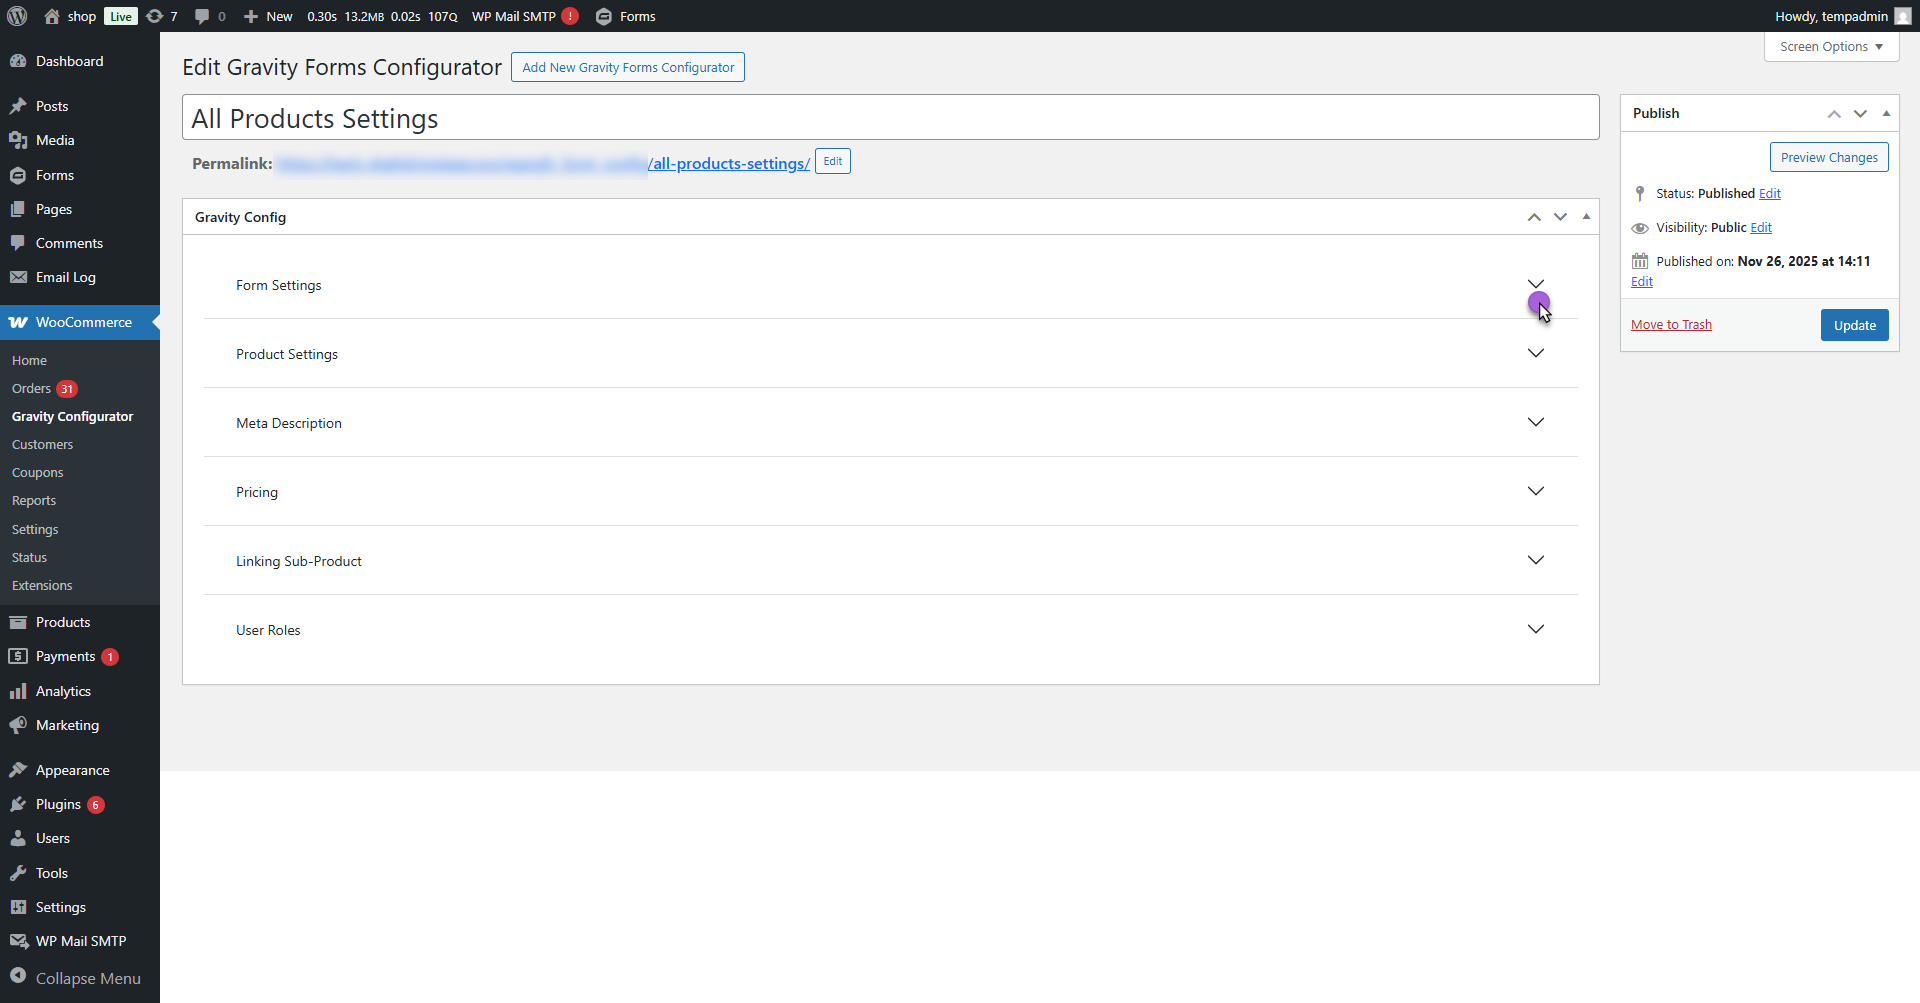
Post Type Gravity Forms Configurator
↑ Back to topThis feature enables admins to assign a Gravity Forms configuration globally across multiple products or categories. You can include/exclude products, define user access roles, and manage global pricing and meta descriptions.
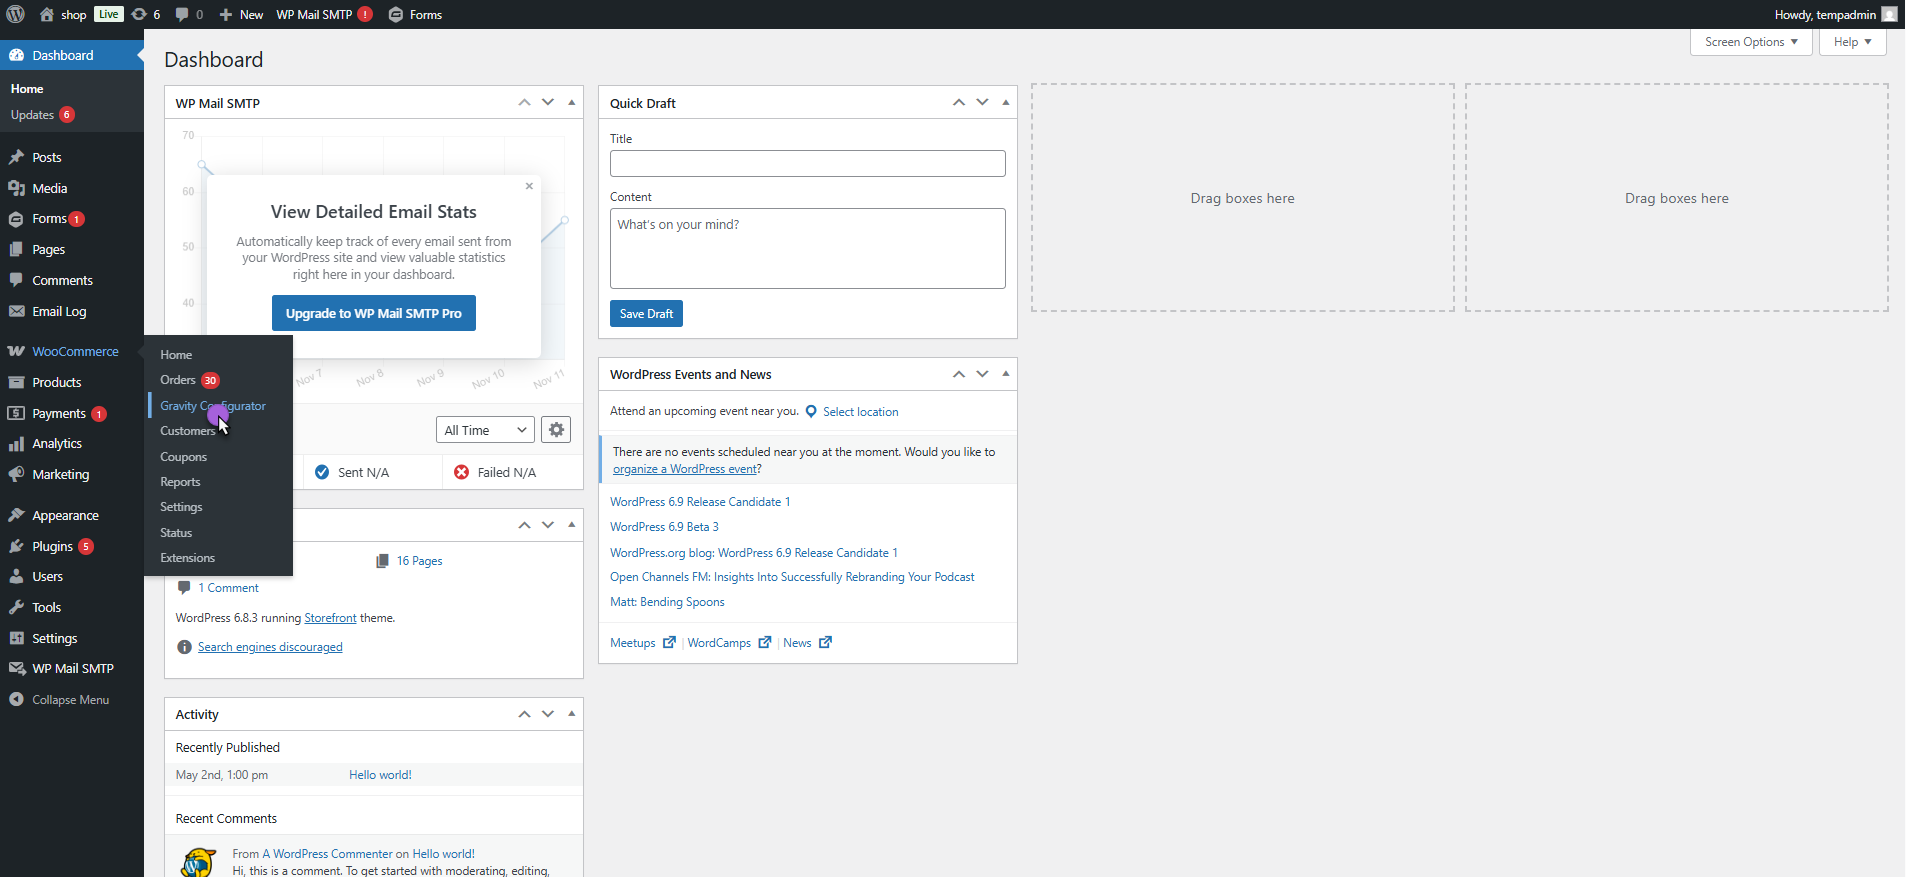
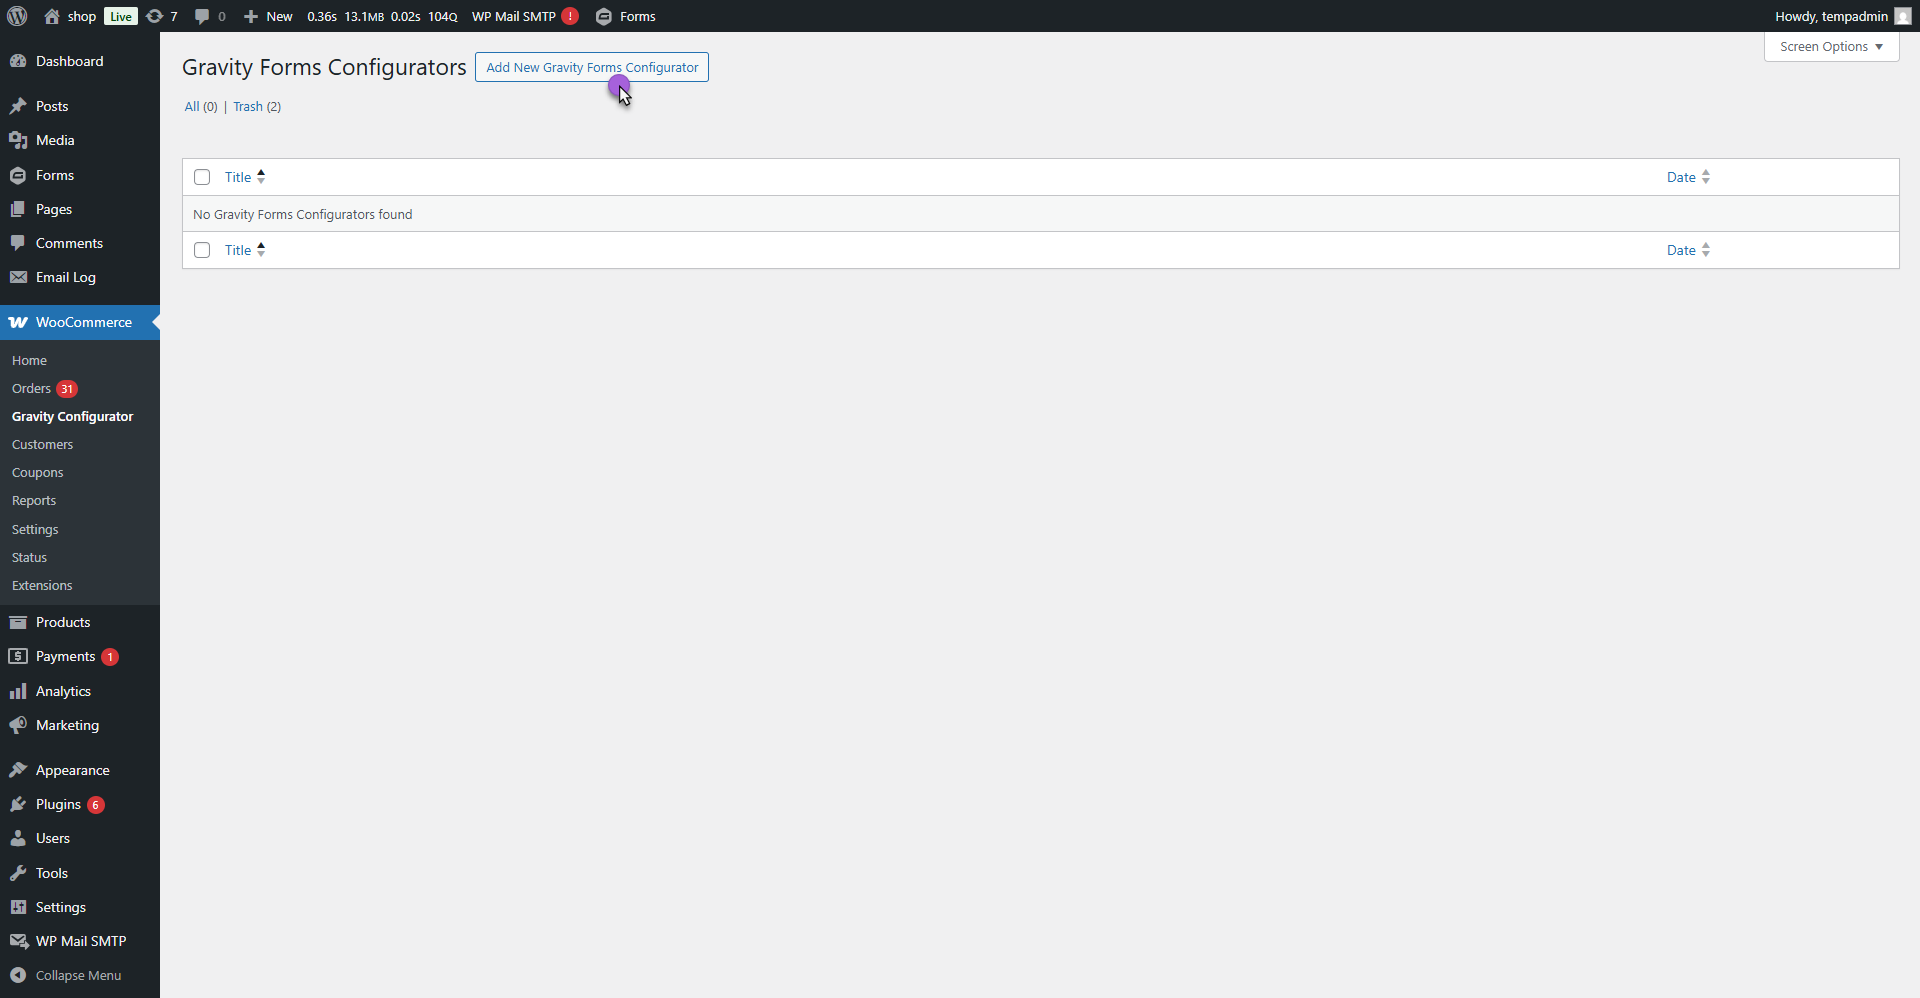
- Go to WooCommerce > Gravity Configurator.
- Click on Add New Gravity Forms Configurator.
- Add a Title for your configurator post type.
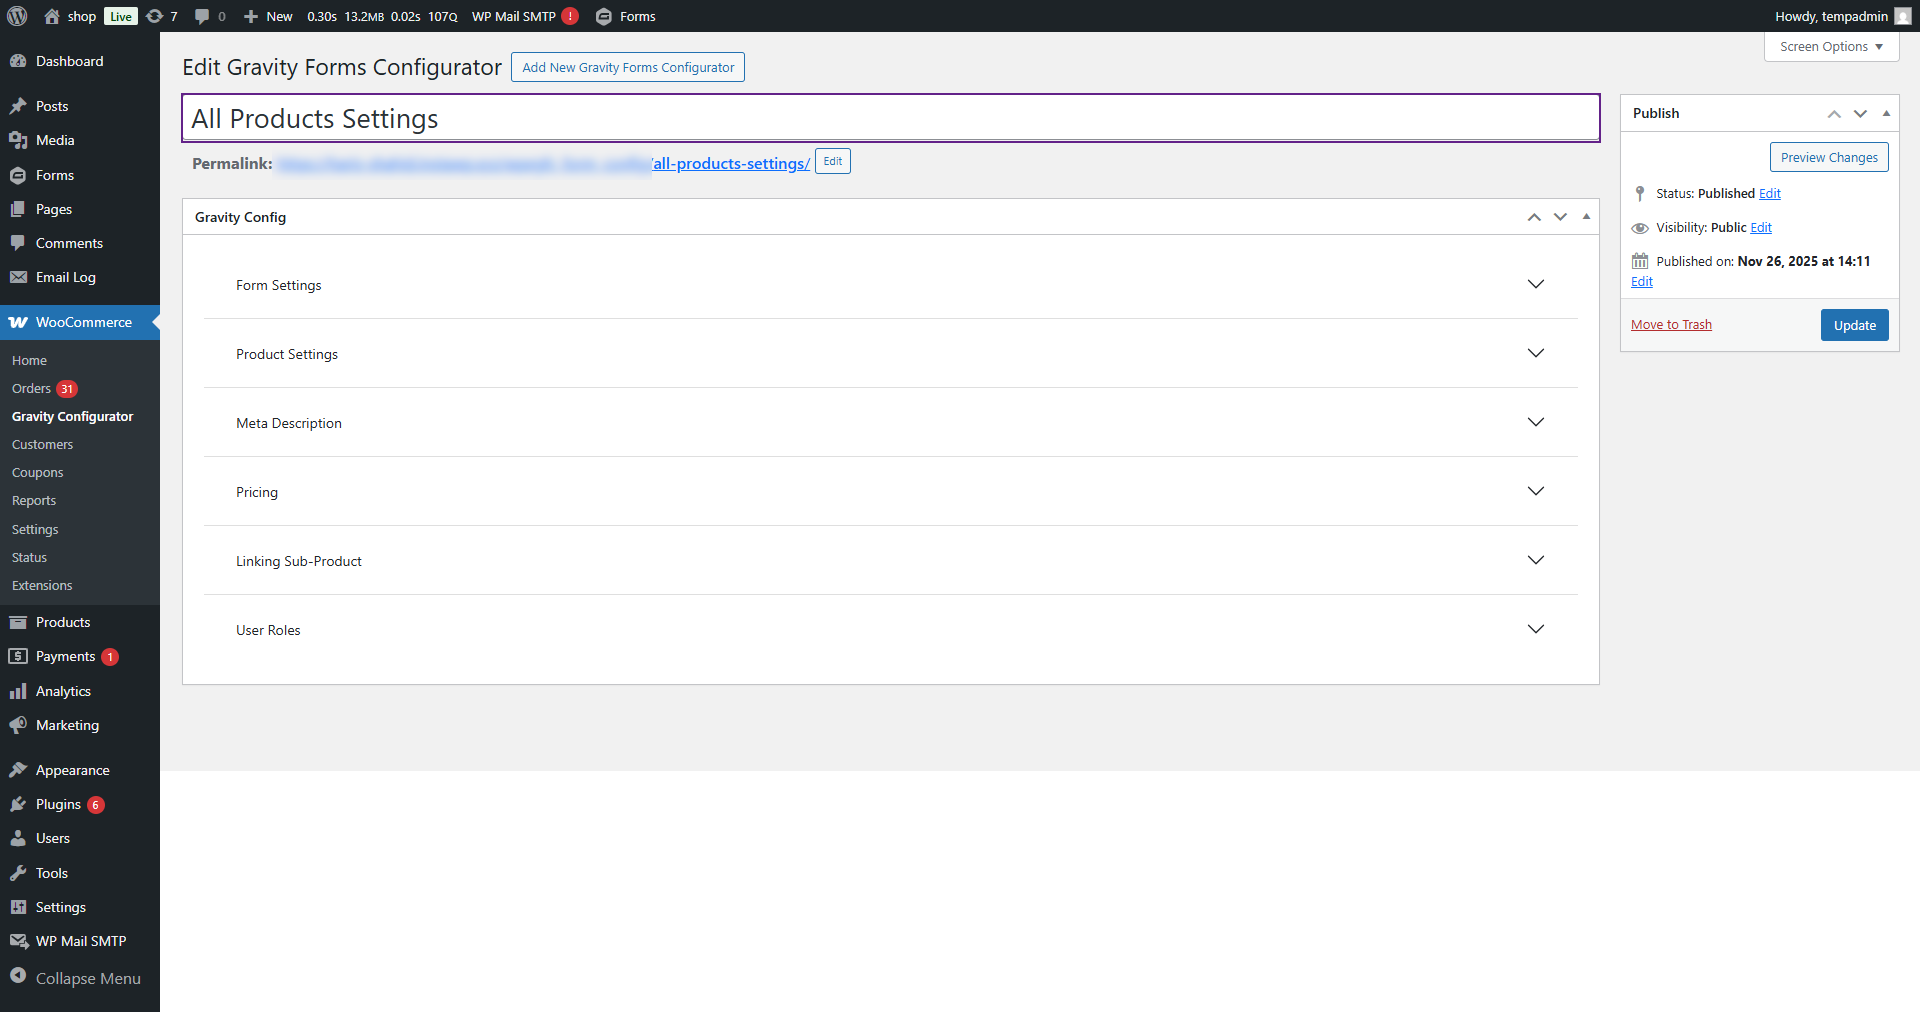
Form Settings
↑ Back to top- Navigate to the Form Settings tab.
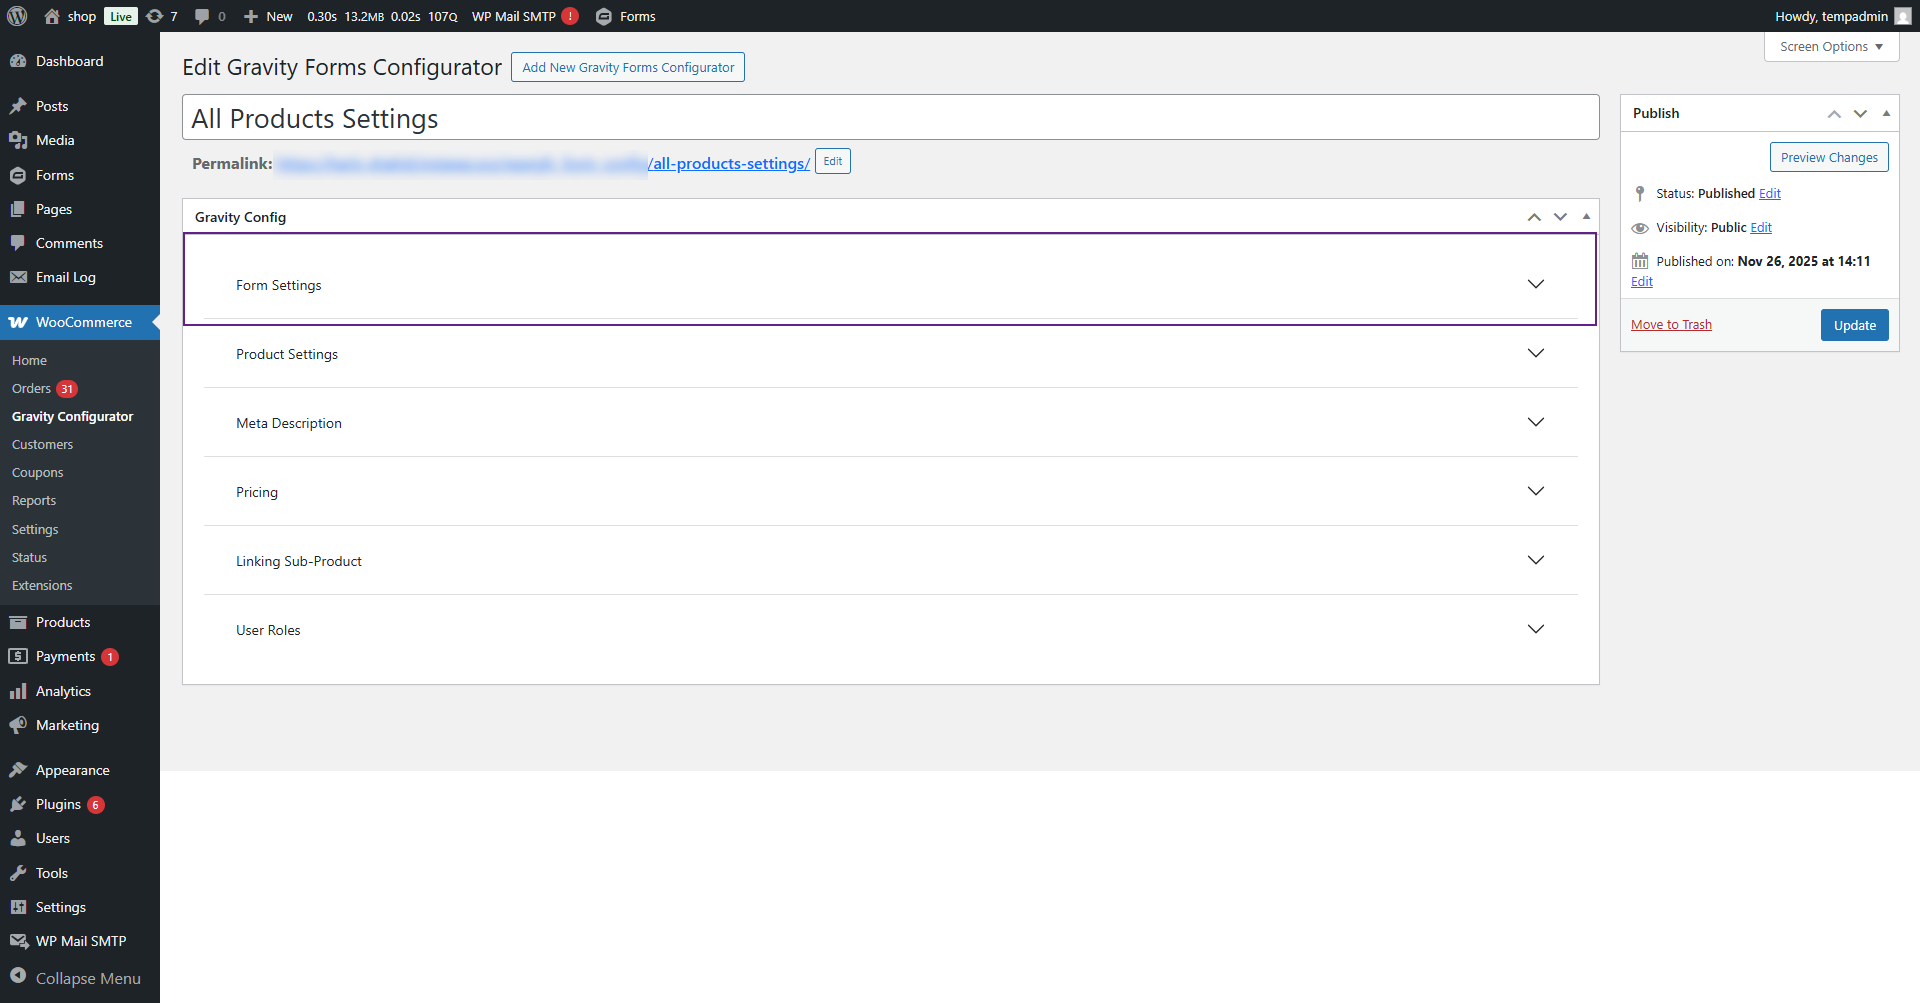
- Click on Form Settings dropdown button.
- A dropdown field named Select Forms will appear.
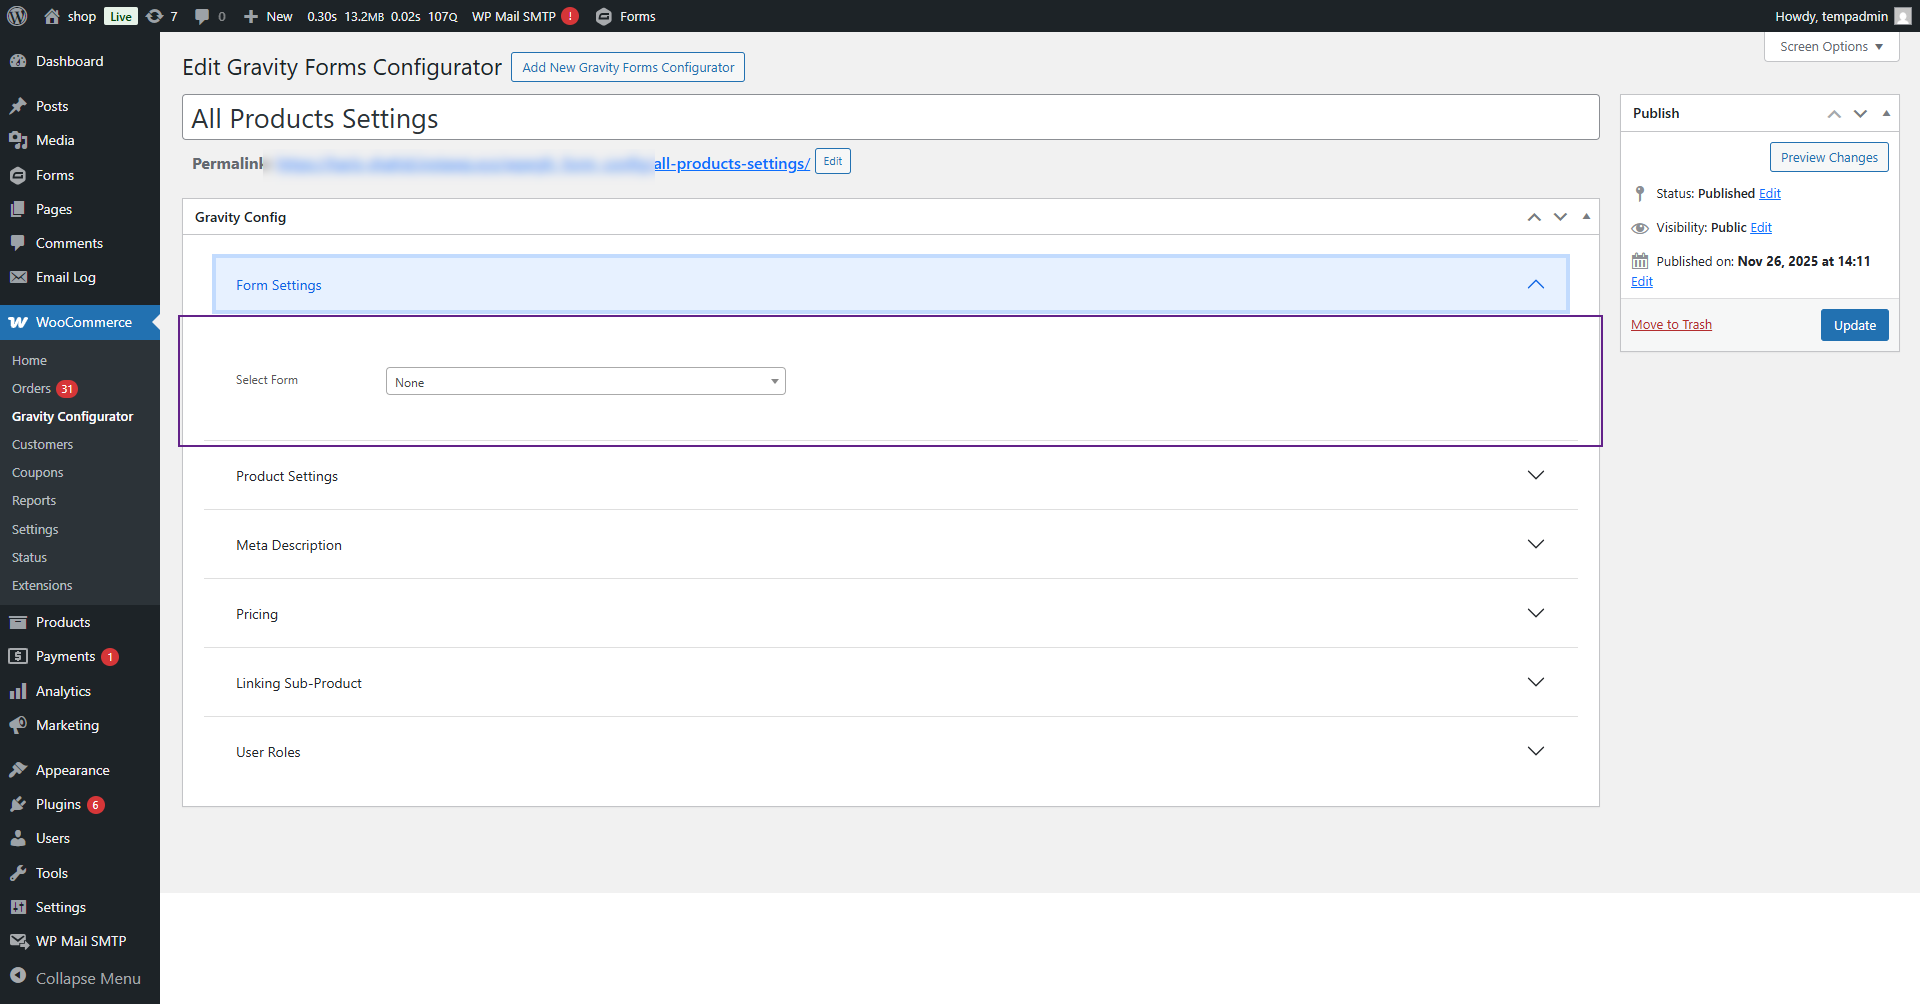
- From this dropdown, select your desired form (the same form you created earlier in Gravity Forms).
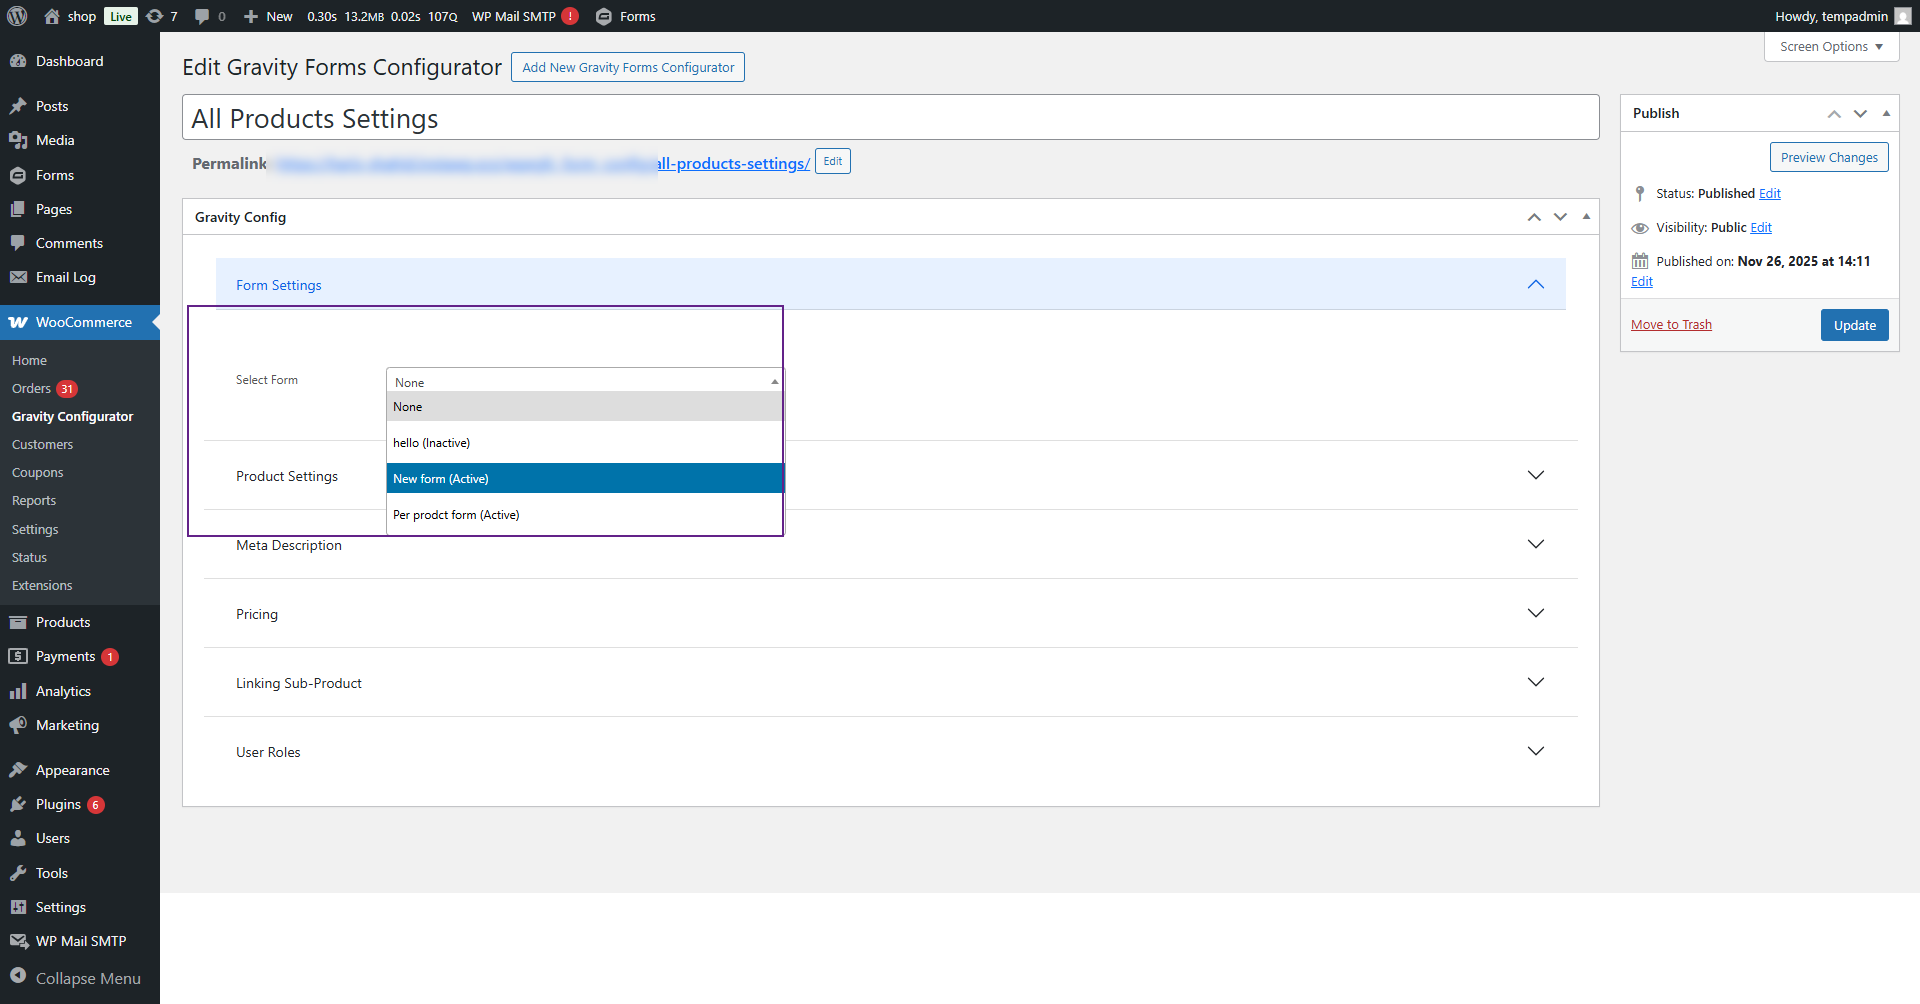
- Once a form is selected, it will be used for configuration across the included products.
Front-End Impact
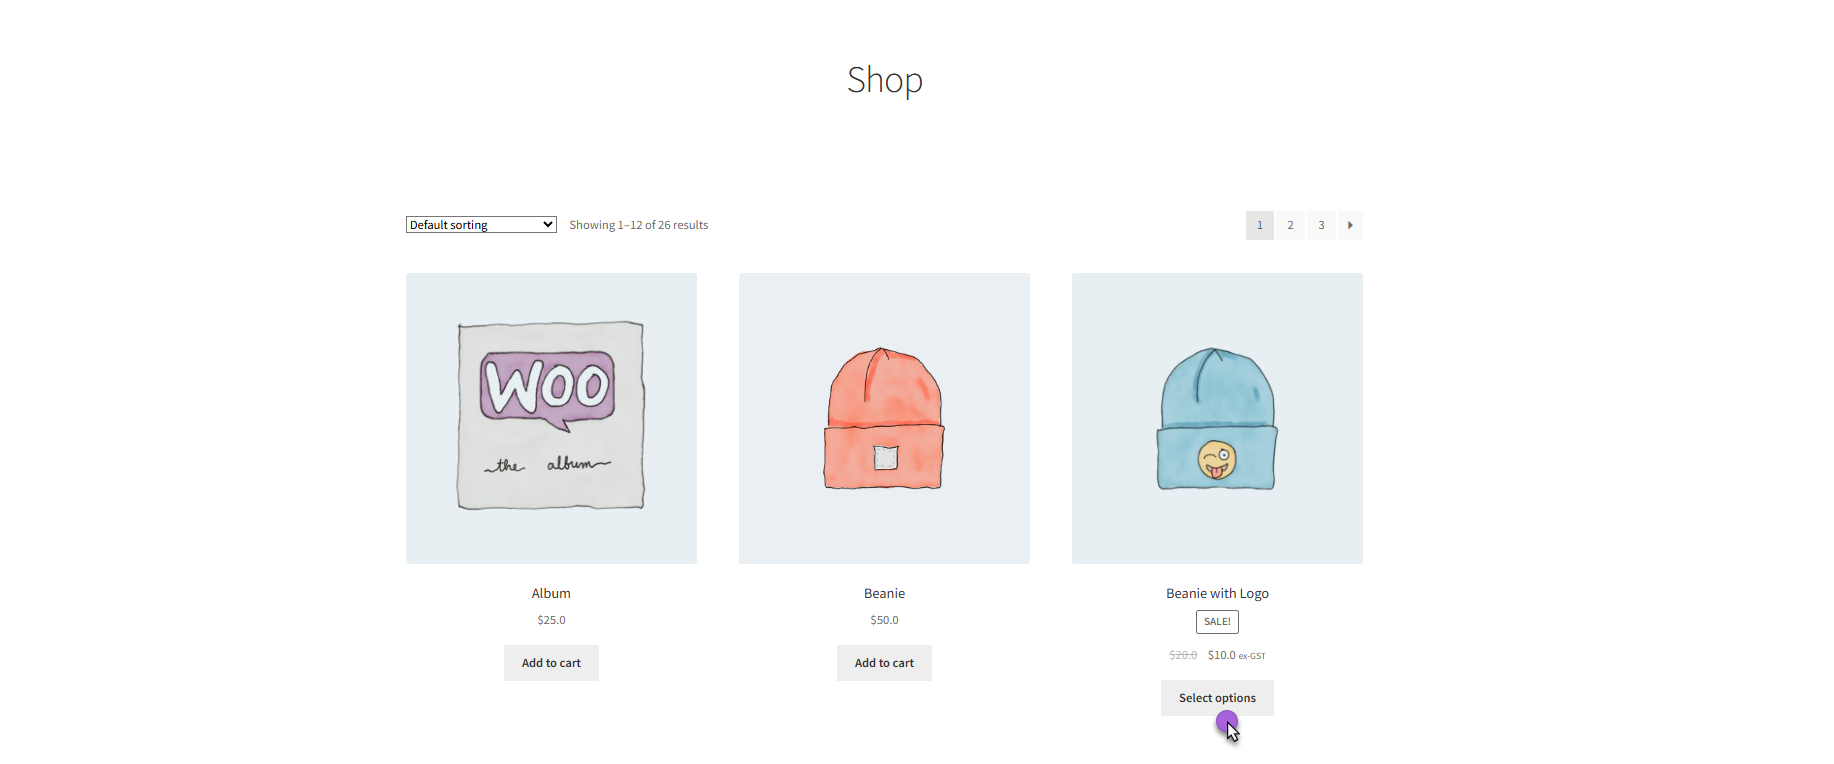
- Navigate to the Shop Page.

- Open any product that is linked to the configured Gravity Forms Configurator settings.
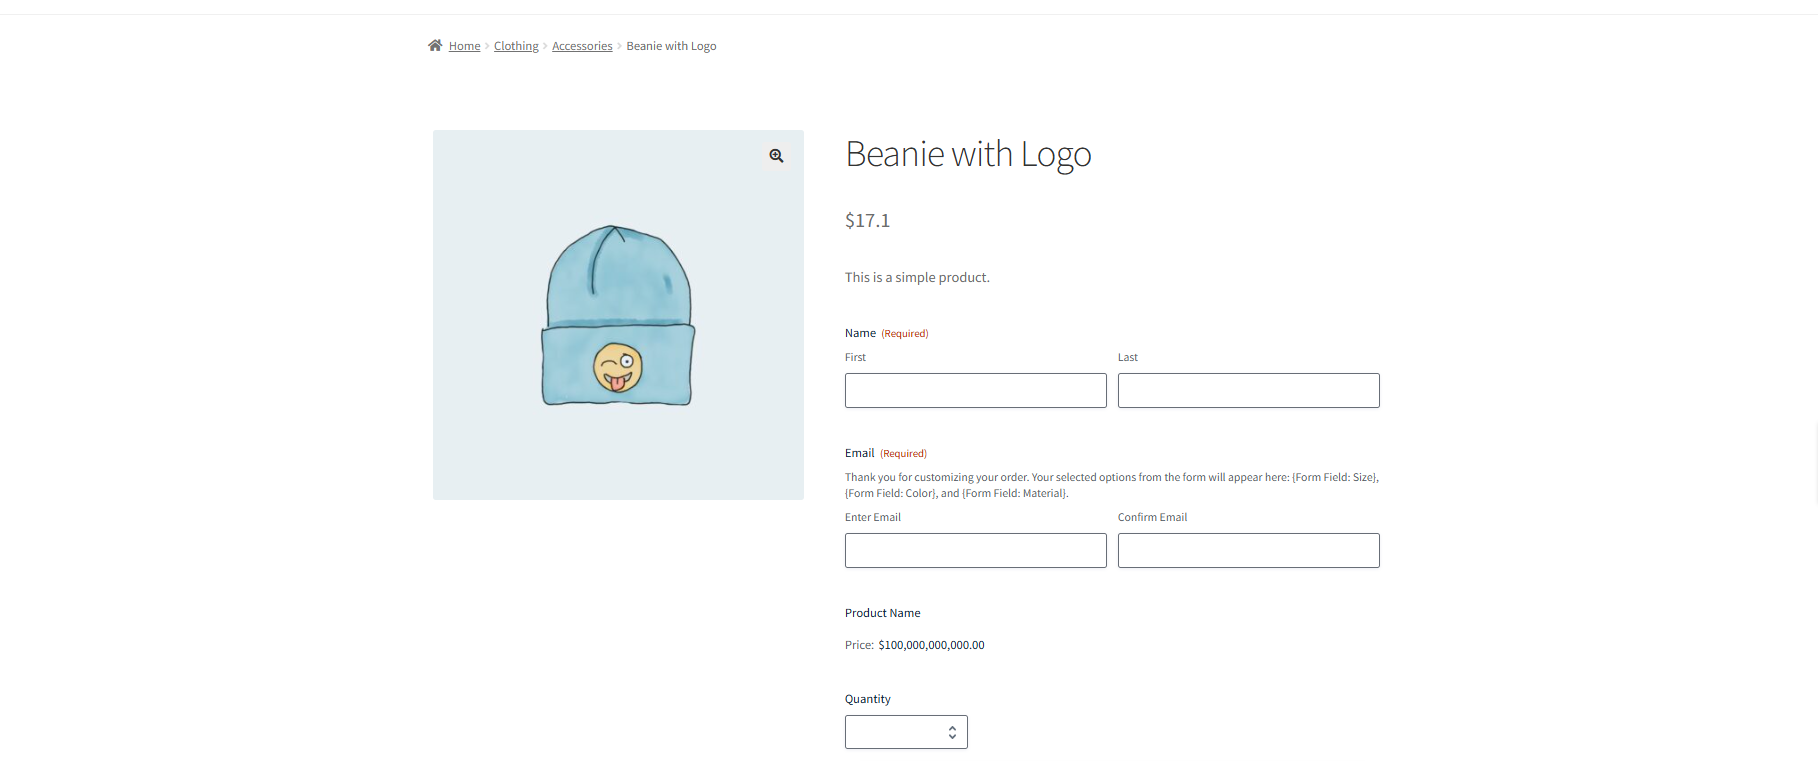
- When we navigate to the Product Page, the selected Gravity Forms will appear for the configured products.

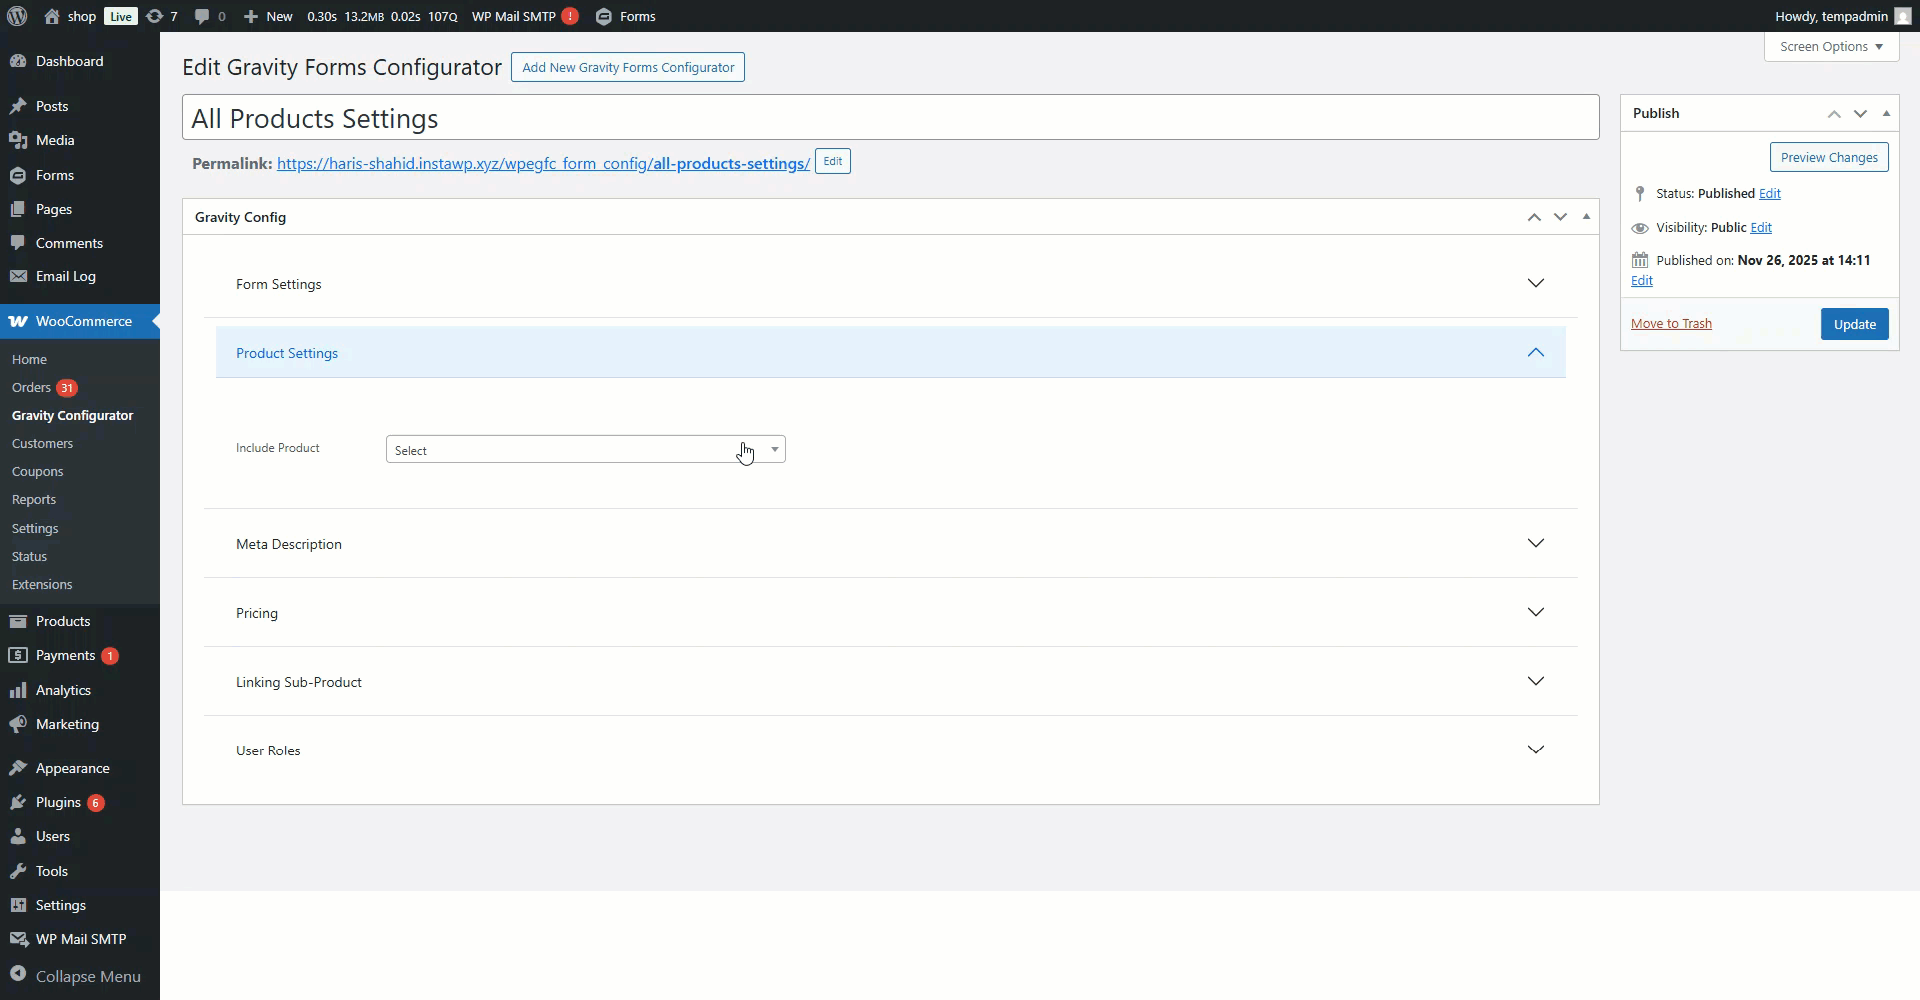
Product Settings
↑ Back to top- Now, navigate to the Product Settings tab.
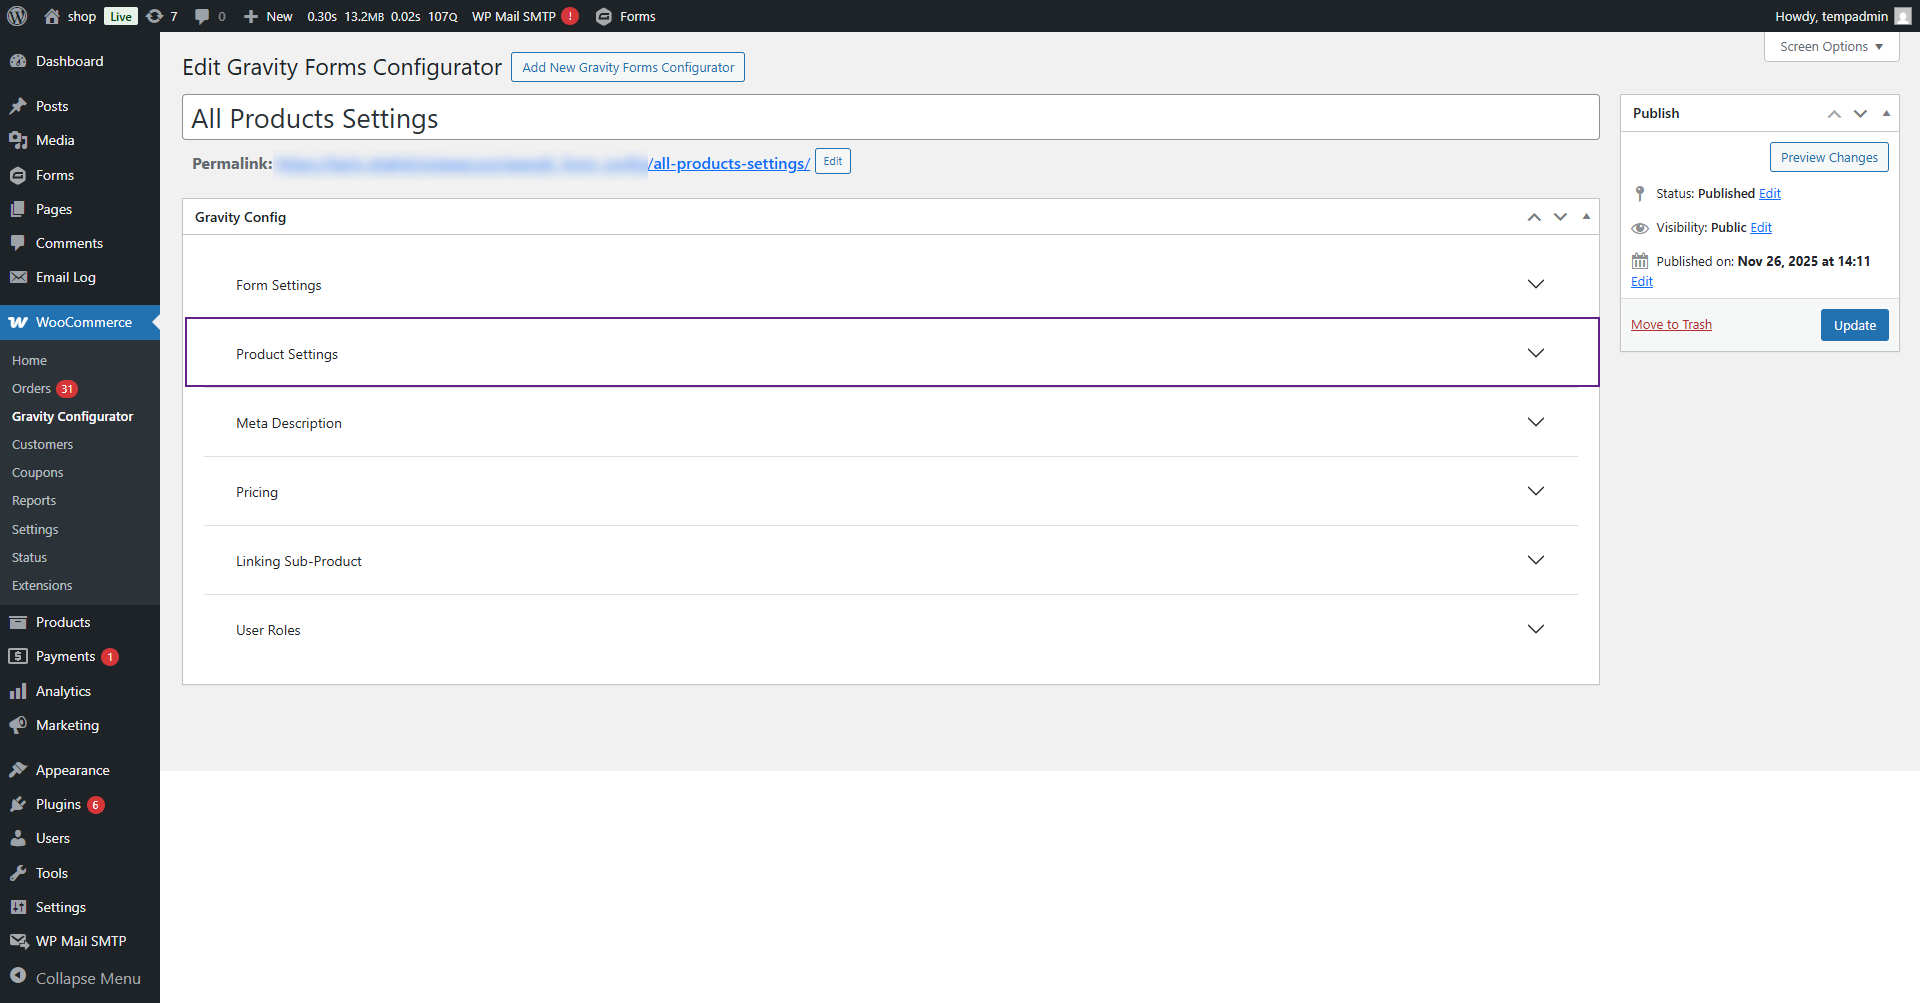
- Click on the Product Settings dropdown button.

- This section allows you to define which products, categories, or tags the selected form should apply to.
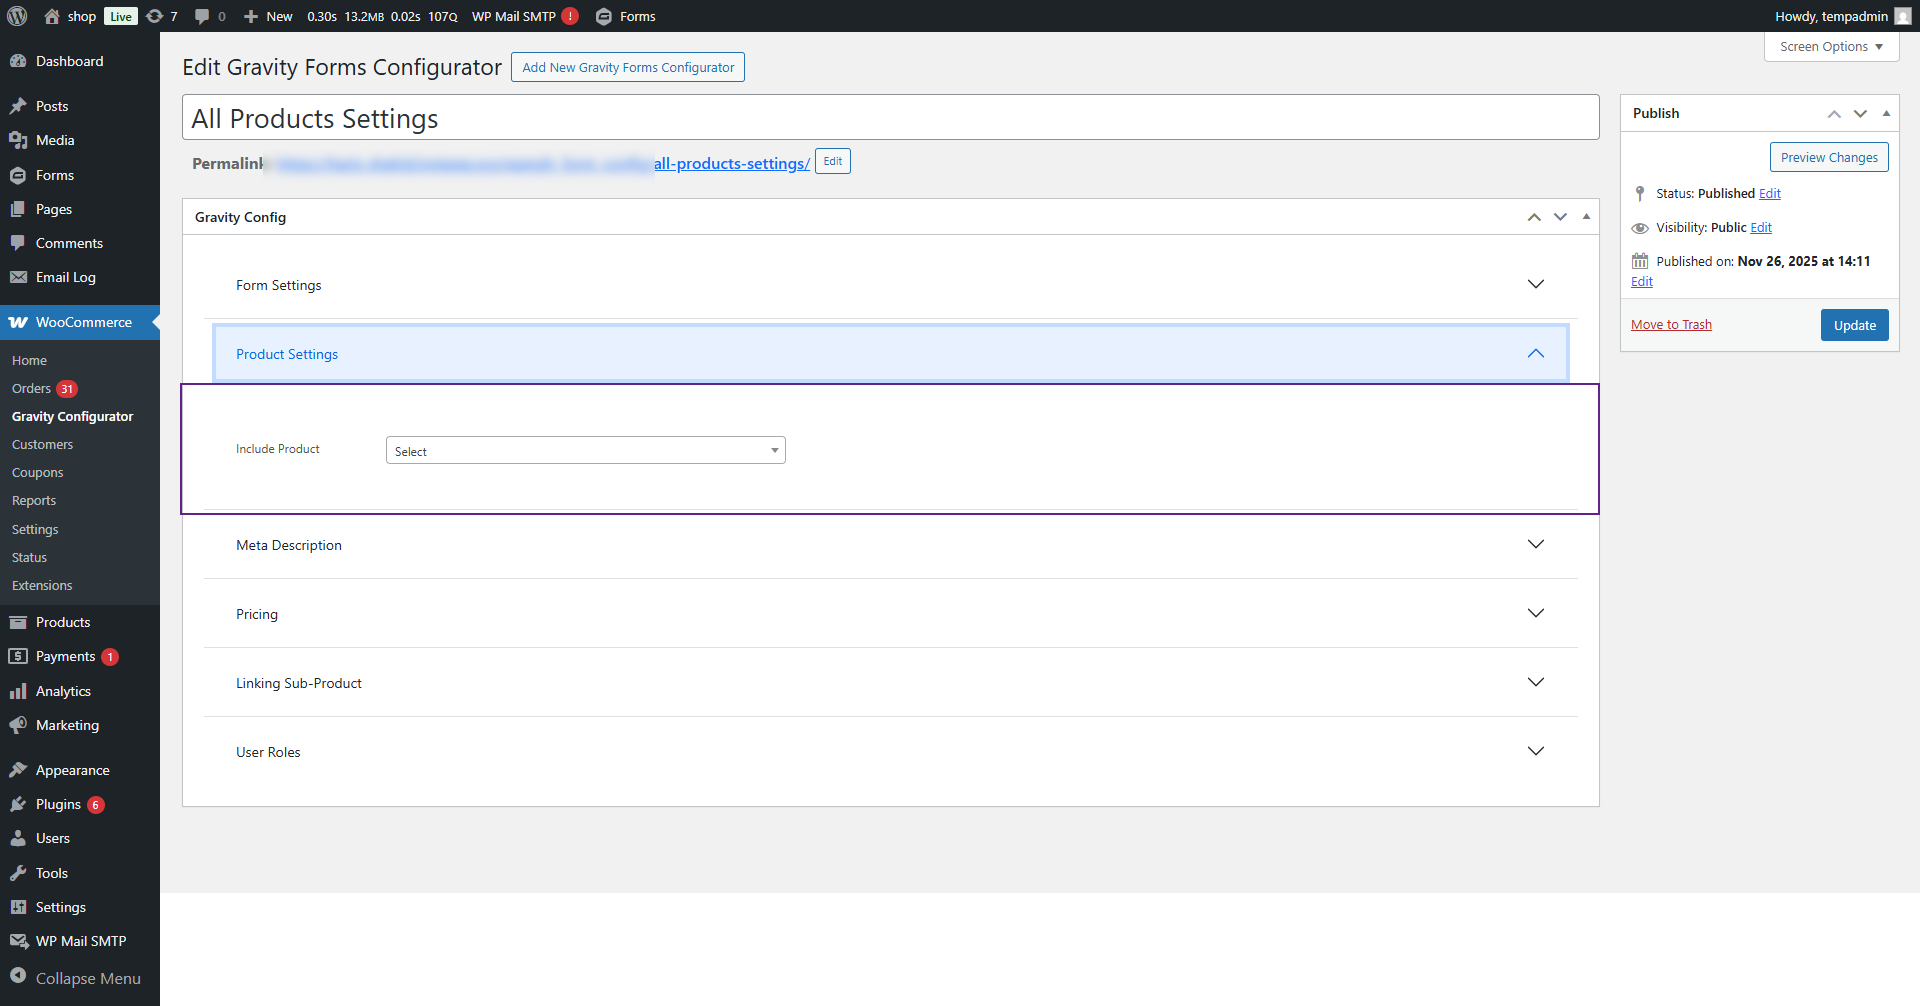
From the Include Product dropdown, choose one of the following options:
- All Products: Applies to all simple and variable products. Under this option, both Include and Exclude product settings are available to control where the form should or should not appear.
- Specific Products: Opens a multi-select box where you can search and select individual products.
- Specific Product Category: Opens a multi-select box to choose categories.
- Specific Product Tag: Opens a multi-select box to choose tags.
Front-End Impact
- Navigate to the Shop Page.

You can see the form appear on the product page based on the settings:
- If All Products is selected, the form appears on all products.
- If Specific Products is selected, the form appears only on the chosen products.
- If Specific Categories is selected, the form appears on products in those categories.

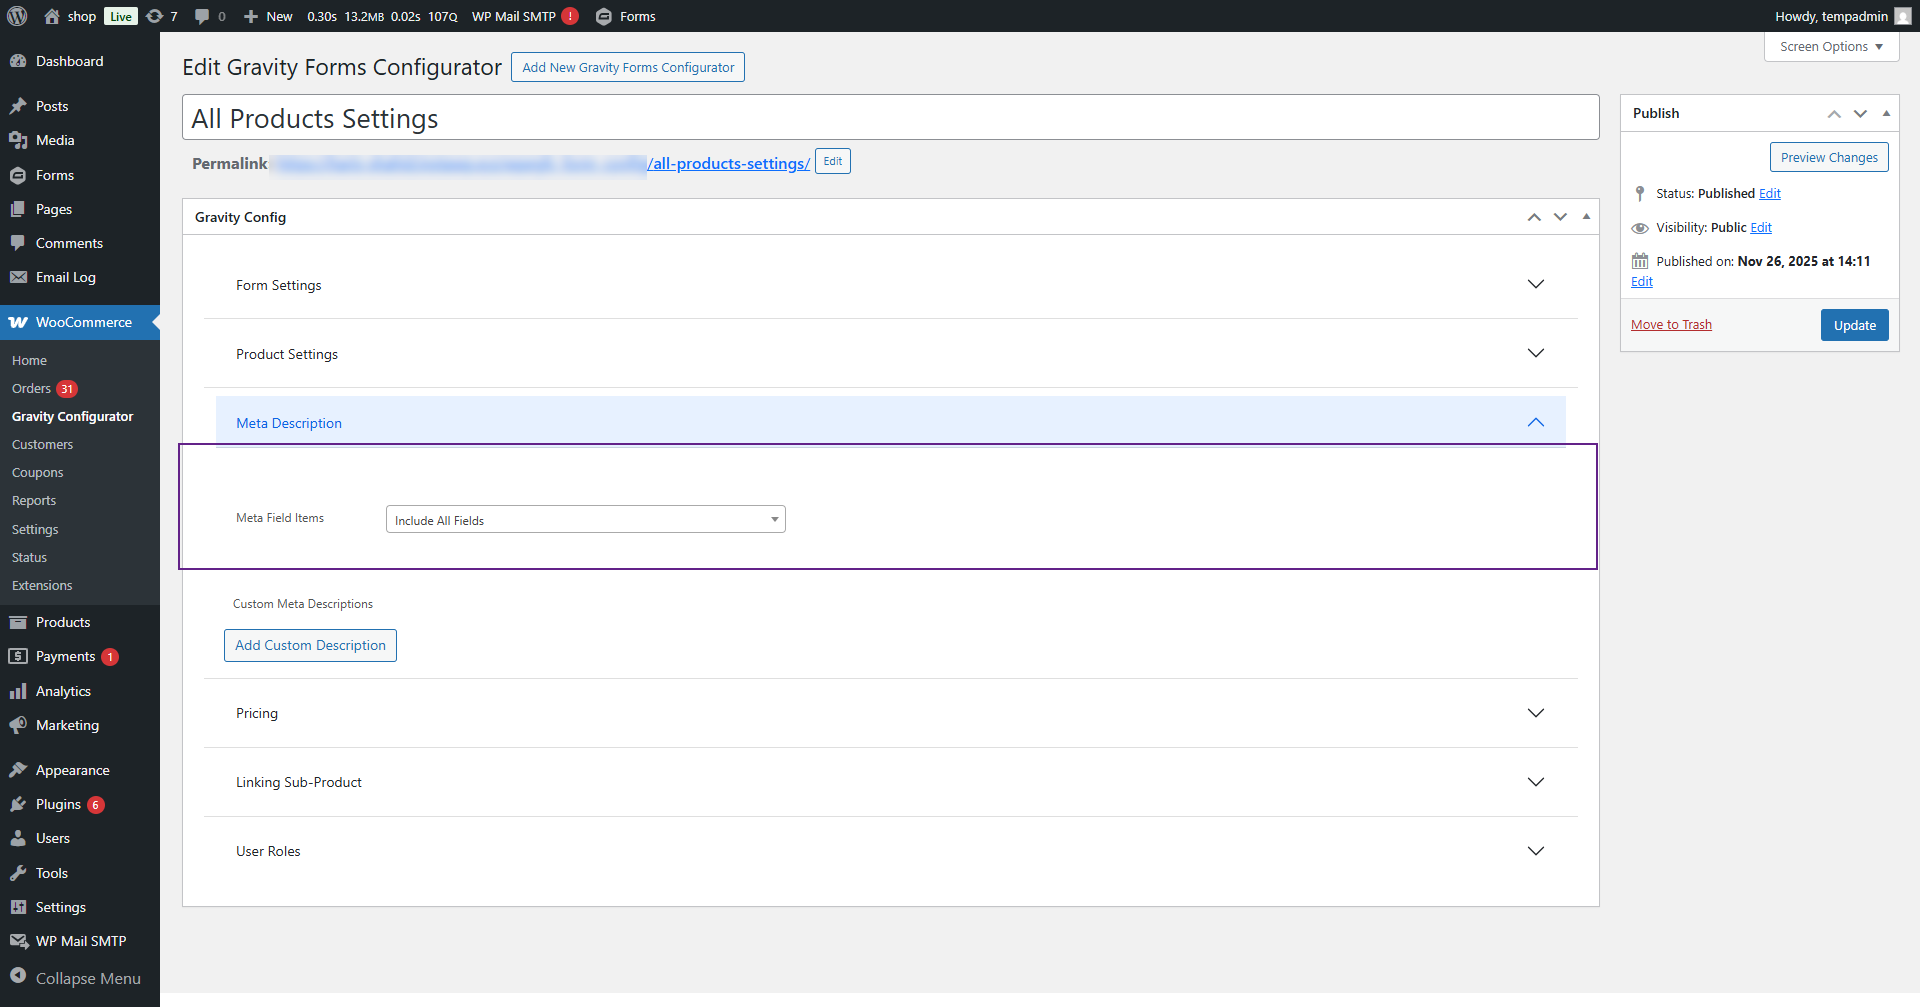
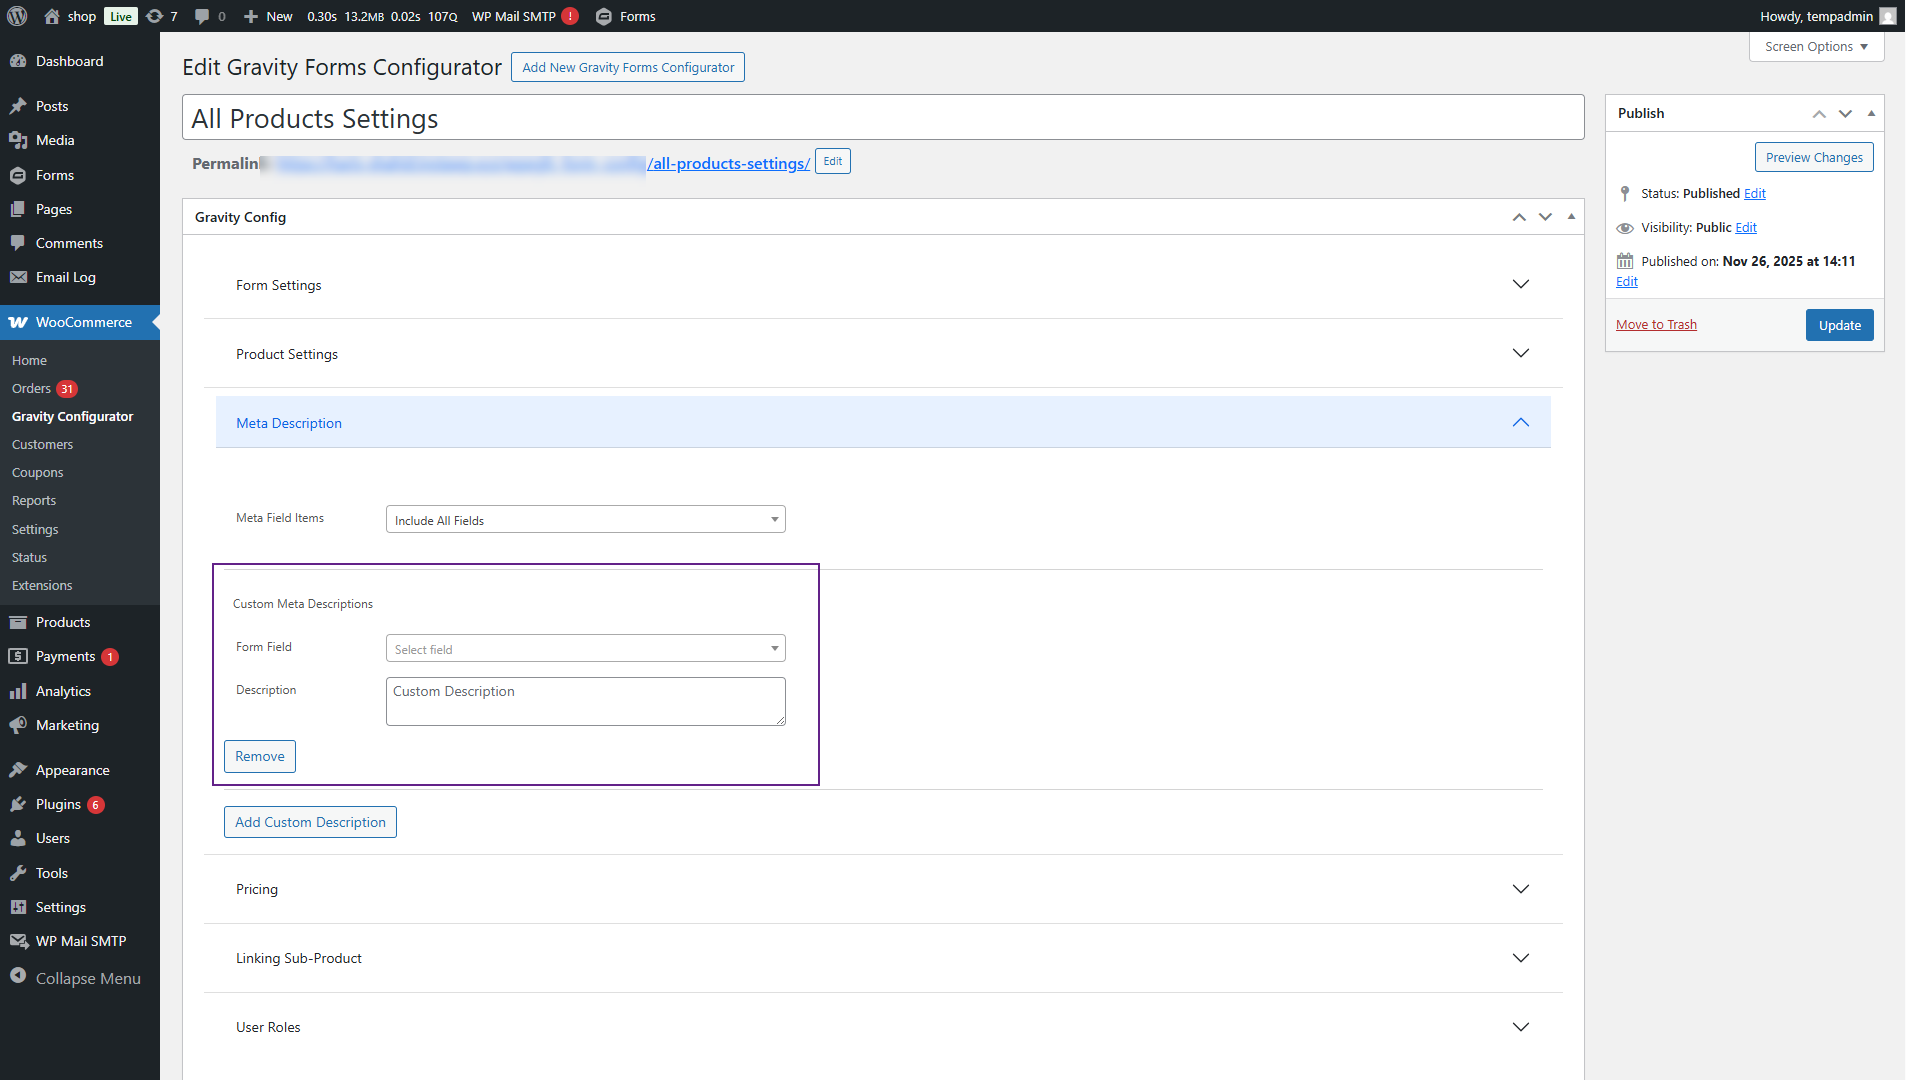
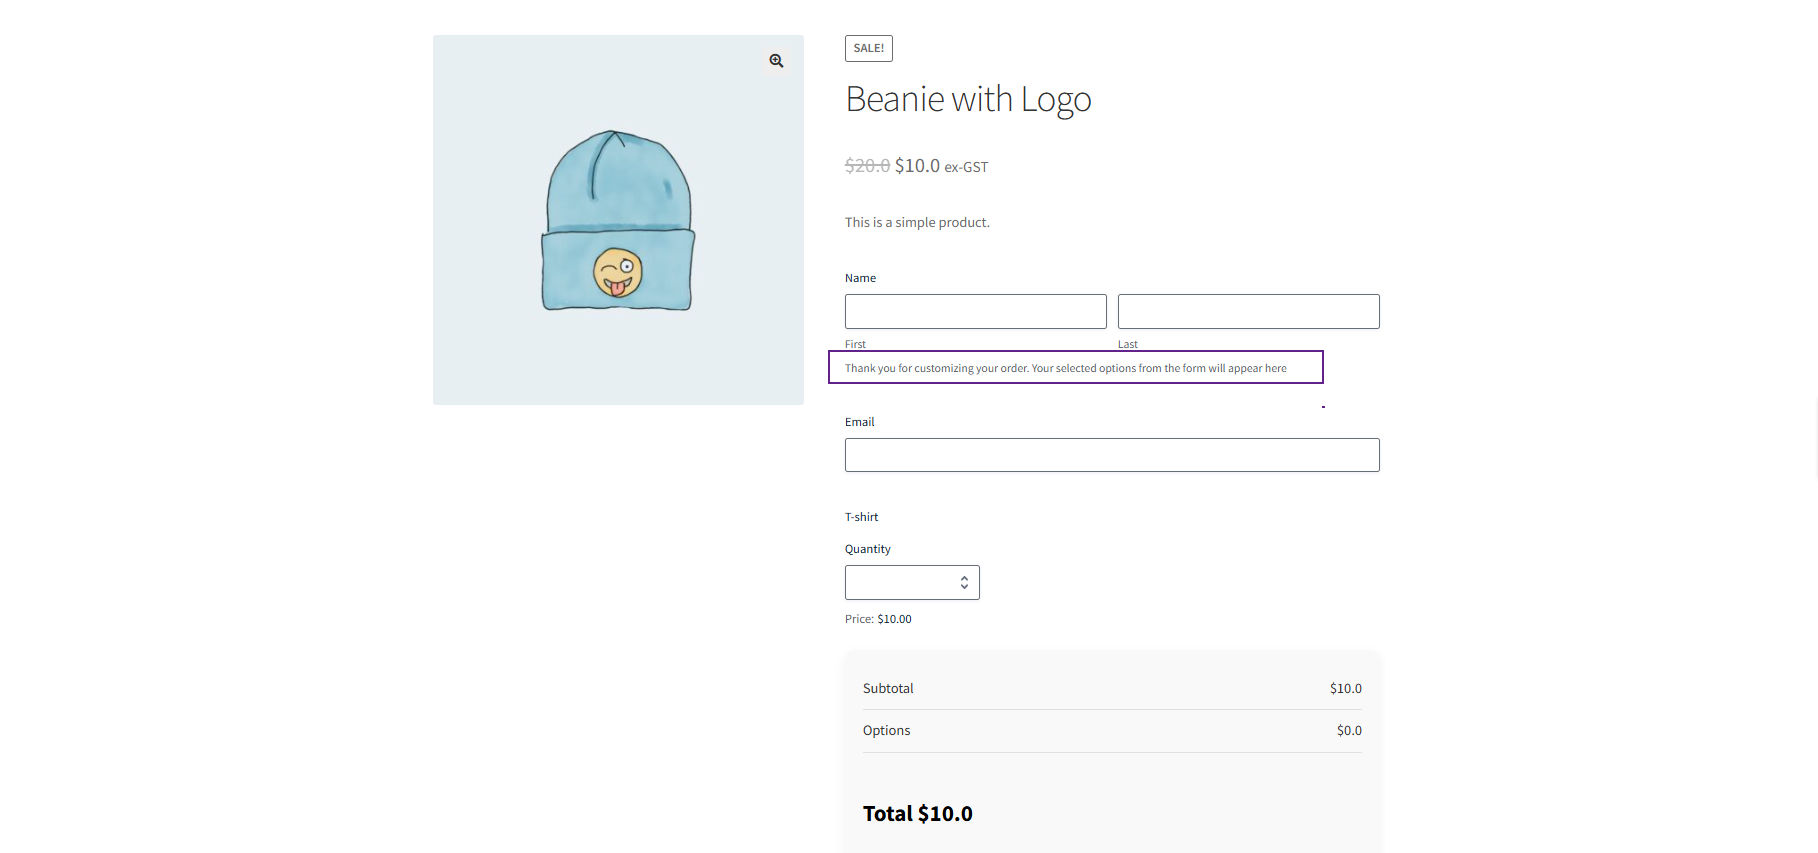
Meta Description
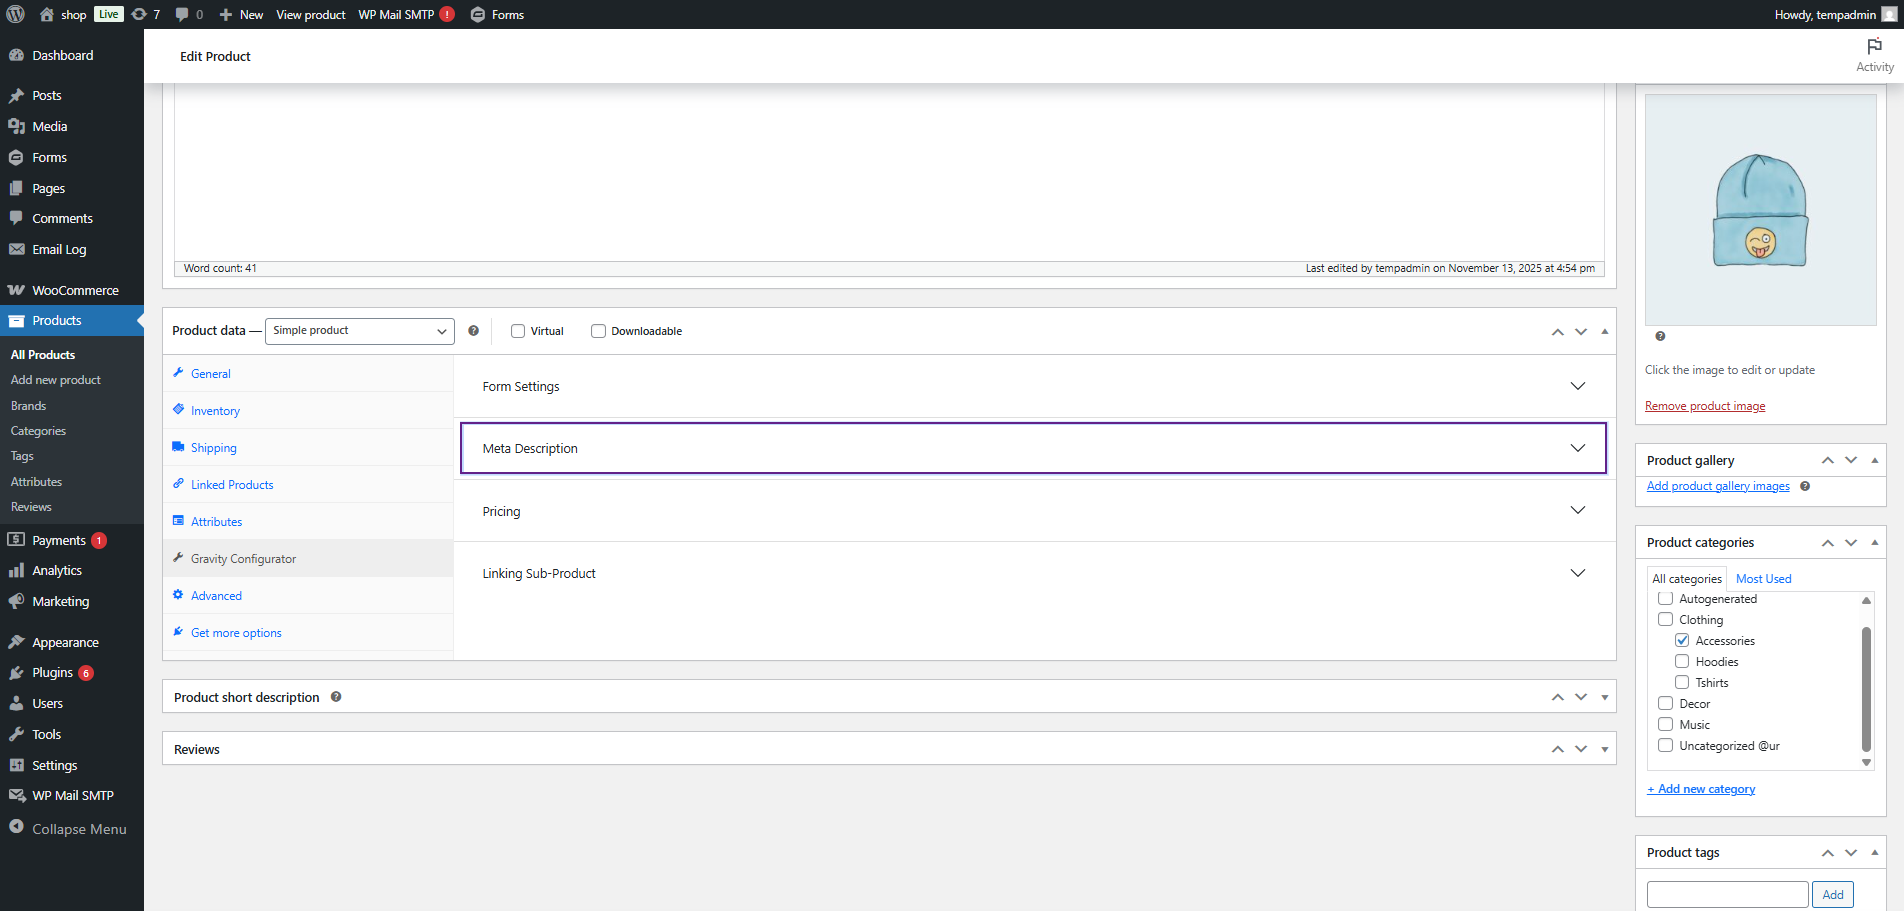
↑ Back to top- Navigate to the Meta Description tab.

- Click on Meta Description dropdown button.

- This section allows the admin to control how the product’s meta details (from the selected Gravity Form) will appear on the frontend.
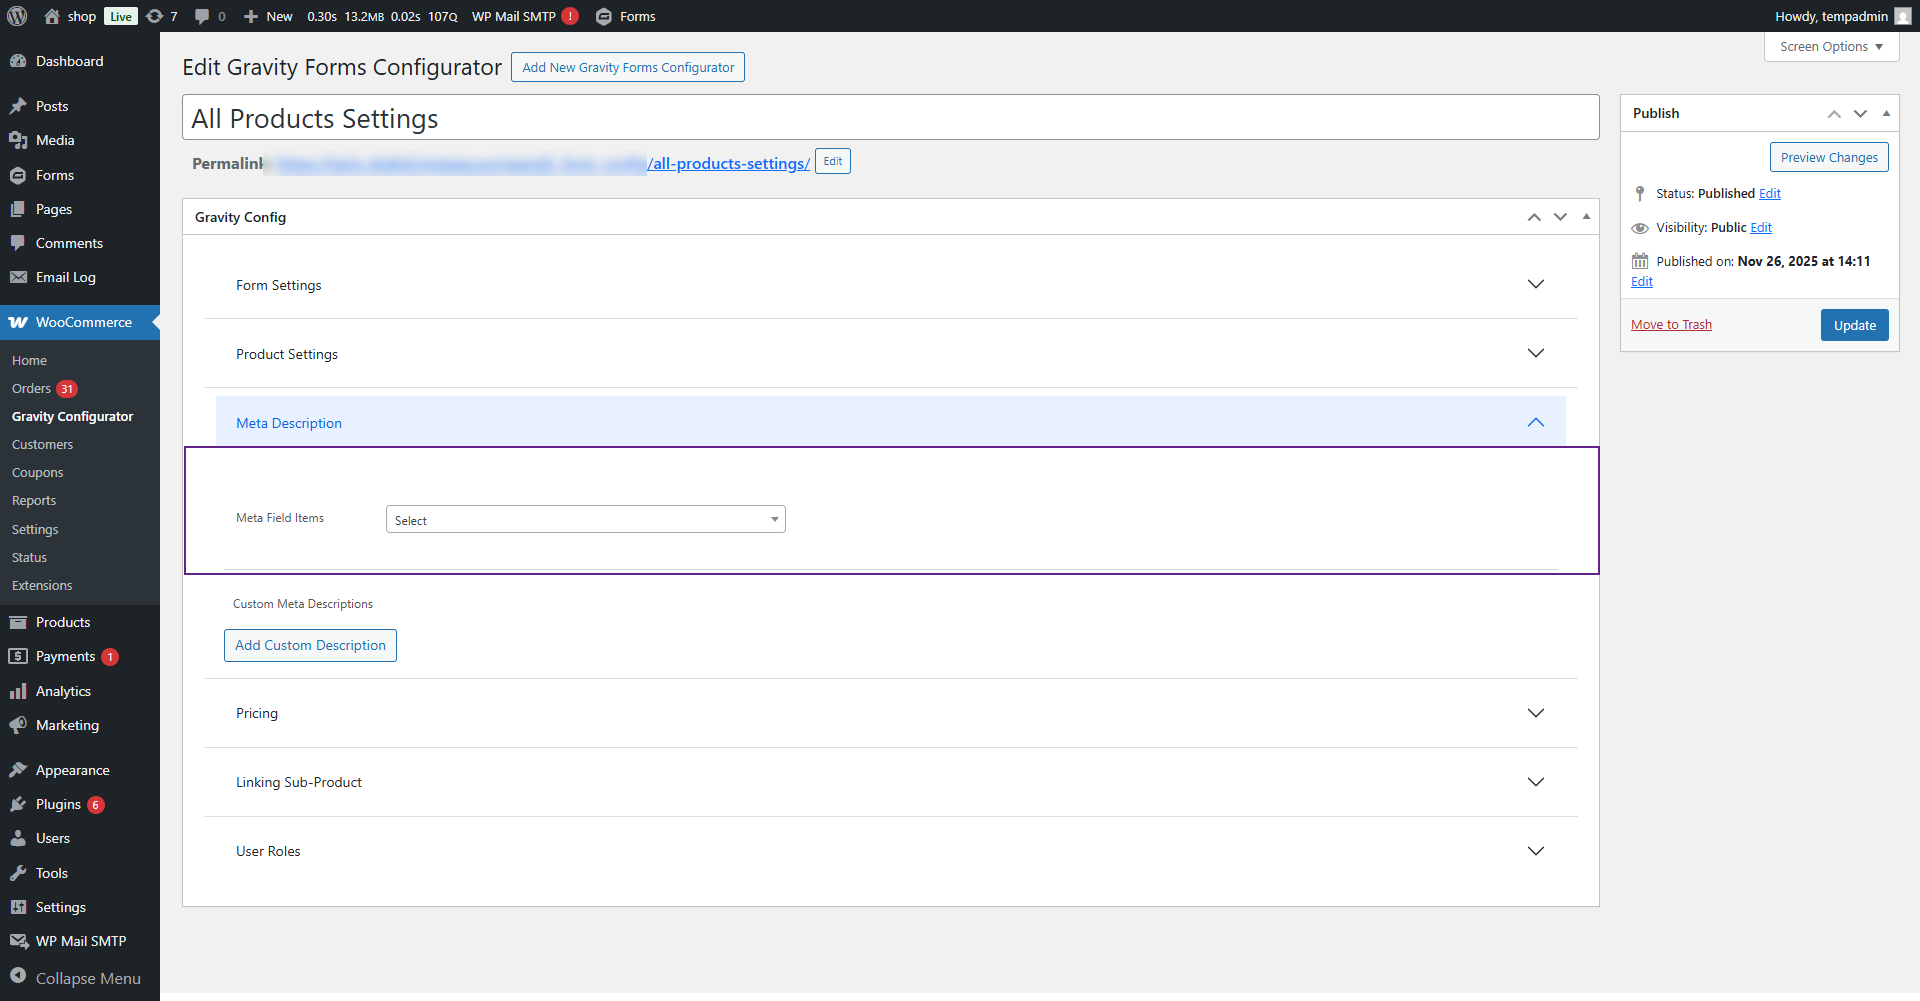
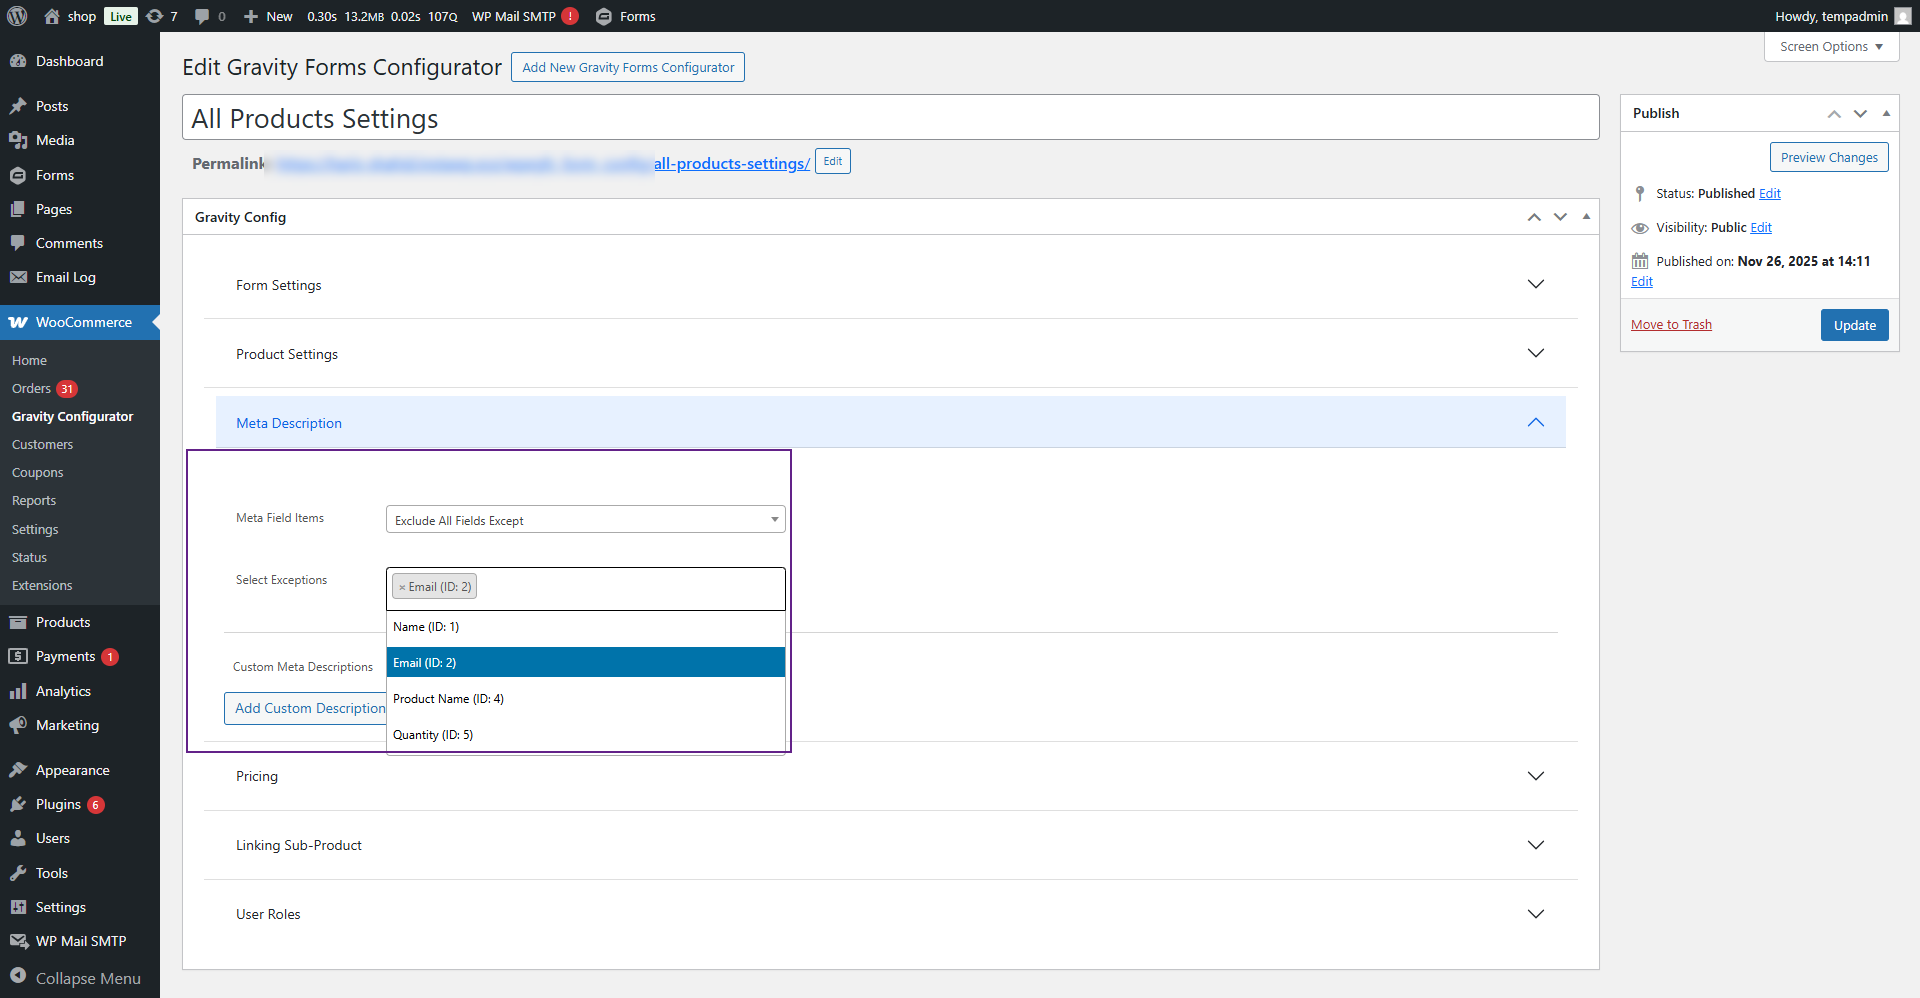
Meta Field Items
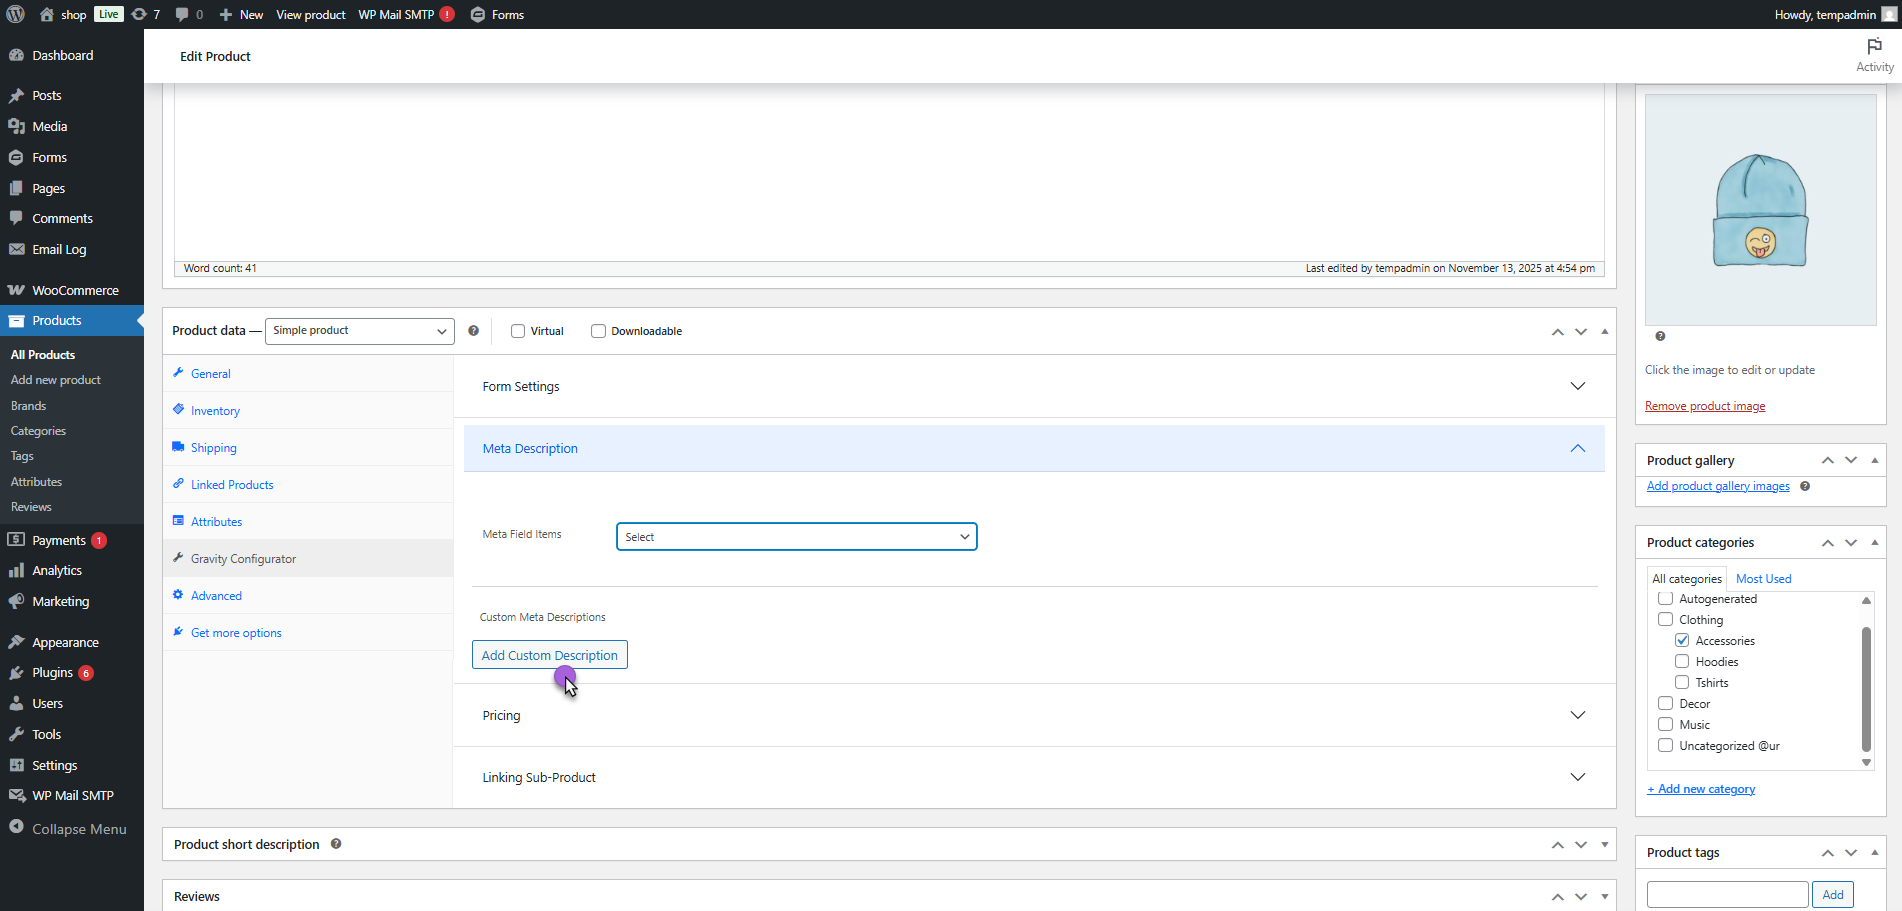
- Under Default, the following display options are available:
- Include All Fields: Displays all meta fields from the selected Gravity Form.
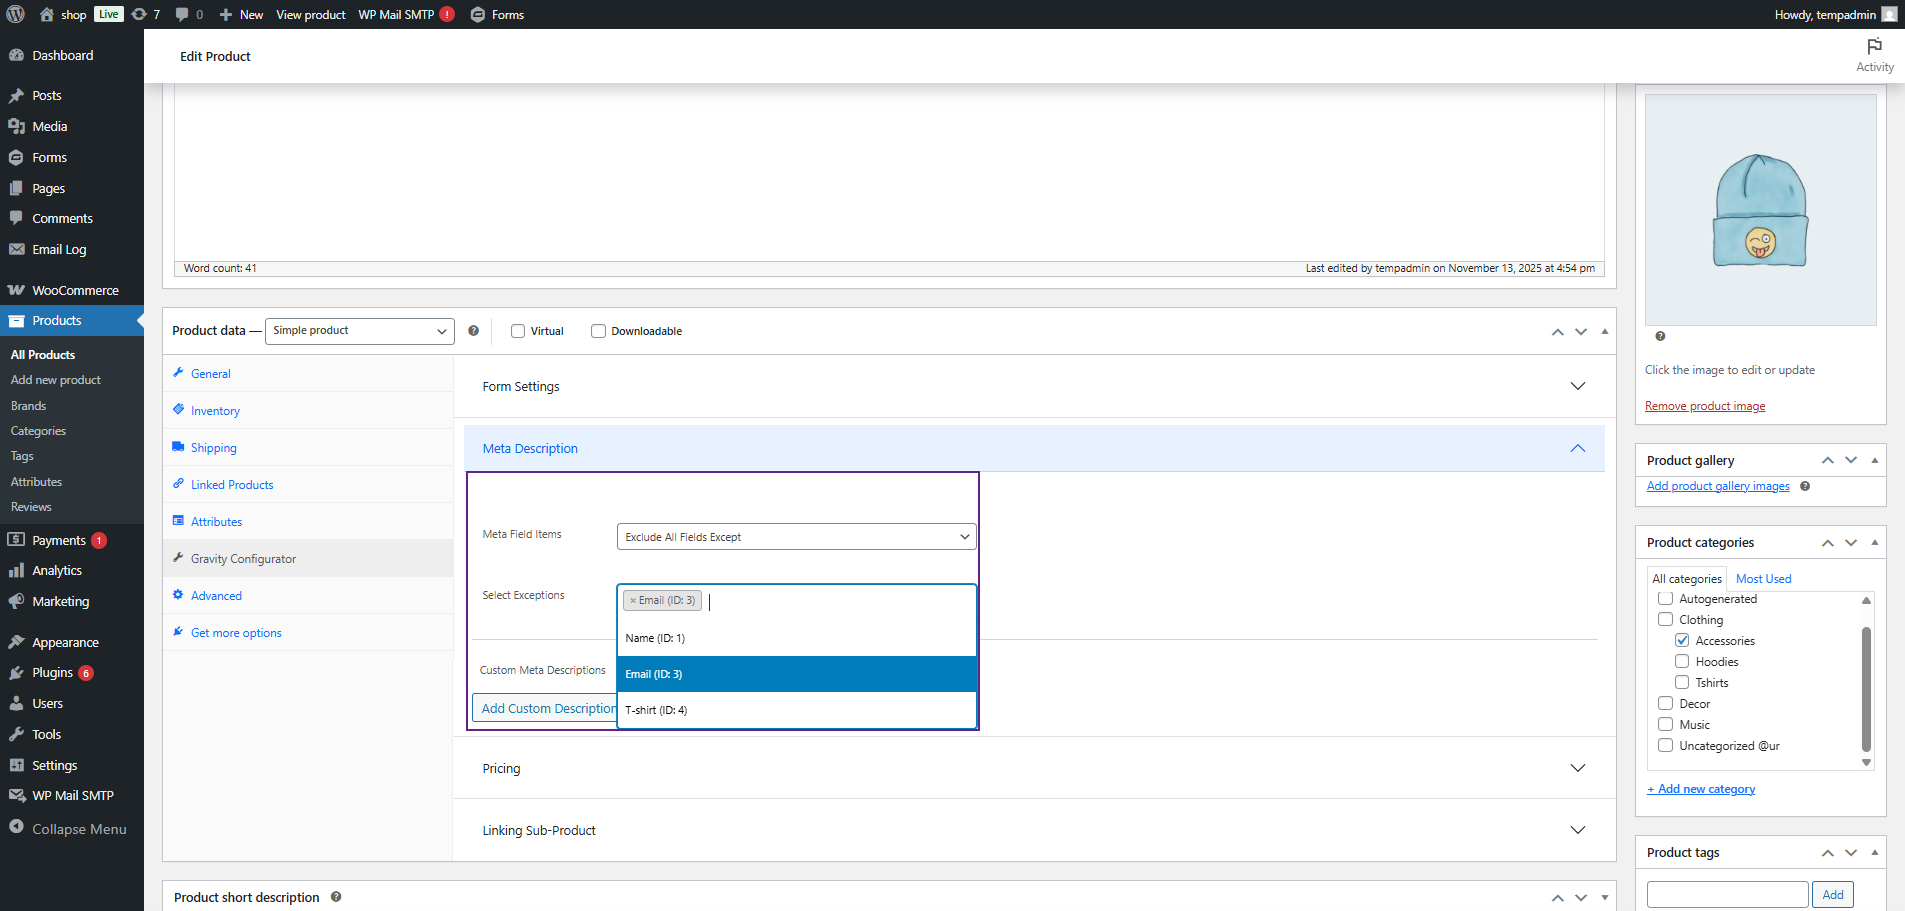
- Include All Fields Except: Displays all meta fields except the ones selected in the Select Exception dropdown.
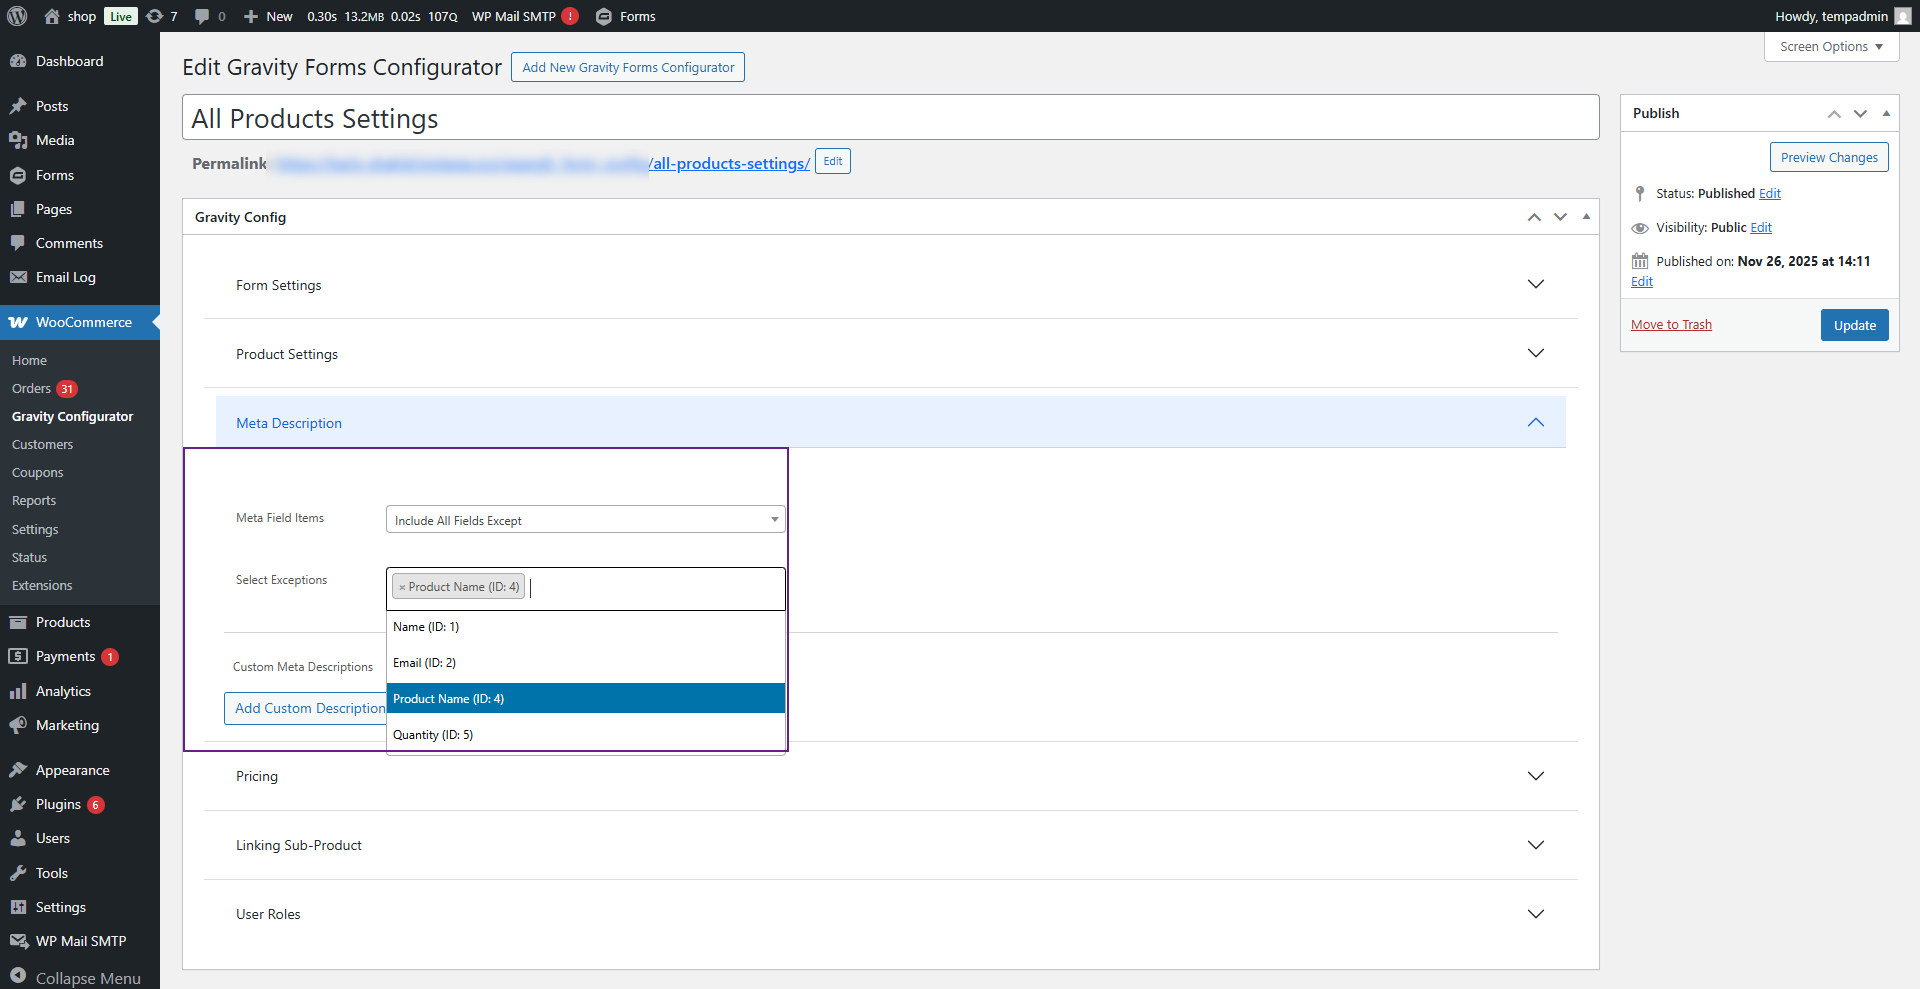
- Exclude All Fields Except: Excludes all fields except those selected from the Select Exception dropdown.
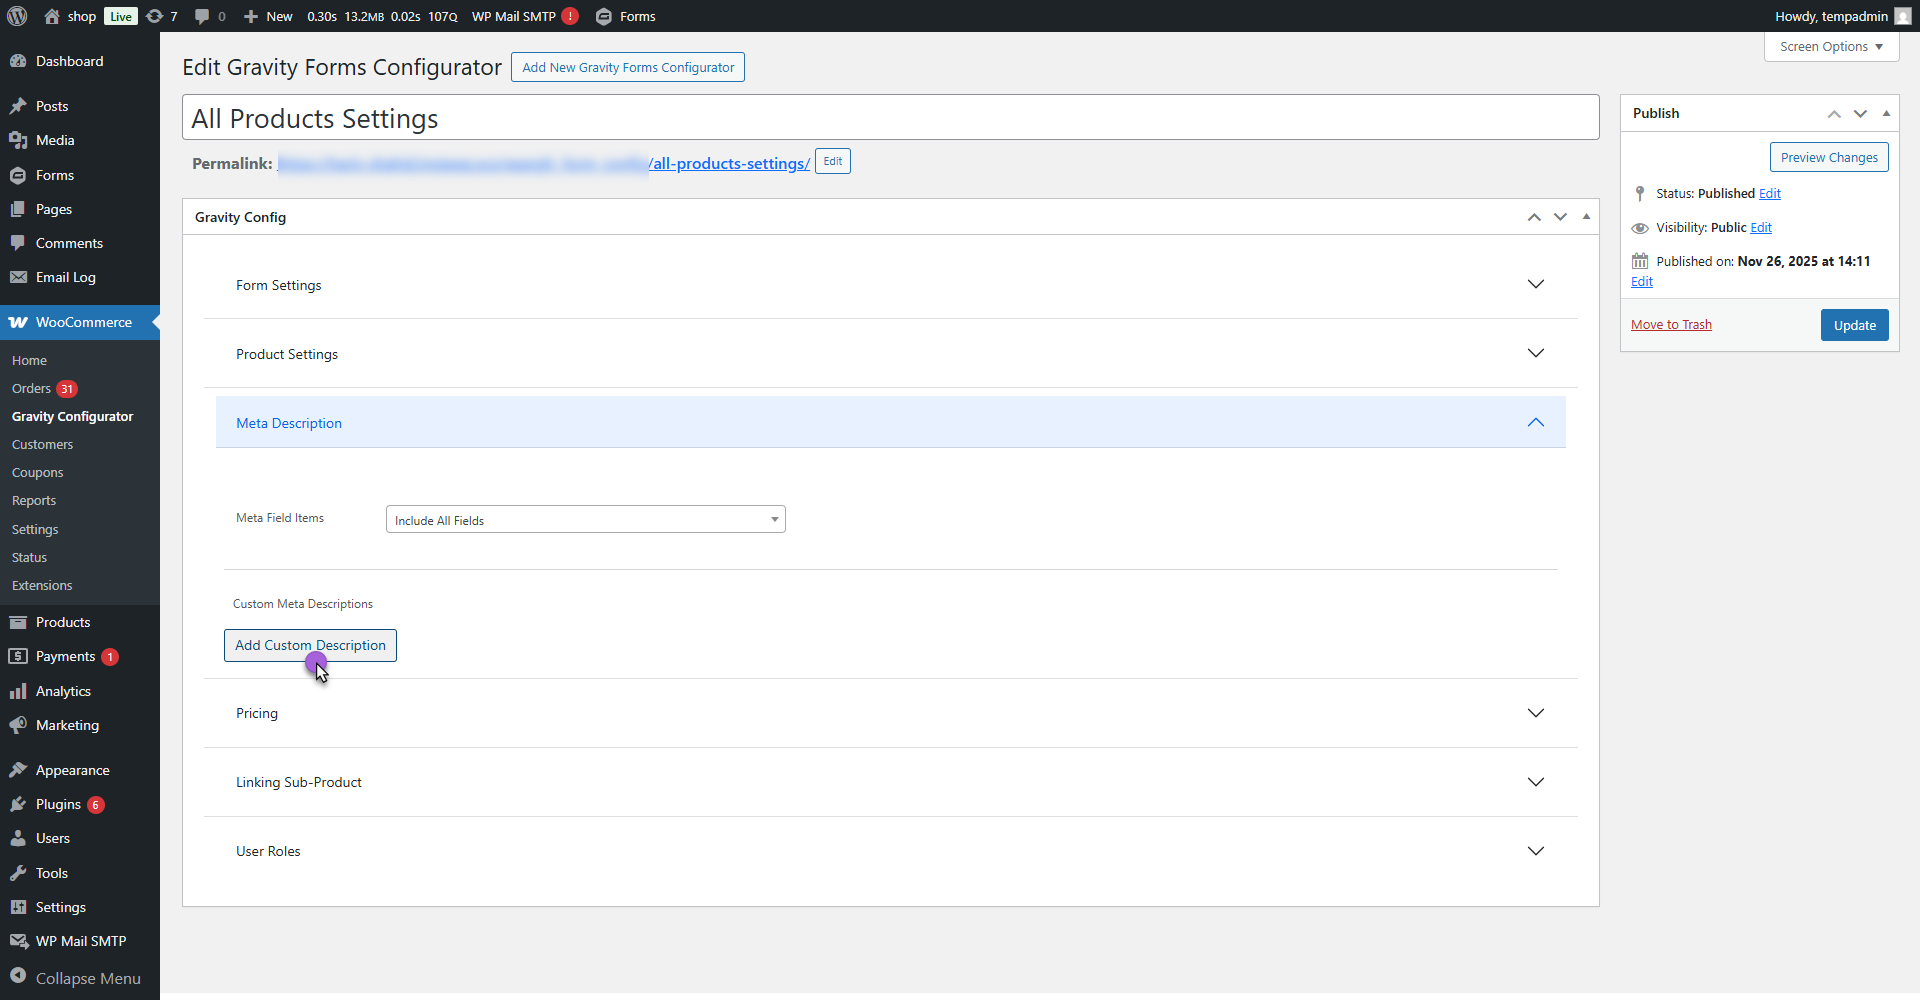
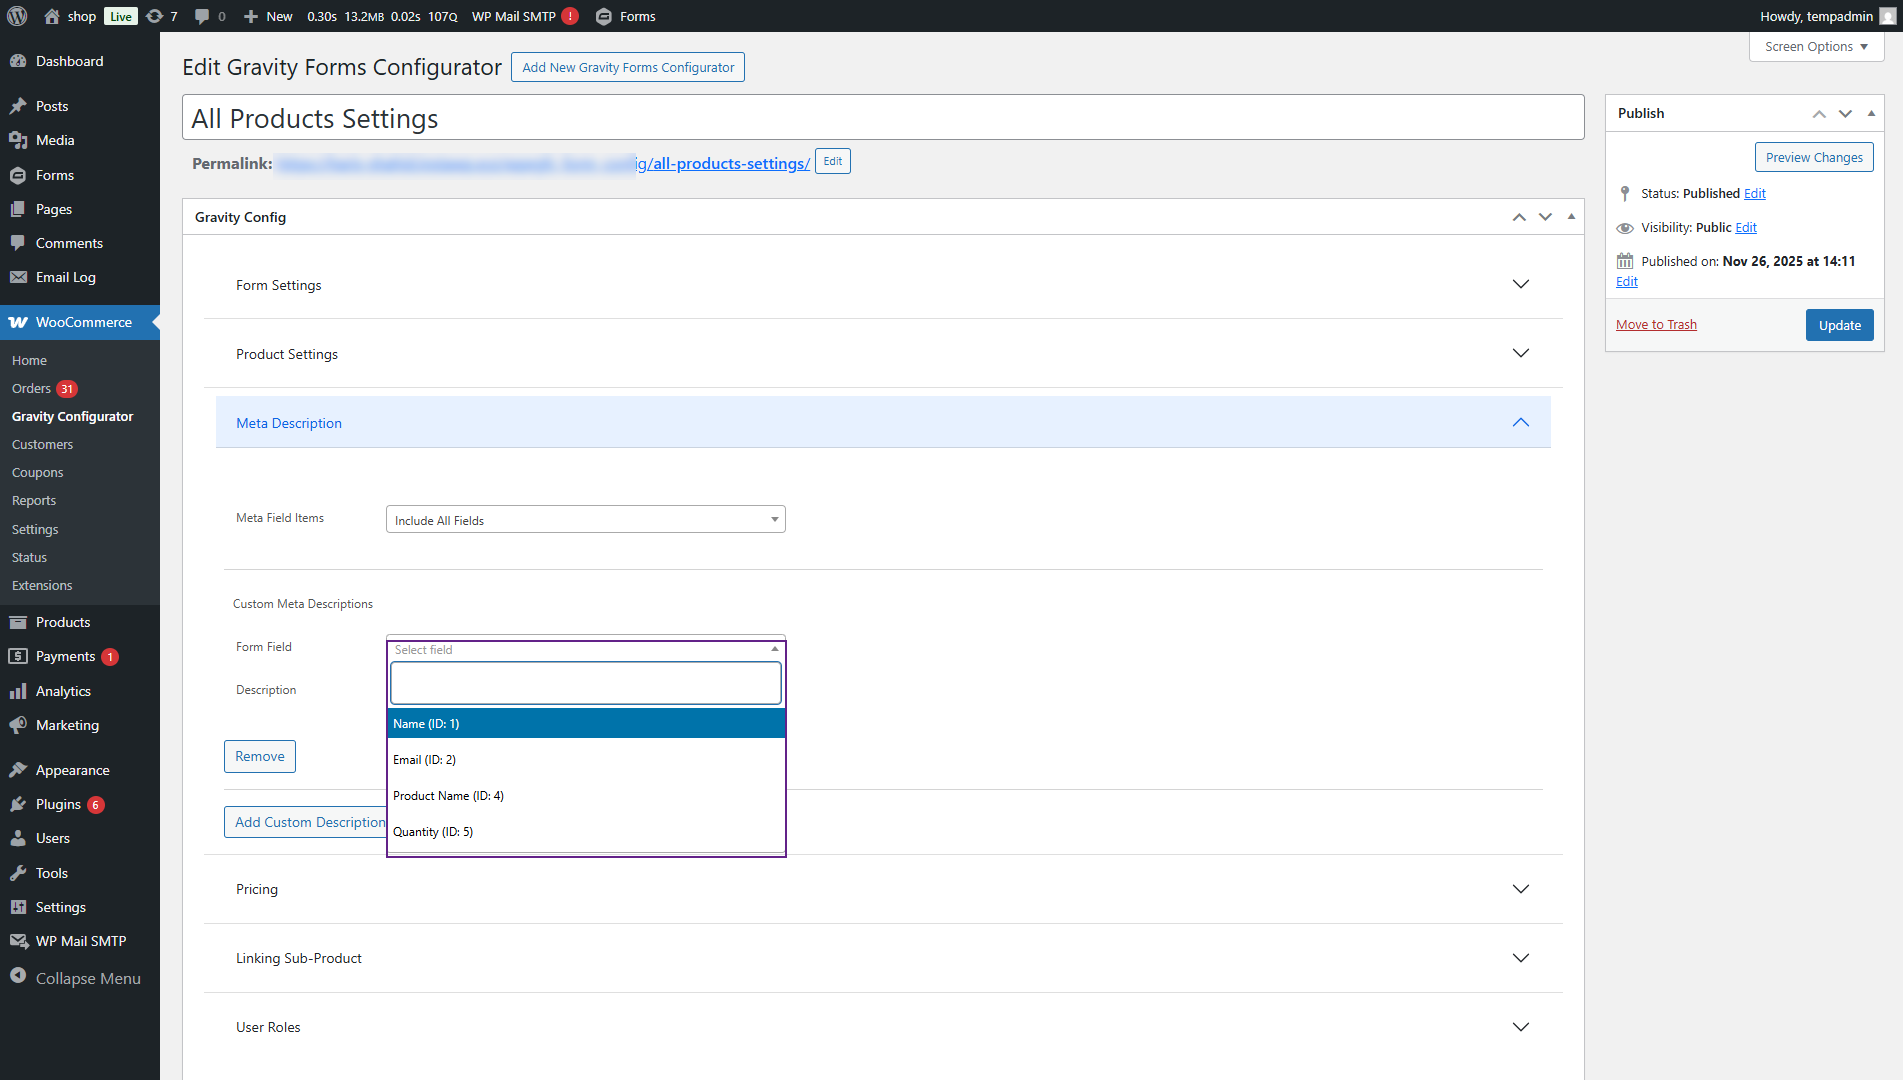
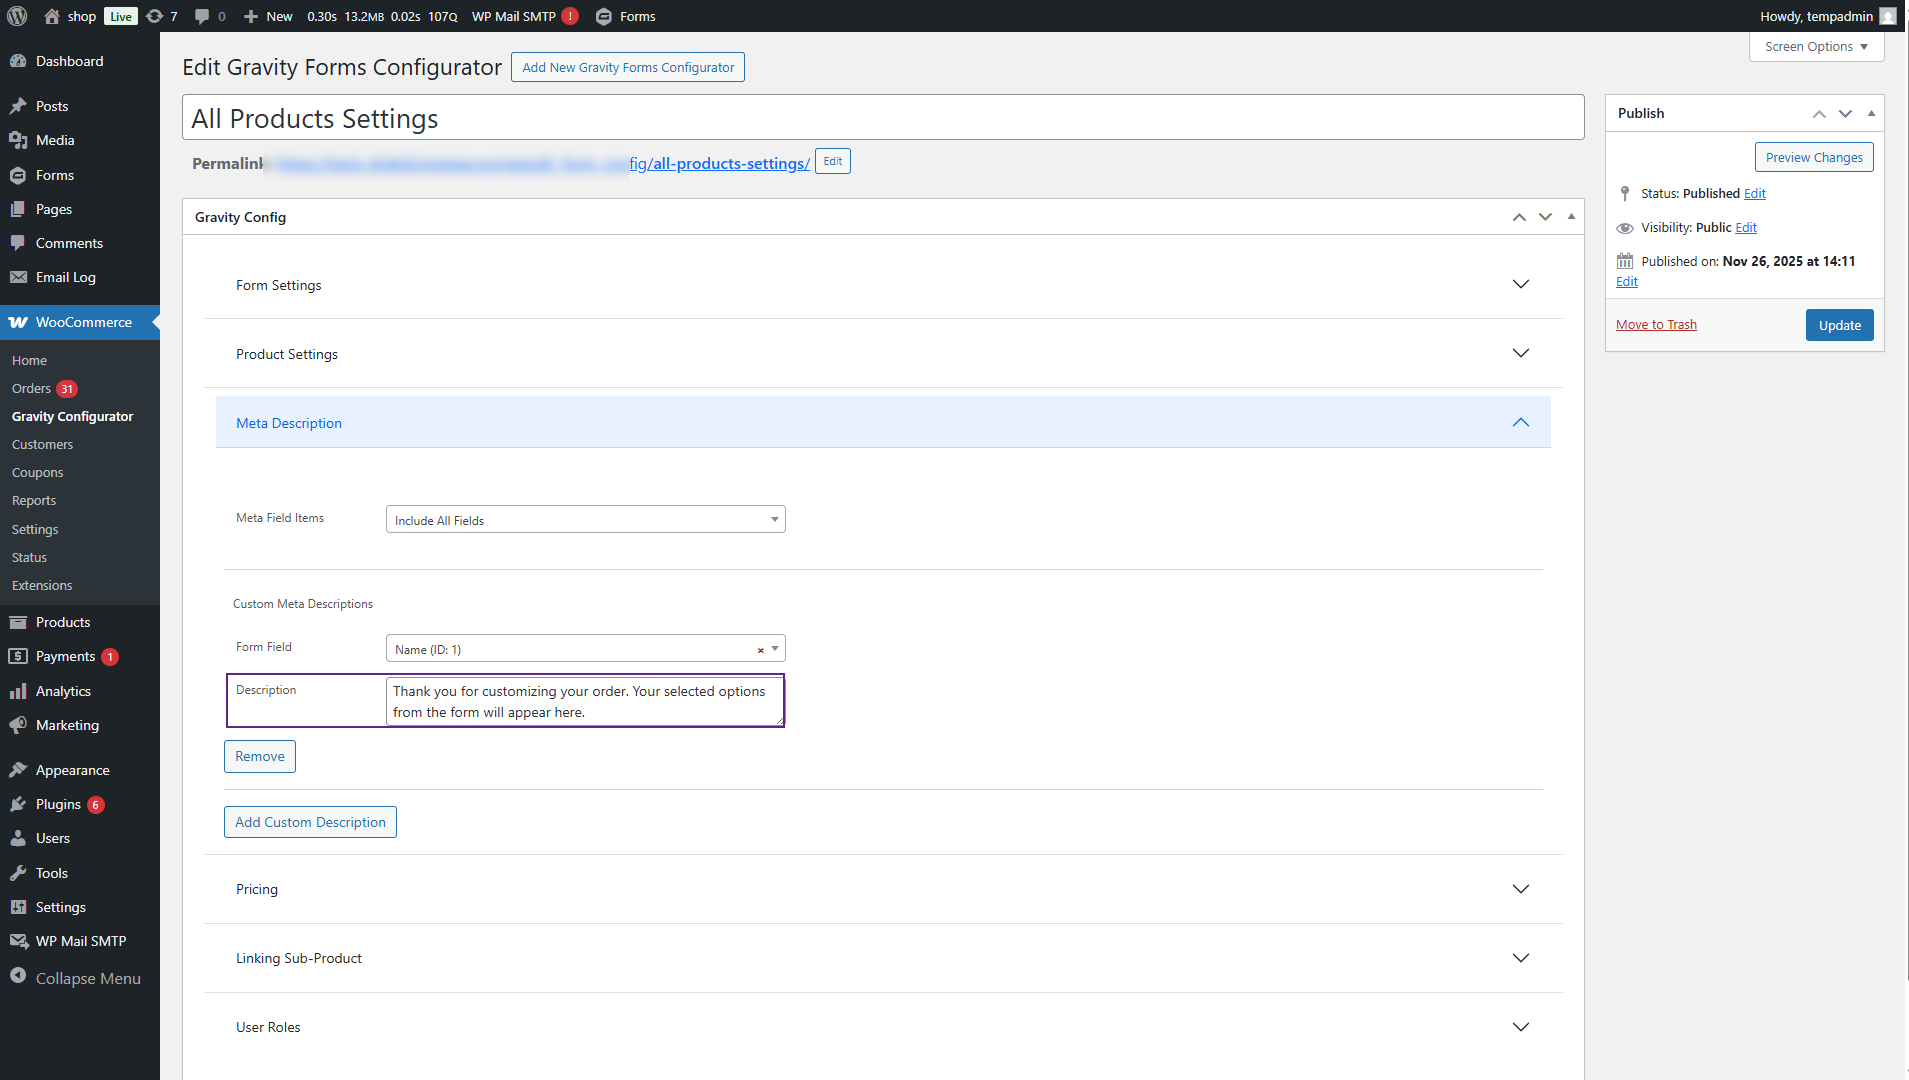
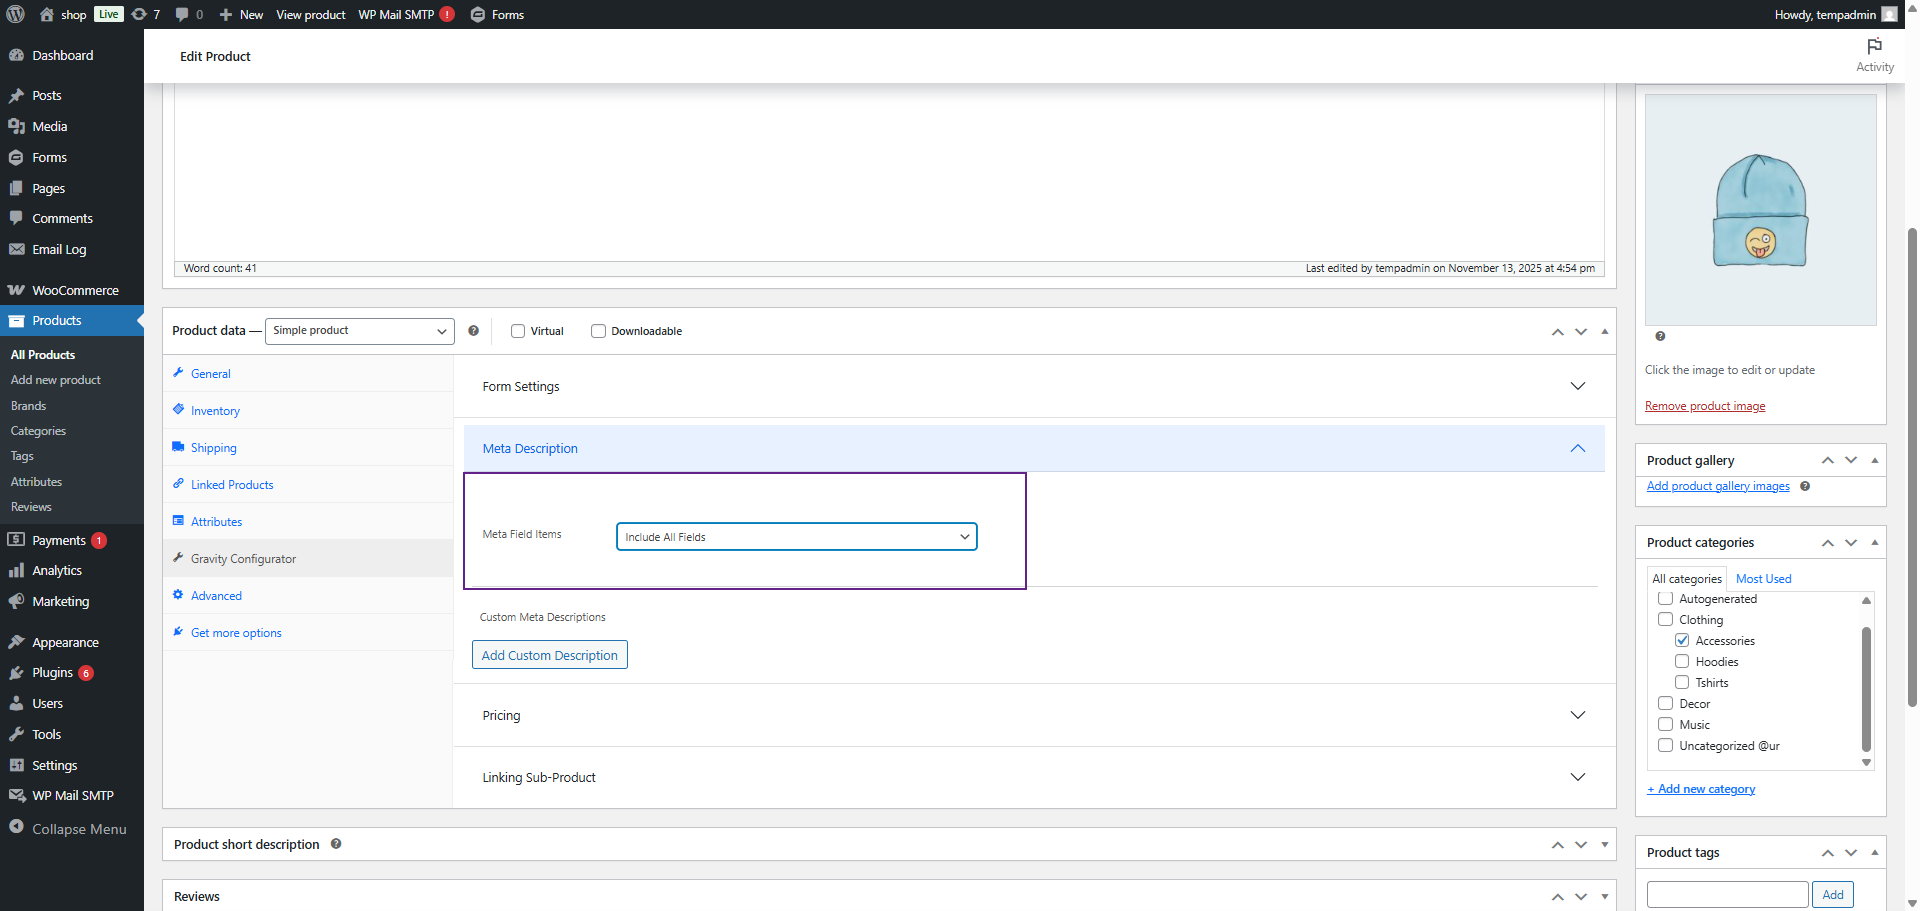
Custom Meta Descriptions
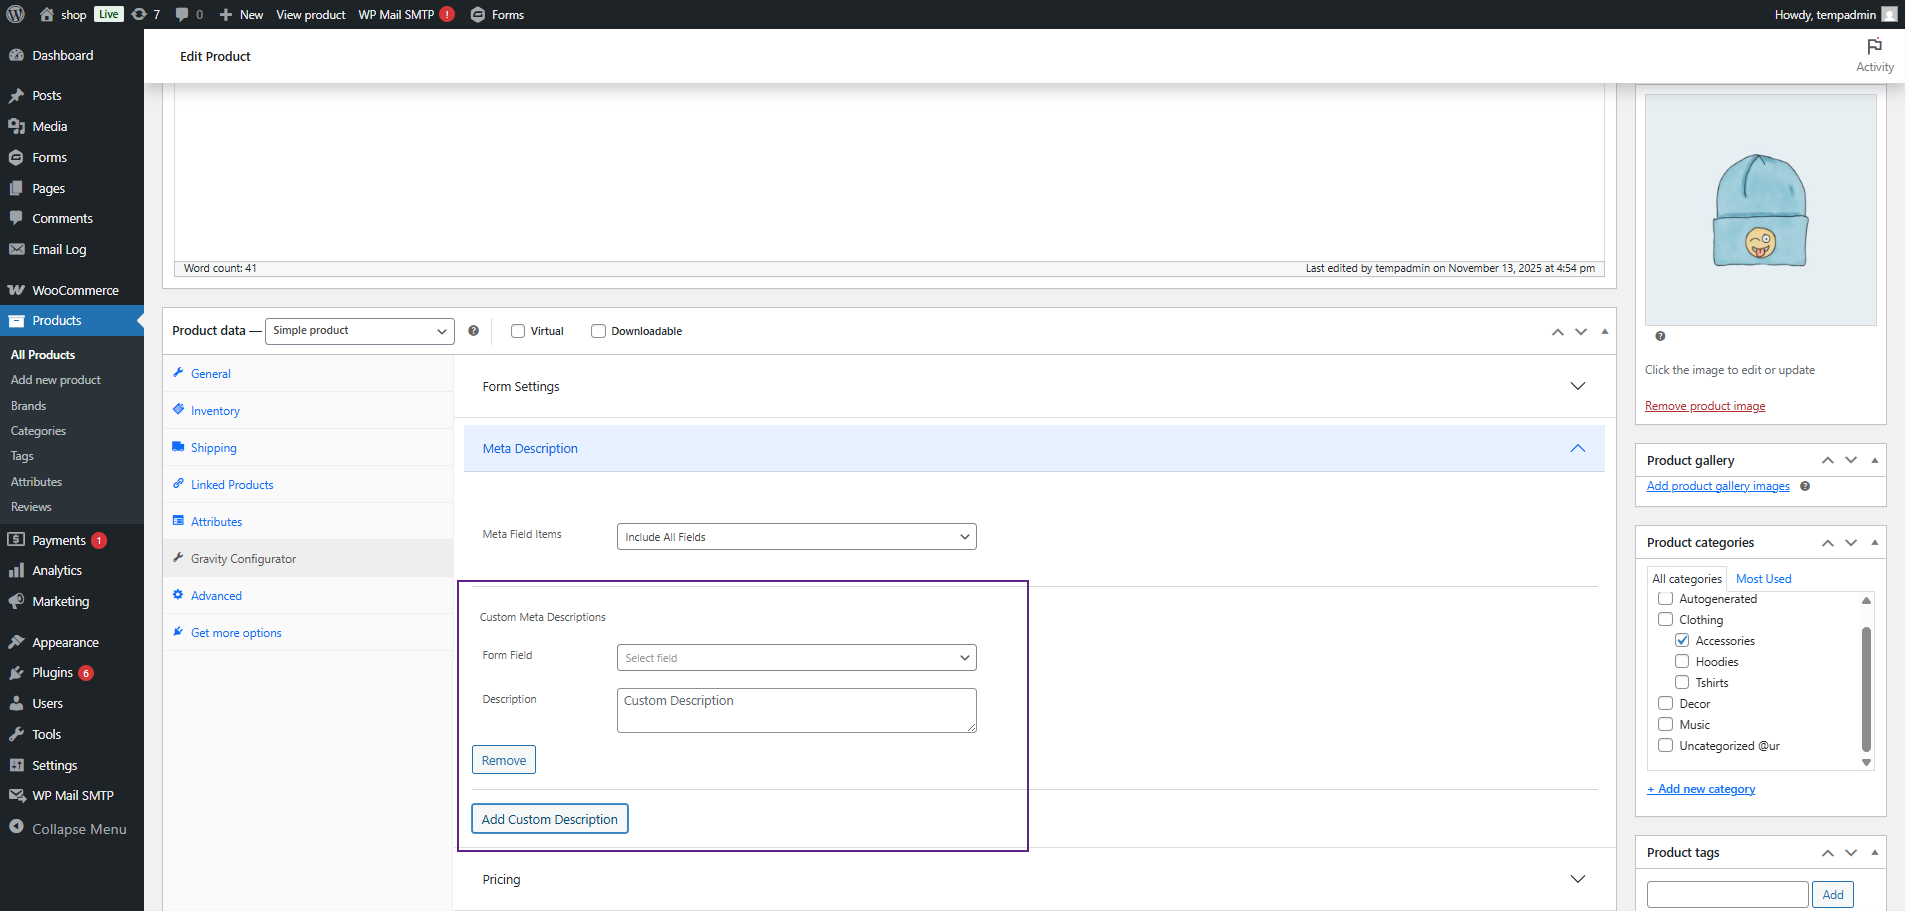
- Now, click on the Custom Meta Description button to switch to the custom configuration mode.
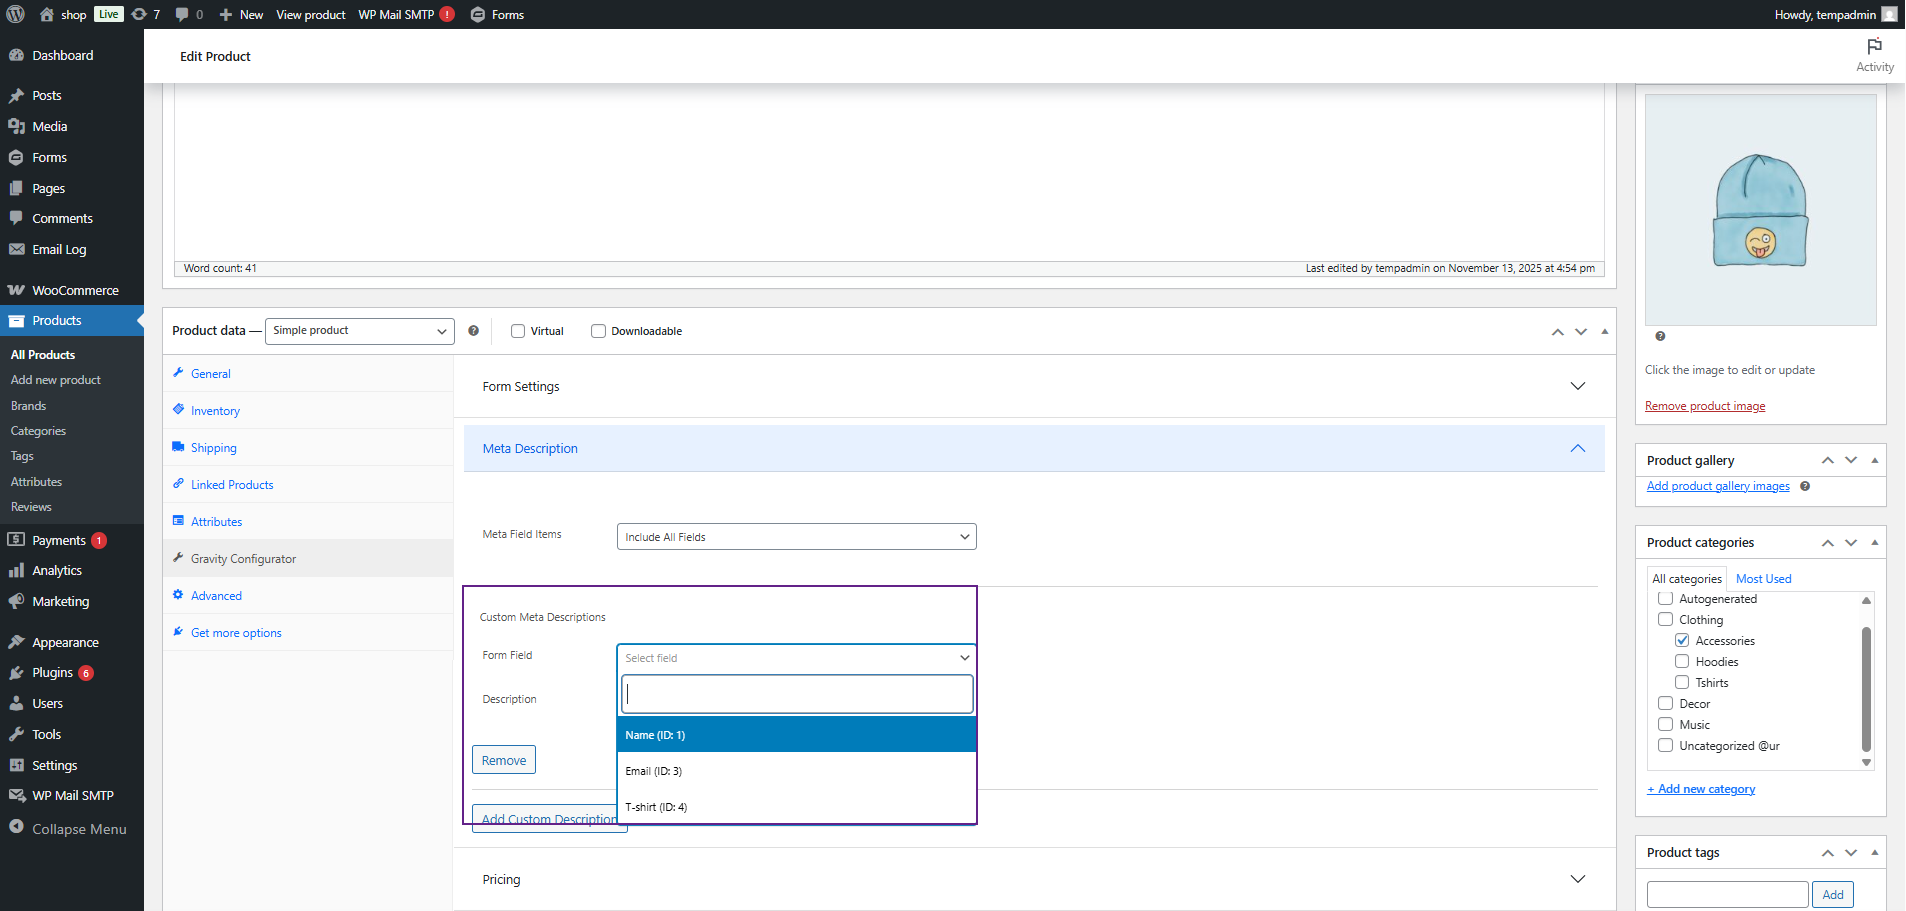
- In this mode, a field named Form Field will appear. This dropdown lists all the available fields from your selected Gravity Form.
- Select your desired Form Field from the dropdown.
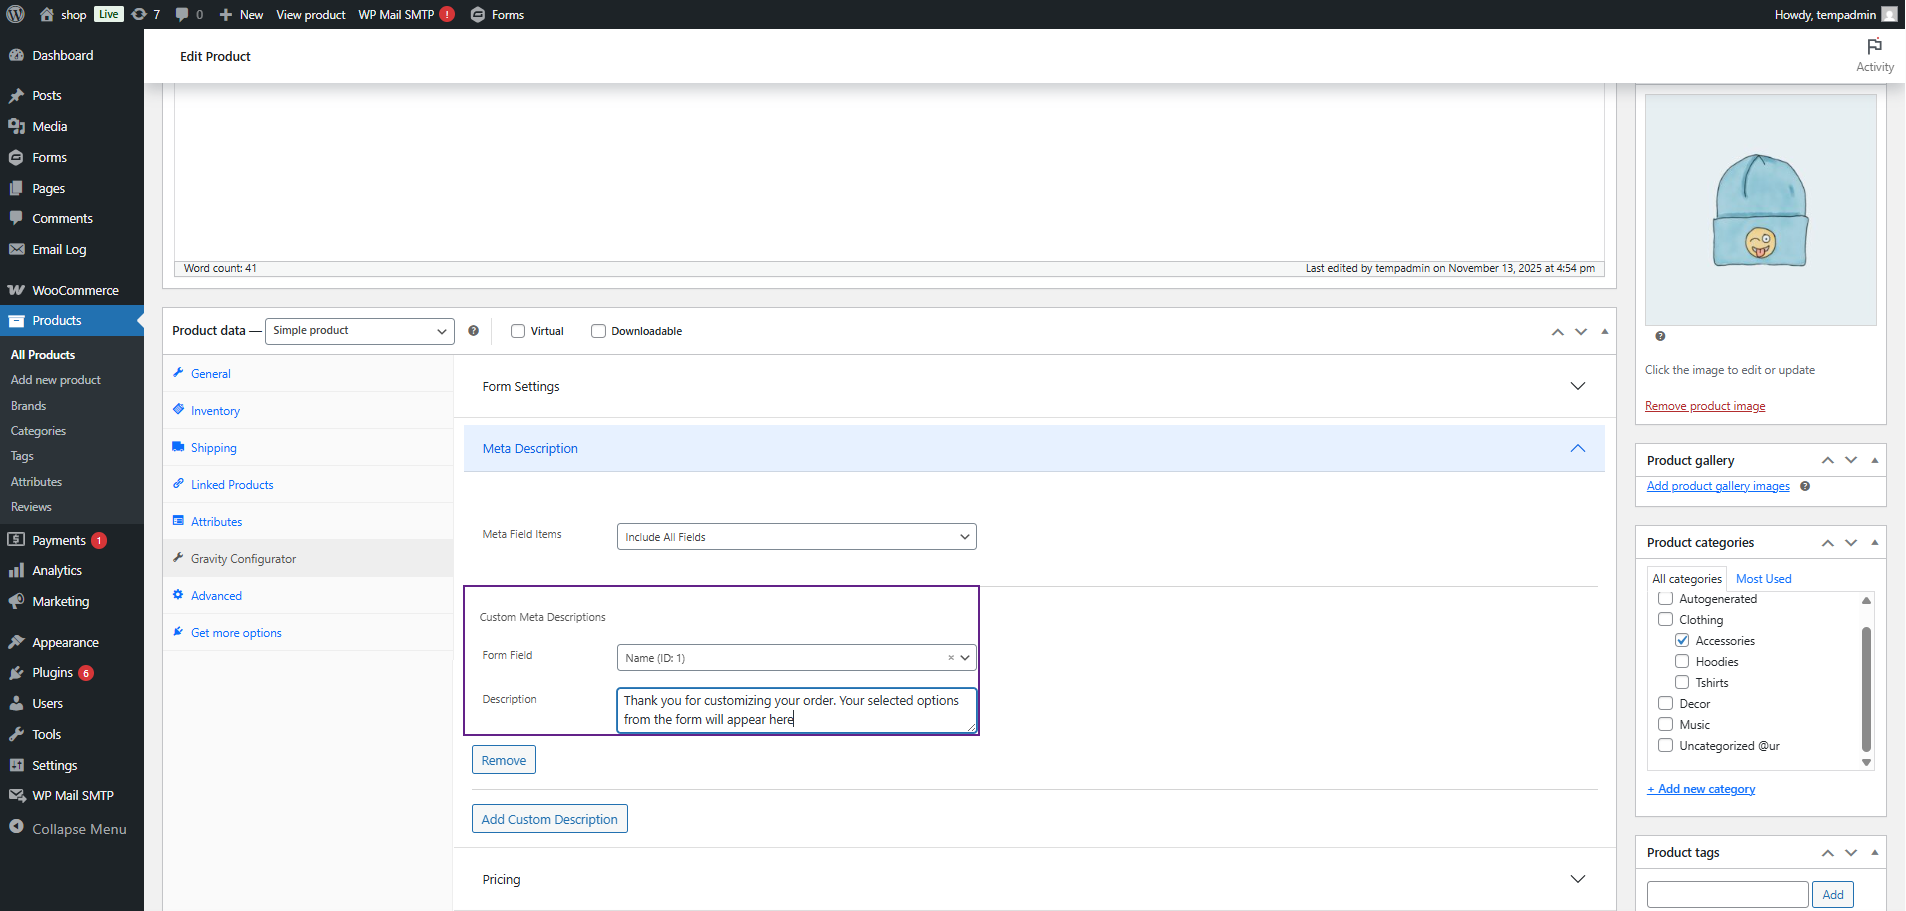
- Now, in the Description box, enter any custom text you want to display.
- You can write any static text or include tags to dynamically pull values from the selected form field.
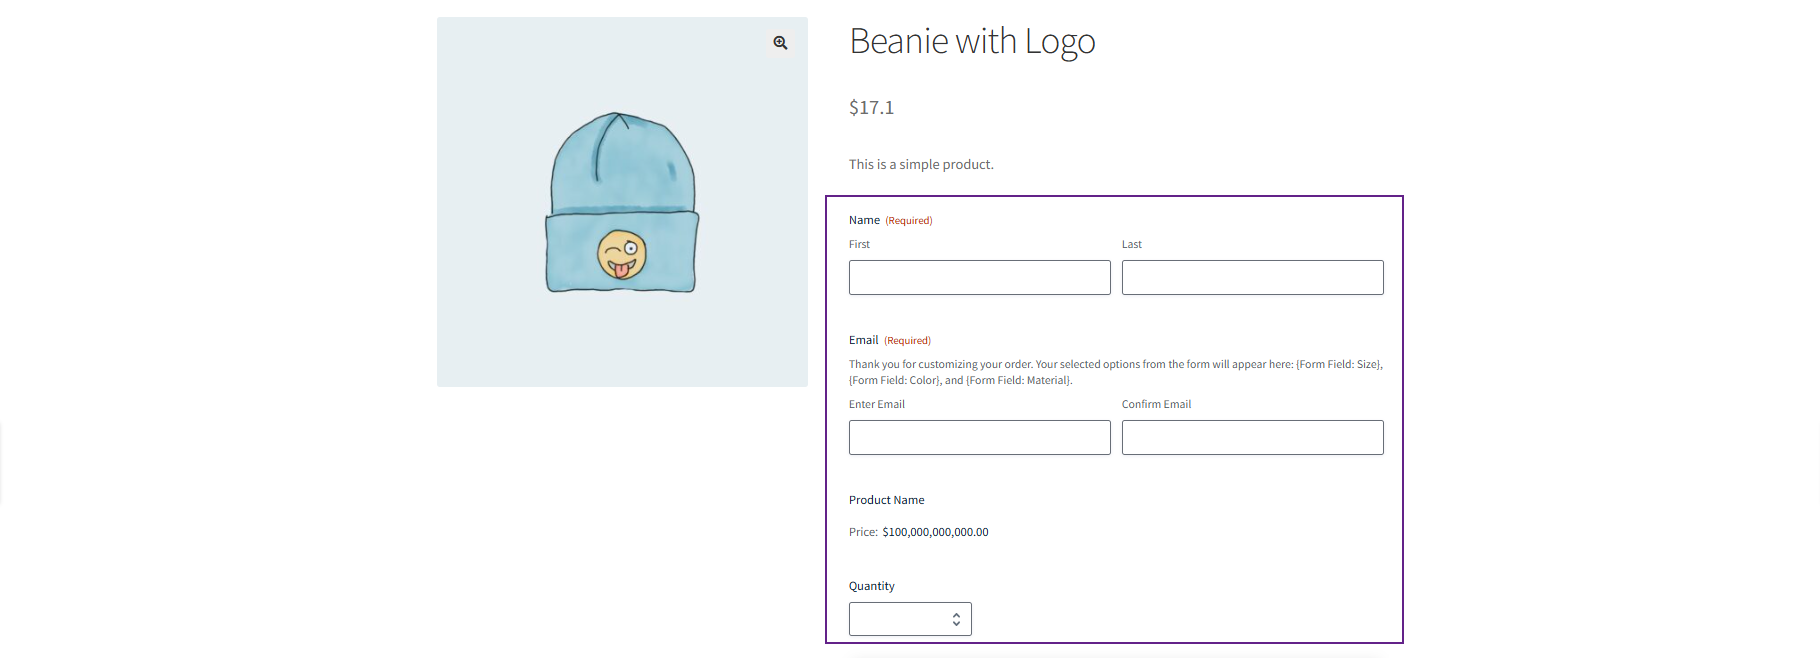
Front-End Impact
- Navigate to the Shop Page.

- Click on any product with Meta Description configured.

You can see the product’s meta details displayed on the product page based on the settings:
- Meta Field Items:
- Include All Fields: Shows all form fields from the selected Gravity Form.
- Include All Fields Except: Shows all fields except the ones excluded.
- Exclude All Fields Except: Shows only the selected fields.
Custom Meta Descriptions:
- Shows the custom text entered by the admin.
- Can dynamically display values from the selected form field.

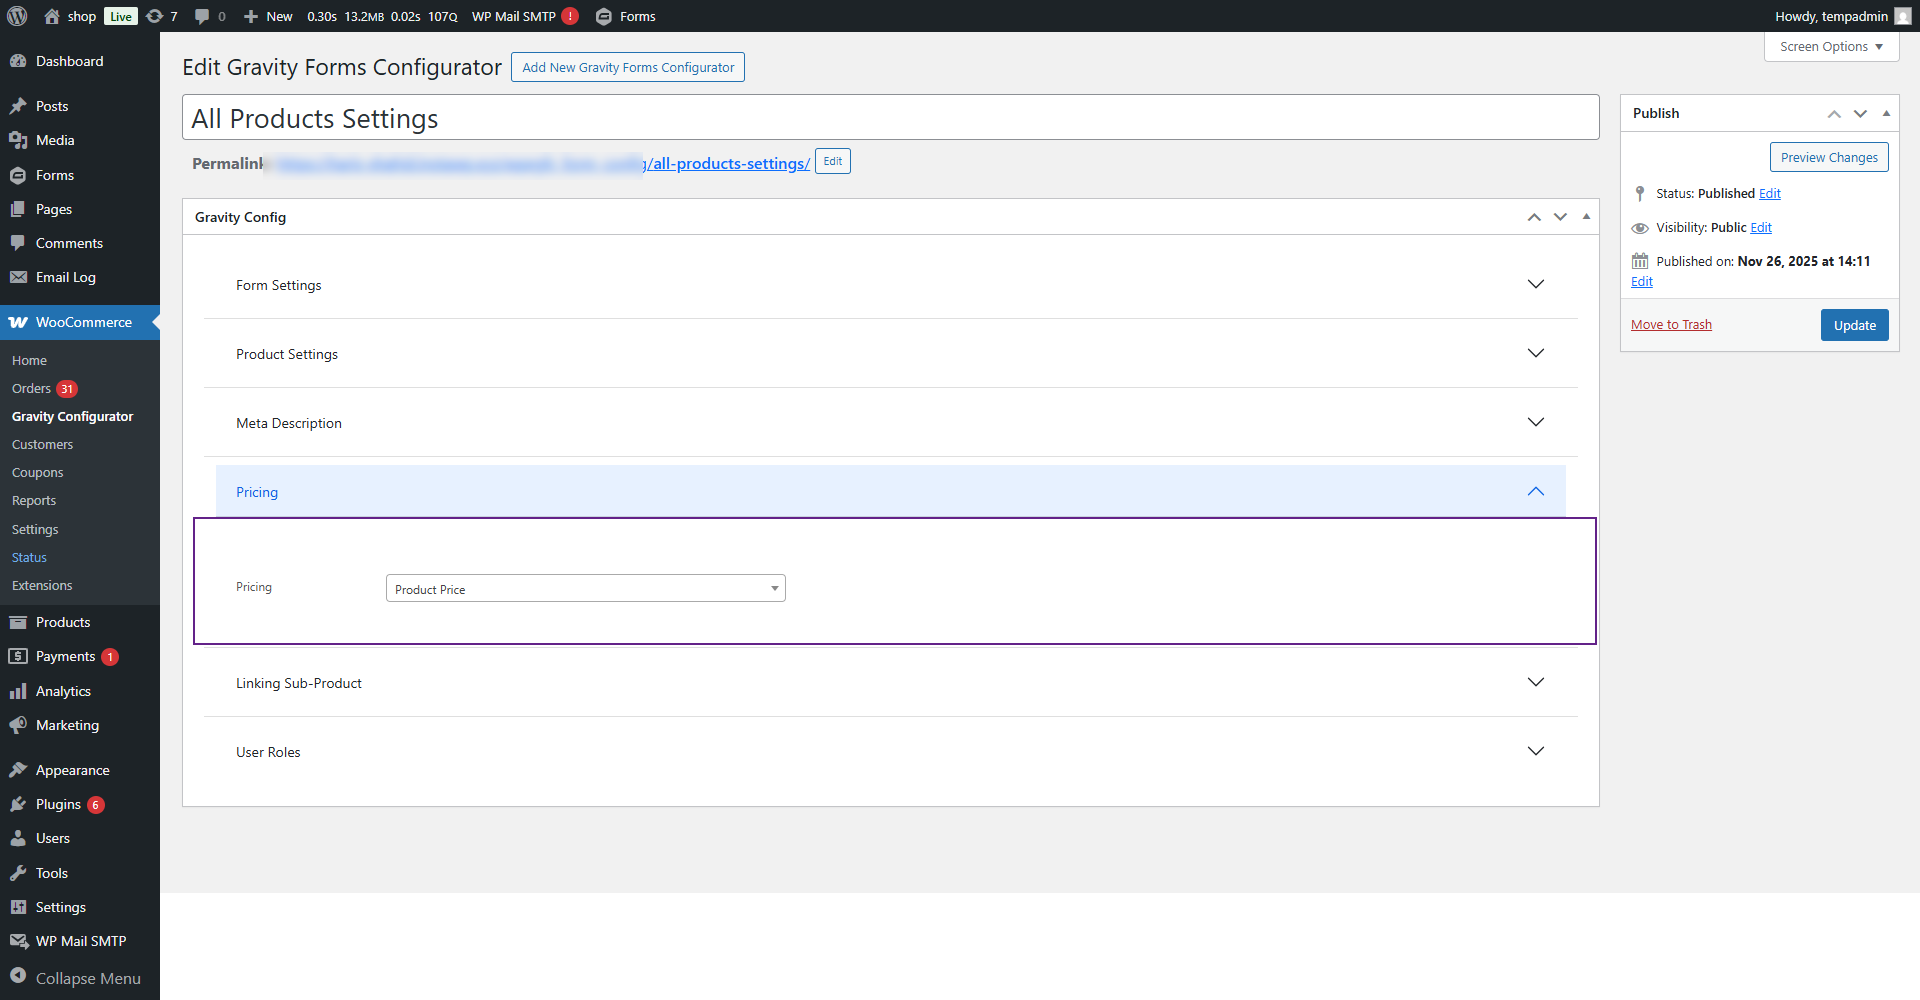
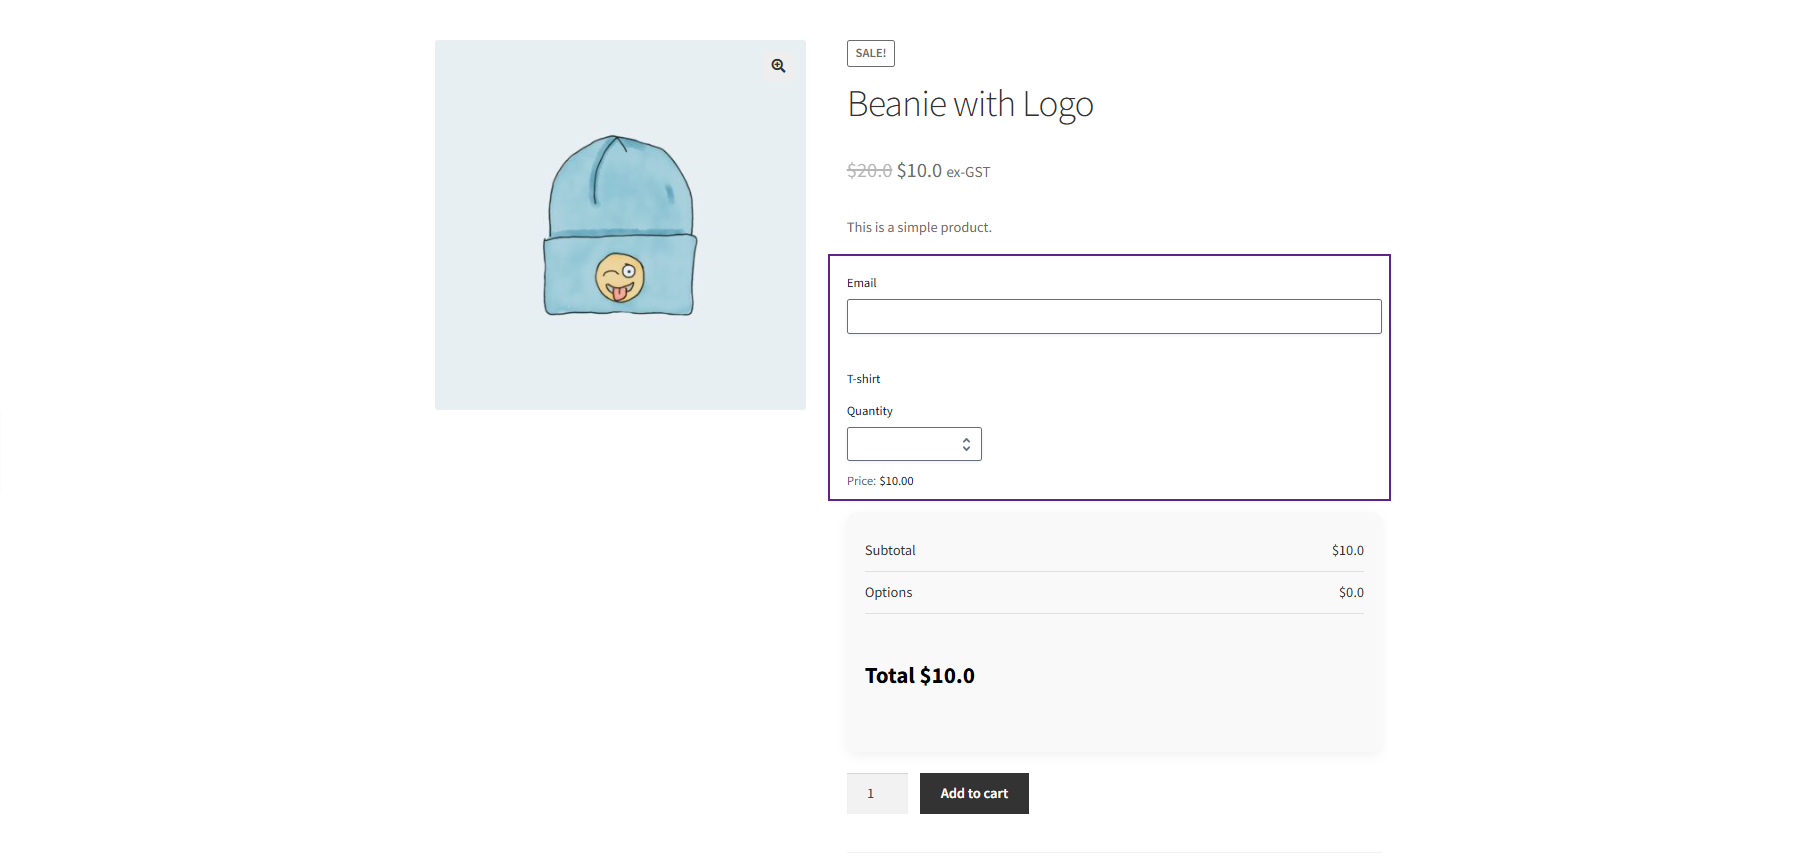
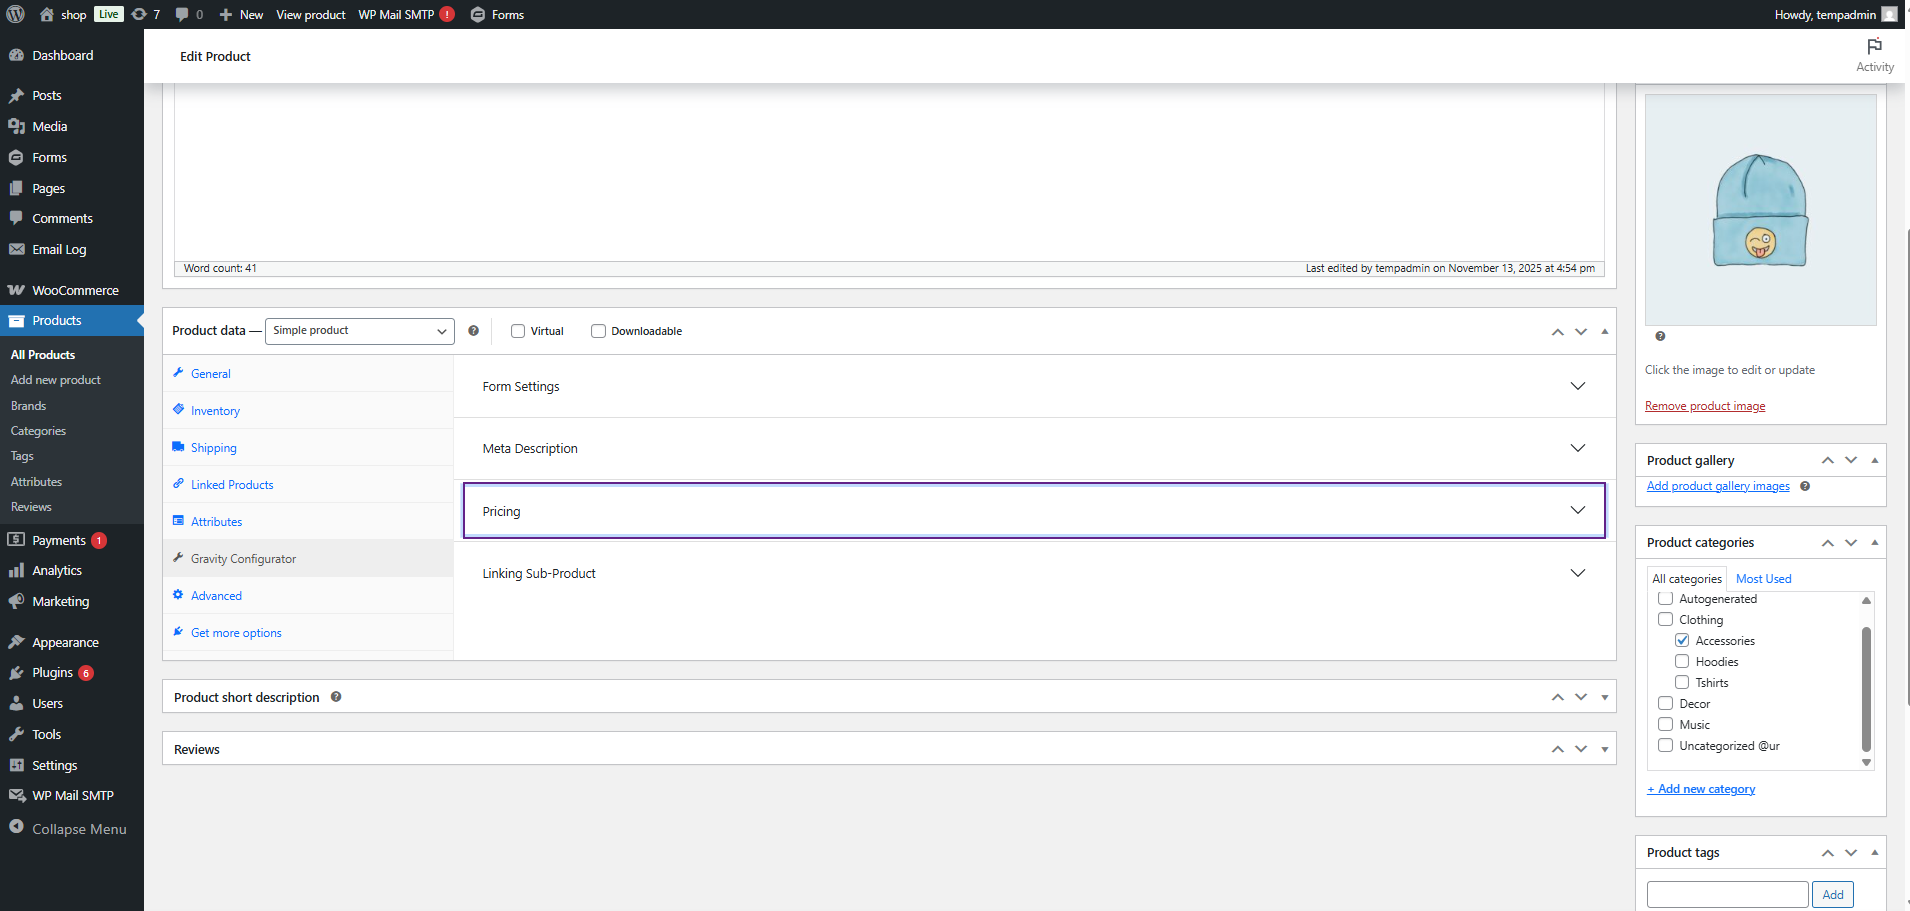
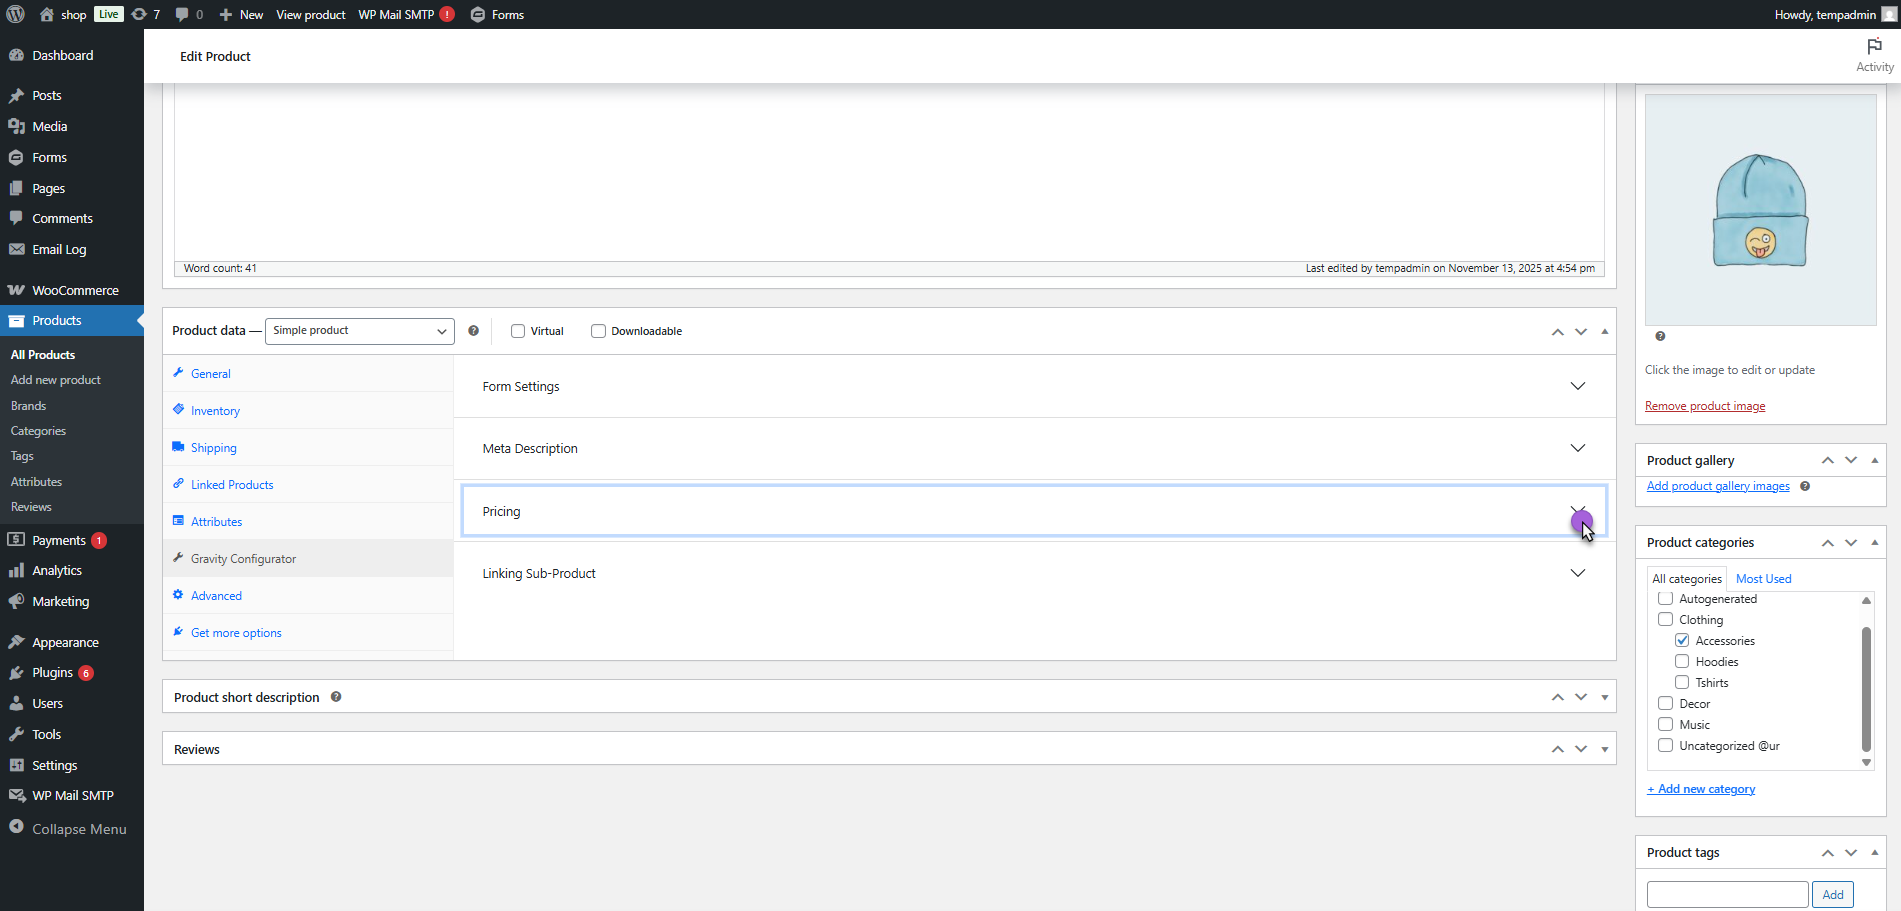
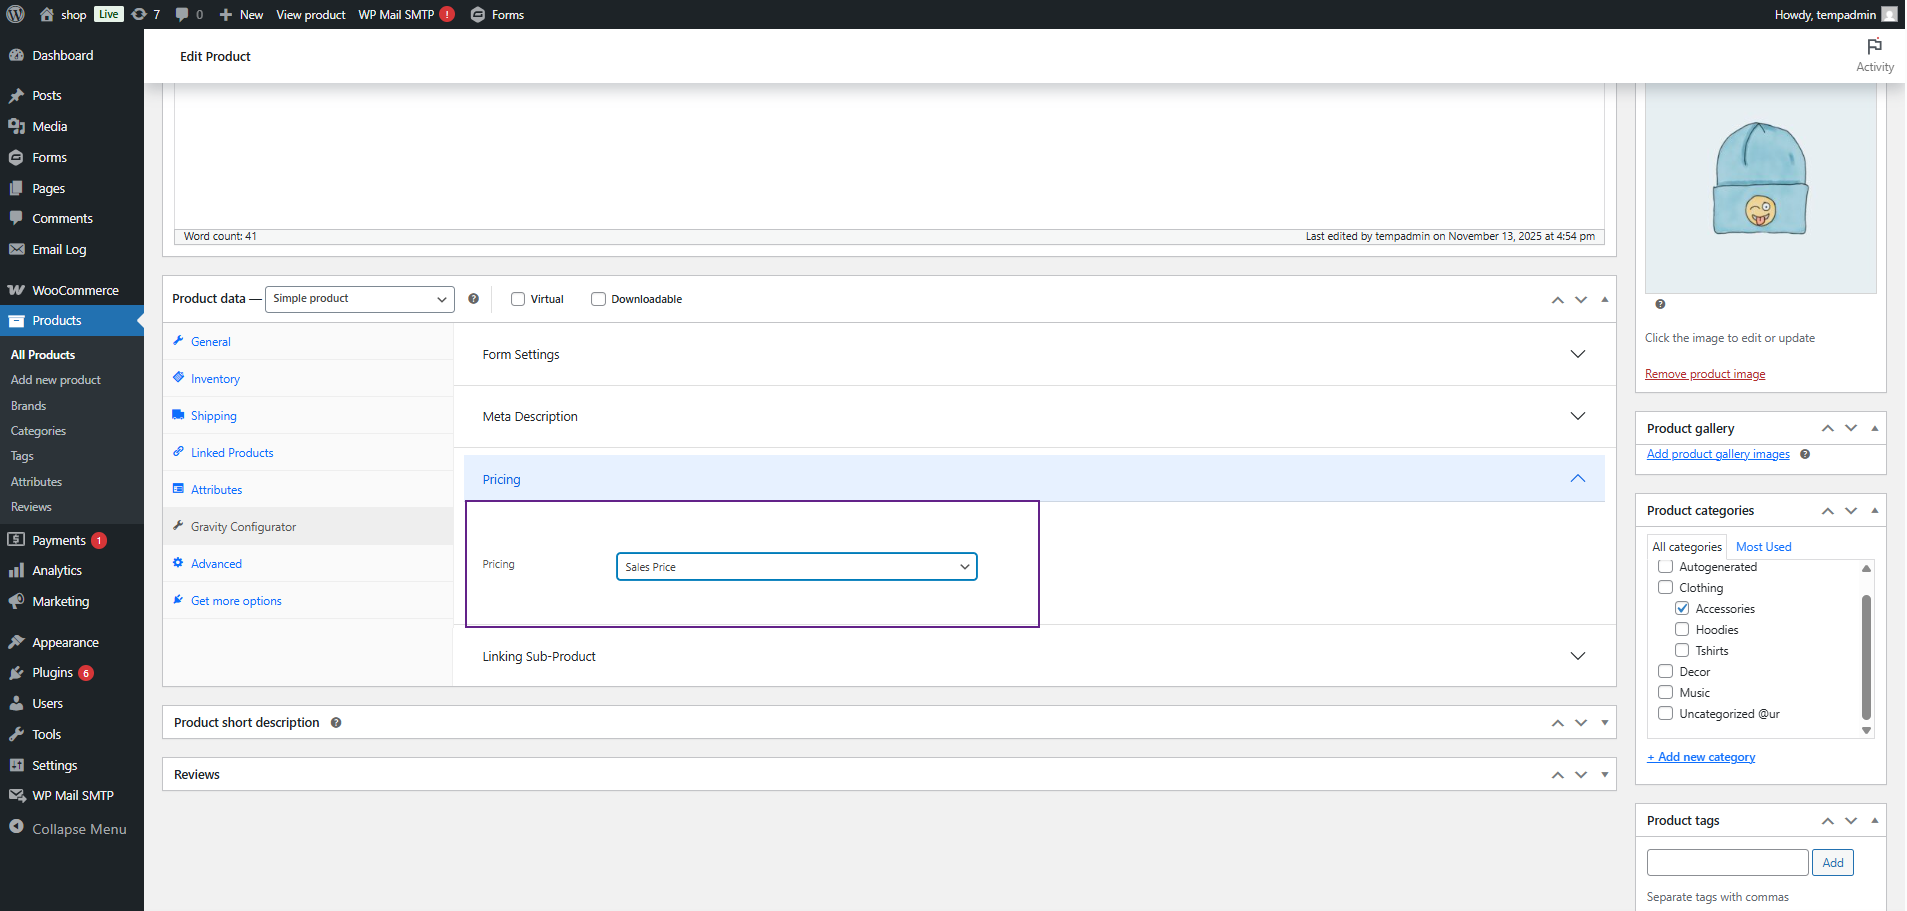
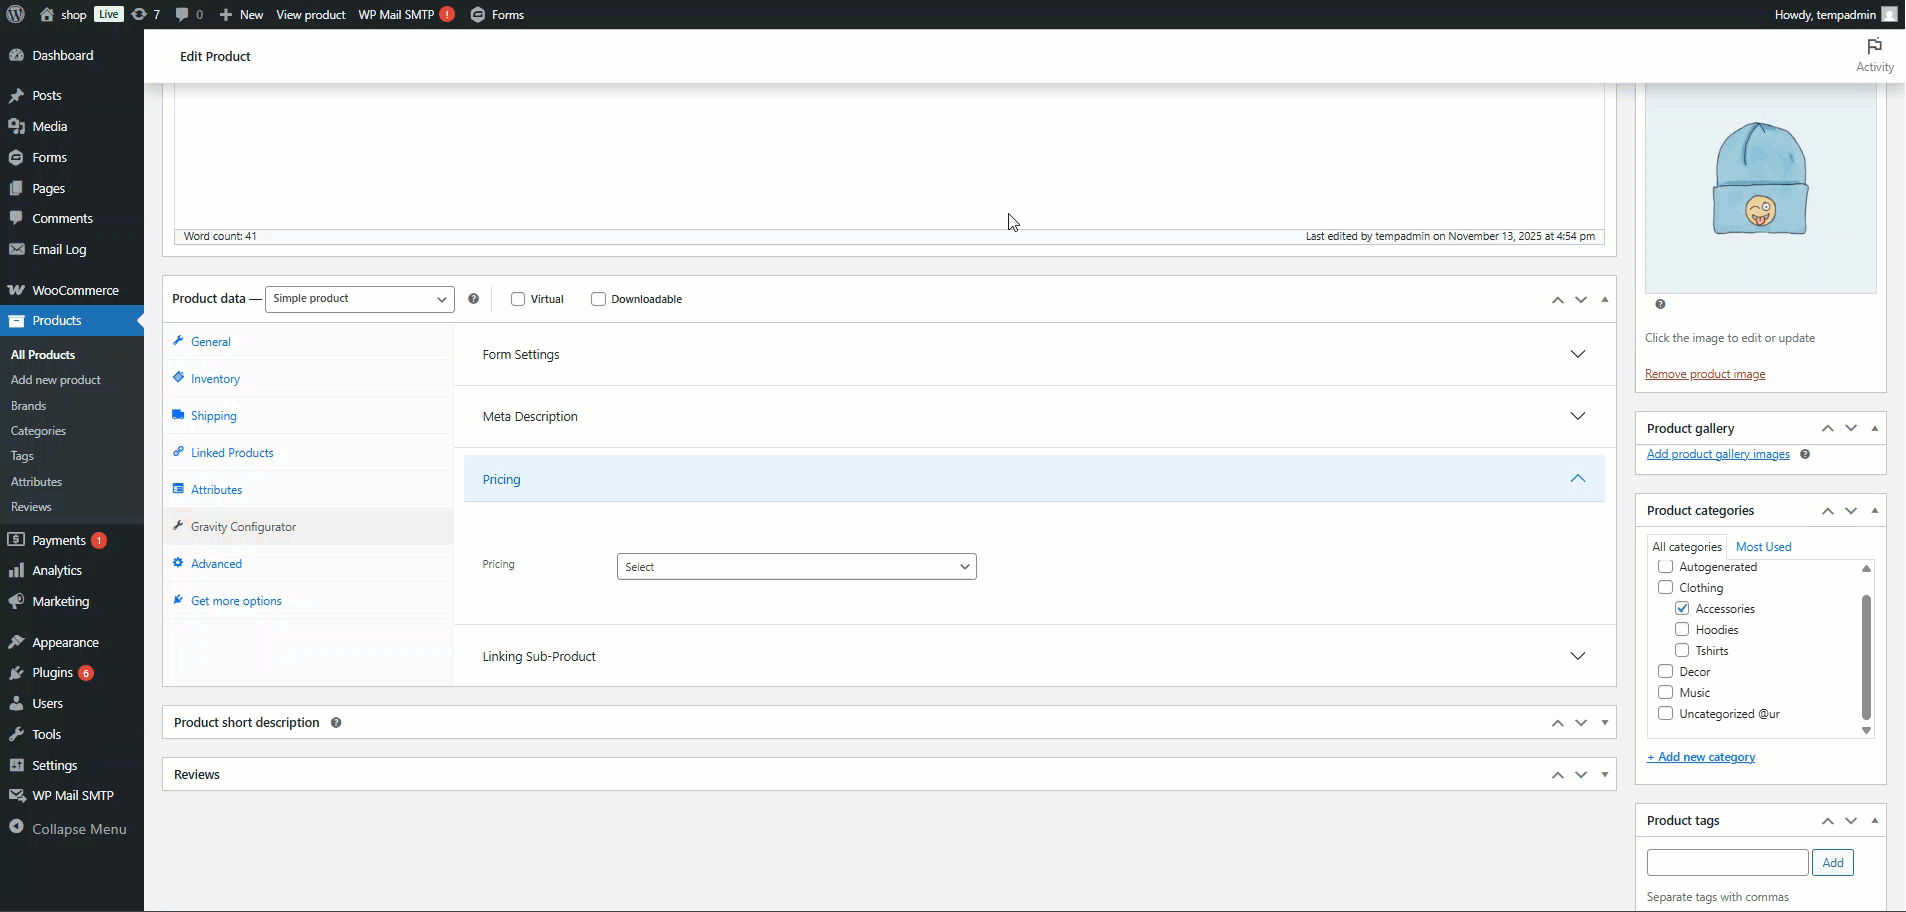
Pricing
↑ Back to top- Navigate to the Pricing tab.

- Click on Pricing dropdown button
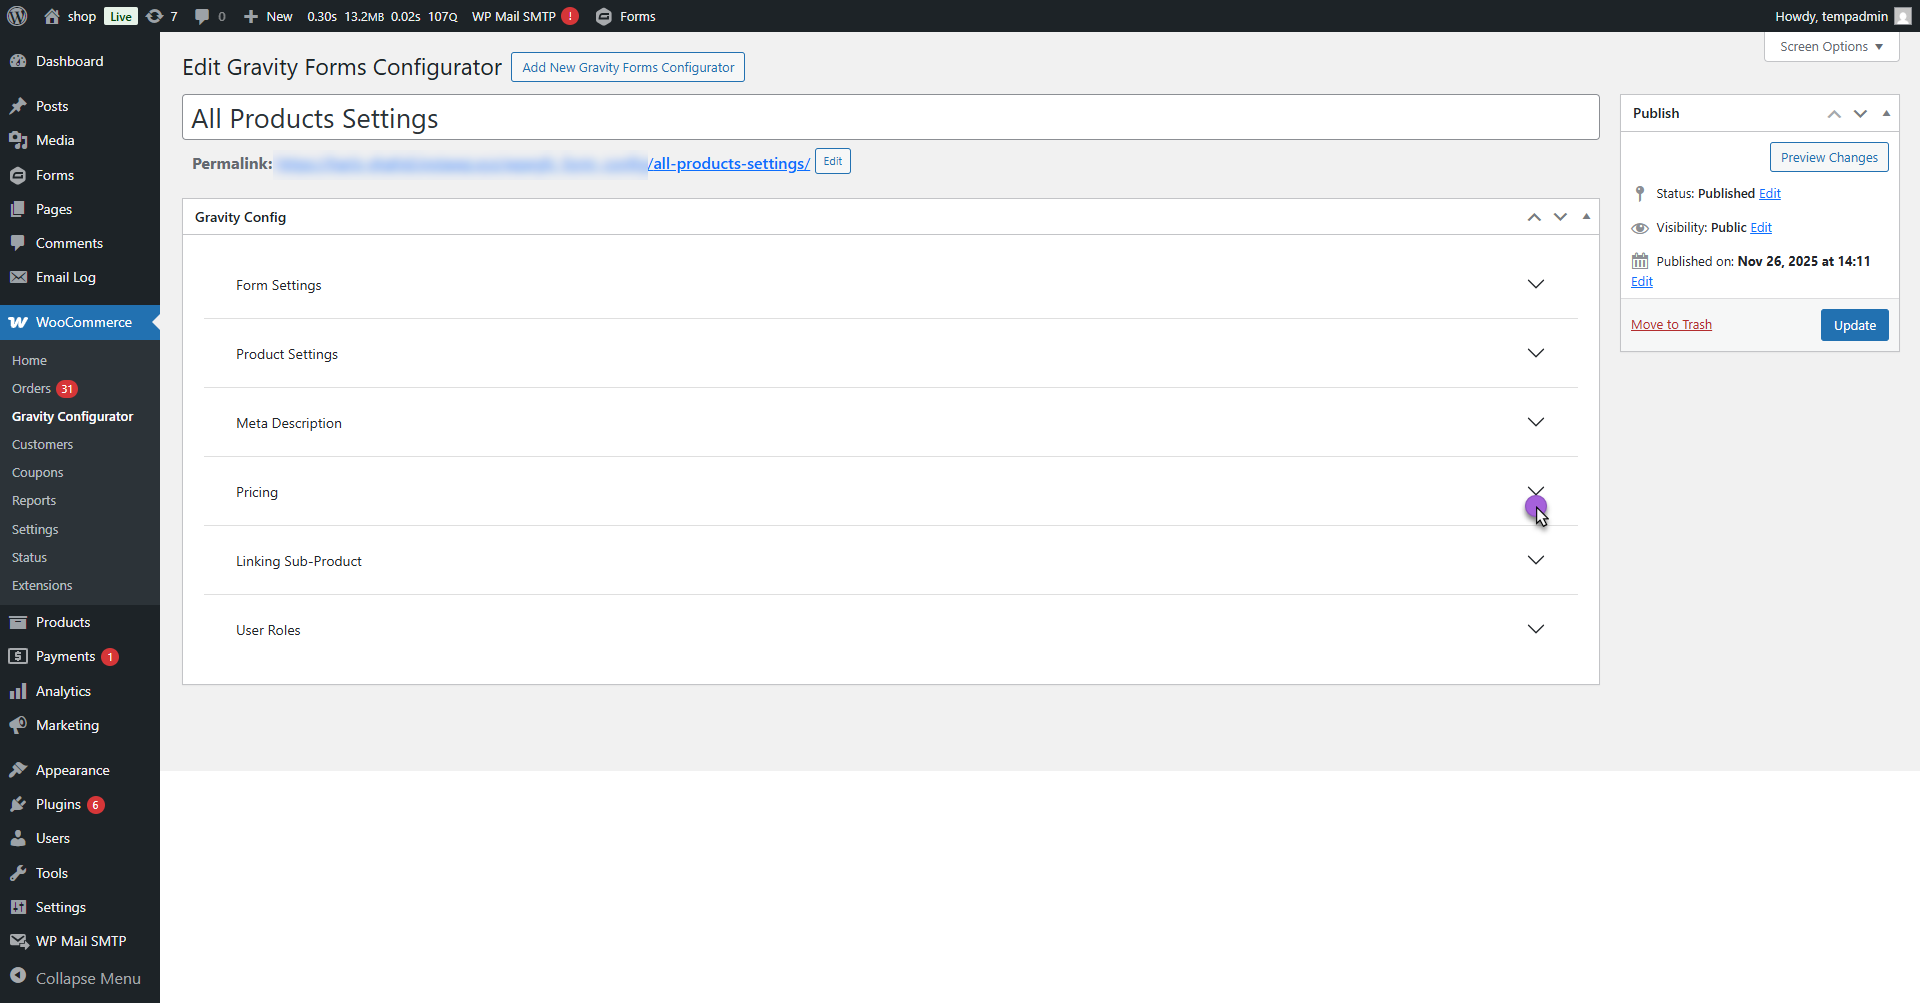
- This section allows the admin to select which product price should appear on the frontend for the customer.
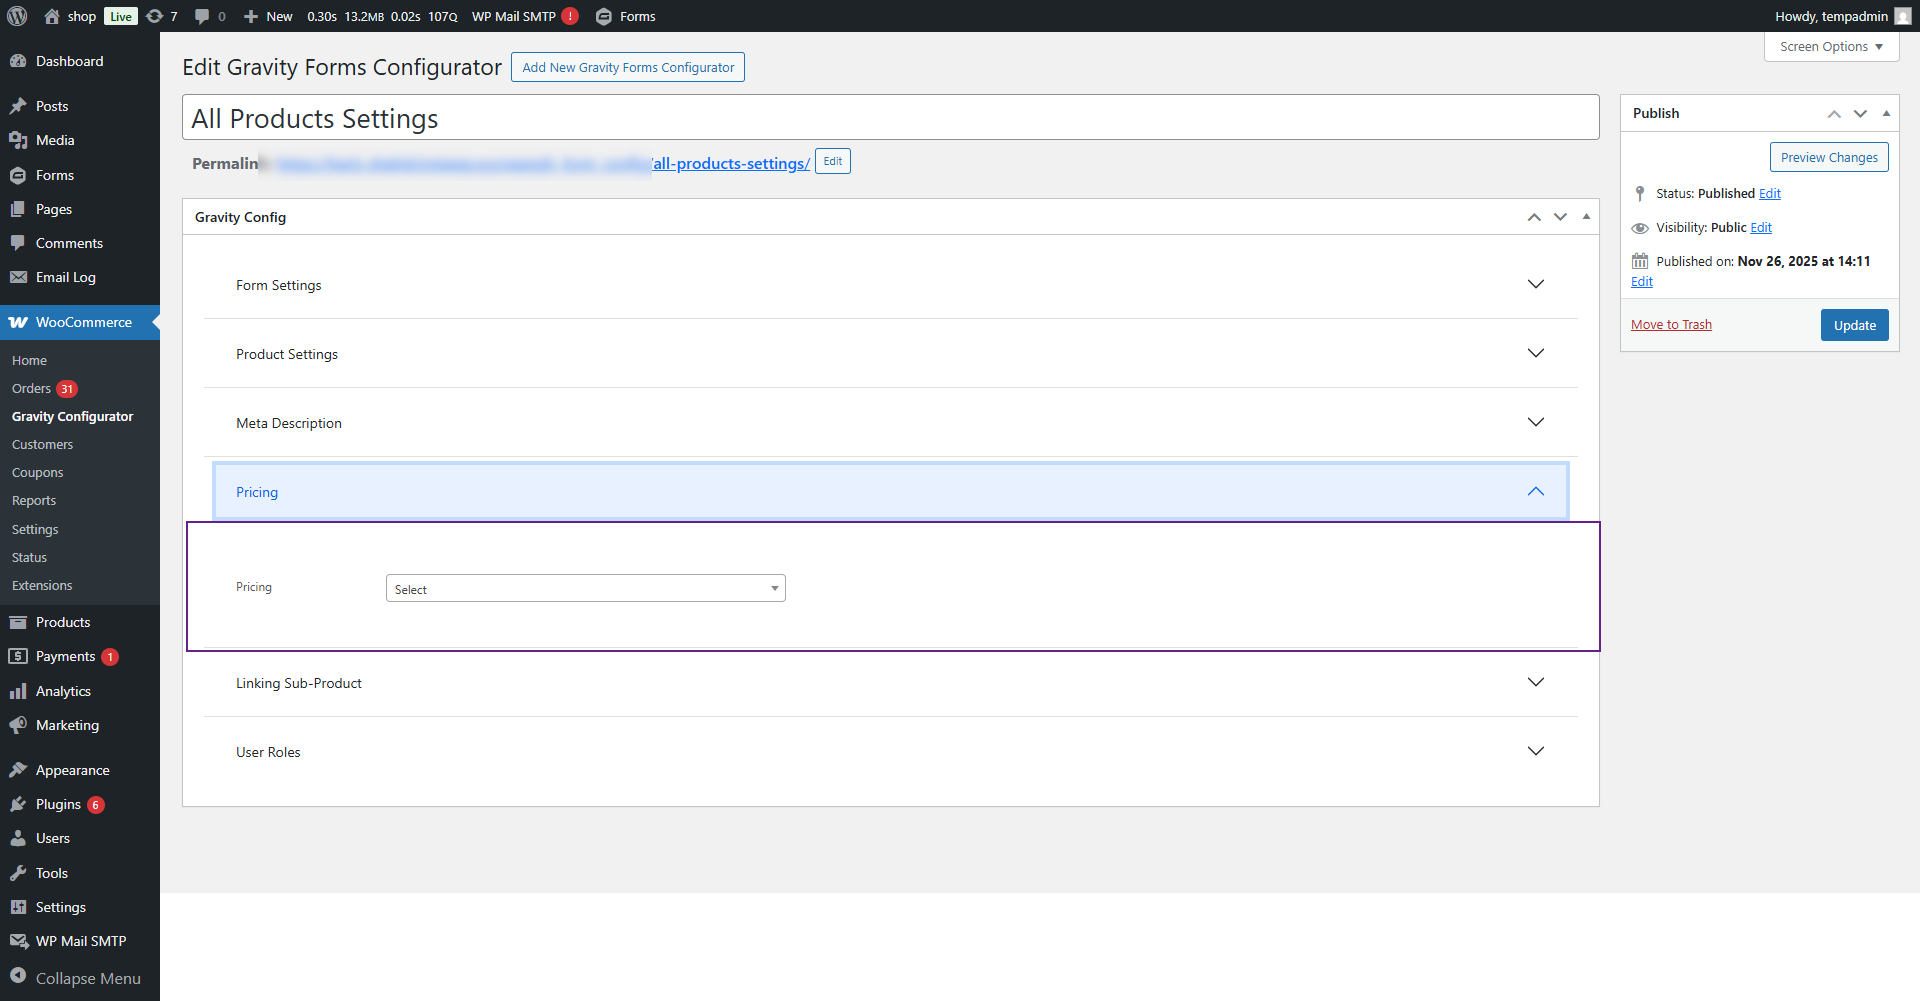
- From the Display Pricing dropdown, choose your preferred pricing option.
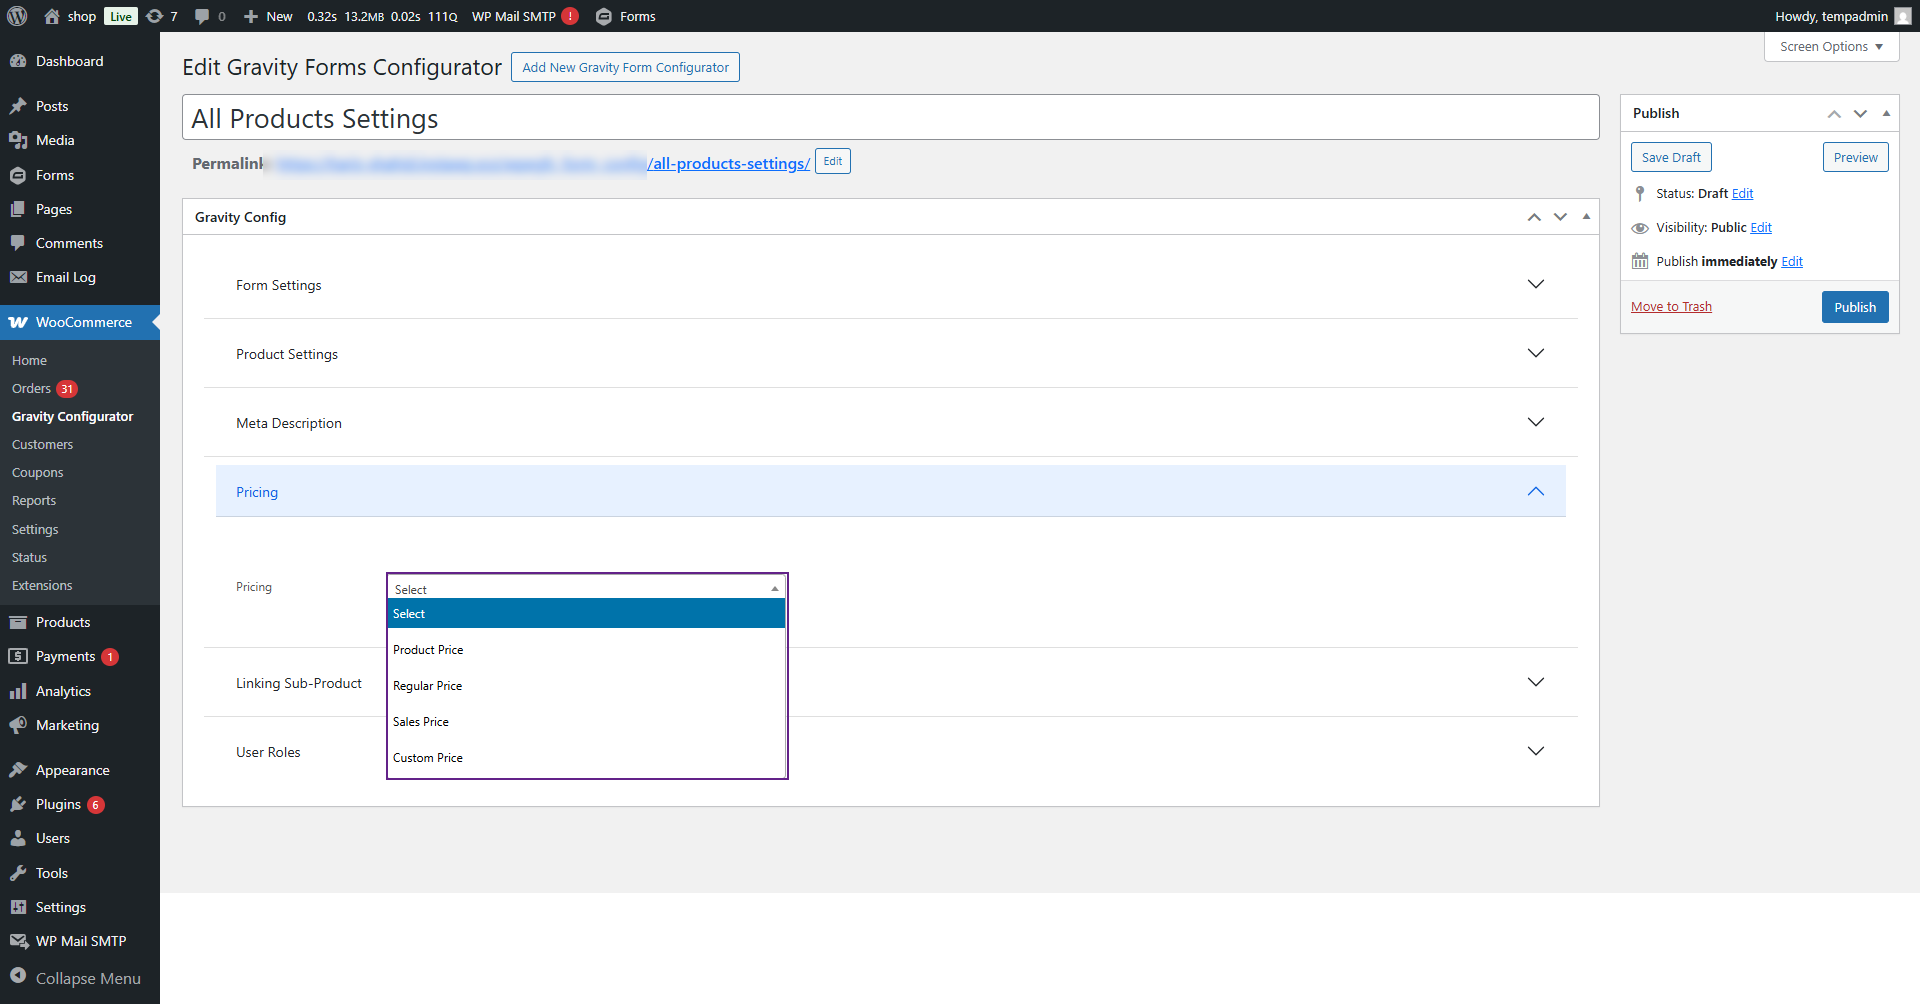
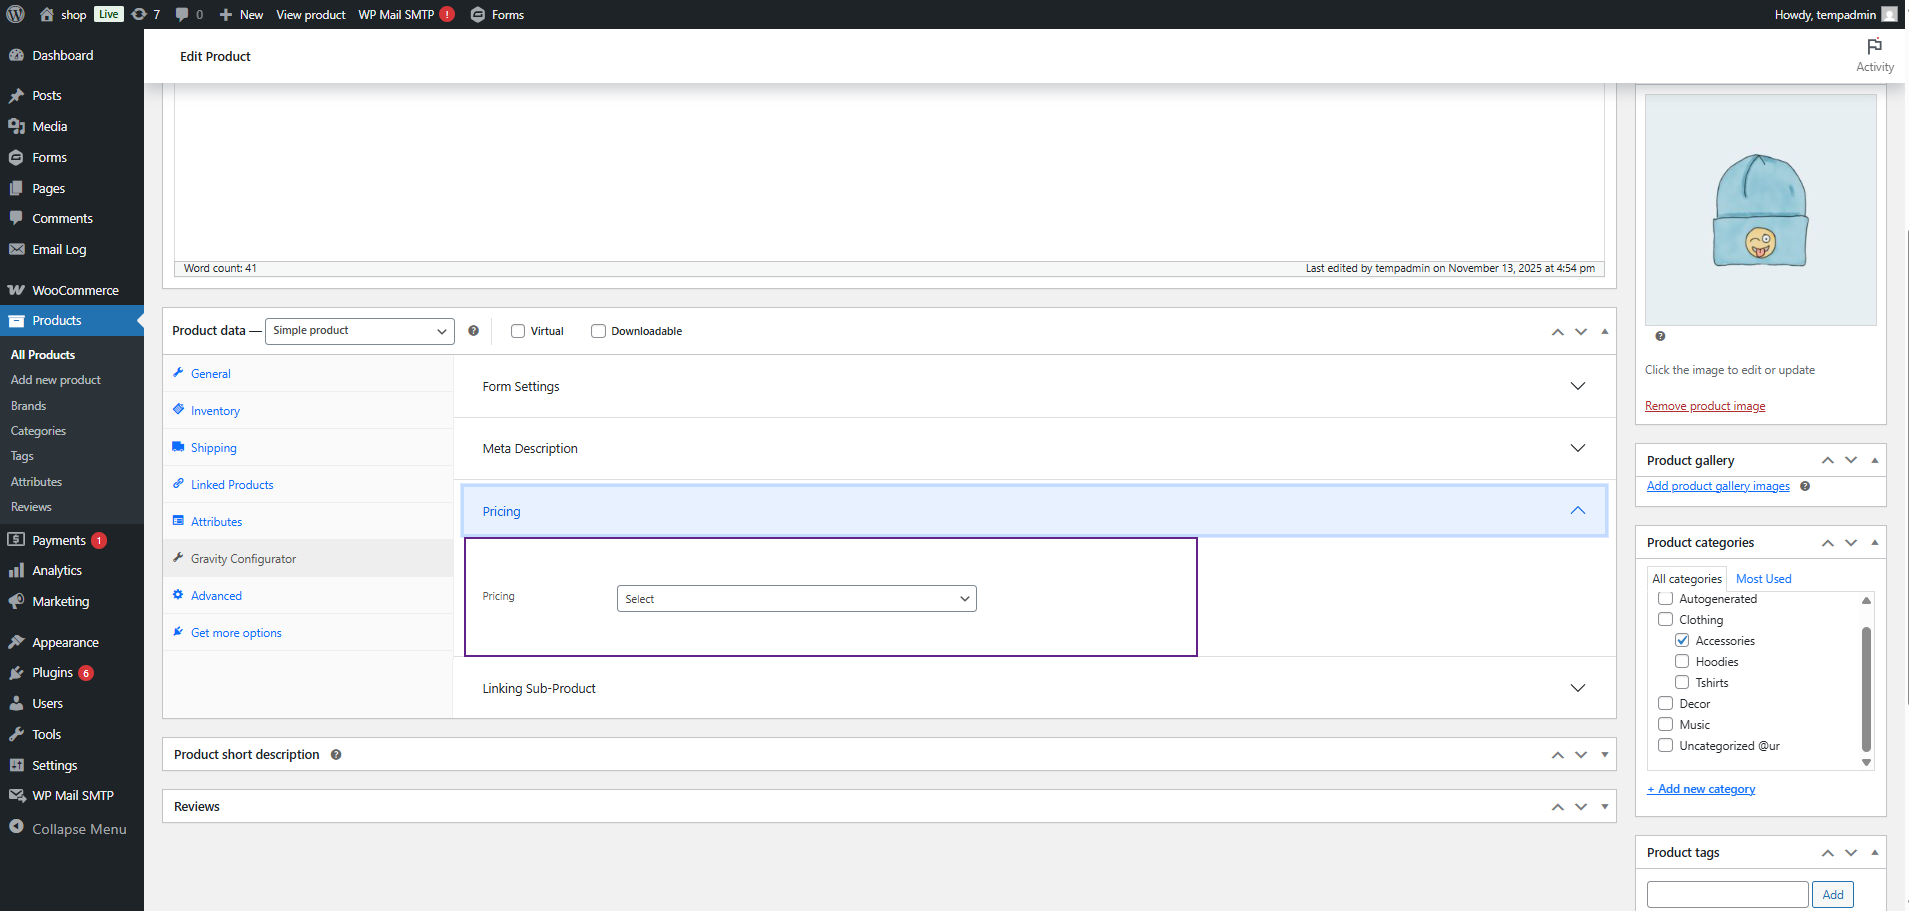
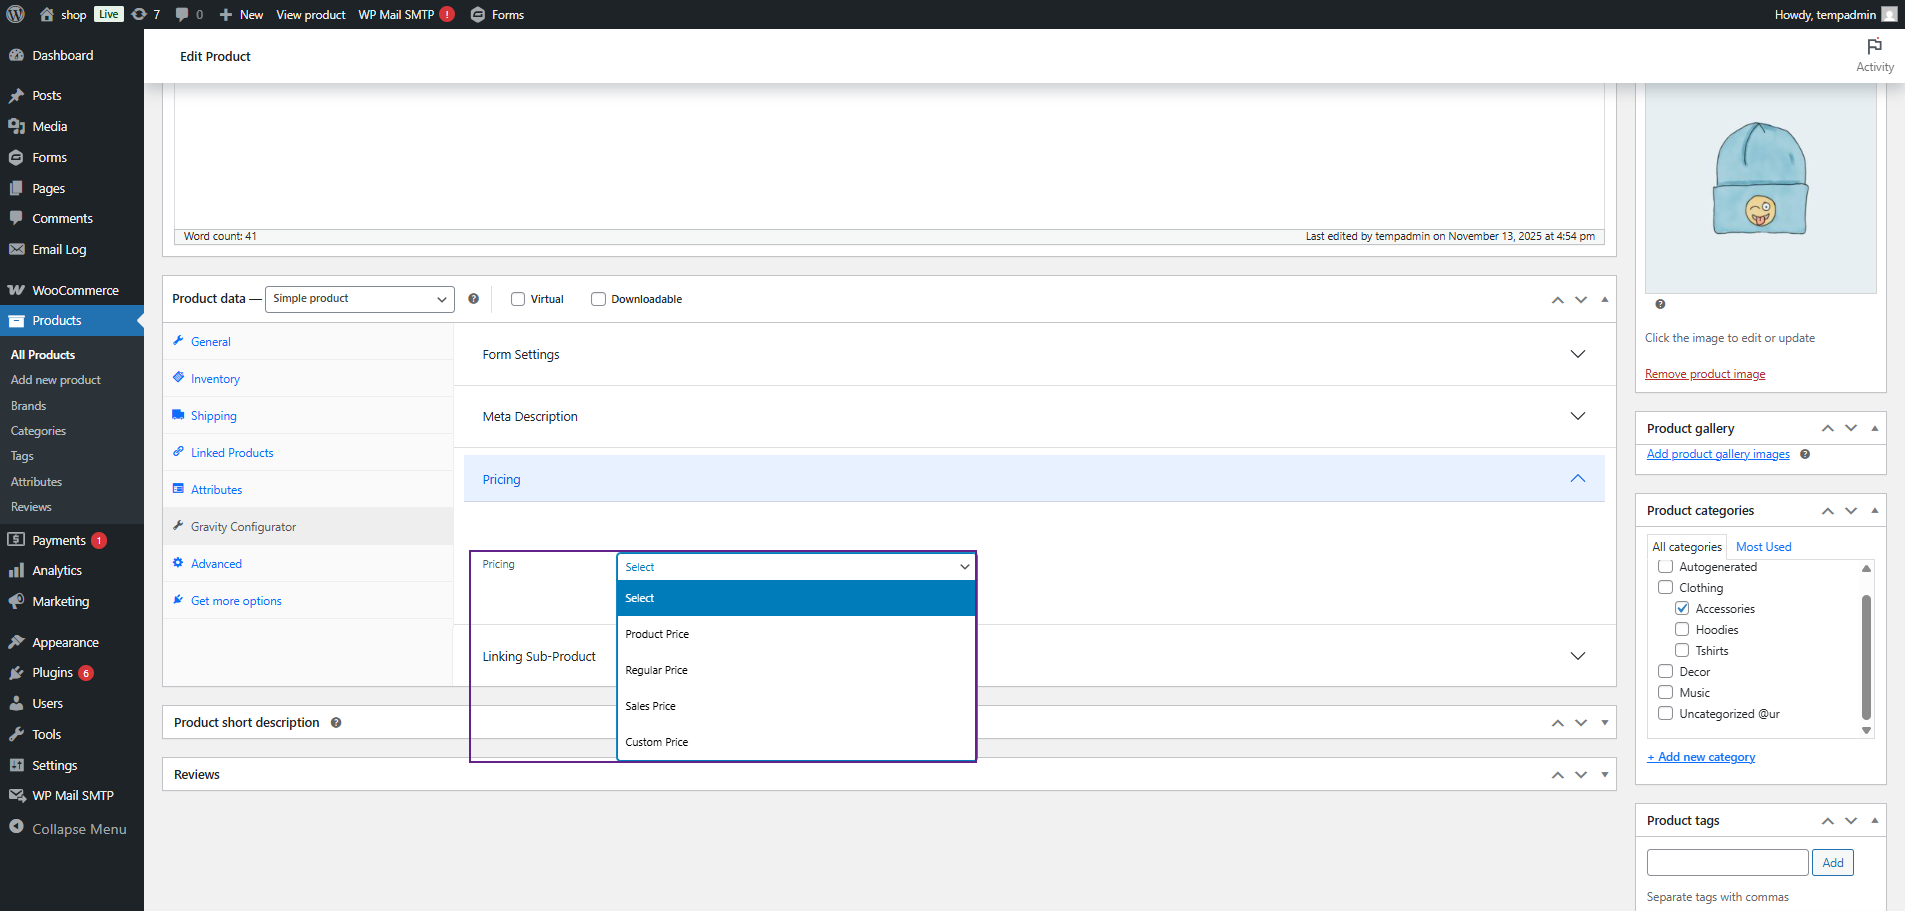
- The following options are available:
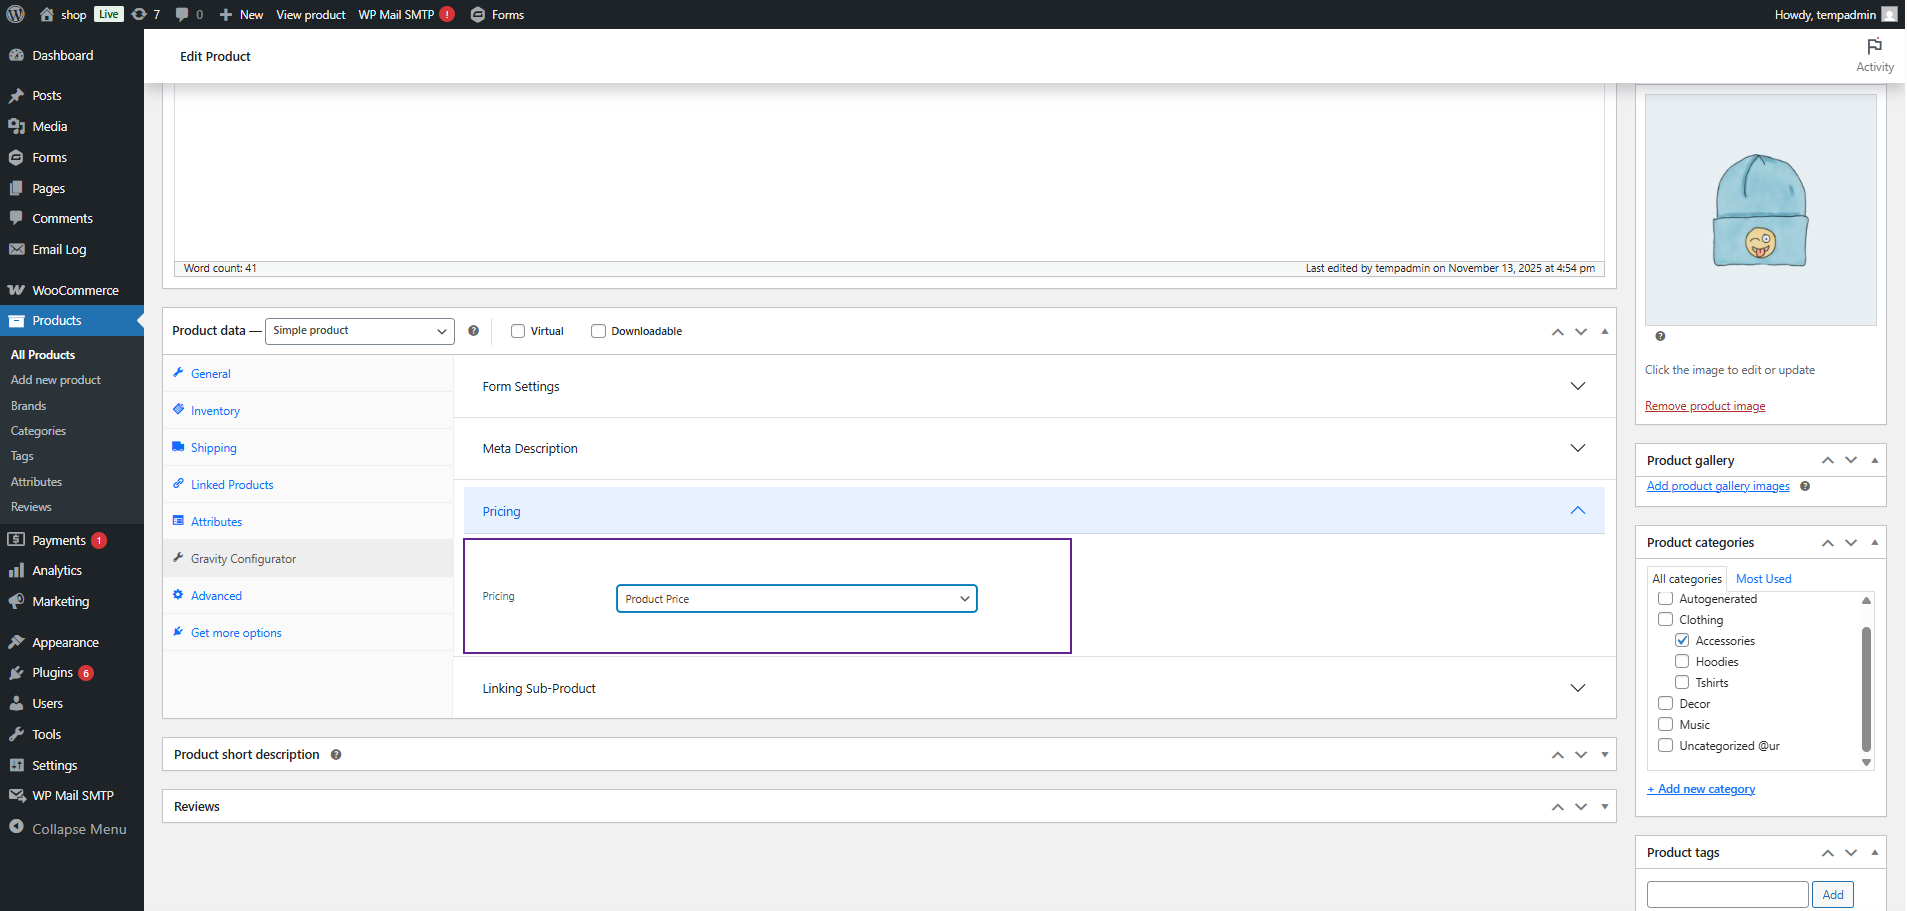
- Product Price: Displays the same price that is set in the product (either Regular or Sale price).
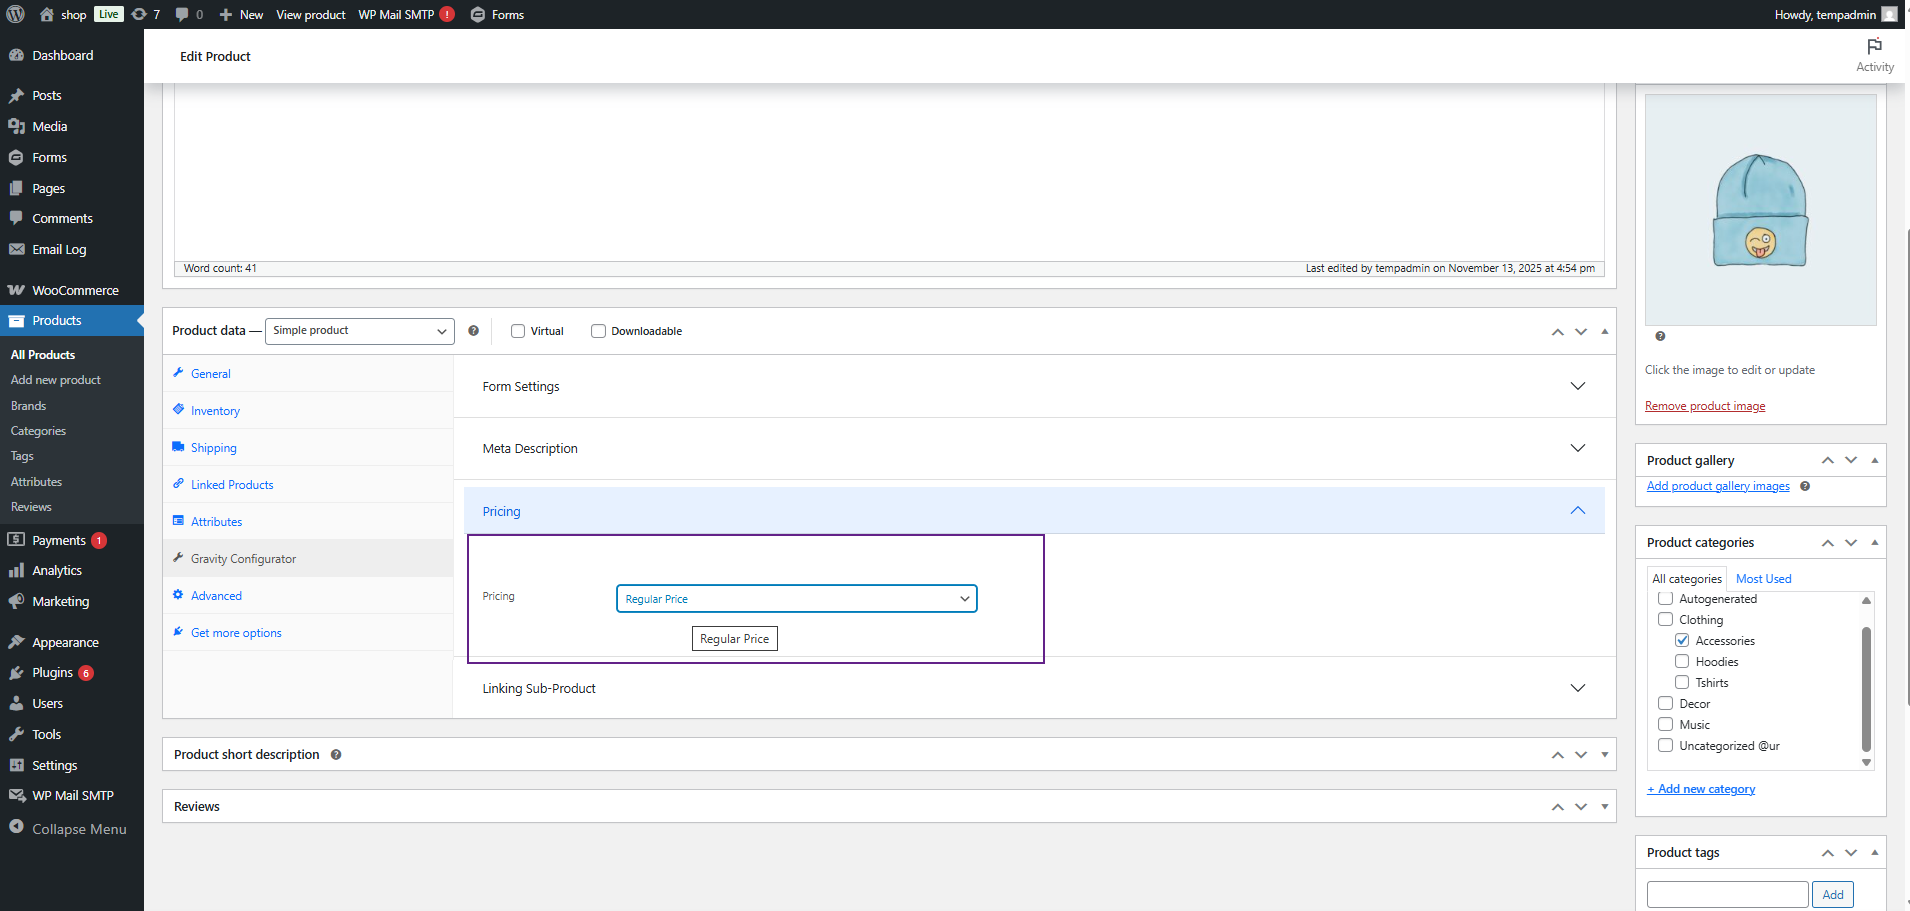
- Regular Price: Displays only the Regular Price of the product.

- Sales Price: Displays only the Sale Price of the product.

- Custom Price: When this option is selected, an additional input field labeled Enter Amount will appear. Enter the desired custom amount that you want to display for the product.
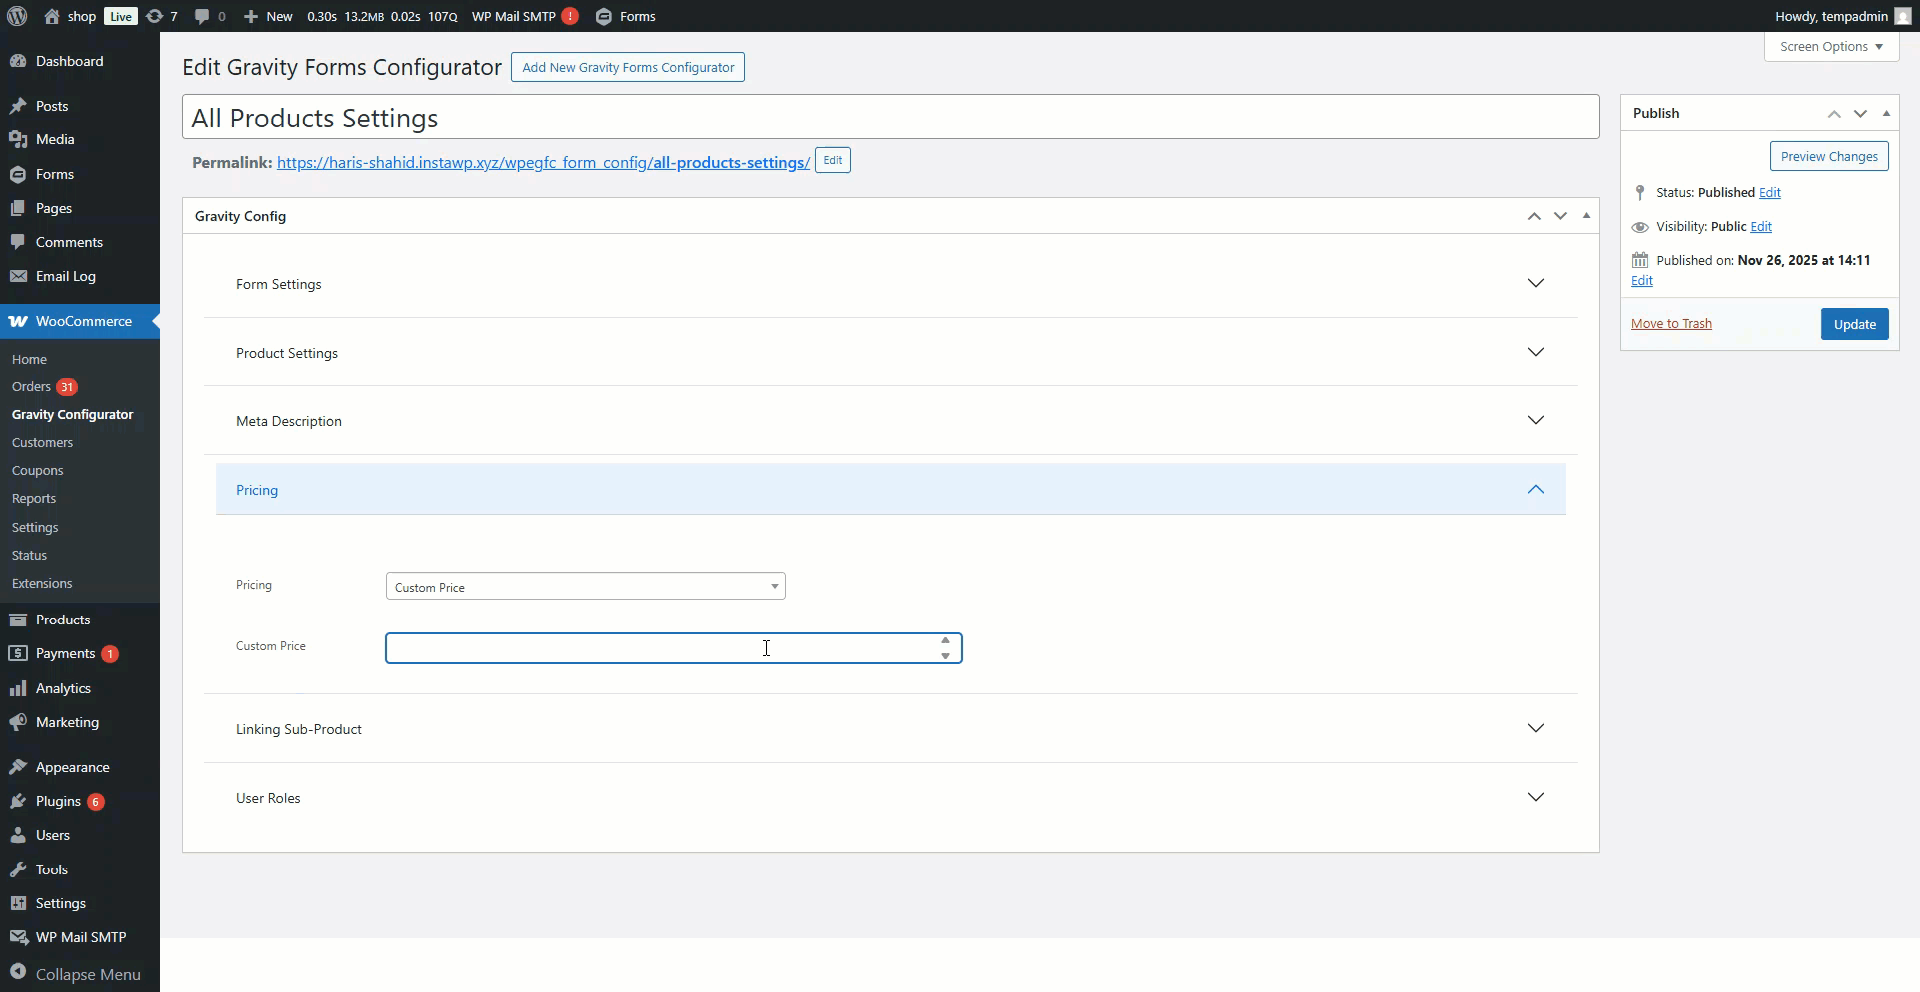
- Once the price type is selected and saved, the configured pricing will appear on the product’s frontend according to the chosen setting.
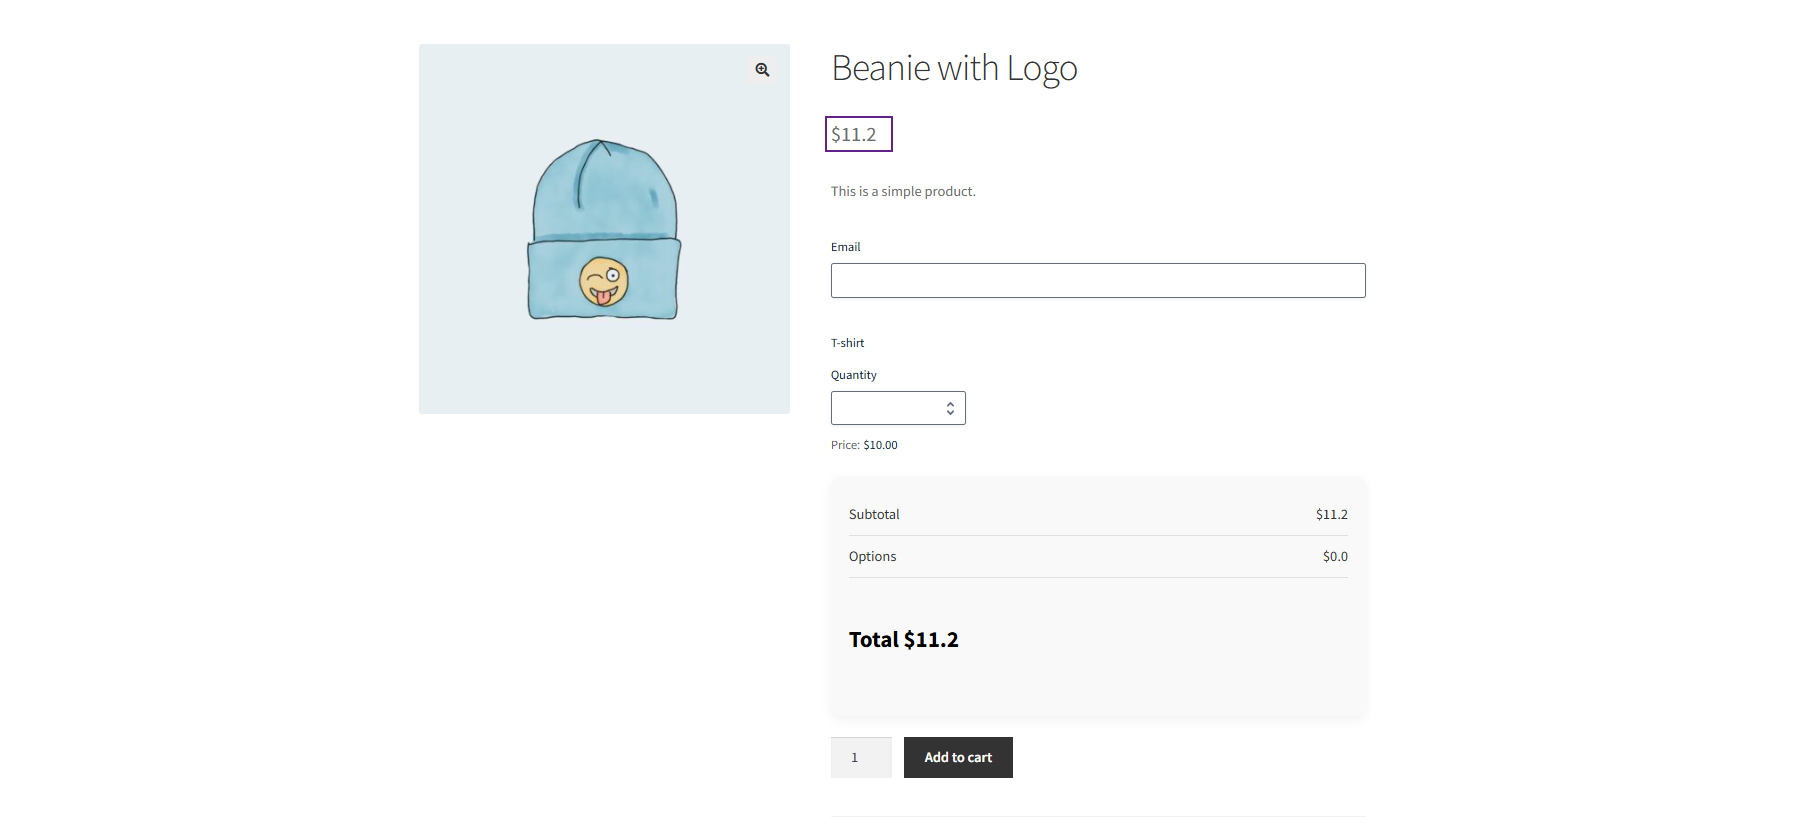
Front-End Impact
- Navigate to the Shop Page.

- Click on any product with Pricing configured.

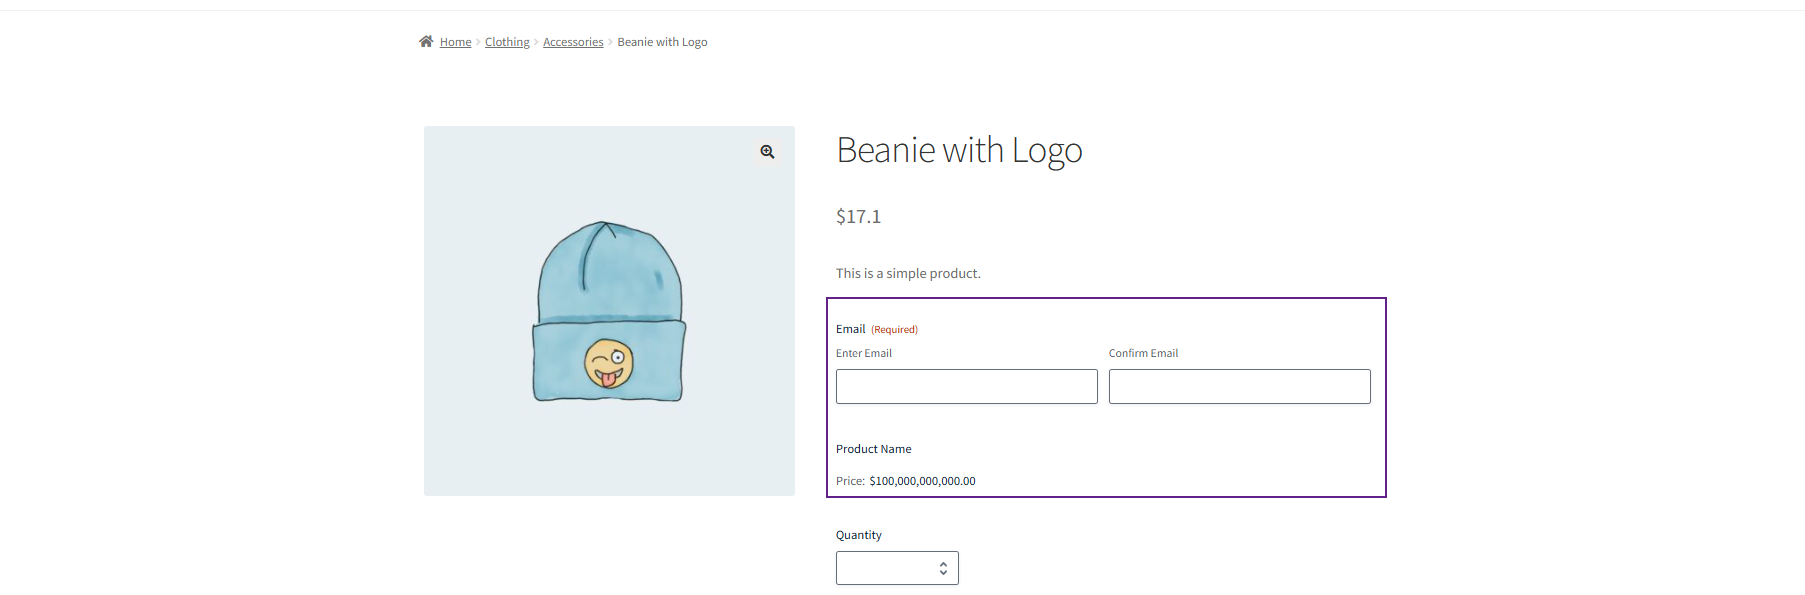
You can see the product price on the product page based on the selected Pricing option:
- Product Price: Shows the price set in the product (Regular or Sale).

- Regular Price: Shows only the Regular Price.

- Sale Price: Shows only the Sale Price.
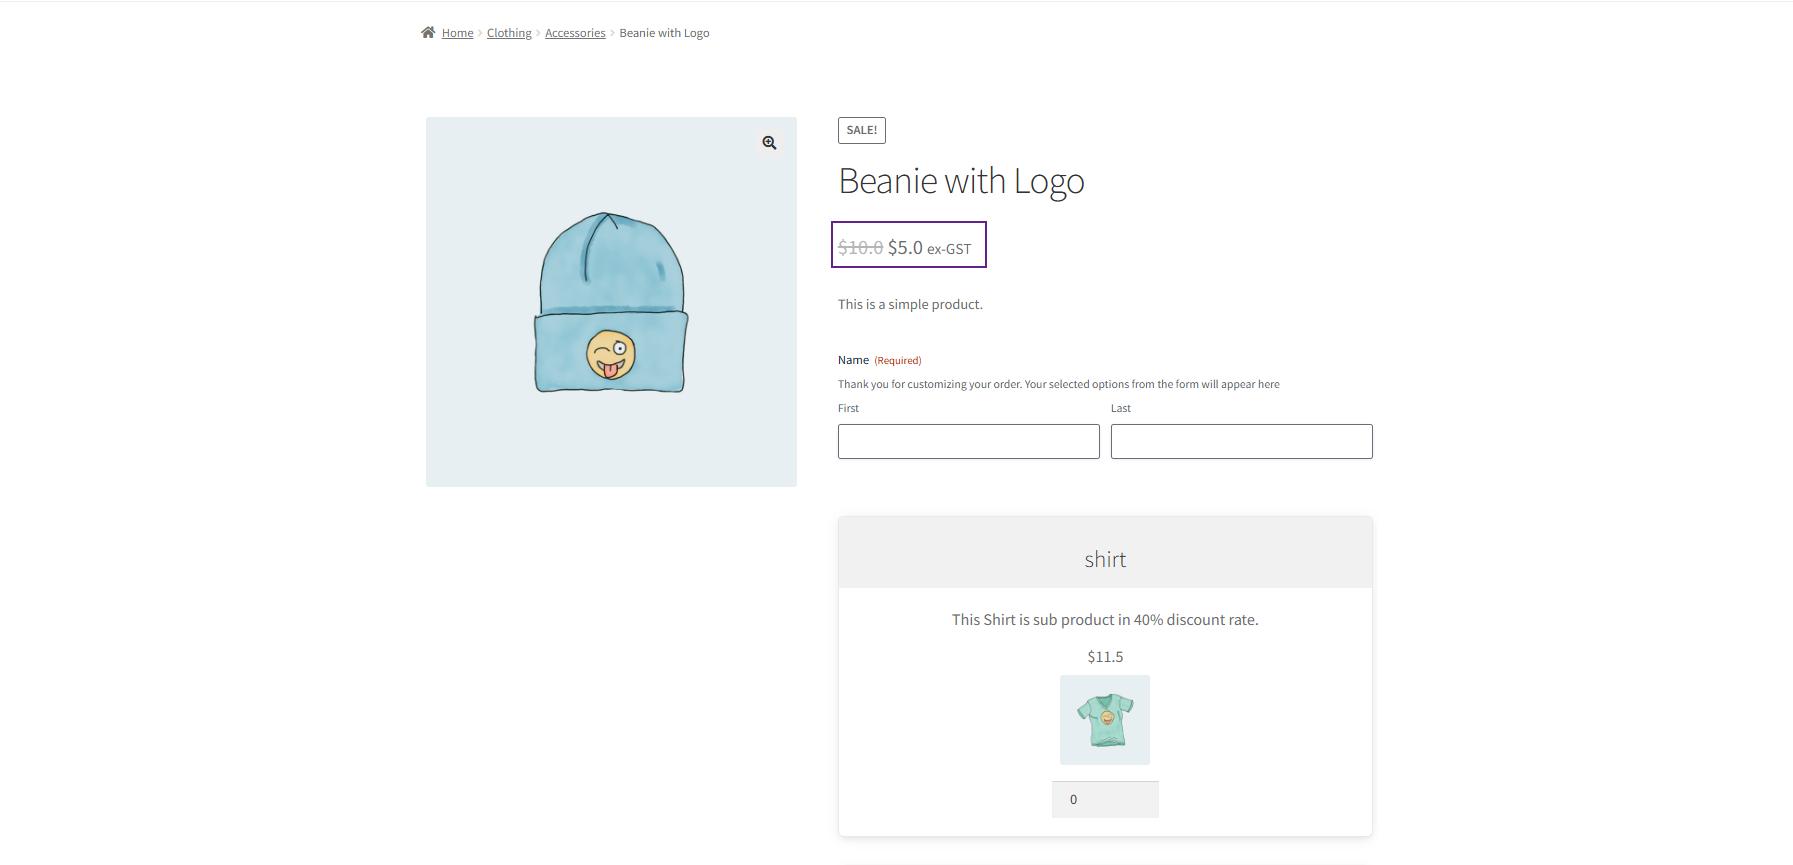
- Custom Price: Shows the custom amount entered by the admin.
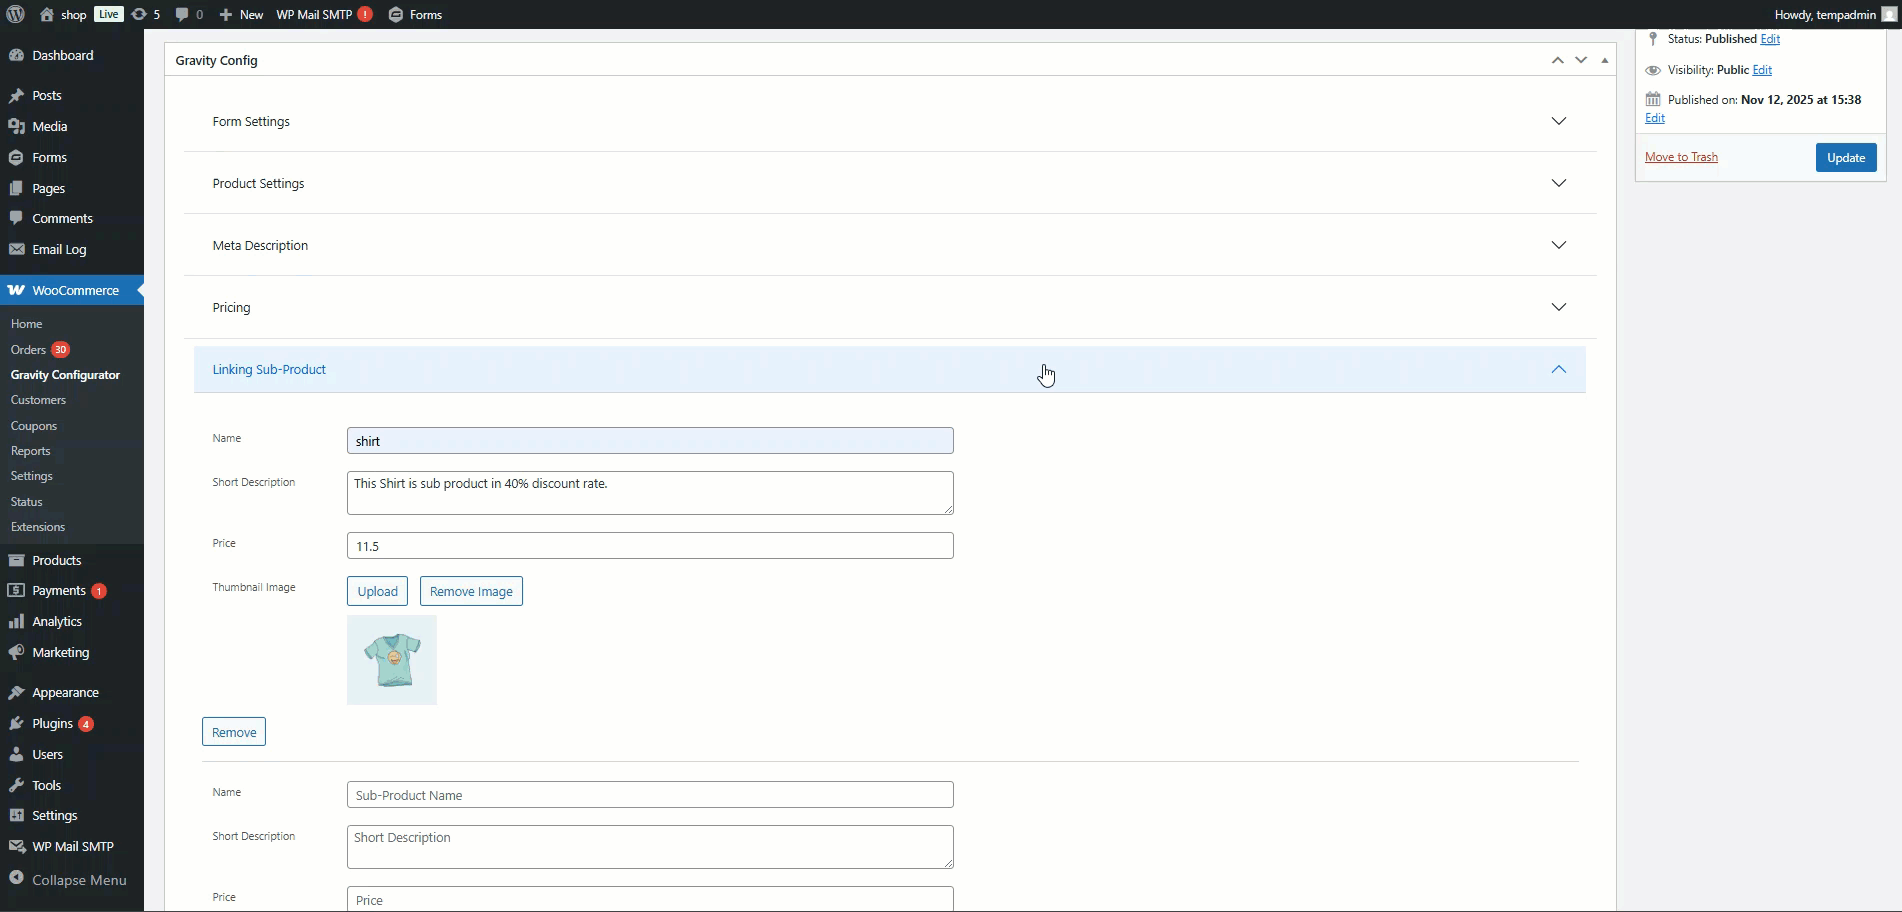
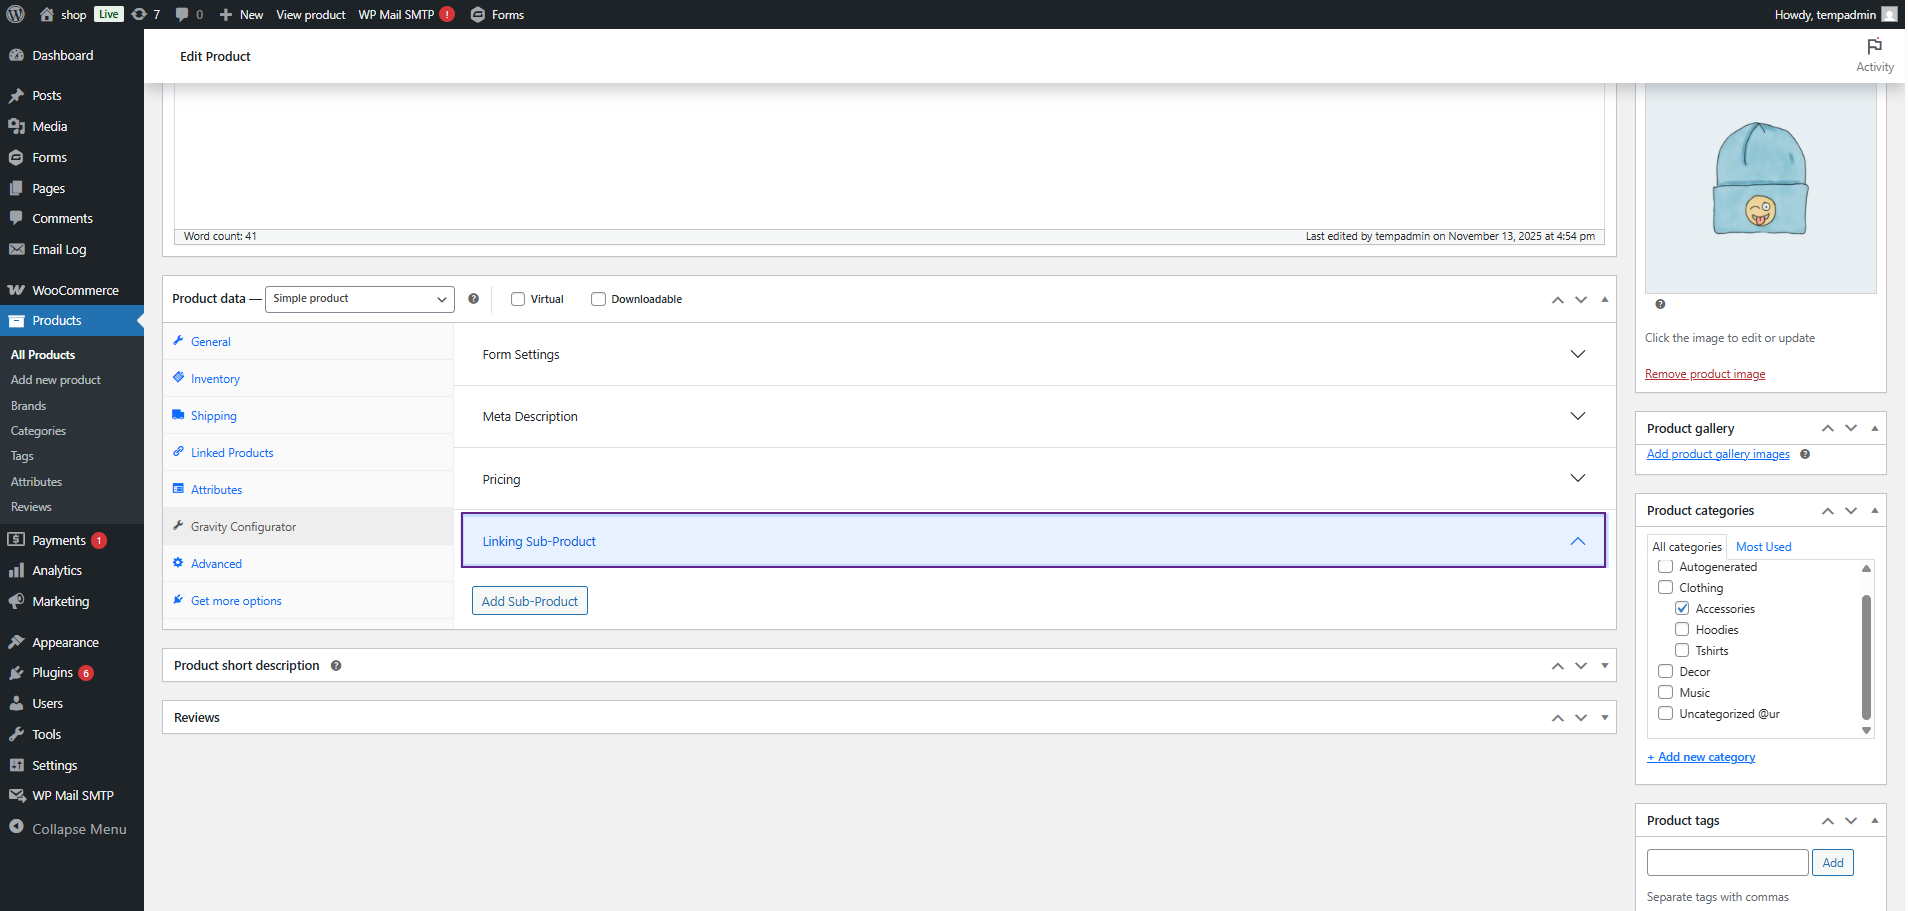
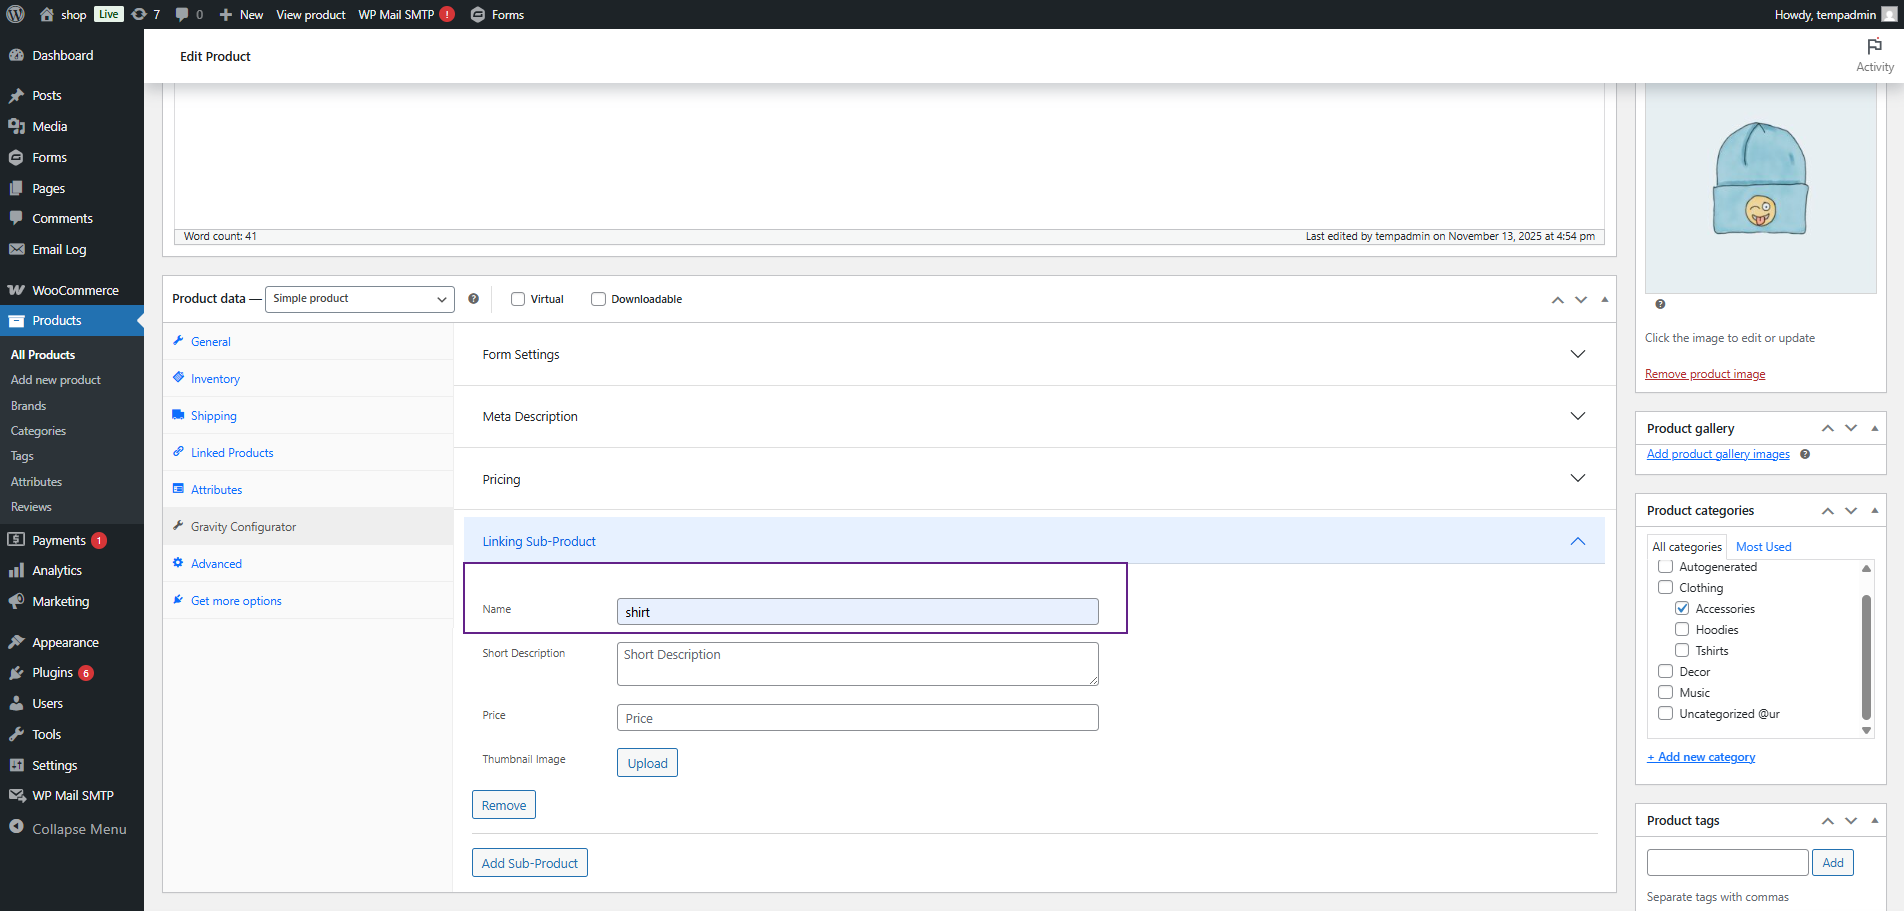
Sub-Product
↑ Back to top- Navigate to the Link Sub-Product tab.
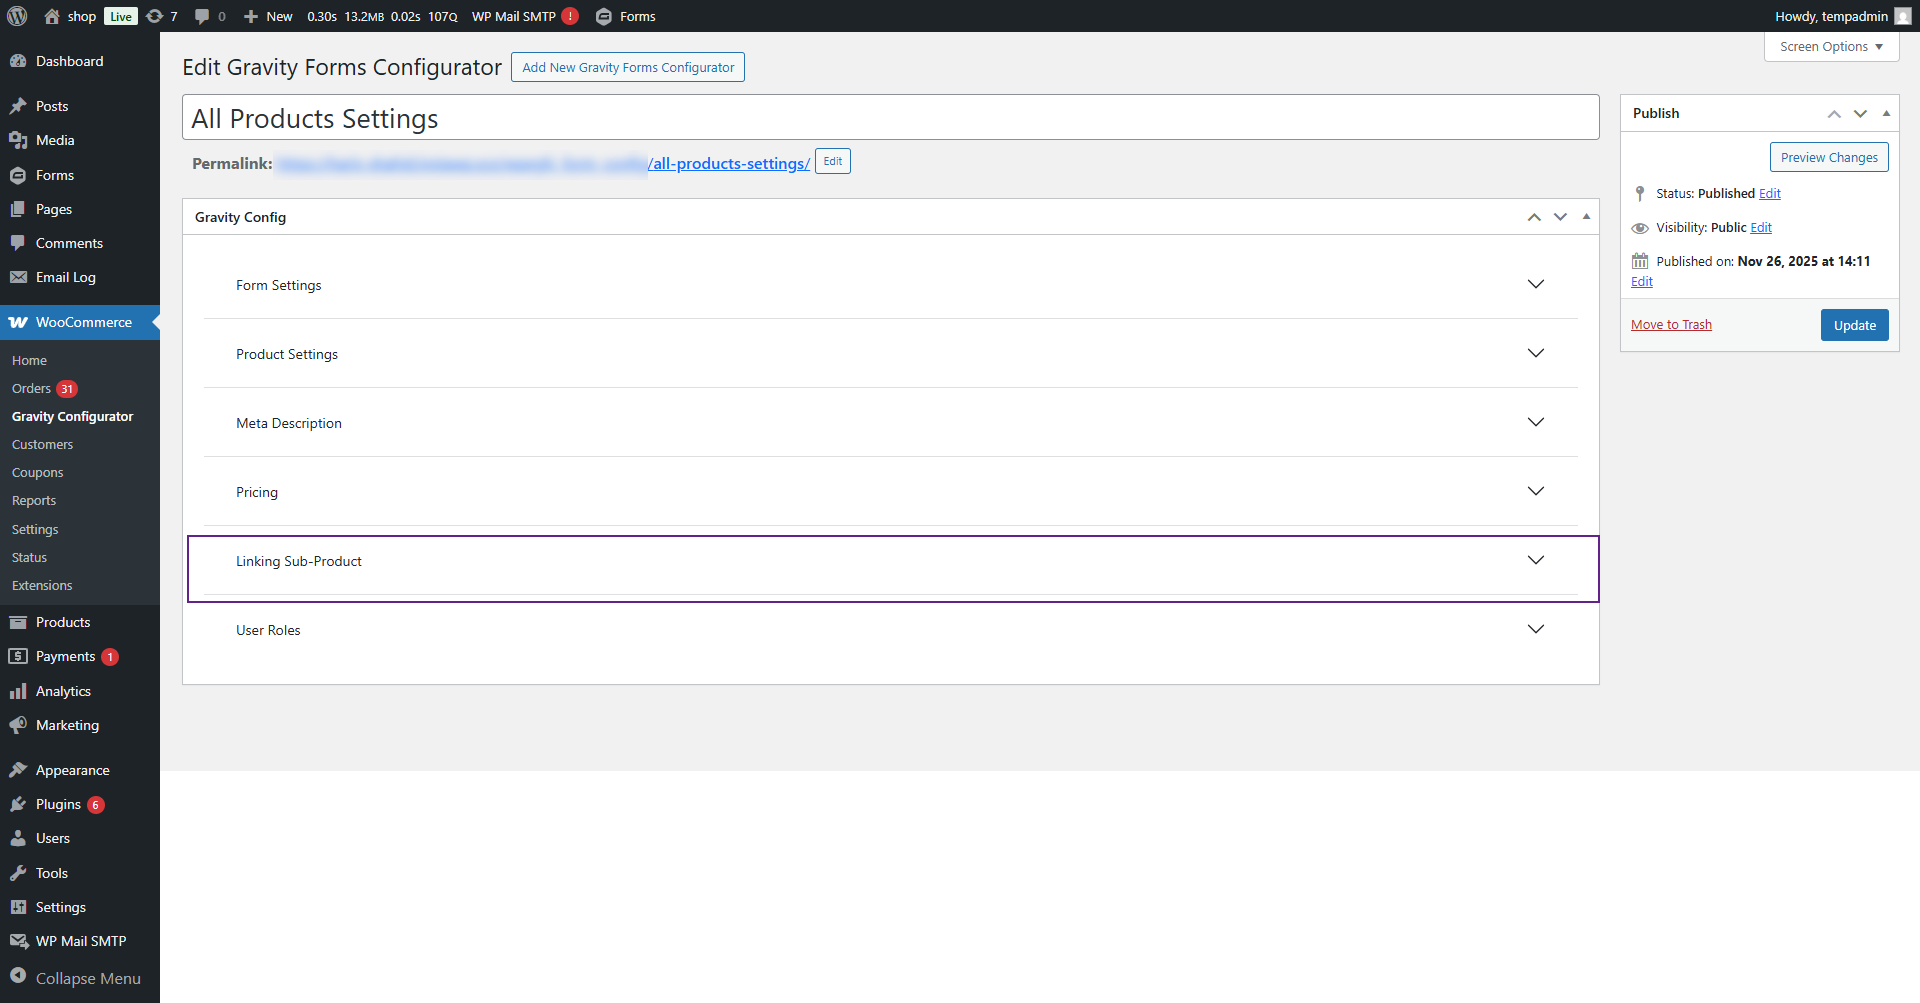
- Click on the Sub-Product dropdown button

- This section allows the admin to link one or multiple sub-products (upsell or add-on items) with the main product.
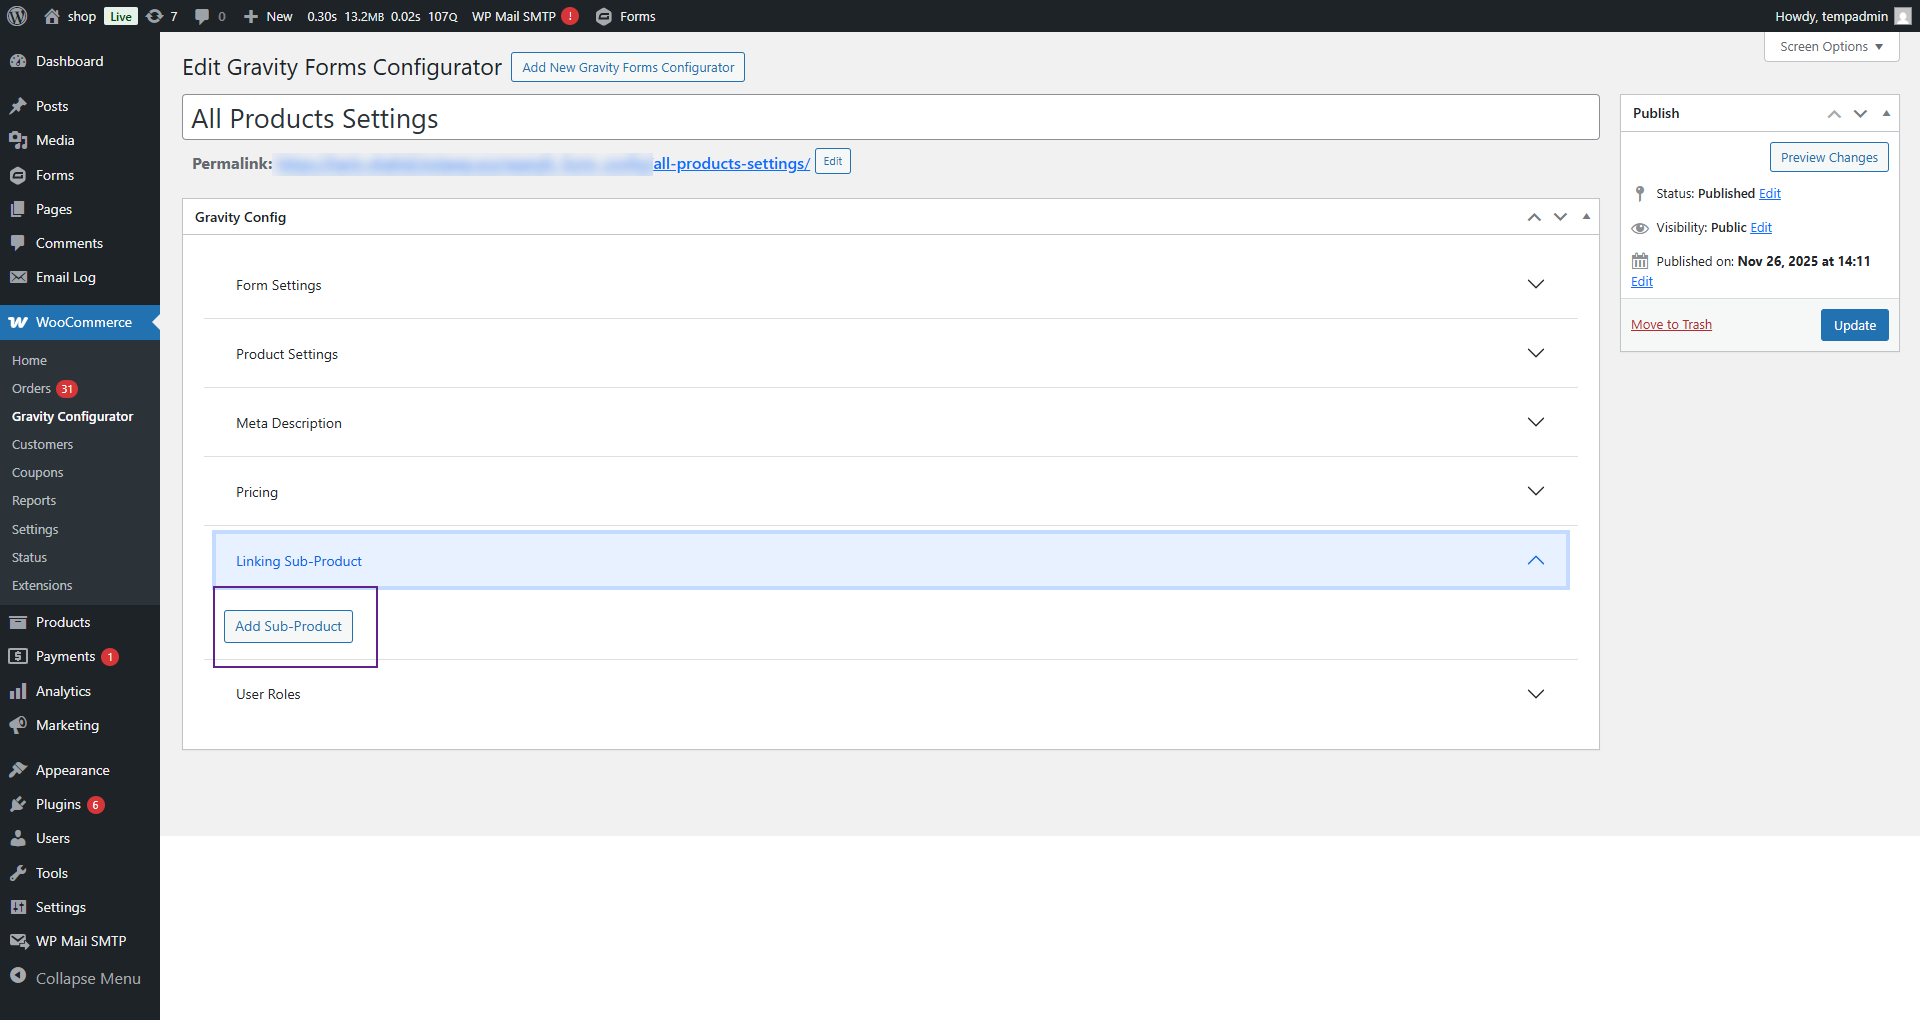
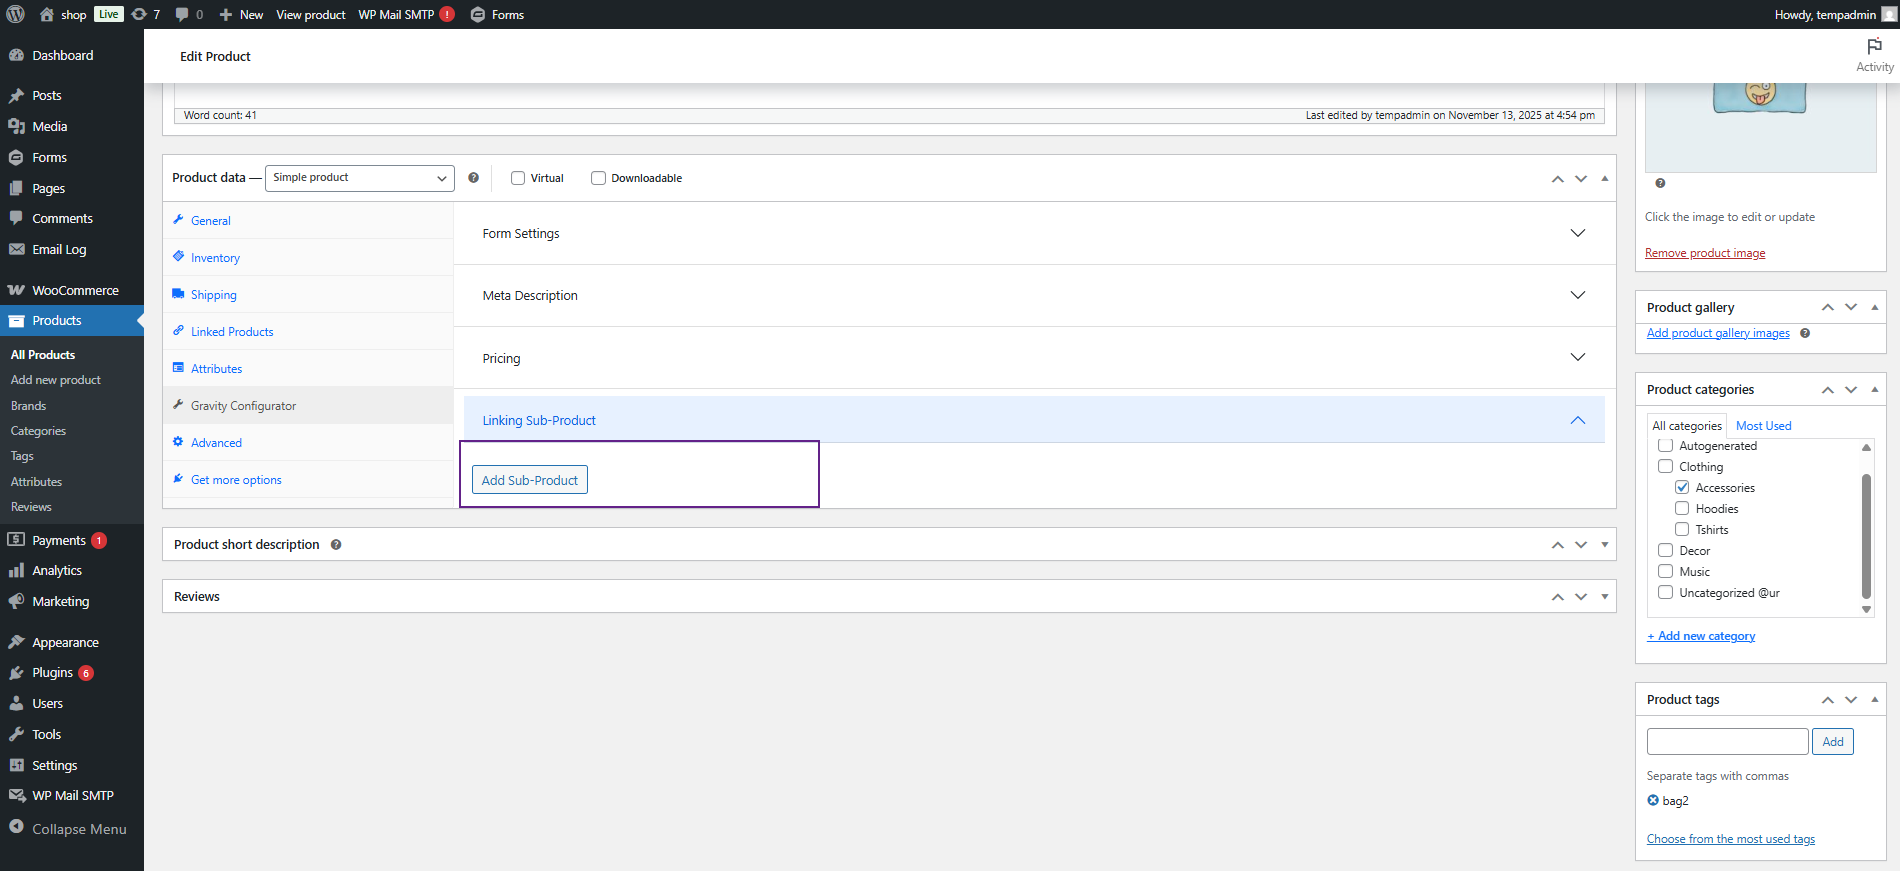
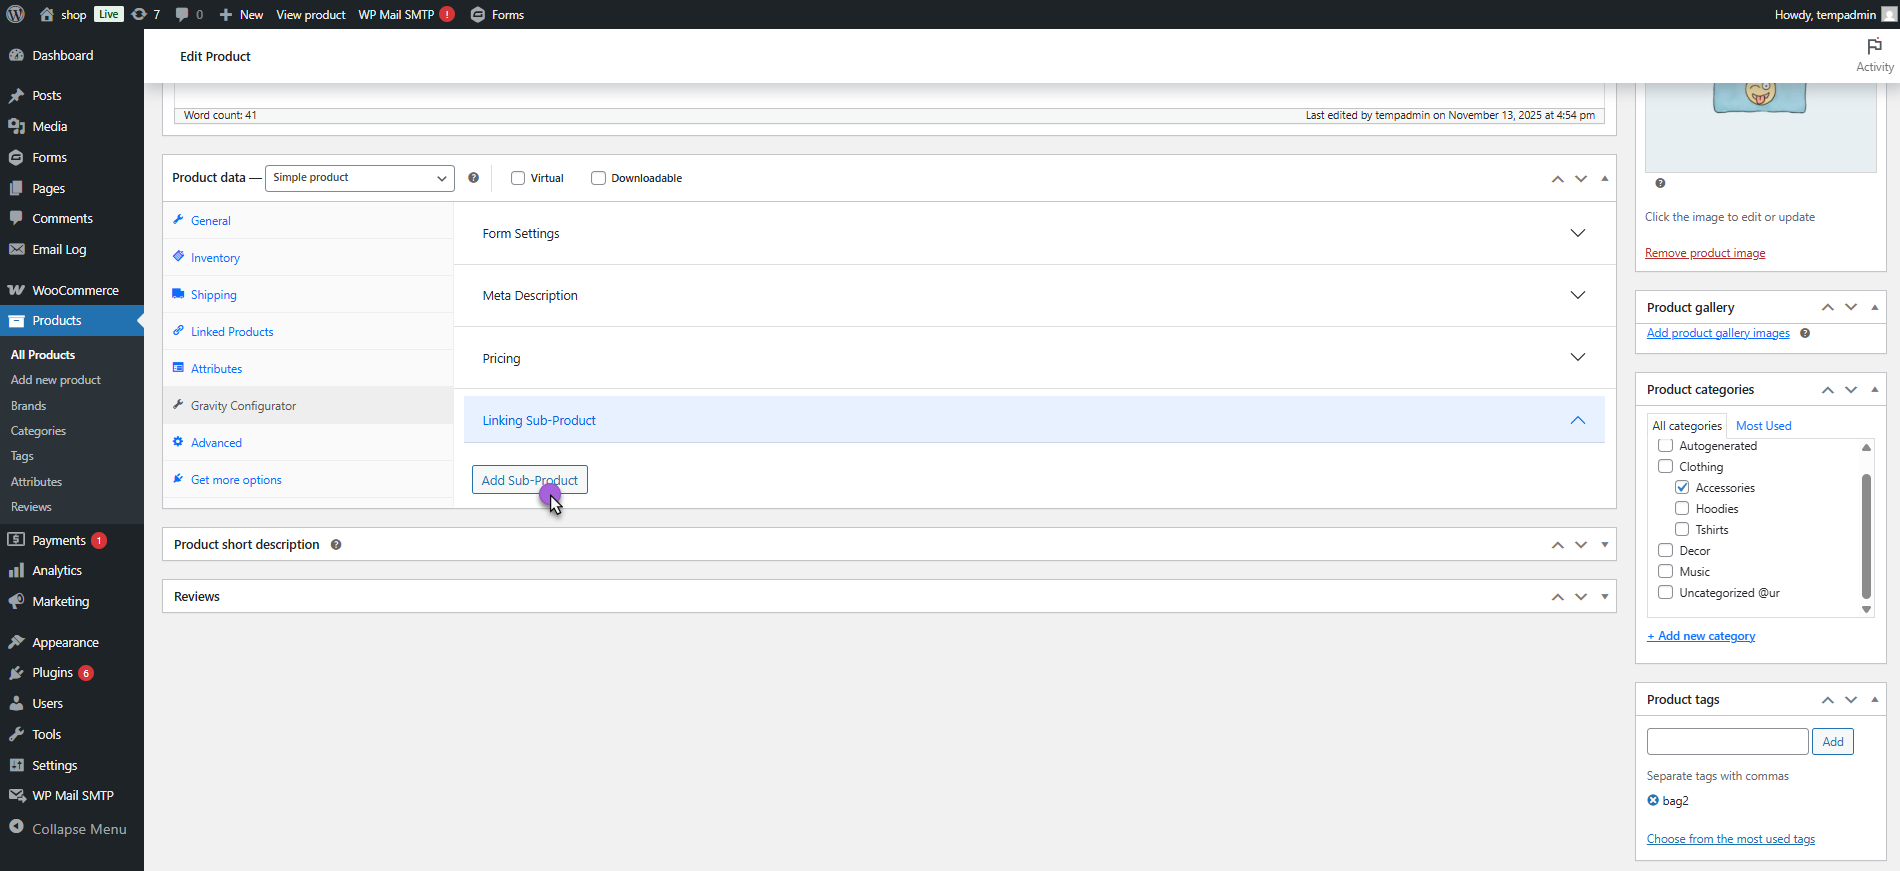
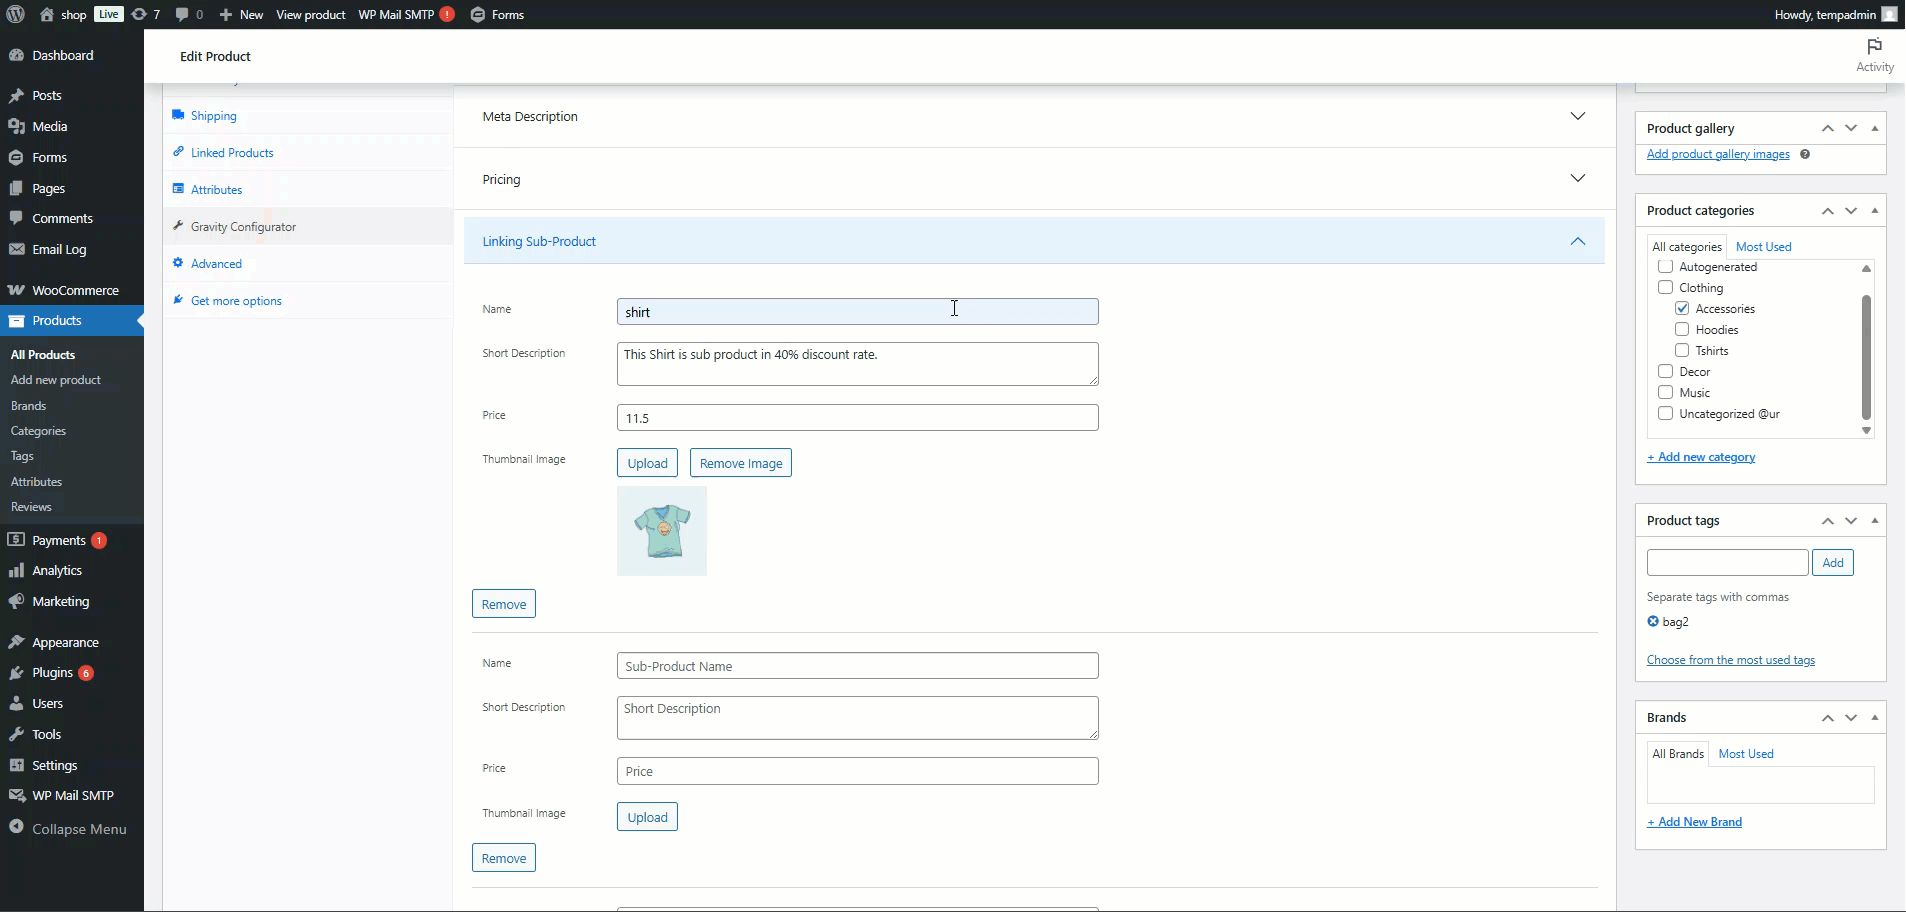
- Click the Add Sub-Product button.
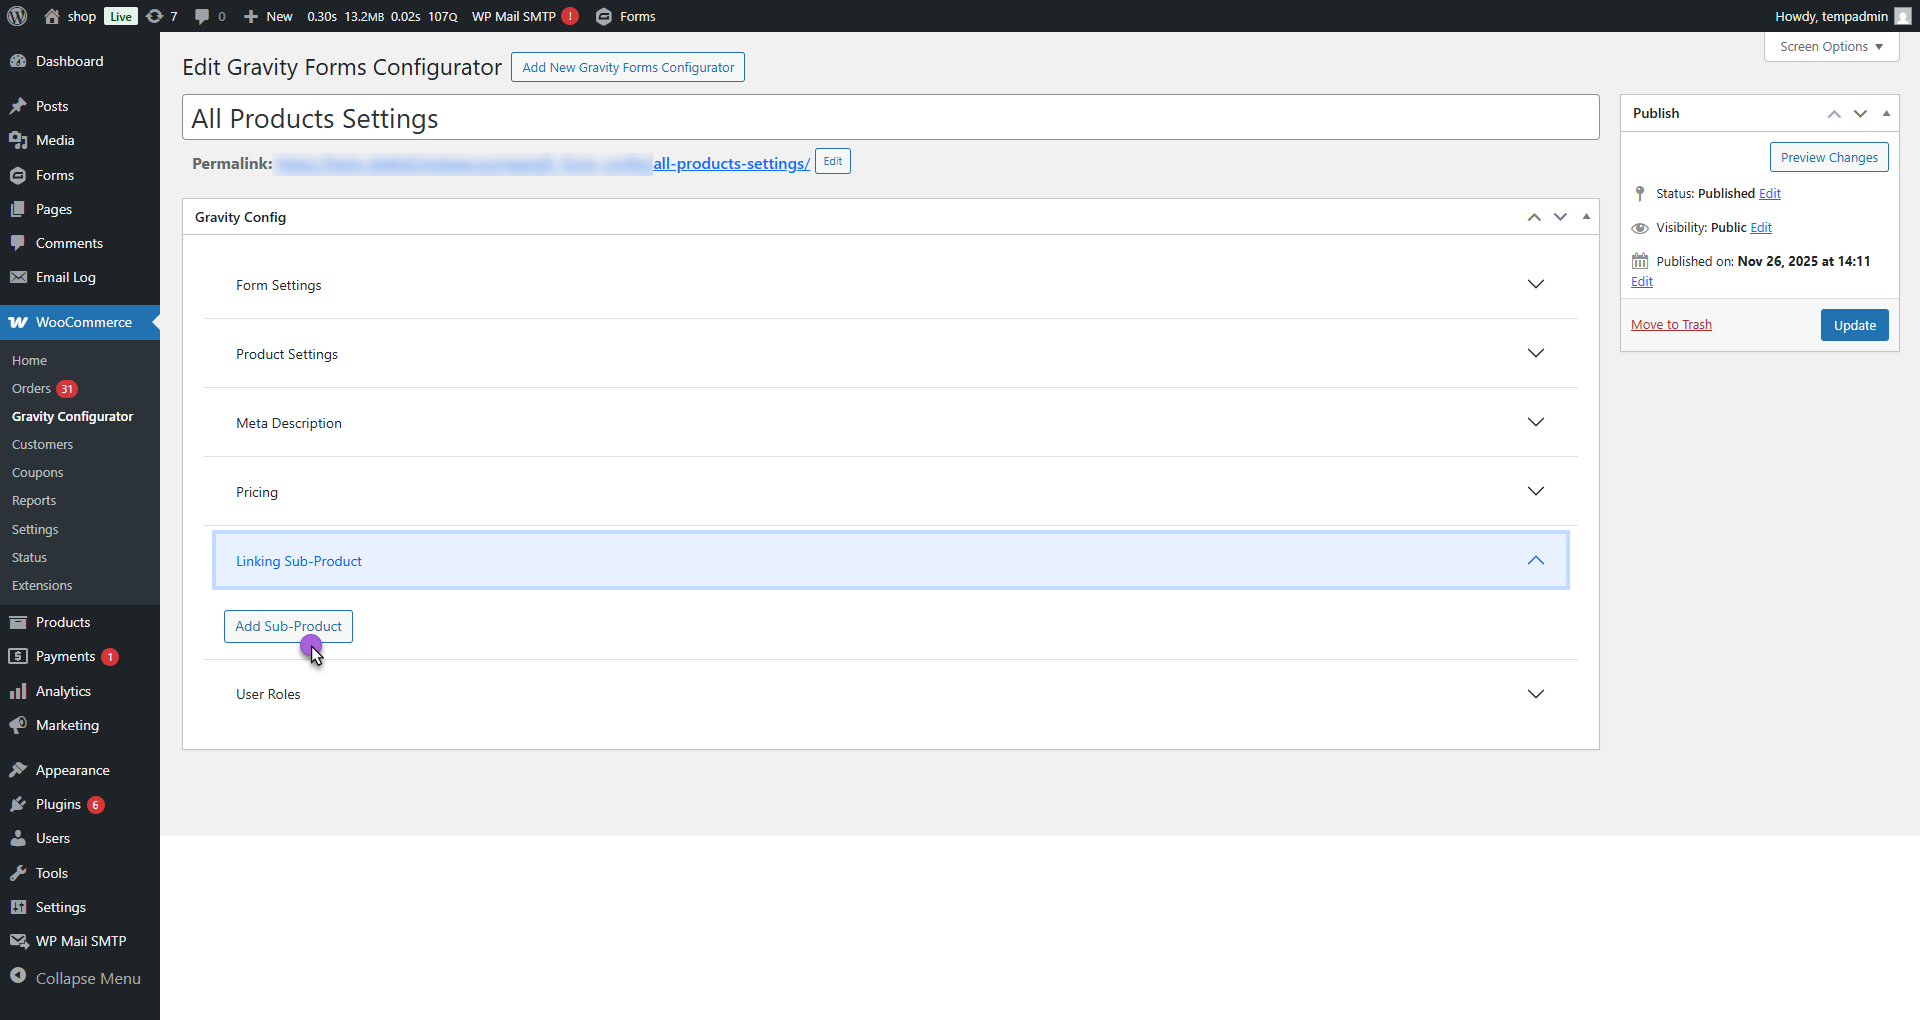
- A field appears where you can add multiple sub-products one by one.
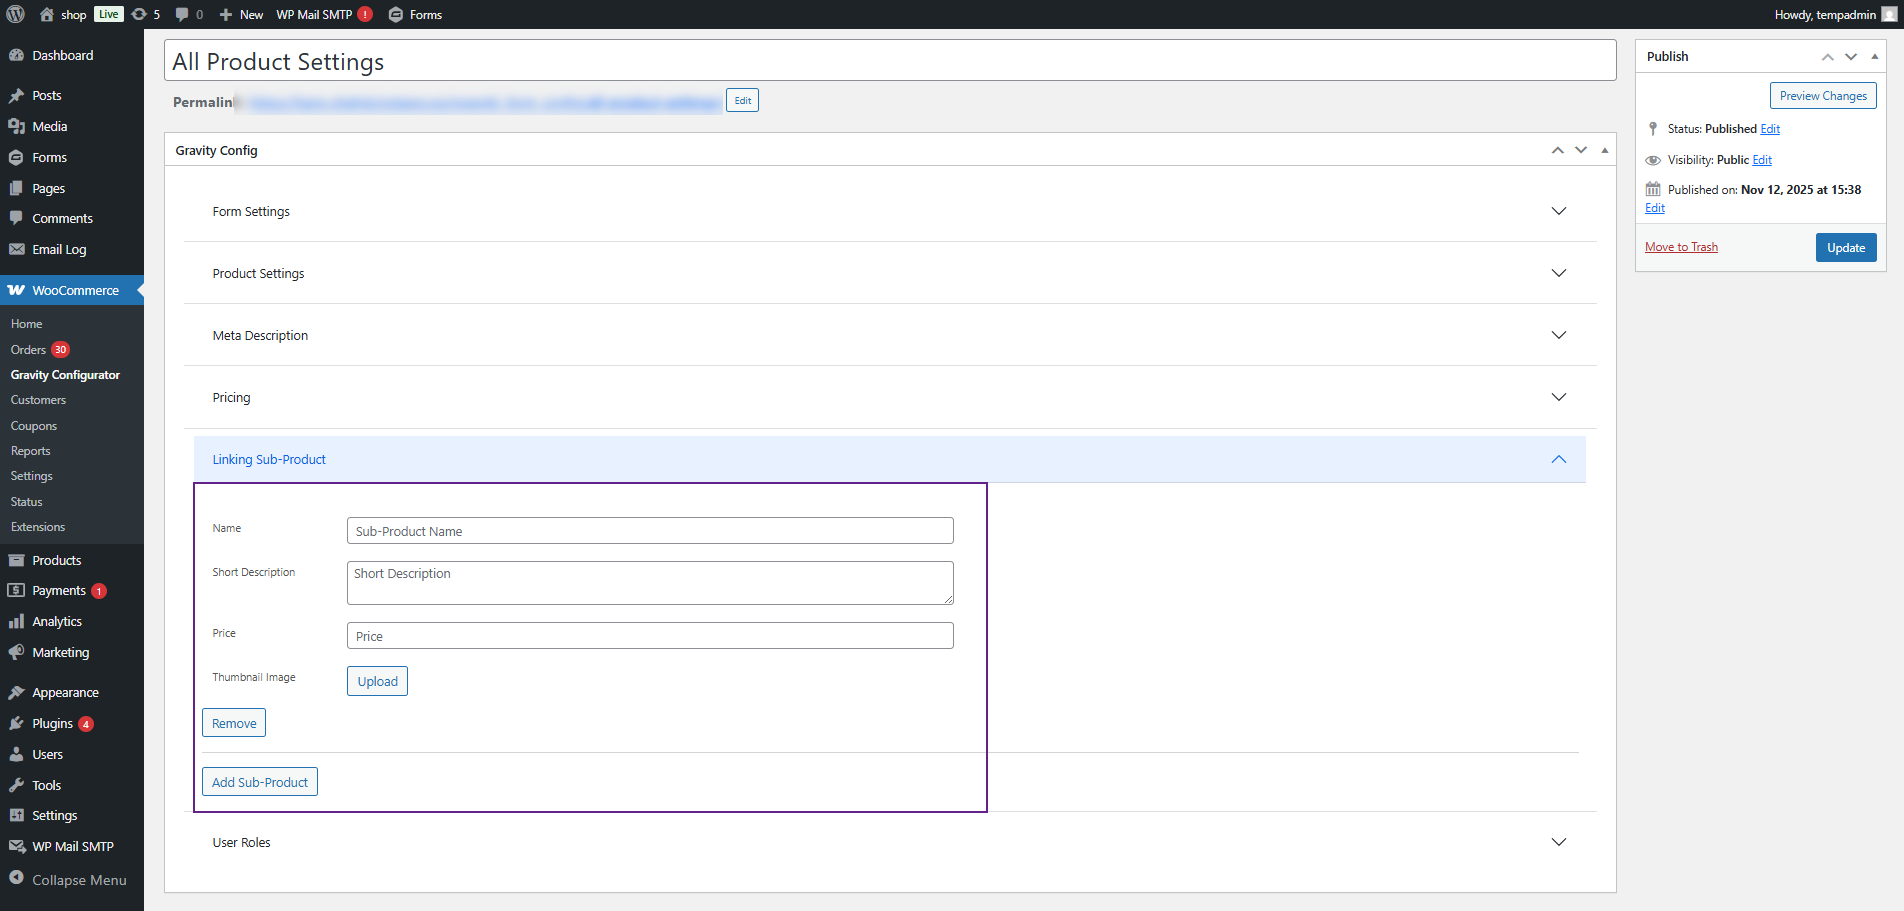
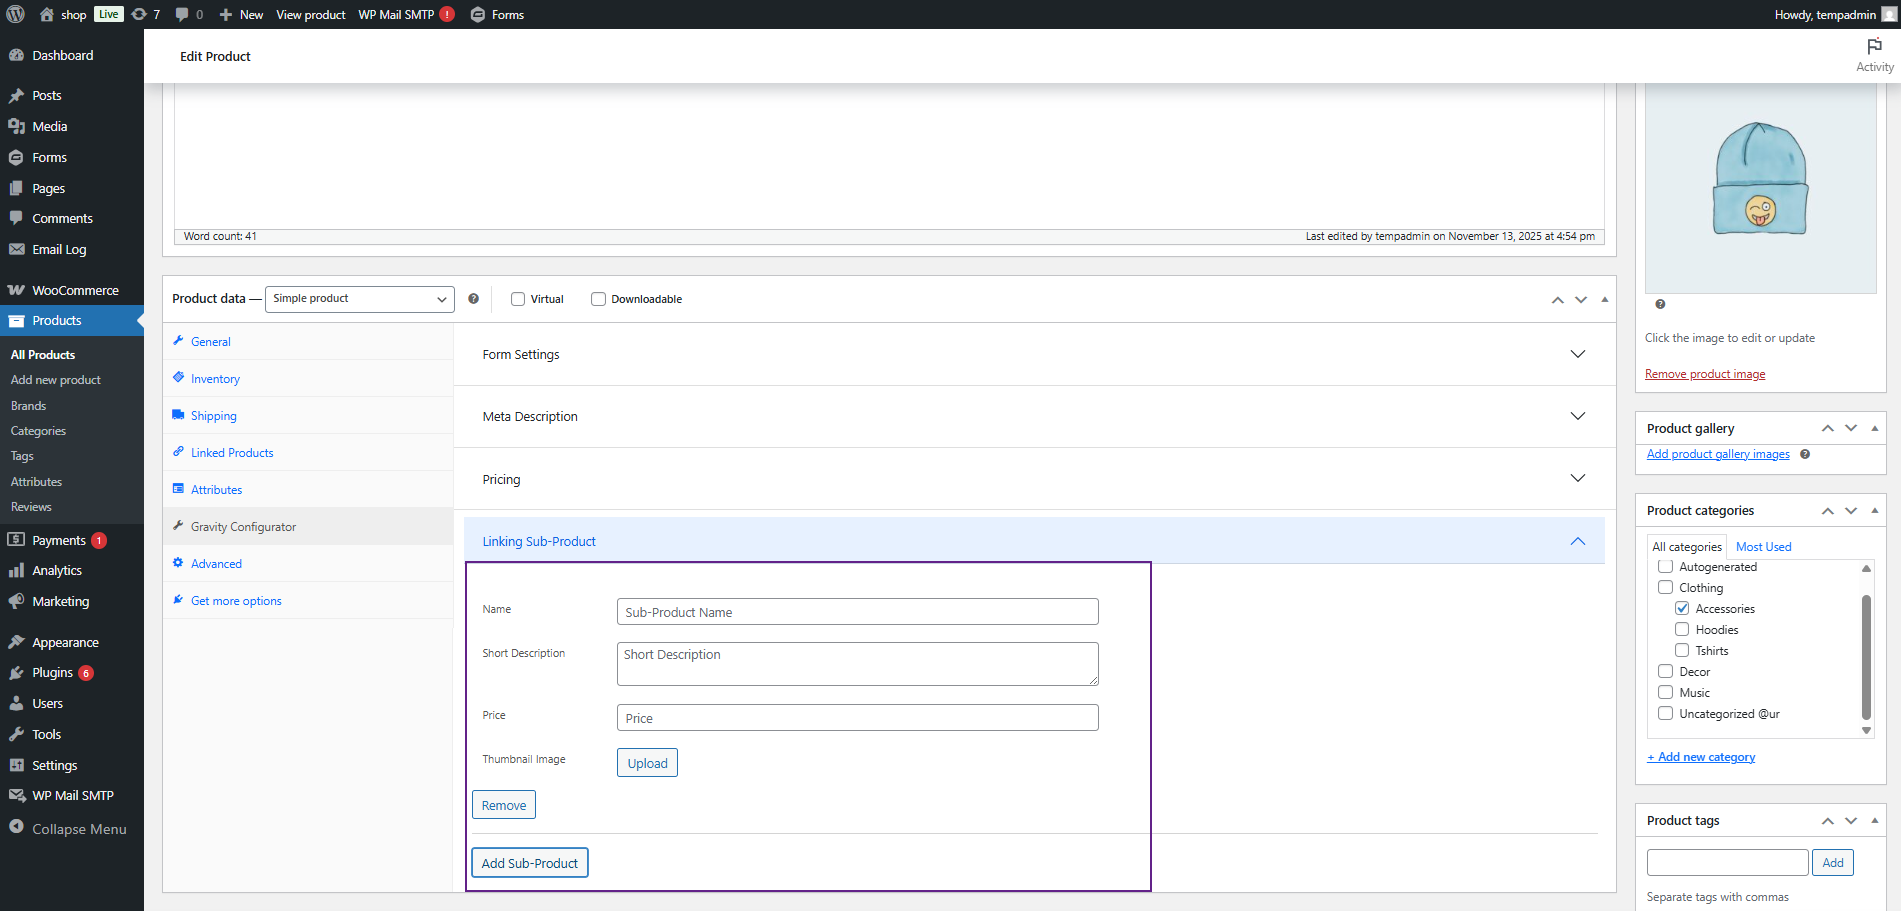
- Each sub-product entry includes the following fields:
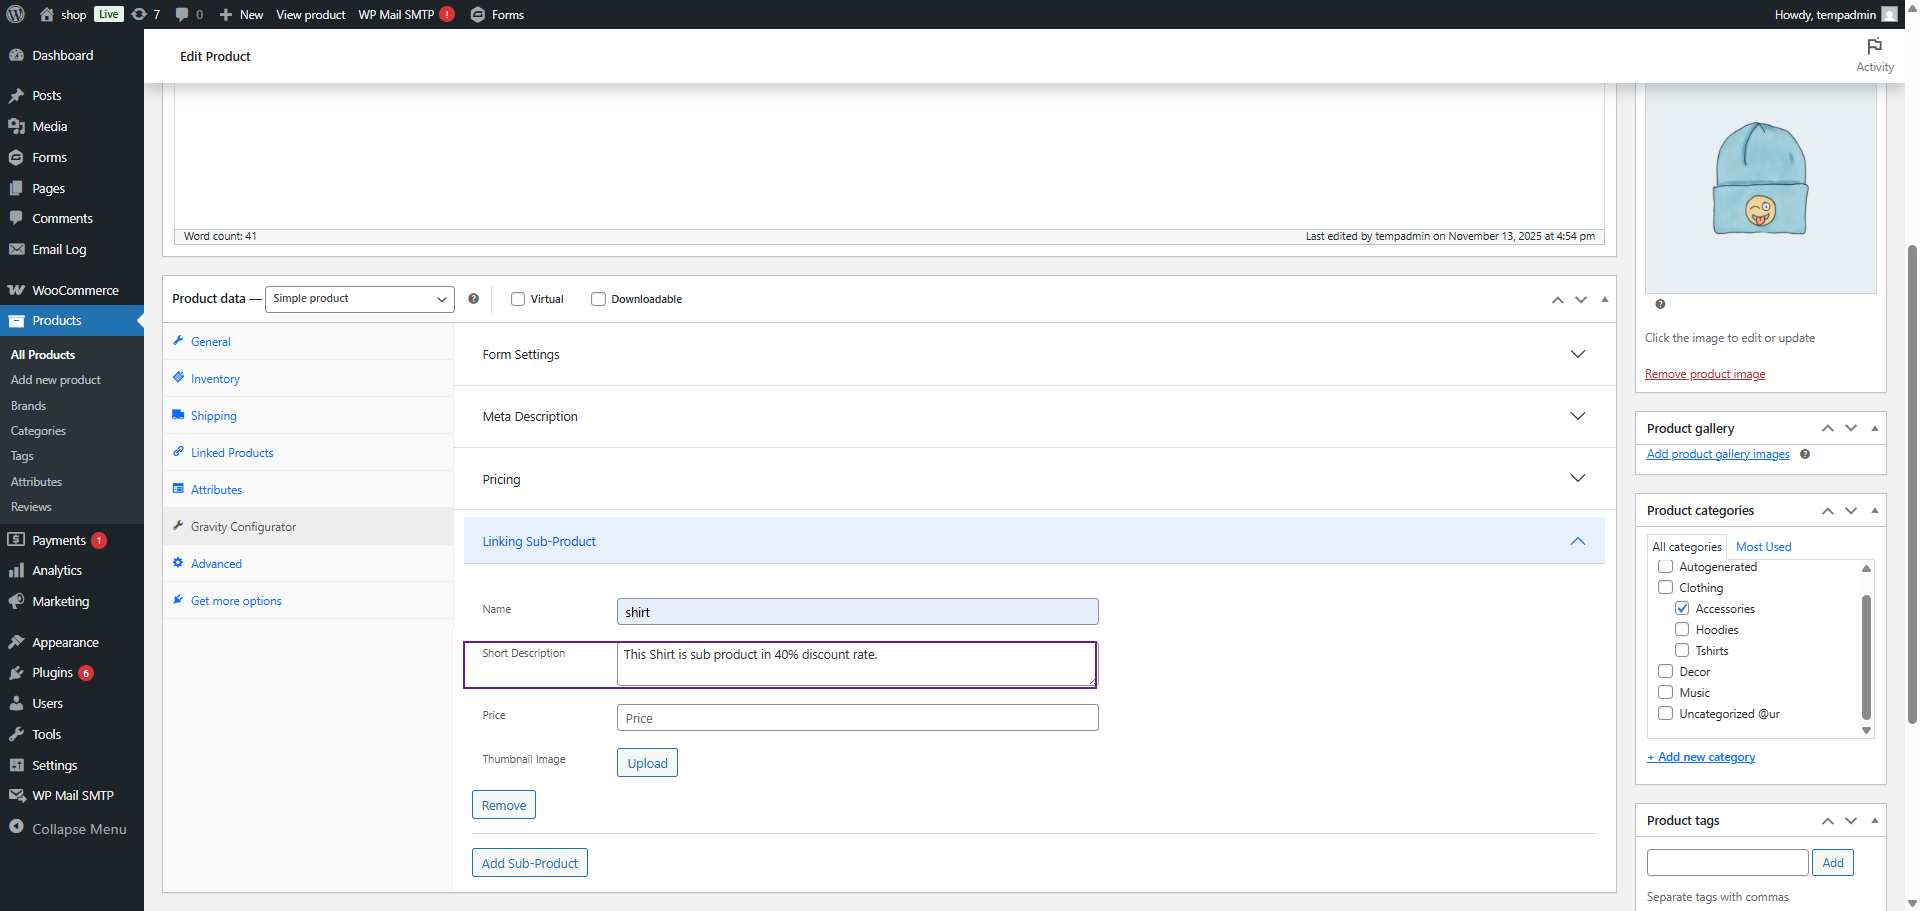
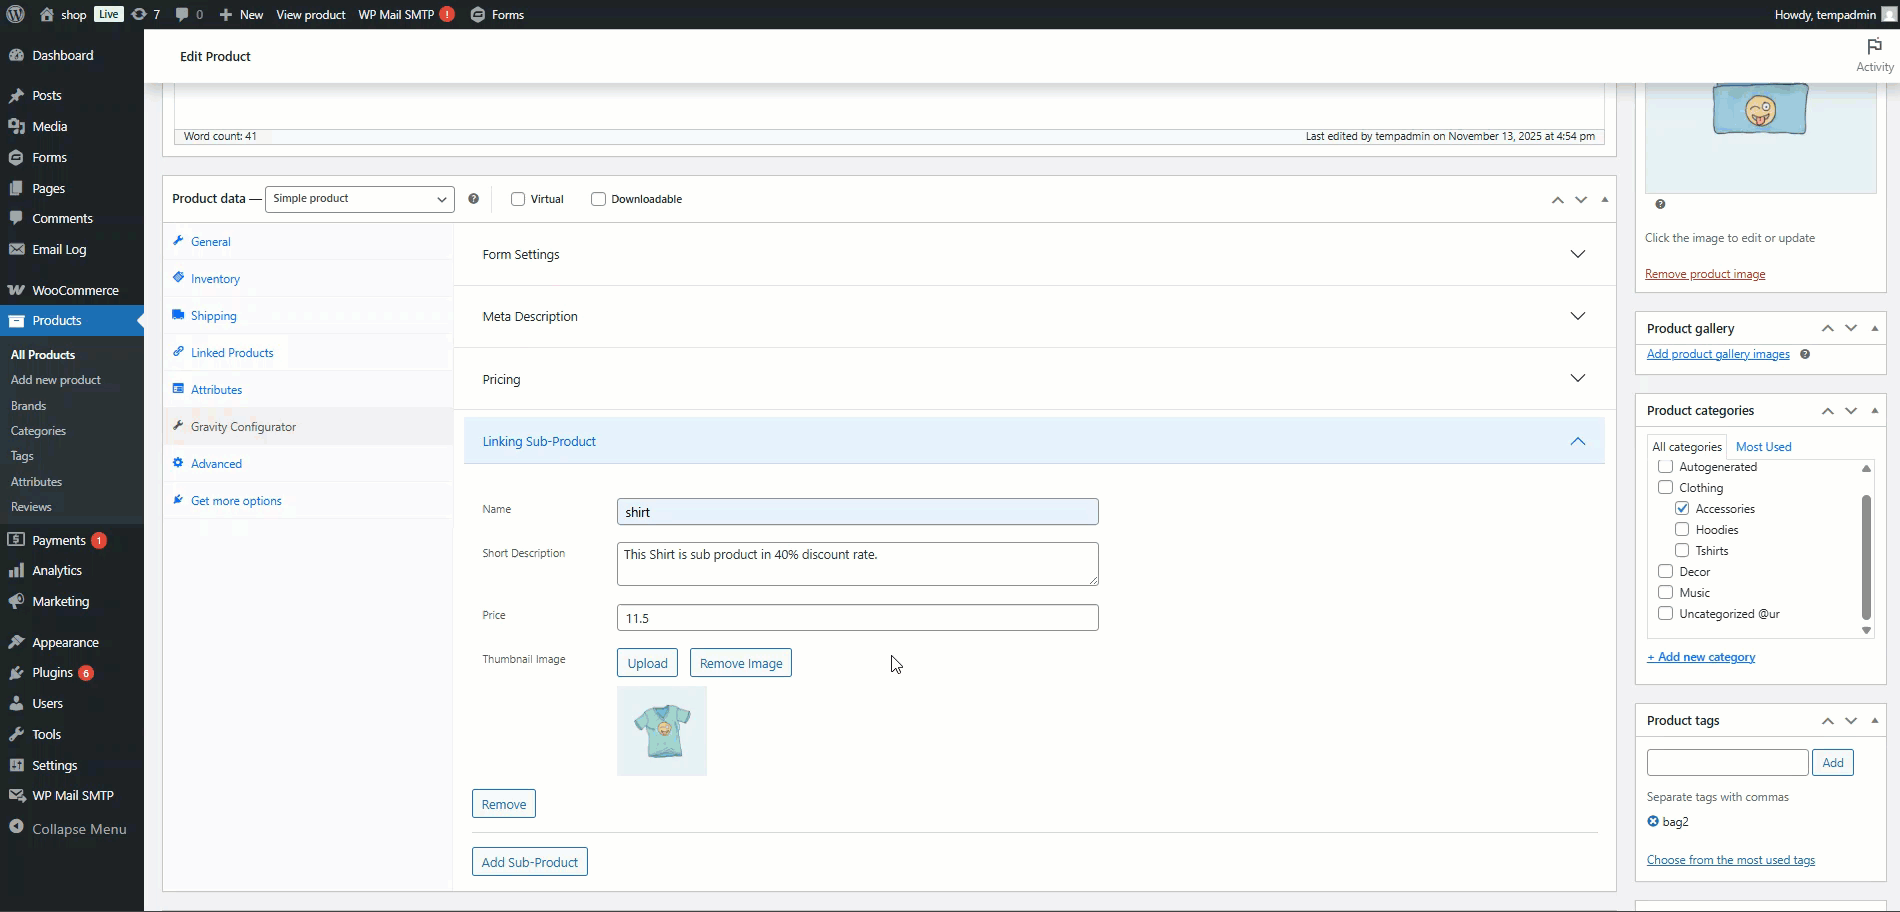
- Name: Enter the name of the sub-product that will appear on the frontend.

- Short Description: Enter a brief description for the sub-product.
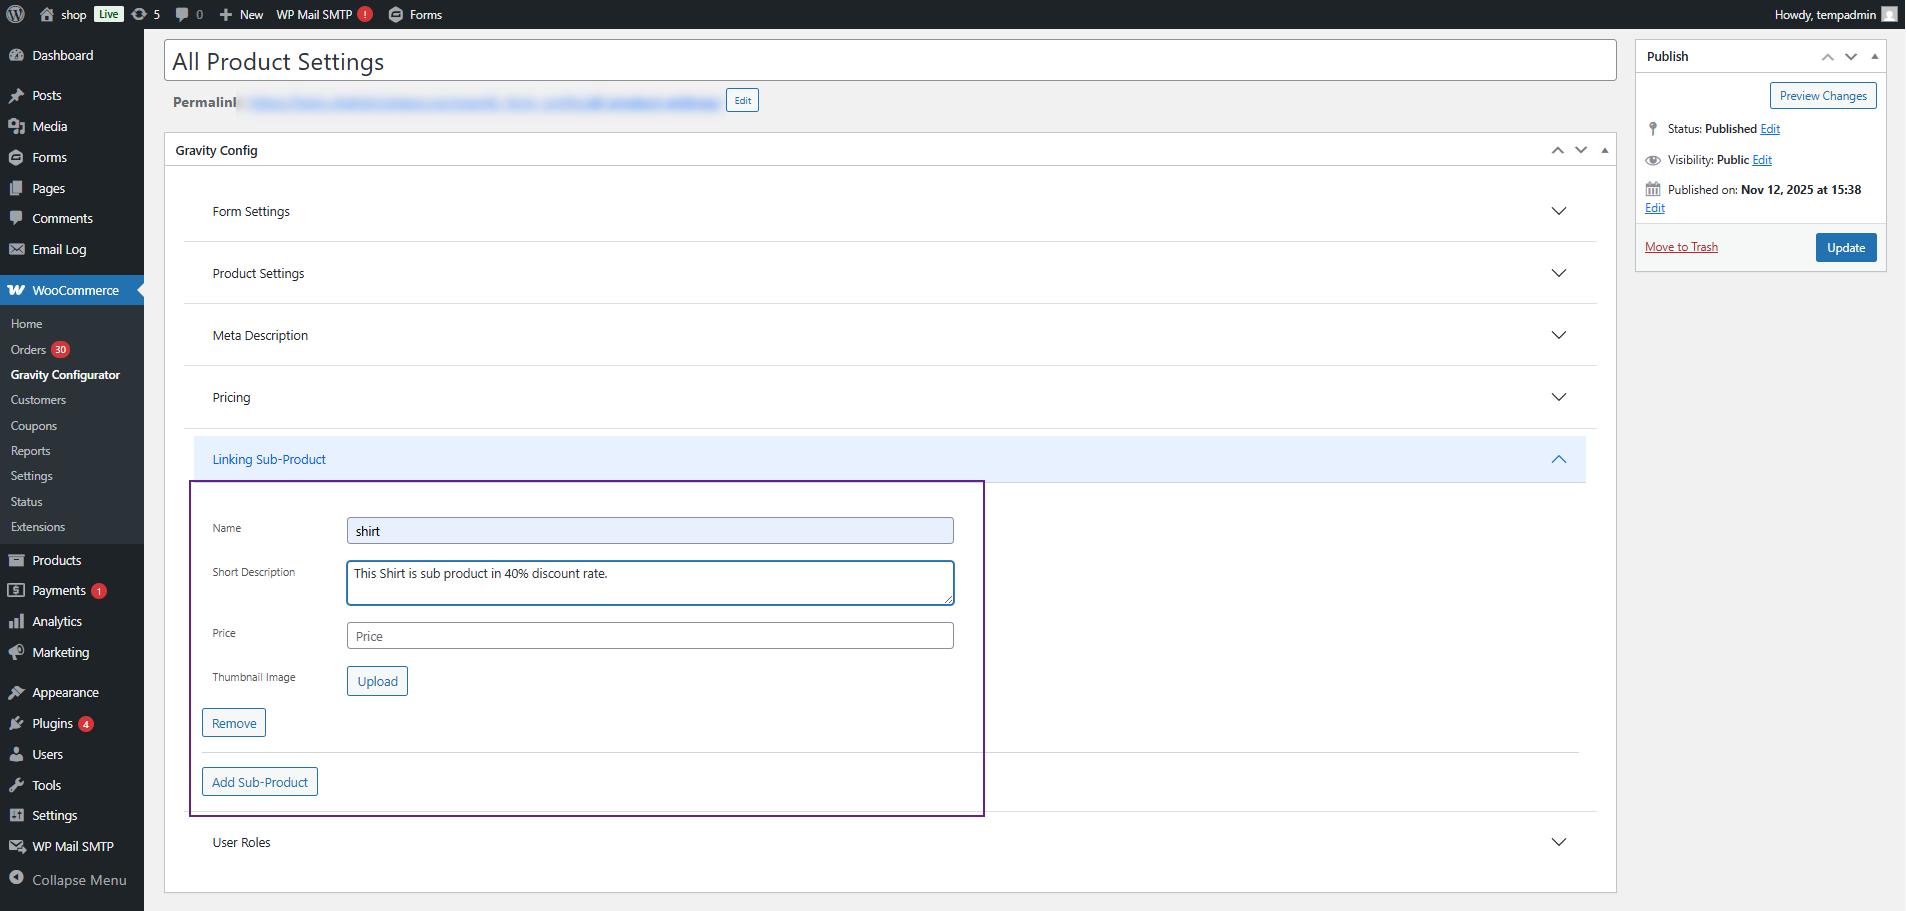
- Price: Enter the amount for the sub-product (this can be different from the main product price).

- Thumbnail: Upload or select an image from the media library to display as the sub-product’s thumbnail.

- Click the Add Sub-Product Button to include additional sub-products as needed.
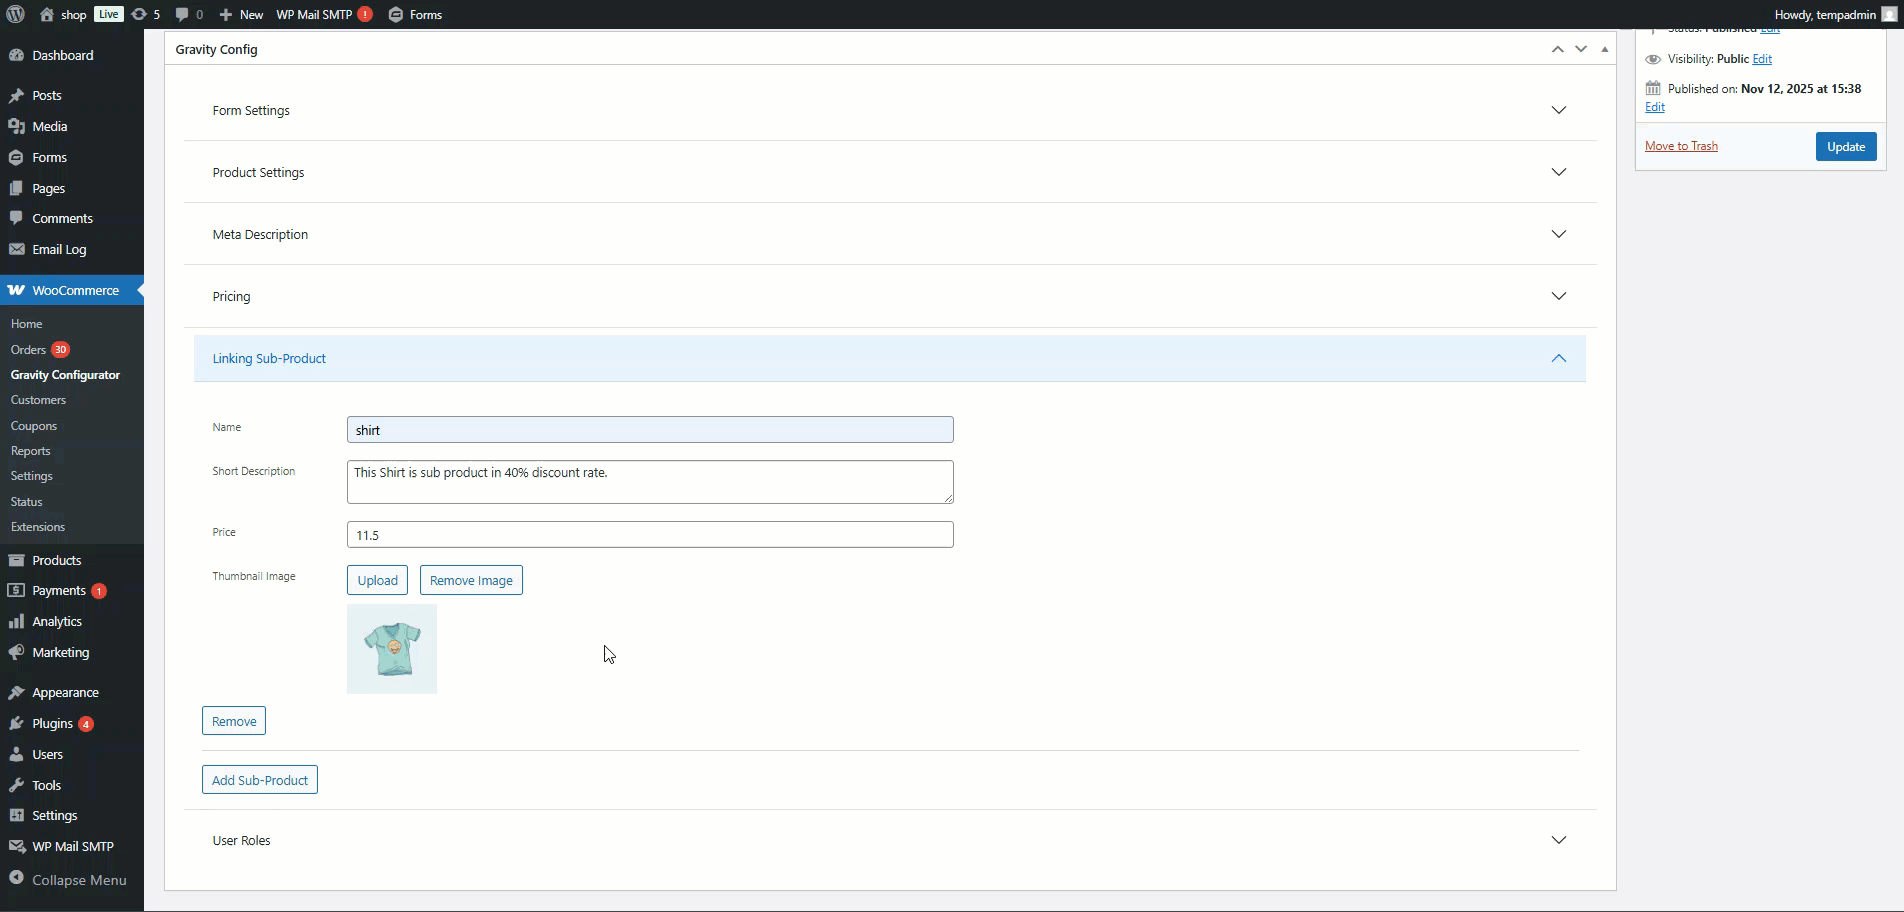
- To remove a sub-product, click the Remove icon beside its entry.
- Once configured, the linked sub-products will appear on the product page as upsell or optional add-ons for customers.
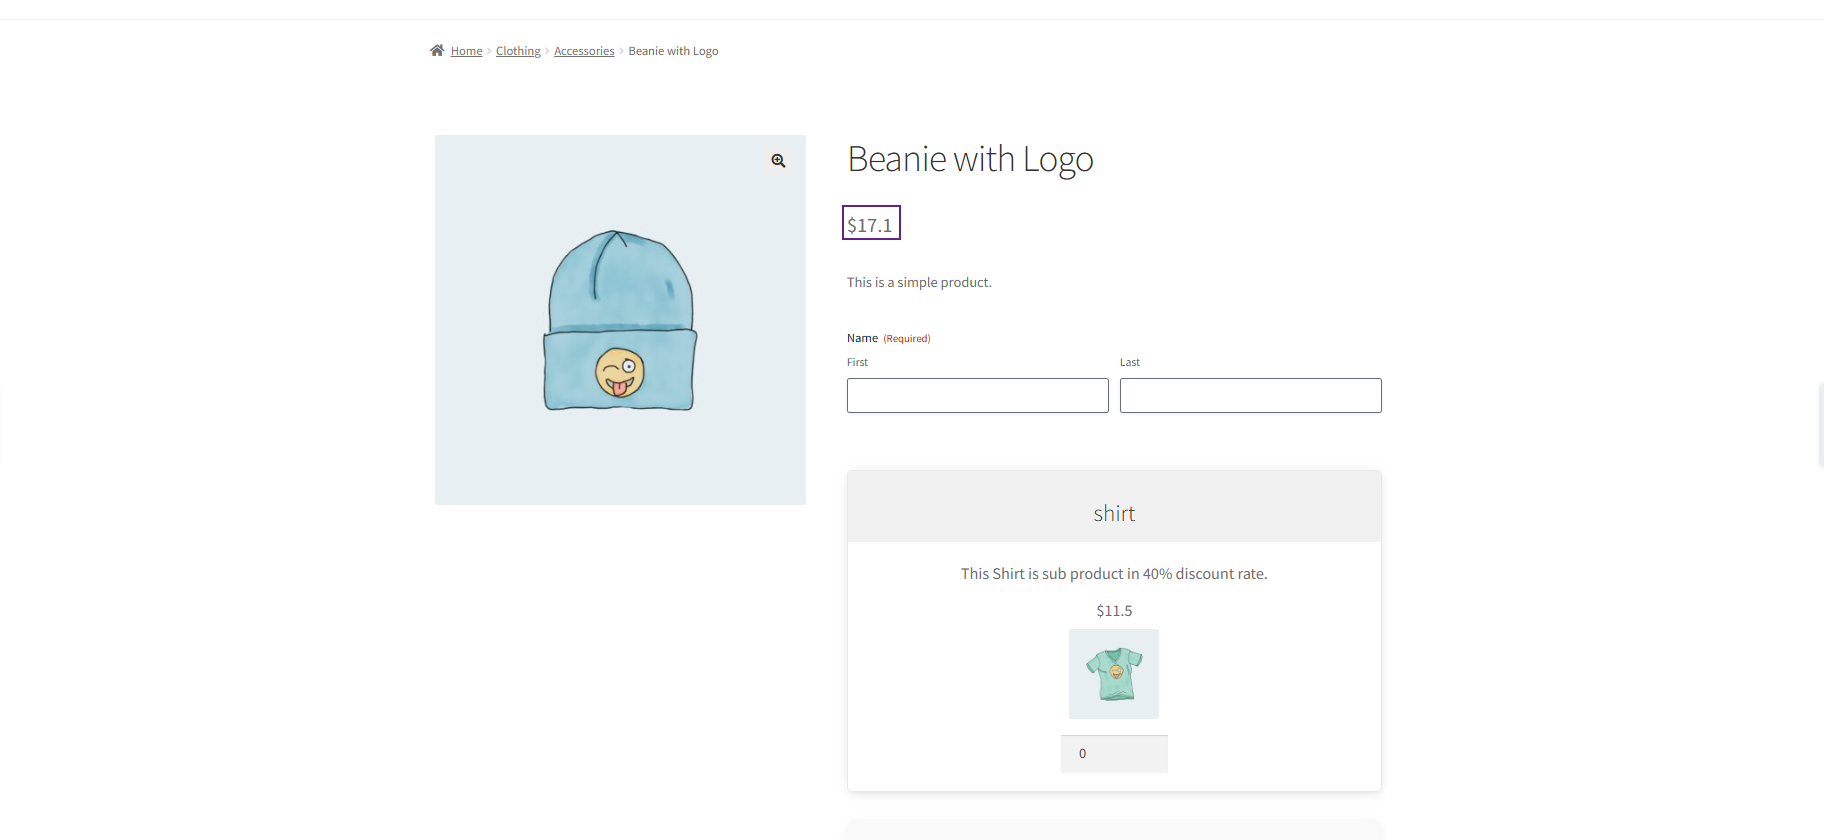
Front-End Impact
- Navigate to the Shop Page.

- Click on any product with Pricing configured.

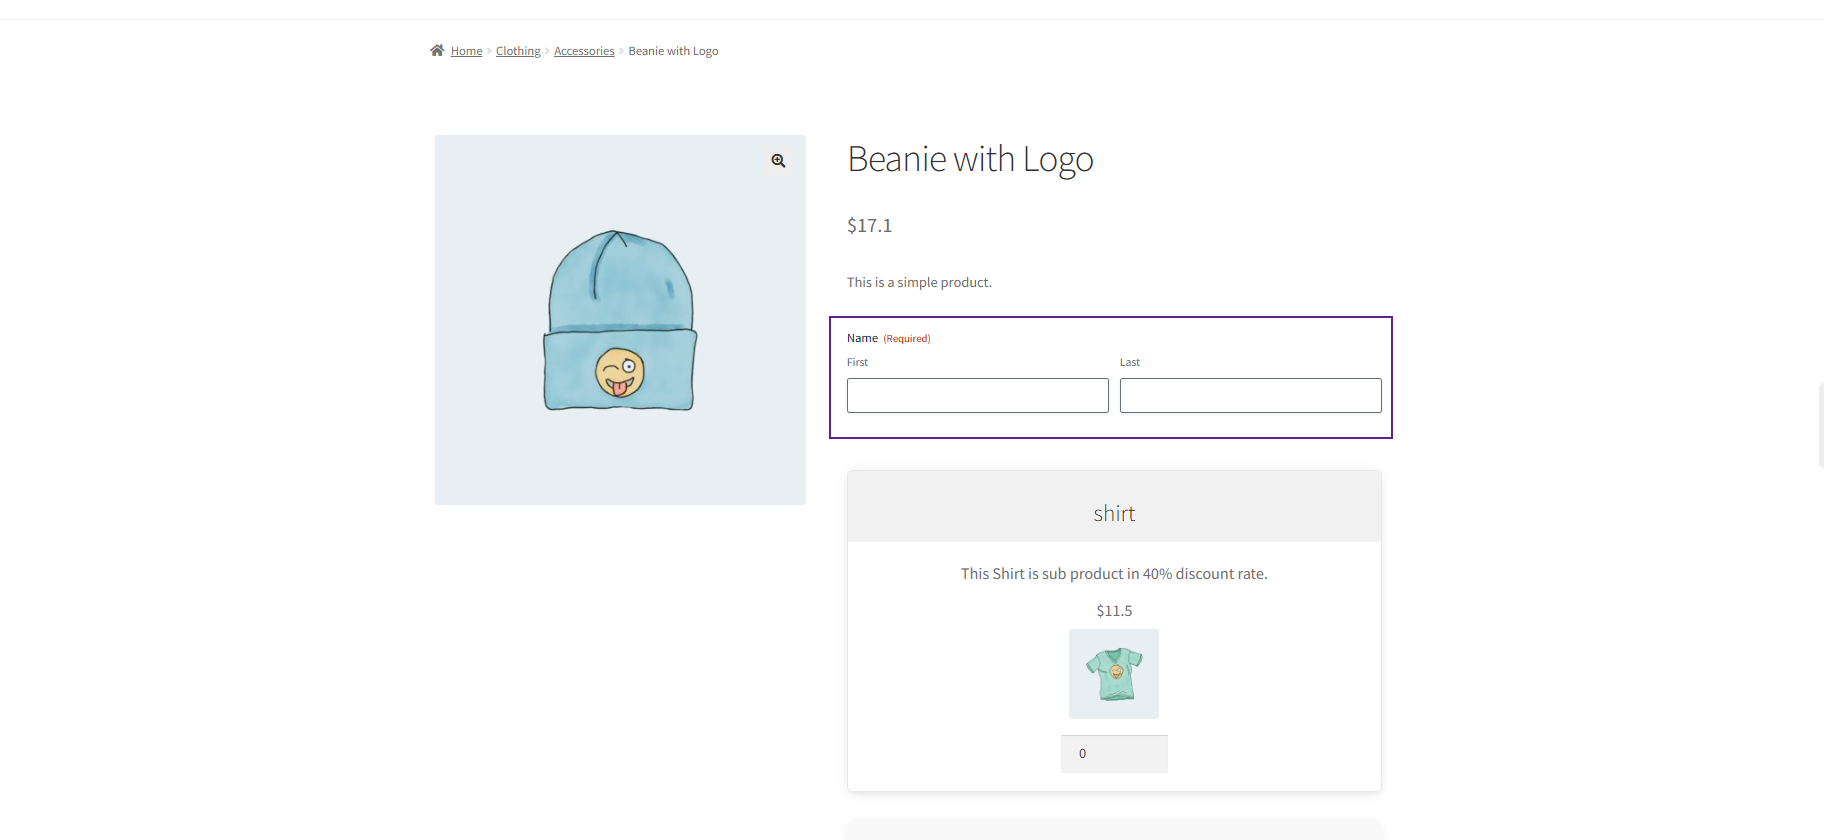
You can see the linked sub-products displayed on the product page:
- Each sub-product shows Name, Short Description, Price, and Thumbnail.
- Customers can view and select sub-products as upsells or optional add-ons.
- Sub-product selections update the totals in Cart, Checkout, and Order pages.

User Role
↑ Back to top- Navigate to the Assign User Role tab.
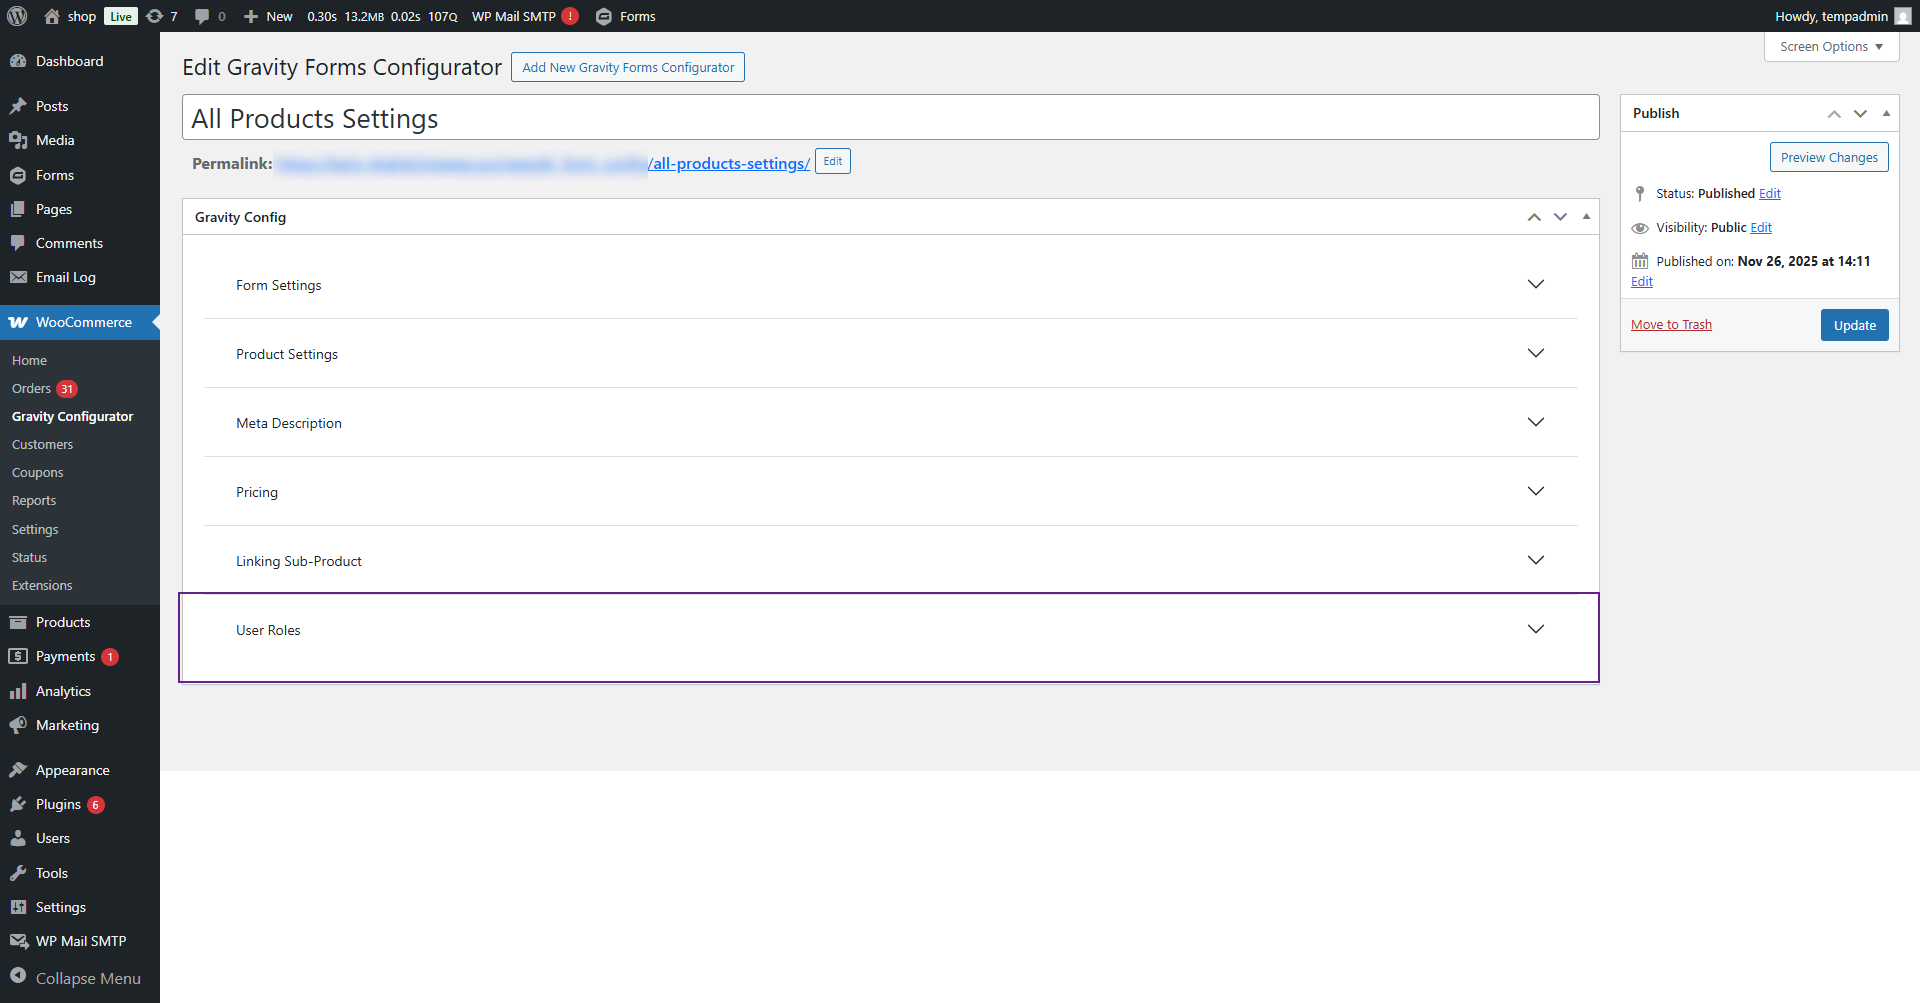
- Click on Assign User Role dropdown button

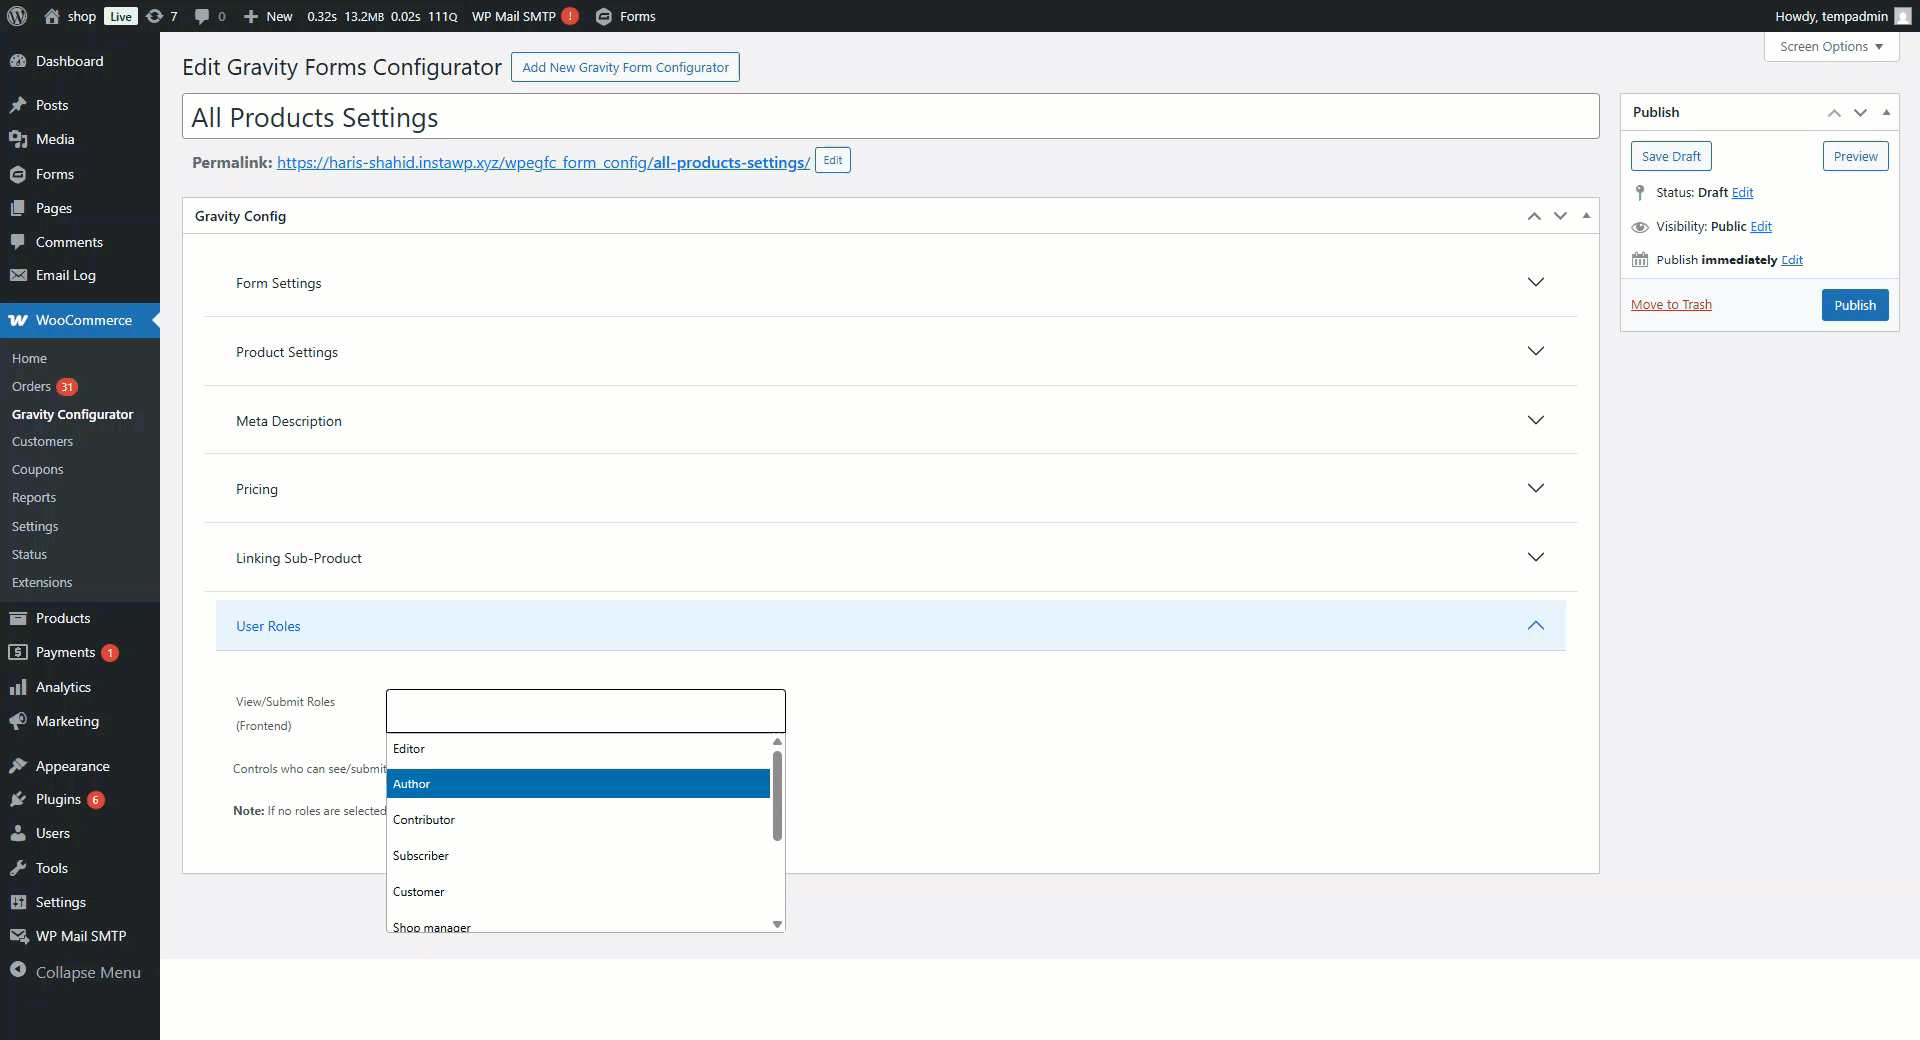
- This section allows the admin to manage which user roles can view or submit the Gravity Form on the frontend.
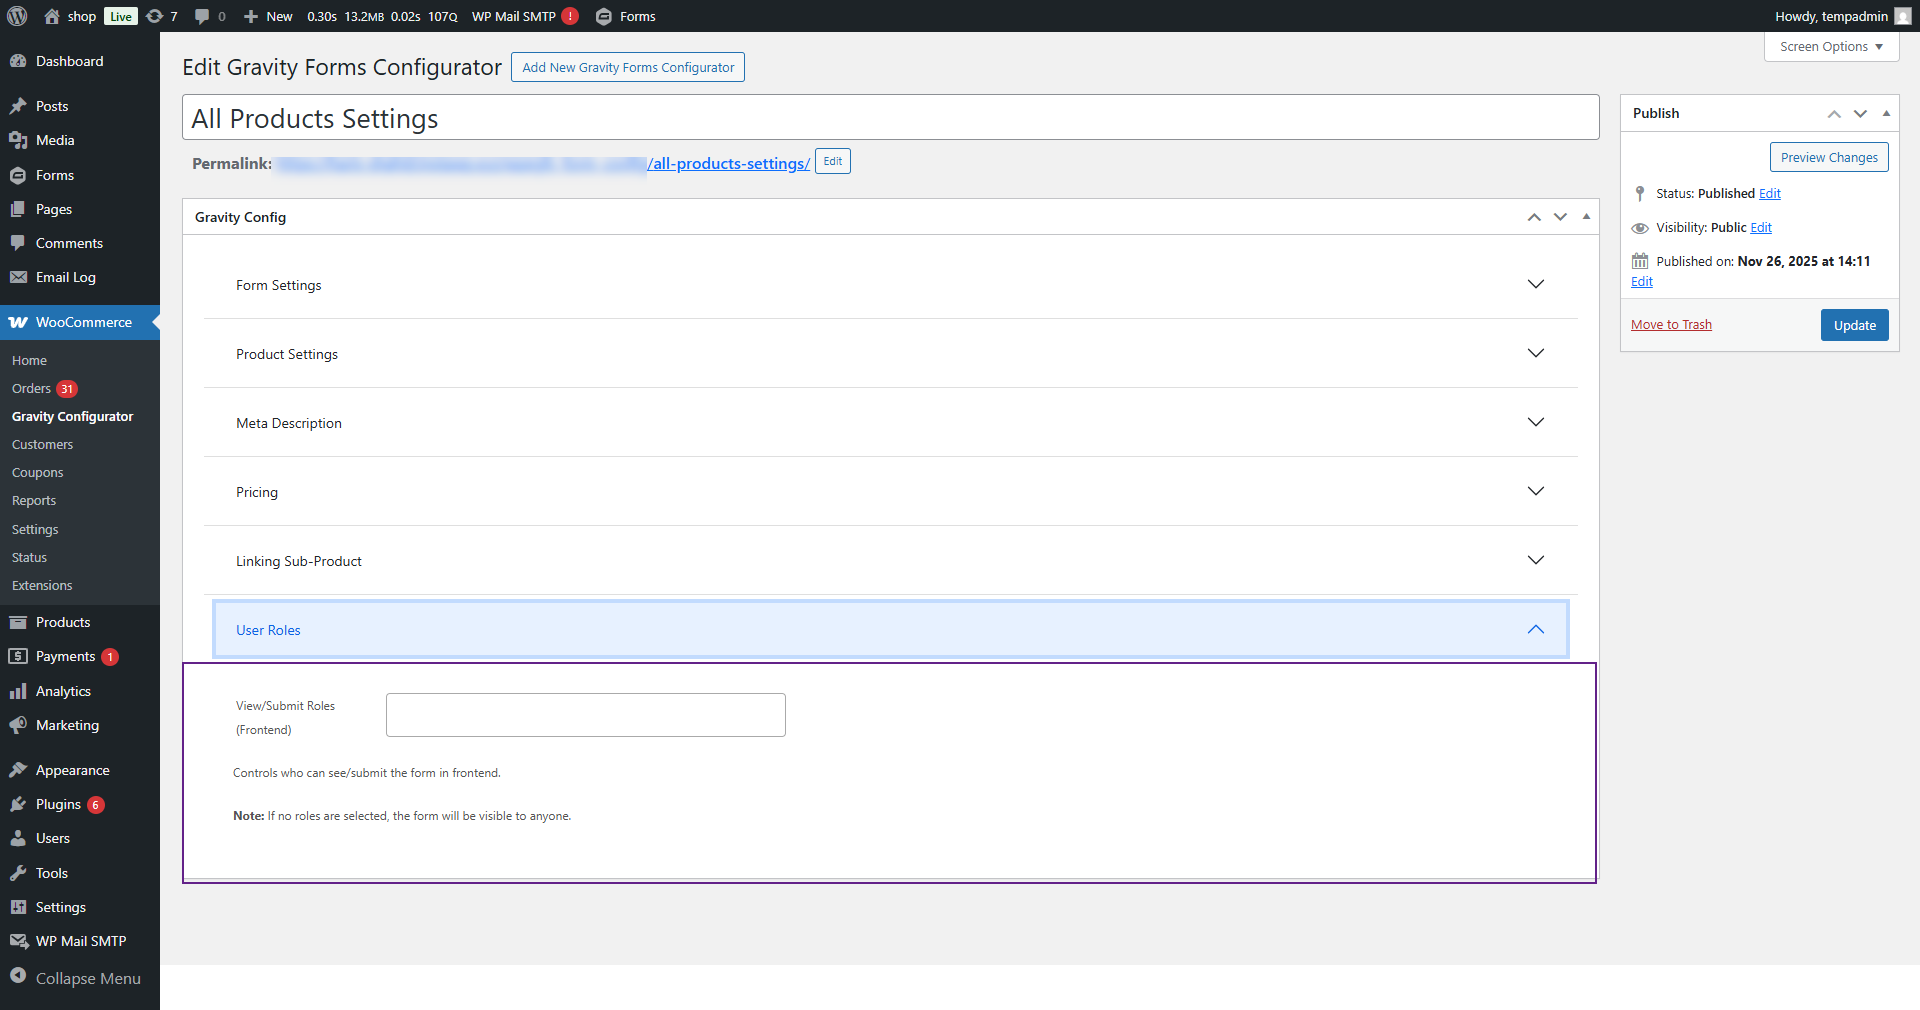
- Under View/Submit Roles, a multi-select dropdown will appear showing all available roles, such as:
- Editor
- Author
- Contributor
- Subscriber
- Customer
- Shop Manager

- Select one or multiple user roles from this dropdown to control form visibility and submission access.
- Only the selected user roles will be able to view and submit the form on the frontend.
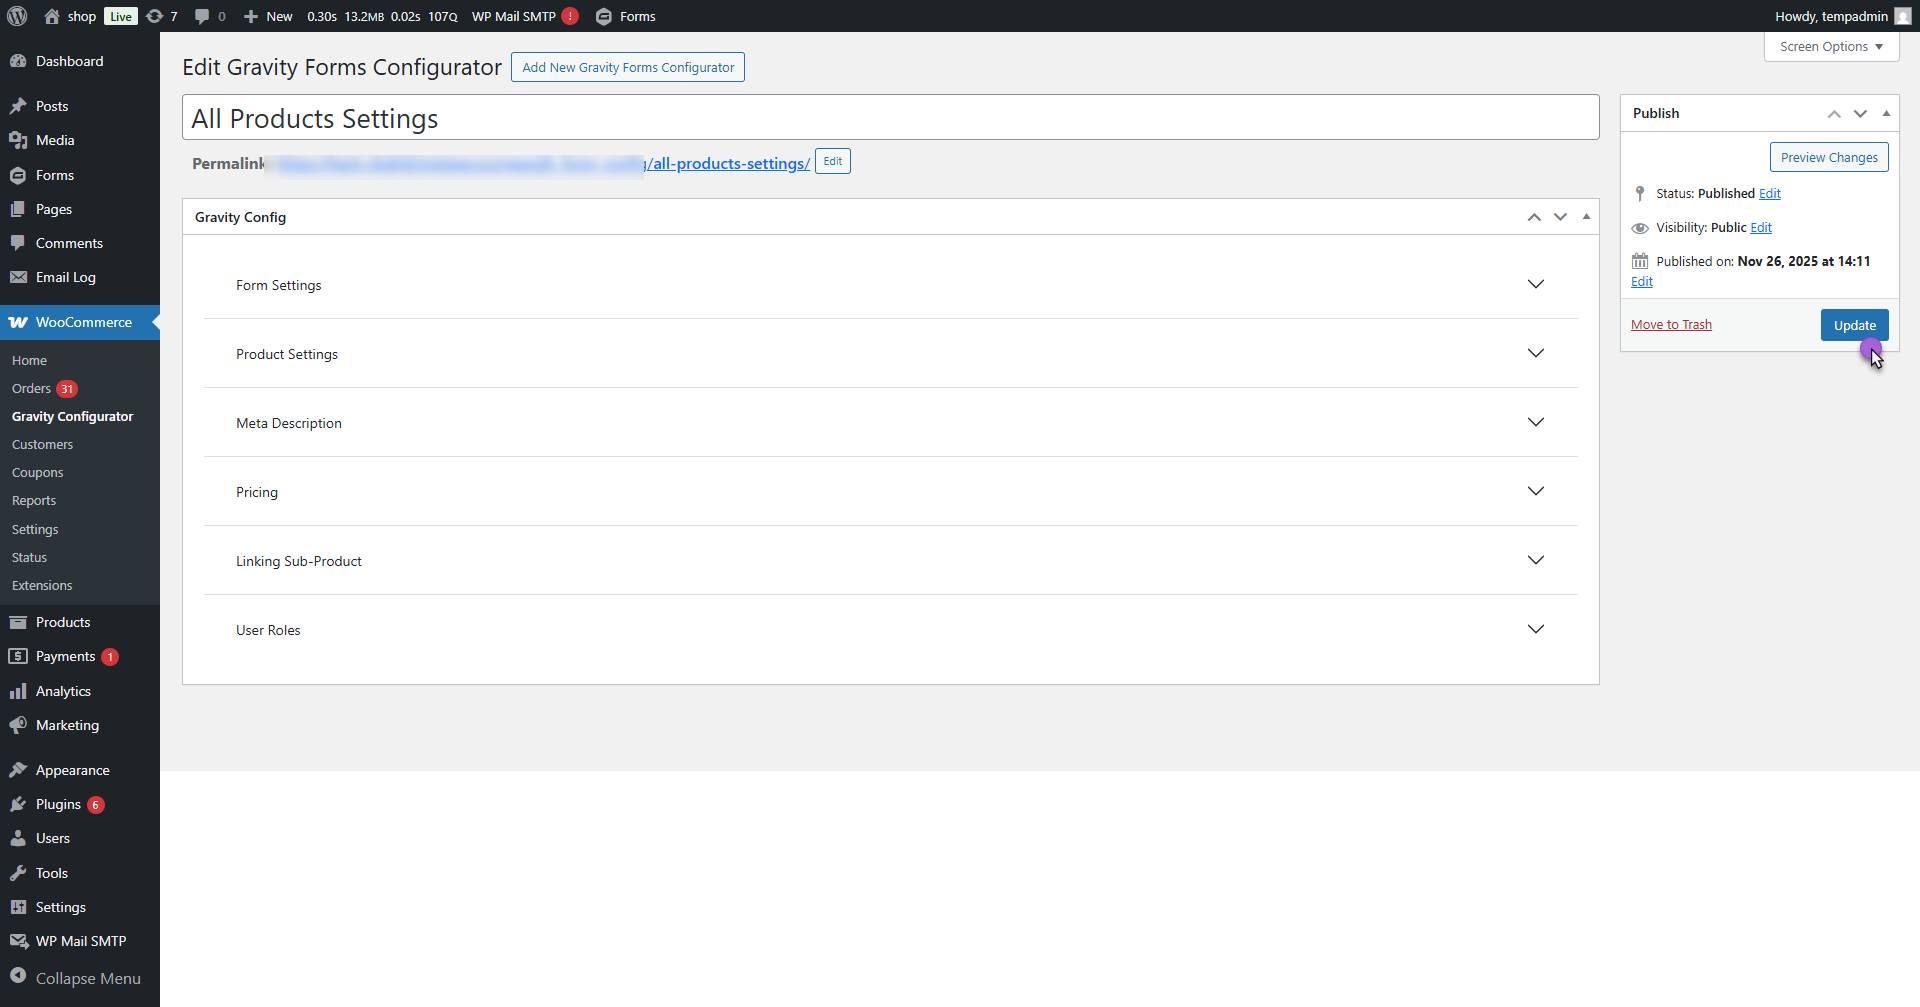
- Now, click Publish or Update to apply all these settings
Per Product Gravity Forms Configurator
↑ Back to topThe Per Product Gravity Forms Configurator allows the admin to fully control how a Gravity Form interacts with each WooCommerce product. From the backend, the admin can assign a form to any simple or variable product and customize how its Pricing, Meta Description, and Sub-Products appear on the frontend. This feature provides product-level flexibility, enabling dynamic pricing,
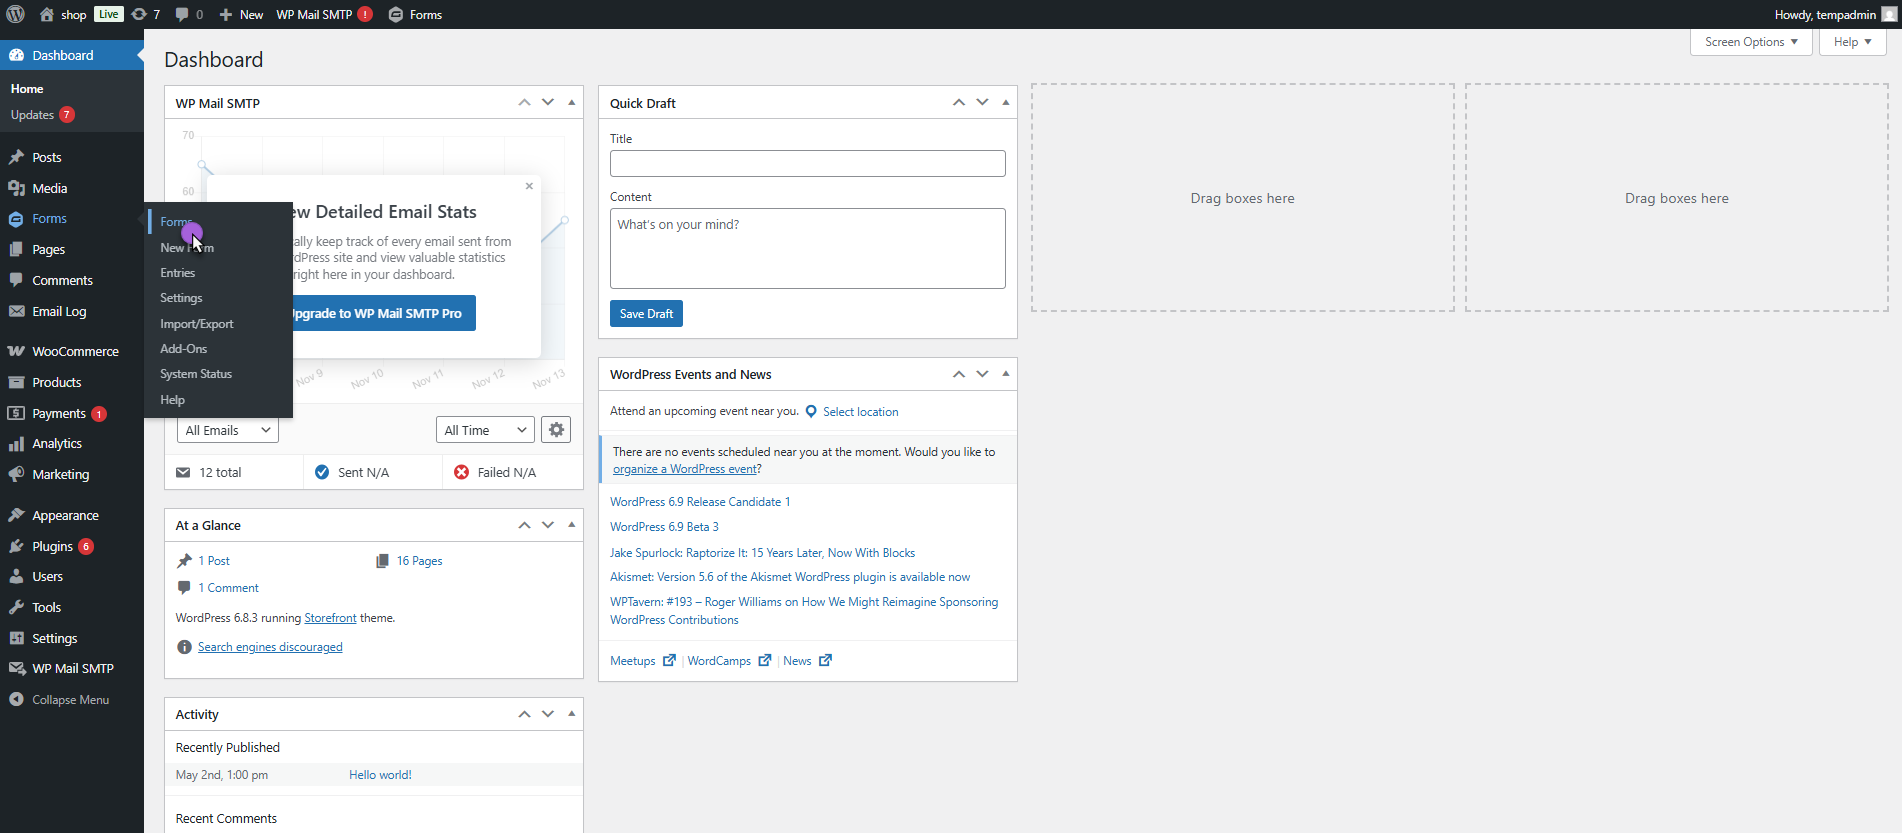
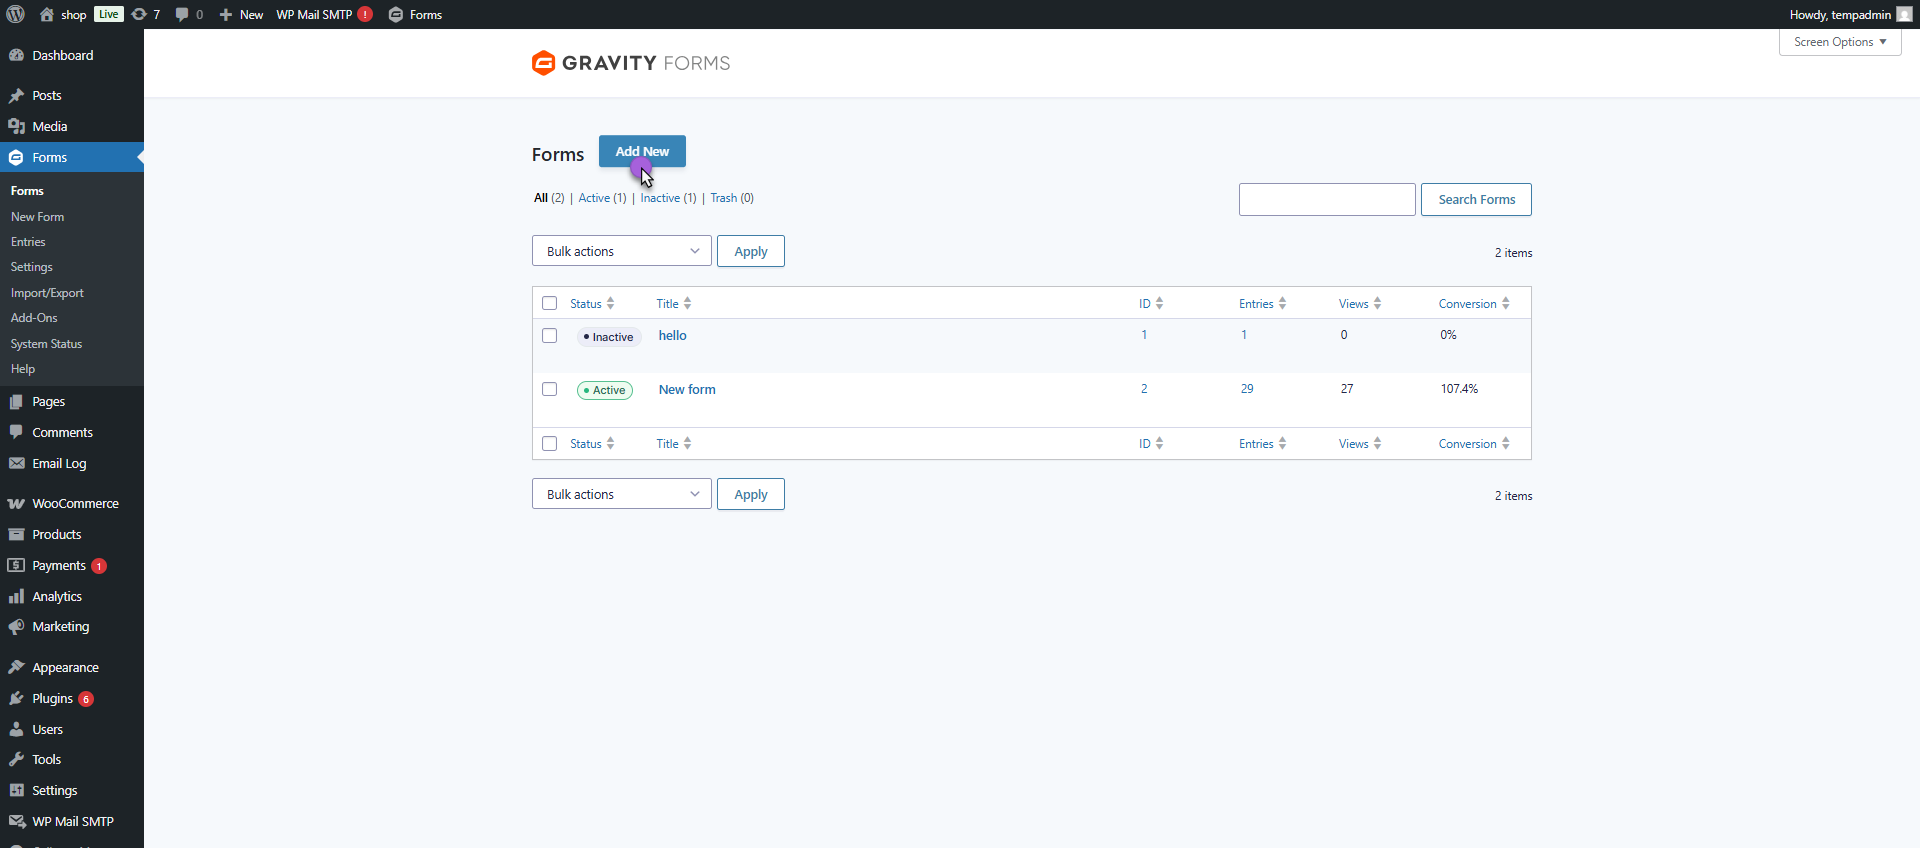
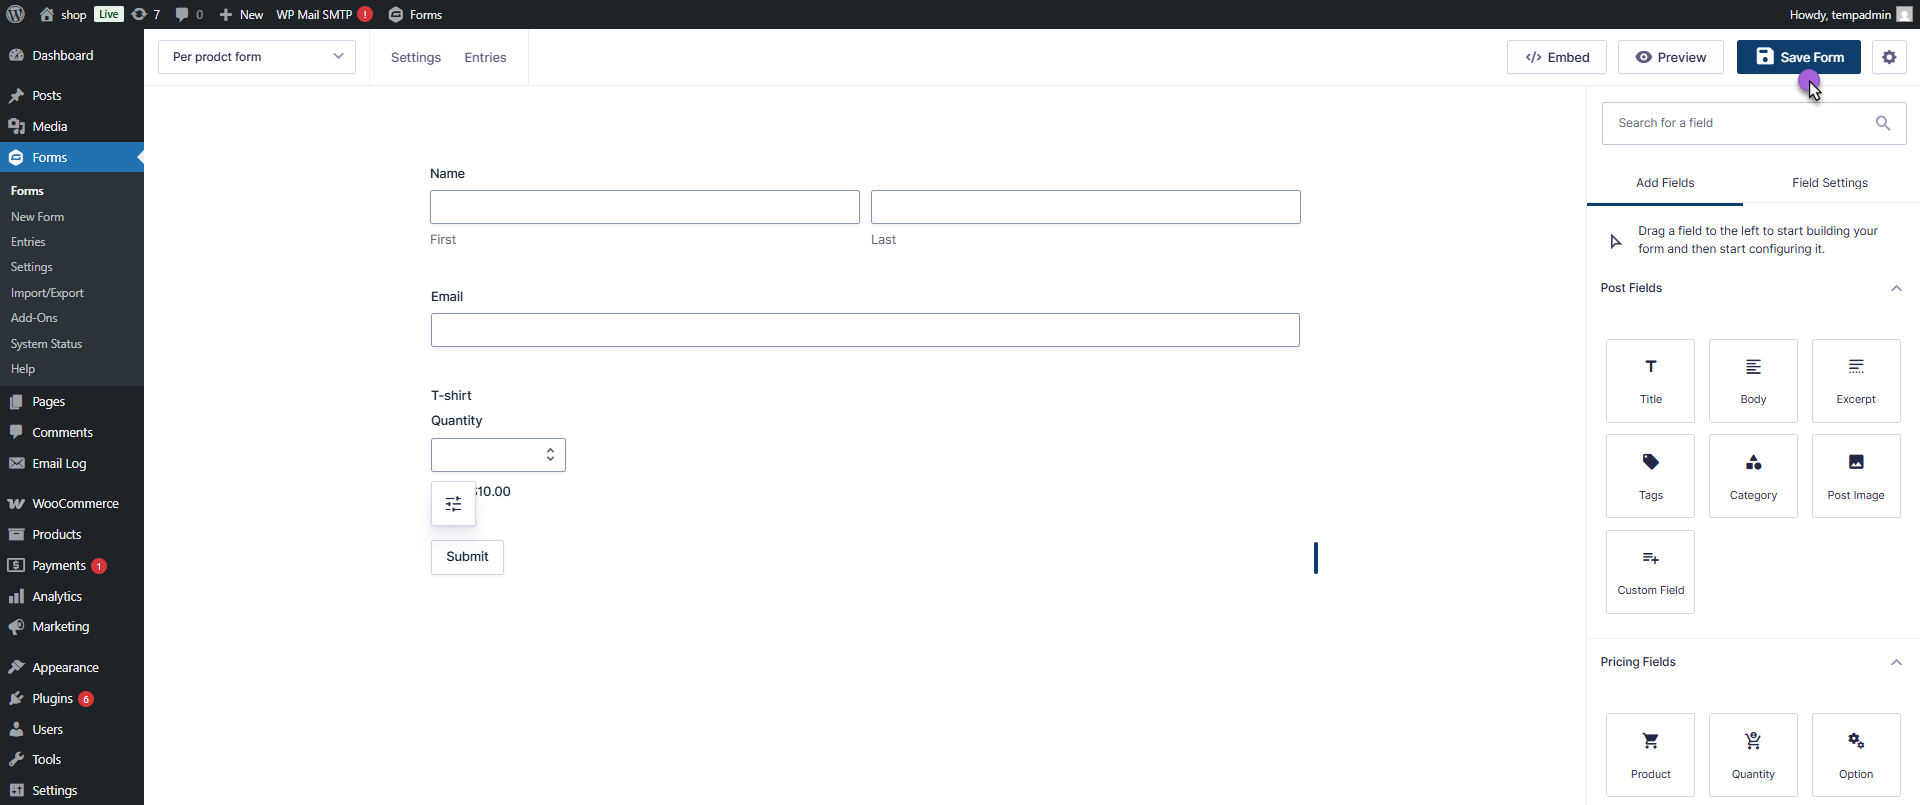
- Navigate to Forms in the WordPress dashboard.
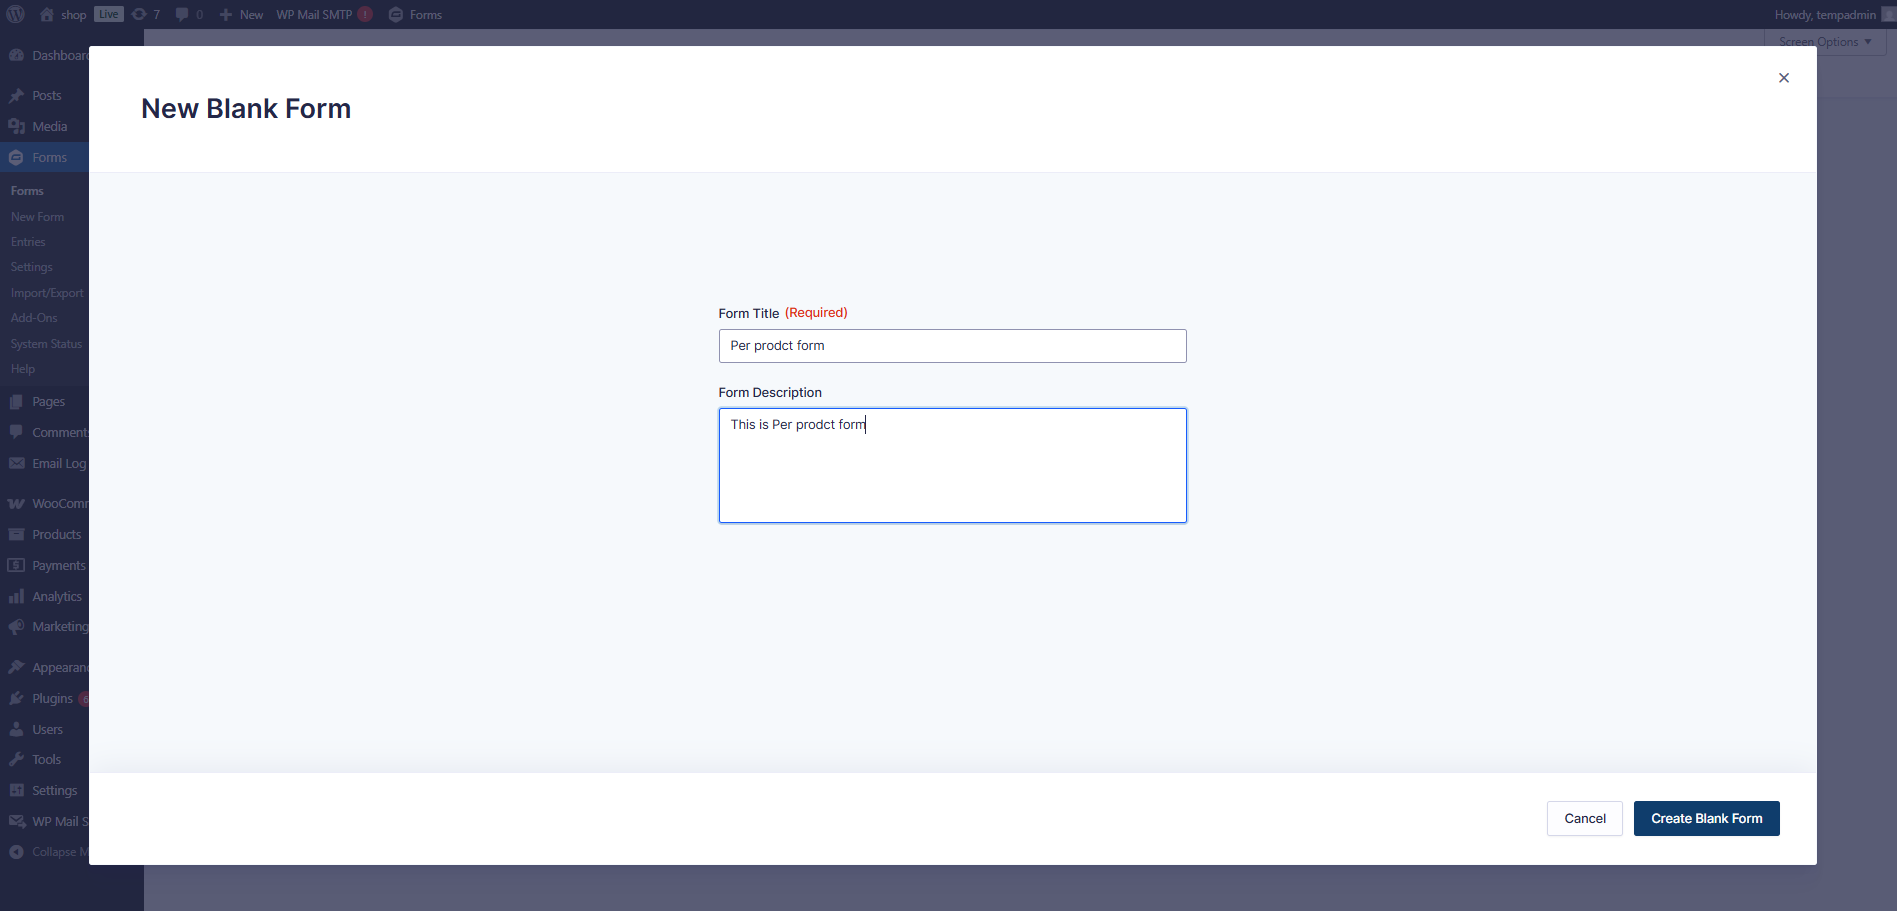
- Click Add New to create a form.
- Select a template or start with a blank form.

- Enter Form Title and Form Description.
- Add, modify, or delete fields as needed.
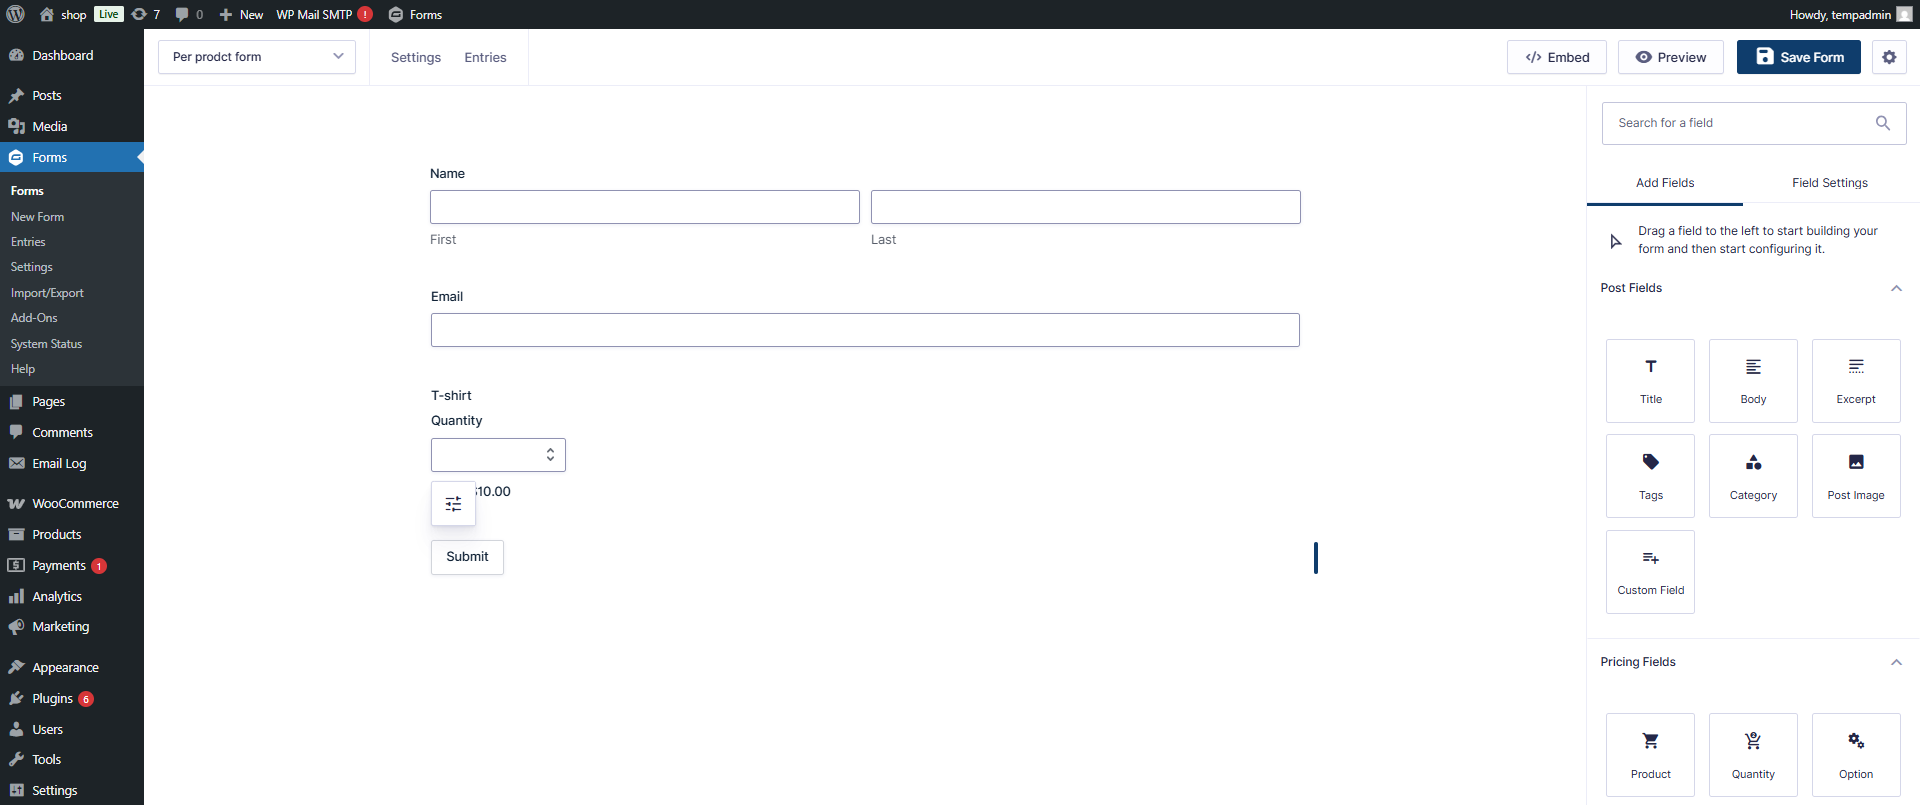
- Save the form.
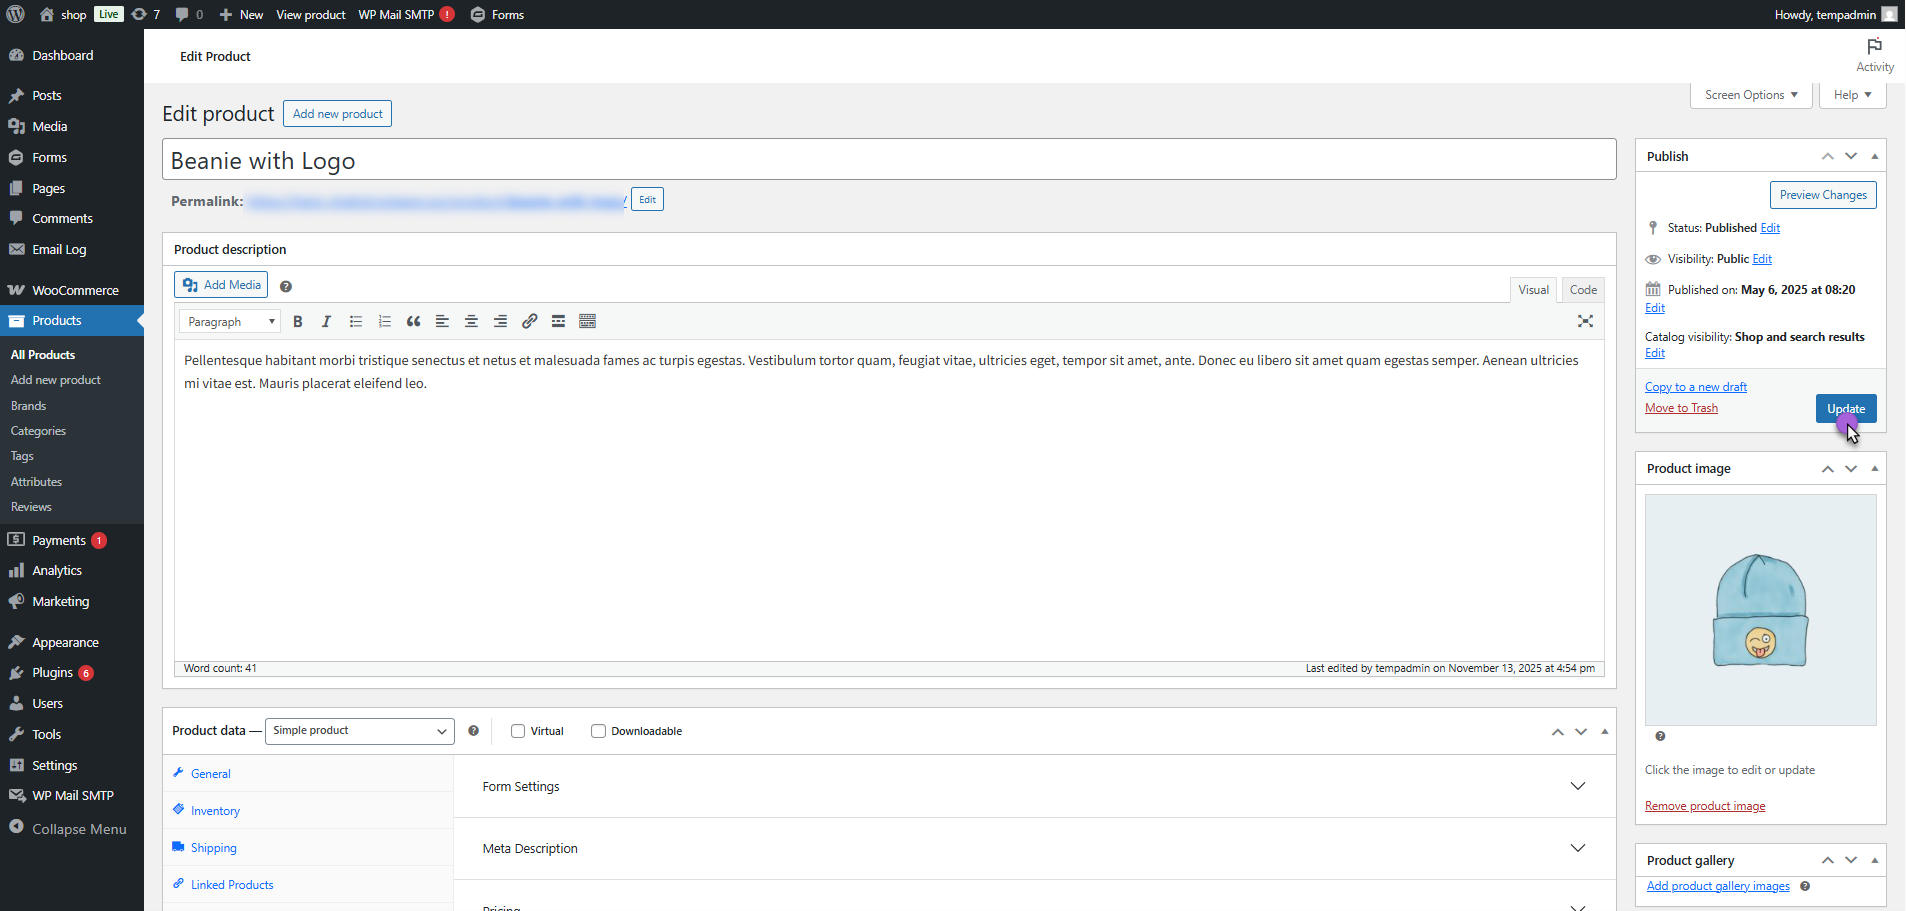
- Now, navigate to Products.
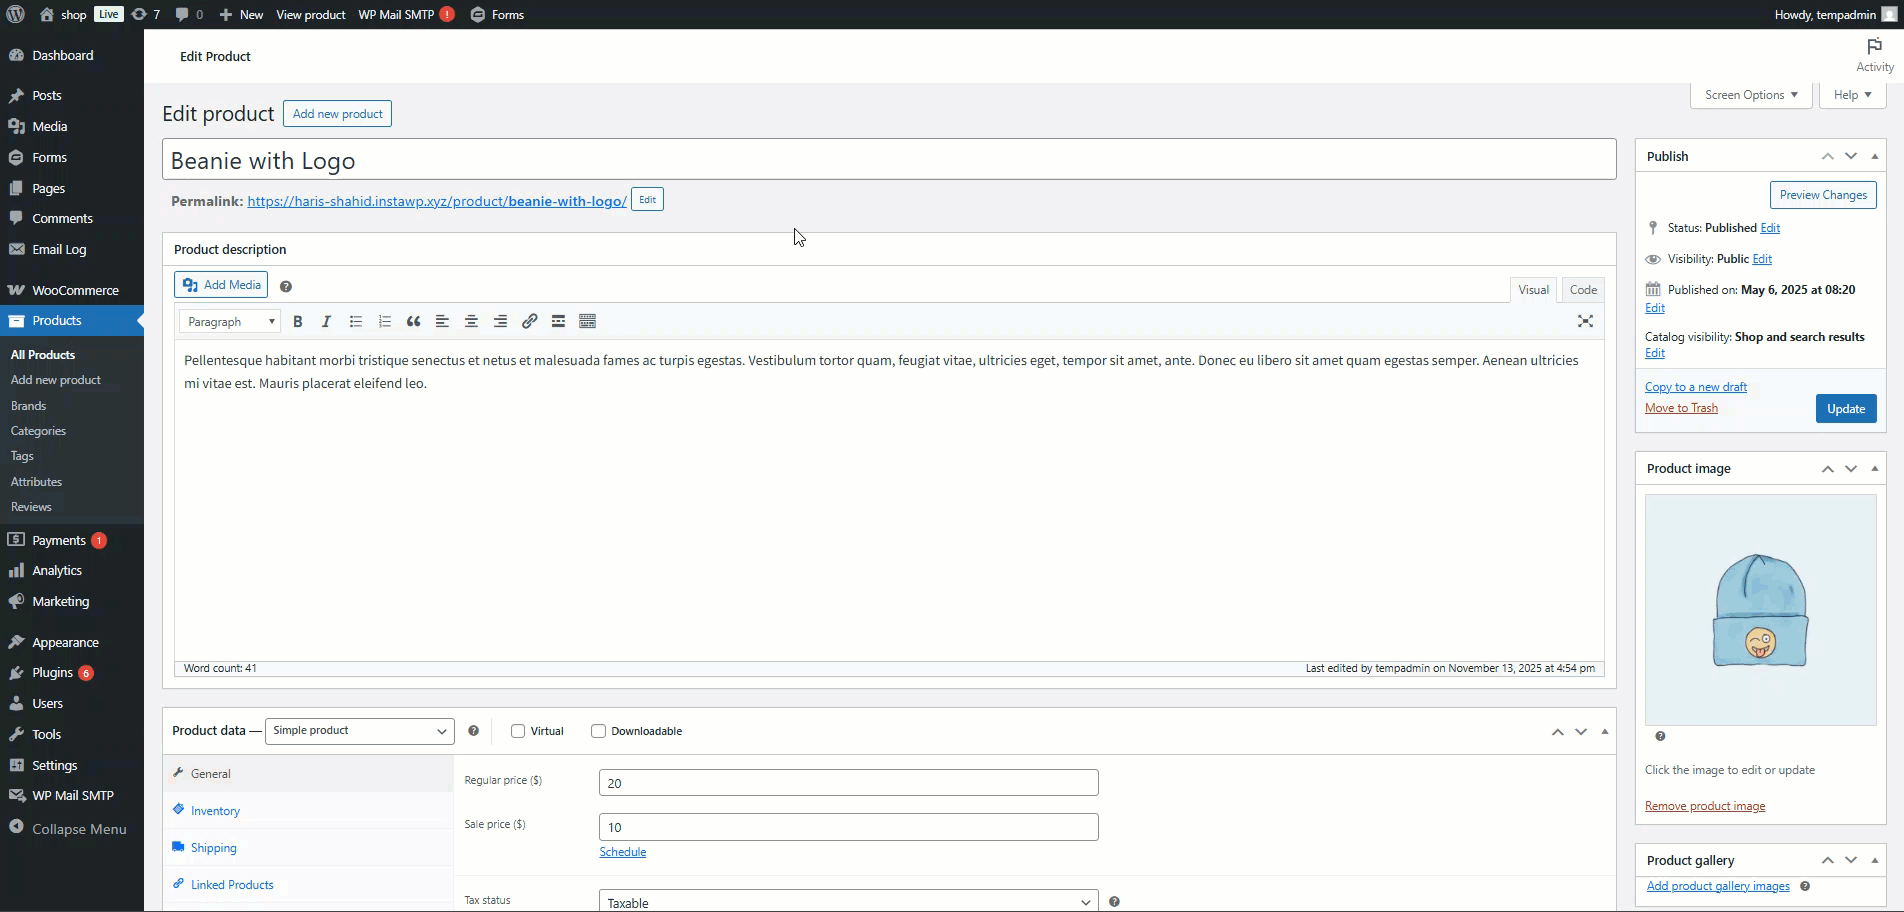
- Click Add New or edit an existing product.
- In Product Data, go to Gravity Forms Configurator.
Form Settings
↑ Back to top- Navigate to the Form Settings.
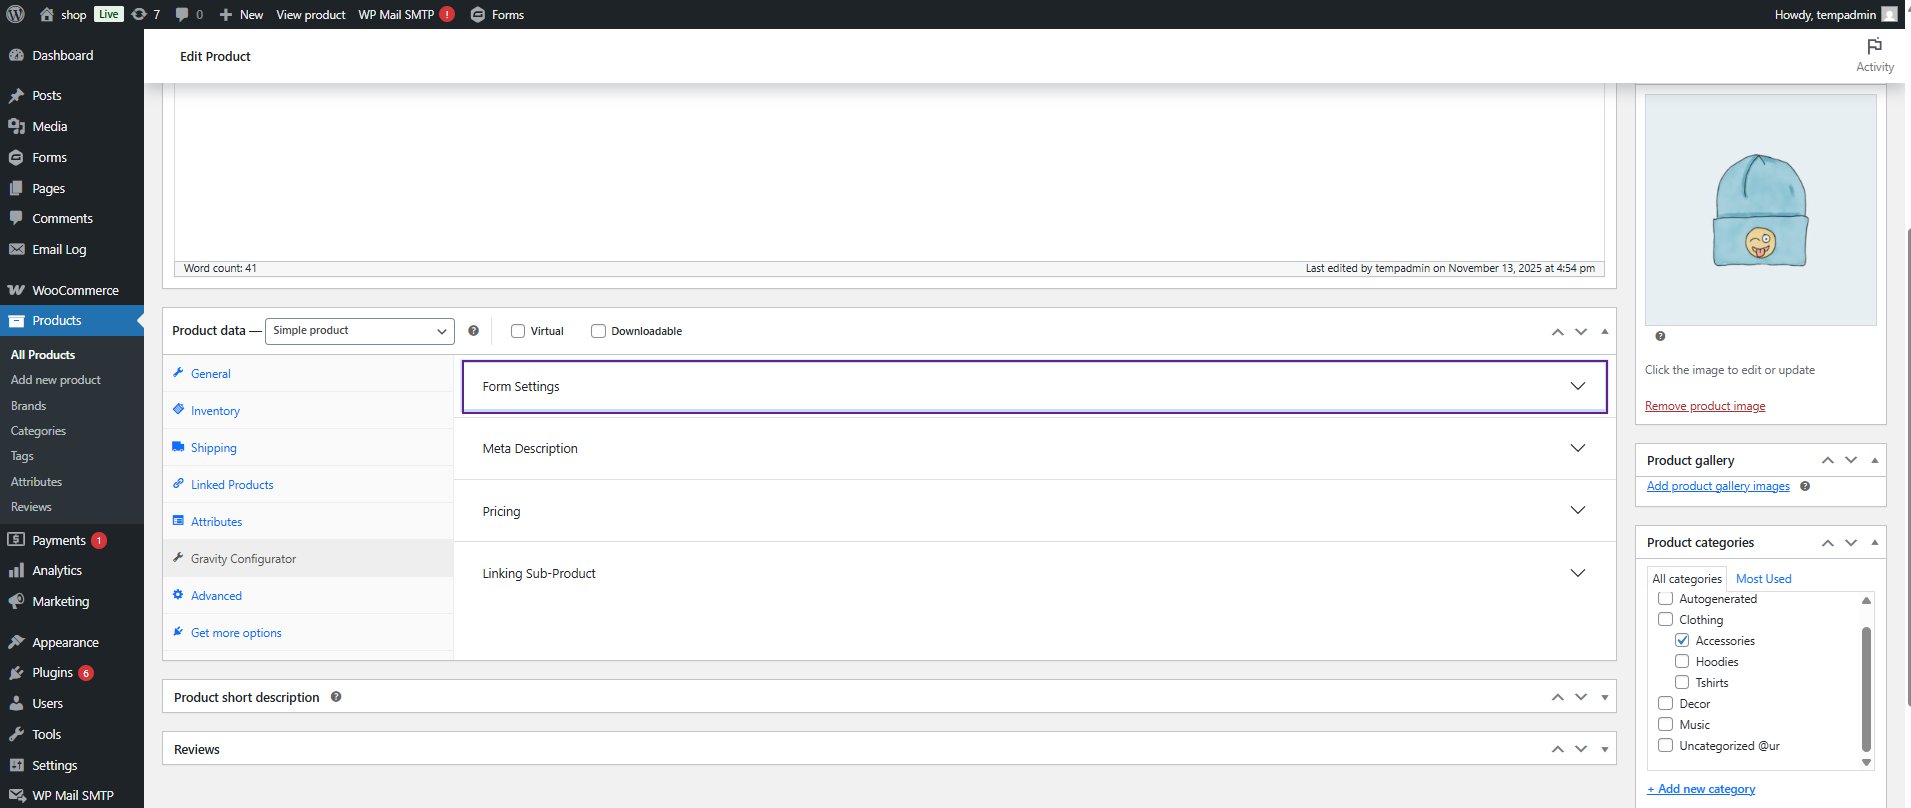
- Click on Form Settings dropdown button.
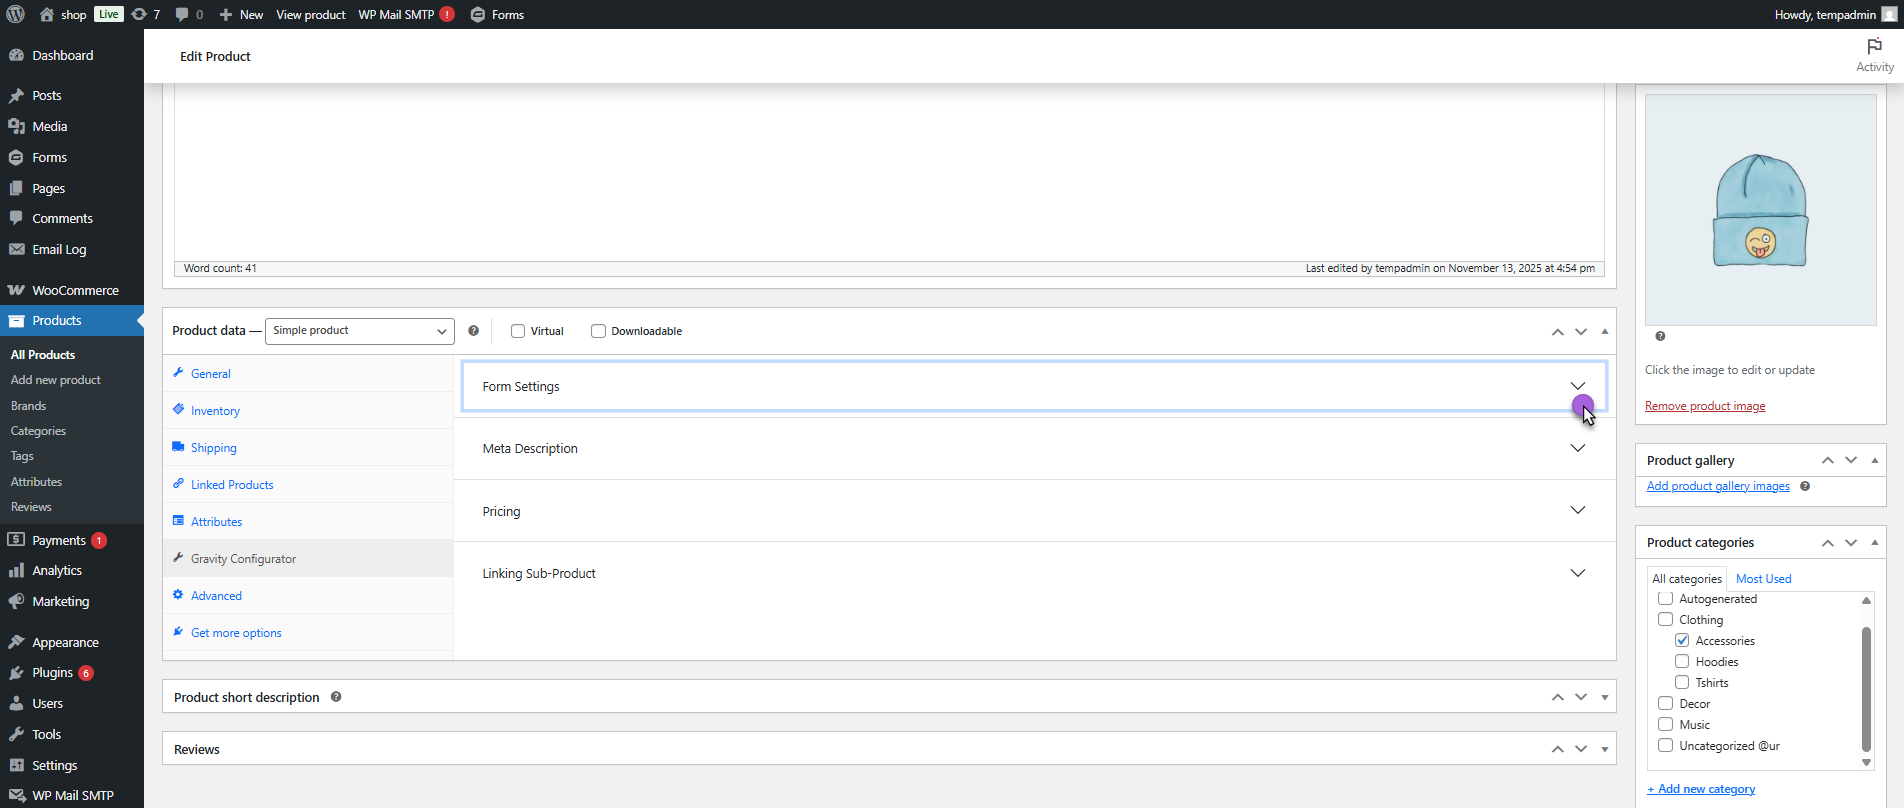
- A dropdown field named Select Forms will appear.

- From this dropdown, select your desired form (the same form you created earlier in Gravity Forms).
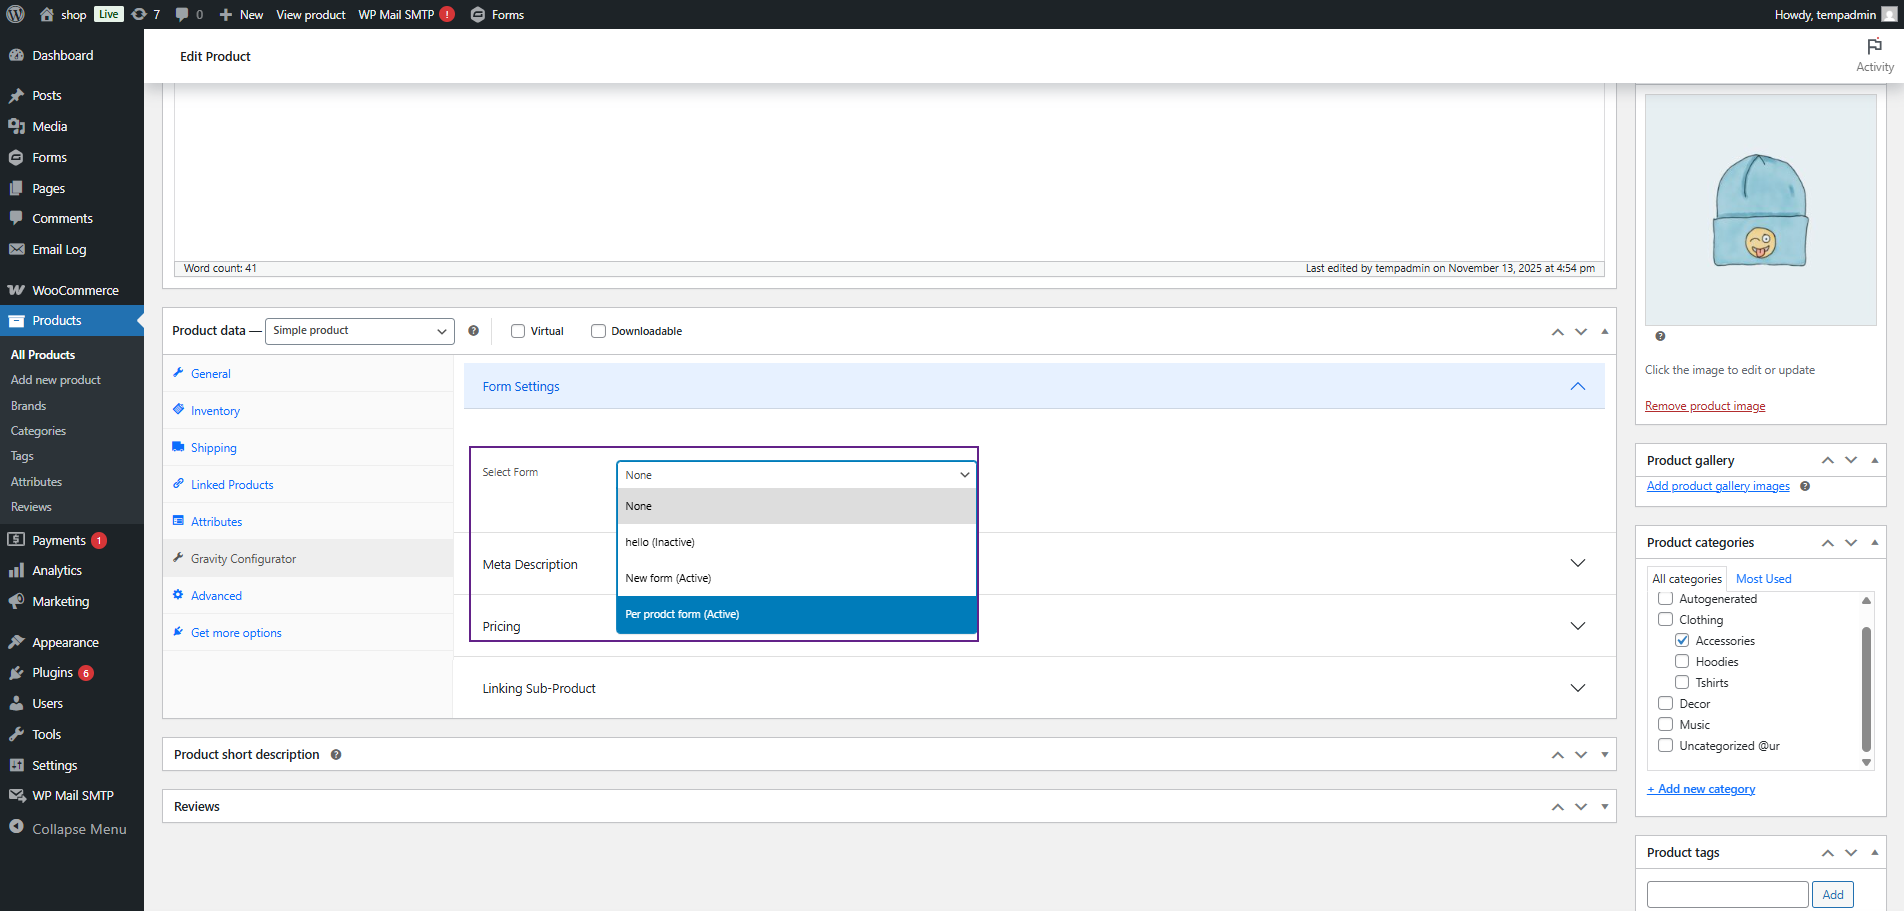
- Once a form is selected, it will be used for configuration across the included products.
Front-End Impact
- Navigate to the Shop Page.
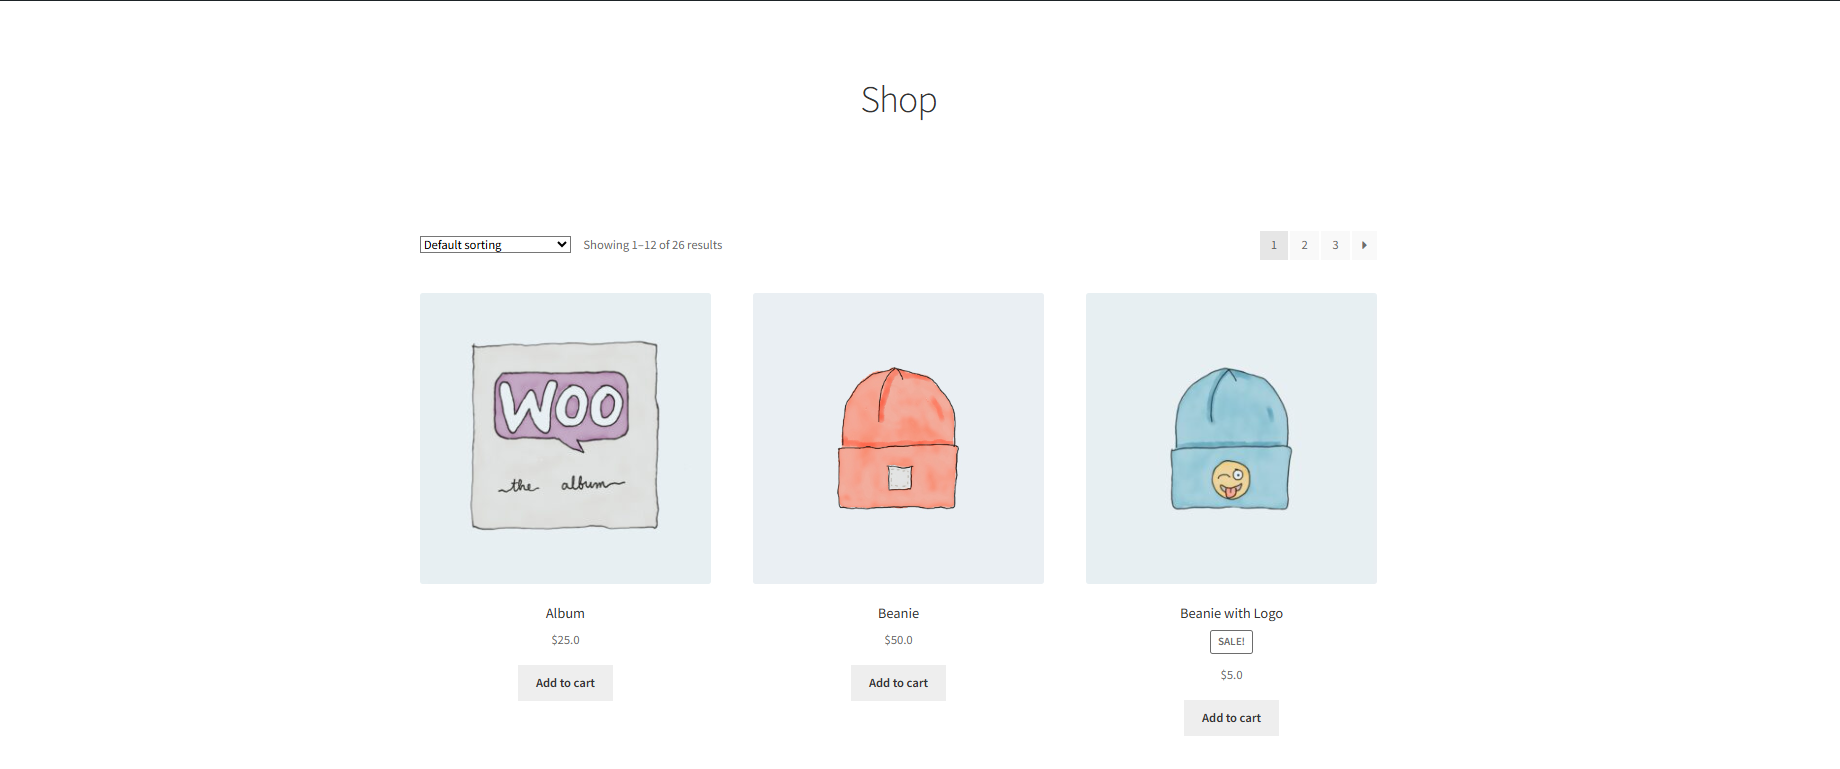
- Open any product that is linked to the configured Gravity Forms Configurator settings.
- When we navigate to the Product Page, the selected Gravity Form will appear for the configured products.

Meta Description
↑ Back to top- Navigate to the Meta Description tab.
- Click on Meta Description dropdown button.

- This section allows the admin to control how the product’s meta details (from the selected Gravity Form) will appear on the frontend.

Meta Field Items
- Under Default, the following display options are available:
- Include All Fields: Displays all meta fields from the selected Gravity Form.
- Include All Fields Except: Displays all meta fields except the ones selected in the Select Exception dropdown.

- Exclude All Fields Except: Excludes all fields except those selected from the Select Exception dropdown.
Custom Meta Descriptions
- Now, click on the Custom Meta Description button to switch to the custom configuration mode.
- In this mode, a field named Form Field will appear. This dropdown lists all the available fields from your selected Gravity Form.
- Select your desired Form Field from the dropdown.
- Now, in the Description box, enter any custom text you want to display.
- You can write any static text or include tags to dynamically pull values from the selected form field.
Front-End Impact
- Navigate to the Shop Page.

- Click on any product with Meta Description configured.

You can see the product’s meta details displayed on the product page based on the settings:
- Meta Field Items:
- Include All Fields: Shows all form fields from the selected Gravity Form.
- Include All Fields Except: Shows all fields except the ones excluded.
- Exclude All Fields Except: Shows only the selected fields.
Custom Meta Descriptions:
- Shows the custom text entered by the admin.
- Can dynamically display values from the selected form field.
Pricing
↑ Back to top- Navigate to the Pricing tab.
- Click on Pricing dropdown button
- This section allows the admin to select which product price should appear on the frontend for the customer.
- From the Display Pricing dropdown, choose your preferred pricing option.
- The following options are available:
- Product Price: Displays the same price that is set in the product (either Regular or Sale price).
- Regular Price: Displays only the Regular Price of the product.
- Sales Price: Displays only the Sale Price of the product.
- Custom Price: When this option is selected, an additional input field labeled Enter Amount will appear. Enter the desired custom amount that you want to display for the product.
- Once the price type is selected and saved, the configured pricing will appear on the product’s frontend according to the chosen setting.
Front-End Impact
- Navigate to the Shop Page.

- Click on any product with Pricing configured.

You can see the product price on the product page based on the selected Pricing option:
- Product Price: Shows the price set in the product (Regular or Sale).
- Regular Price: Shows only the Regular Price.
- Sale Price: Shows only the Sale Price.
- Custom Price: Shows the custom amount entered by the admin.
Sub-Product
↑ Back to top- Navigate to the Link Sub-Product tab.
- Click on Sub-Product dropdown button
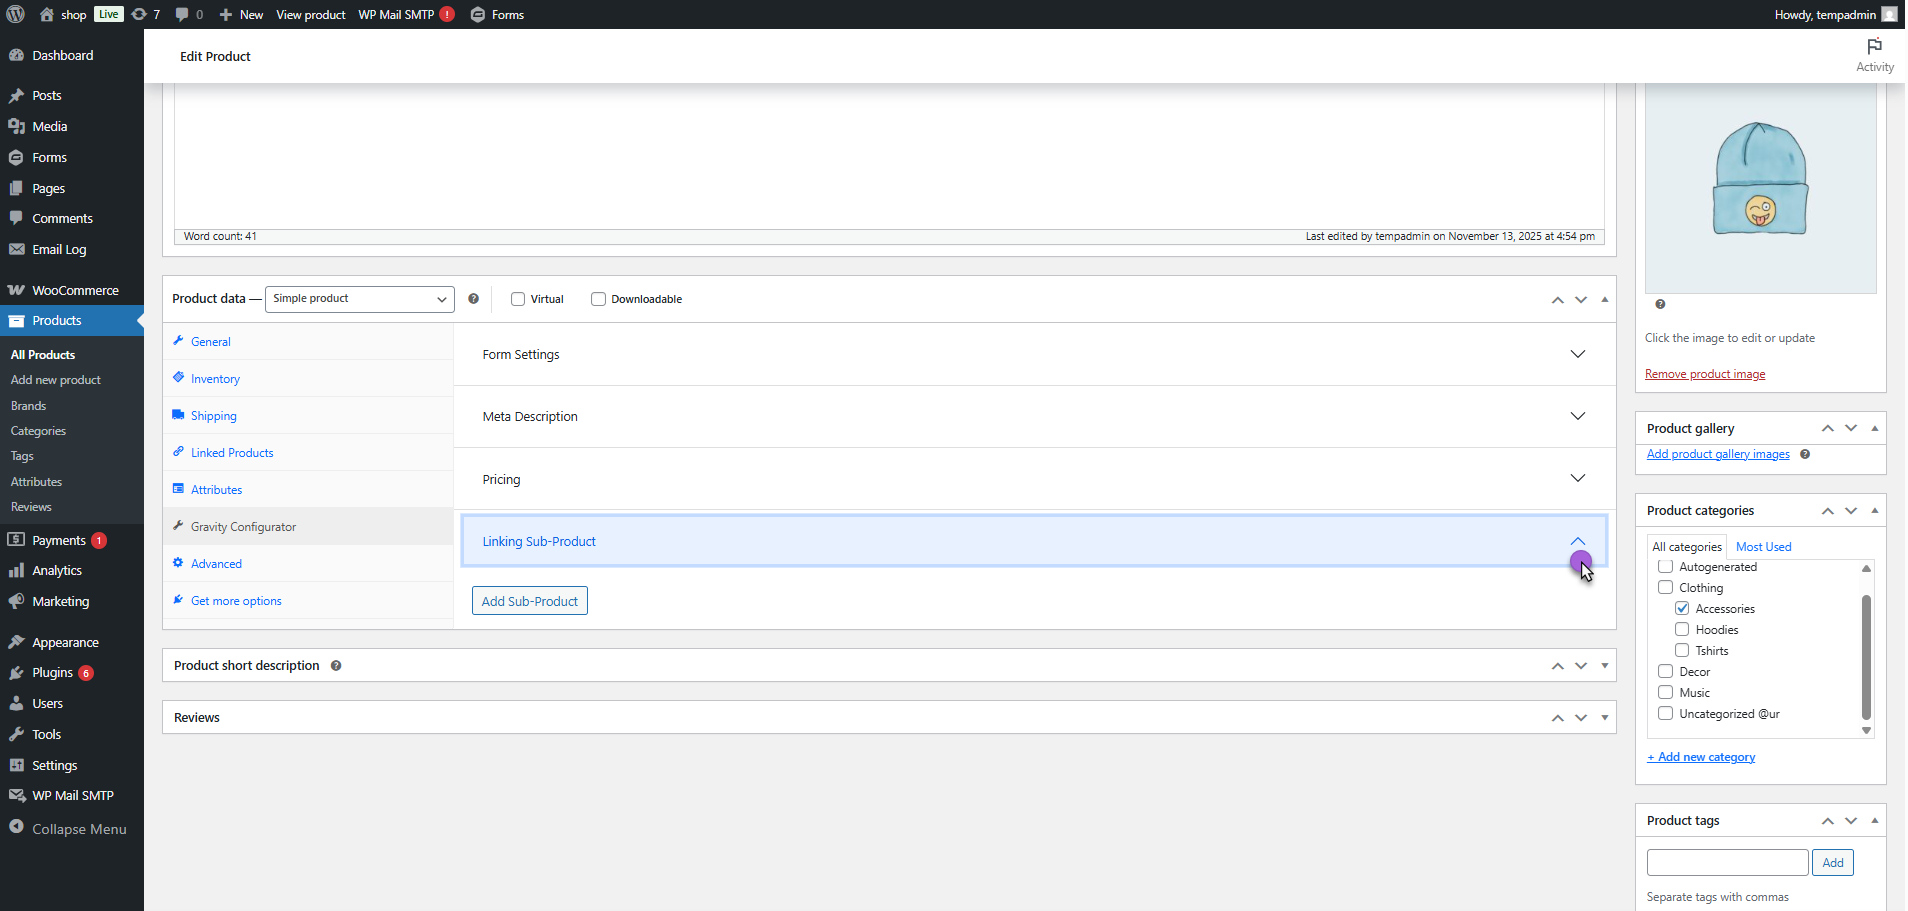
- This section allows the admin to link one or multiple sub-products (upsell or add-on items) with the main product.
- Click the Add Sub-Product button.
- A field appear where you can add multiple sub-products one by one.
- Each sub-product entry includes the following fields:
- Name: Enter the name of the sub-product that will appear on the frontend.
- Short Description: Enter a brief description for the sub-product.
- Price: Enter the amount for the sub-product (this can be different from the main product price).

- Thumbnail: Upload or select an image from the media library to display as the sub-product’s thumbnail.

- Click the Add Sub-Product Button to include additional sub-products as needed.
- To remove a sub-product, click the Remove icon beside its entry.
- Once configured, the linked sub-products will appear on the product page as upsell or optional add-ons for customers.
- Now, click Publish or Update to apply all these settings
Front-End Impact
- Navigate to the Shop Page.
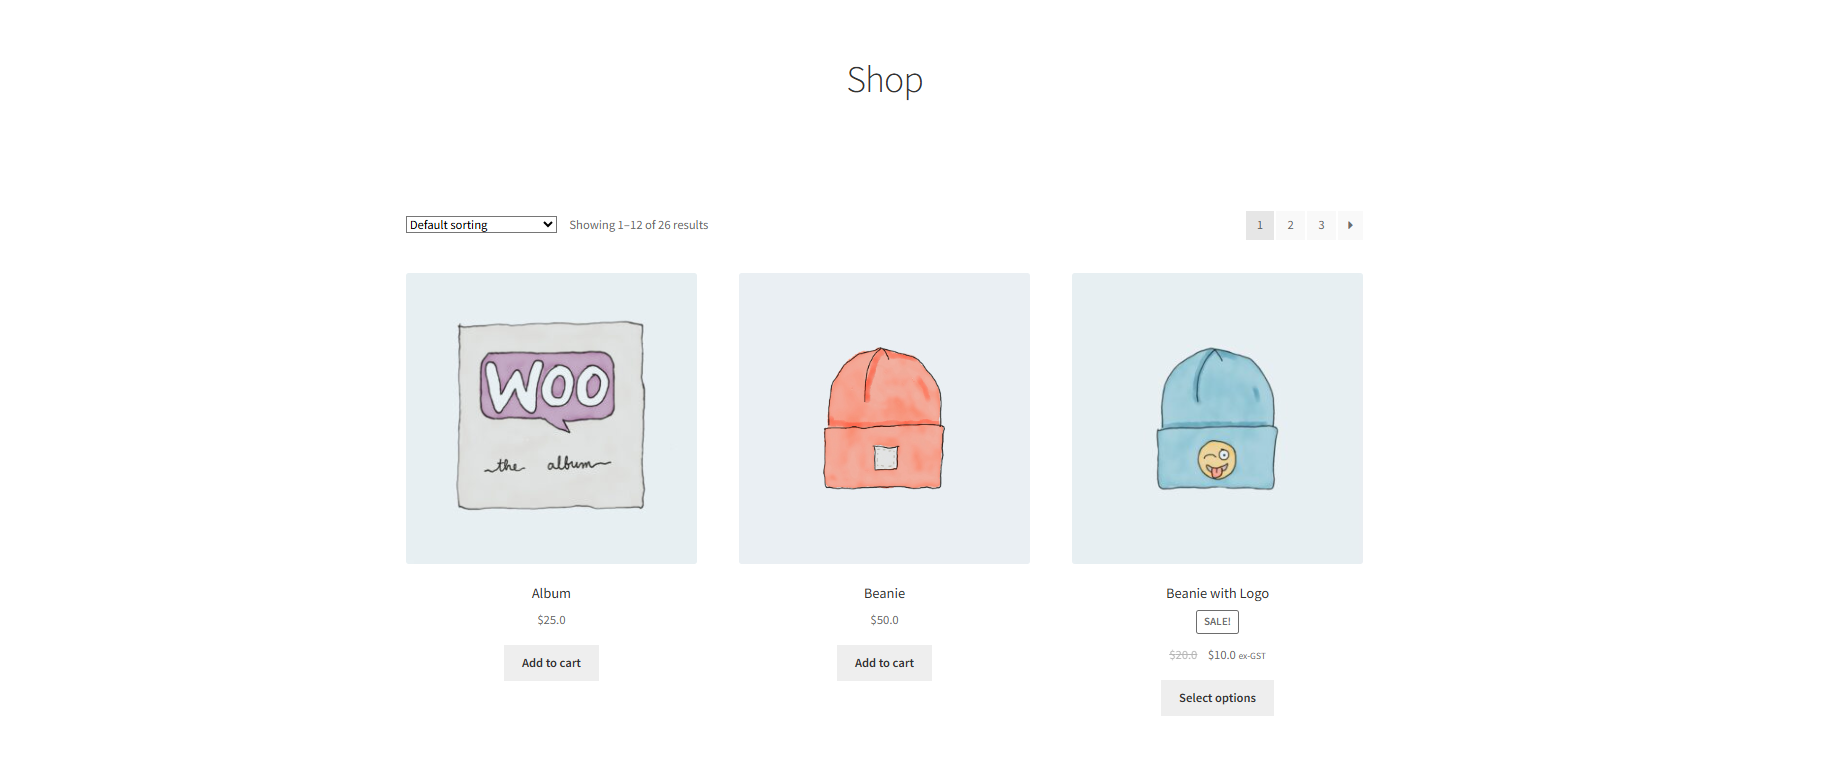
- Click on any product with Pricing configured.

You can see the linked sub-products displayed on the product page:
- Each sub-product shows Name, Short Description, Price, and Thumbnail.
- Customers can view and select sub-products as upsells or optional add-ons.
- Sub-product selections update the totals in Cart, Checkout, and Order pages.
