Features
↑ Back to top- Spin Wheel List Page
- Multiple Wheels
- Customizable Wheel Settings
- Manage Wheel Slices
- Set Wheel Priority
- Triggers
- Display Wheel on Specific Pages
- Spin Wheel Logs & Analytics
- Spin Wheel Block
Spin Wheel
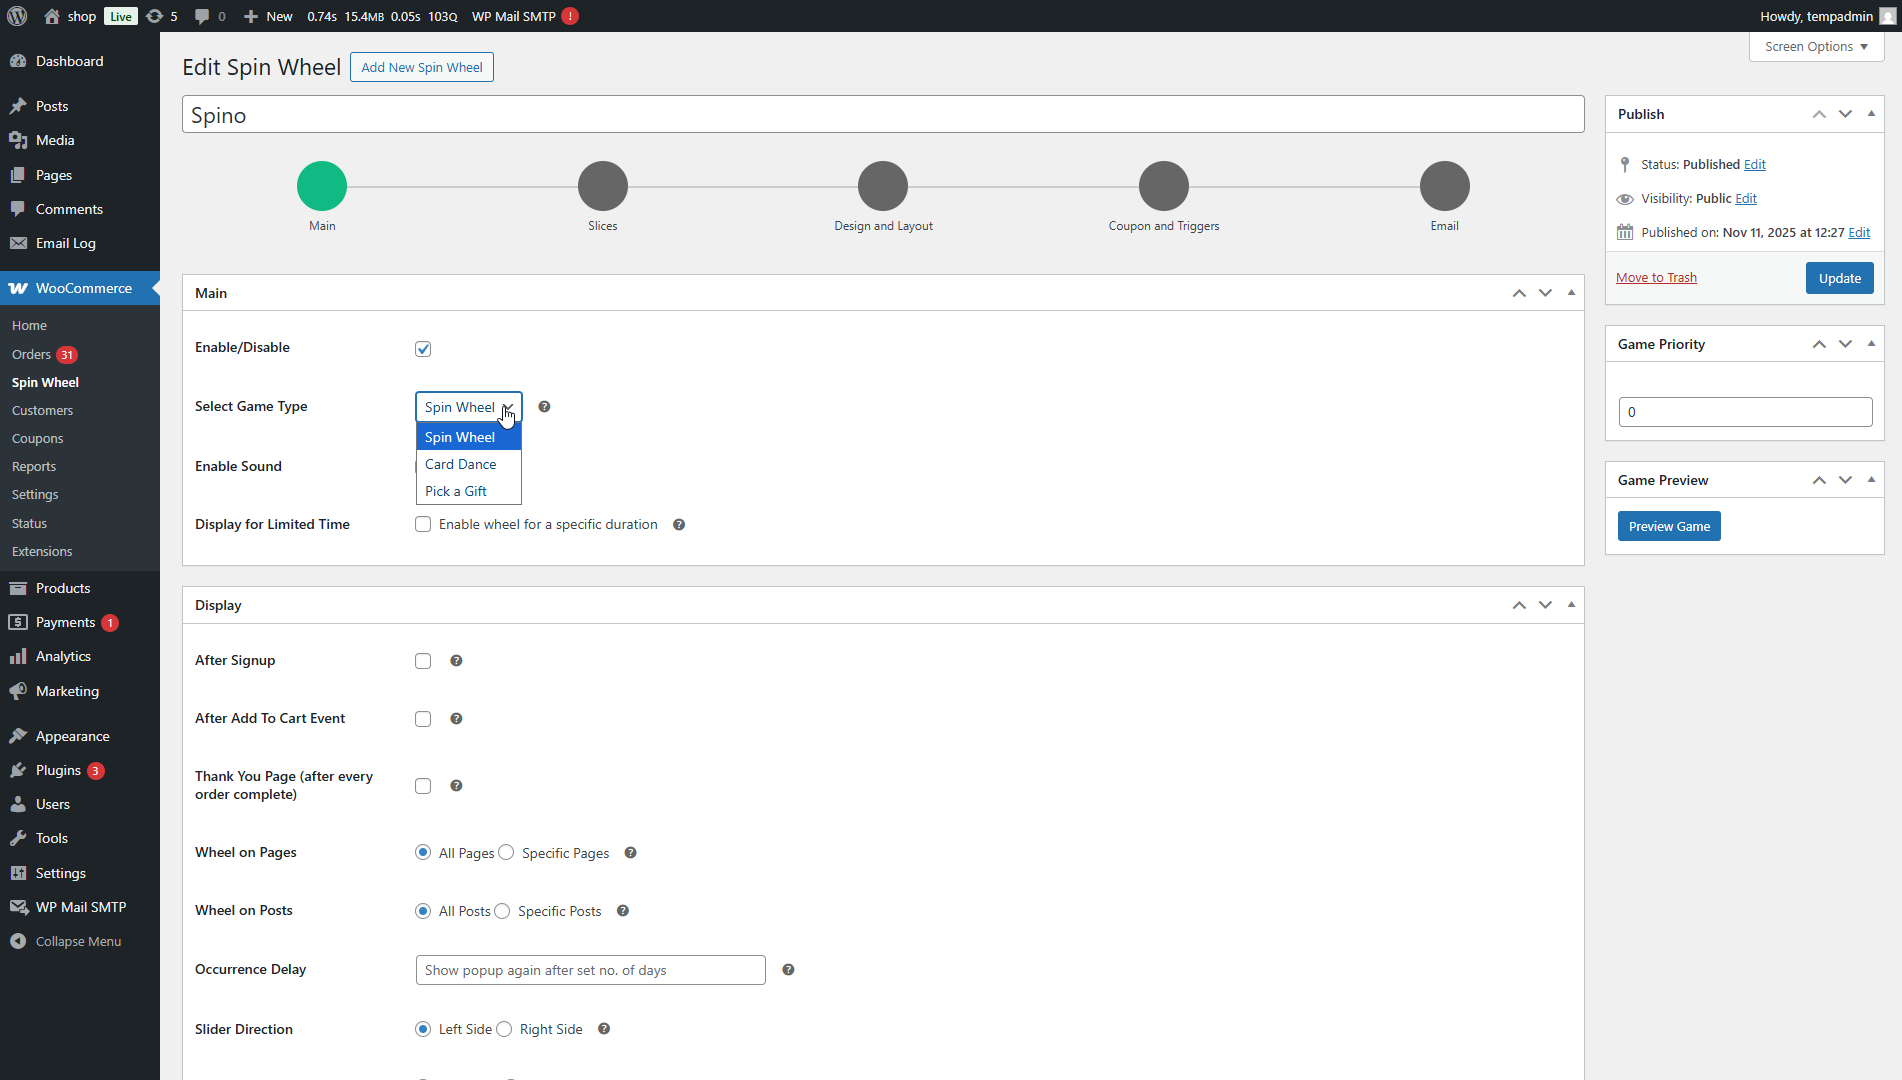
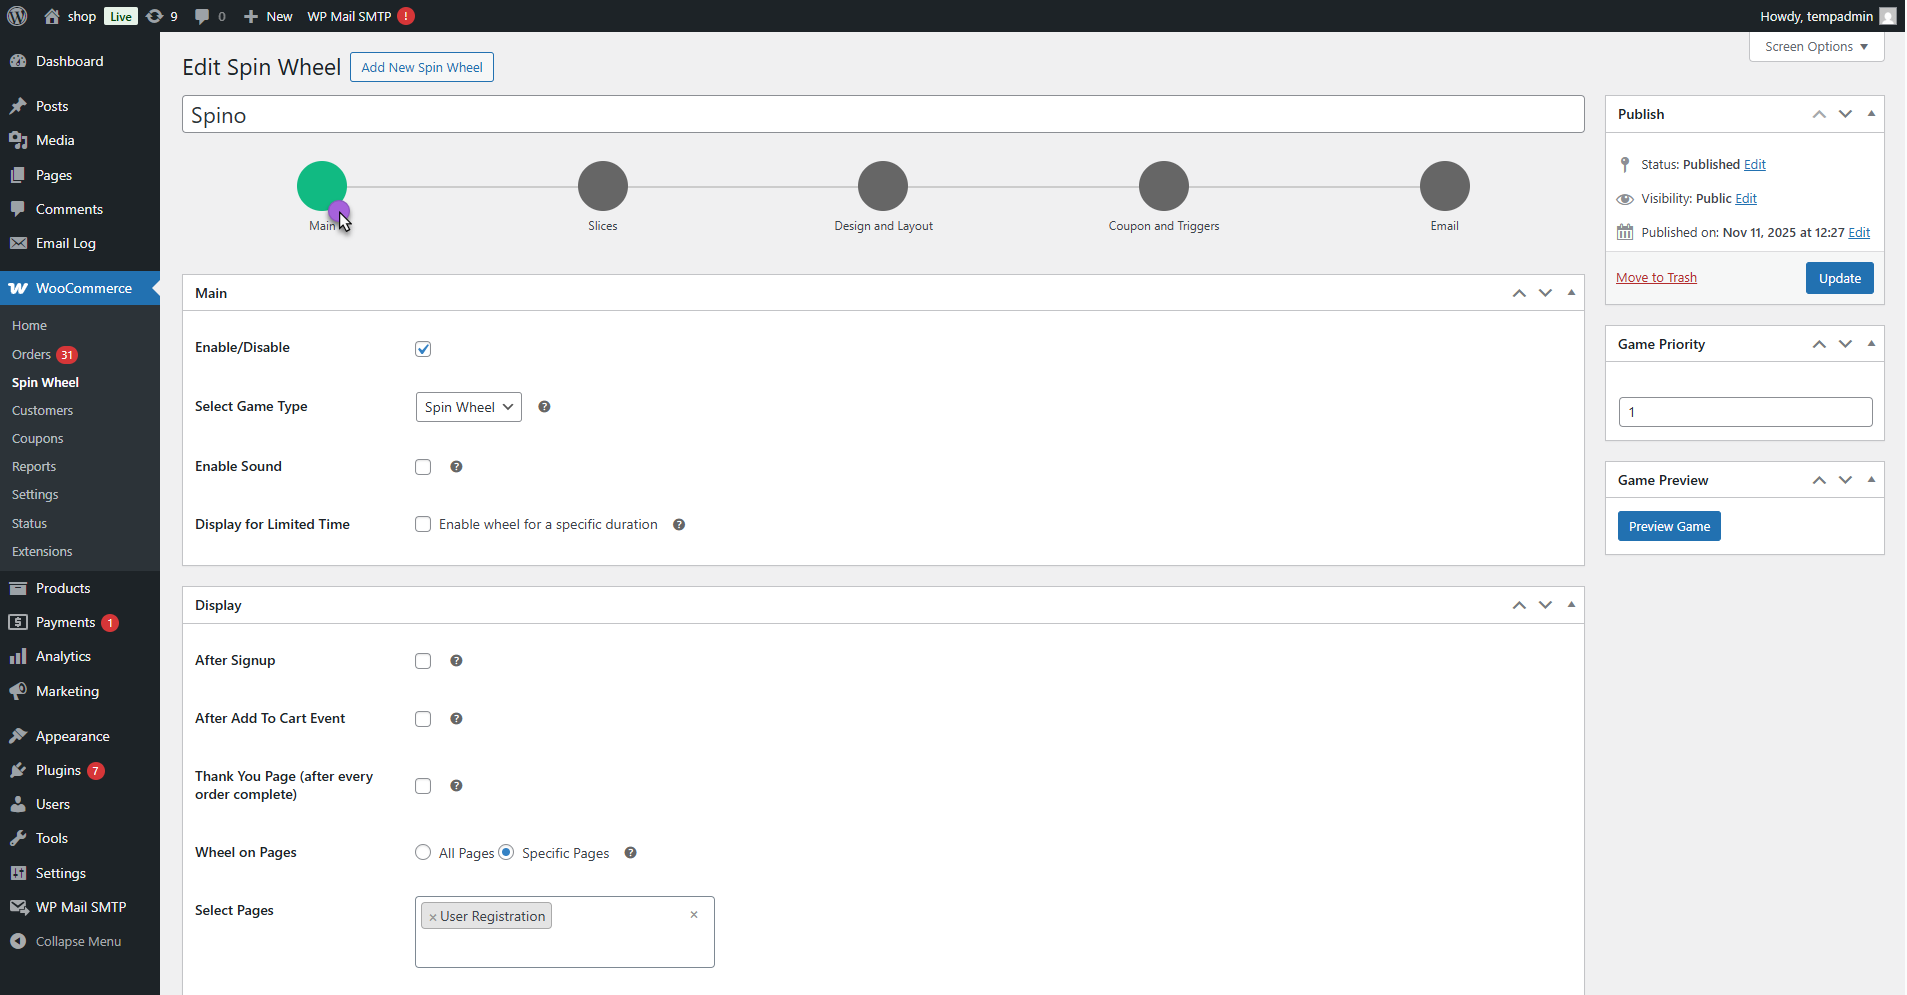
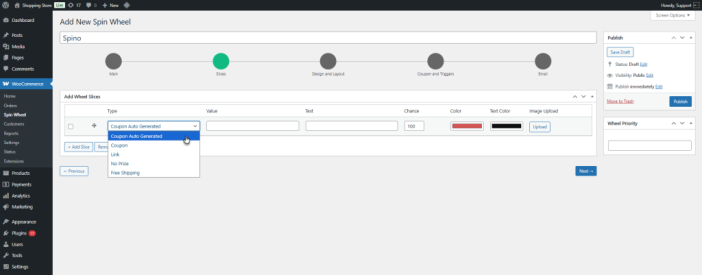
↑ Back to top- Go to WordPress Admin Dashboard > WooCommerce > Spin Wheel. The Spin Wheel list page will appear. Click on the Add New Spin Wheel button.
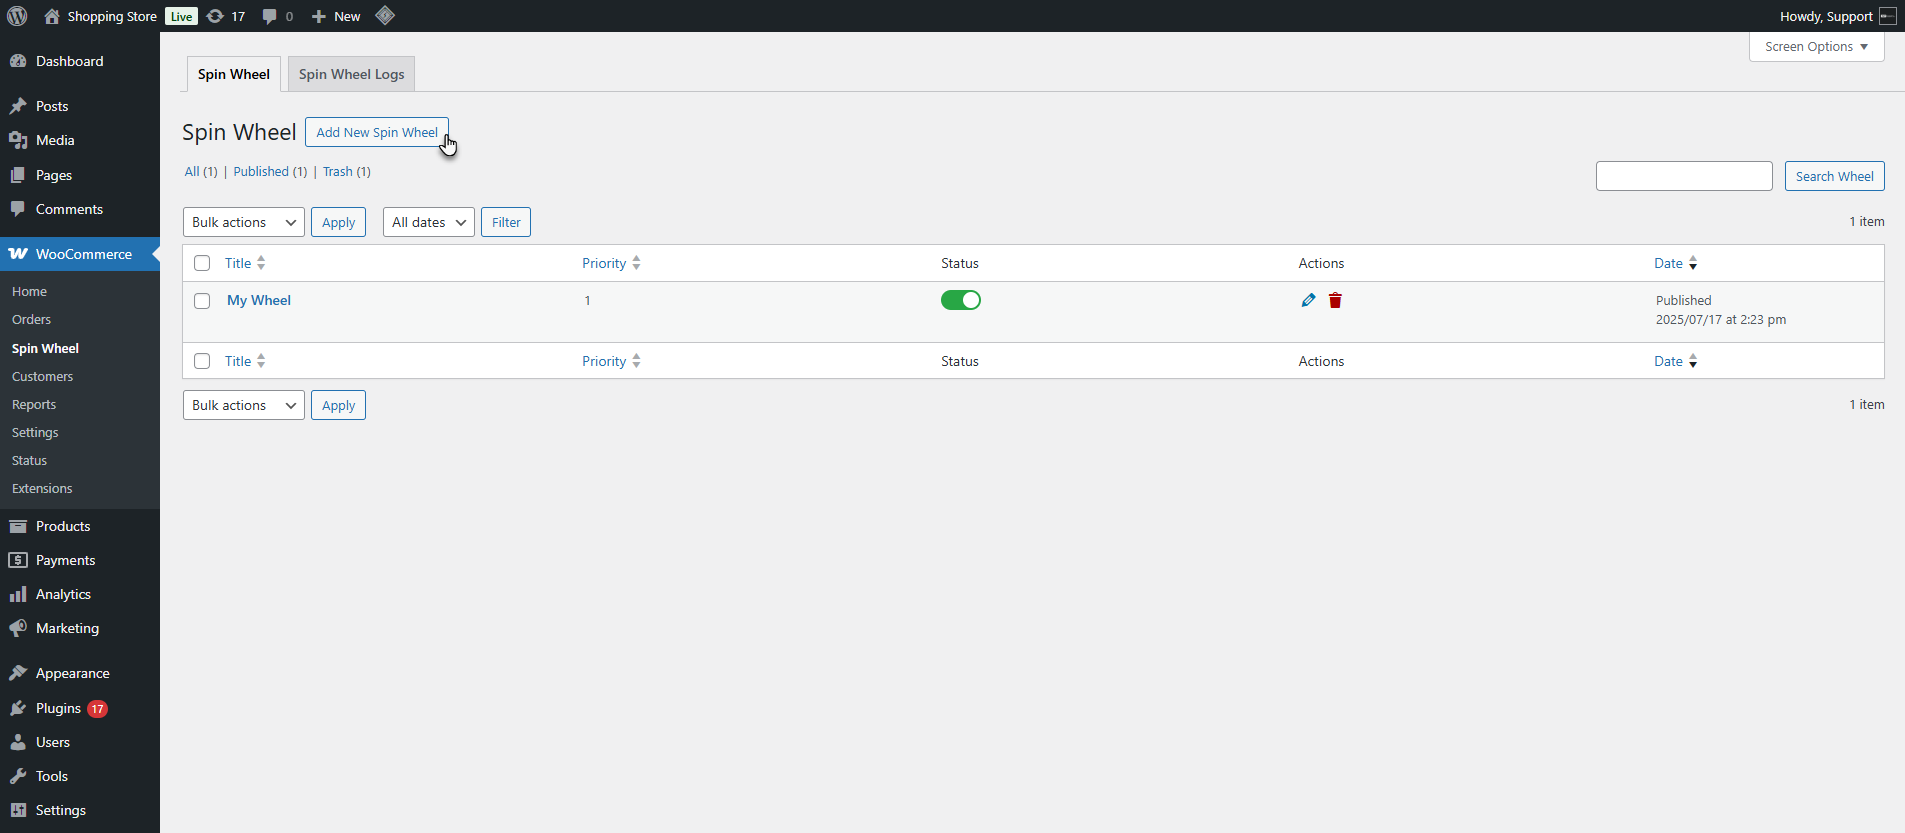
- The Add New Spin Wheel screen will open. Add a title to the wheel.
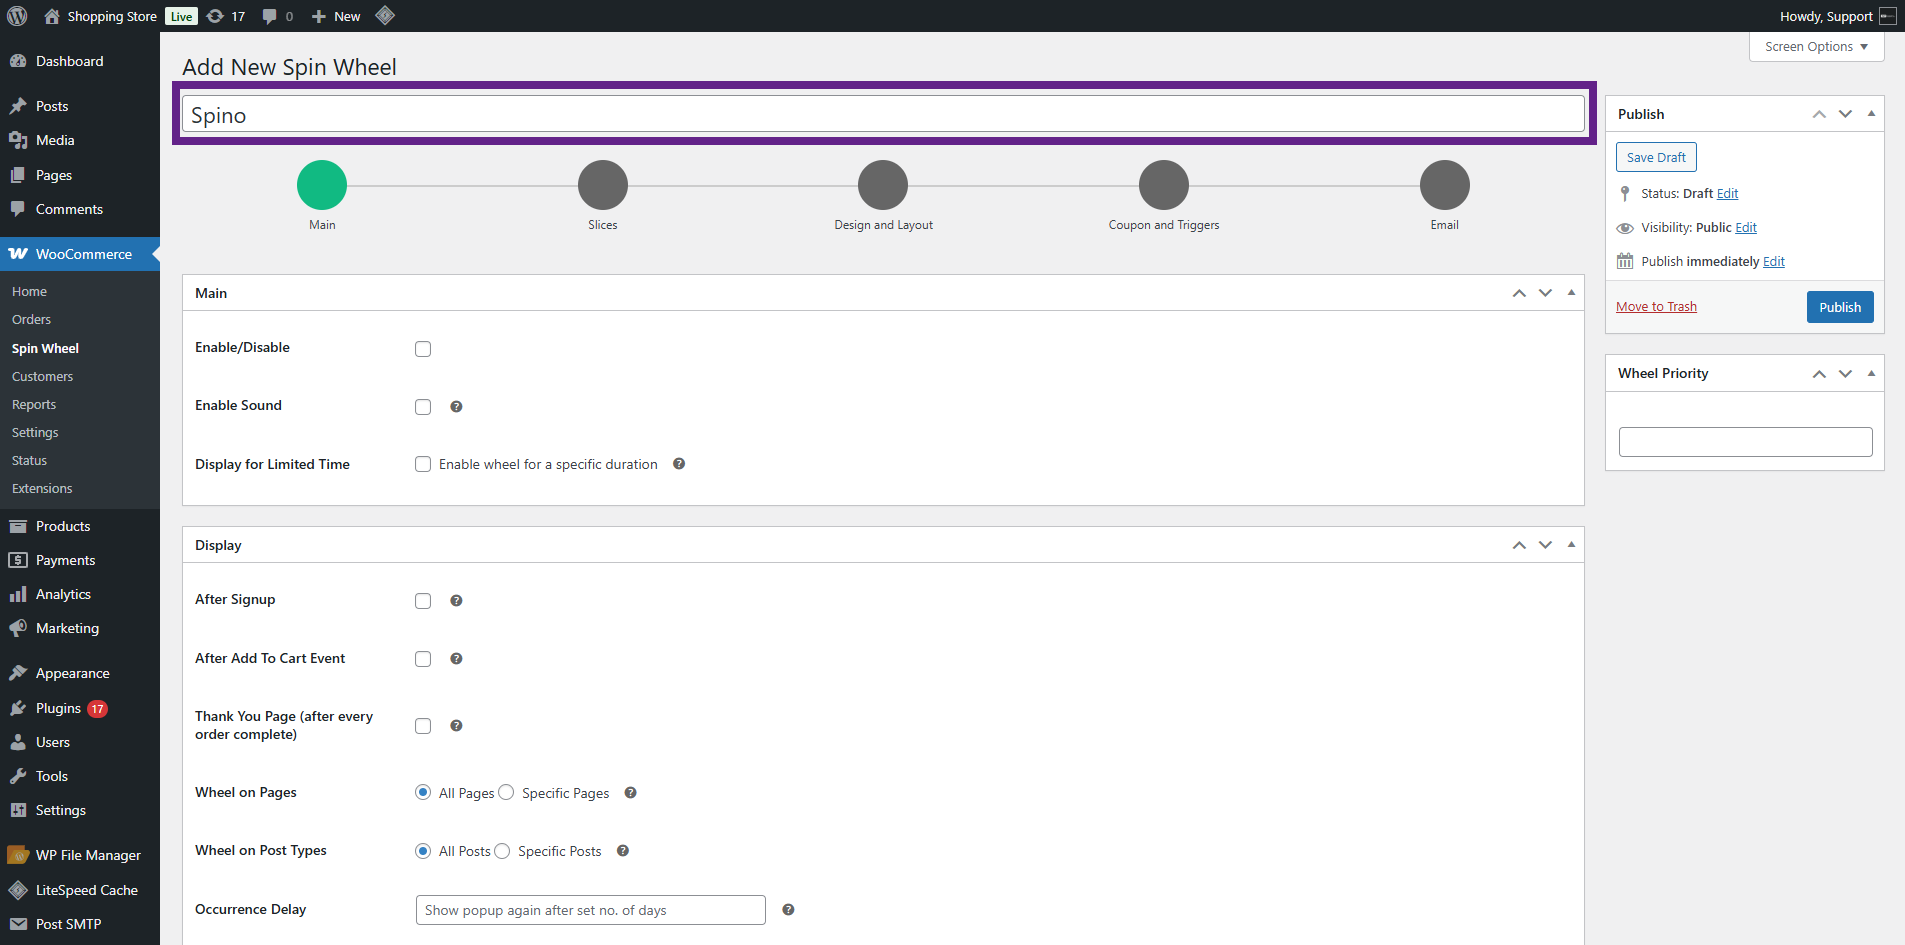
- The admin will see five tabs for configuration:
- Main
- Slices
- Design & Layout
- Coupons & Triggers
- Email.
- To create a spin wheel, the admin must configure the Main and Slices tabs.
- For customization, the admin can use the Design & Layout.
- For setting up coupons and triggers, the admin can use the Coupons & Triggers feature.
- For email notifications, the admin can configure the Email tab.
Main Tab
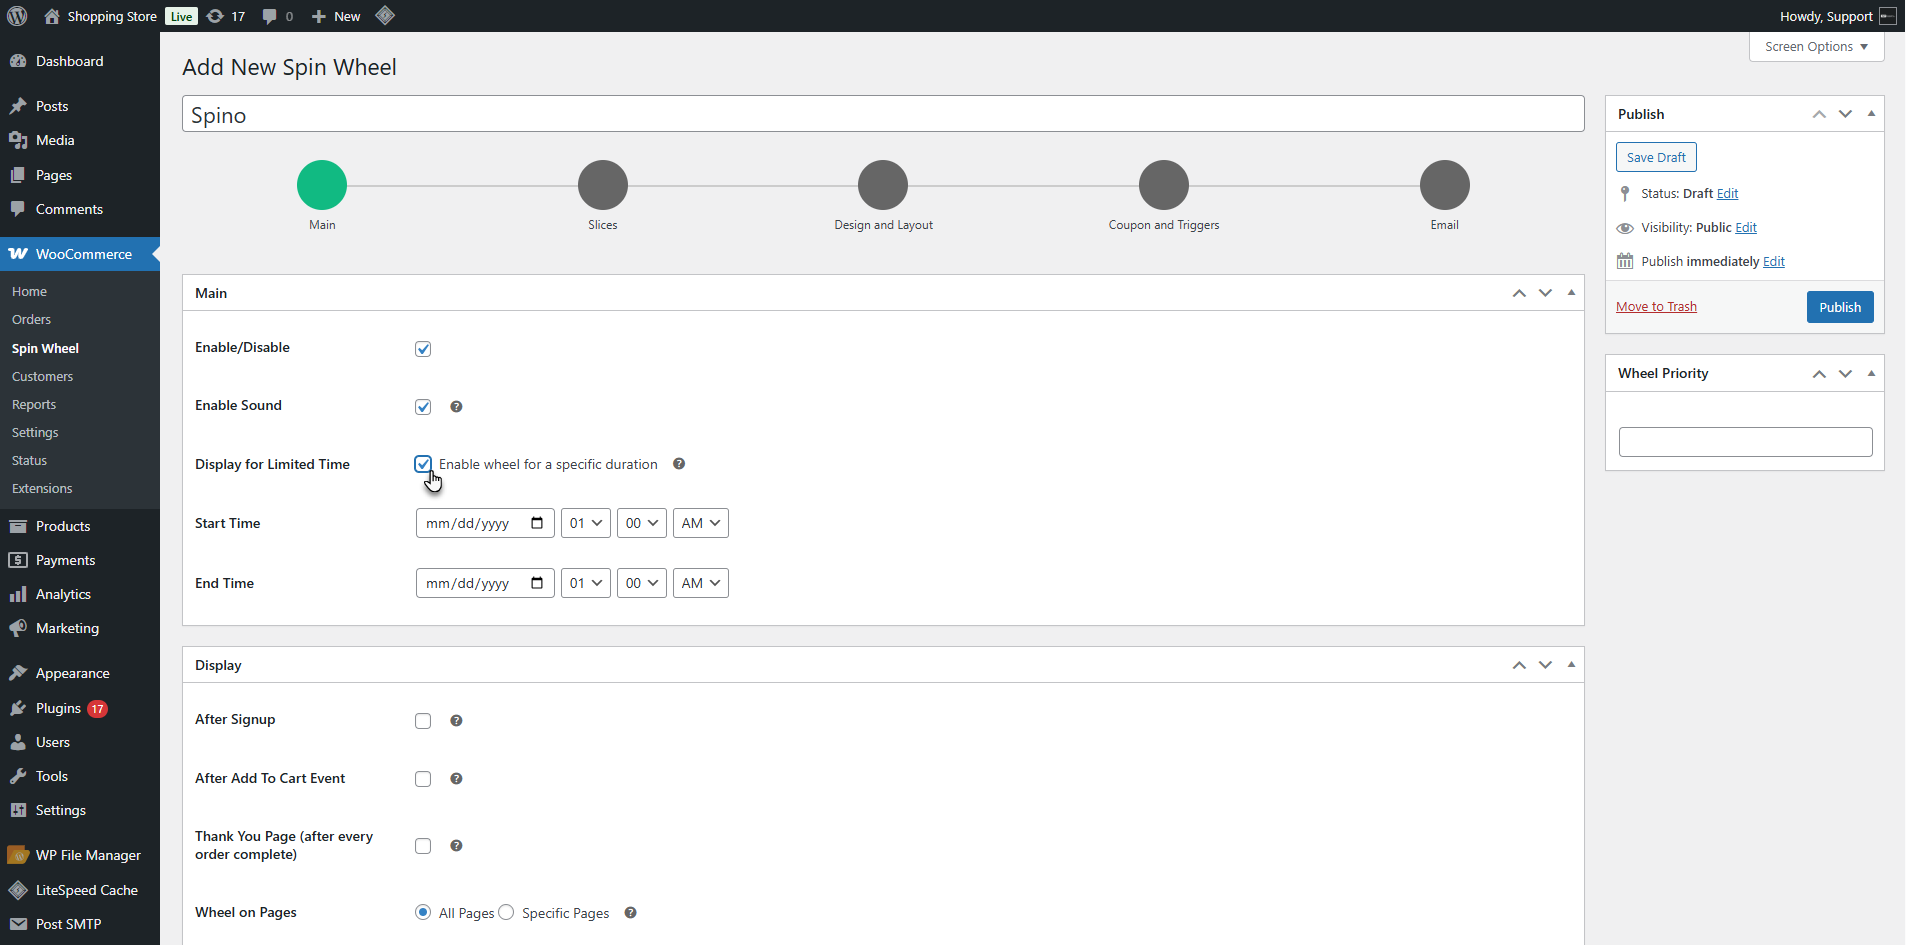
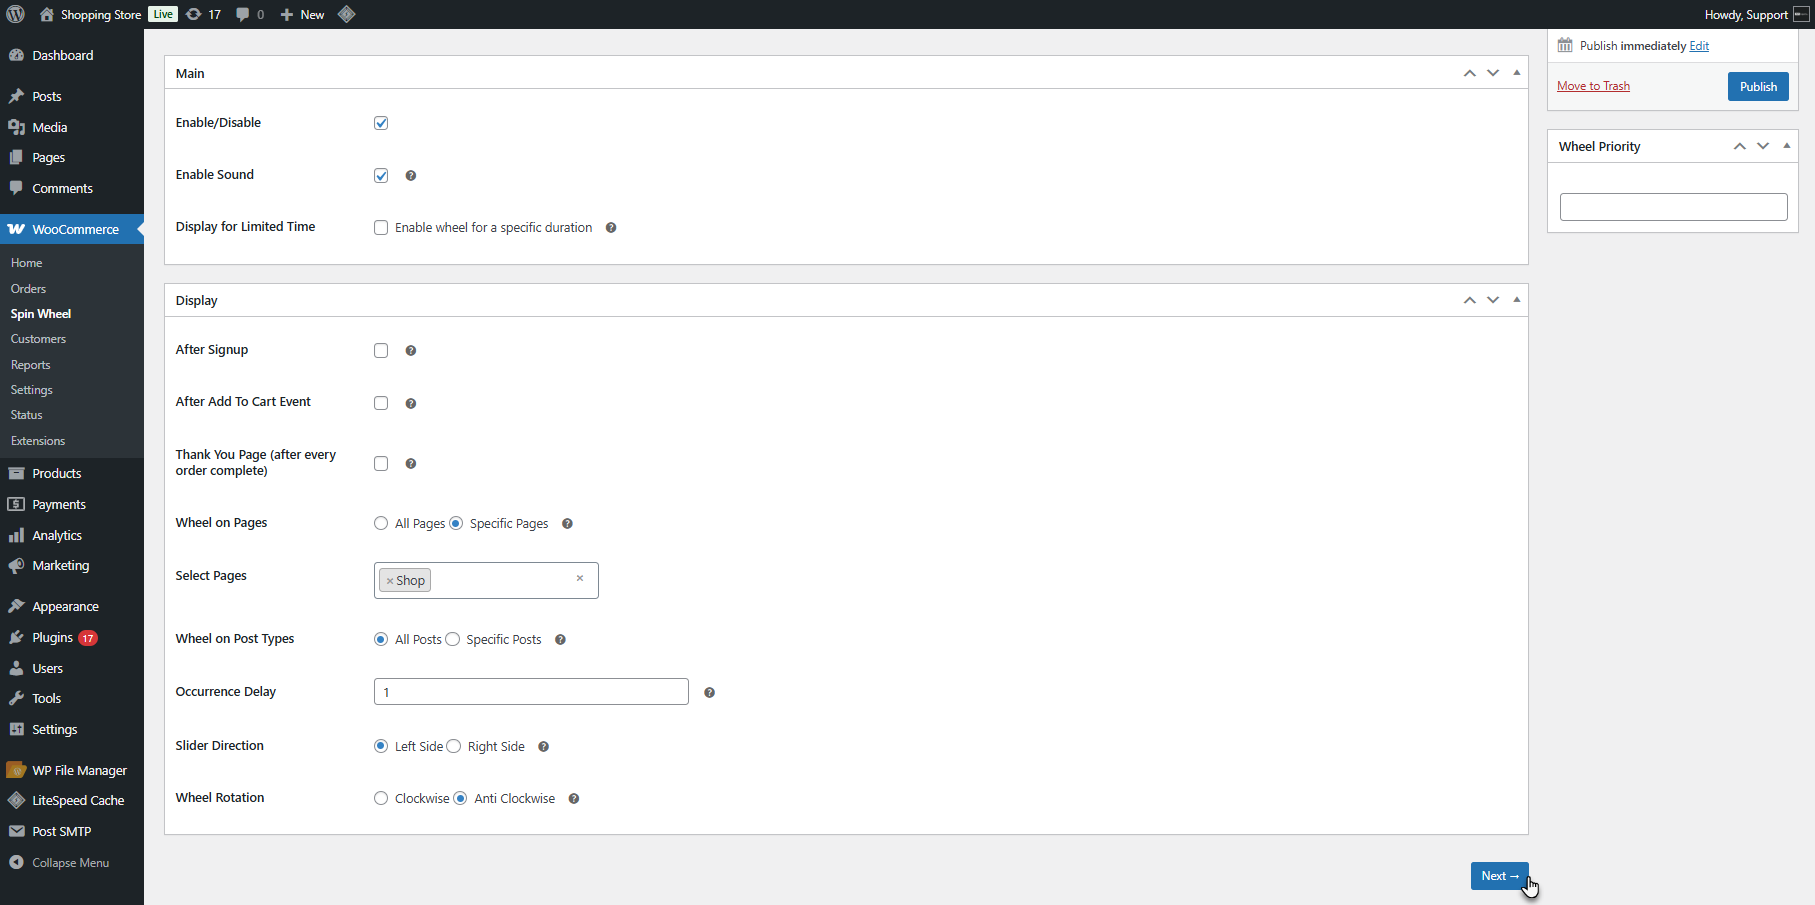
↑ Back to top- Enable the wheel by checking the Enable option.
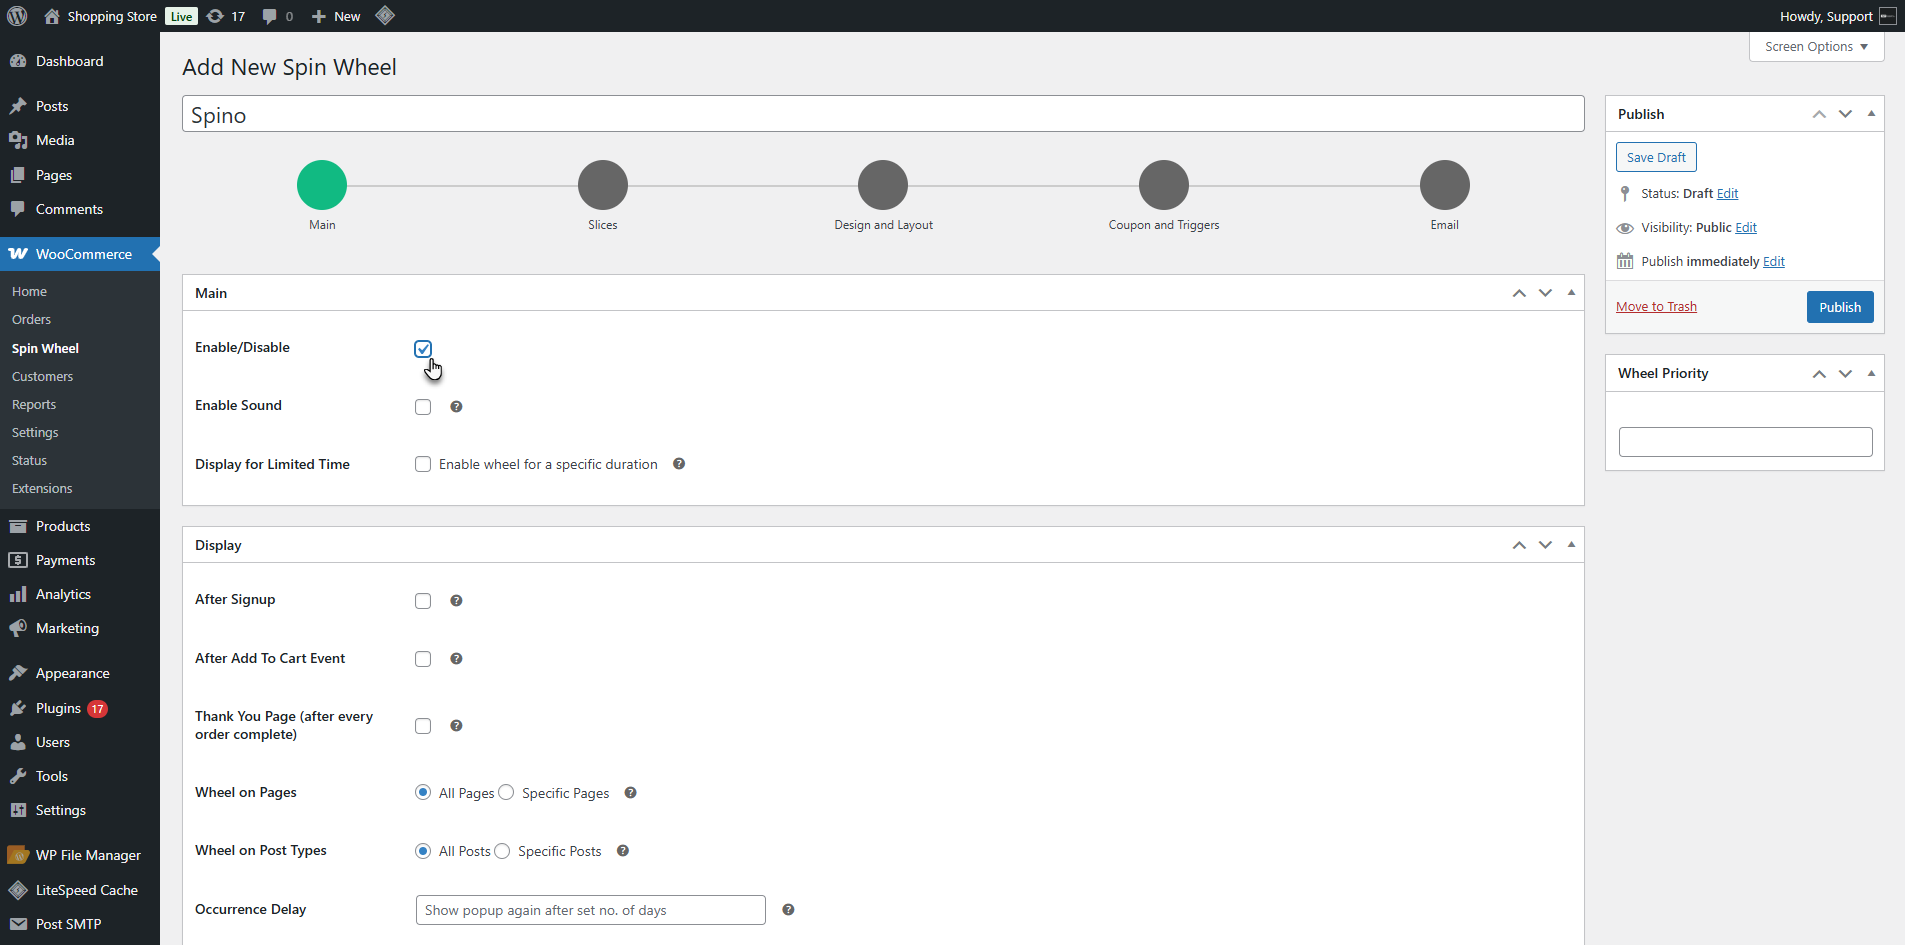
- Enable the spin wheel sound by checking the Enable Sound option.

- Limit the display of the wheel by setting a start date, time, and end date. The wheel will only display for the time period defined by the admin.
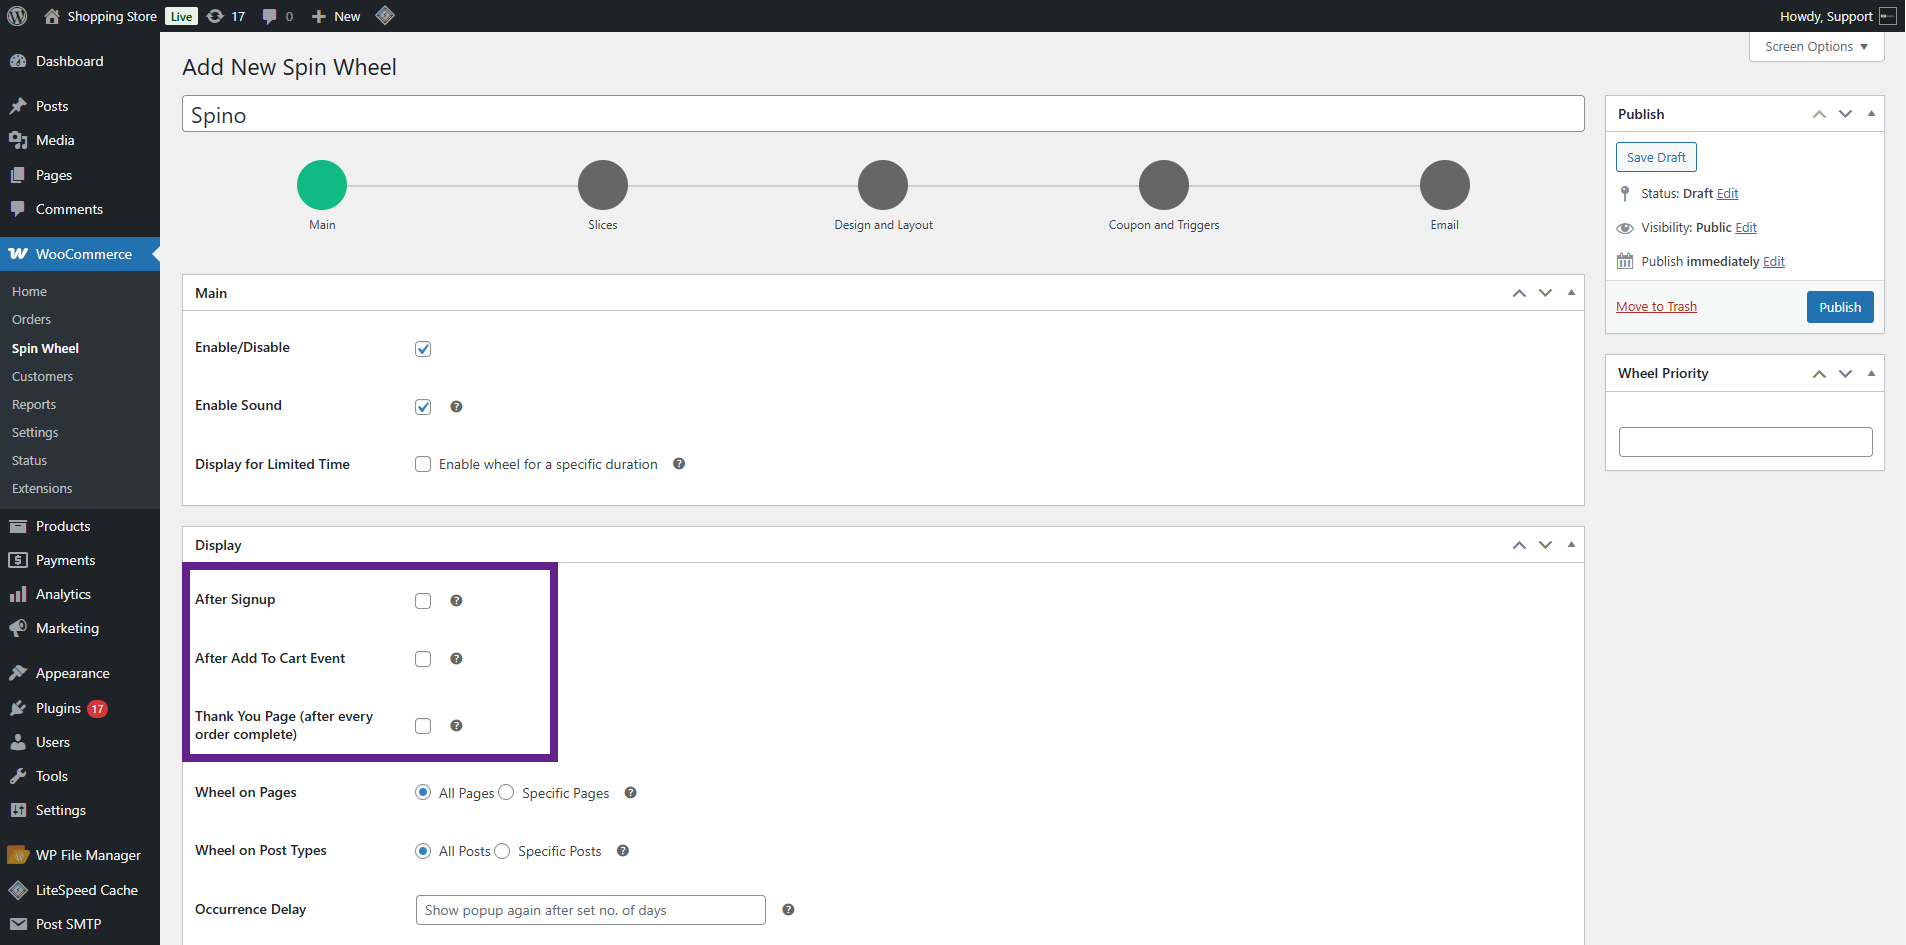
- Select when the wheel will appear by choosing the Signup, Add to Cart, or Thank You Page events. The wheel will appear when a user signs up, adds a product to their cart, or reaches the thank-you page after placing an order.
- Use the Wheel on Pages option to display the wheel on all pages or on specific pages.
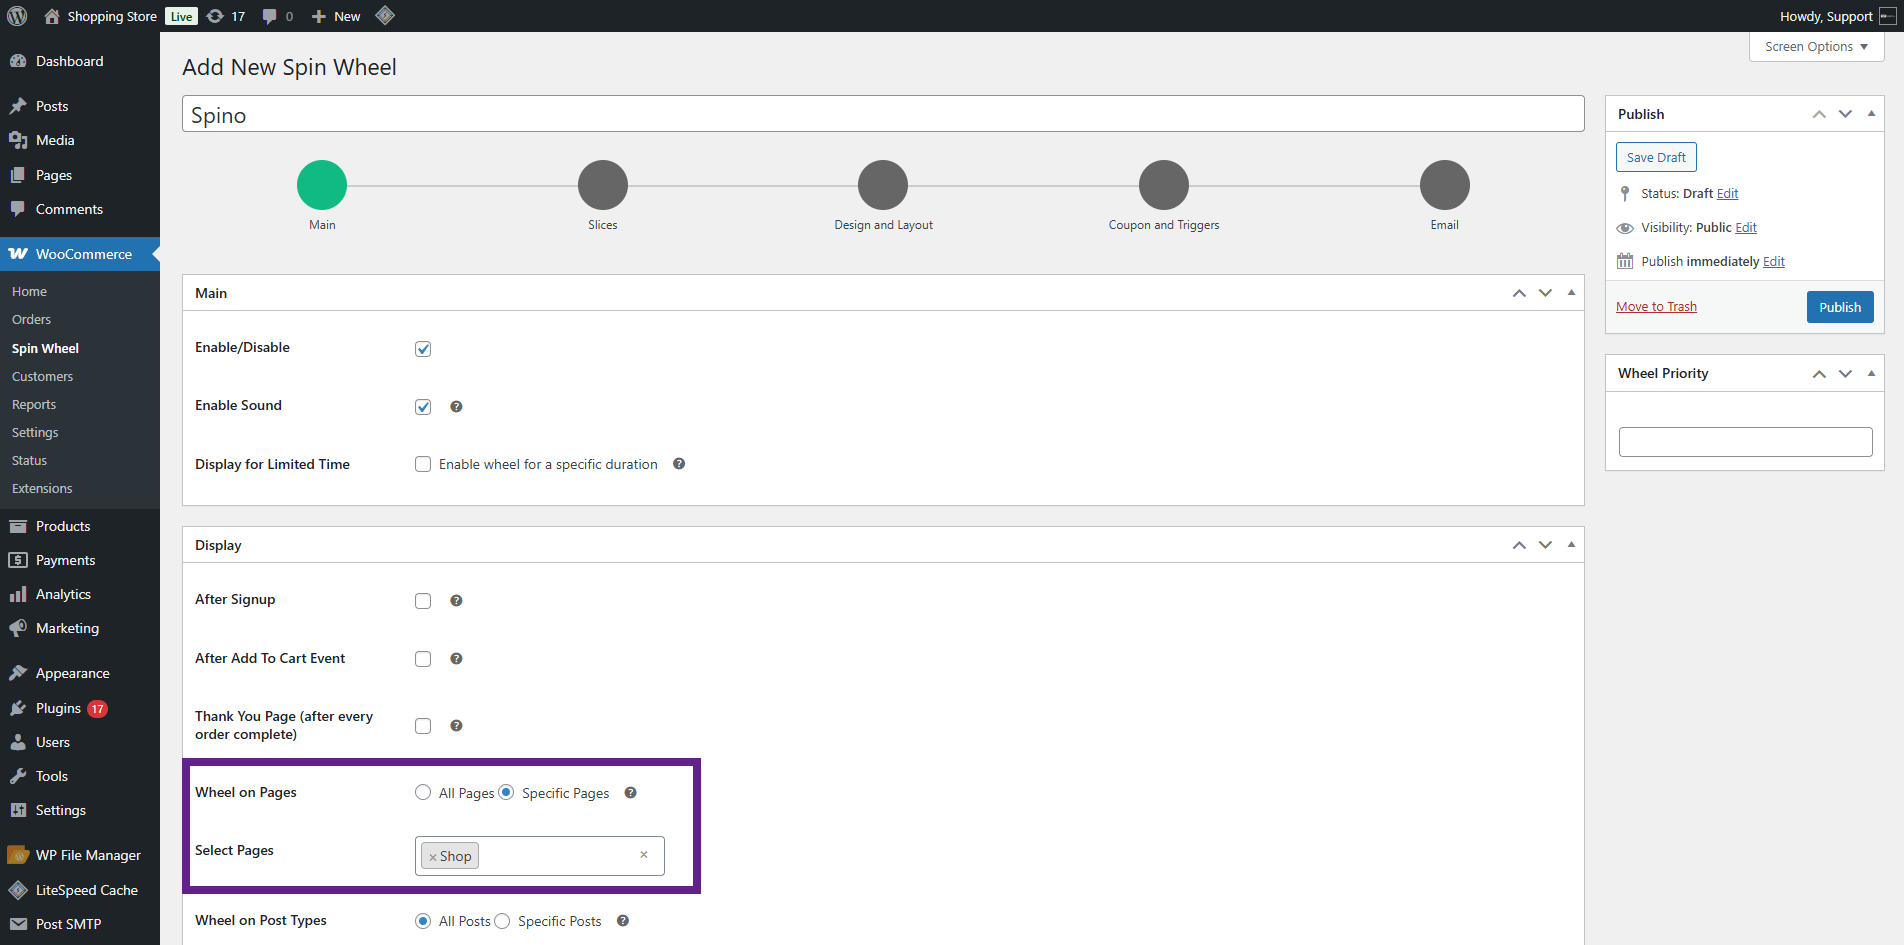
- Use the Wheel on Post Types option to show the wheel on all or specific post types.
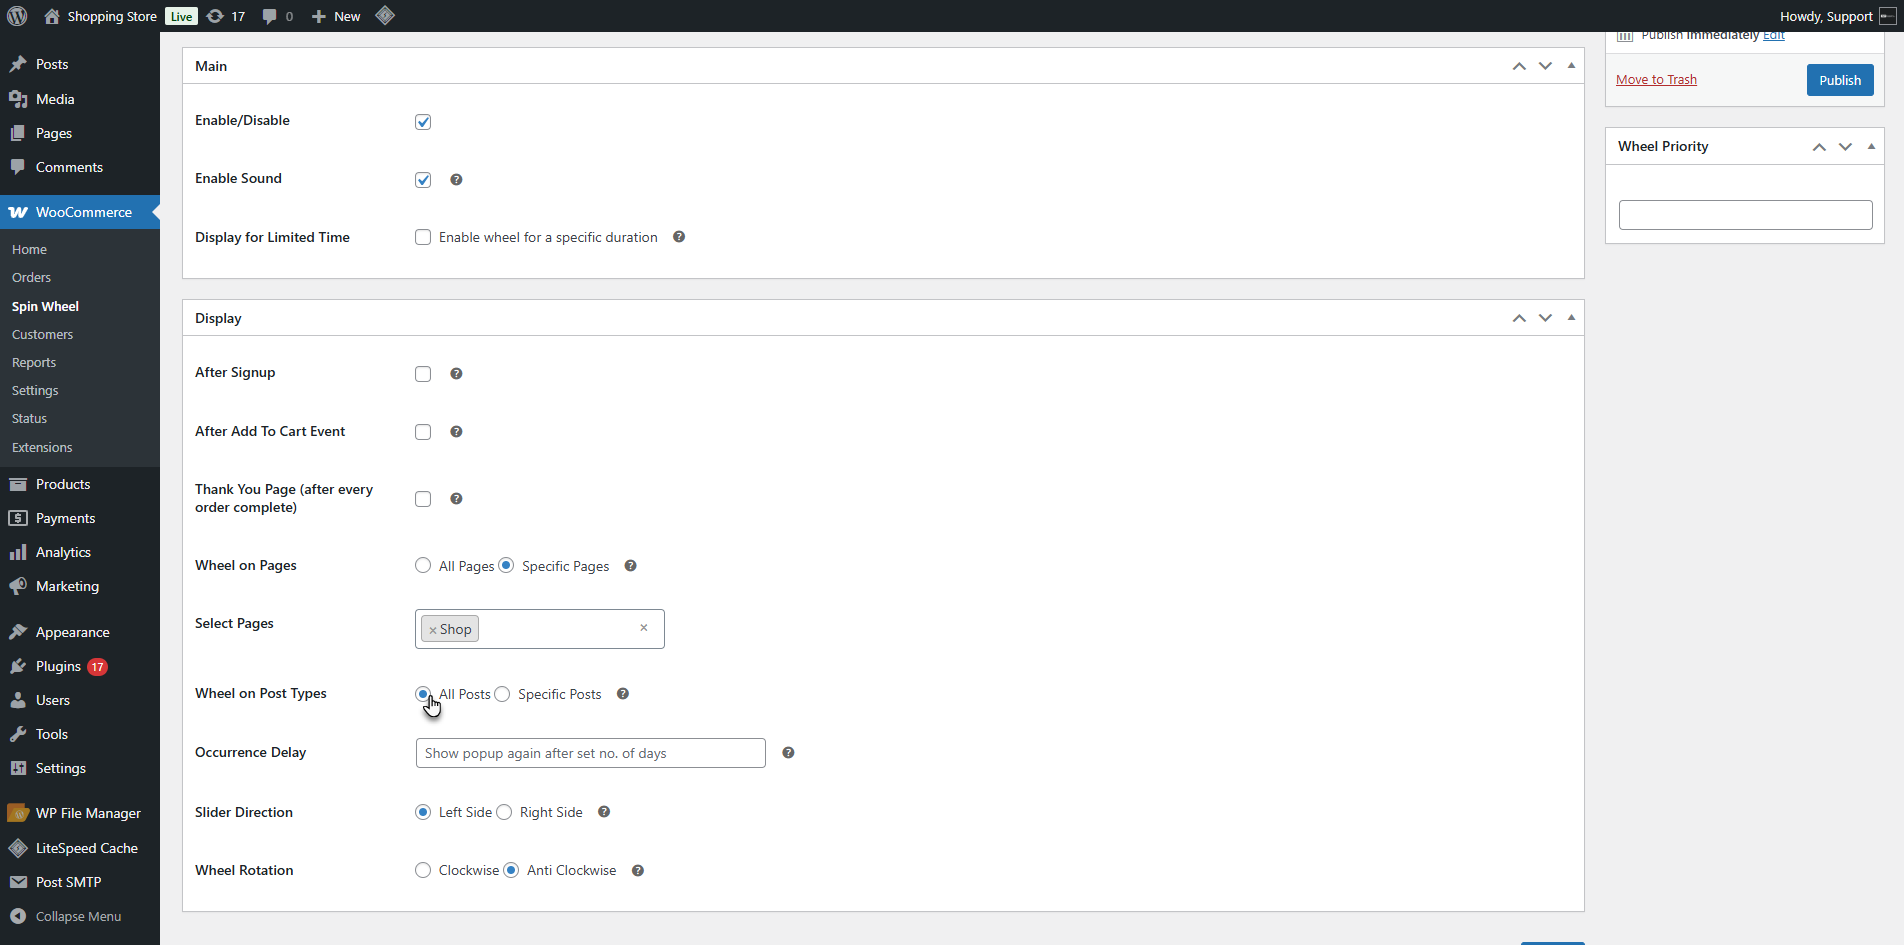
- Set an Occurrence Delay to control how many days the wheel will reappear for the same user.
- Select the Slider Direction (Left or Right) and configure the Wheel Rotation(Clockwise or Anticlockwise).
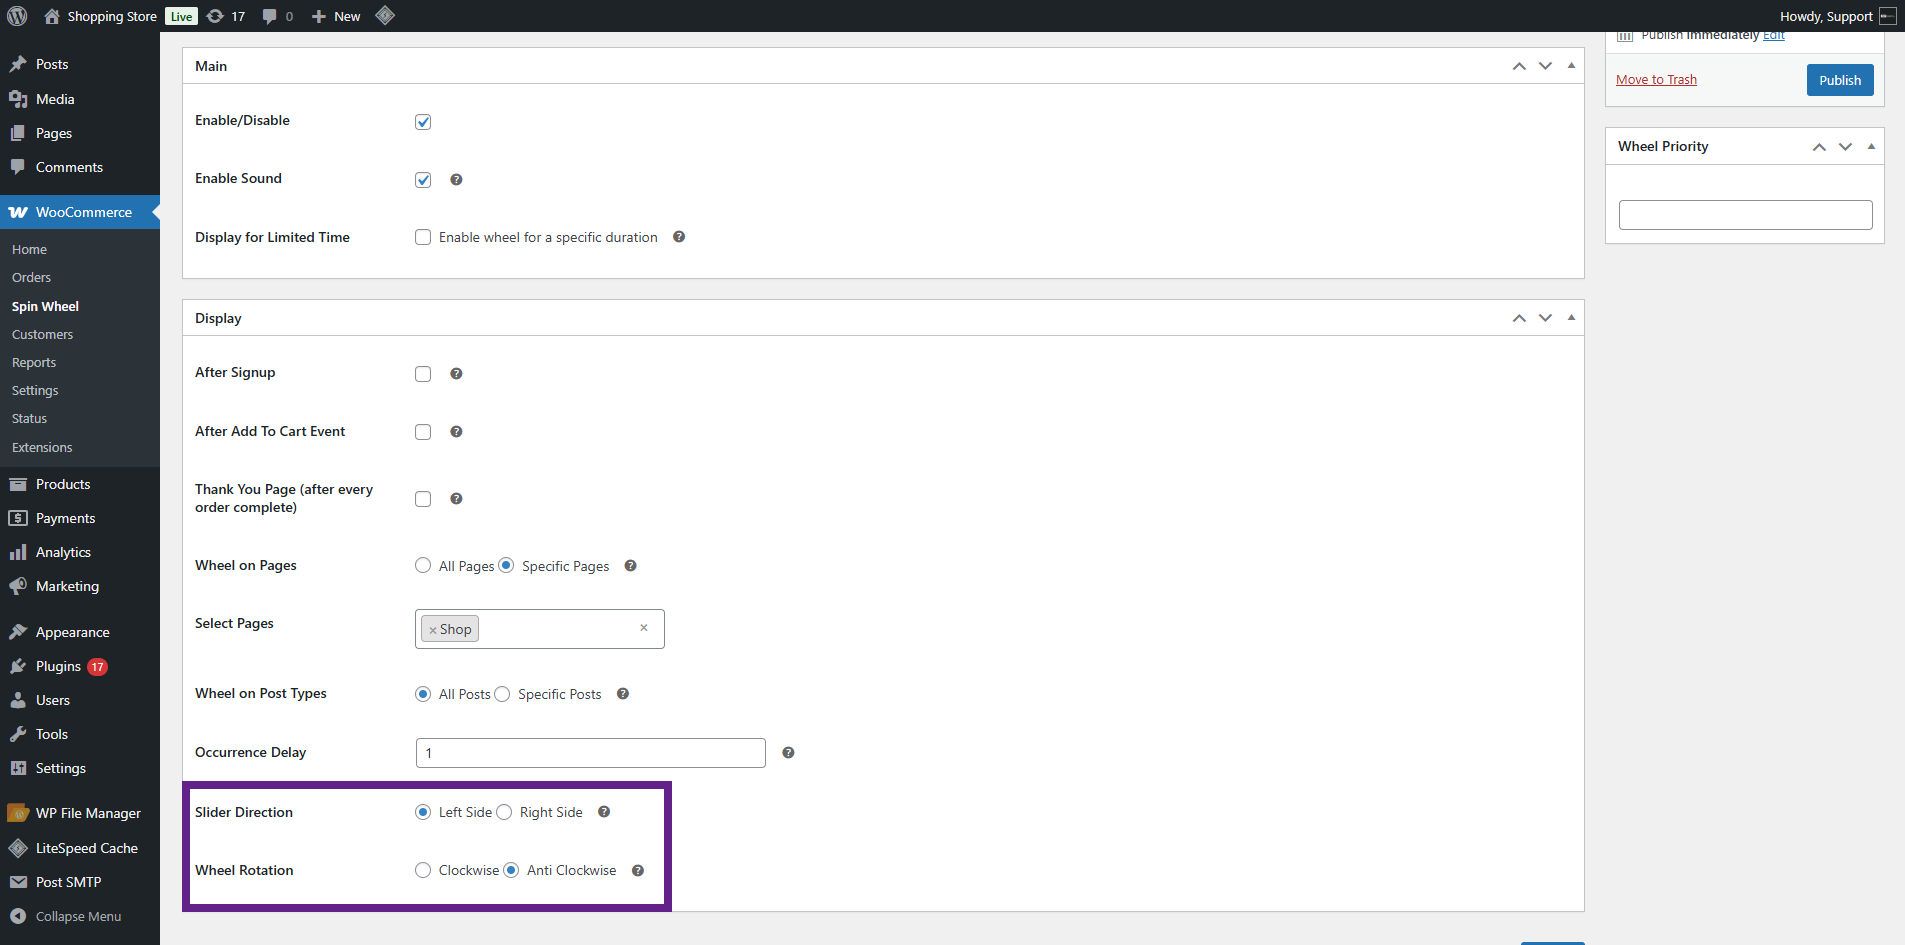
- After completing the Main tab, click Next or select the Slices tab.
Game Types
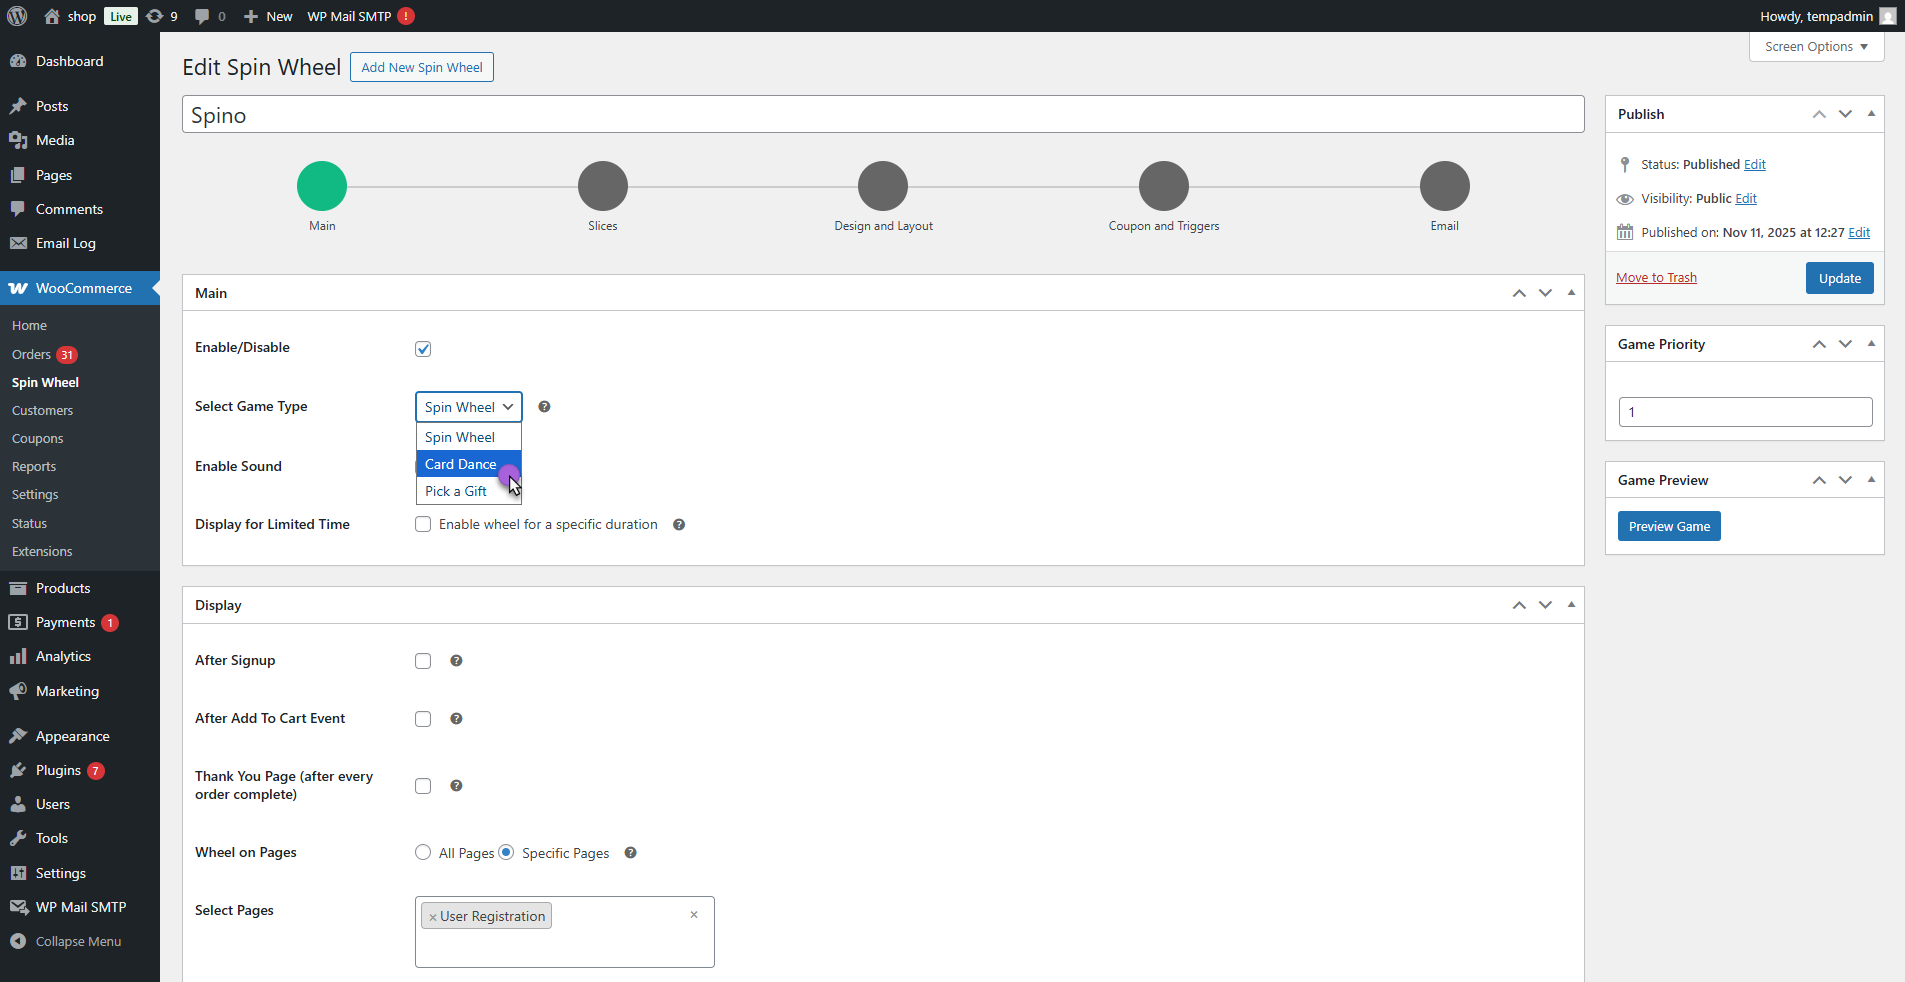
↑ Back to topChoose the game type you want to display to users by selecting an option from the Game Type dropdown. Each game type has its own settings and behavior.
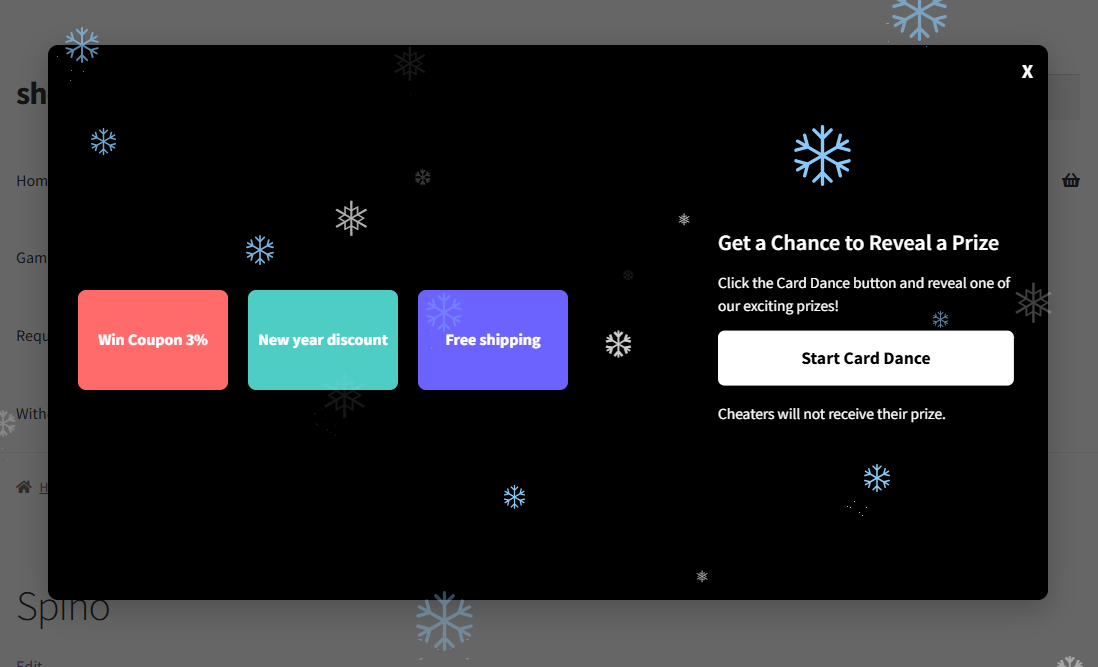
Card Dance
The game type card dance shows a grid of animated cards. Users click the Start Game button, the cards perform a dance animation, and one card is selected as the winner based on the set chances.
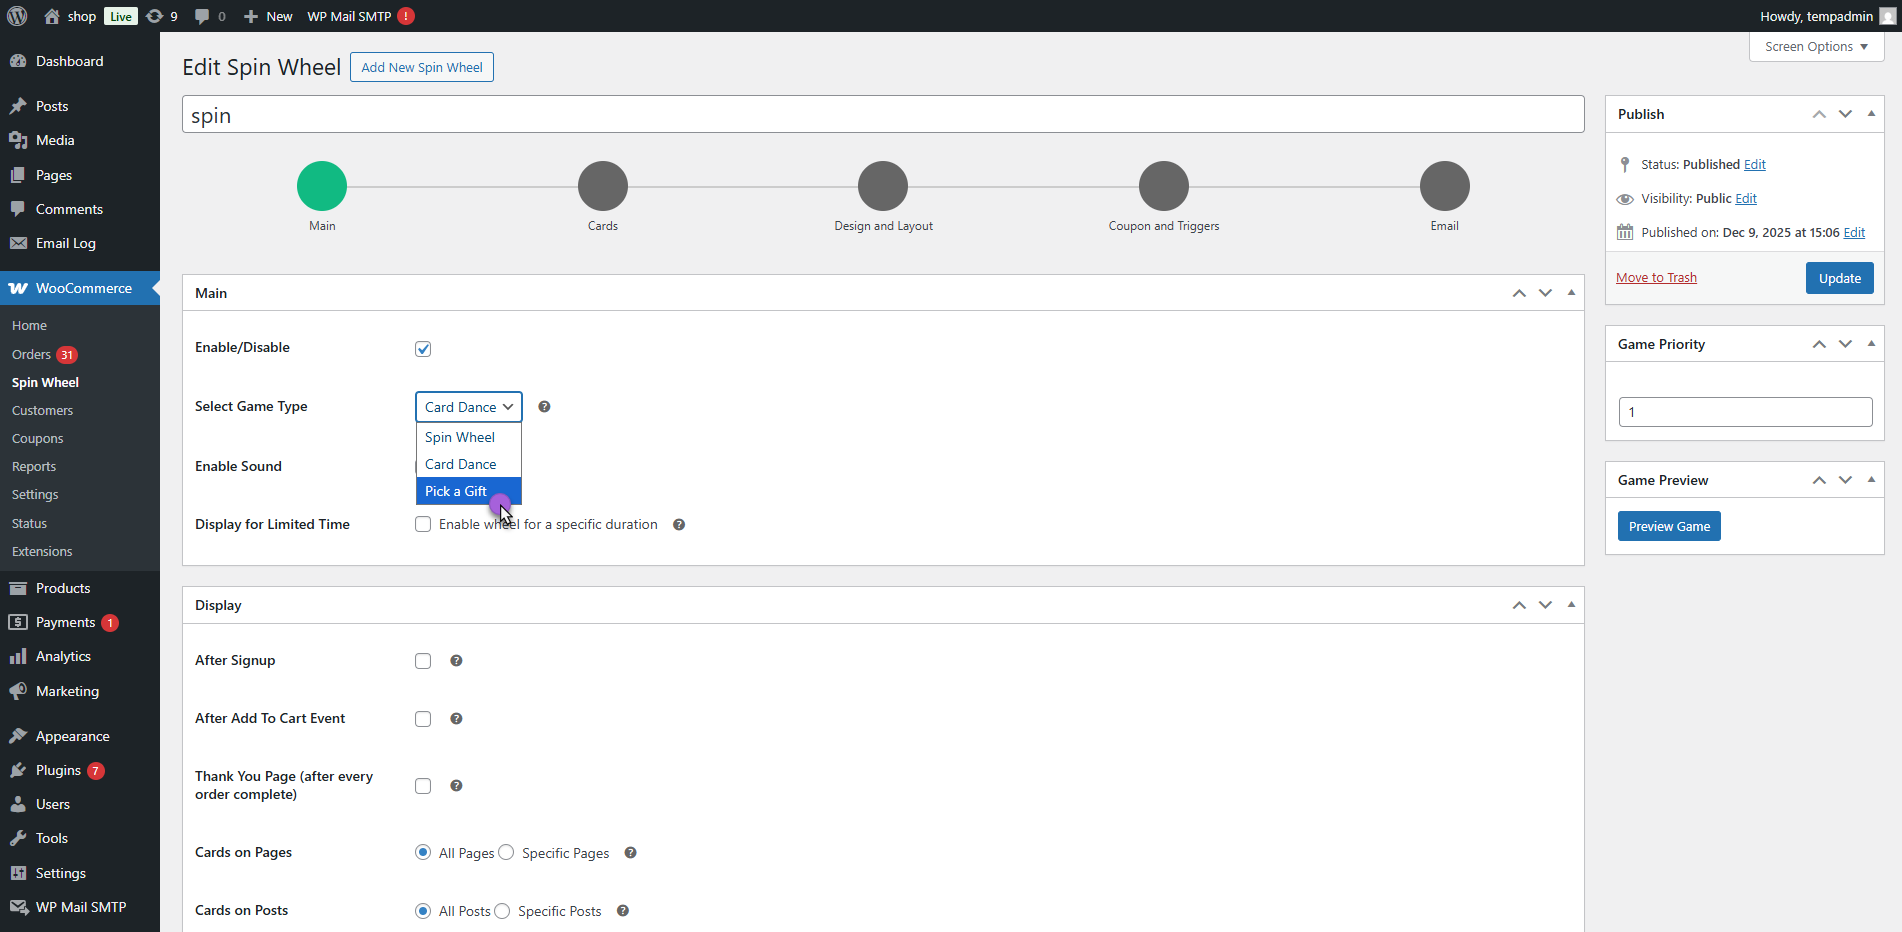
- Navigate to: WP Admin Dashboard > WooCommerce > Spin Wheel > Main.

- Under the Main section, A Select Game Type dropdown is displayed.
- Choose Card Dance to proceed with Card Dance settings.
- Now, navigate to the Cards Tab.

- For each card, the admin can configure:
- Type (Coupon, Auto Coupon, etc.)
- Value
- Text
- Chance
- Card Color
- Text Color
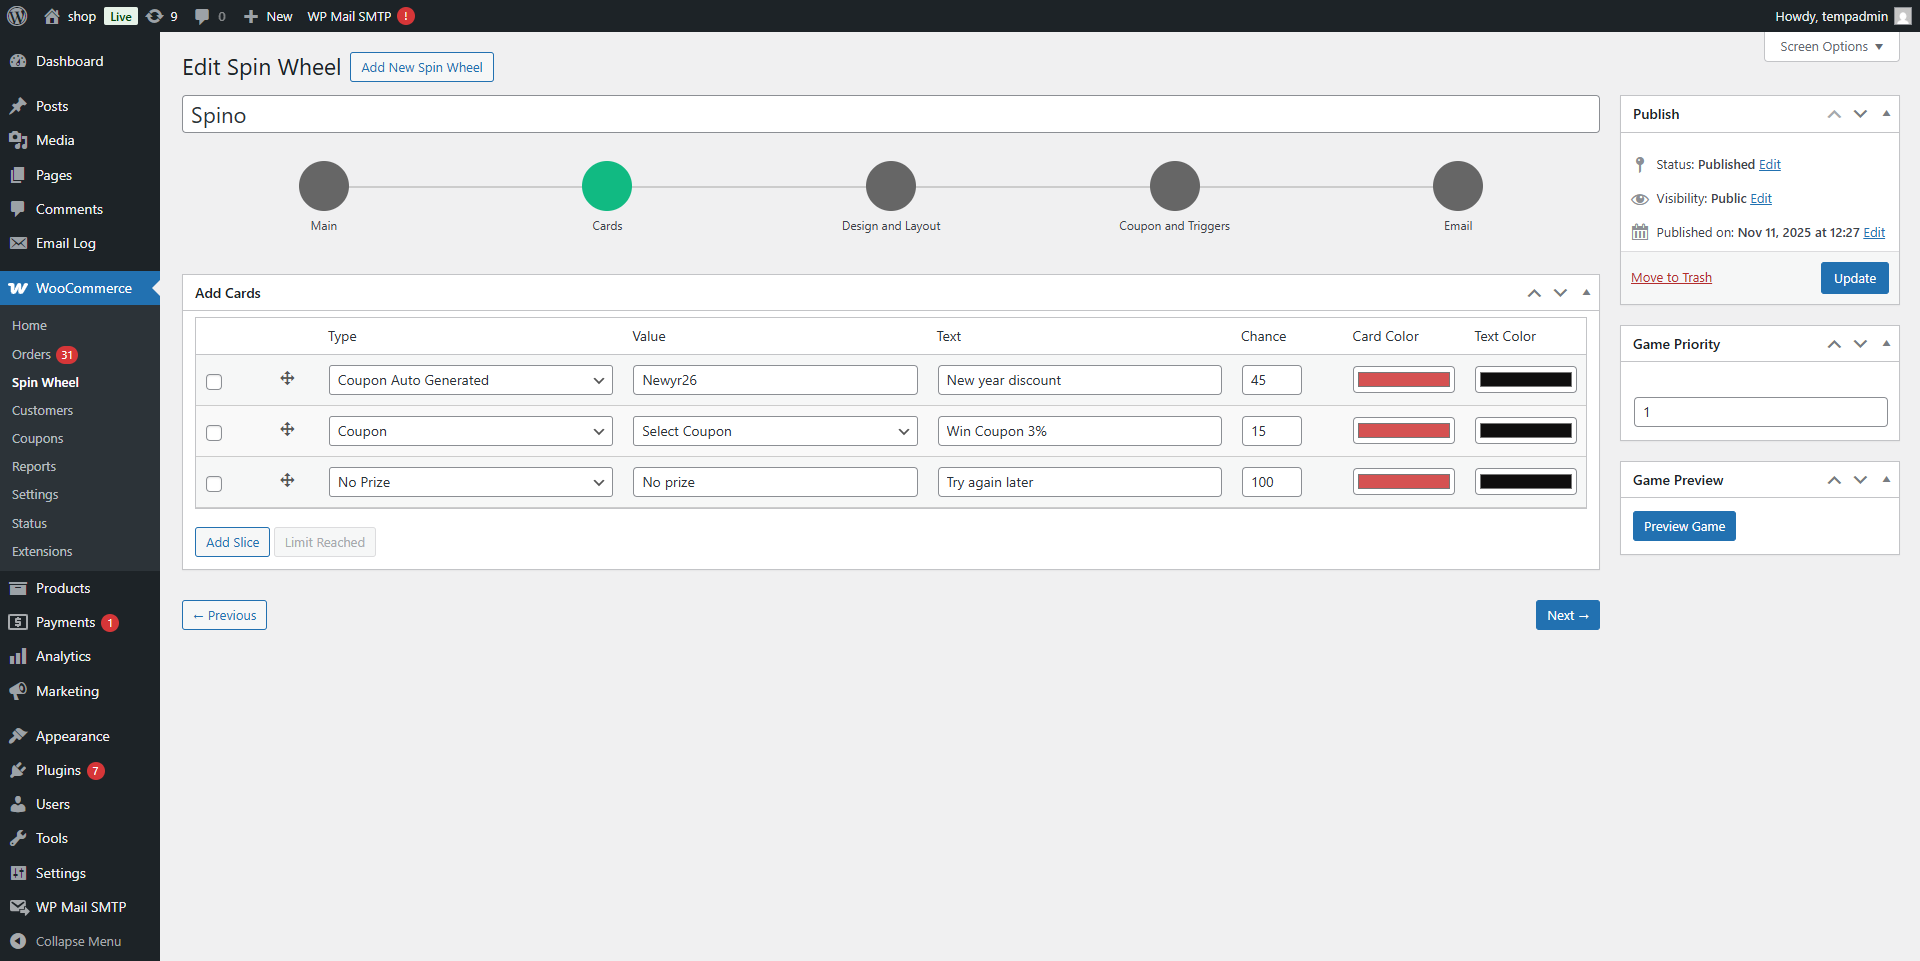
Note: The total number of cards must be set to a value between 3 and 9 and must be a multiple of 3. The first 3 cards are mandatory and cannot be deleted.
Front-end-impact
- Go to the page where the Card Dance game is enabled, and it displays all cards created by the admin (3, 6, or 9 cards).
- The cards are displayed in a grid layout, with text visible on each card.
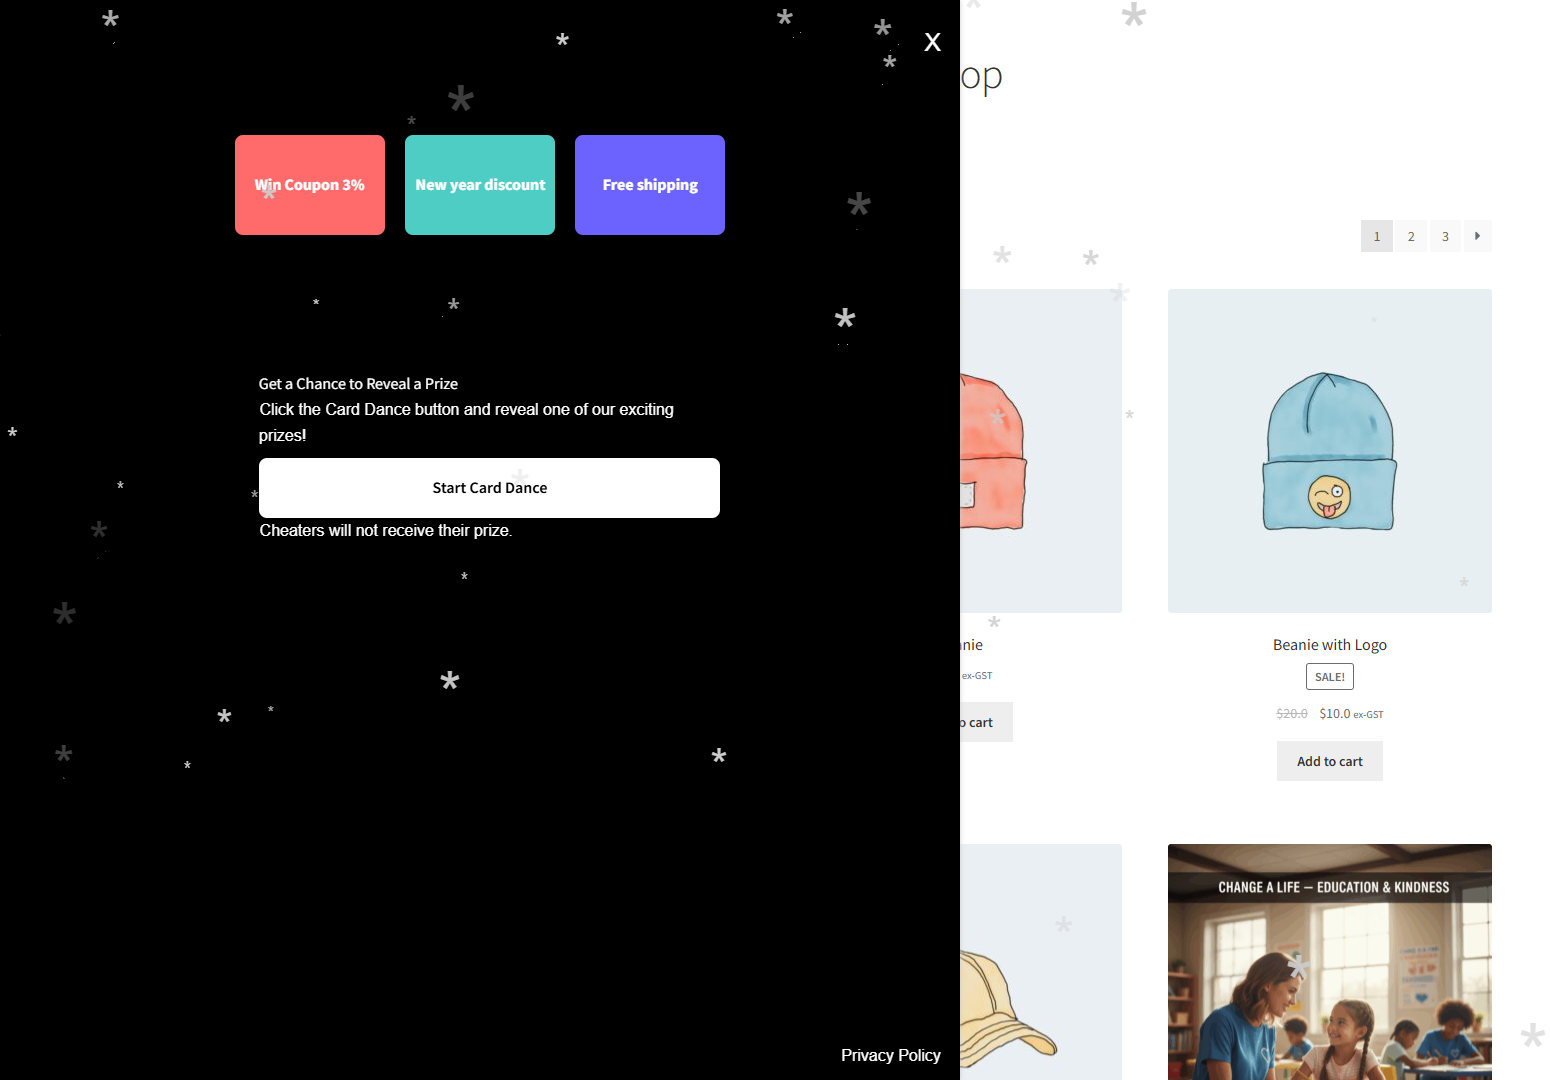
- Now, click the button to begin. All cards perform a quick dance animation.
- After the animation, a card is automatically selected as the winner based on the admin-set Chance value.
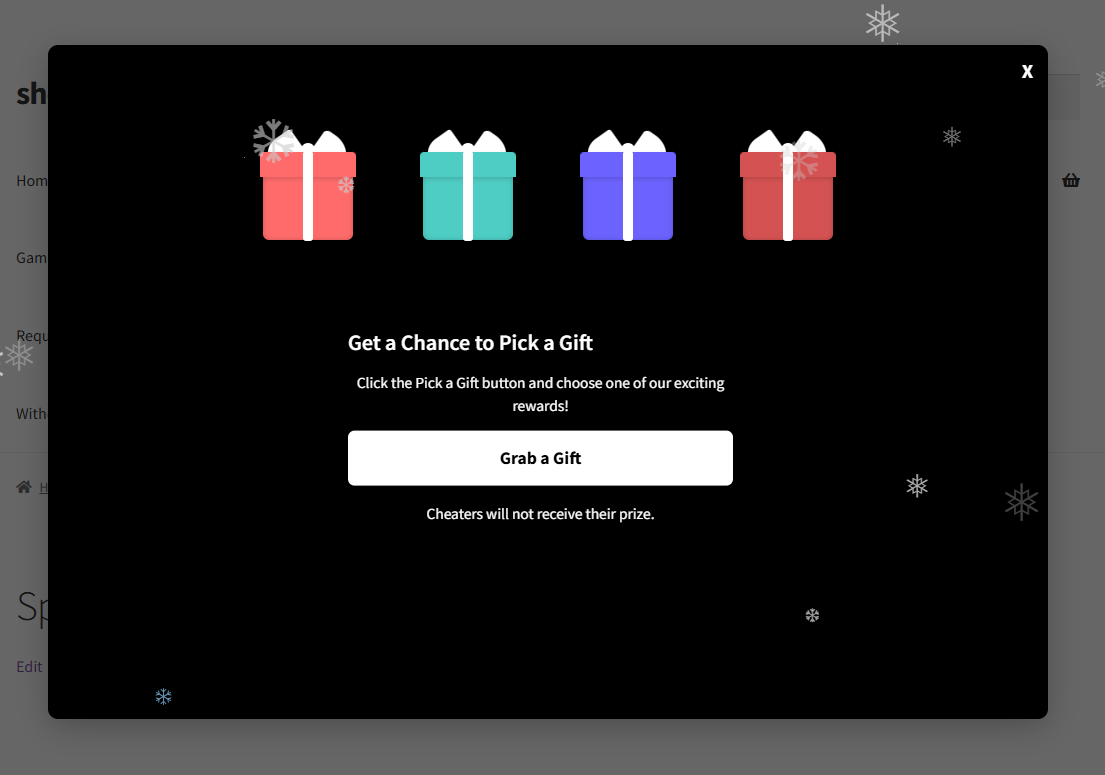
Pick a Gift
Displays multiple gift boxes. Users pick one box, which opens to reveal the assigned reward.
- Navigate to: WP Admin Dashboard > WooCommerce > Spin Wheel > Main.

- Under the Main section, A Select Game Type dropdown is displayed.
- Choose Pick a Gift to proceed with Pick a Gift settings.
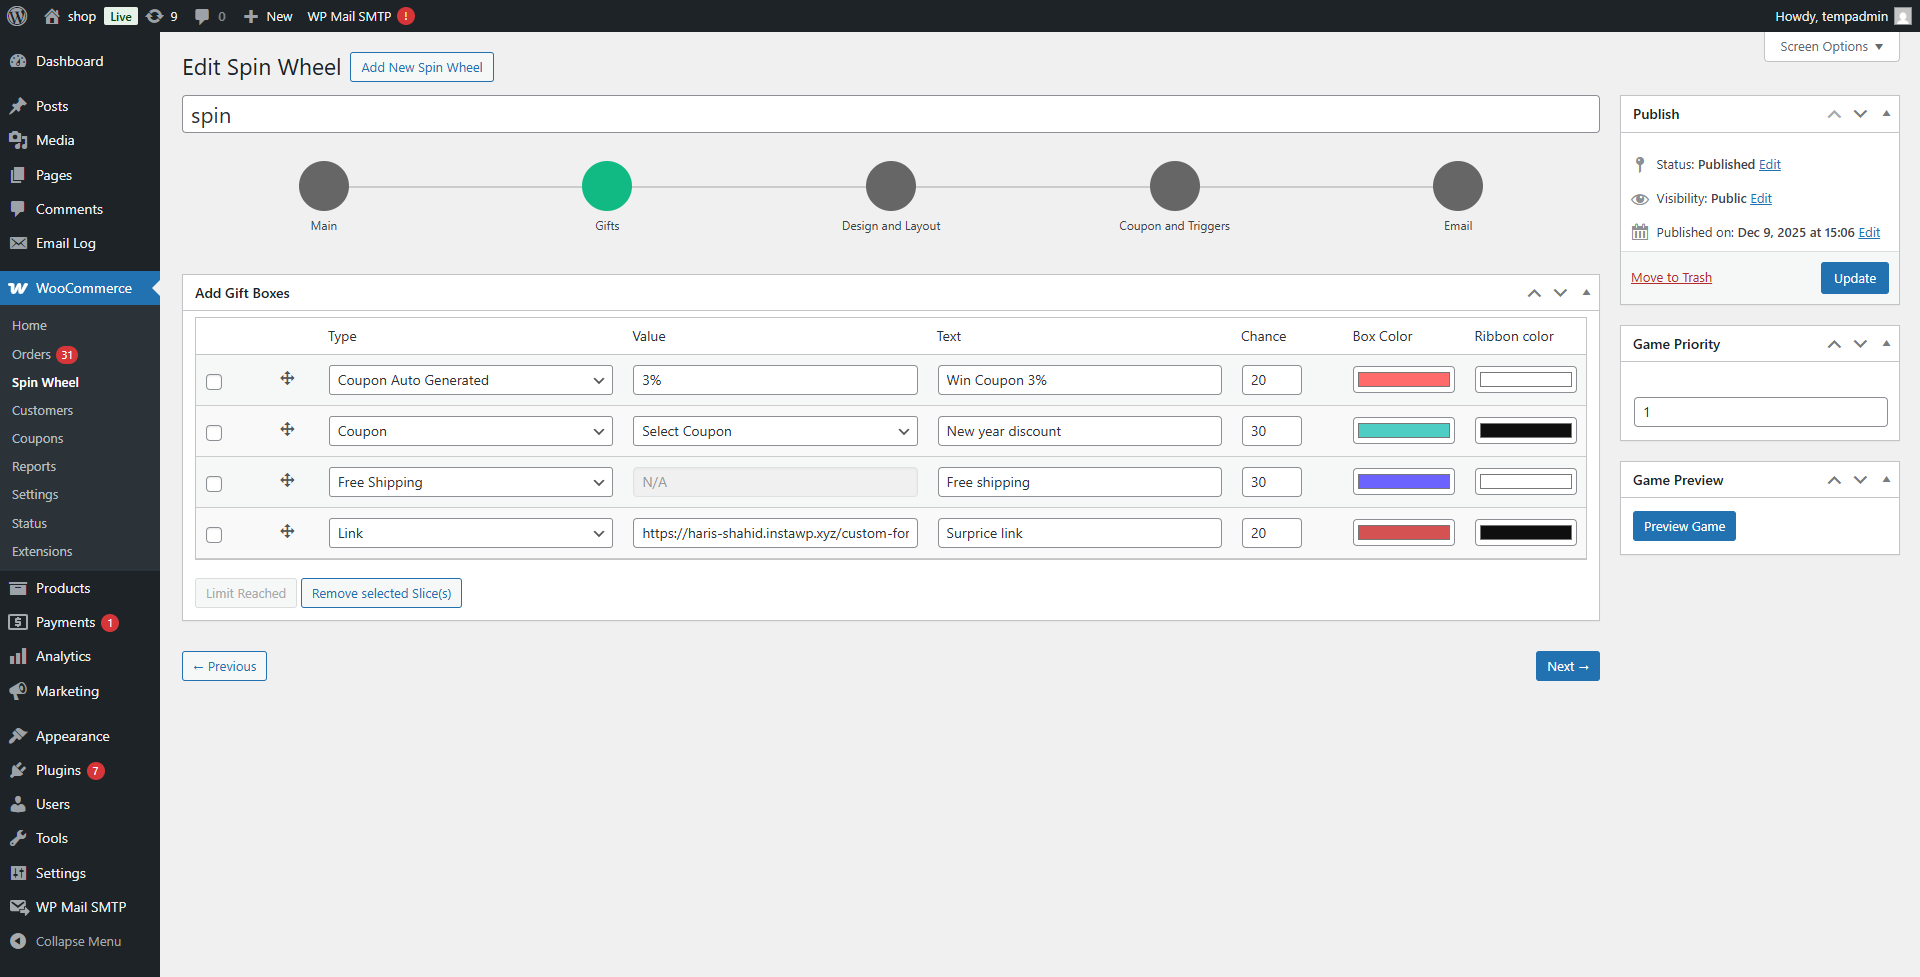
- Now, navigate to the Gift Tab.
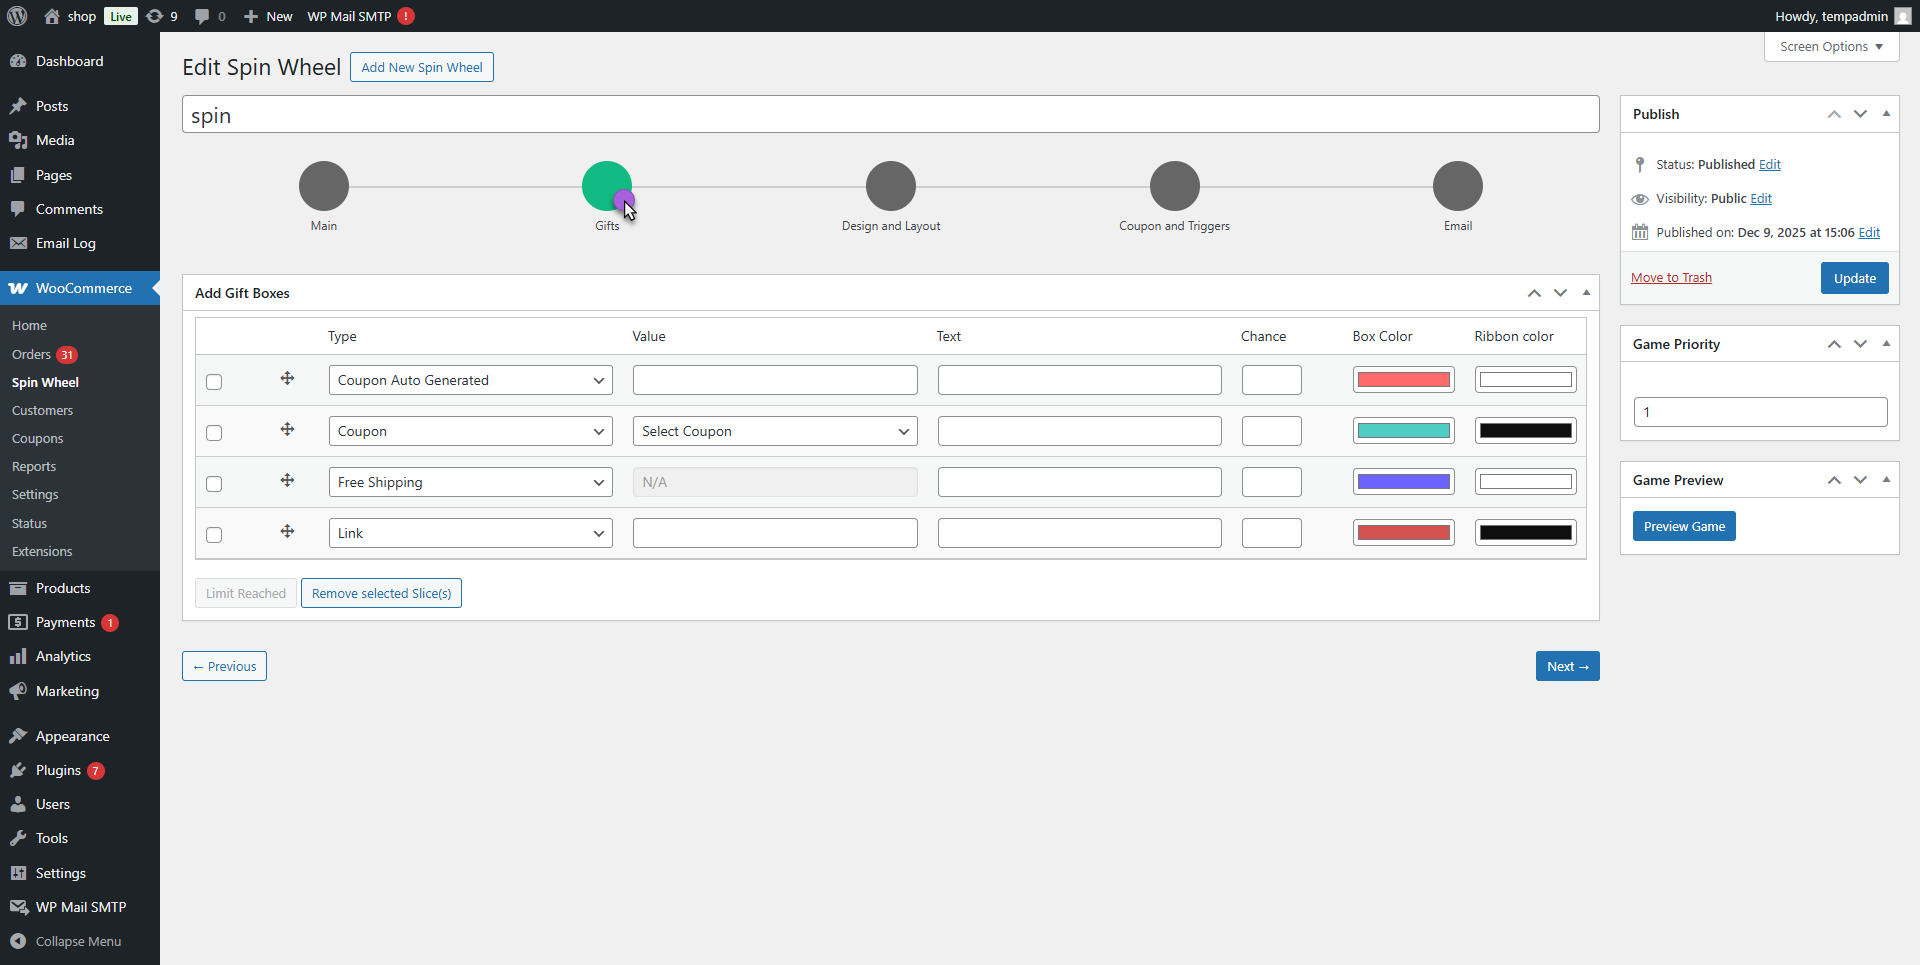
- For each gift, configure:
- Reward Type: Coupon, Auto Coupon, Link, Free Shipping, No Prize
- Value or Coupon Code
- Text
- Chance of being selected
- Box Color
- Ribbon color
- Add or remove gifts as needed.
Front-end-impact
- Go to the page where the Pick a Gift game is enabled, and a series of gift boxes appears.
- All gift boxes are displayed (depending on your settings, box design).
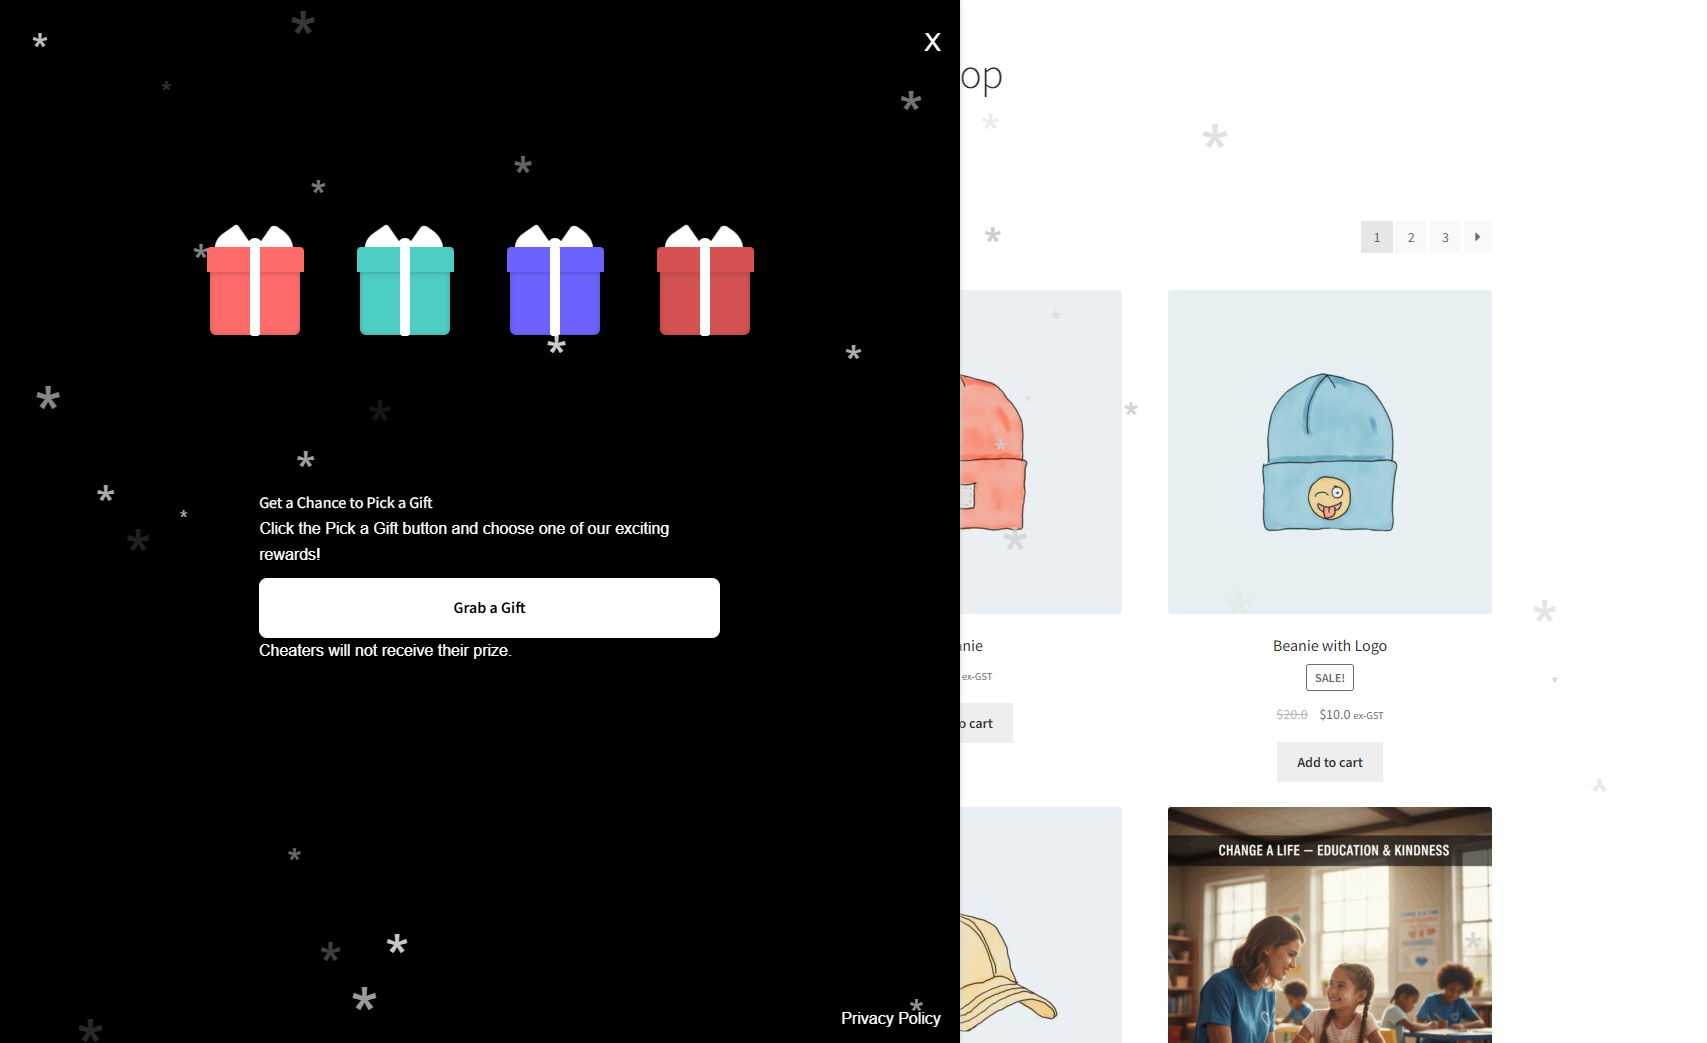
- Click the button to start.
- Select any Gift Box by clicking on it.
- The box opens with an animation.
- The reward inside the chosen box is revealed.
Clickable Button
↑ Back to top- Navigate to: WP Admin Dashboard > WooCommerce > Spin Wheel > Main
- Enable Button: This option allows users to open the Spin Wheel via a button. It is enabled by default.
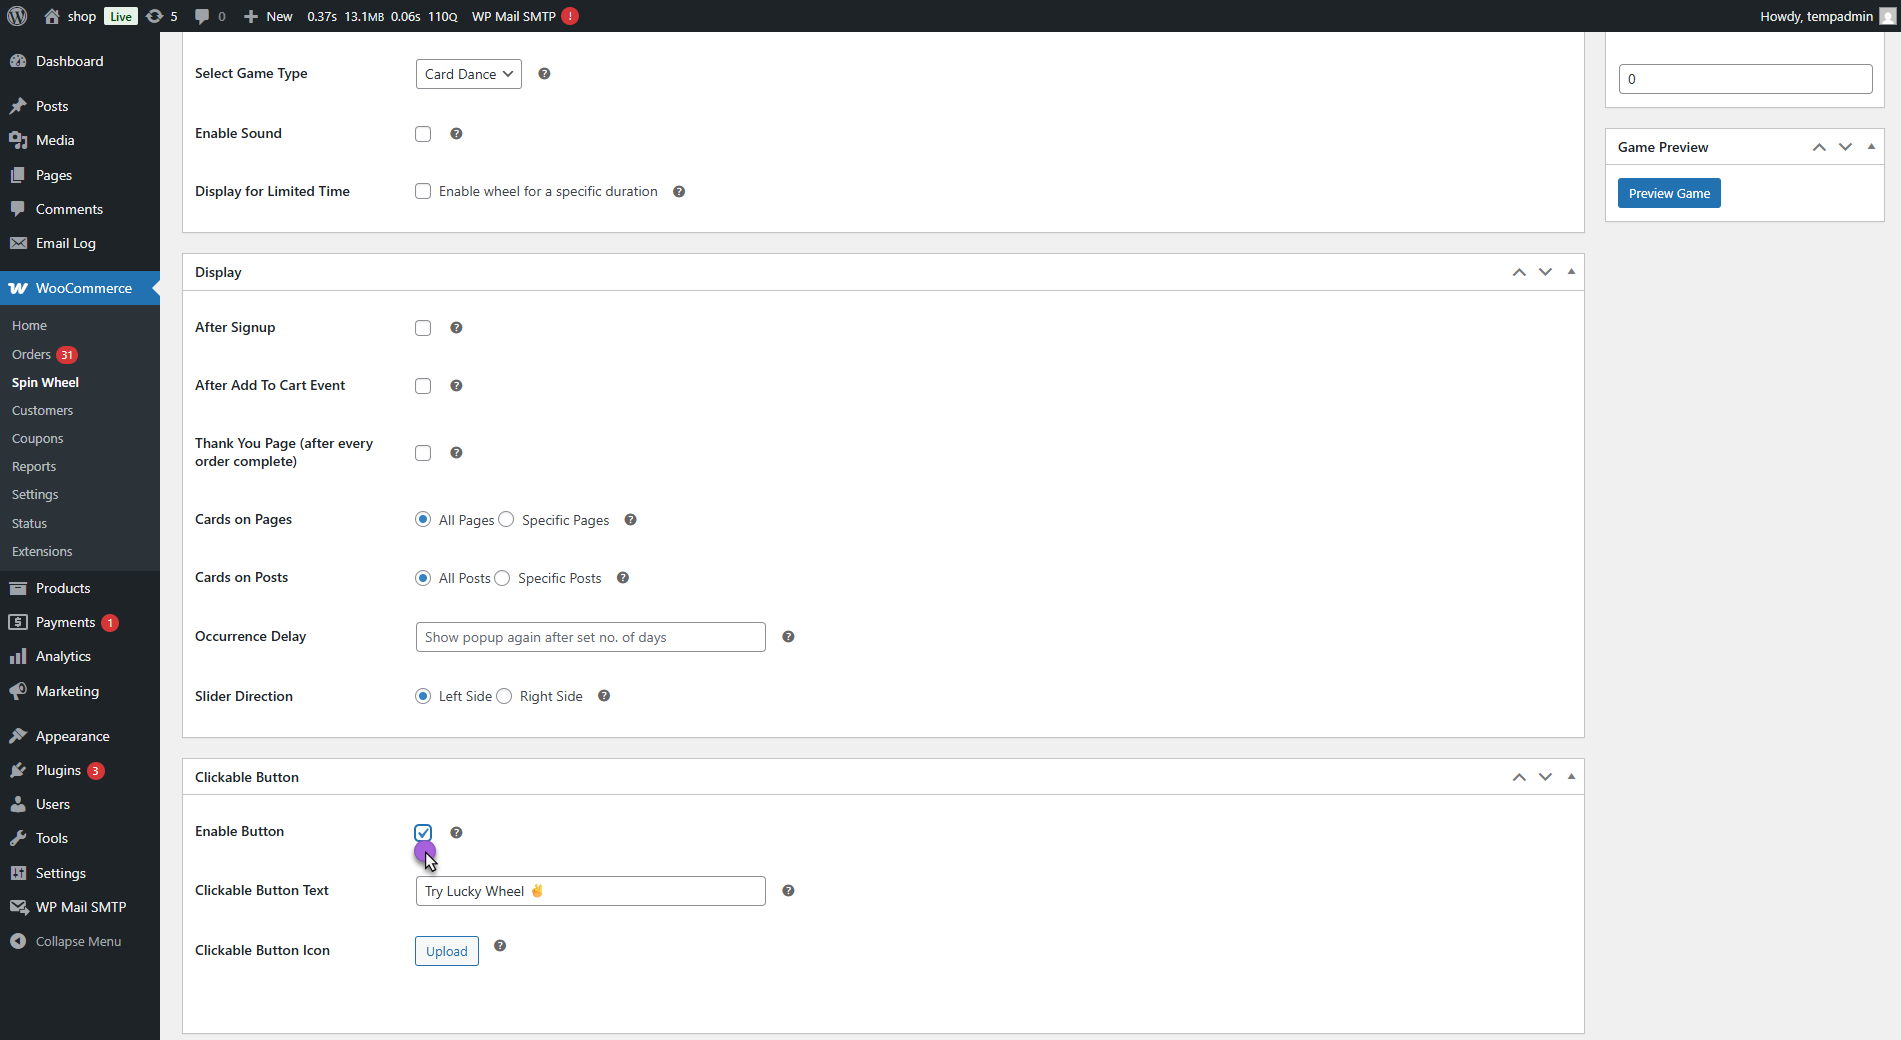
- Clickable Button Text: The admin can customize the text displayed when the button is clicked.
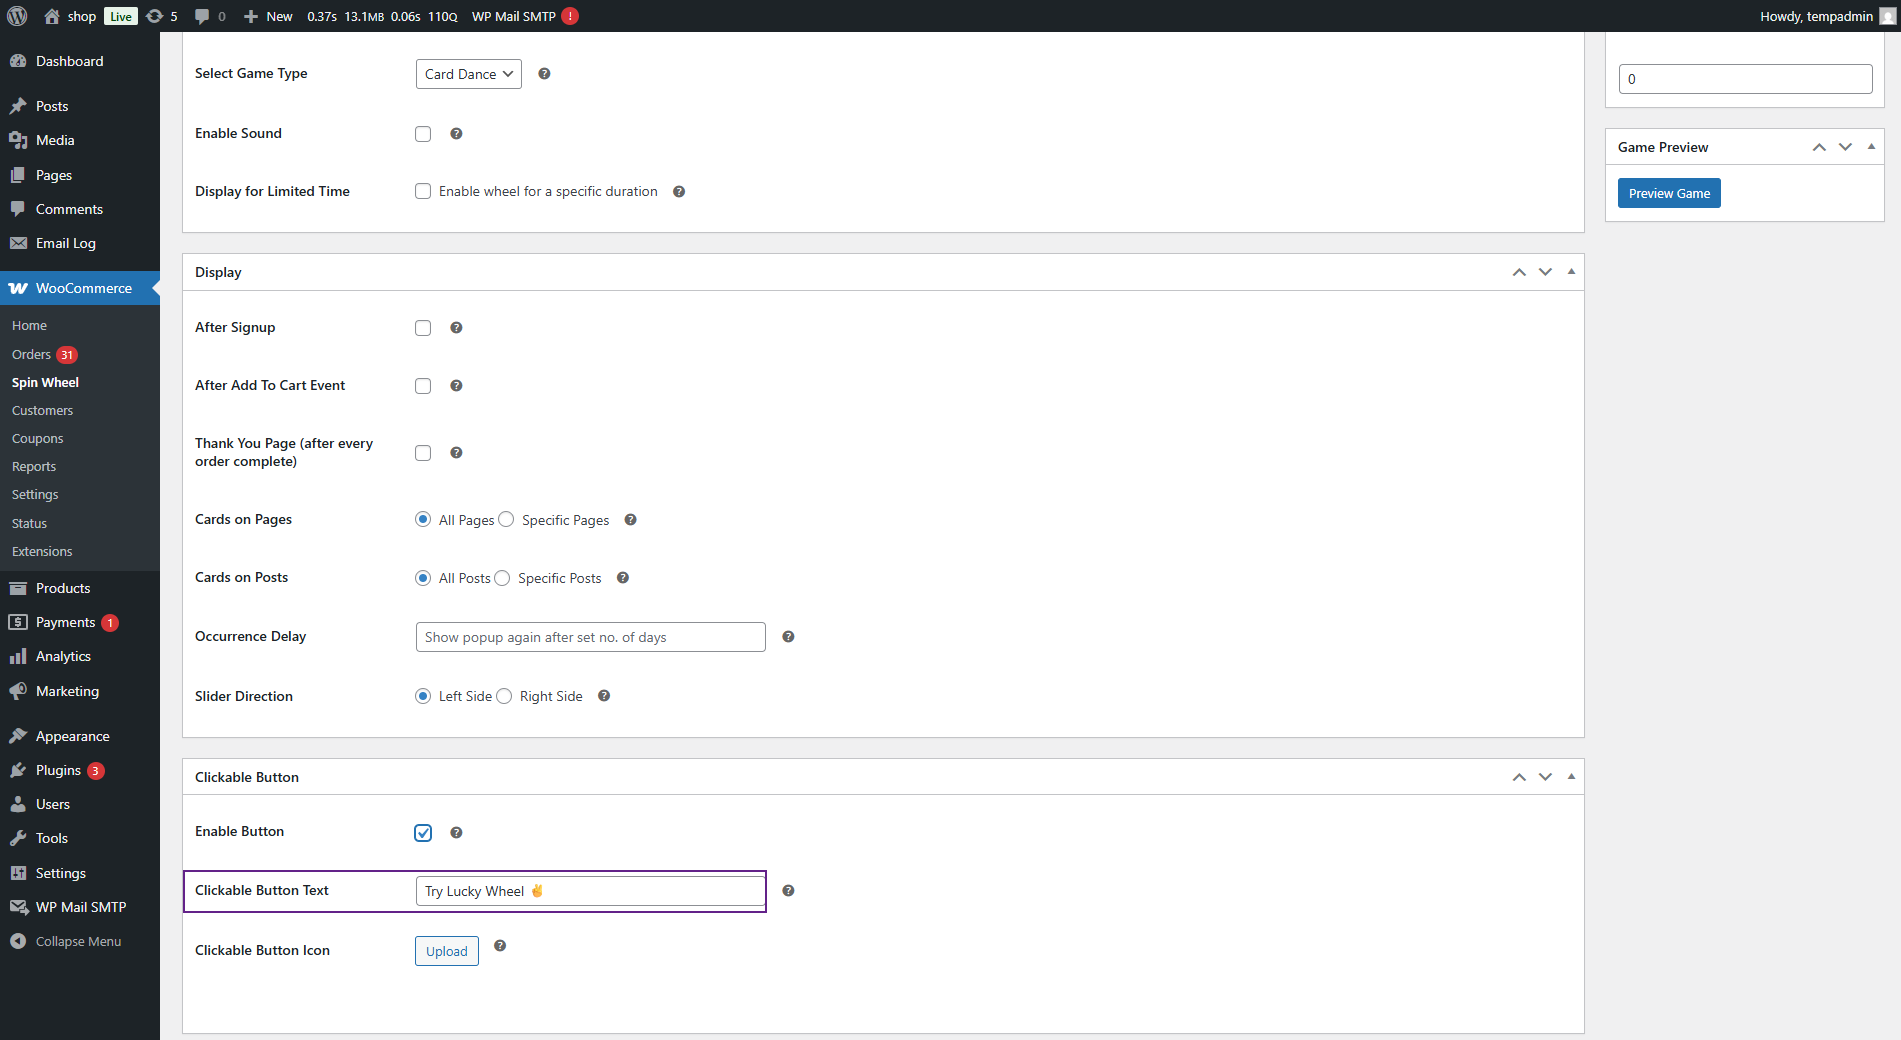
- Clickable Button Icon: Admin can upload an icon to be shown on the button.
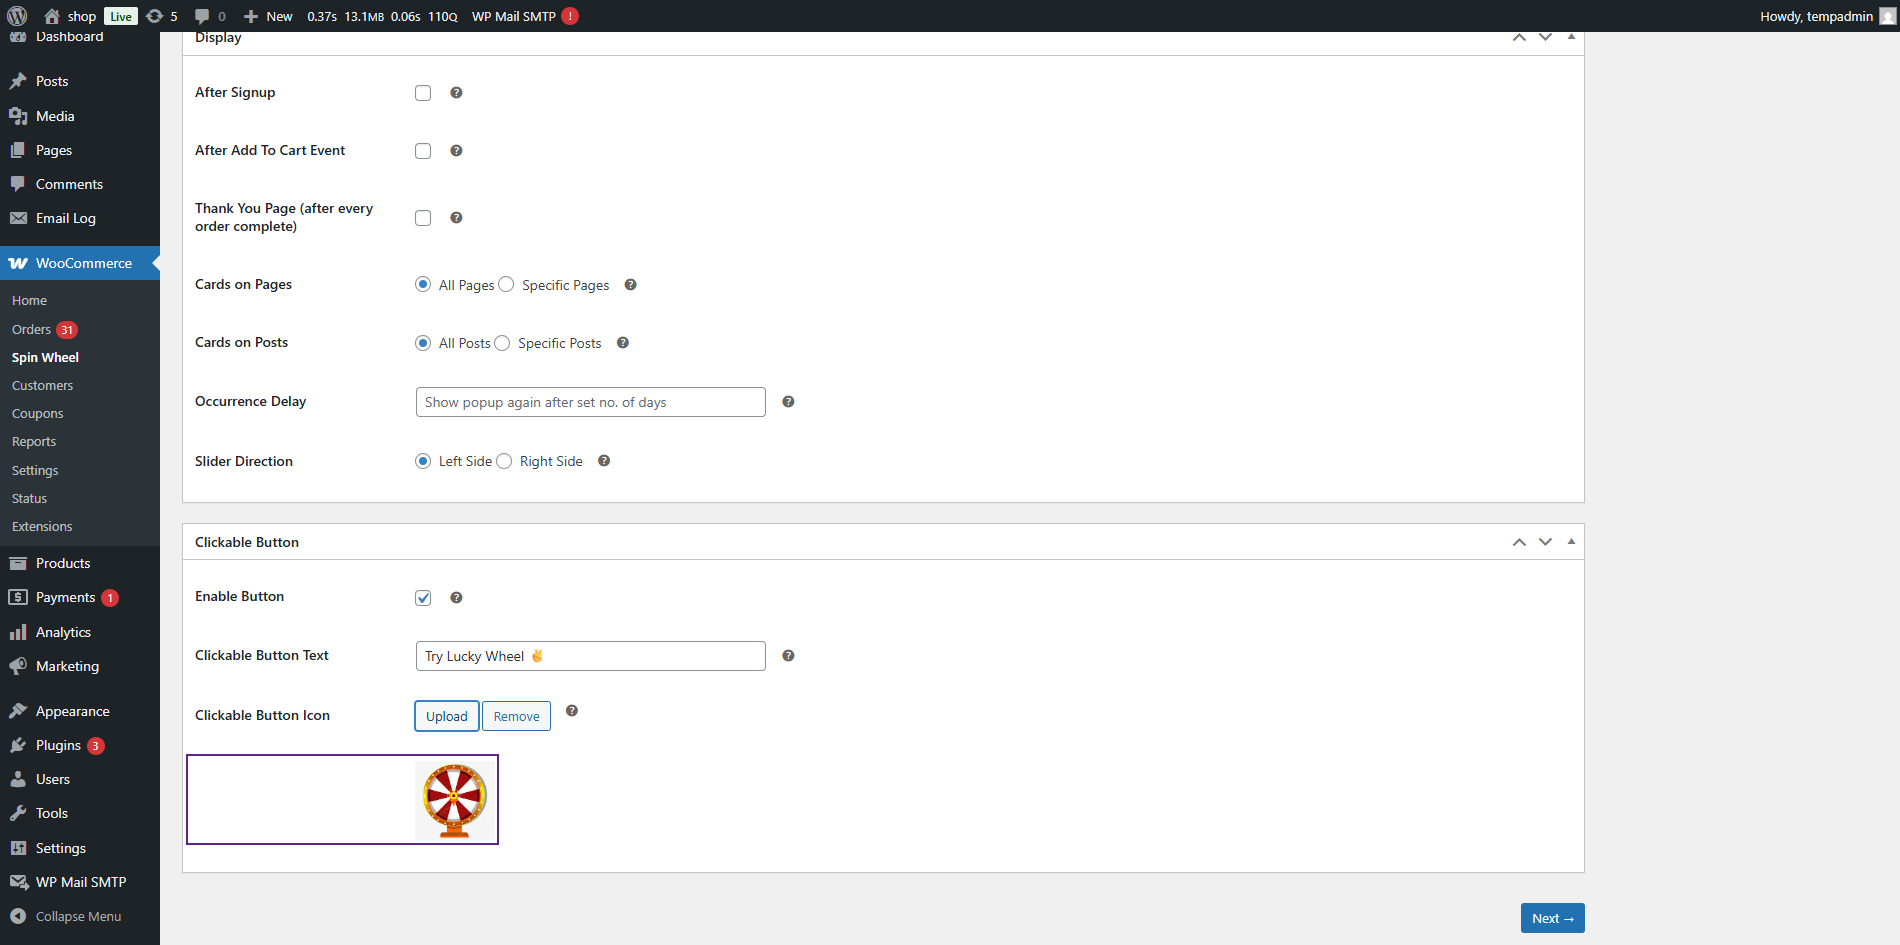
Note: All clickable button settings are per-game instance. Each Spin Wheel, Card Dance, or Pick a Gift game can have its own unique button configuration.
Front End Impact
↑ Back to top- Log in to your account.

Slices Tab
↑ Back to top- The admin can configure the slices of the wheel. The available slice types are:
- Coupon Auto-Generated: Automatically generates a coupon upon winning the value set by the admin in the Value field.
- Coupon: Uses a pre-defined WooCommerce coupon.
- Link: Redirects the user to a specific URL
- No Prize: Indicates the user did not win
- Free Shipping: Grants the user free shipping as a coupon. (Free shipping coupons will only work if the following setting is enabled: WooCommerce > Settings > Shipping > Shipping Zones > Free Shipping > A Valid Free Shipping Coupon.)
- The admin can add all types as needed.
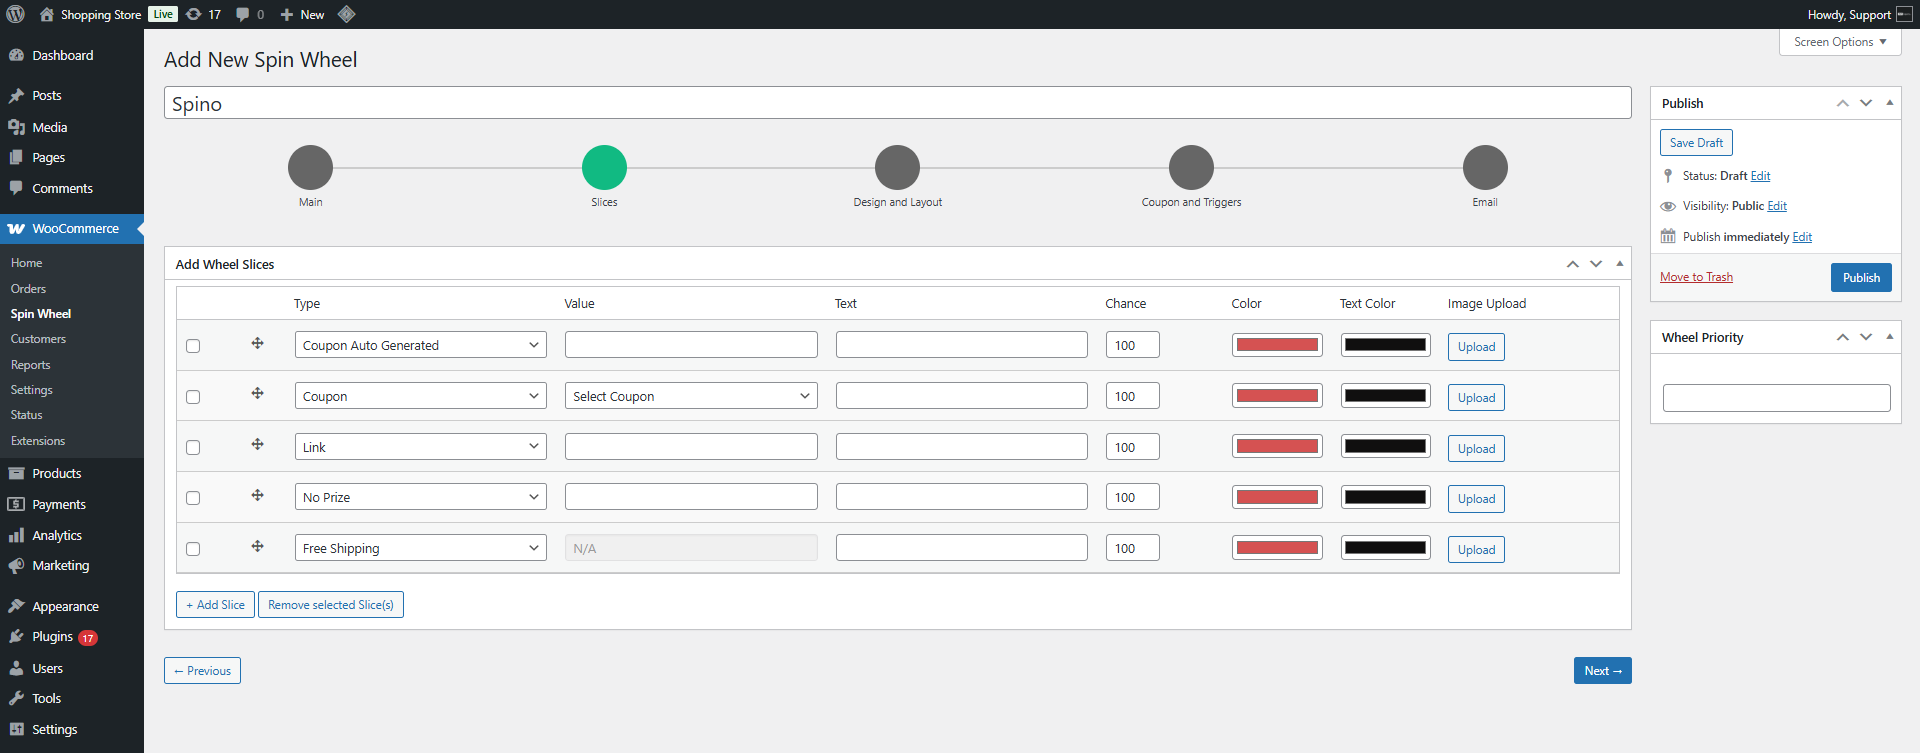
- Enter the Value for applicable slices.
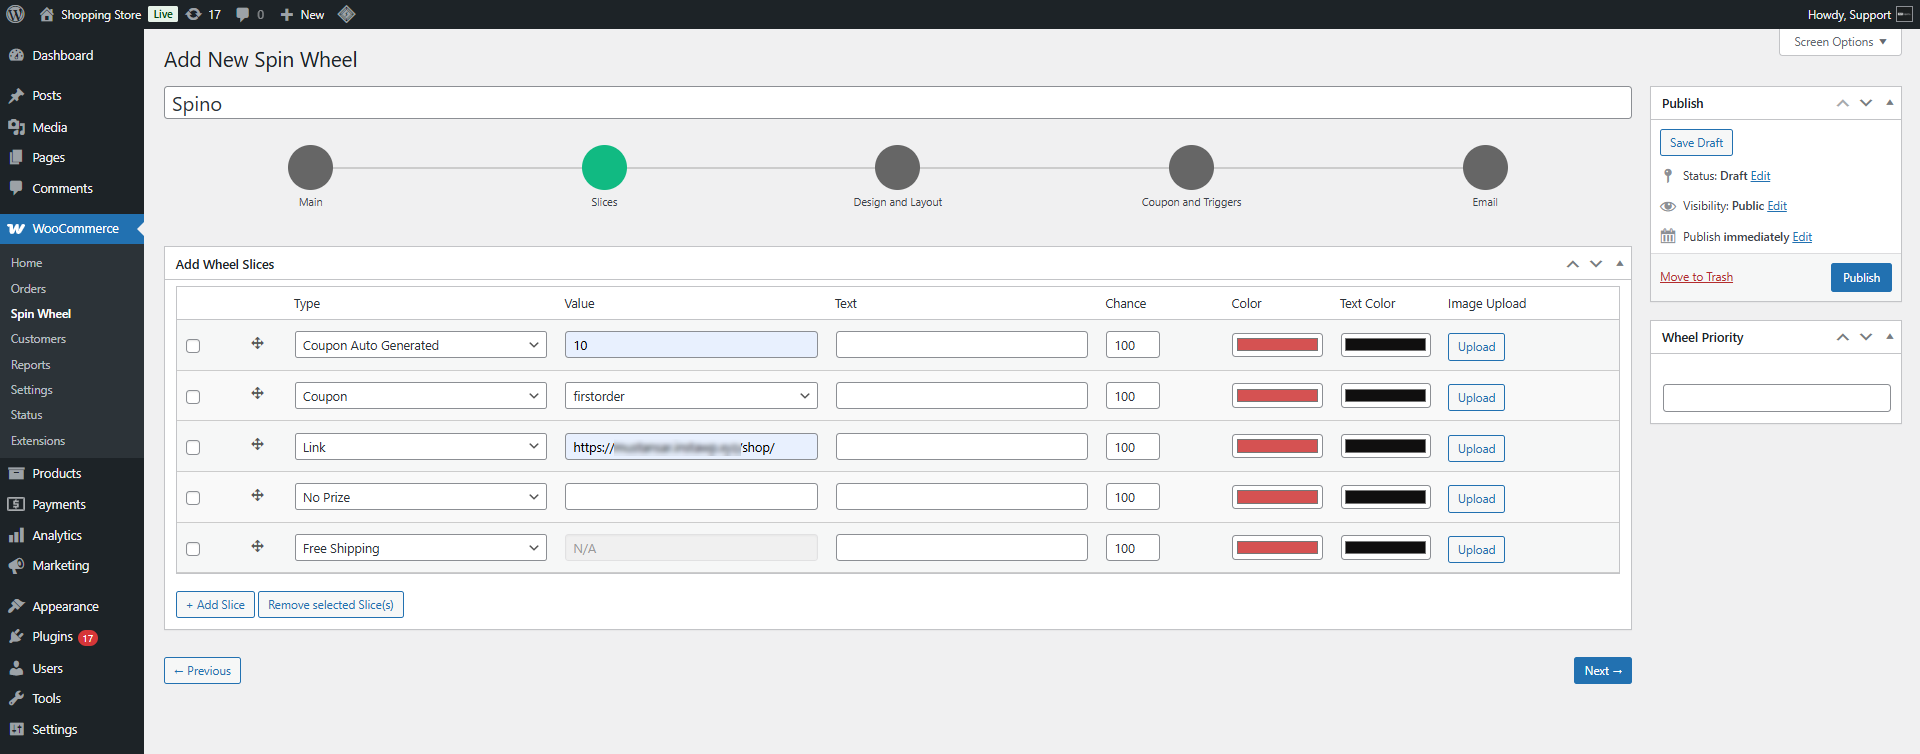
- Add a Label for each slice.
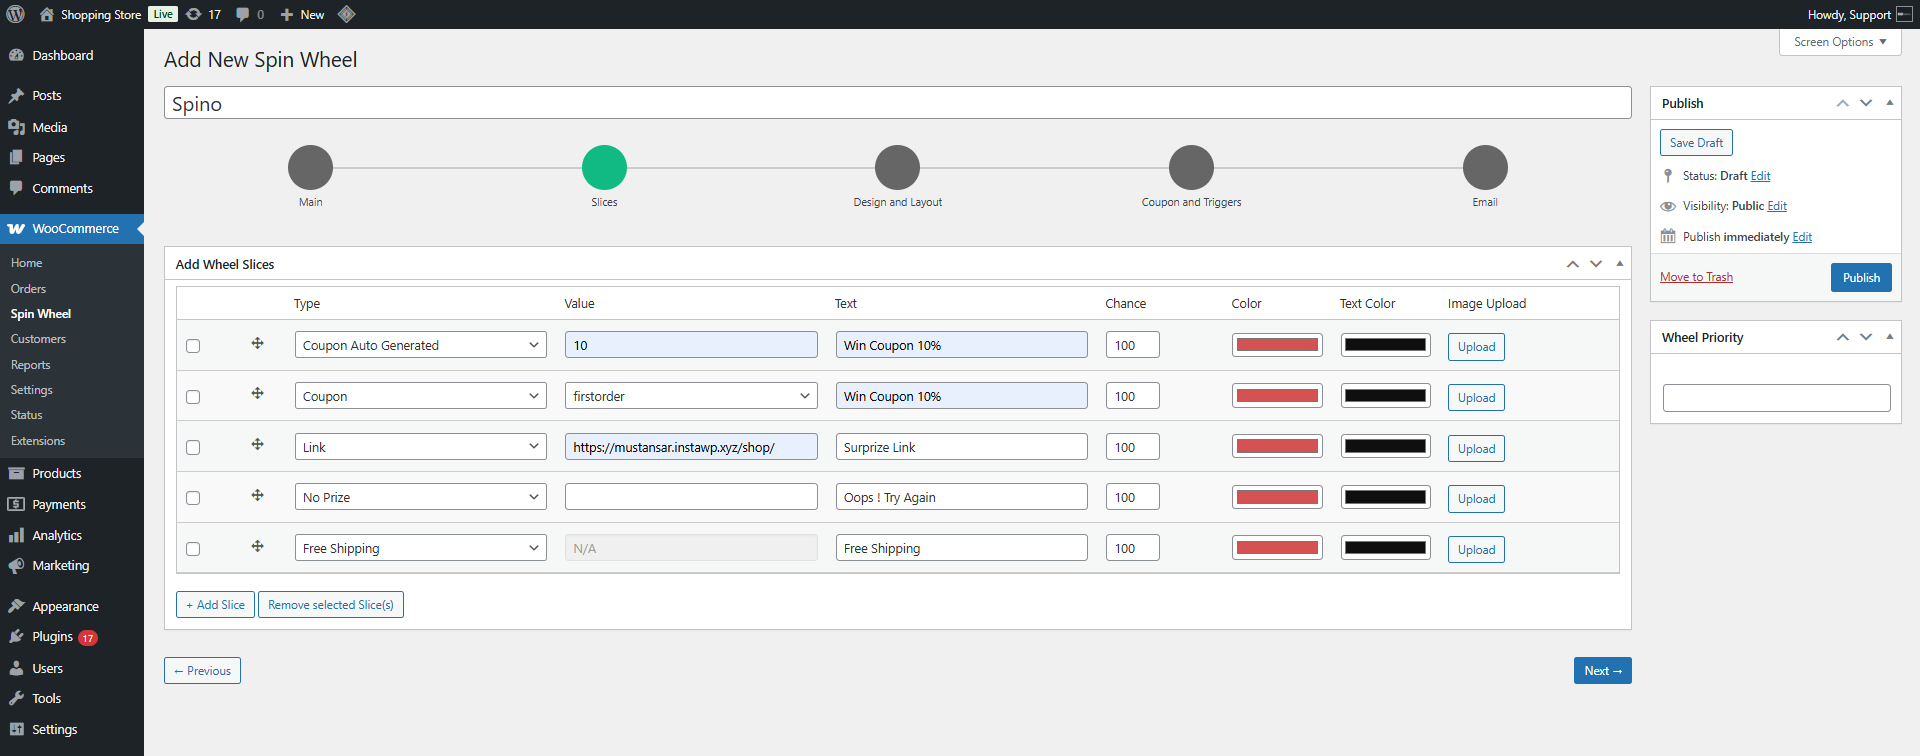
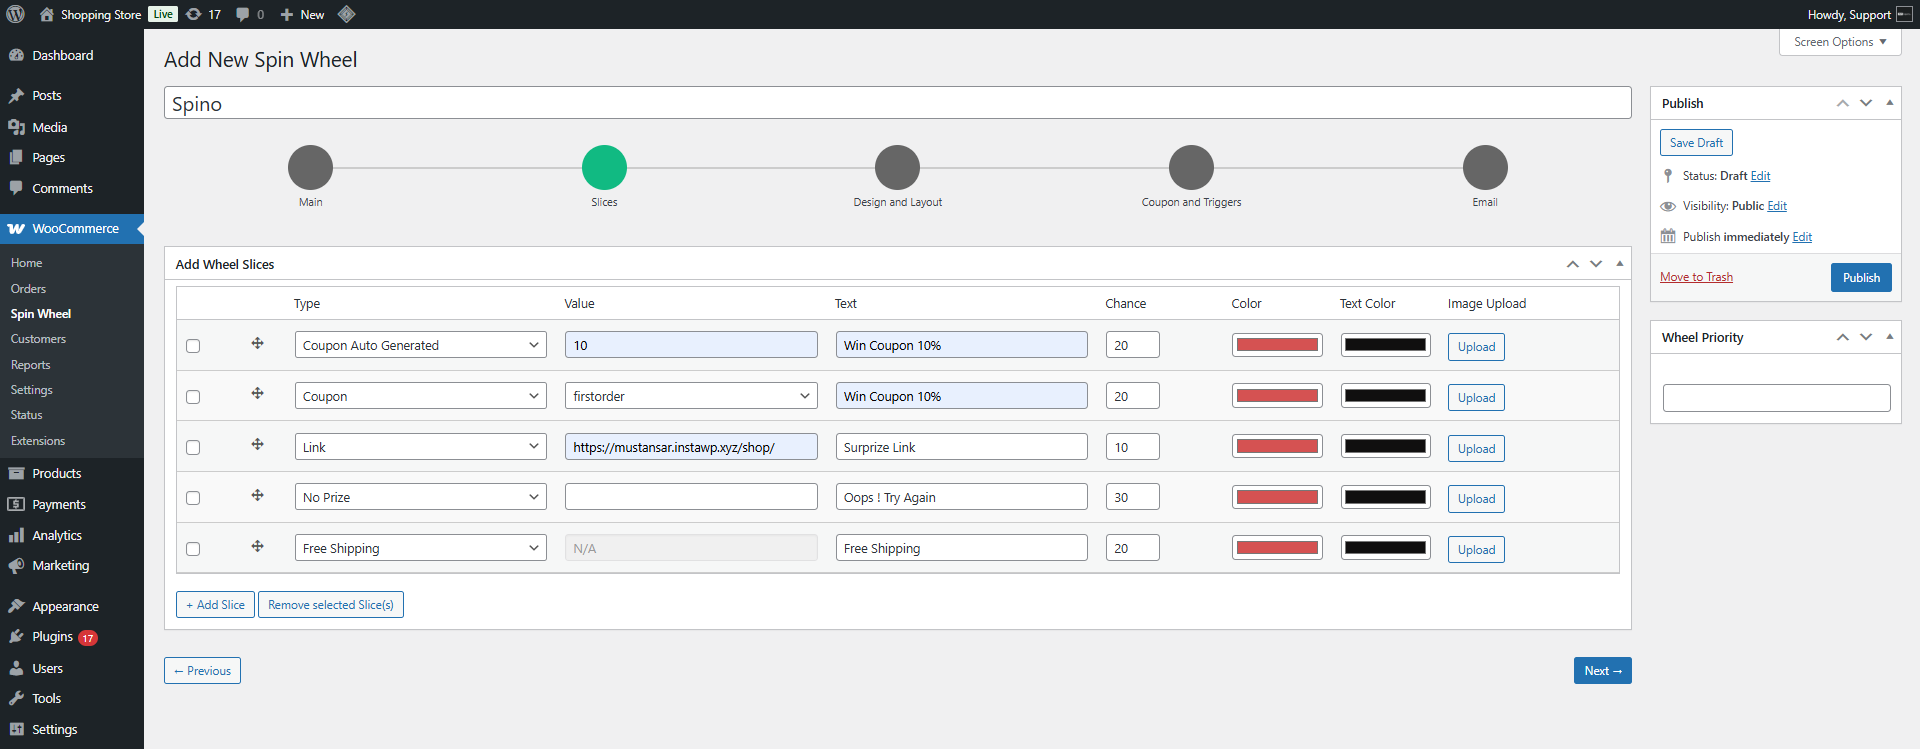
- Set the Chance (probability of being selected).
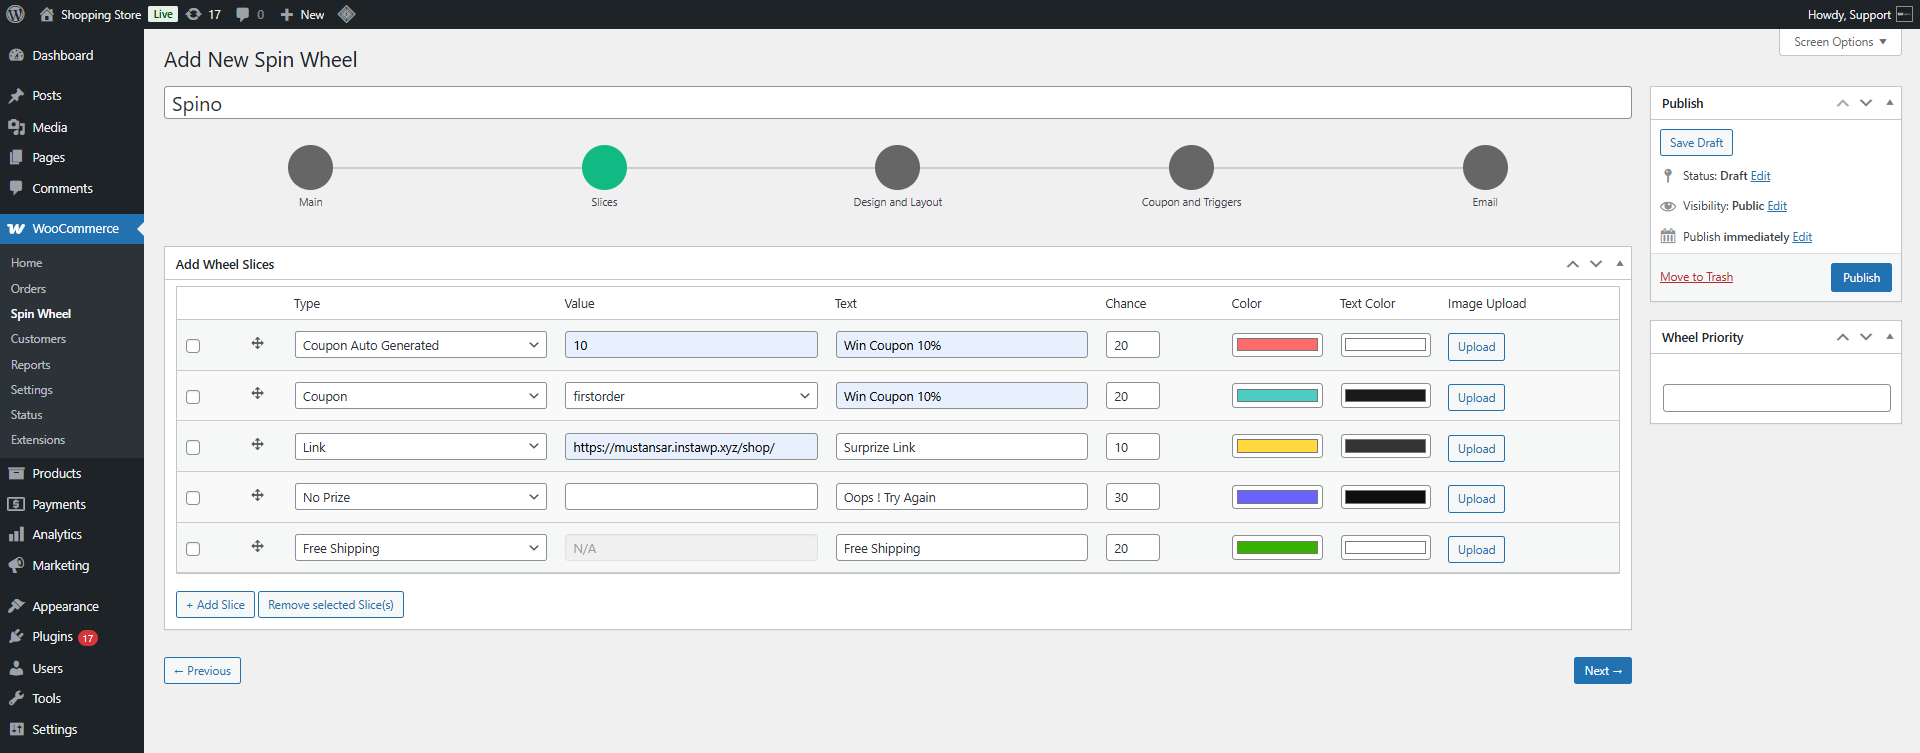
- Choose the Slice Color and Text Color.
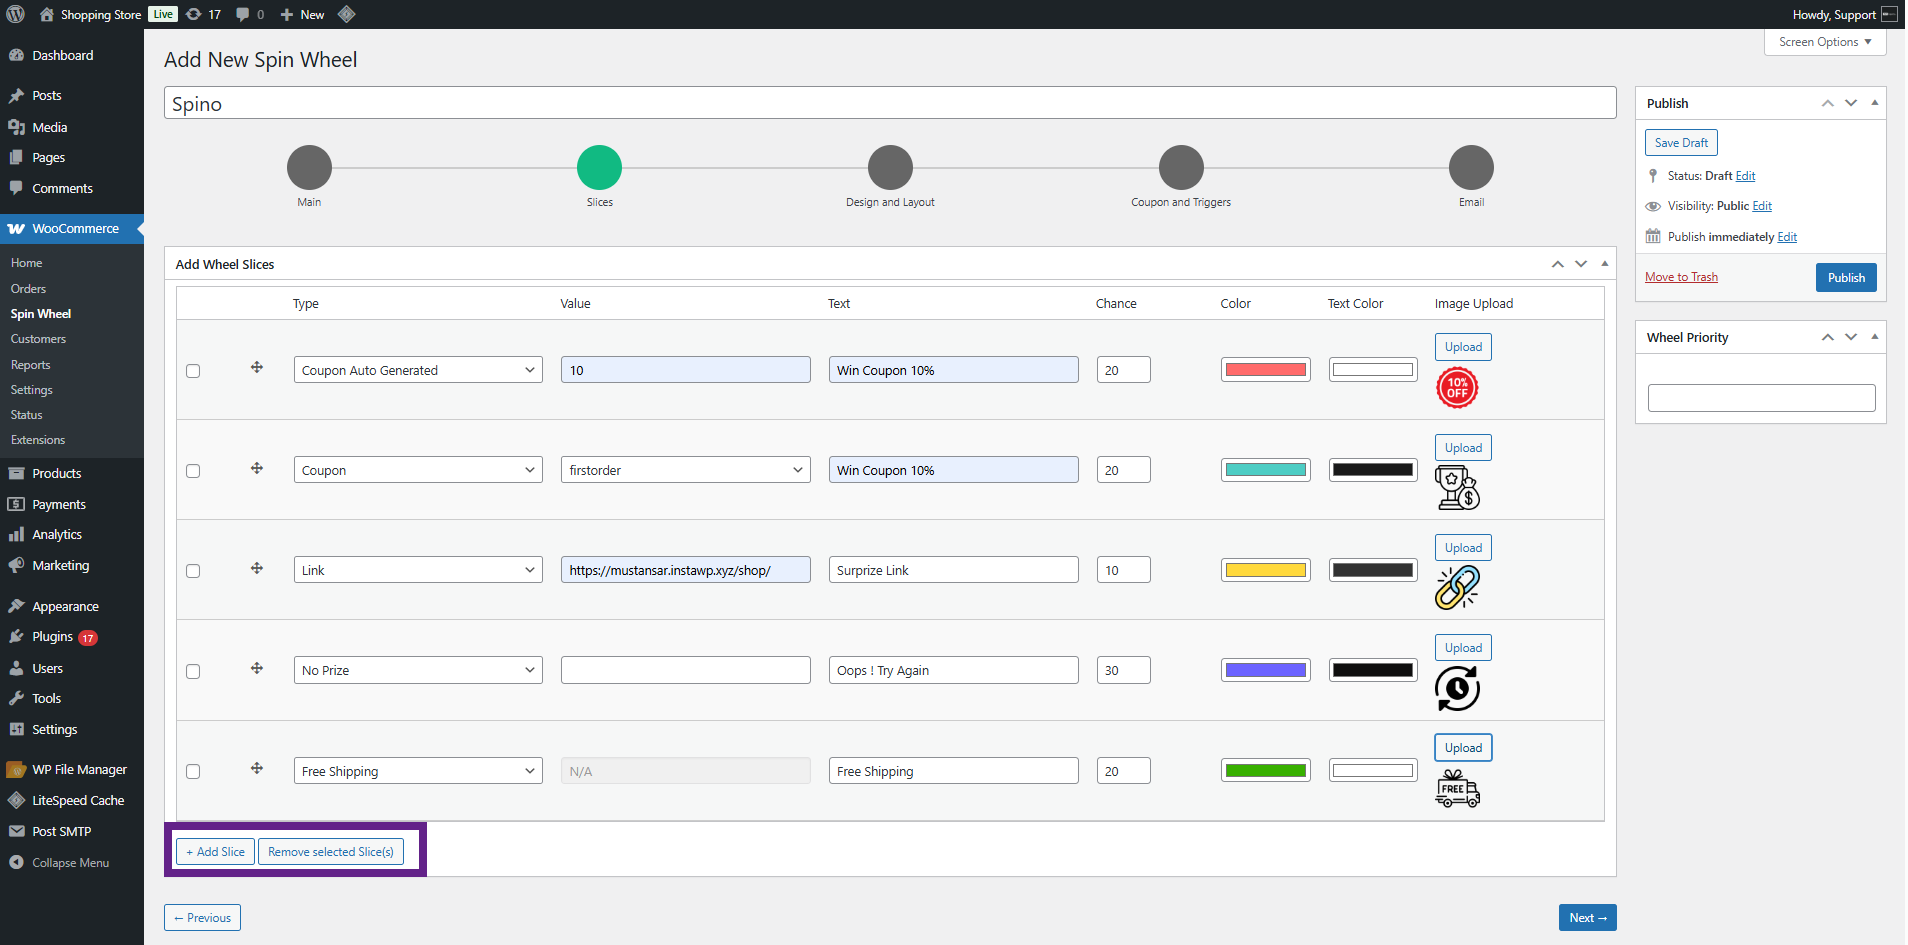
- Upload an Image if needed.

- Add or remove slices using the buttons below the slice table.
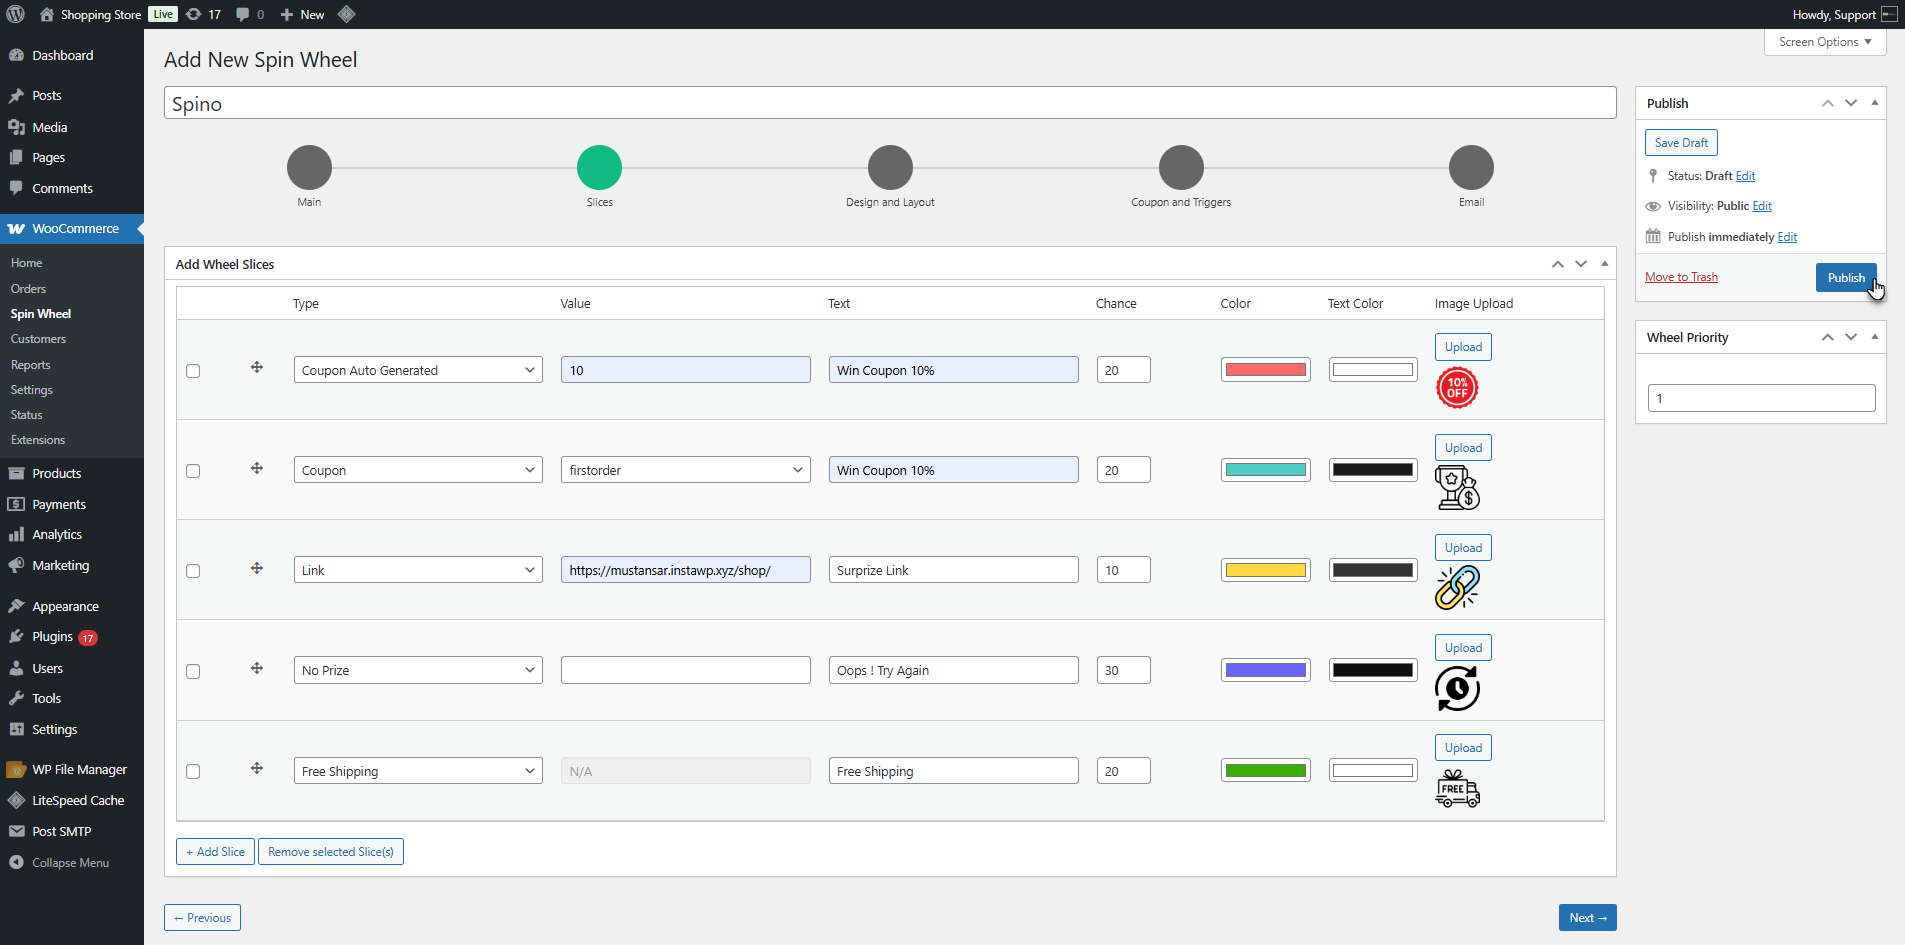
- If multiple wheels are created, set the priority number for each wheel. The lowest number has the highest priority.
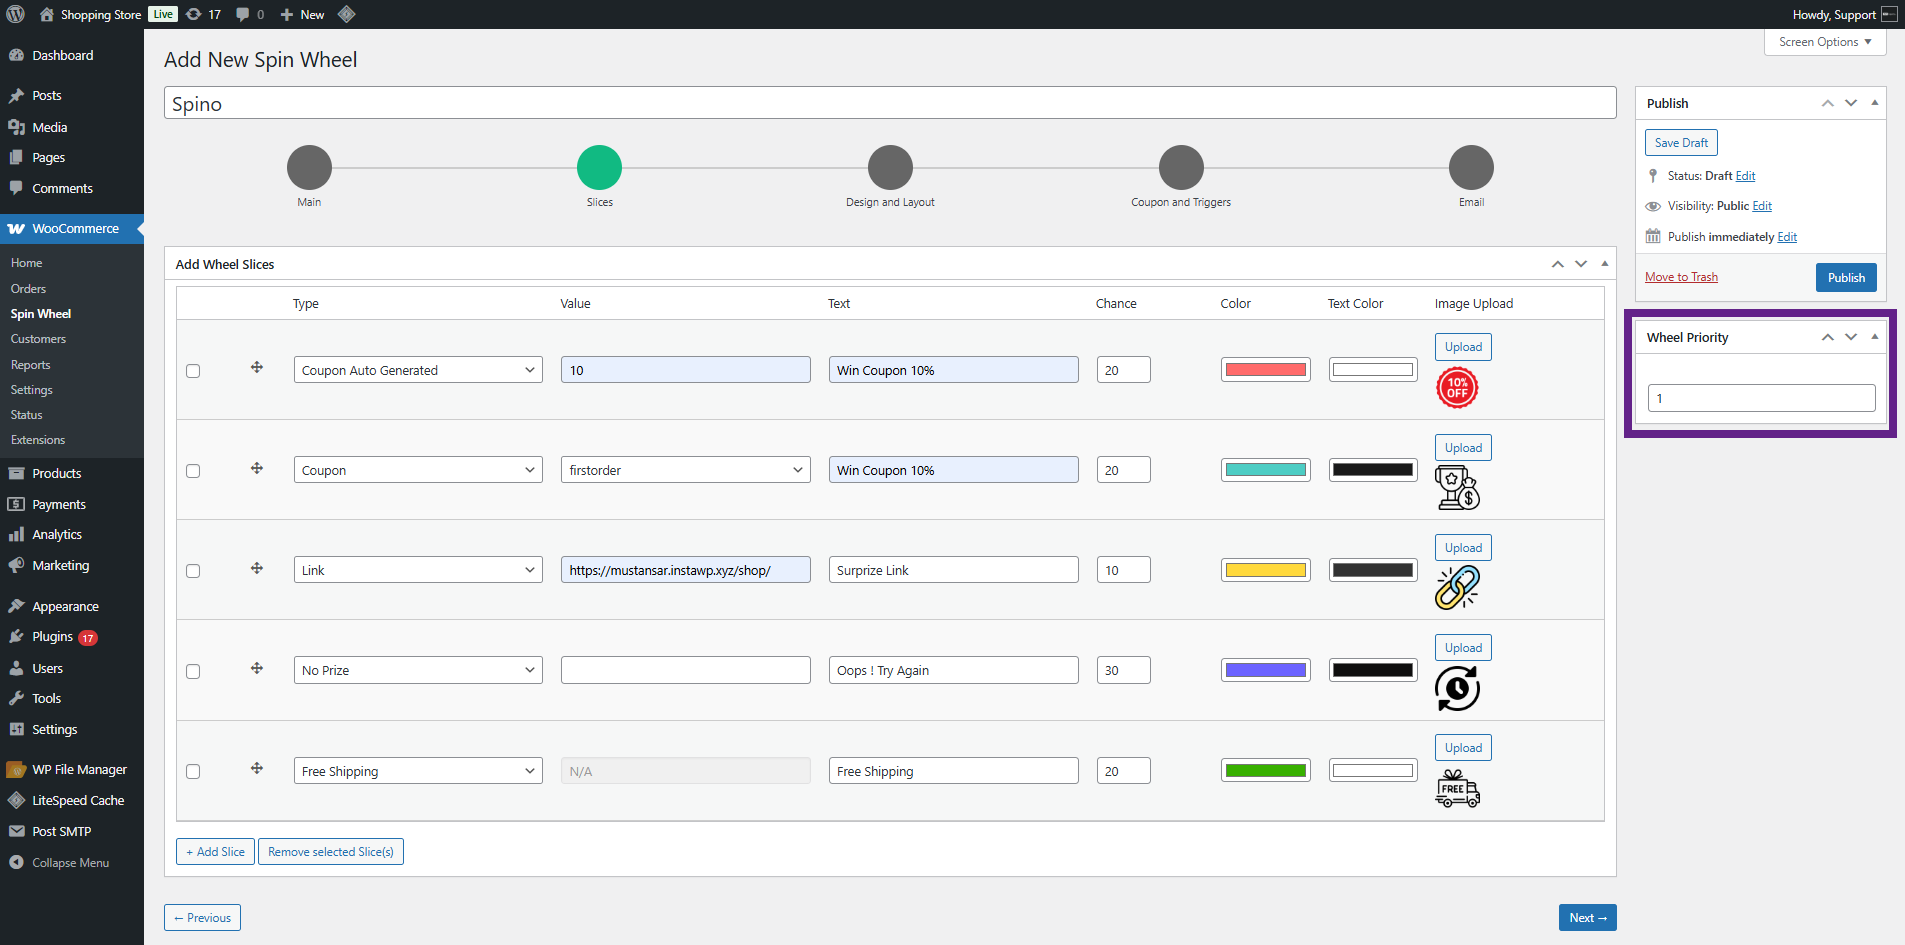
- Finally, click Publish to activate the wheel.
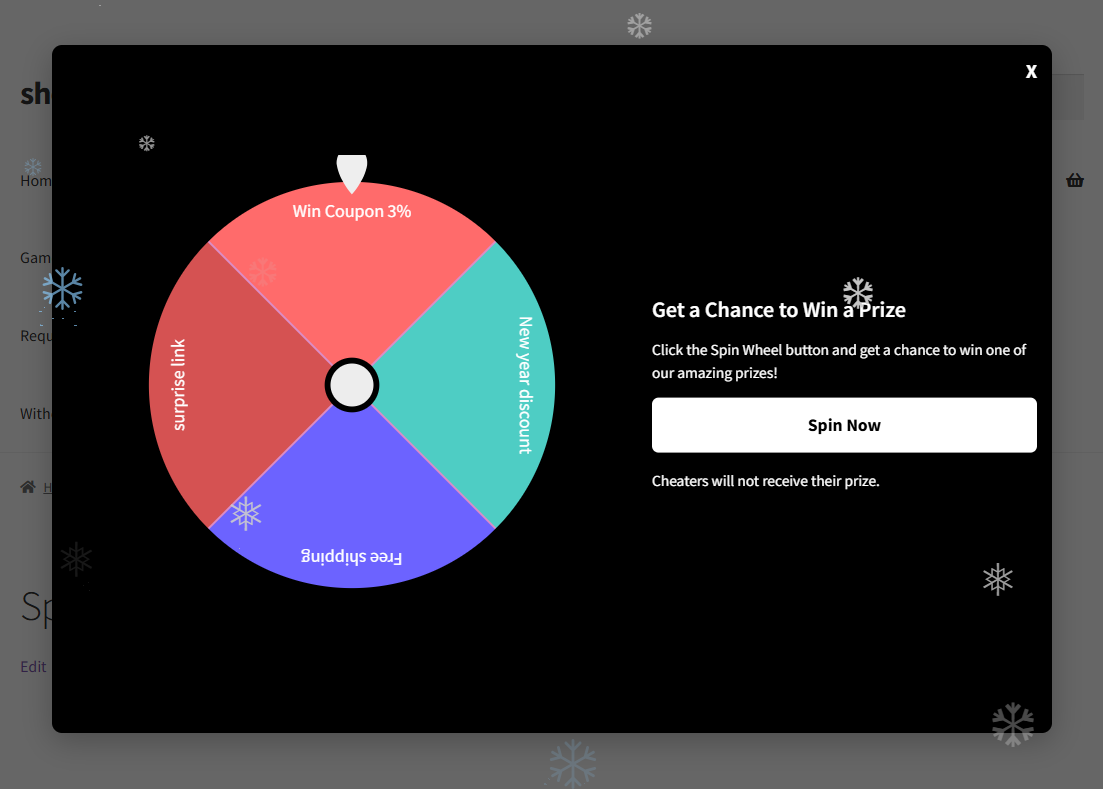
Front End Impact
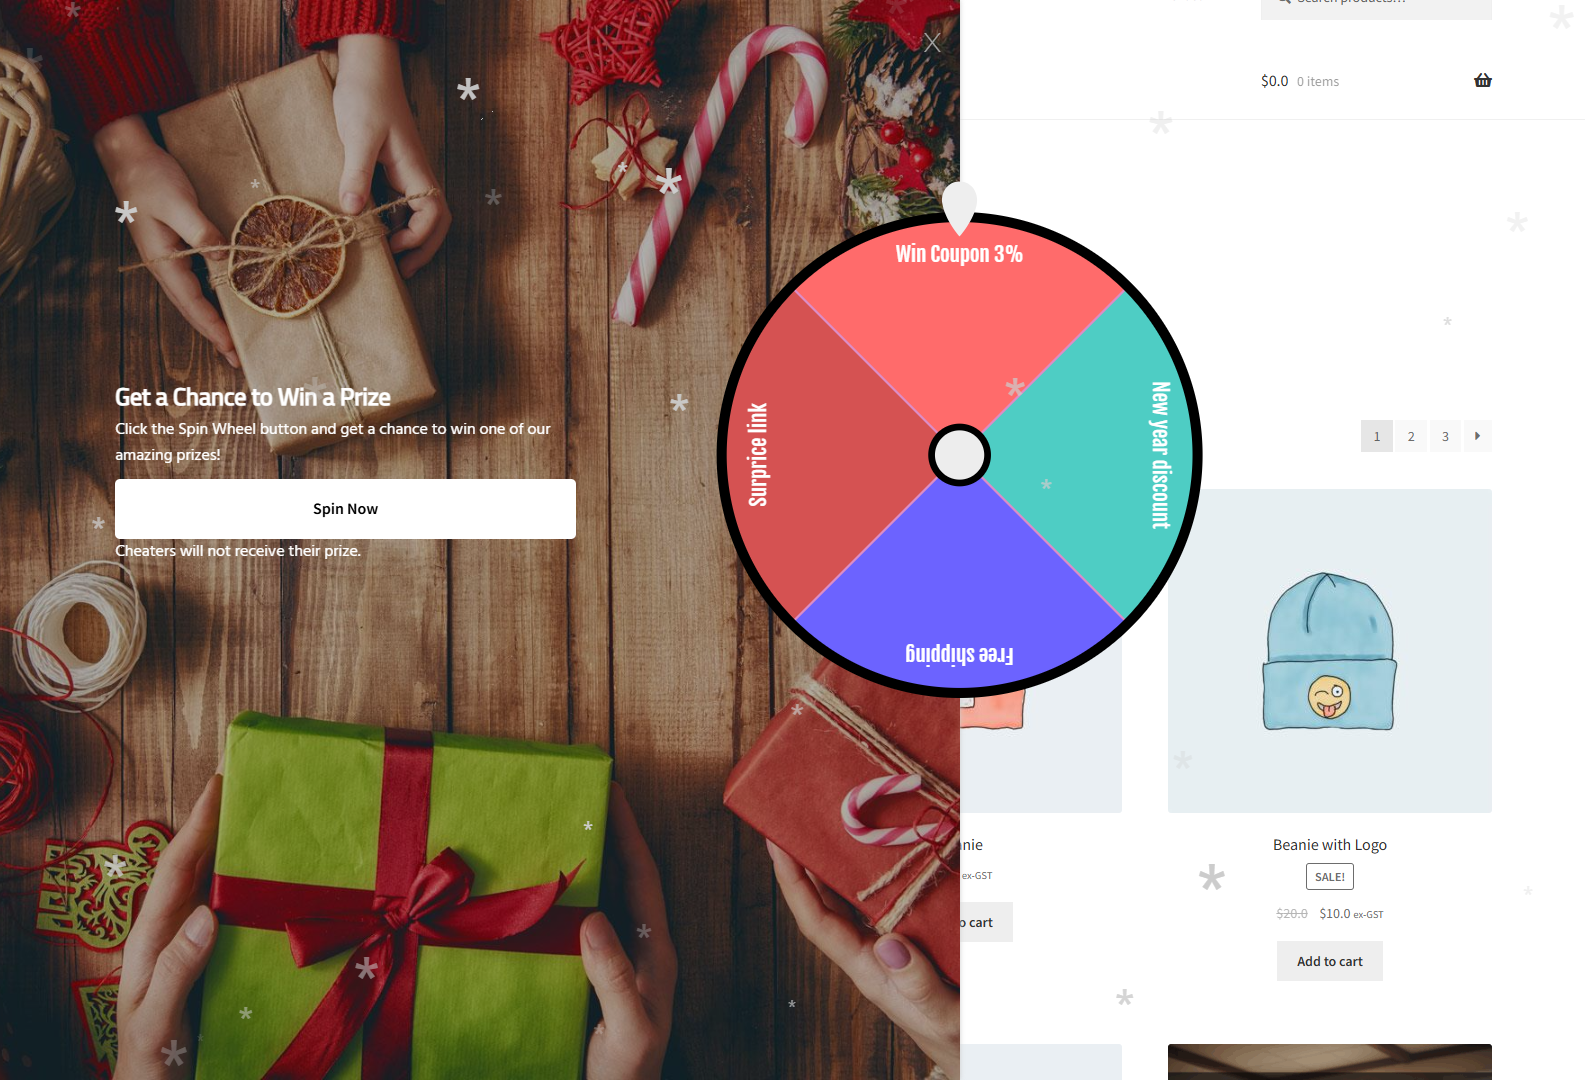
- Log in to your account. The spin wheel appears on the selected pages by the admin.
- Click on the Spin Now button. The spin wheel below features a left-side slider and anti-clockwise wheel rotation.
- The spin wheel below features a Right-side slider and clockwise wheel rotation.
Customization
↑ Back to topDesign and layout
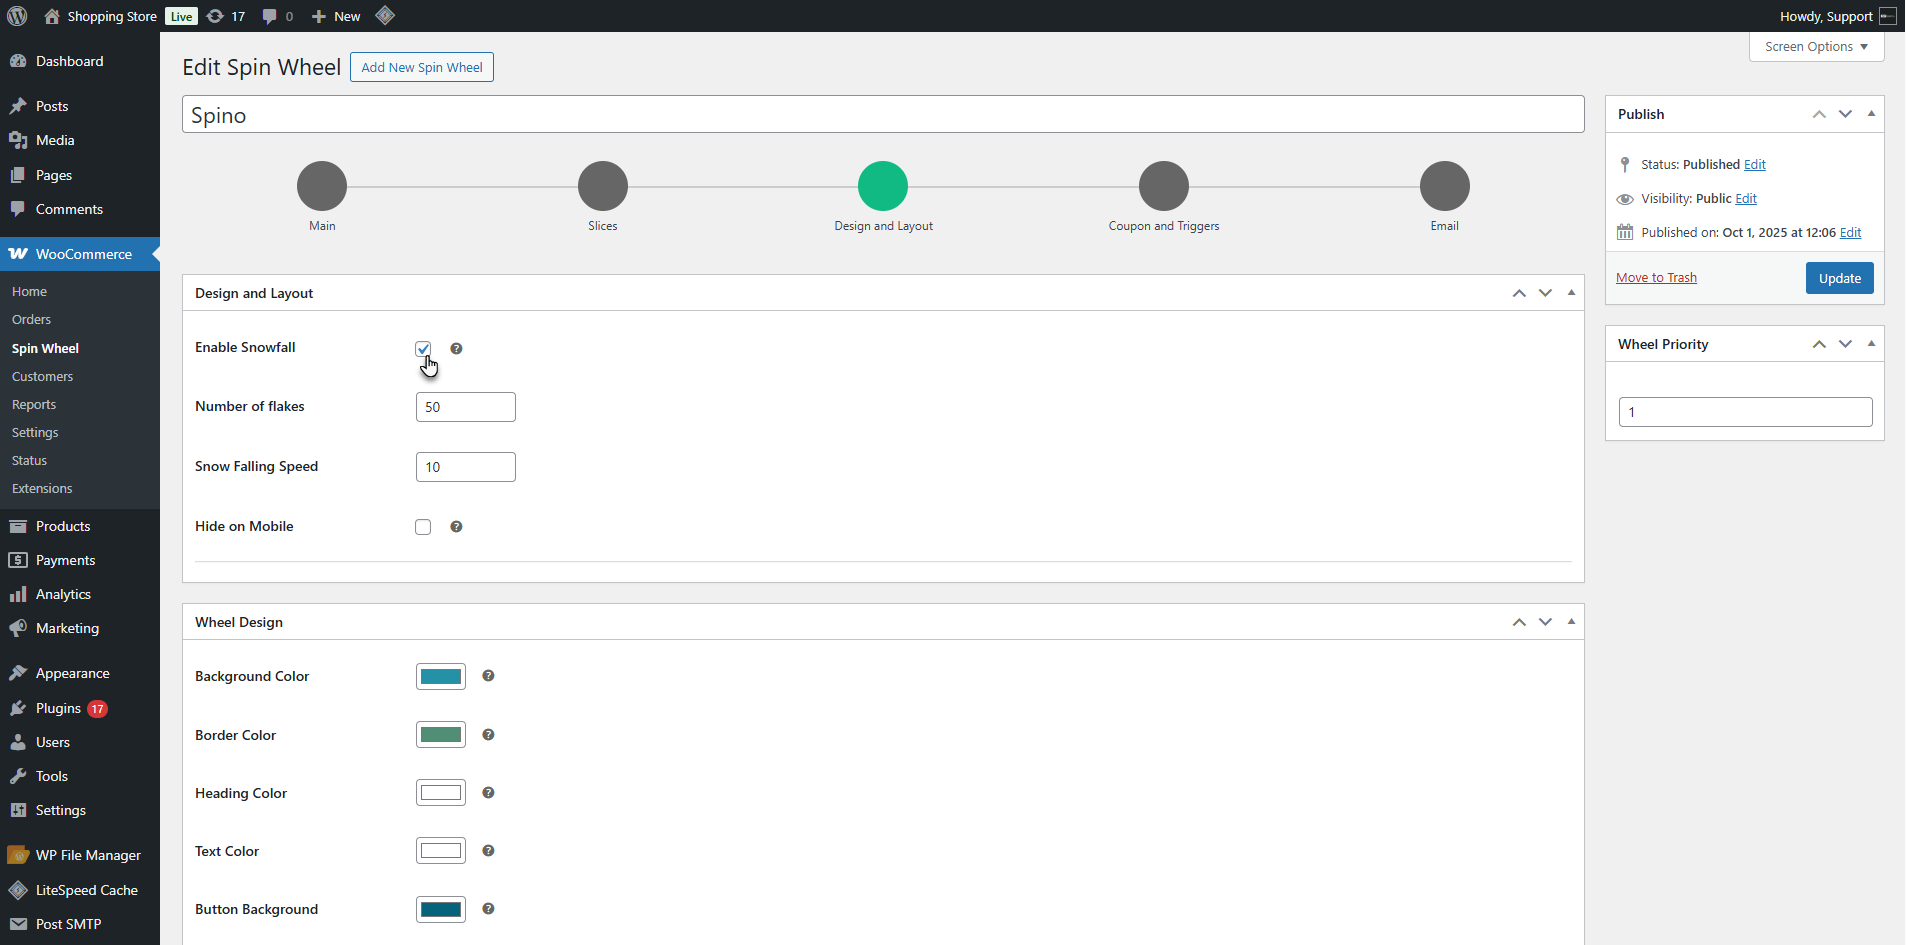
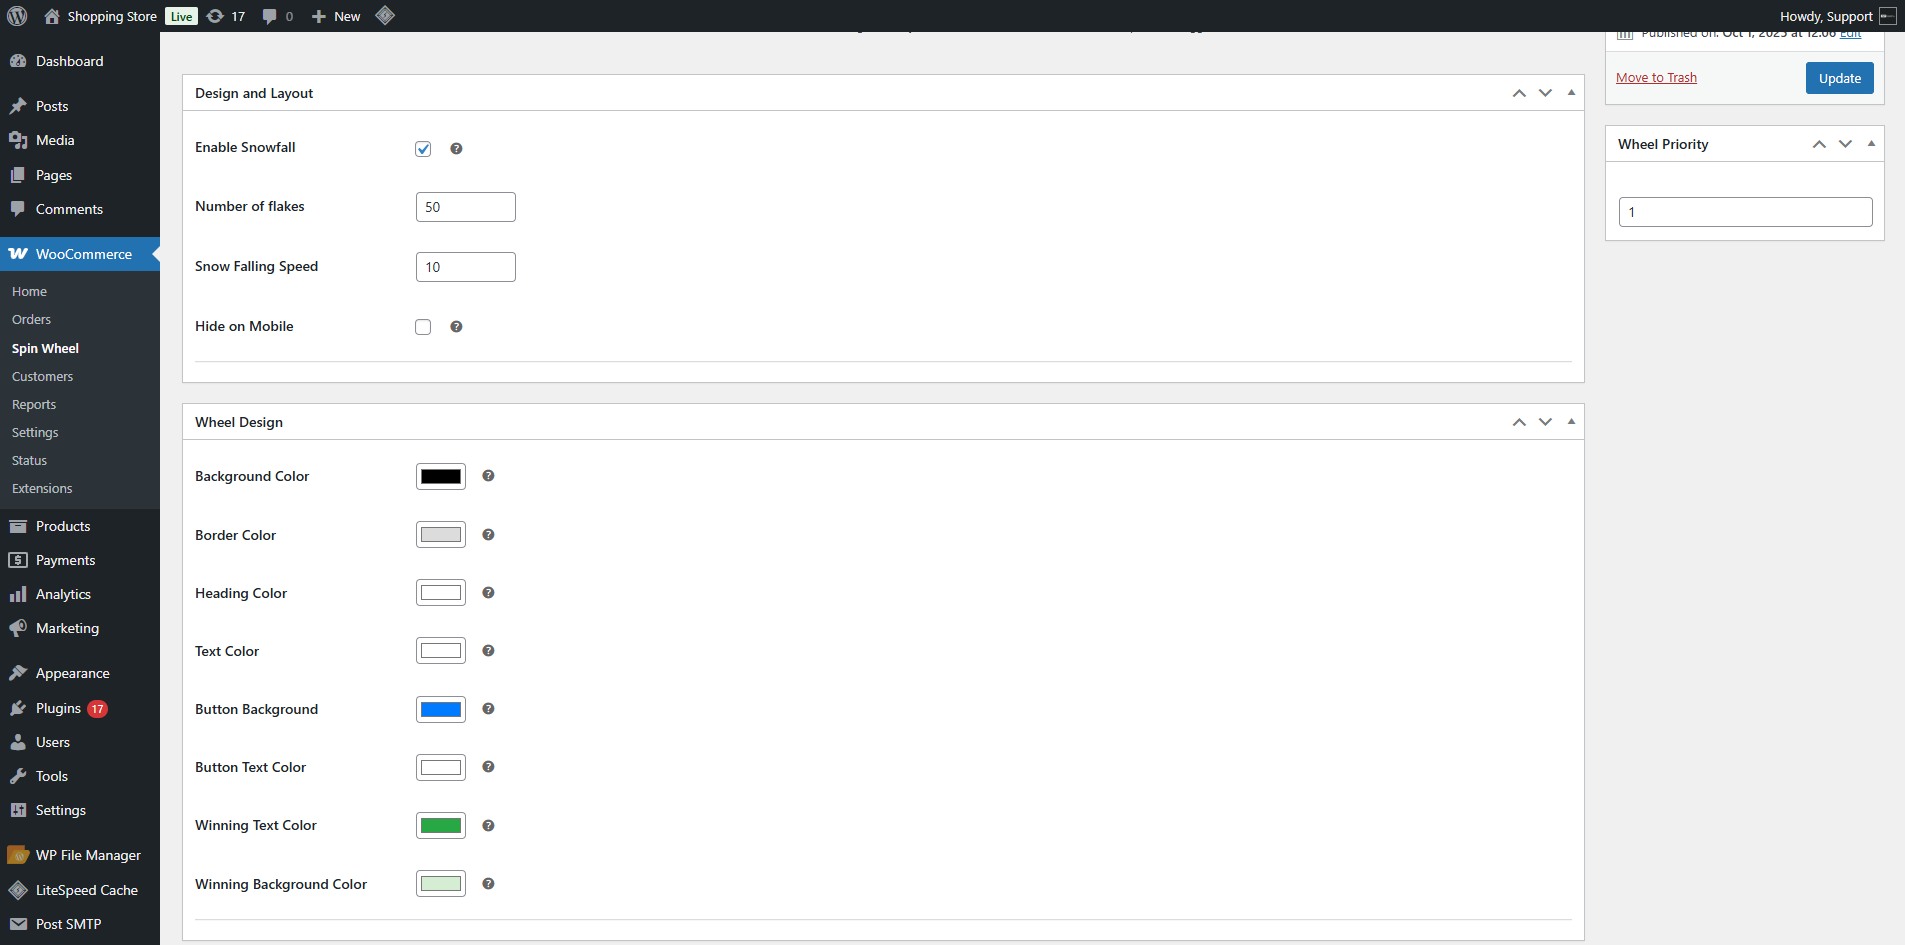
↑ Back to top- To customize the Spin Wheel background, the admin should go to the Design and Layout tab.
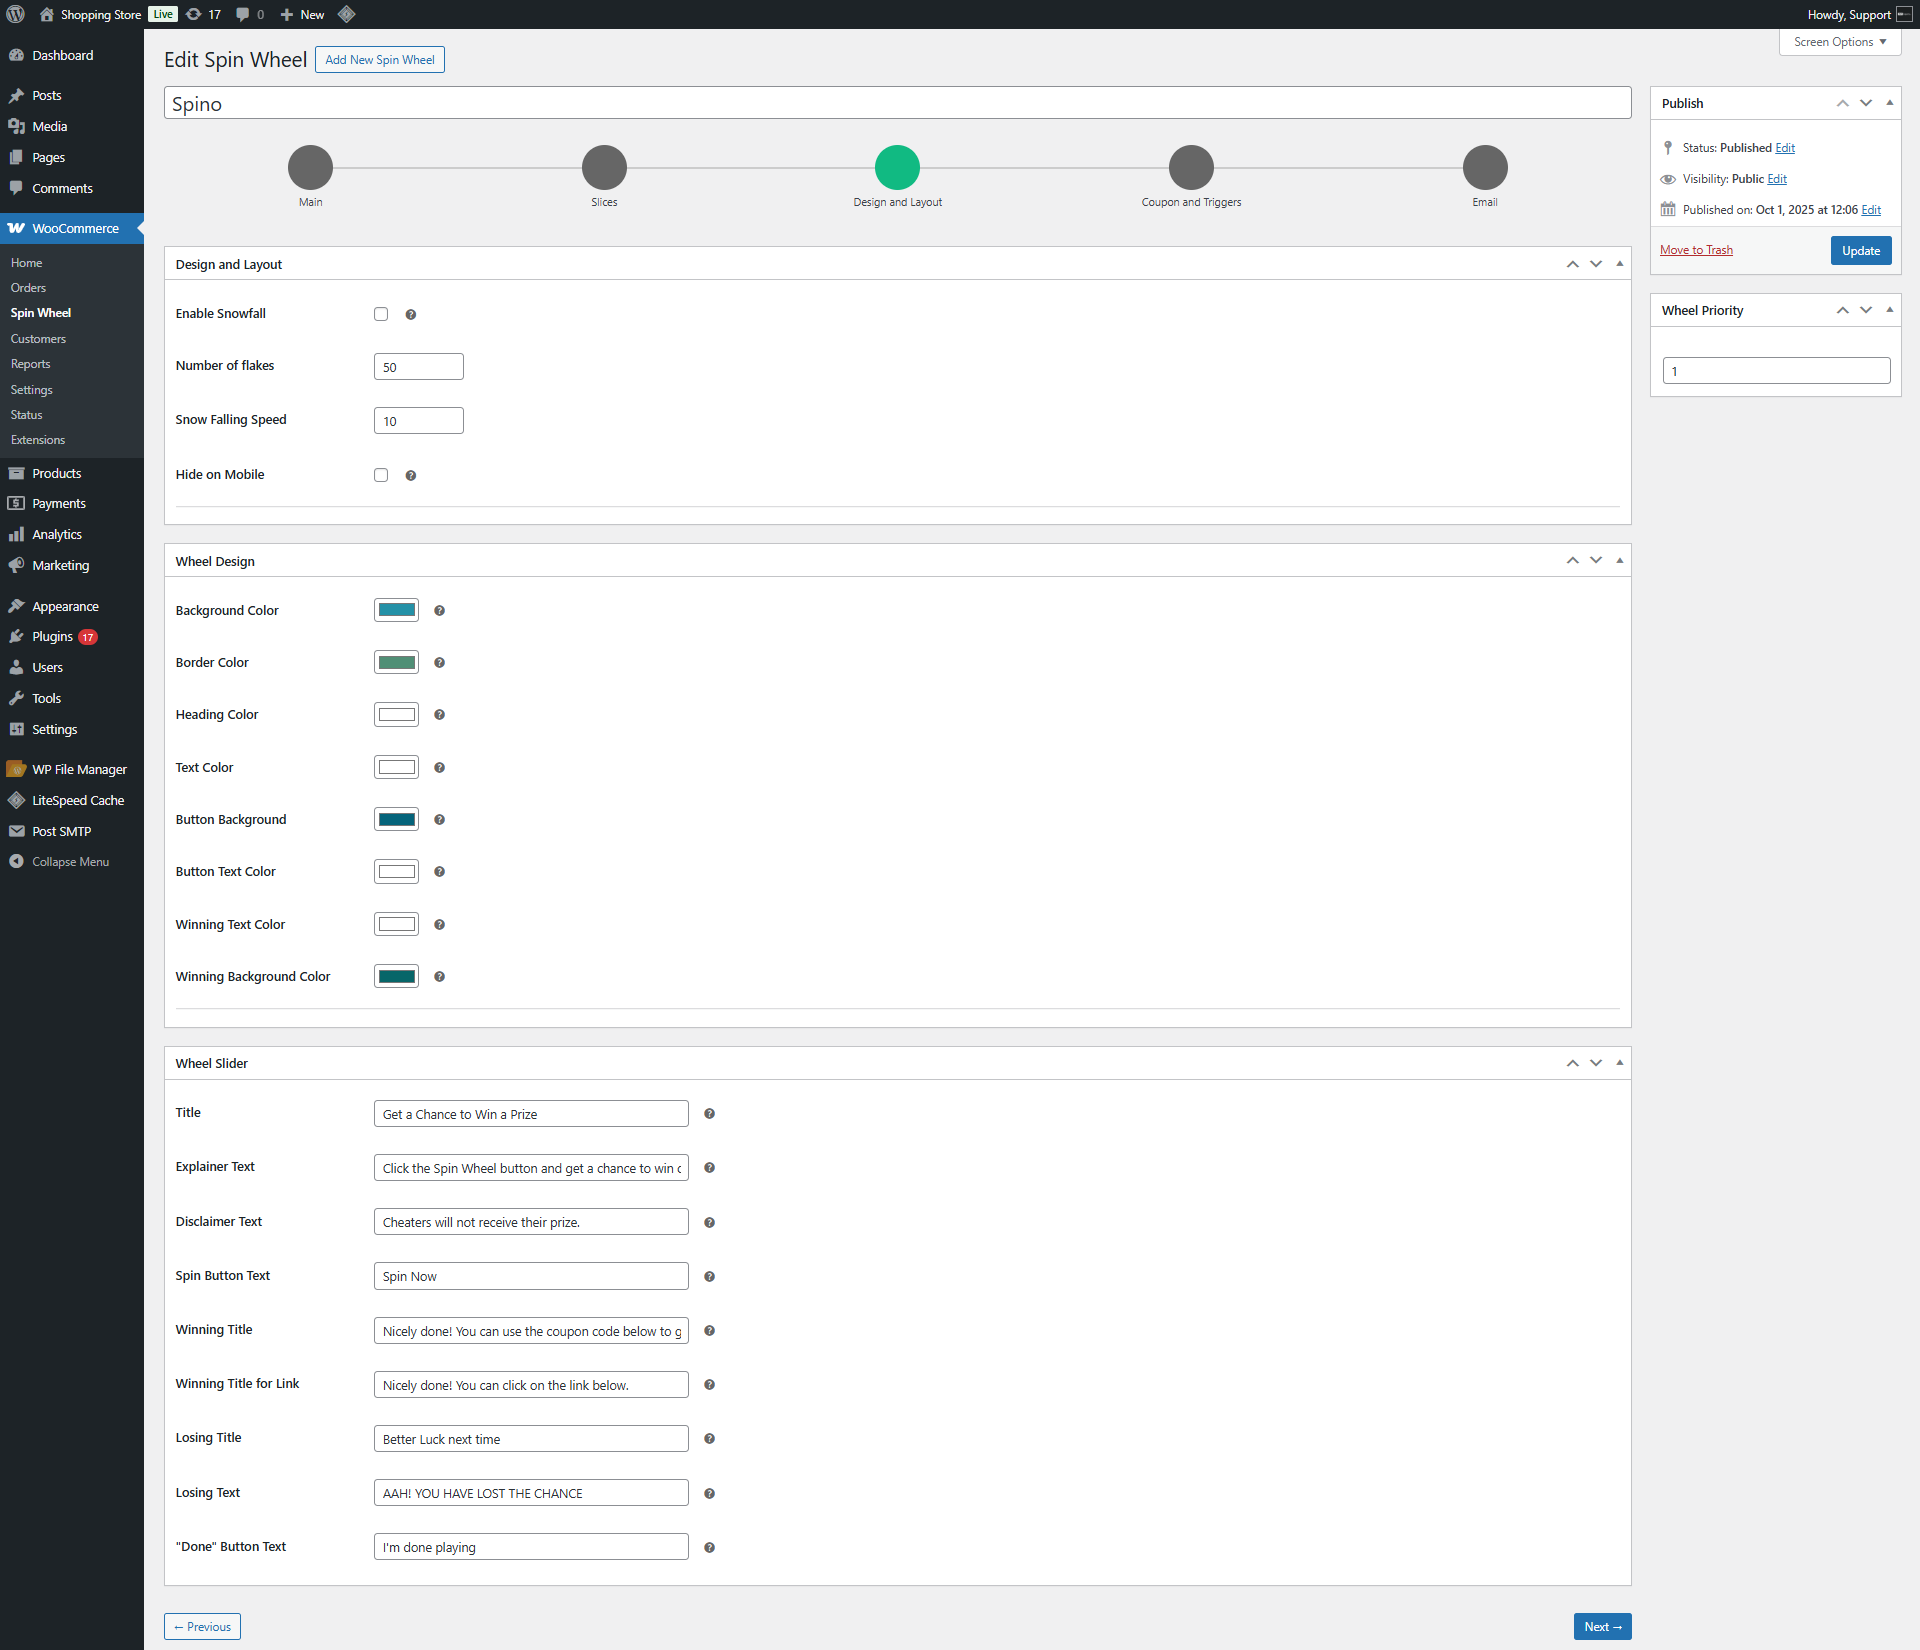
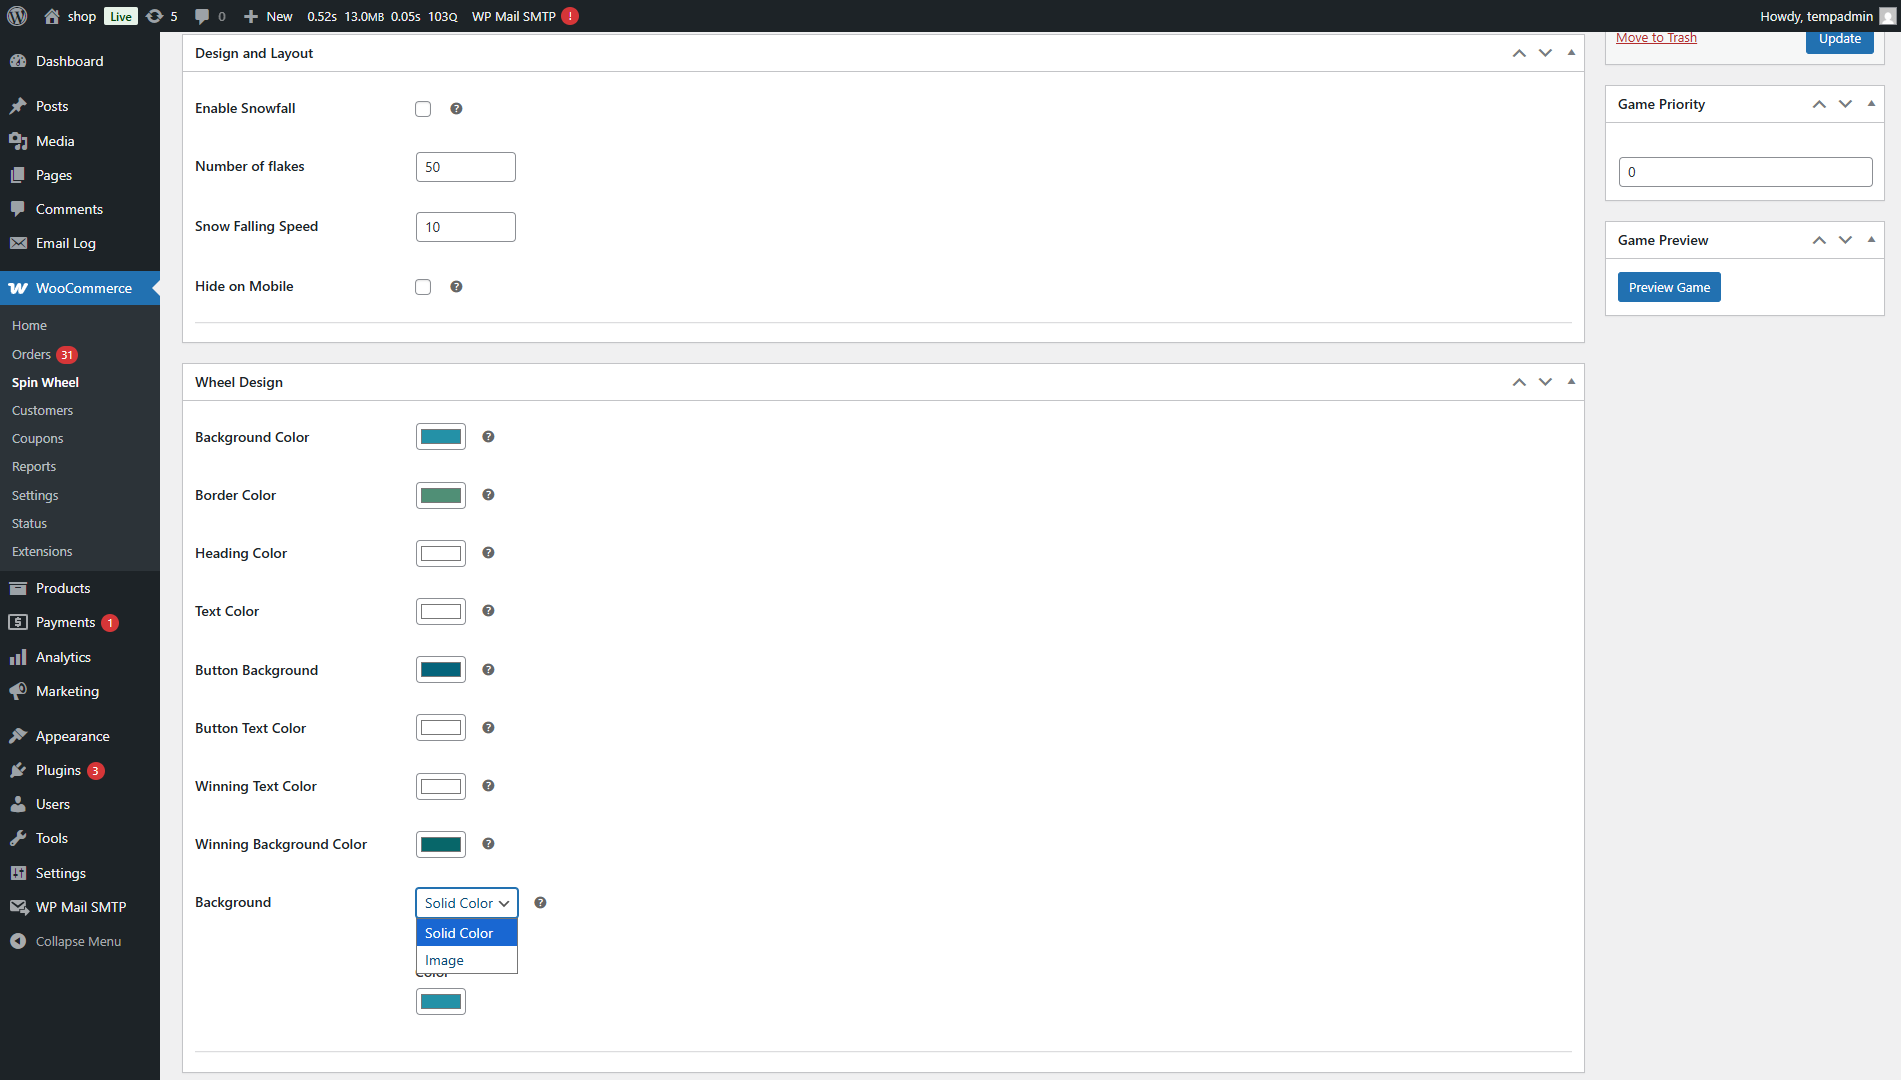
- In the Snowfall Settings, the admin can enable or disable the snowfall effect.
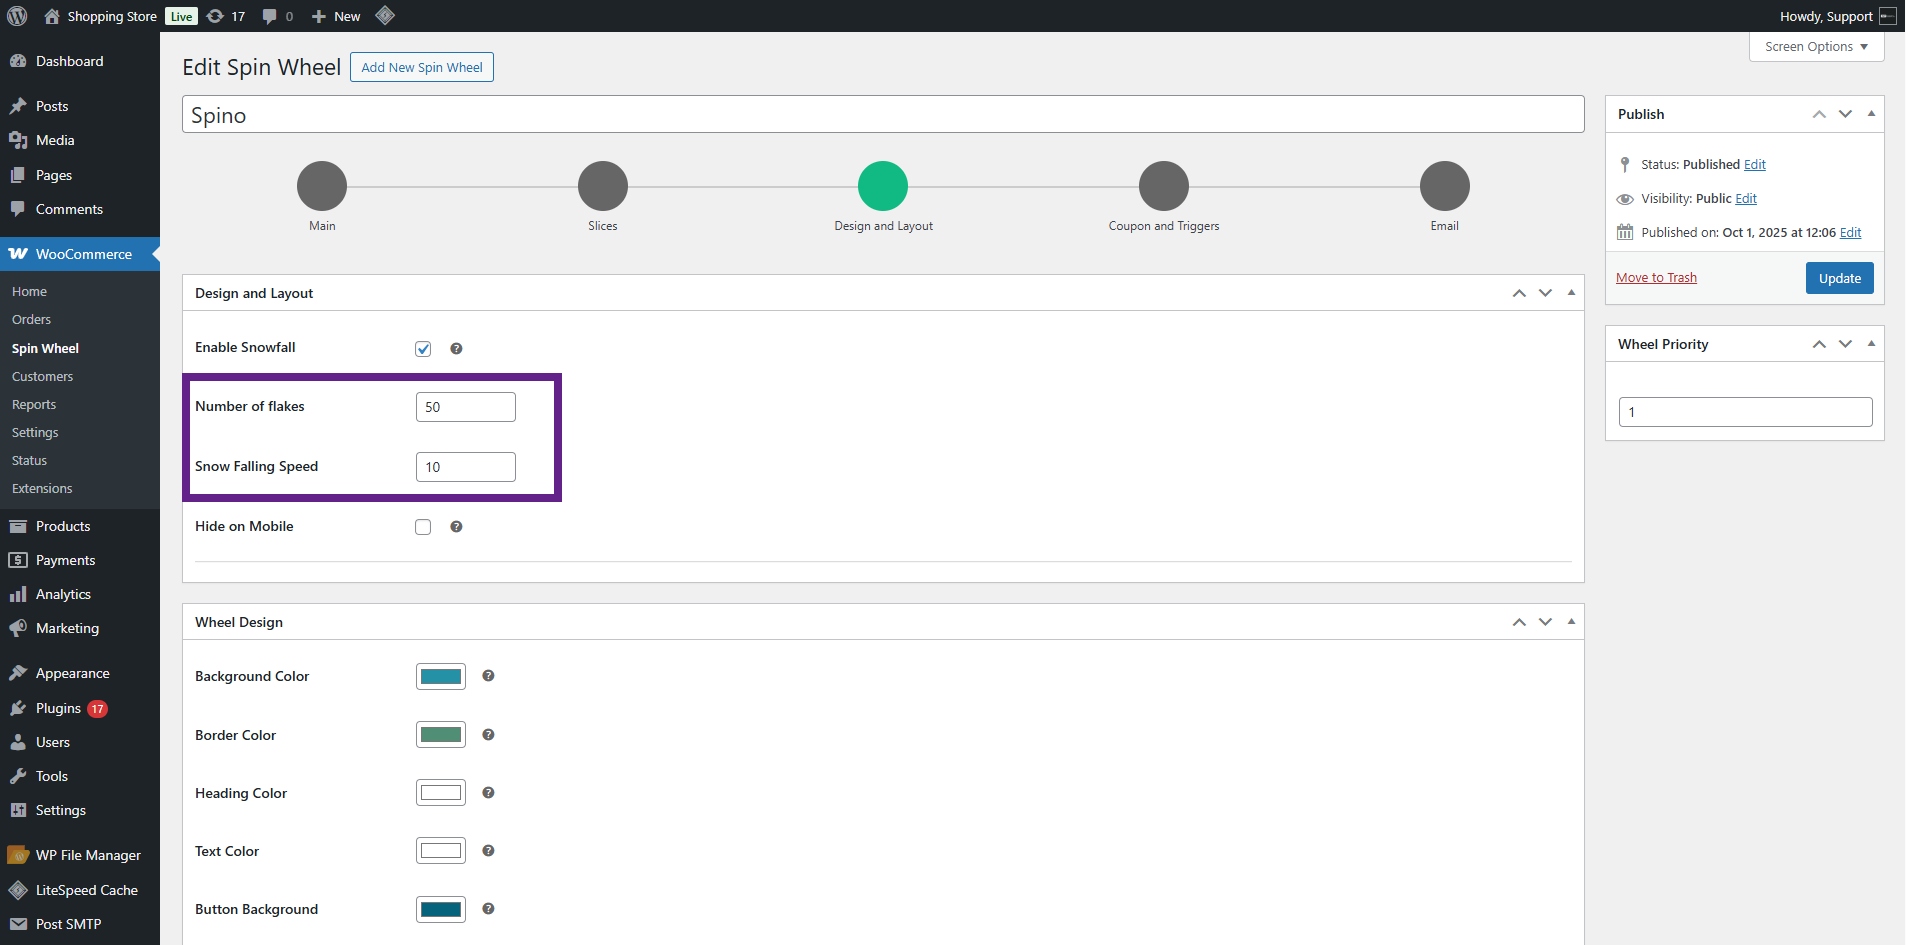
- The admin can set the number of flakes for snowfall. The admin can adjust the falling speed of the snowfall effect.
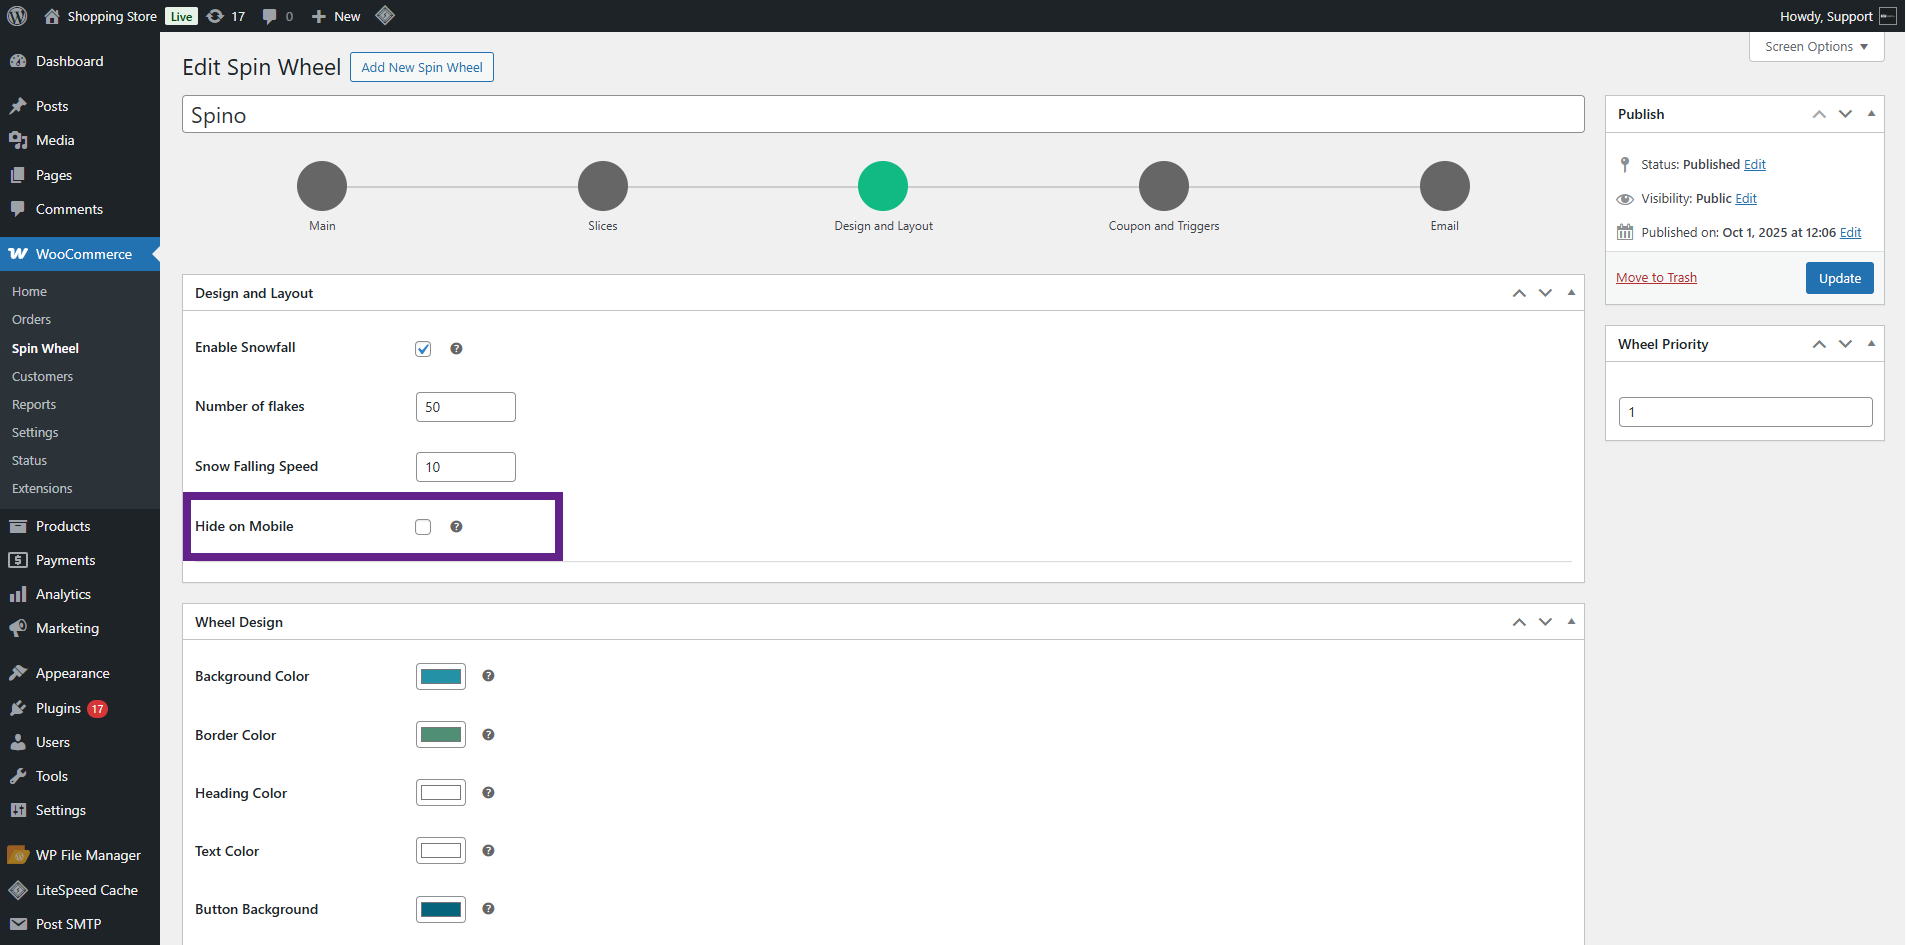
- The admin can choose to hide the spin wheel on mobile devices using the Hide on Mobile option.
- In the Wheel Design, the admin can customize the wheel’s appearance by changing colors for:
- Background Color (behind the wheel)
- Border Color
- Heading Color
- Text Color
- Button Background Color
- Button Text Color
- Winning Text Color
- Winning Background Color
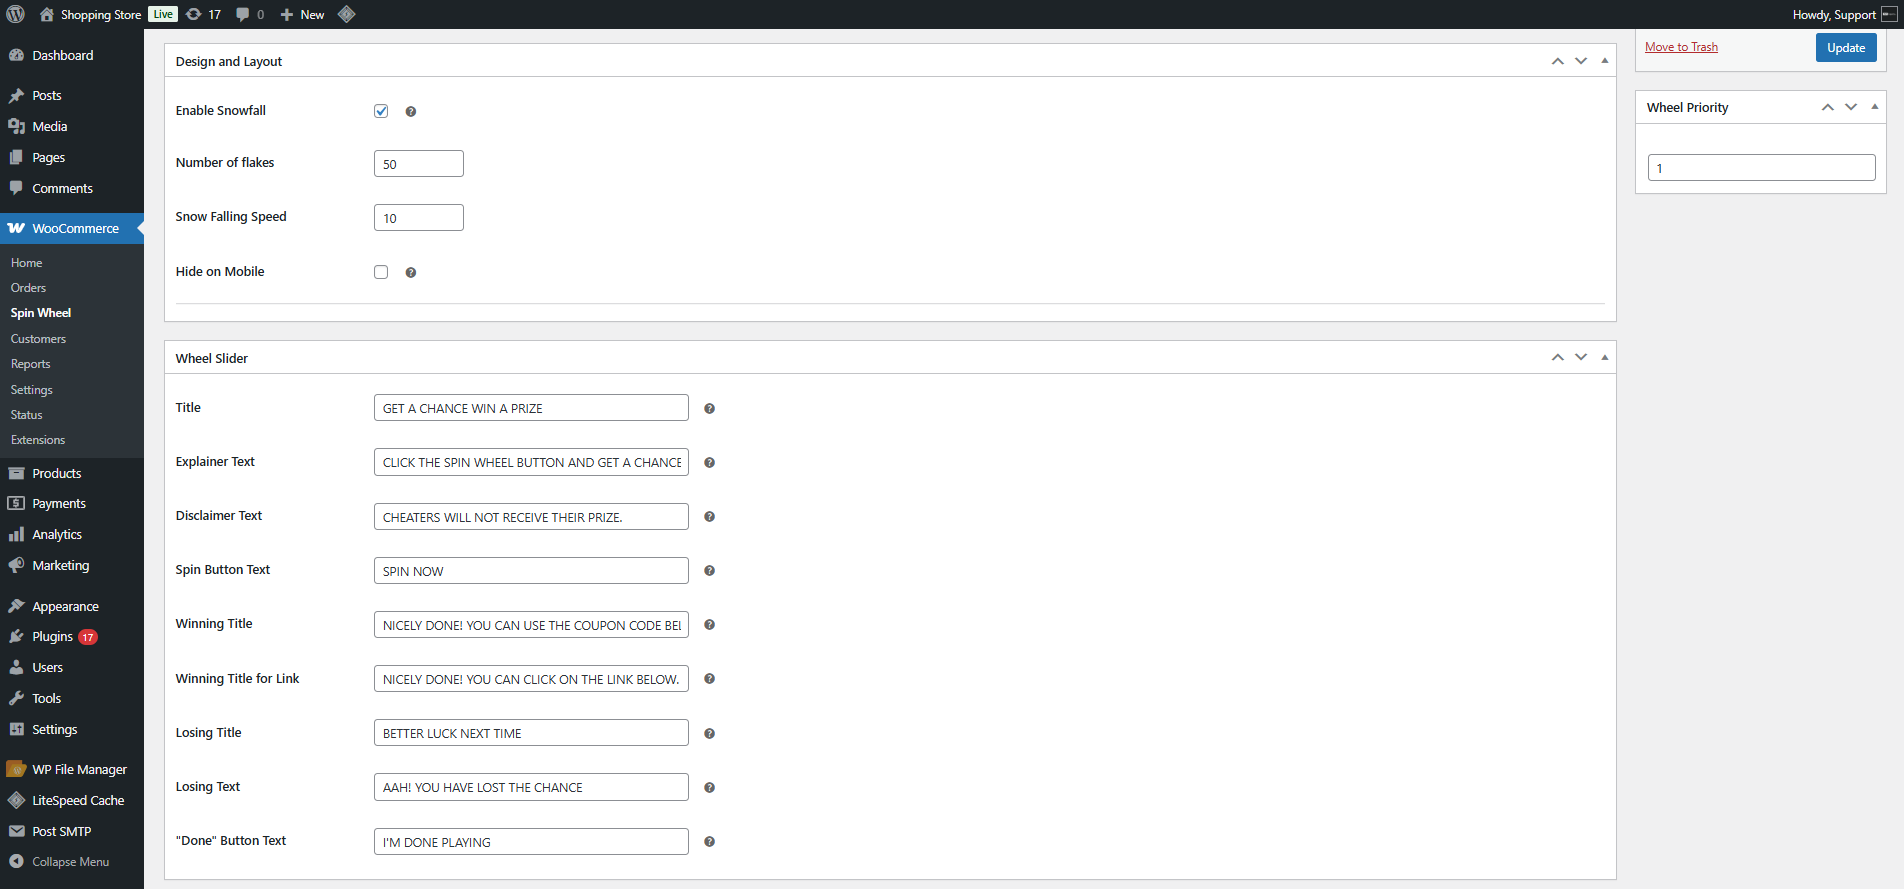
- In the Wheel Slider, the admin can customize the text displayed in the slider:
- Slider Title
- Explainer Text
- Disclaimer Text
- Spin Wheel Button Text
- Winning TitleWinning Link Text
- Losing Title
- Losing Text
- Done Button Text
Front End Impact:
- Before
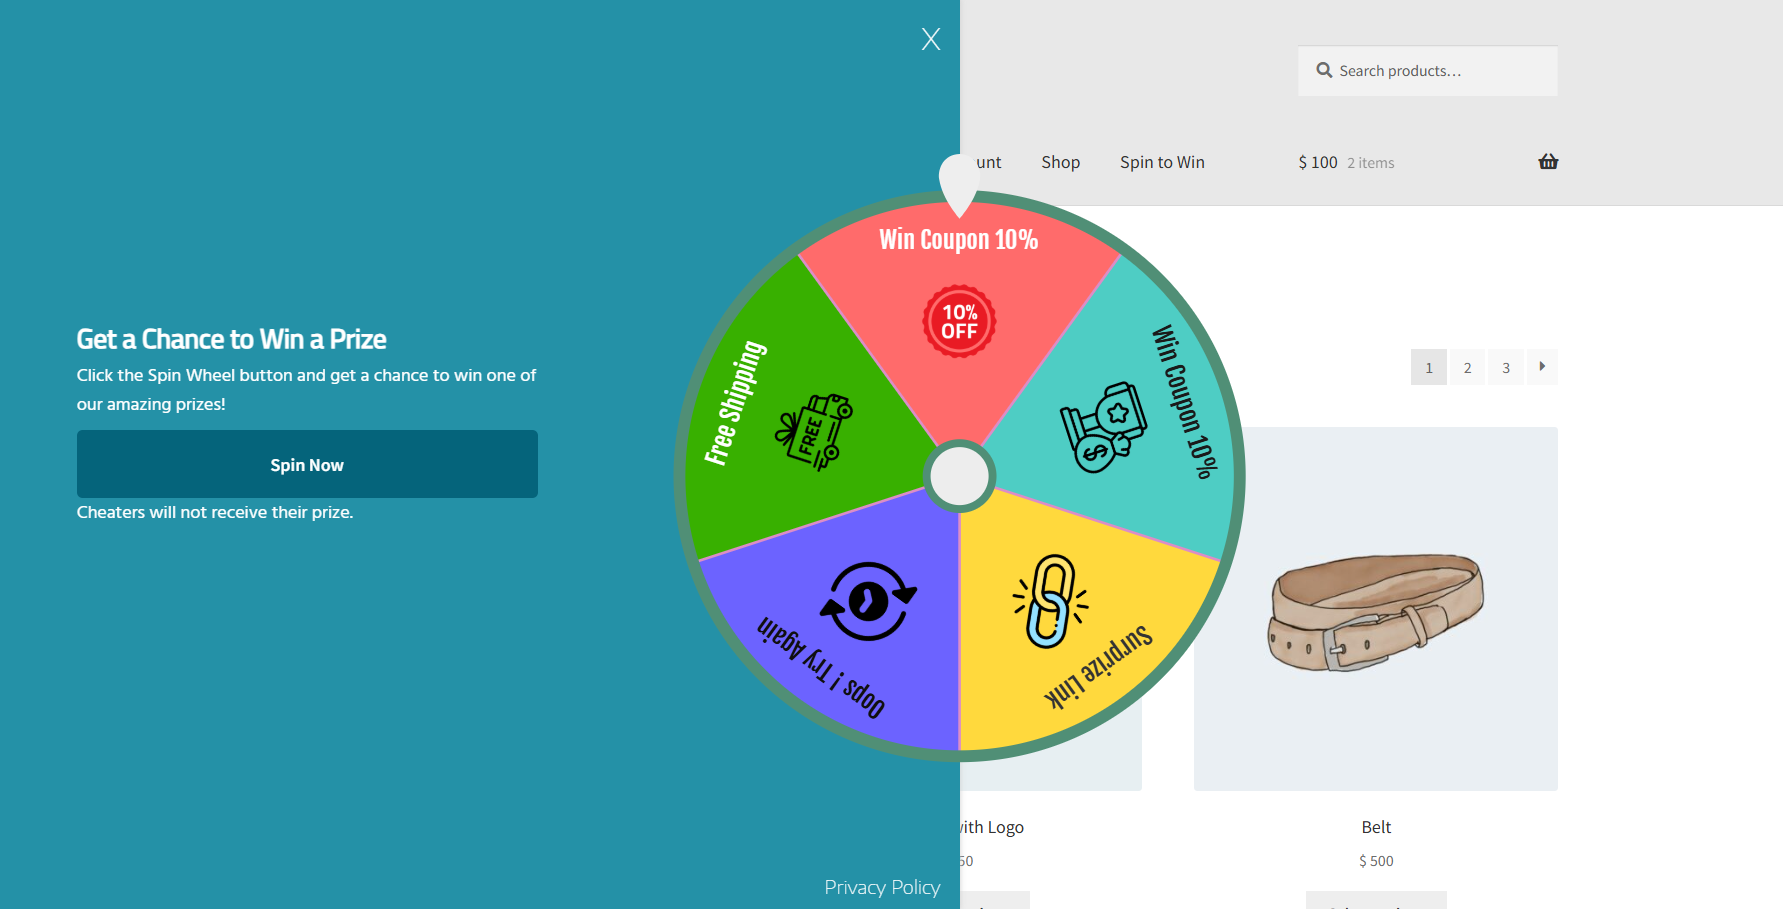
- After

Background Image
↑ Back to topSet a custom background for any game type (Spin Wheel, Card Dance, or Pick a Gift) to enhance the design by choosing either a solid color or an image.
- Navigate to: WP Admin Dashboard > WooCommerce > Spin Wheel > Design and Layout
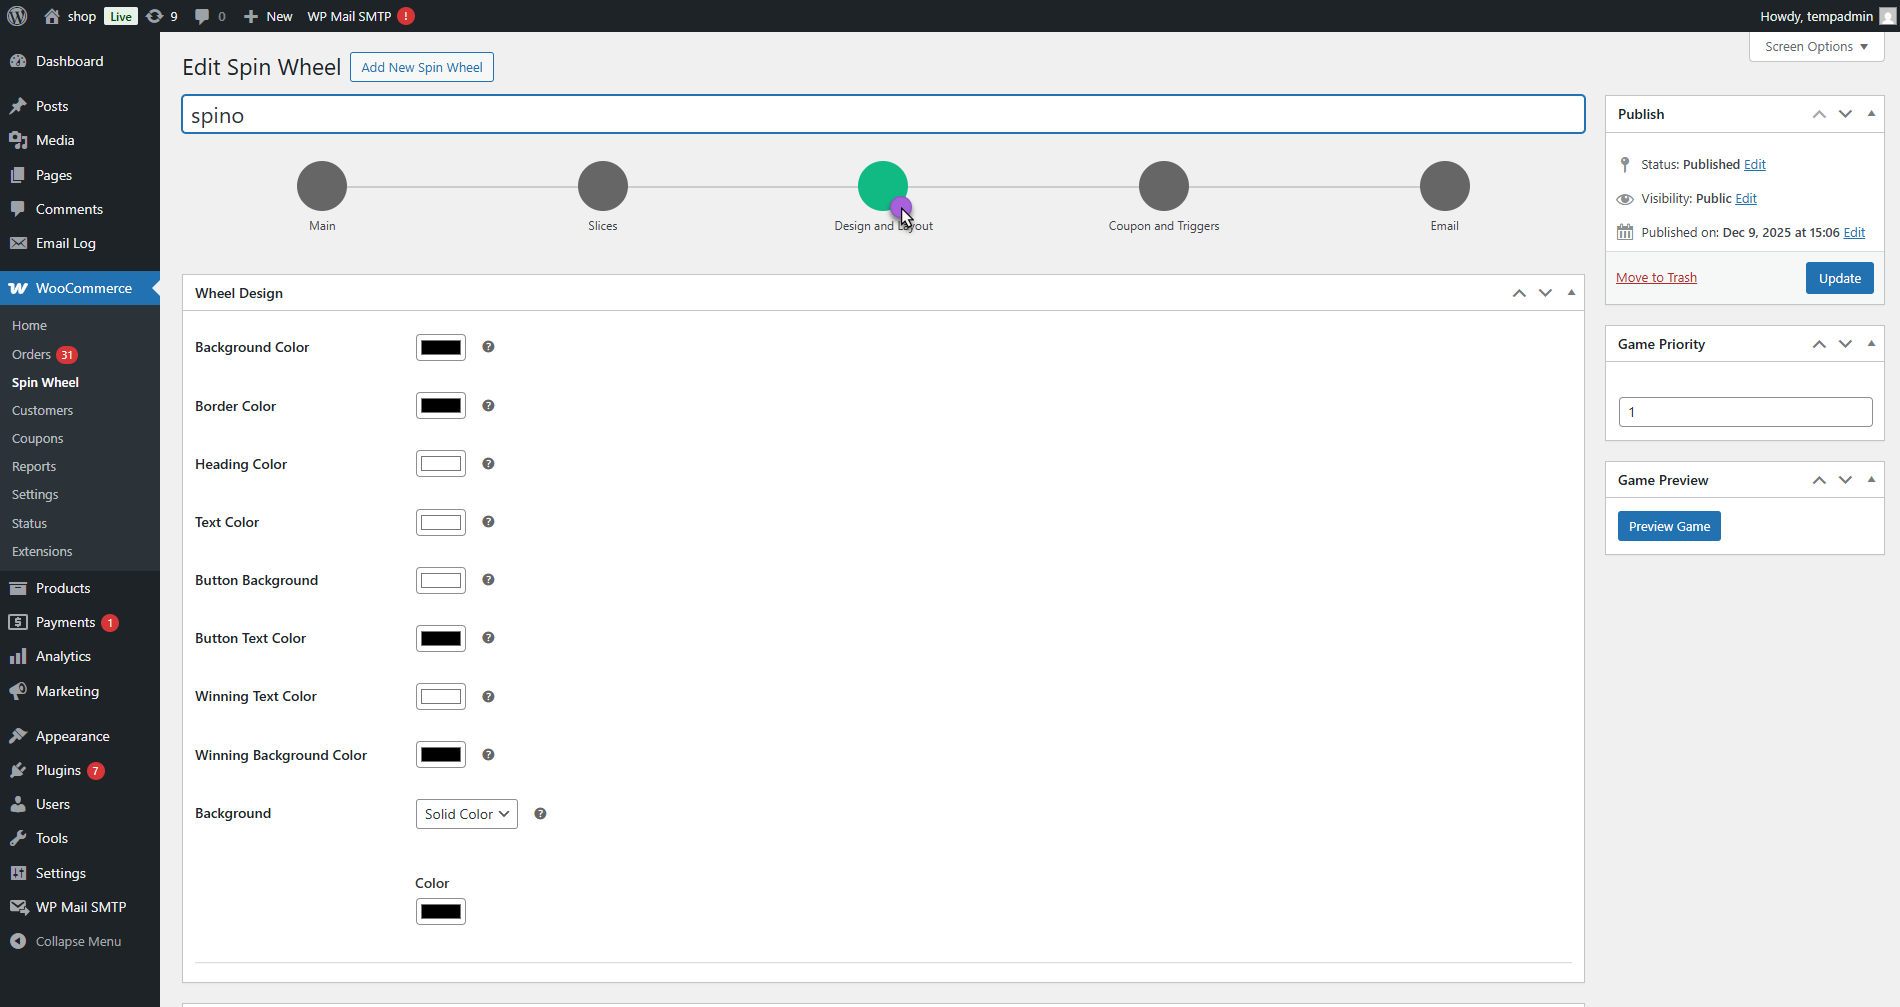
- Under the Wheel Design section, A Background dropdown is displayed.
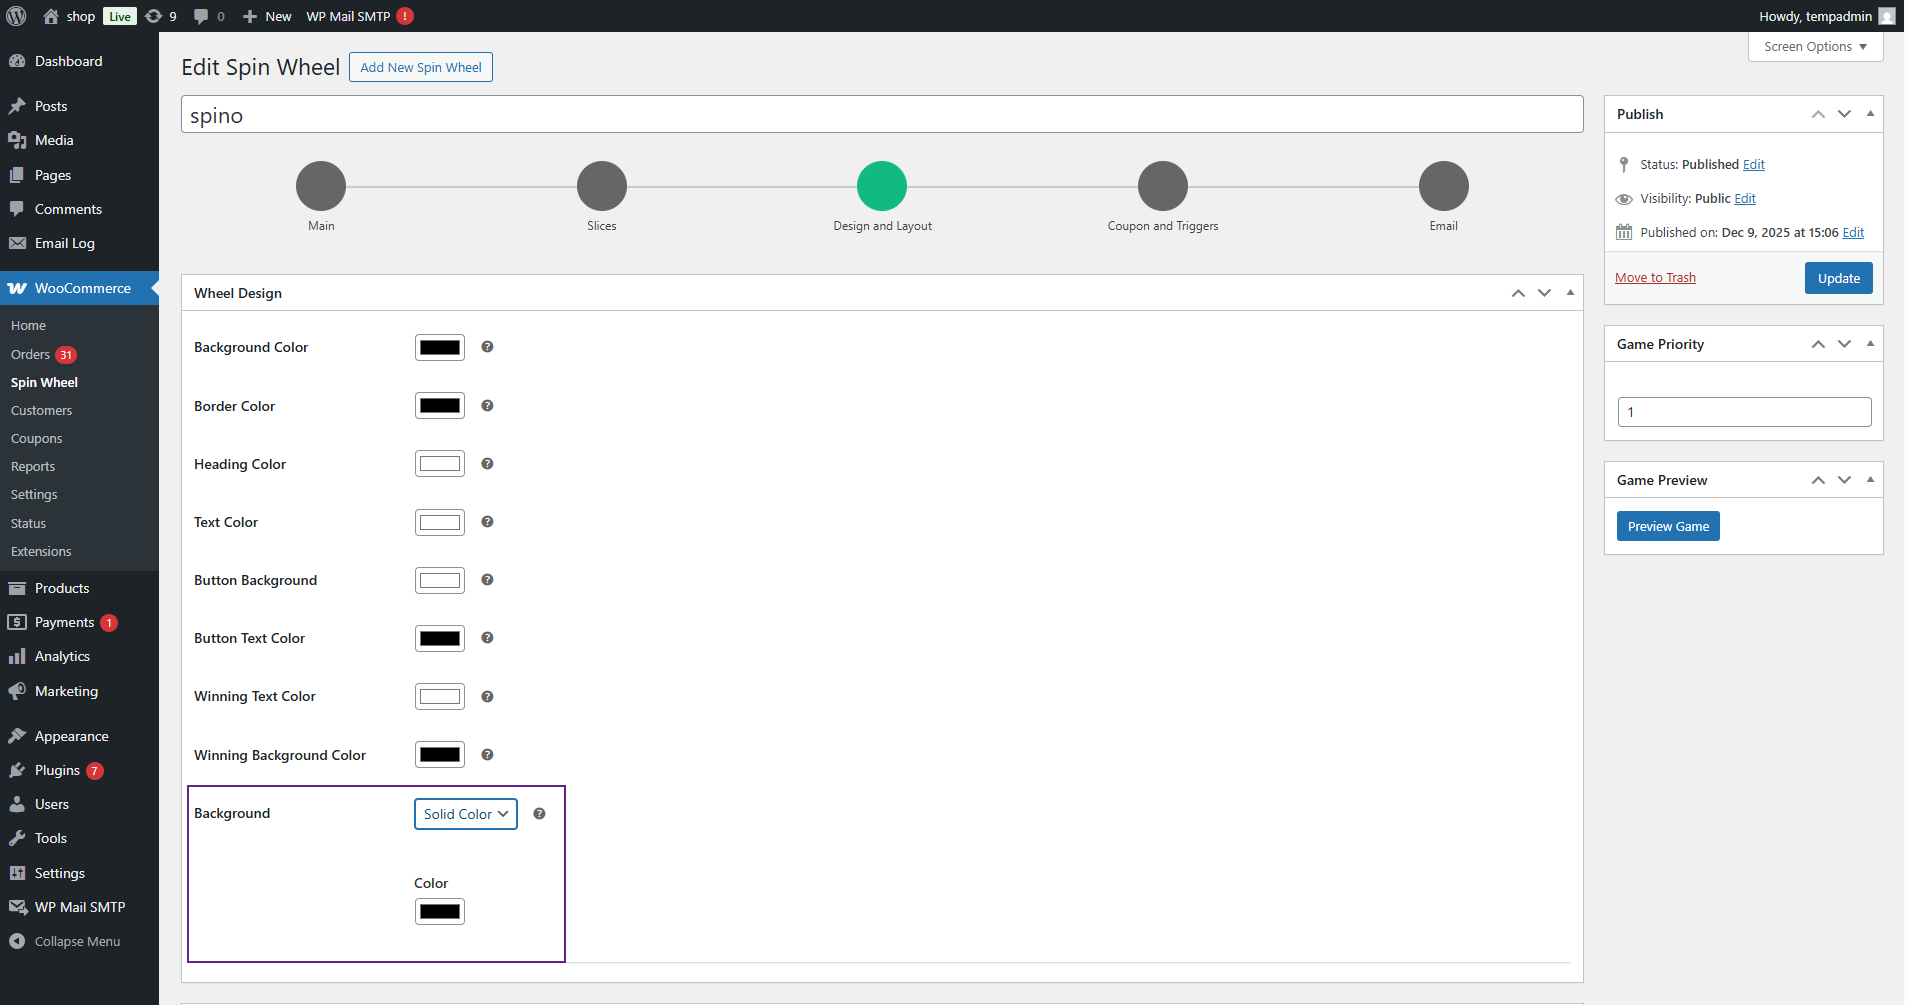
- Click on the dropdown to see options:
- Solid Color (default)
- Image
Solid Color
- Click Solid Color. A color picker appears.
- Choose your desired color.
Image
- Click the Image, and An Upload Image button appears.
- Admin can:
- Upload a new image.
- Select an image from the media library.
- Remove or replace the image.
Opacity Option:
- Enable the Opacity checkbox. A range slider appears to adjust opacity. Slide to increase or decrease transparency as needed.
Front-end-impact
↑ Back to top- Go to the page where the game appears (Spin Wheel, Card Dance, or Pick a Gift).
The pop-up will display the background set by the admin.
- If Solid Color is selected:
- The chosen color appears behind the game pop-up.

- If Image is selected:
- The uploaded image appears behind the pop-up.
- If opacity is enabled, the image transparency reflects the admin’s chosen opacity level.
Coupons & Triggers Settings
↑ Back to top- To configure coupons and triggers, the admin should go to the Coupons and Triggers tab.
- In the Coupons metabox, the admin can set the duration of auto-generated coupons.
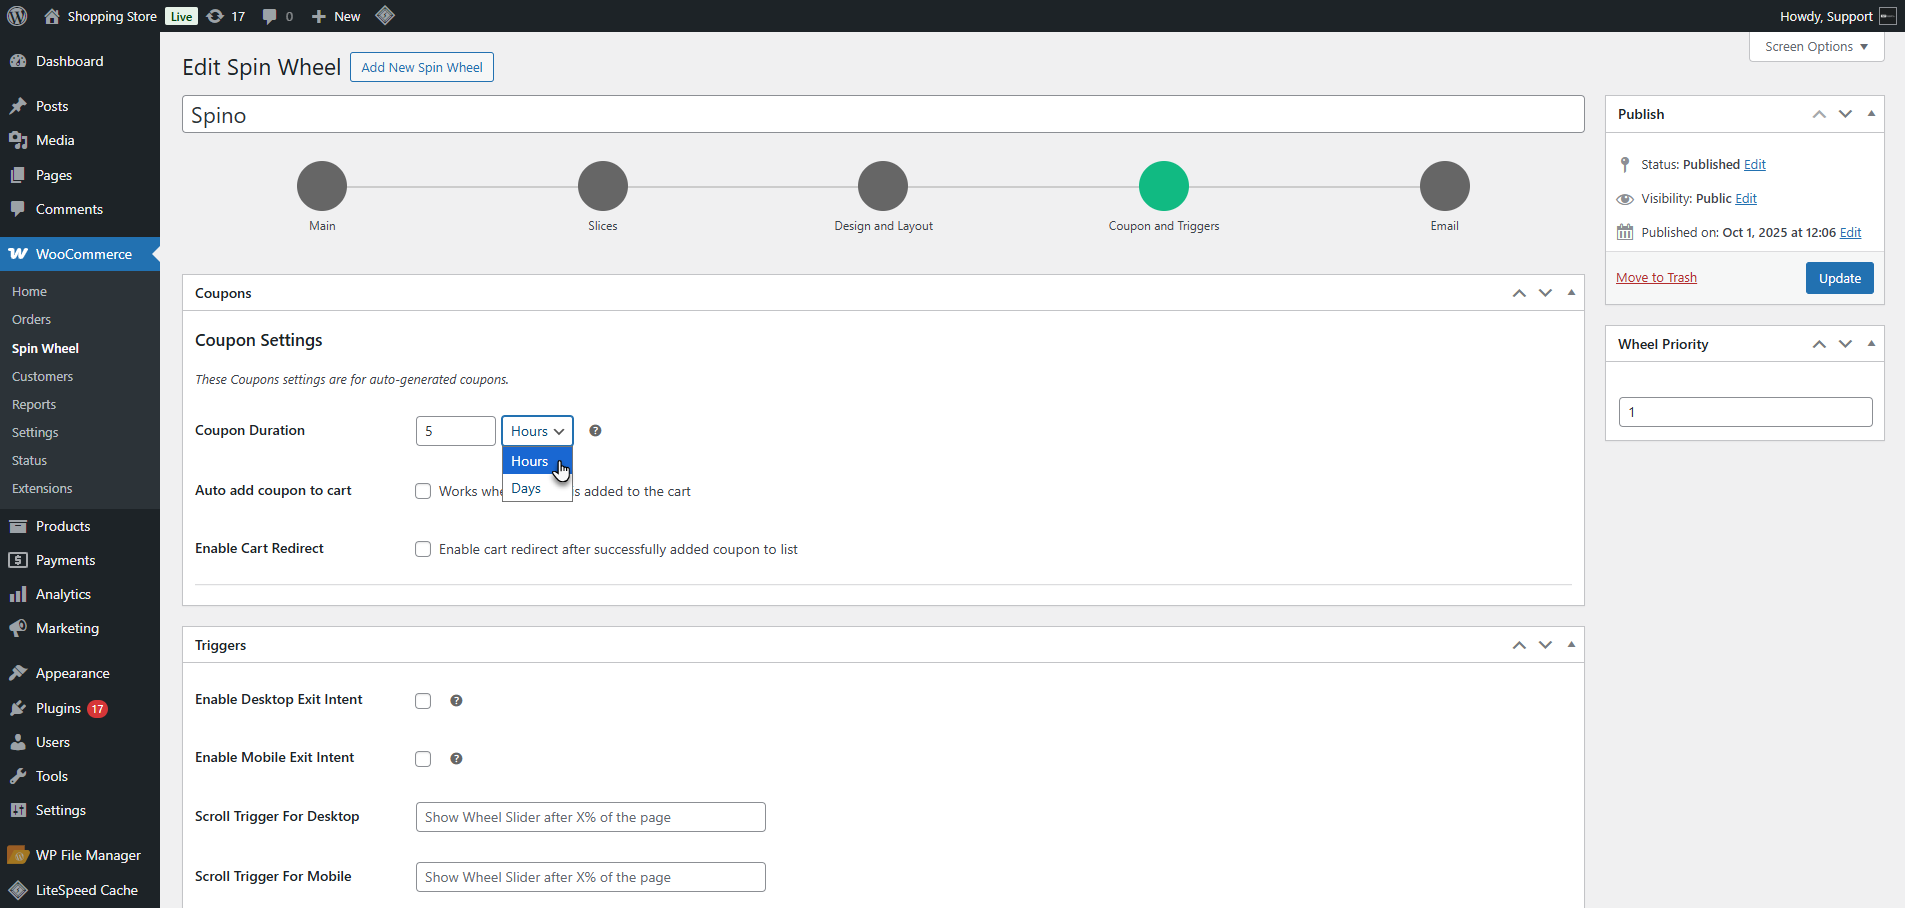
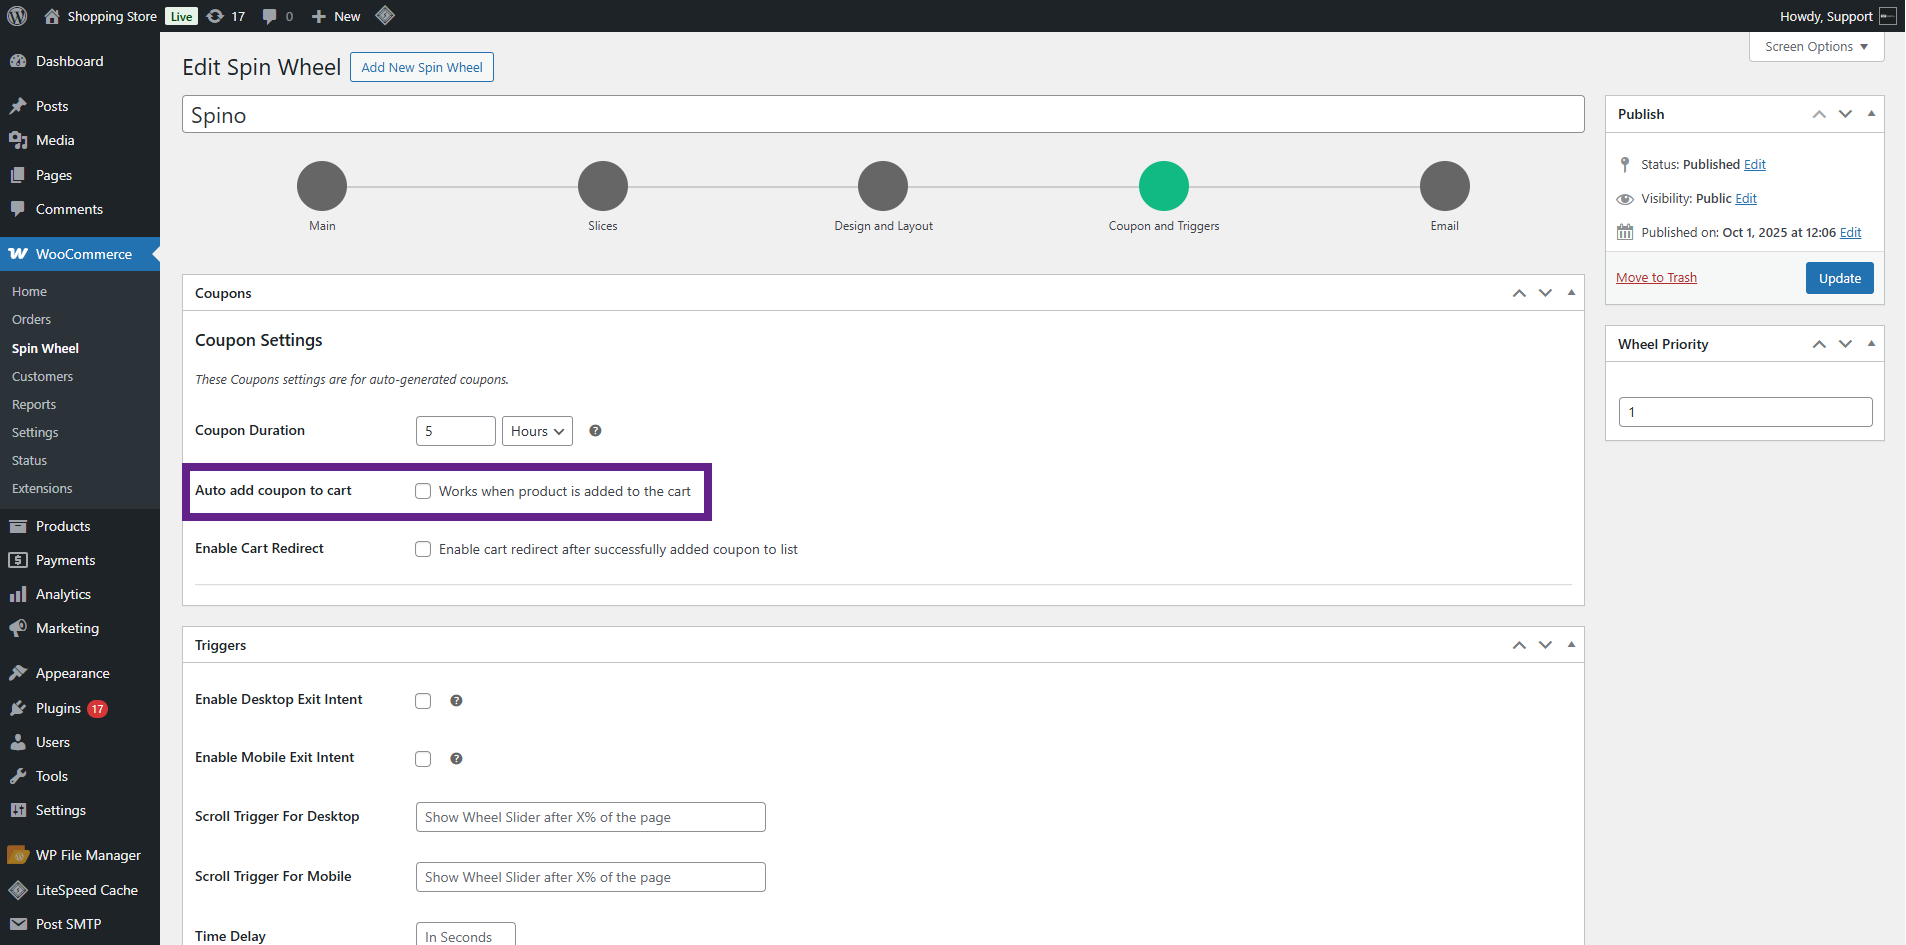
- The admin can enable the Auto Add Coupon to Cart option. This allows a winning coupon to be directly applied to the cart.
- The admin can enable the Cart Redirect option. This automatically redirects the user from the Spin Wheel to the cart after winning a coupon.
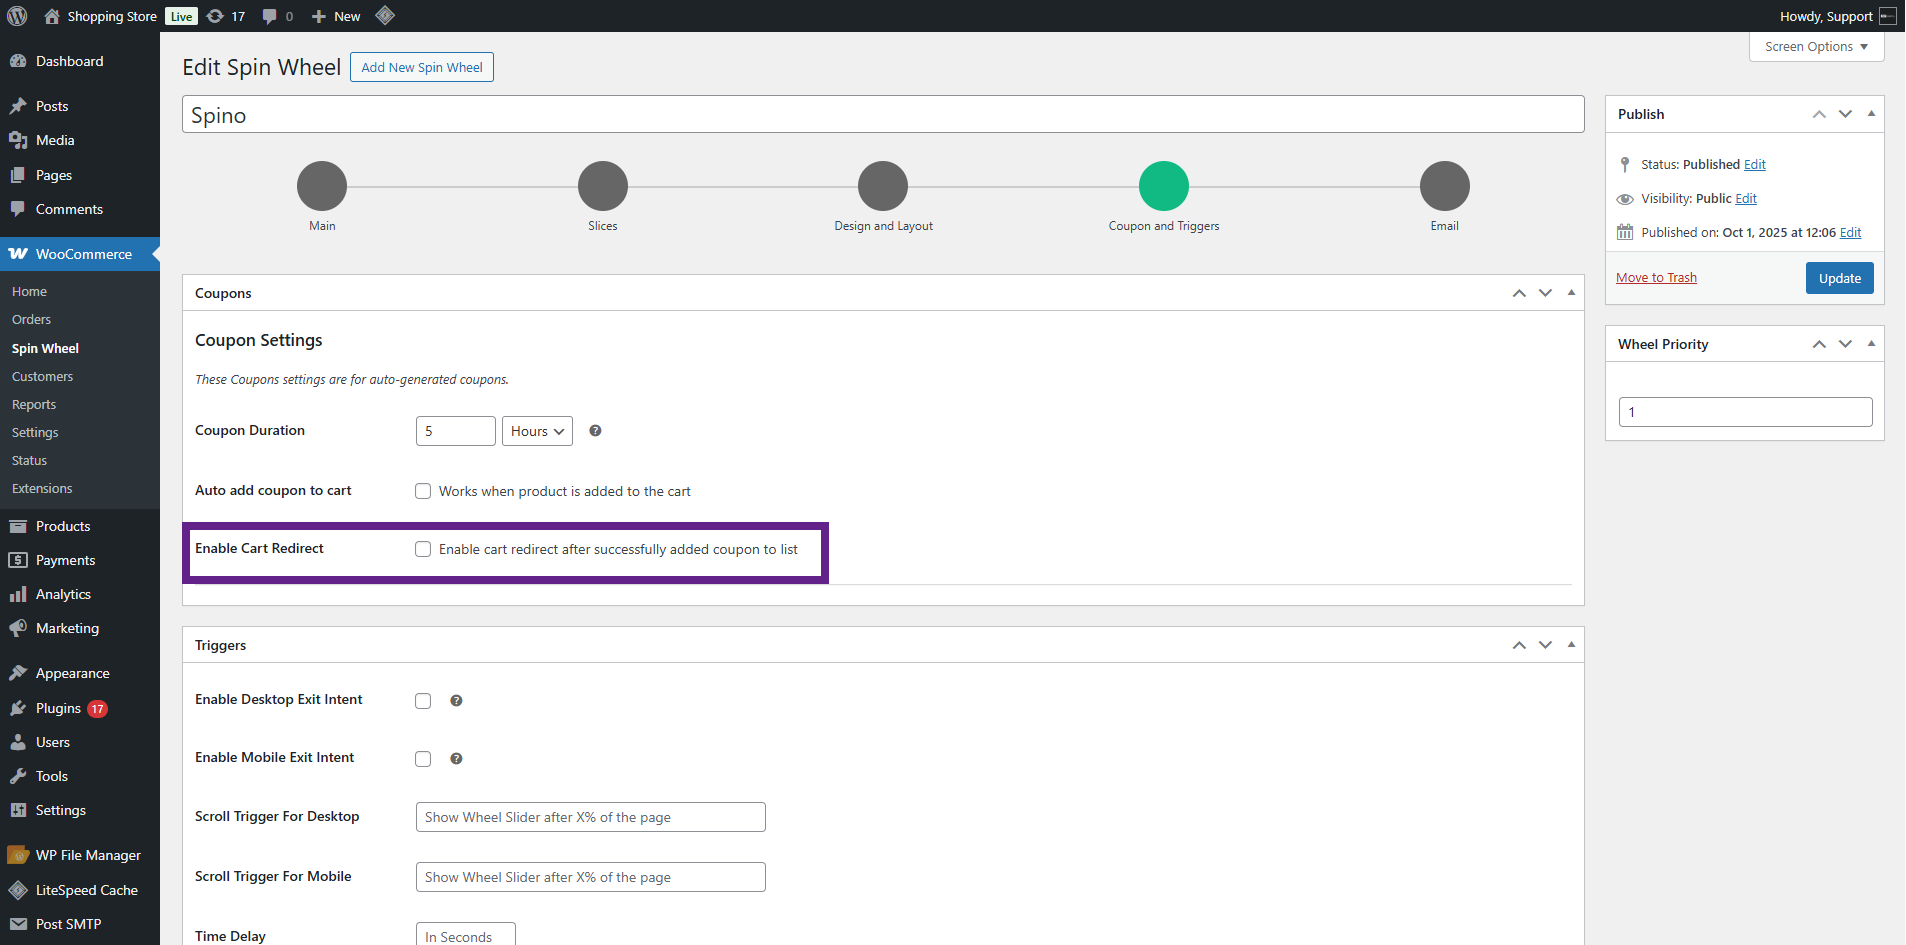
PLEASE NOTE: The Enable Cart Redirect option will work when the Auto Add Coupon to Cart option is enabled.
- In the Triggers (Metabox), the admin can manage the events that trigger the Spin Wheel display. The Spin Wheel triggered by events will only appear once per day for each user. If a user closes the wheel and later performs the trigger action again, the wheel will not reappear. This setting applies to all trigger settings.
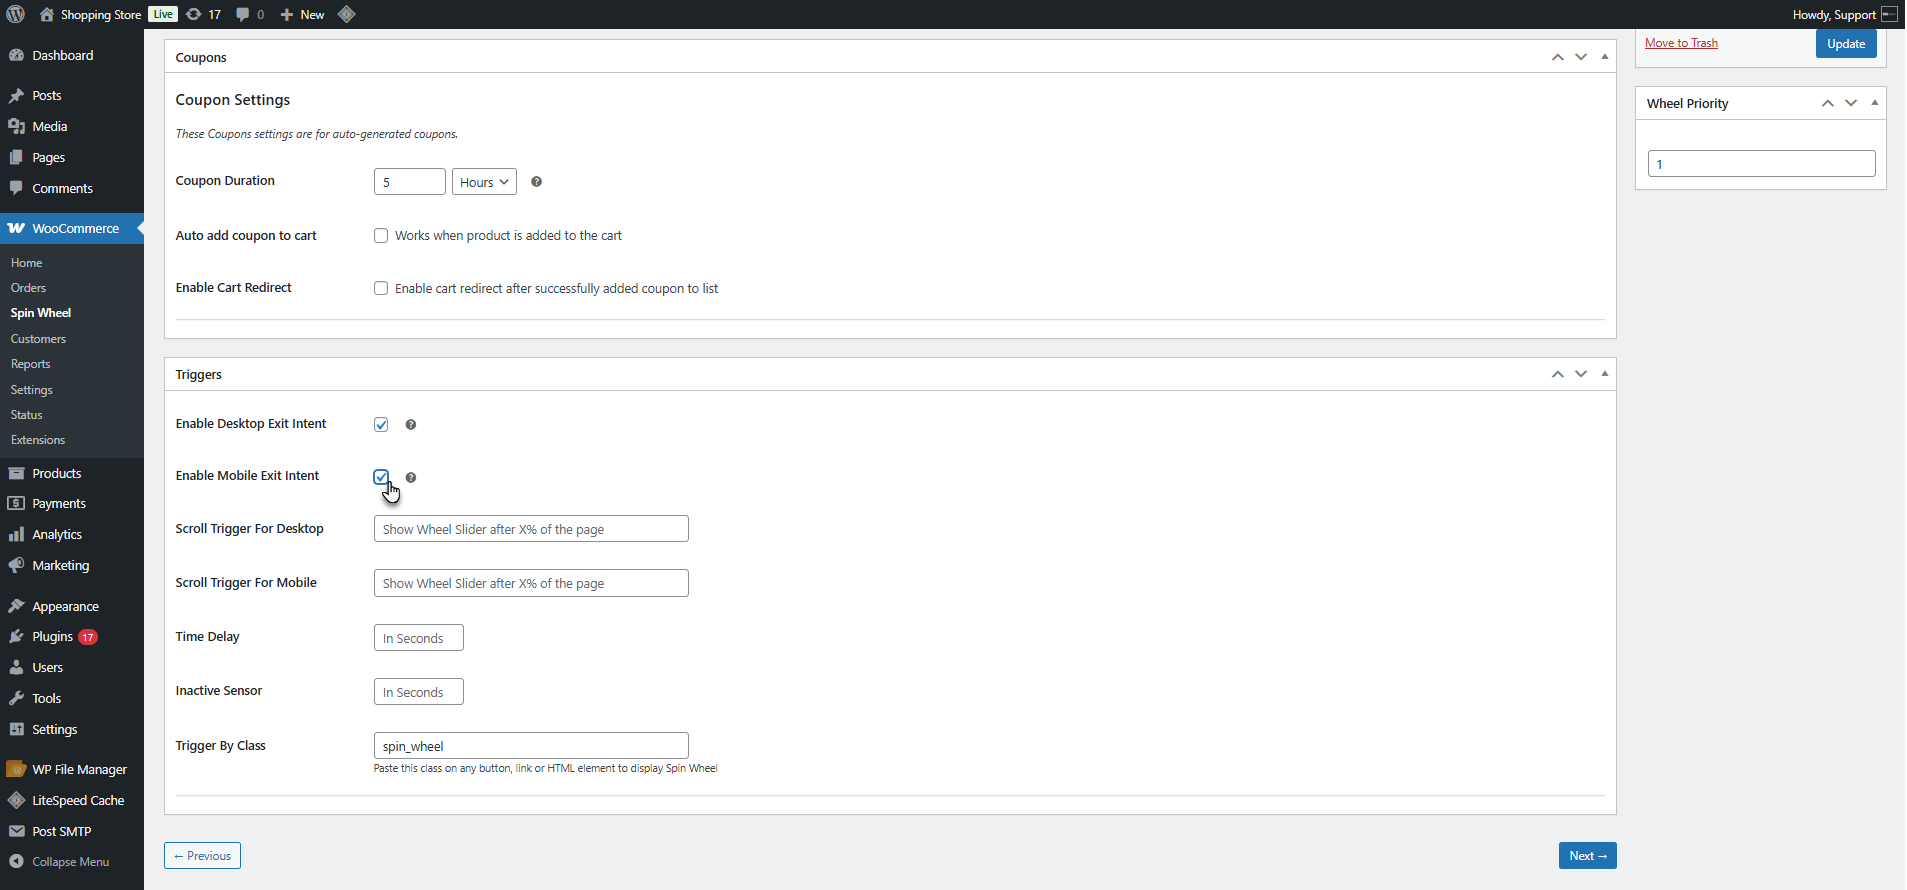
- Desktop Exit Intent – The wheel appears when a user moves the cursor toward closing the browser tab.
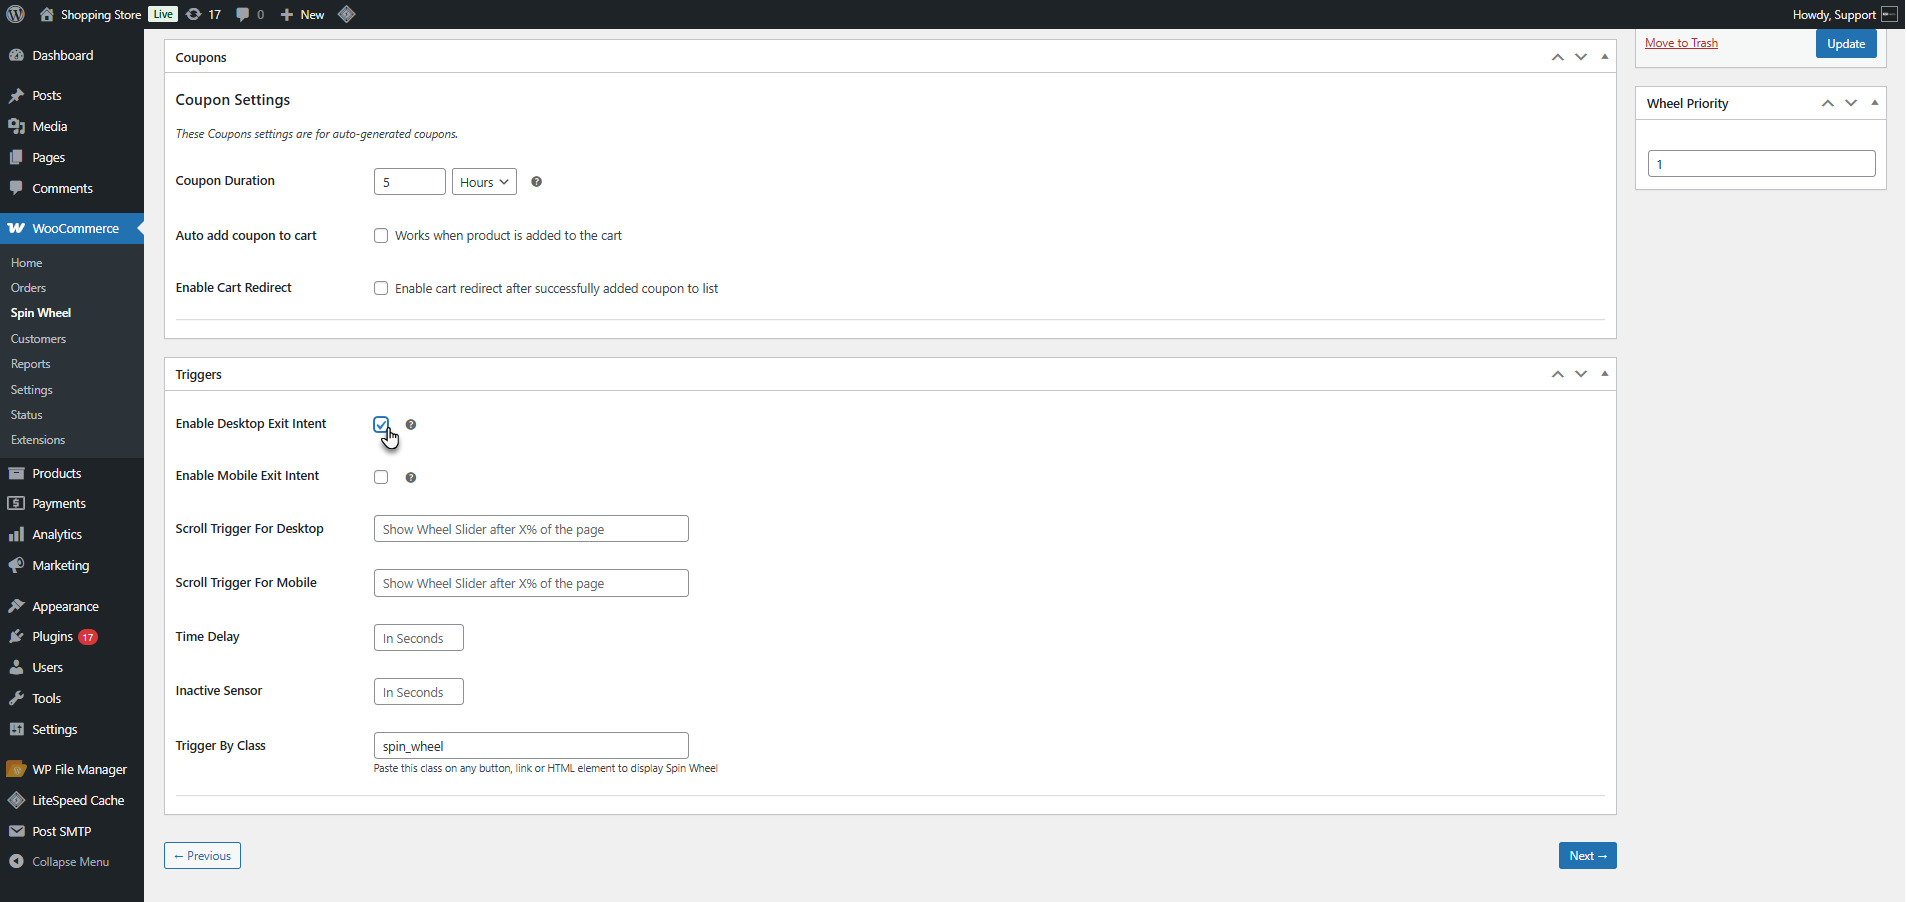
- Mobile Exit Intent – The wheel appears when a user navigates back from a page, simulating an exit.
- Scroll Trigger For Desktop – The wheel appears when the user scrolls down the screen. The admin can set the percentage of the screen to be scrolled to show the wheel.
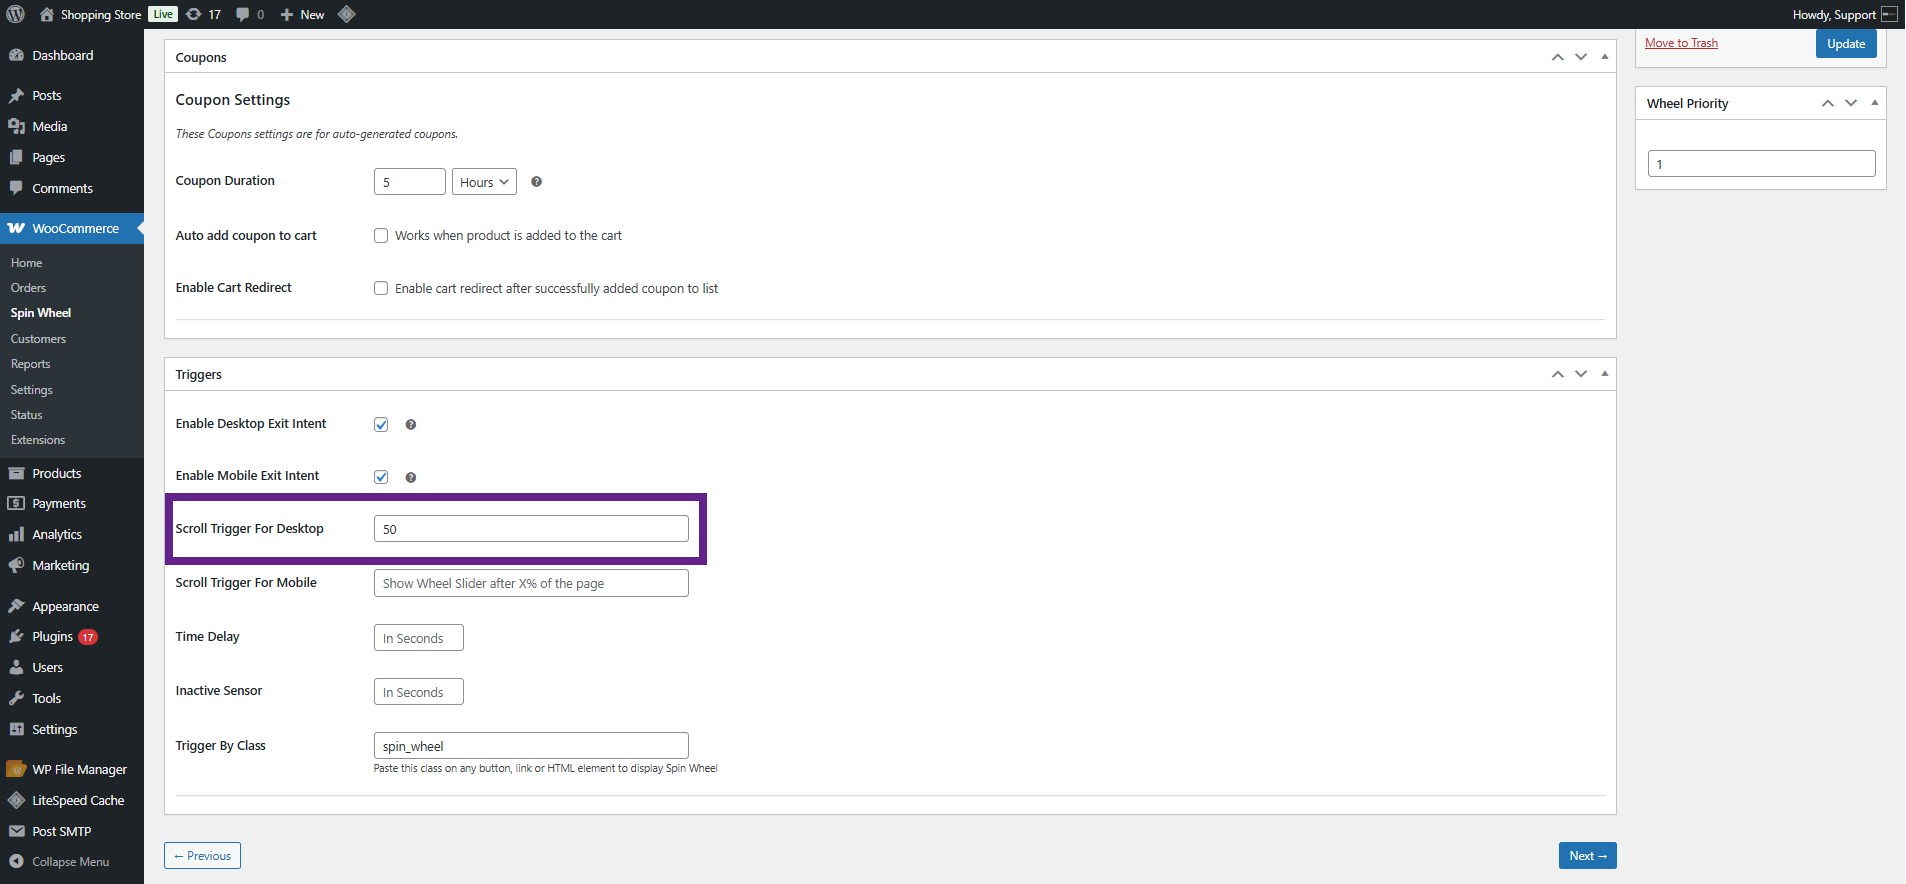
- Scroll Trigger For Mobile – The wheel appears when the user scrolls on mobile devices. The admin can set the percentage of the screen to be scrolled to show the wheel.
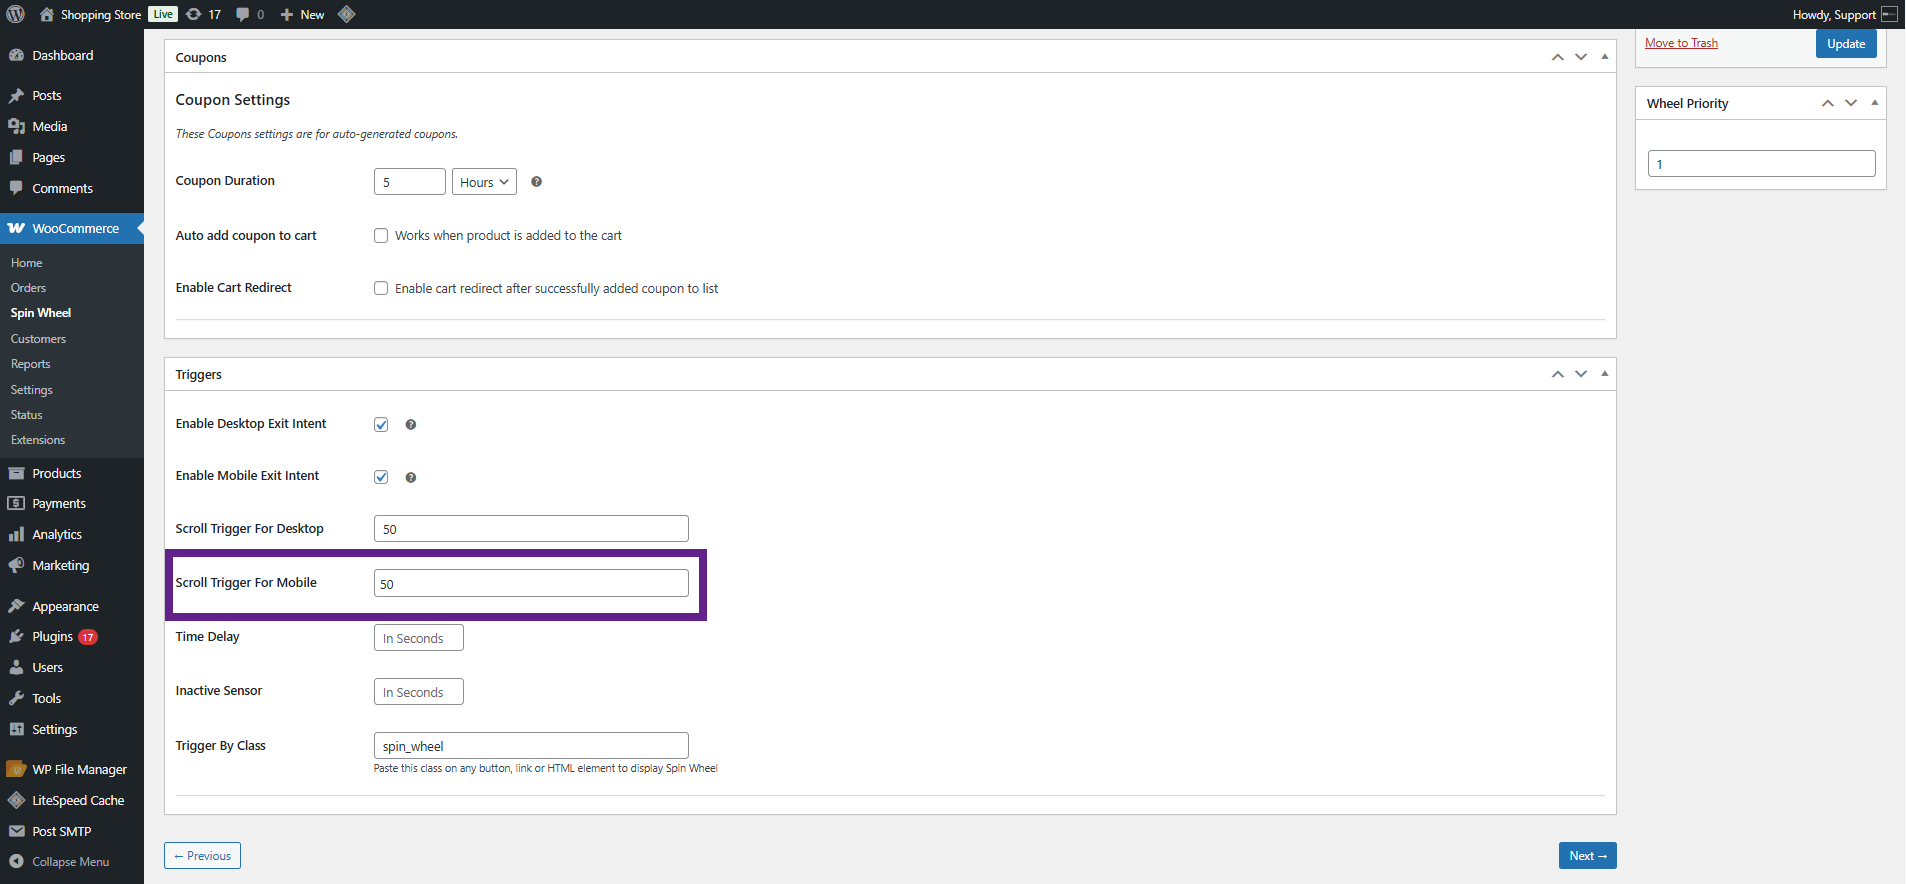
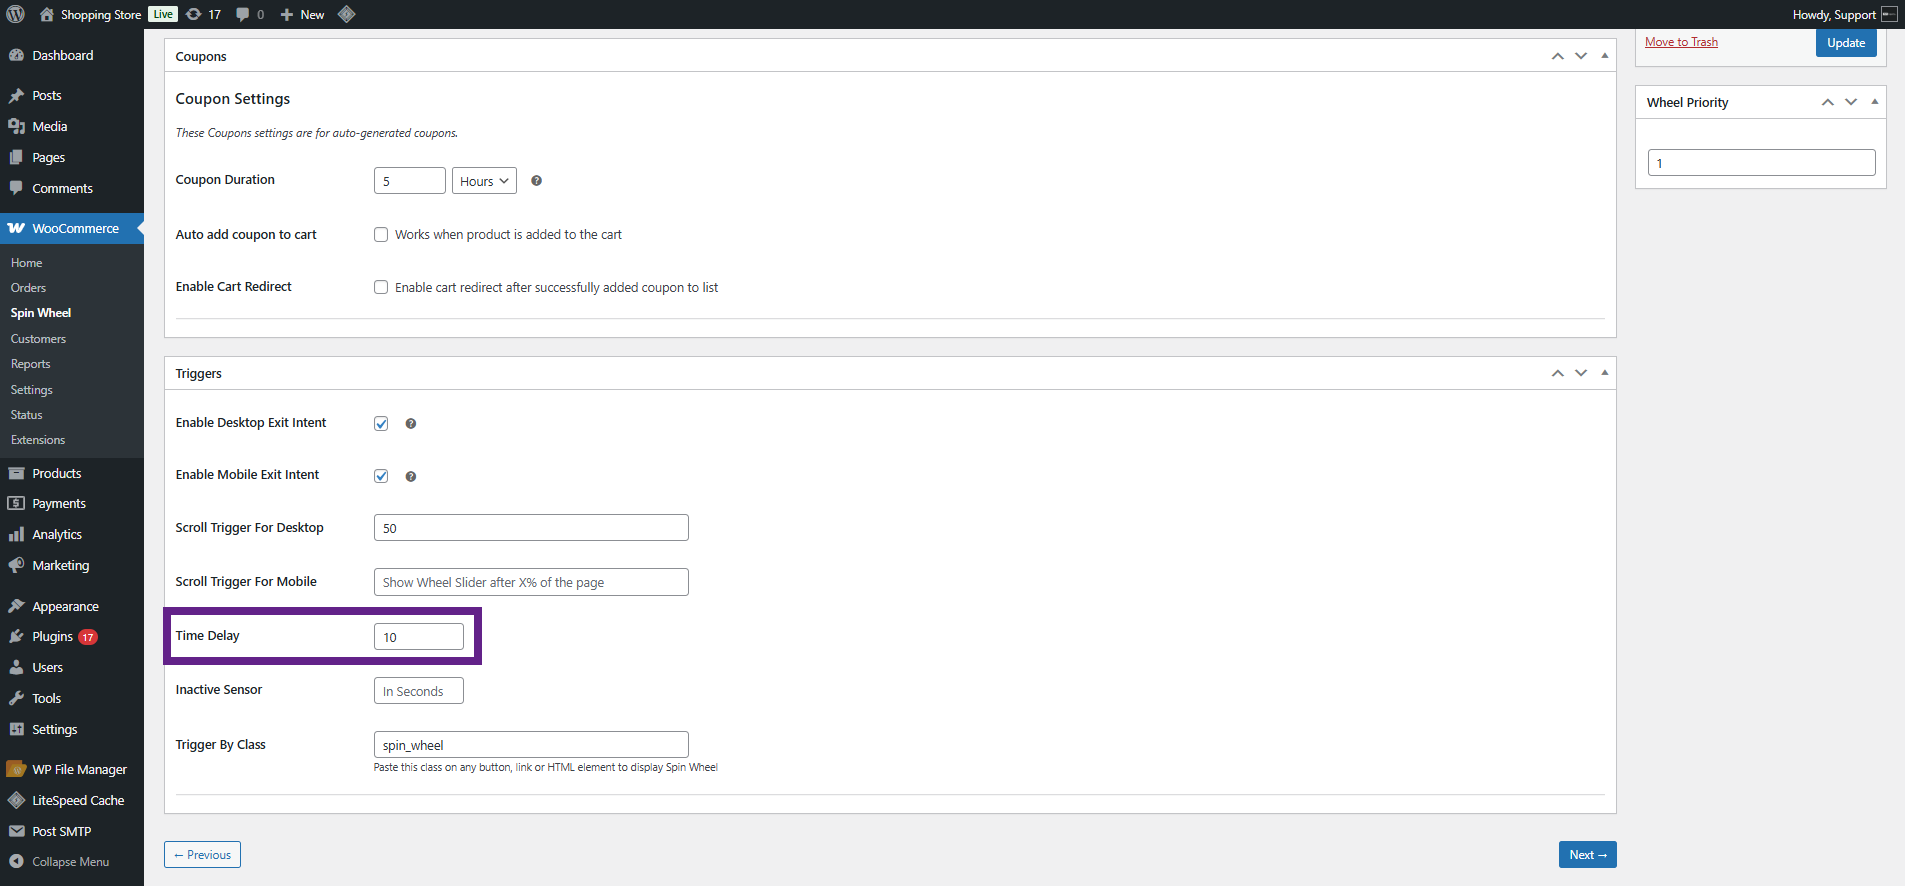
- Time Delay Trigger – The wheel appears after a set number of seconds. The admin can set the time in seconds.
- Inactivity Trigger – The wheel appears if the user remains inactive for a specified duration.
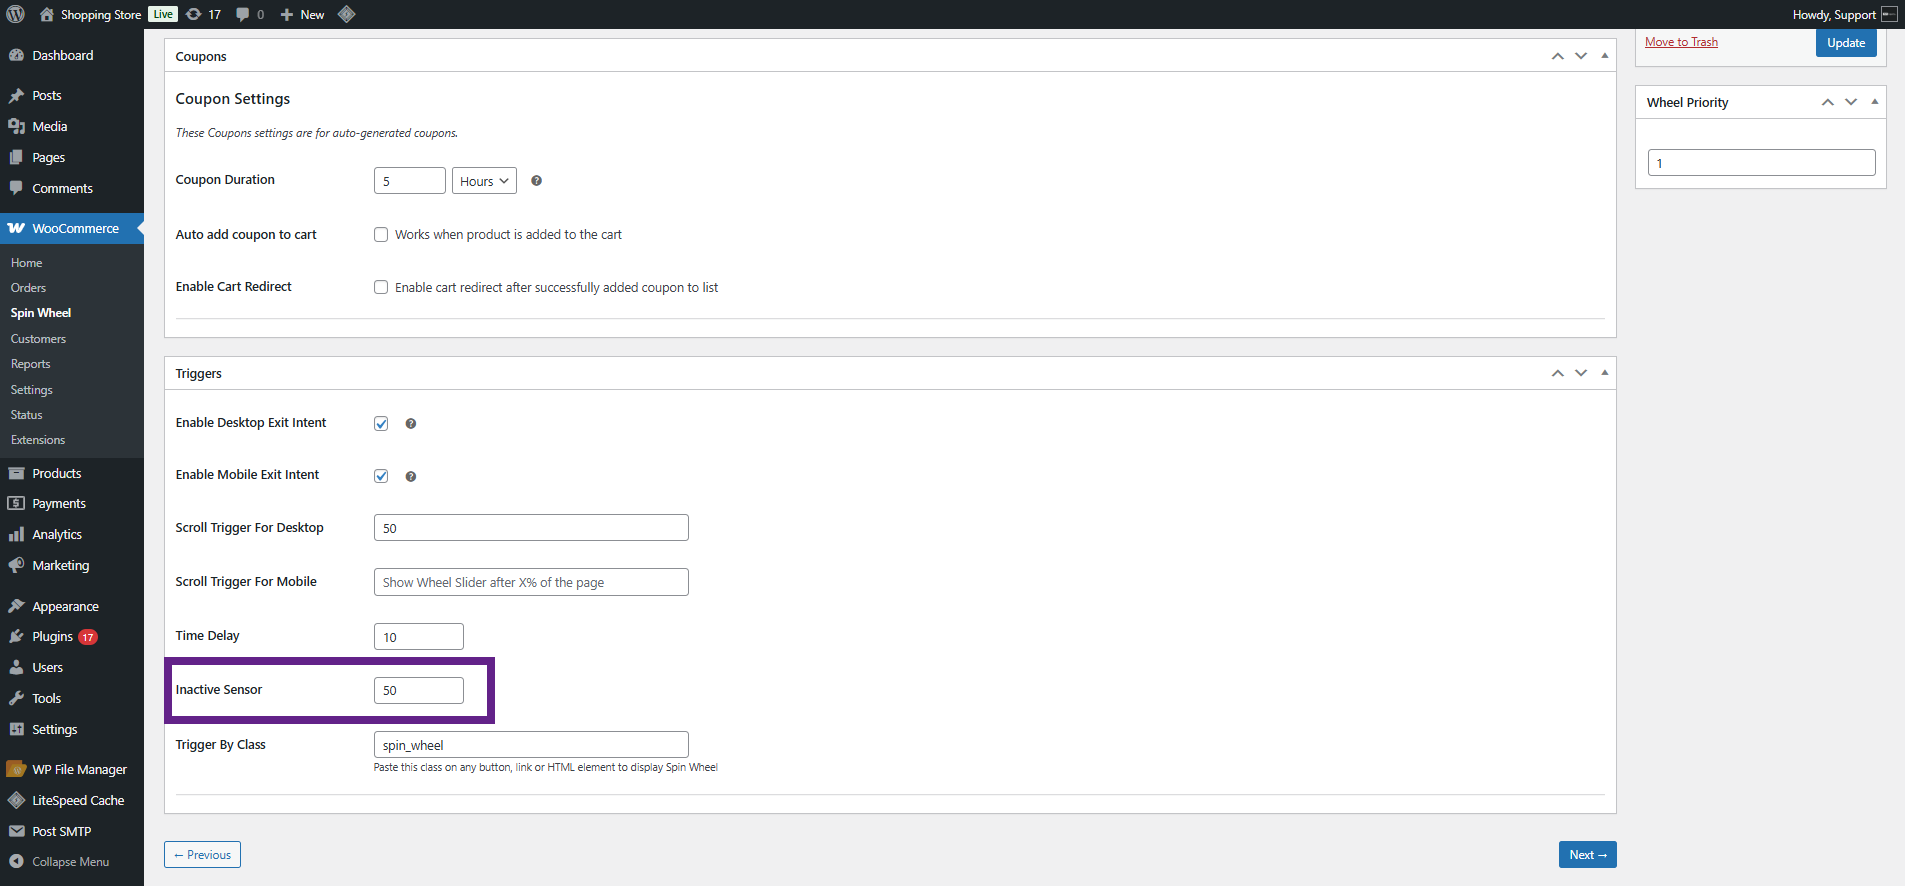
- Trigger by Class – The wheel can be displayed by assigning it to a specific button, link, or HTML element.

Emails
↑ Back to top- To configure email notifications, the admin should go to the Email tab.
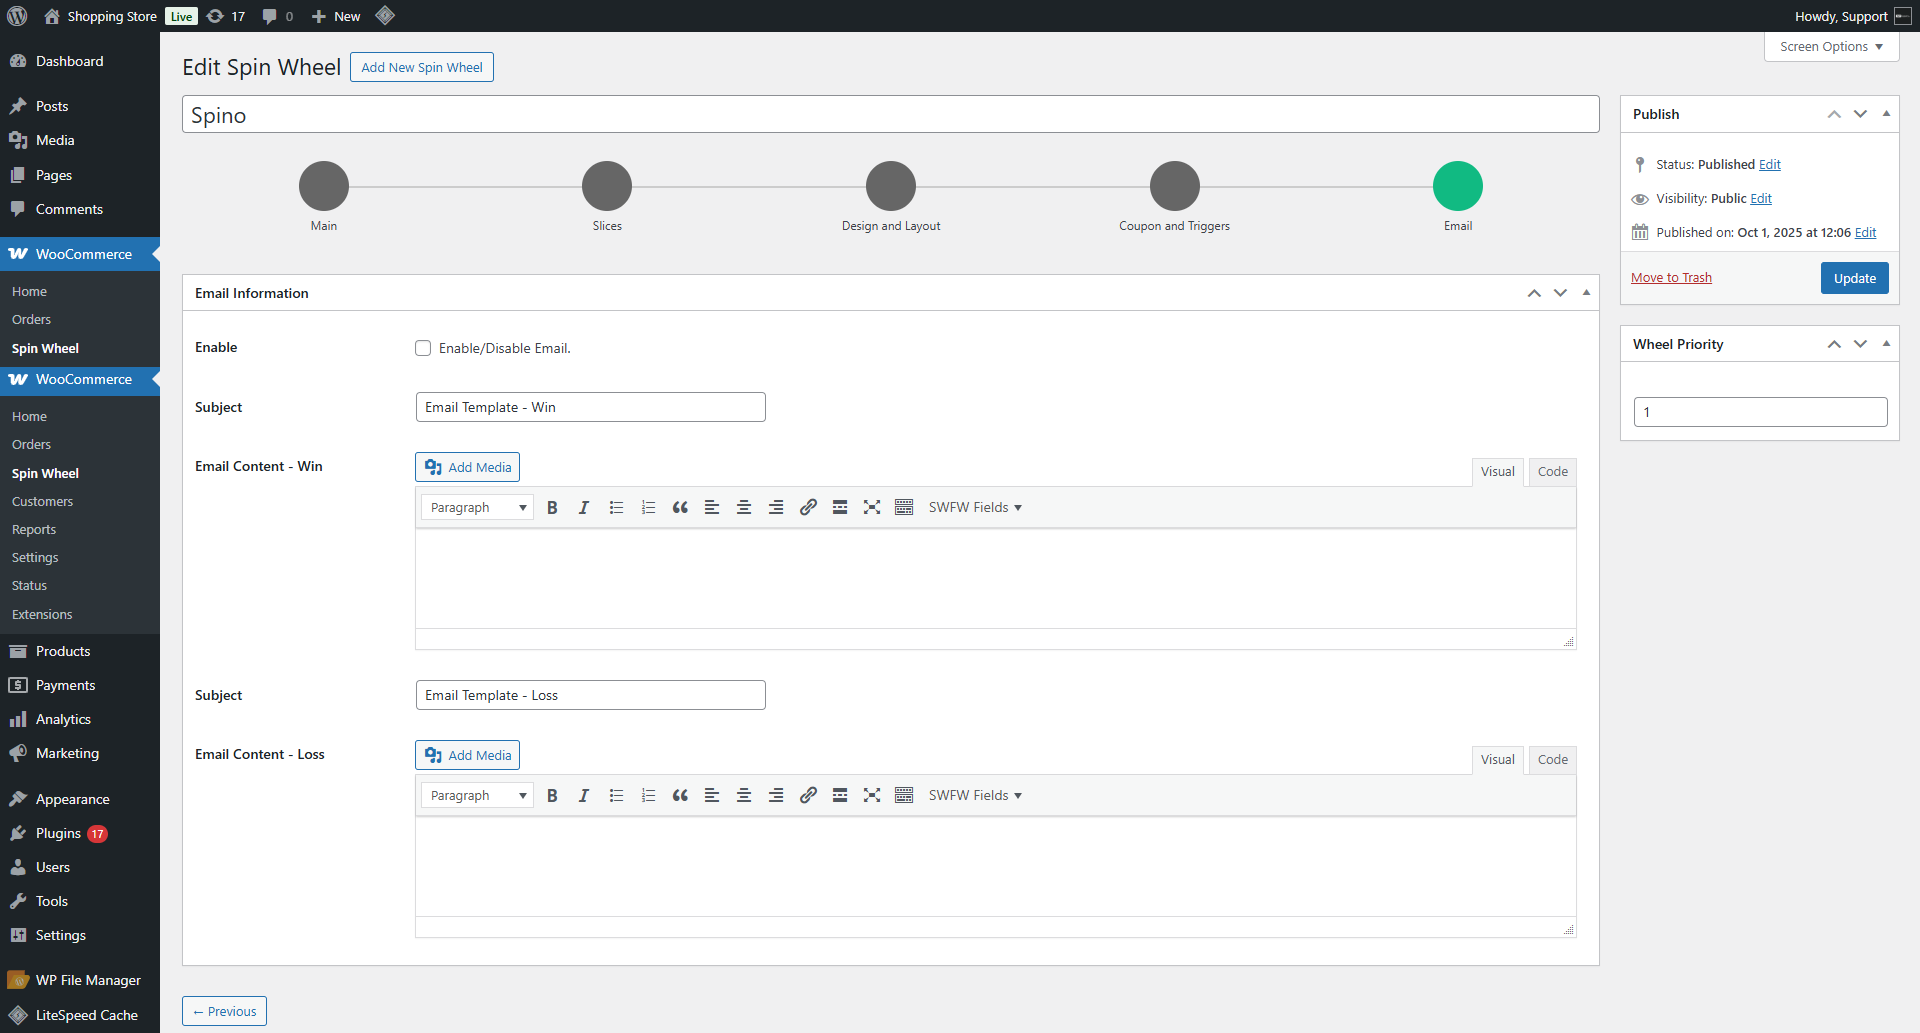
- In the Email Information (Metabox), the admin can enable or disable email notifications. If enabled, users will receive an email notification about their win or loss on the Spin Wheel.
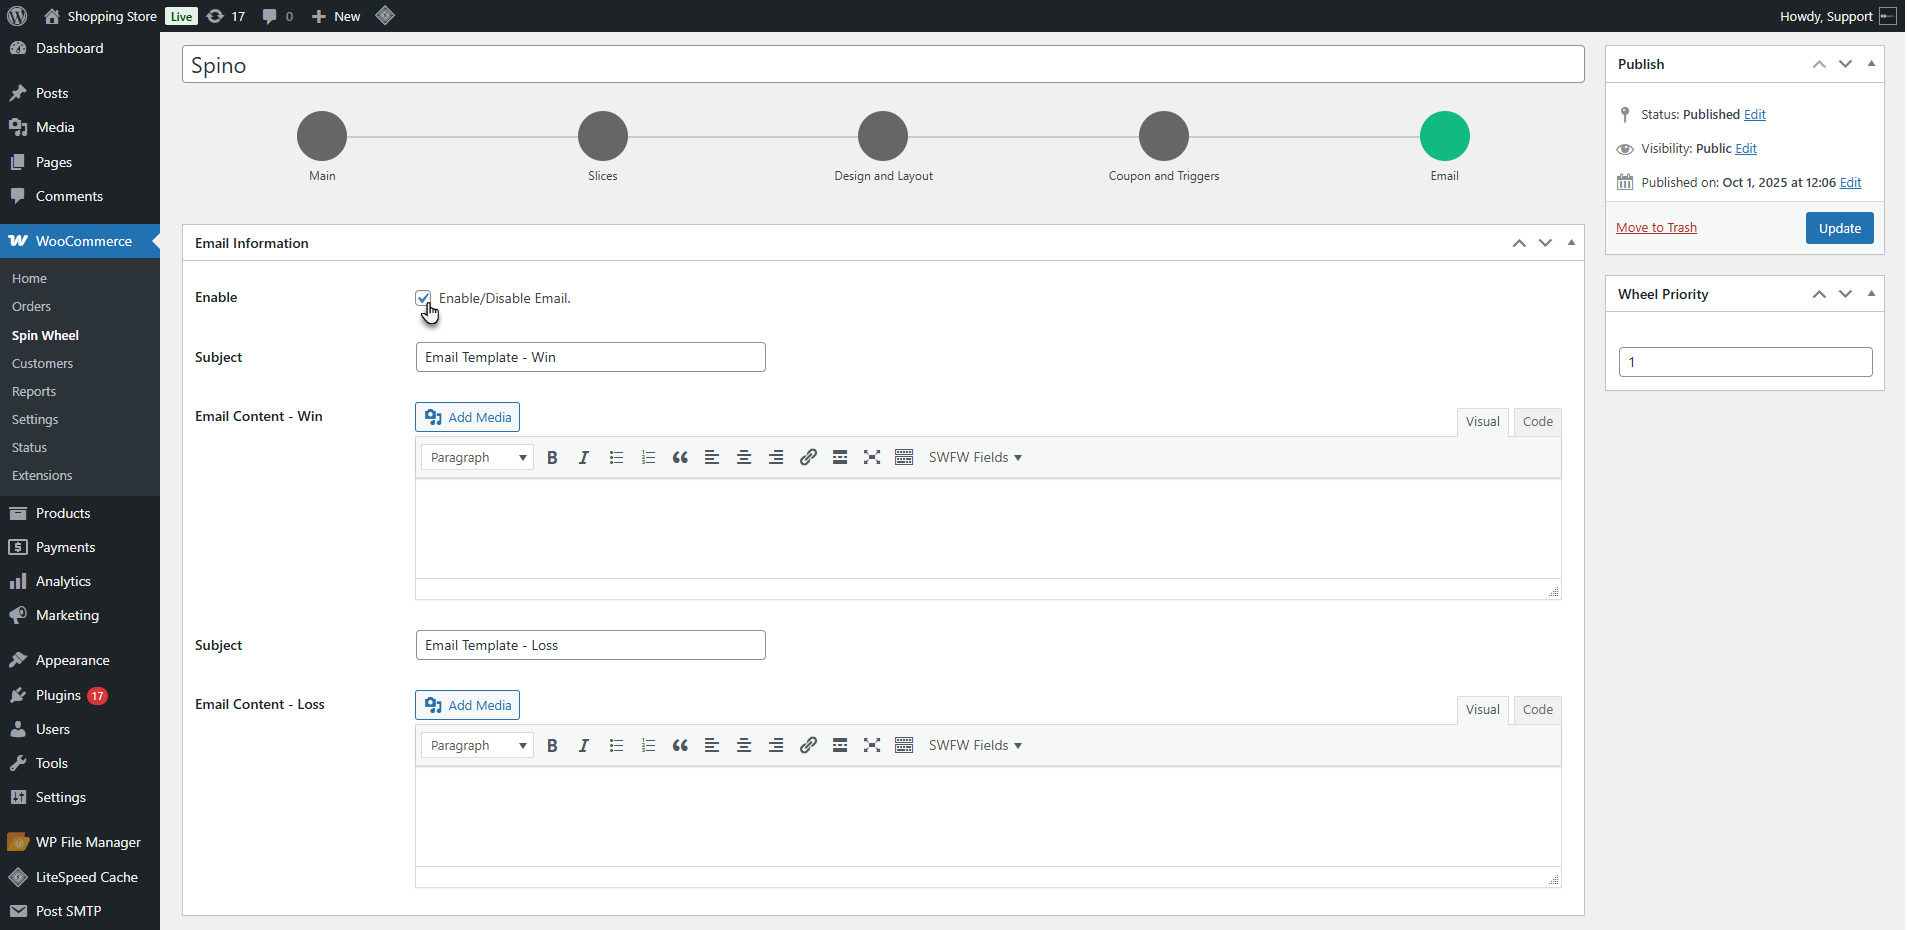
- The admin can configure email templates separately for Win and lose outcomes.
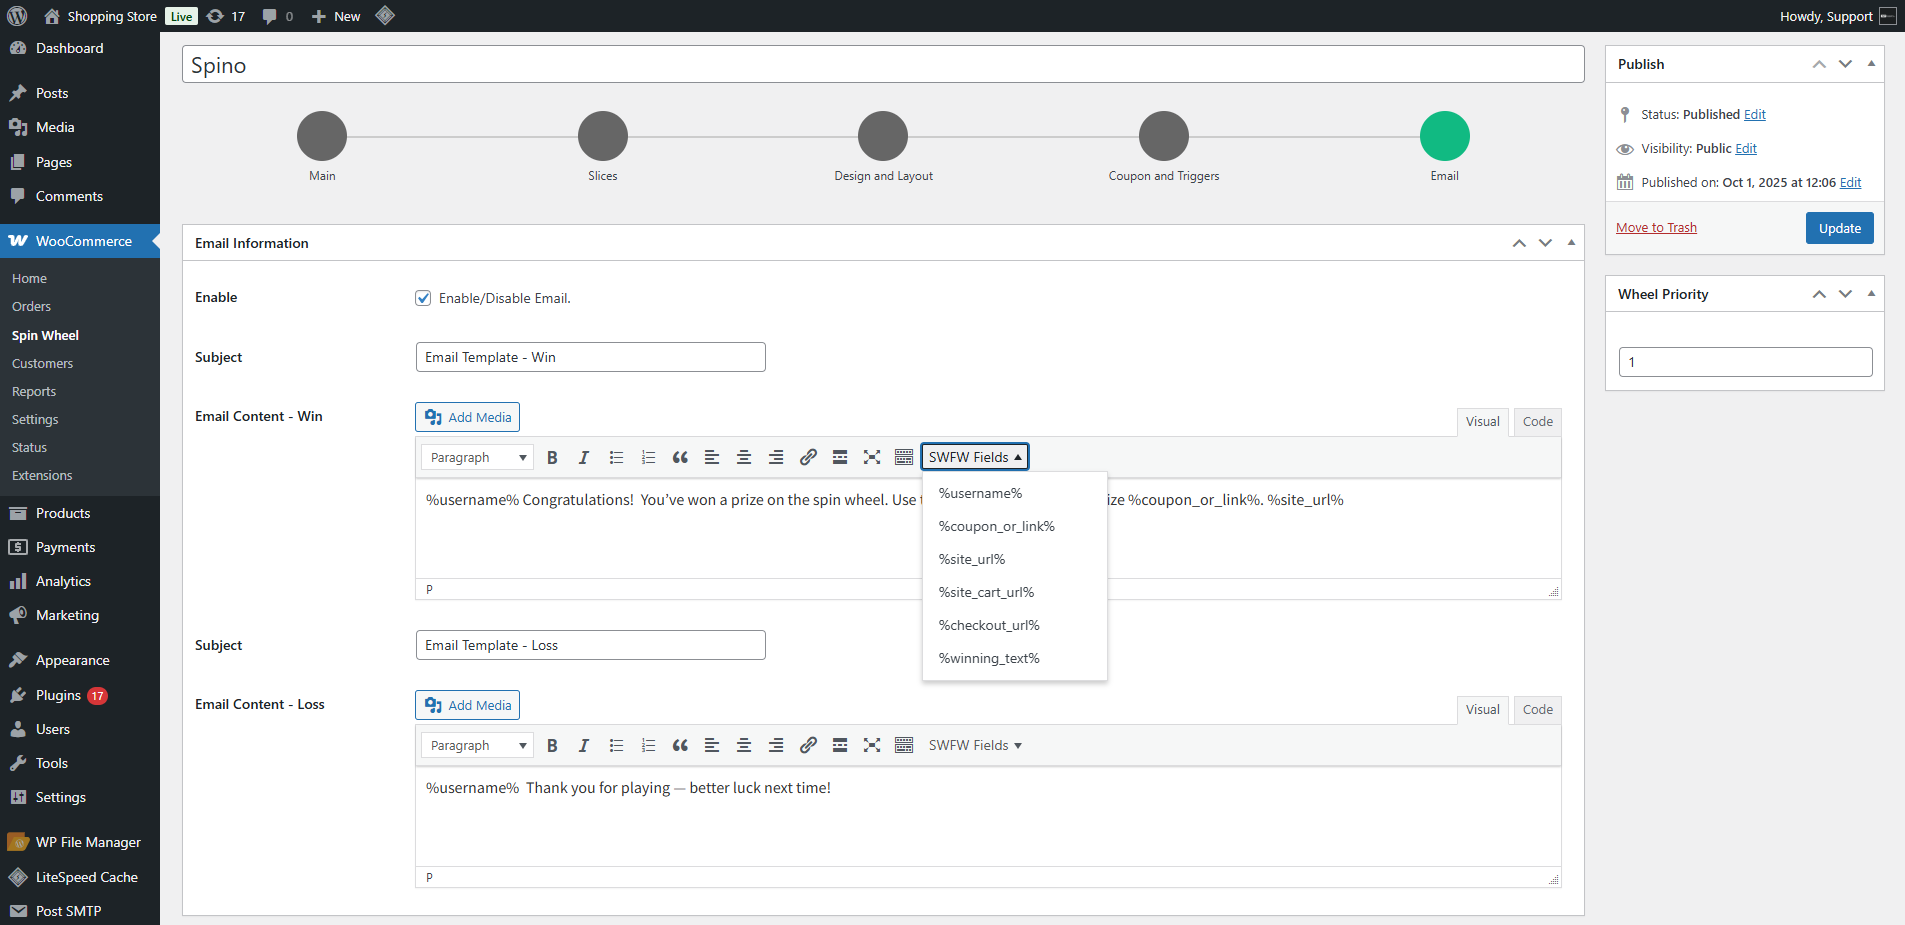
- Set the email subject. Write the email body using available SWFW fields.

- Available SWFW Fields:
- {username} – User’s name
- {coupon or link} – Coupon code or link (depending on slice type)
- {site_url} – Website URL
- {cart_url} – Cart page link
- {checkout_url} – Checkout page link
- {winning_text} – Winning message text
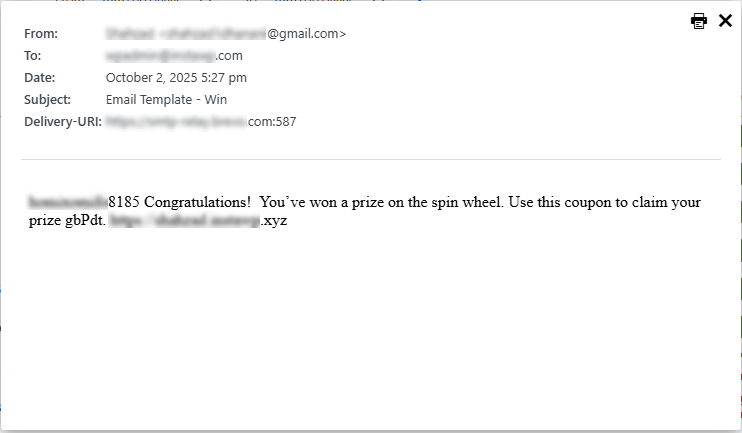
Front End Impact
↑ Back to top- Win
- Lose

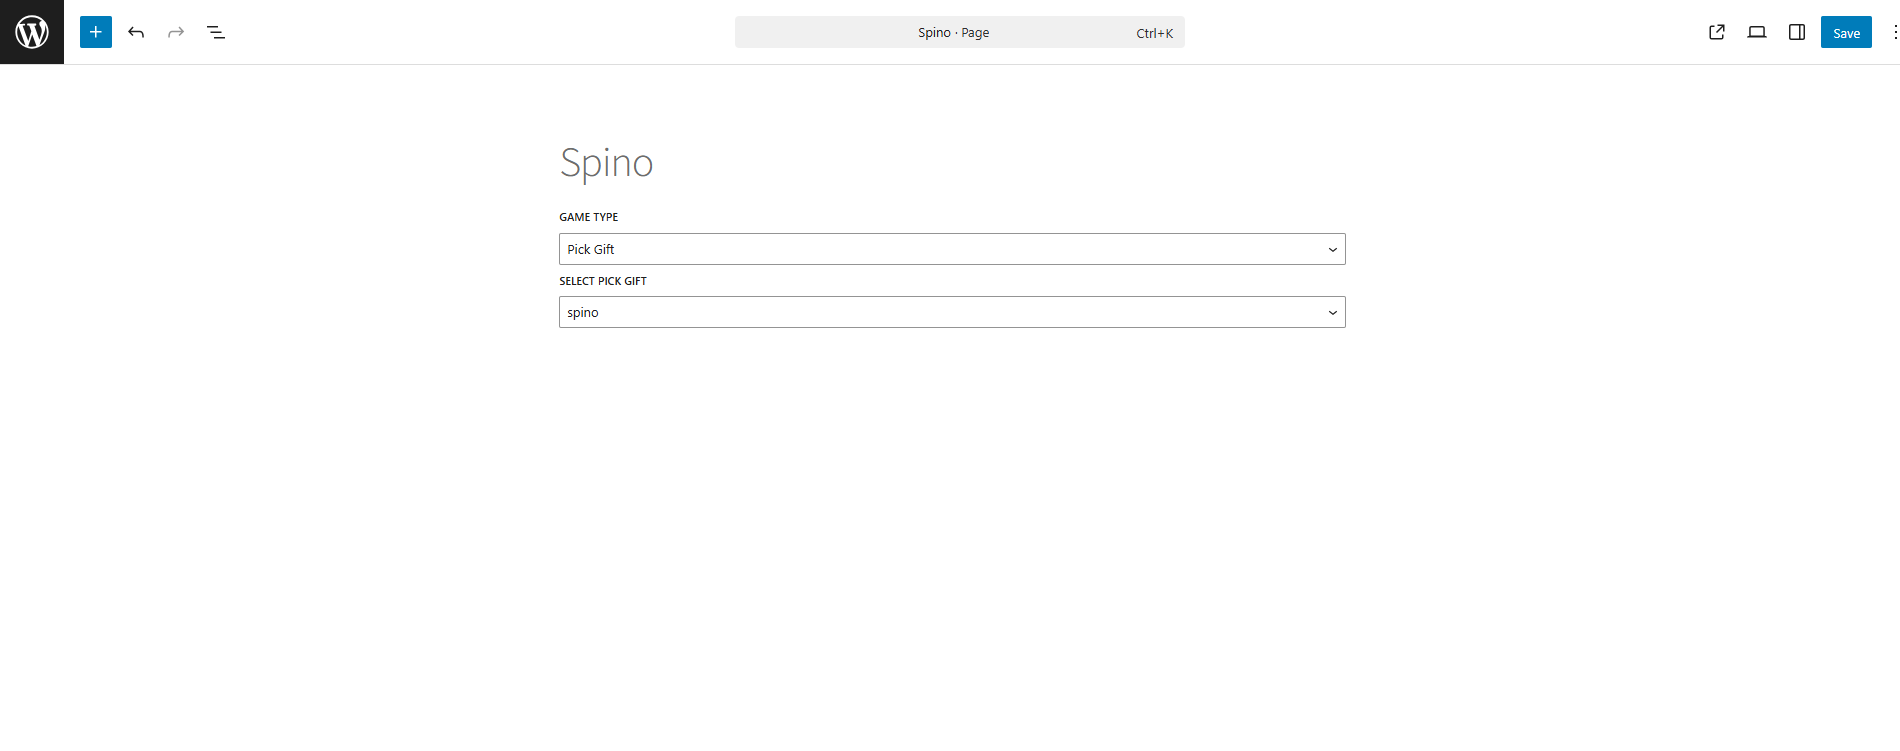
Spin Wheel (Block)
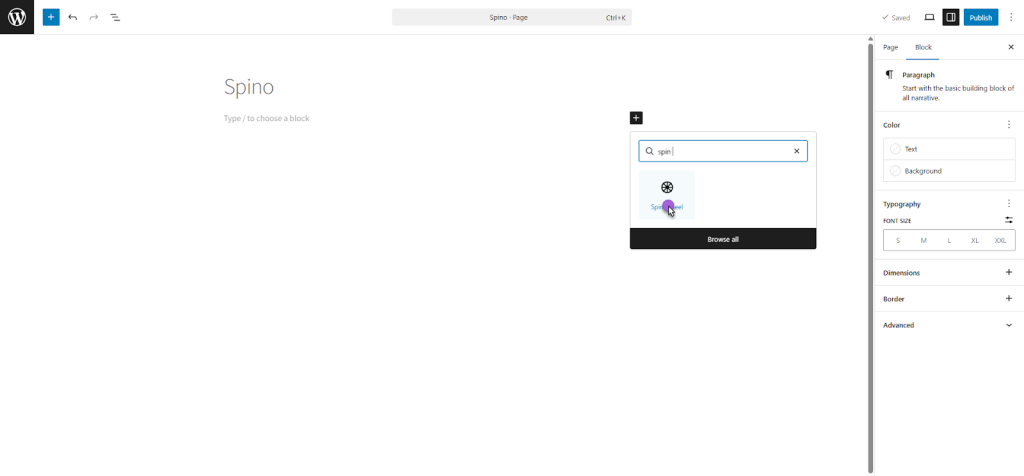
↑ Back to top- The admin can display the Spin Wheel on the frontend using the Spin Wheel Block. Go to WordPress Admin Dashboard > Pages > Add New.
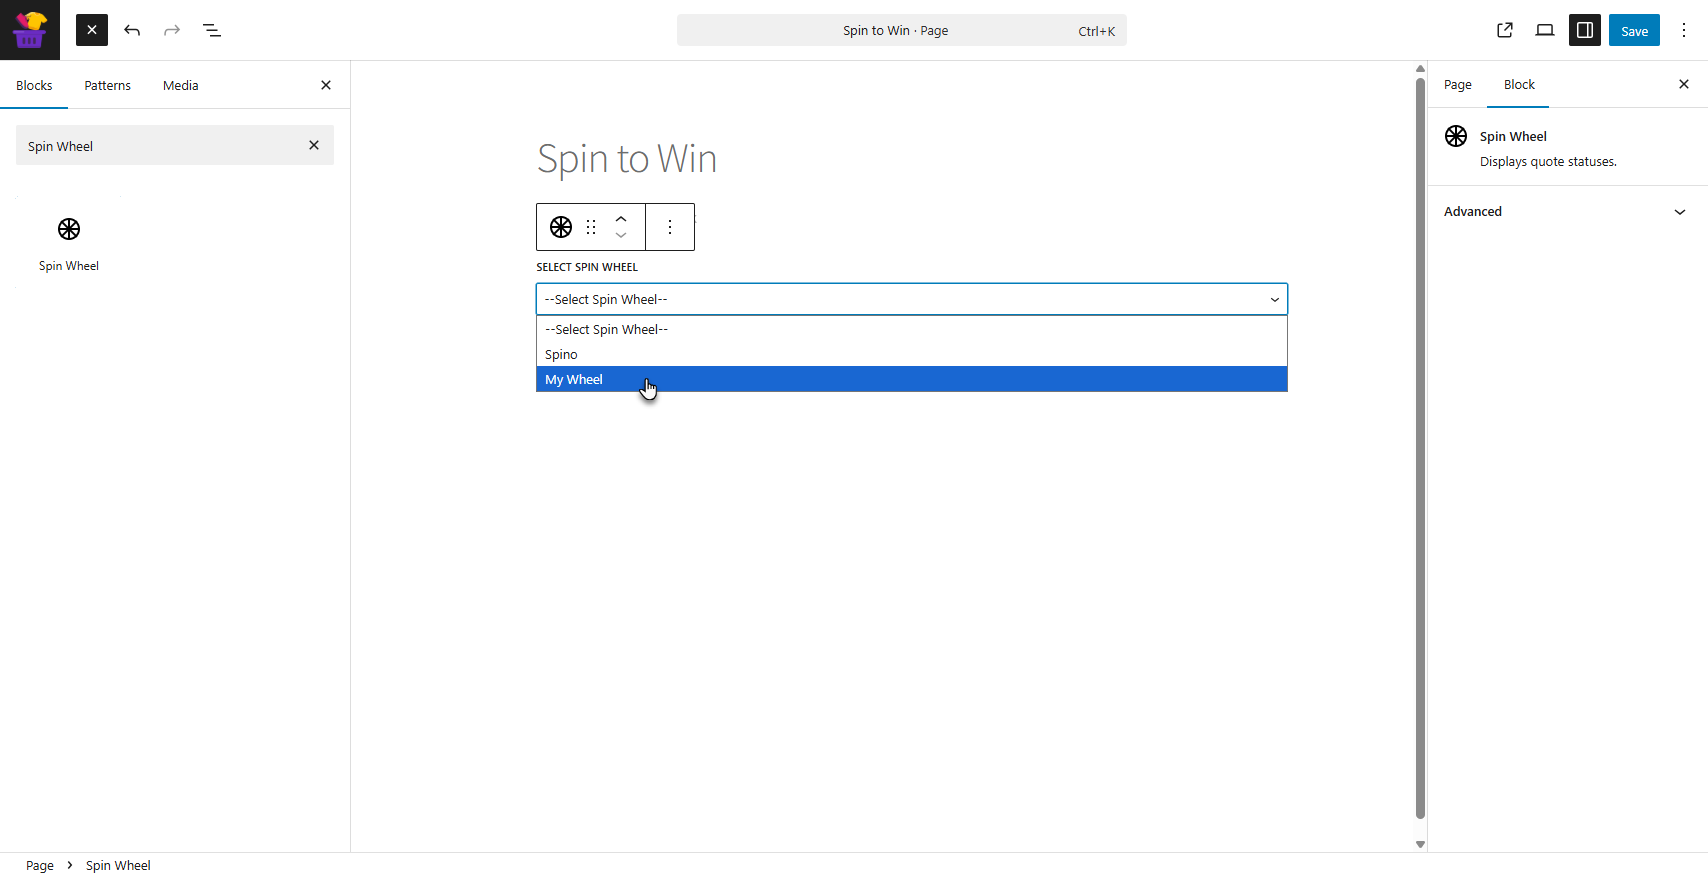
- In the block editor, search for Spin Wheel Block. Insert the block into the page.
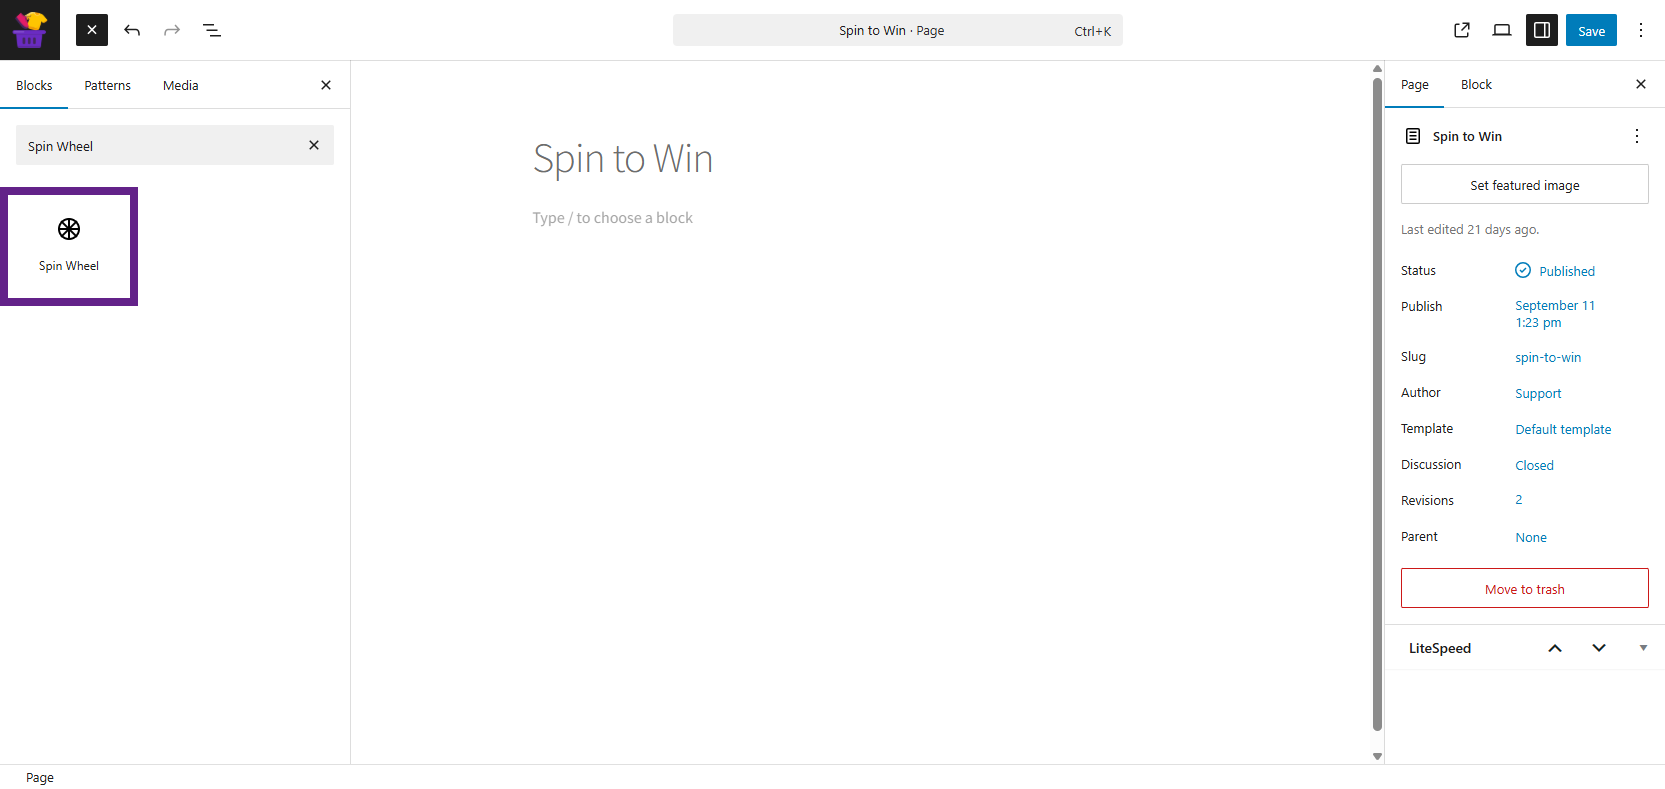
- A dropdown will appear if multiple wheels are created. The admin can select the one they want to display on the page. Publish or update the page to make the Spin Wheel visible to users.
Front End Impact
↑ Back to top- Log in to your account.
- The wheel added from the Block will appear as a pop-up.
Card Dance / Pick a Gift (Block)
↑ Back to top- Navigate to: WordPress Admin Dashboard > Pages > Add New.
- In the block editor, search for Spin Wheel Block (used for all game types) and insert it into the page.
- Now, select Game Type from the first dropdown:
- Options: Spin Wheel, Card Dance, Pick a Gift
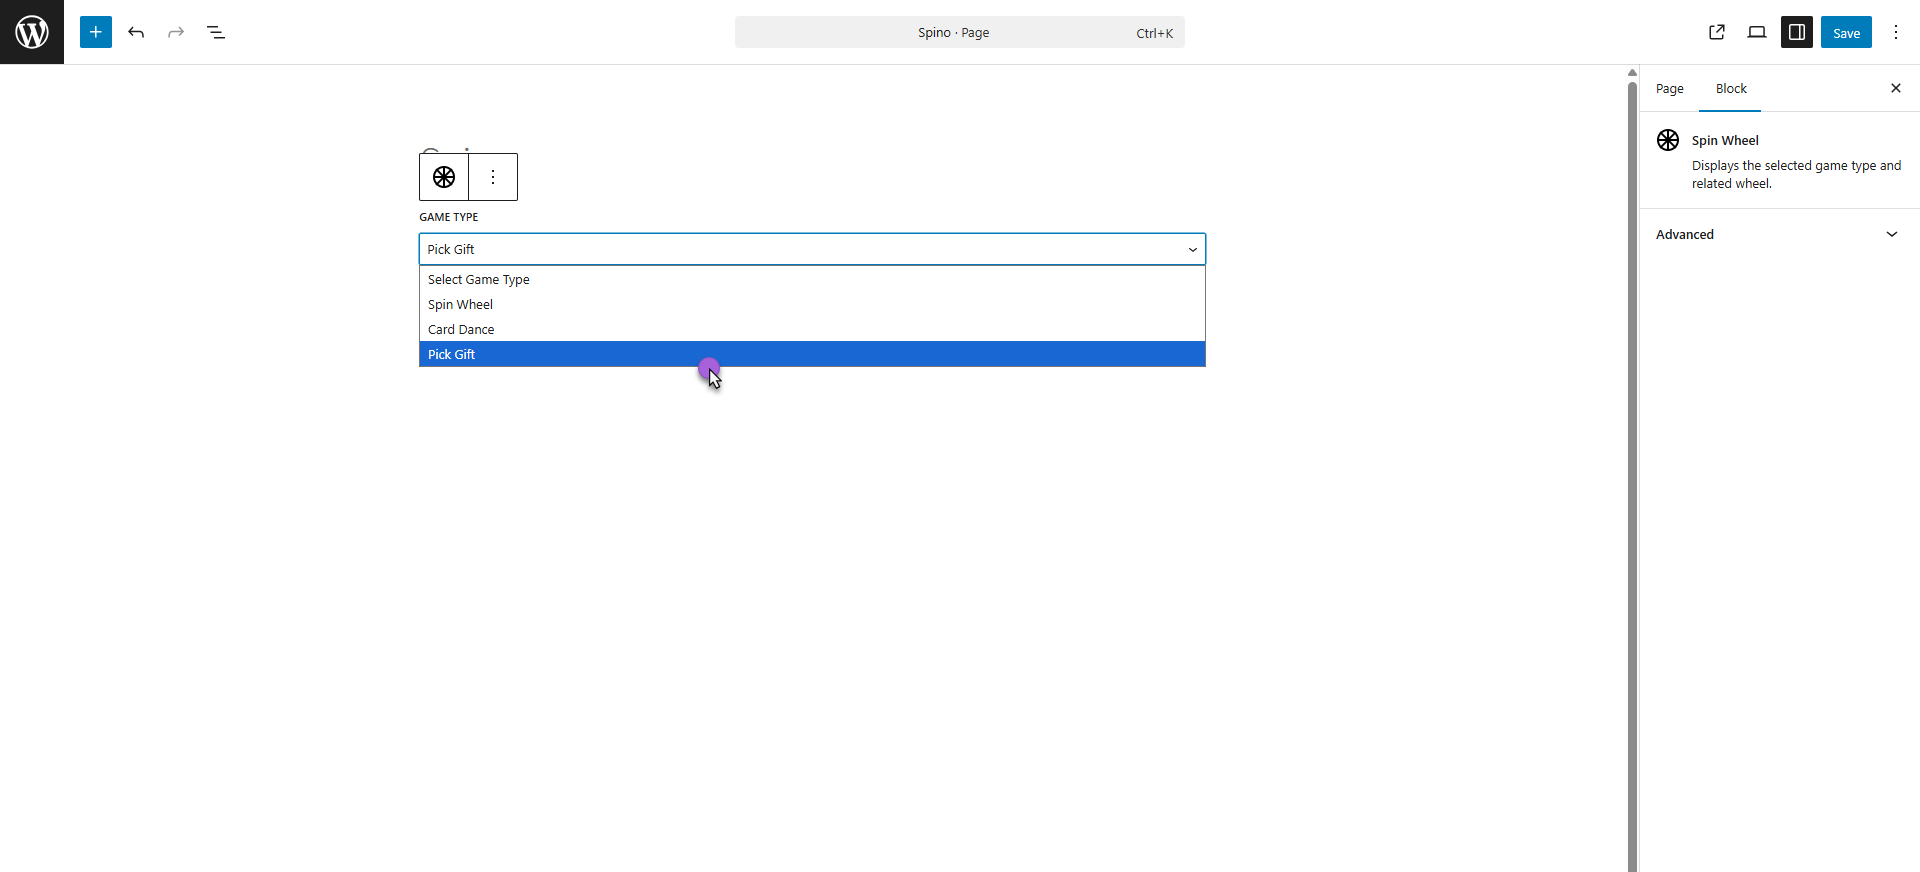
- Select Specific Game from the second dropdown (only games available for the chosen type will appear.

- Click Publish or Update the Page to display the game to users.
Front End Impact
- Log in to your account.
- The selected game (Spin Wheel, Card Dance, or Pick a Gift) added from the Block will appear as a pop-up.
Spin Wheel
Card Dance
Pick a Gift
General Settings
↑ Back to topTo configure the general settings for the plugin, the admin must
- Navigate to WordPress Admin Dashboard > WooCommerce > Settings > Spin Wheel.
- The following options will be available:
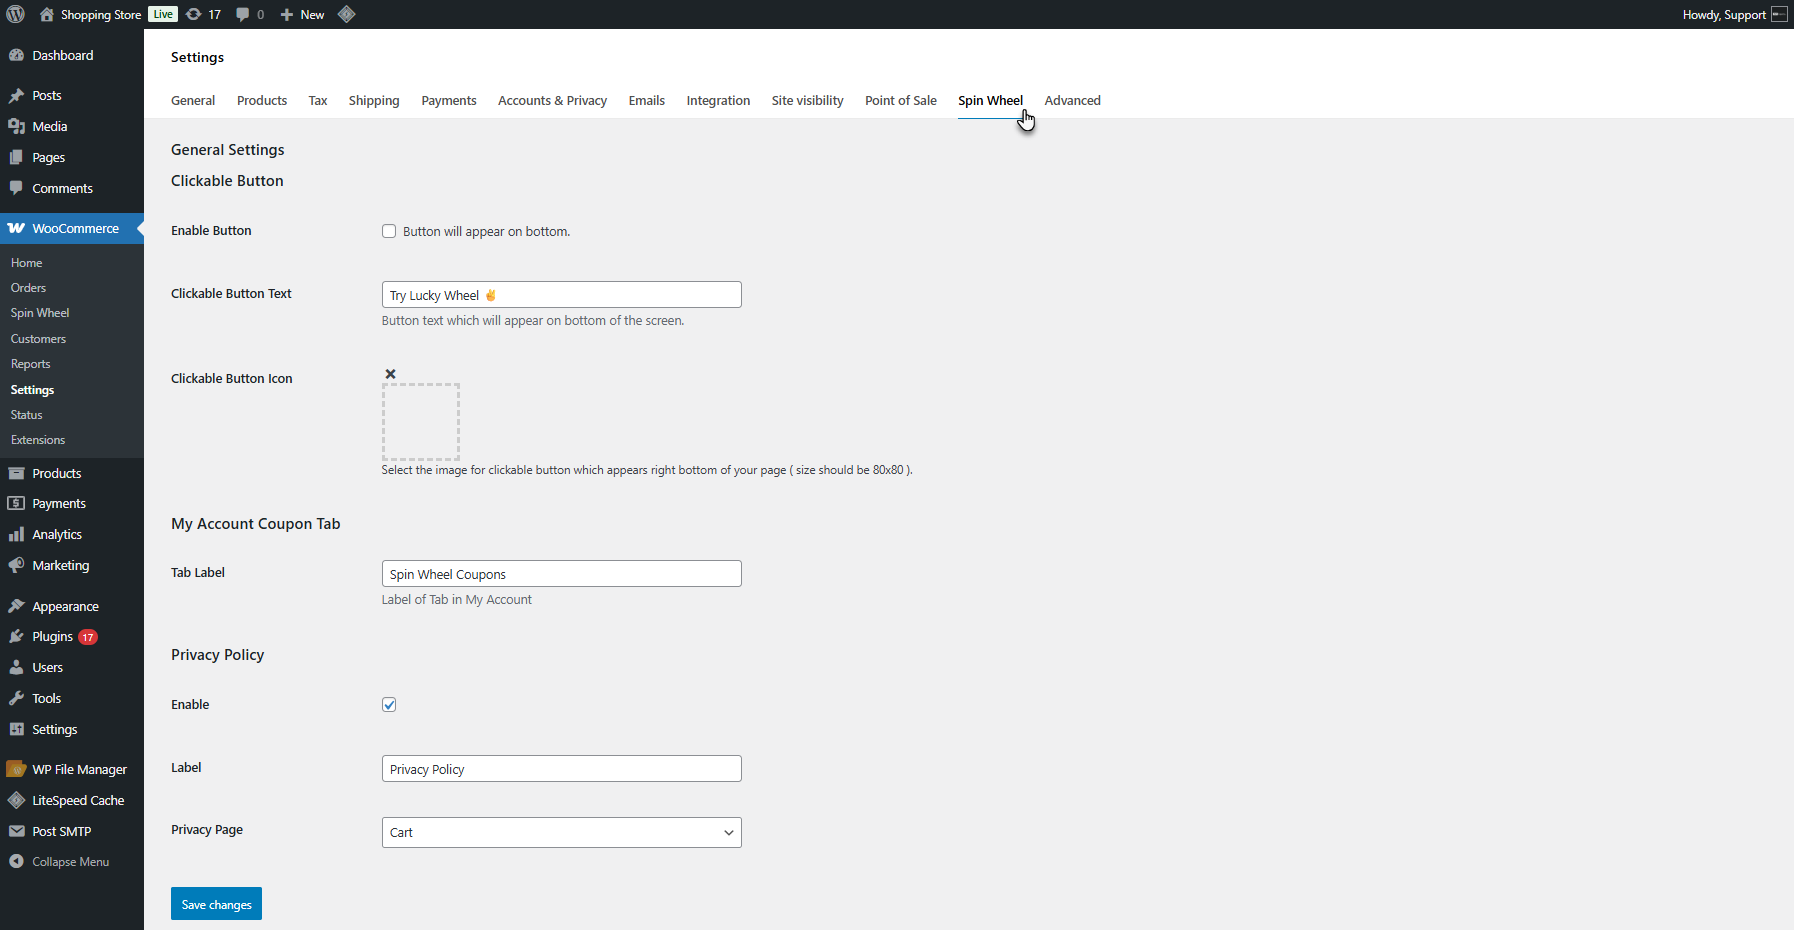
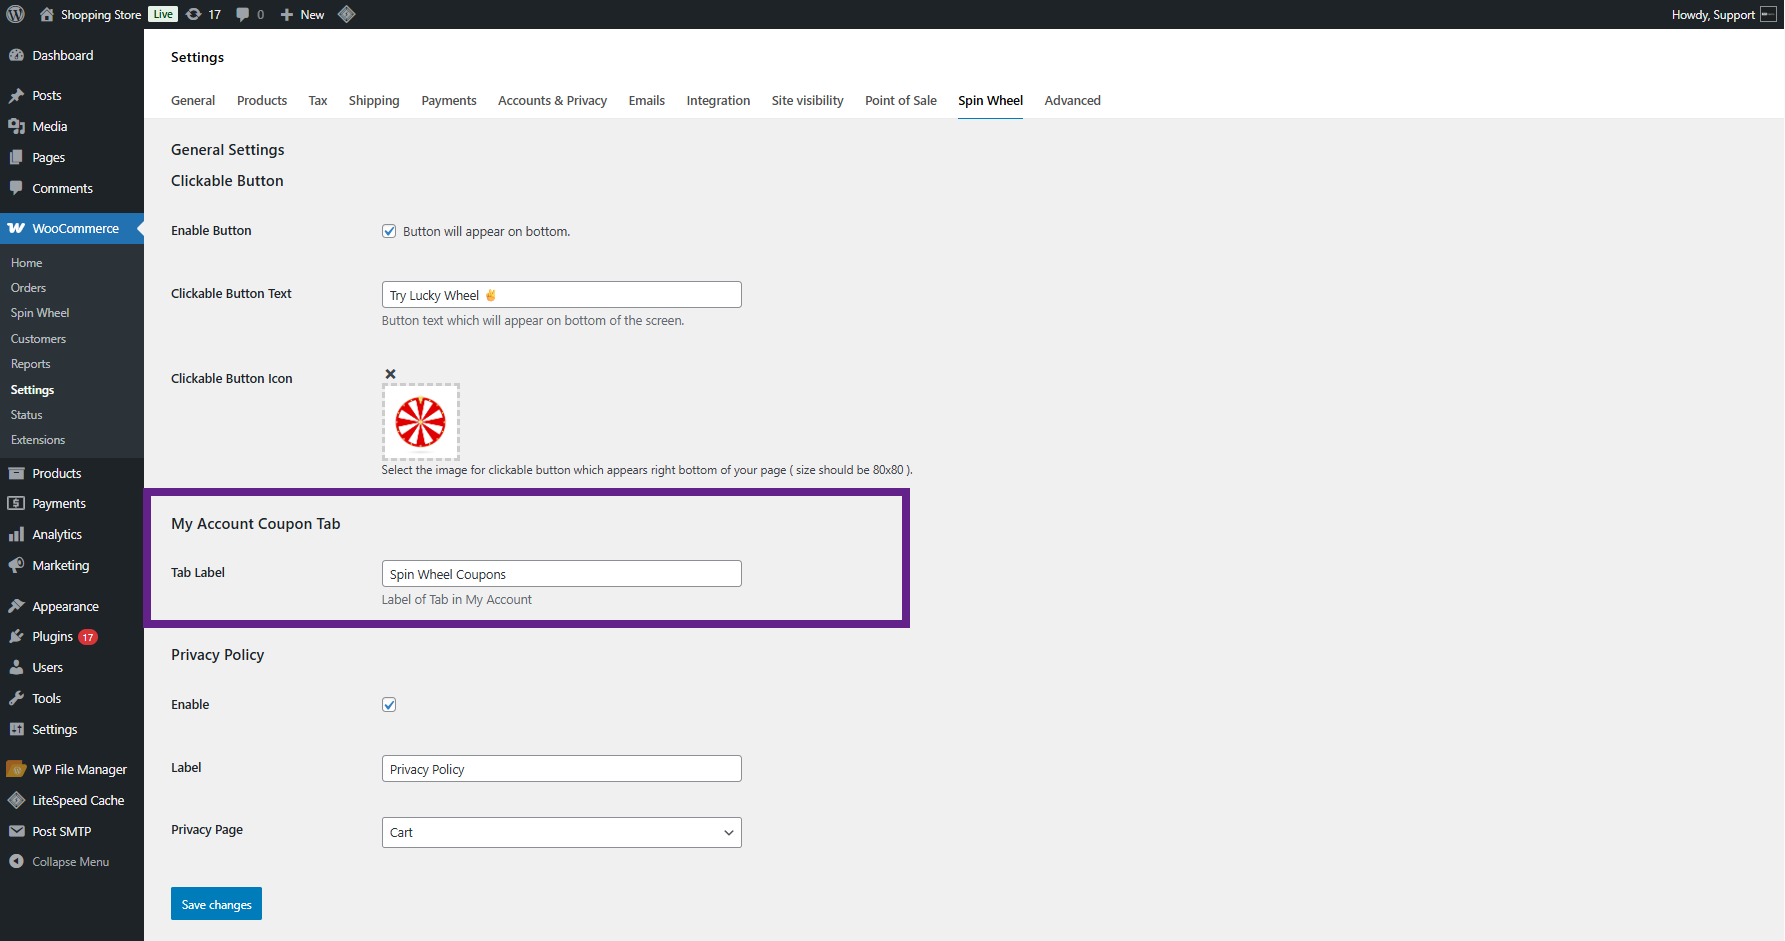
Clickable Button
↑ Back to top- Enable Button: This option allows users to open the Spin Wheel via a button. It is enabled by default.

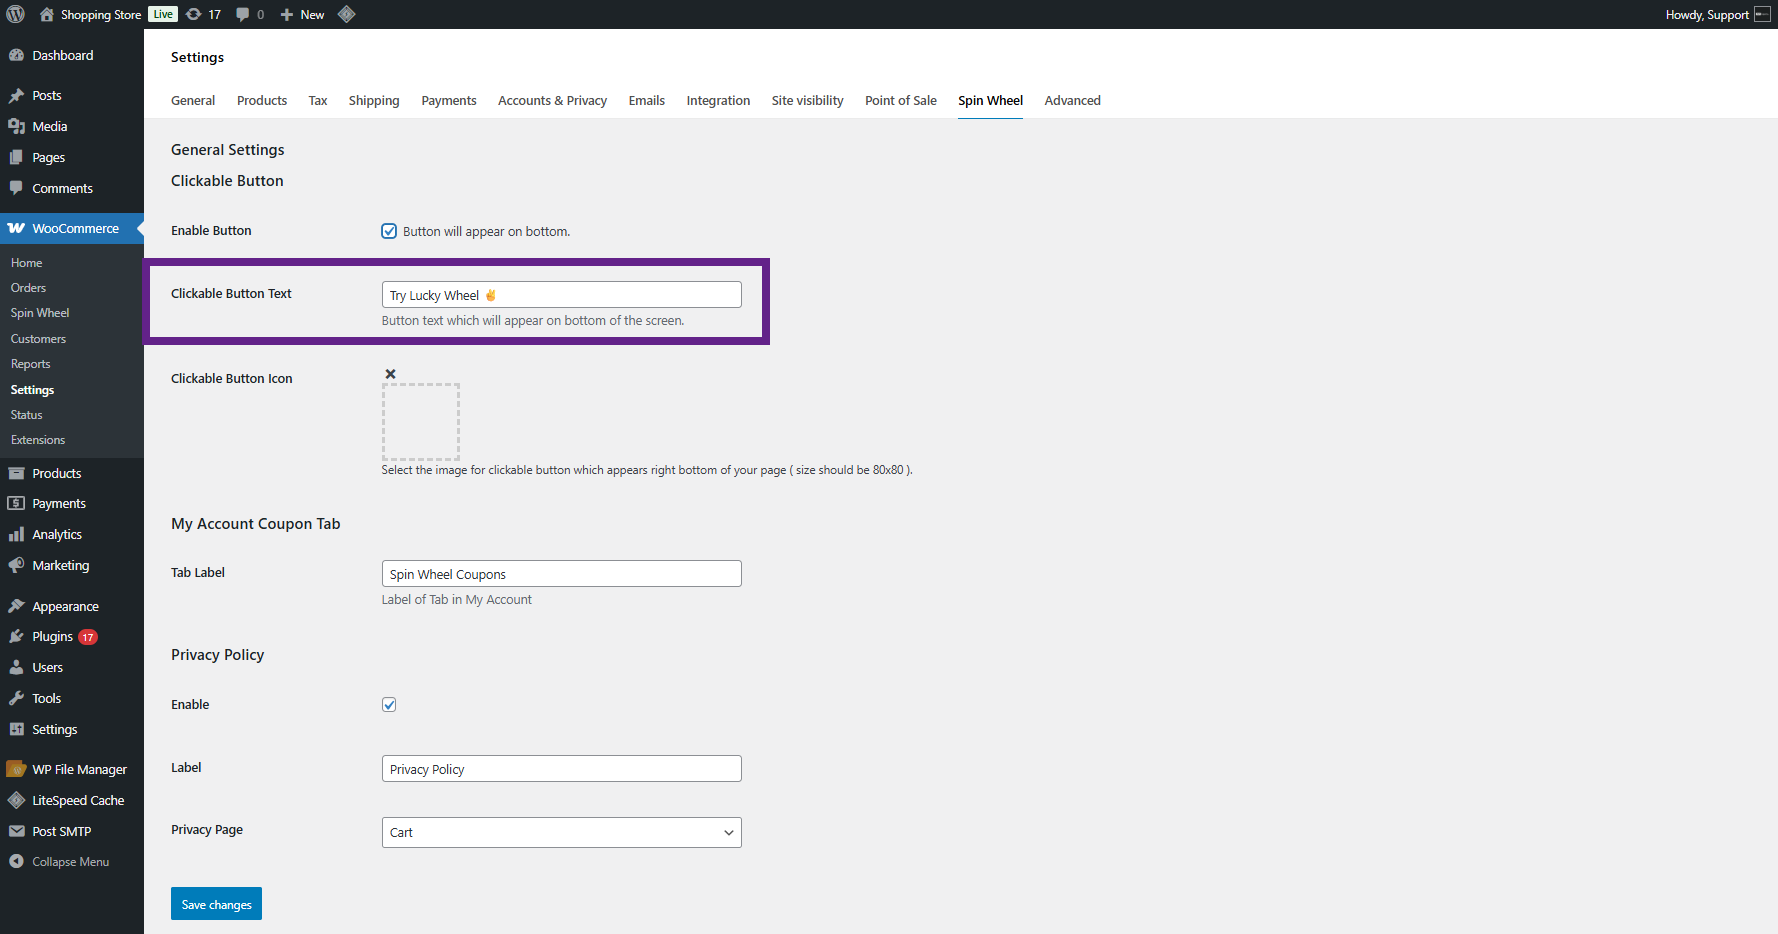
- Clickable Button Text: The admin can customize the text displayed by clicking the clickable button.
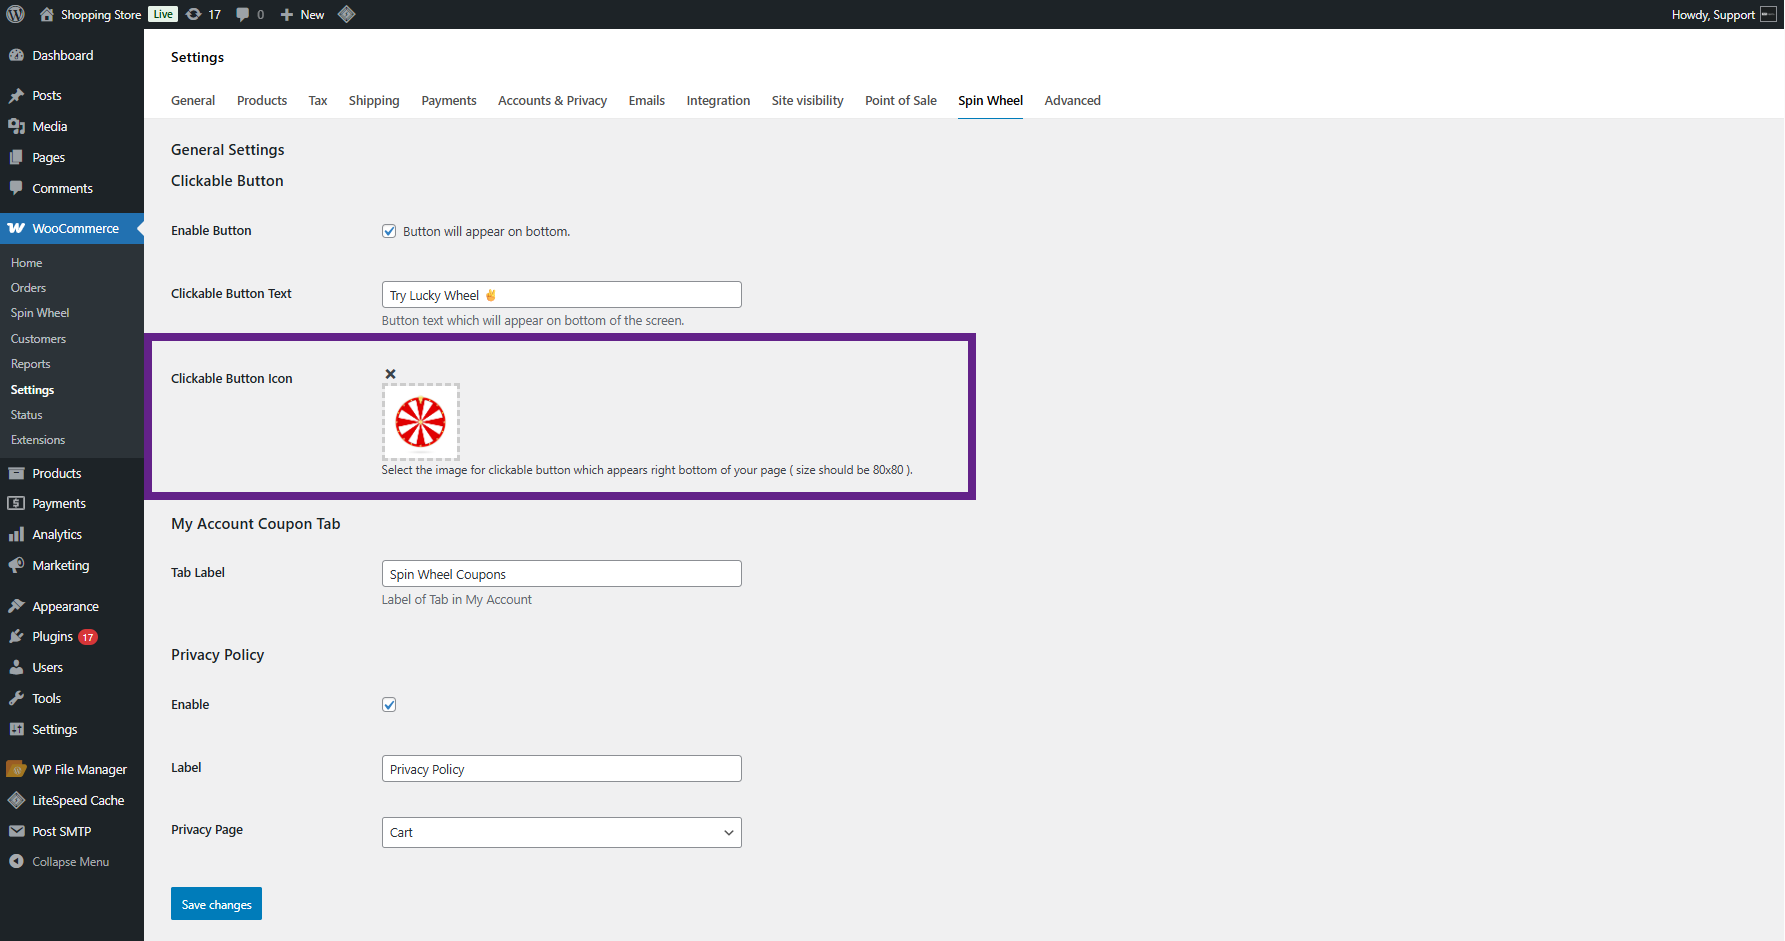
- Clickable Button Icon: Admin can upload an icon to be shown on the button.
Front End Impact
My Account Coupon Tab
↑ Back to top- Tab Label: Customize the label for the Spin Wheel tab on the My Account page.
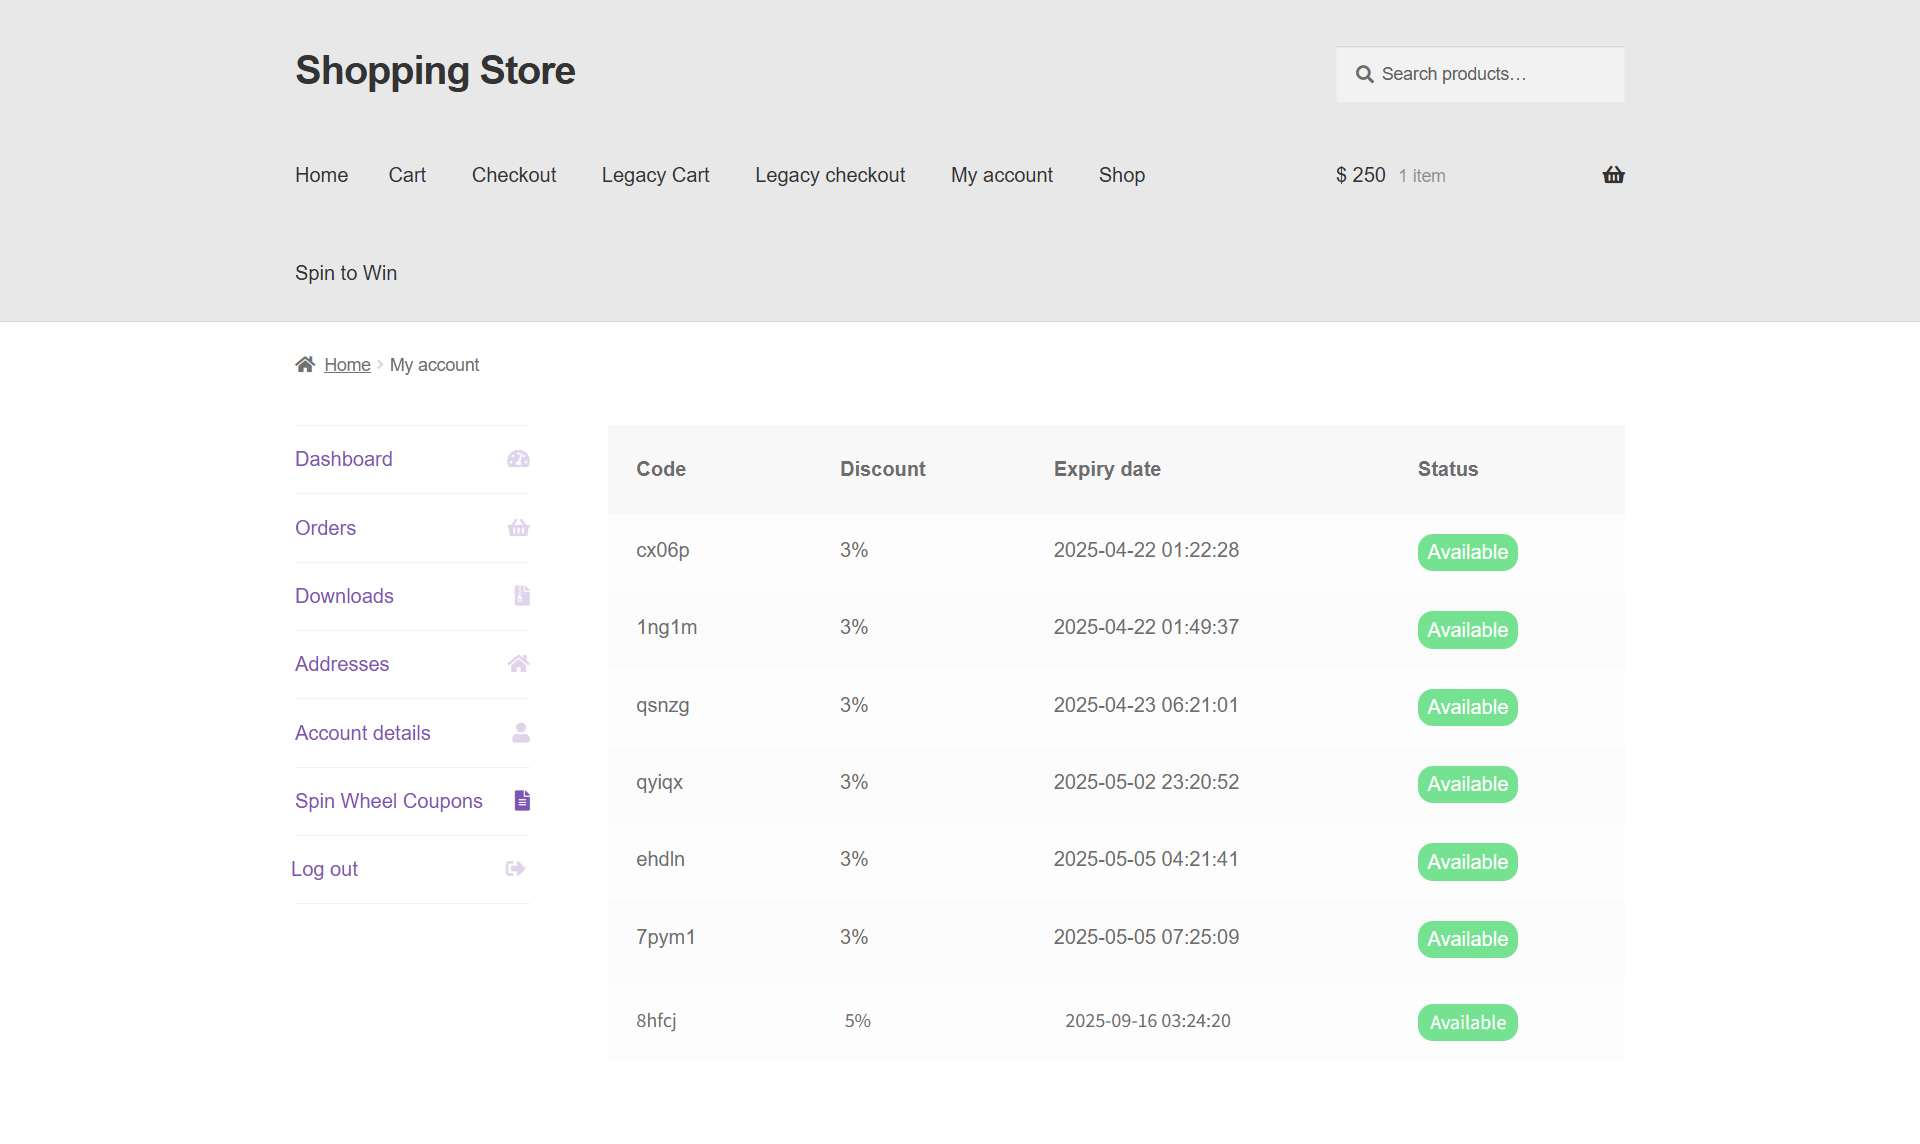
Front End Impact
↑ Back to top- Log in to your account.
- Go to the My Account page. Click on the Spin Wheel Coupons tab. The coupon list will appear.
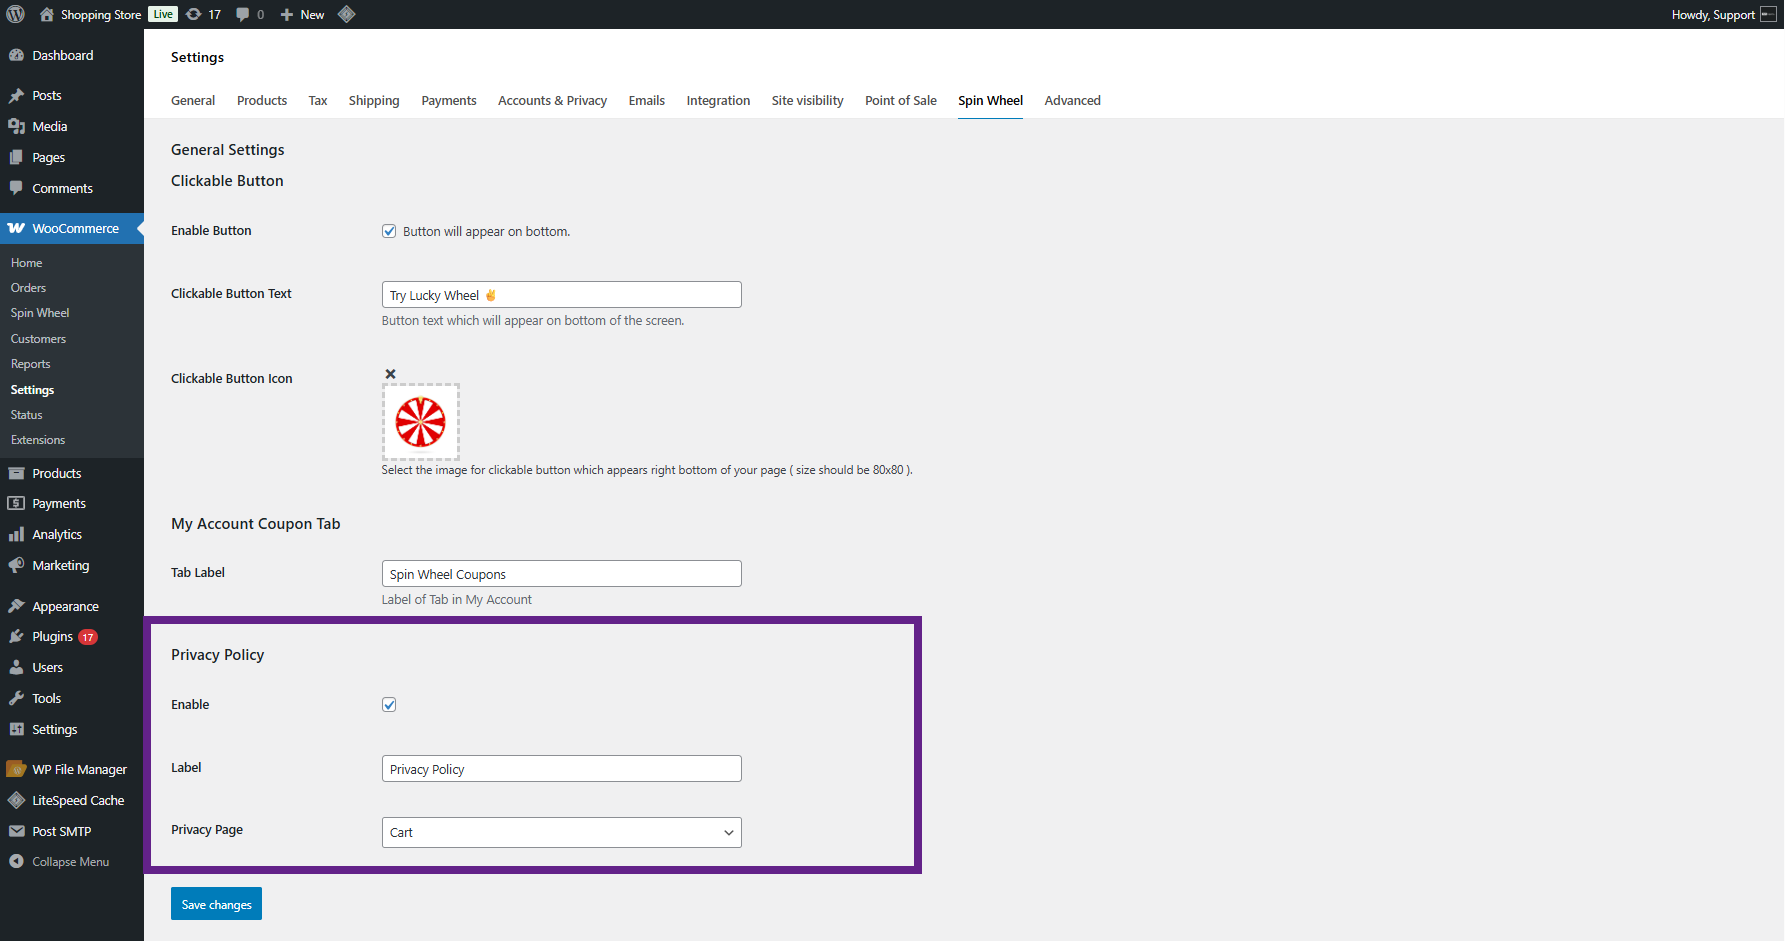
Privacy Policy
↑ Back to top- Enable: Enable/Disable Privacy Policy agreement checkbox (enabled by default).
- Label: Customize the label for the Privacy Policy agreement.
- Privacy Page: Select the desired Privacy Policy page from a dropdown.
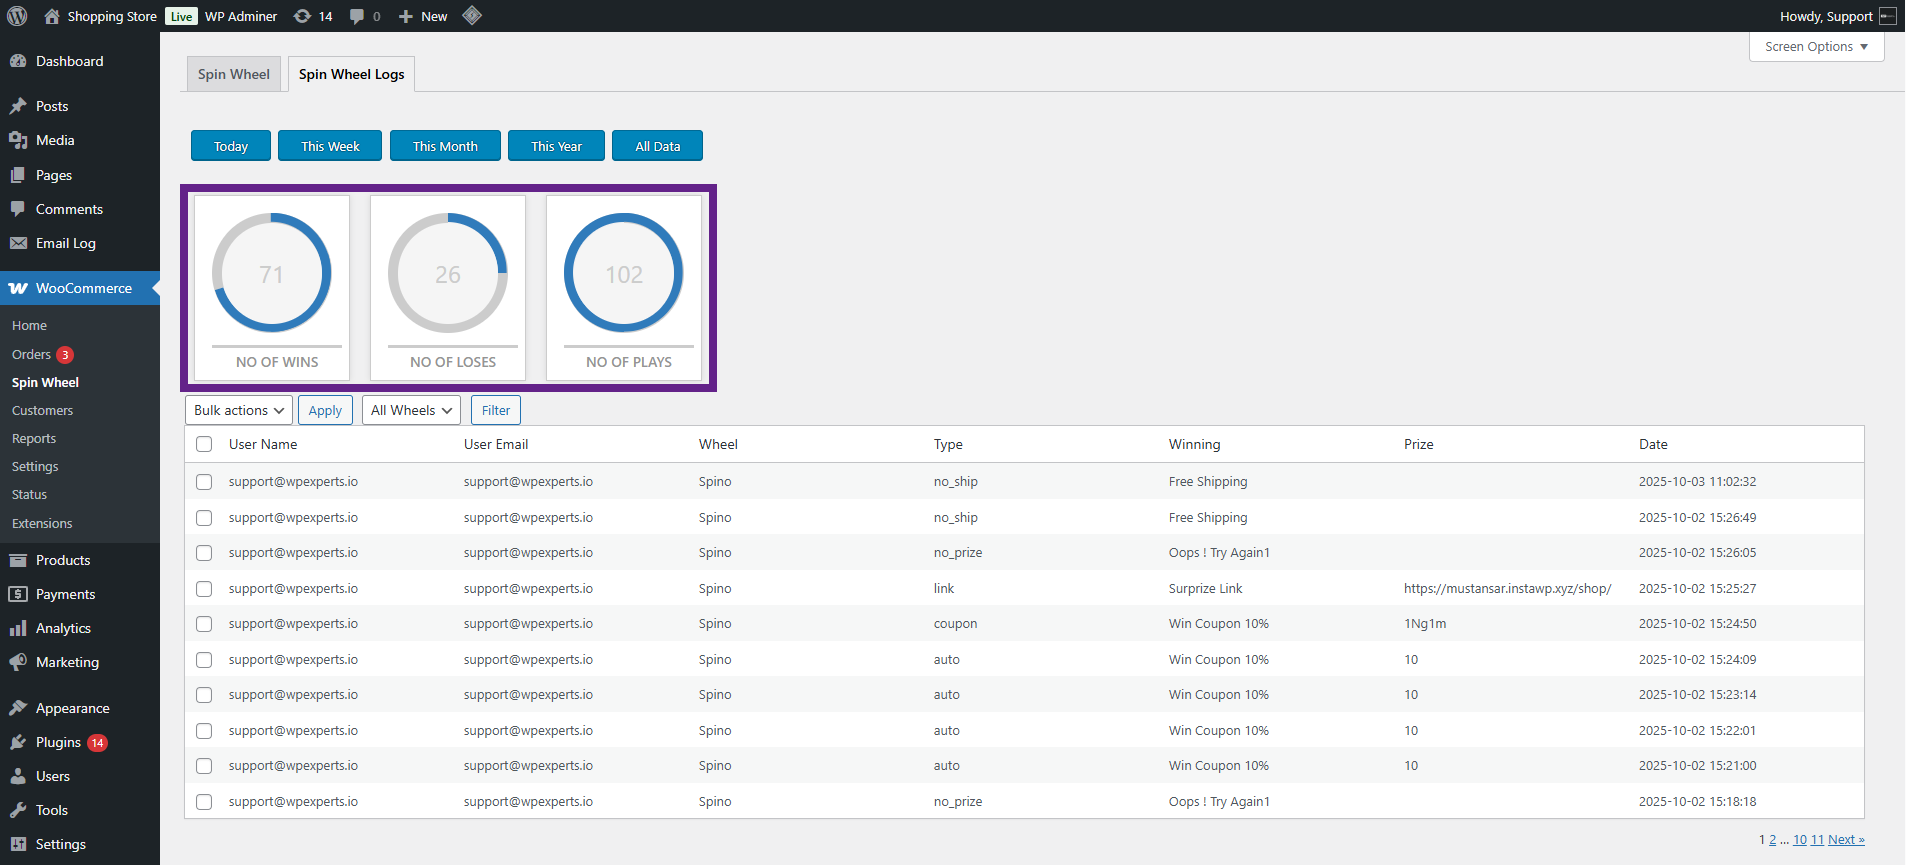
Spin Wheel Logs
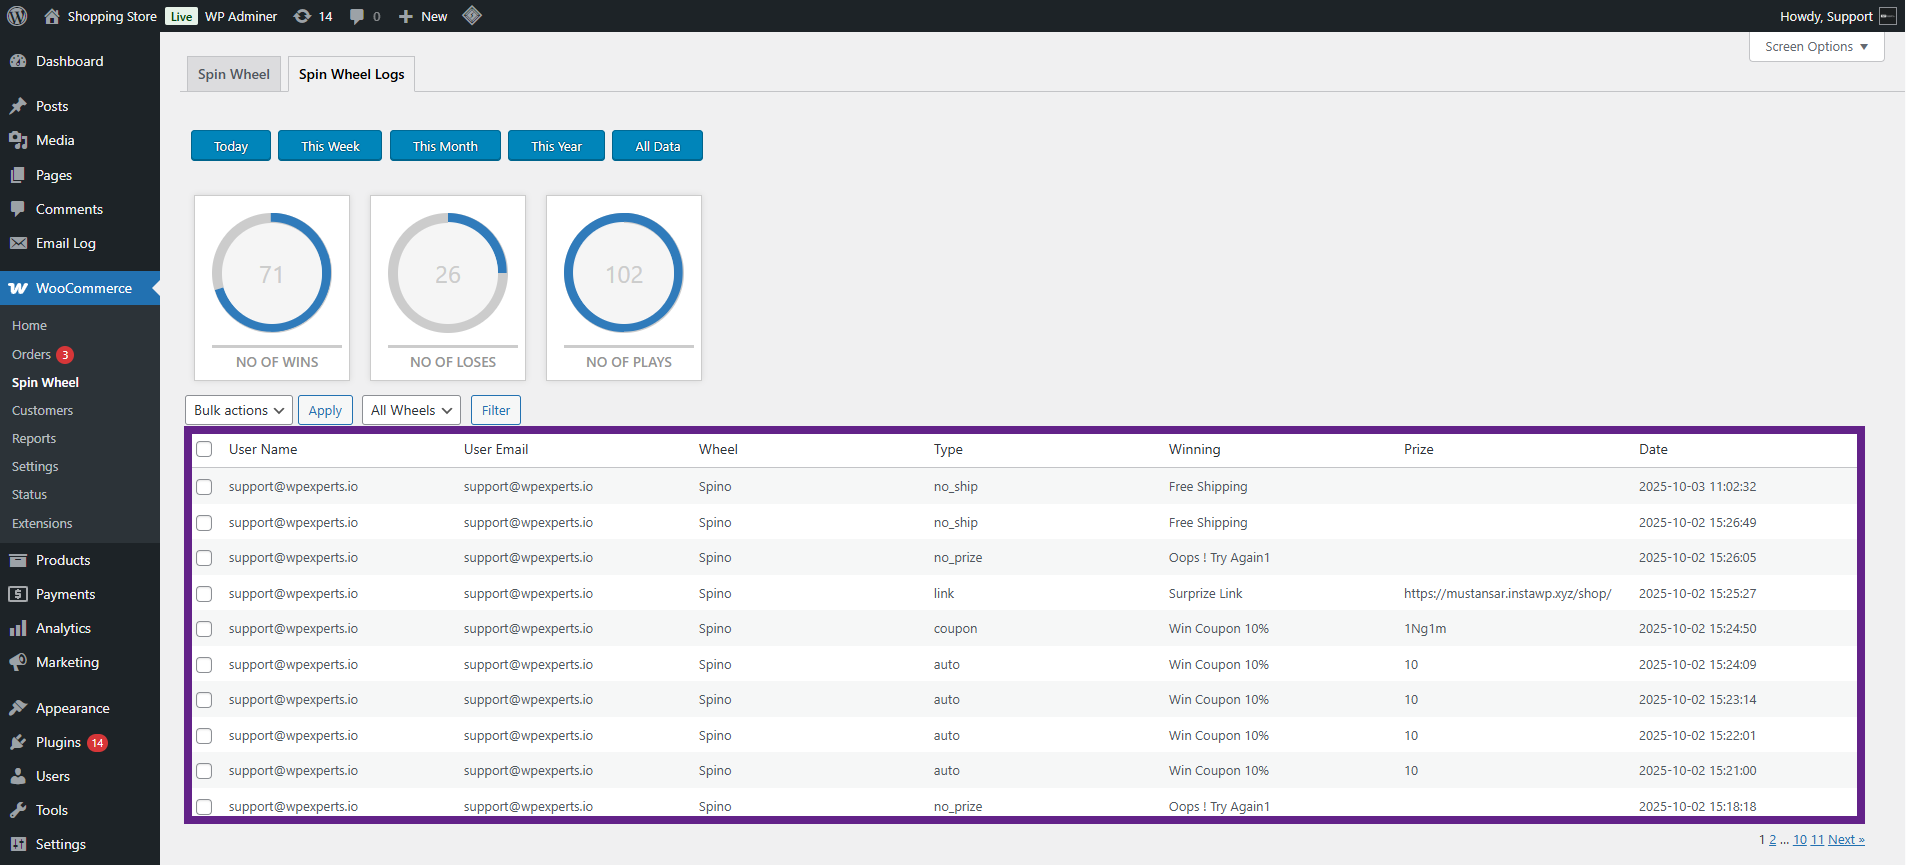
↑ Back to top- To view logs and statistics for Spin Wheels, the admin should navigate to WordPress Admin Dashboard > Spin Wheel > Spin Wheel Logs.
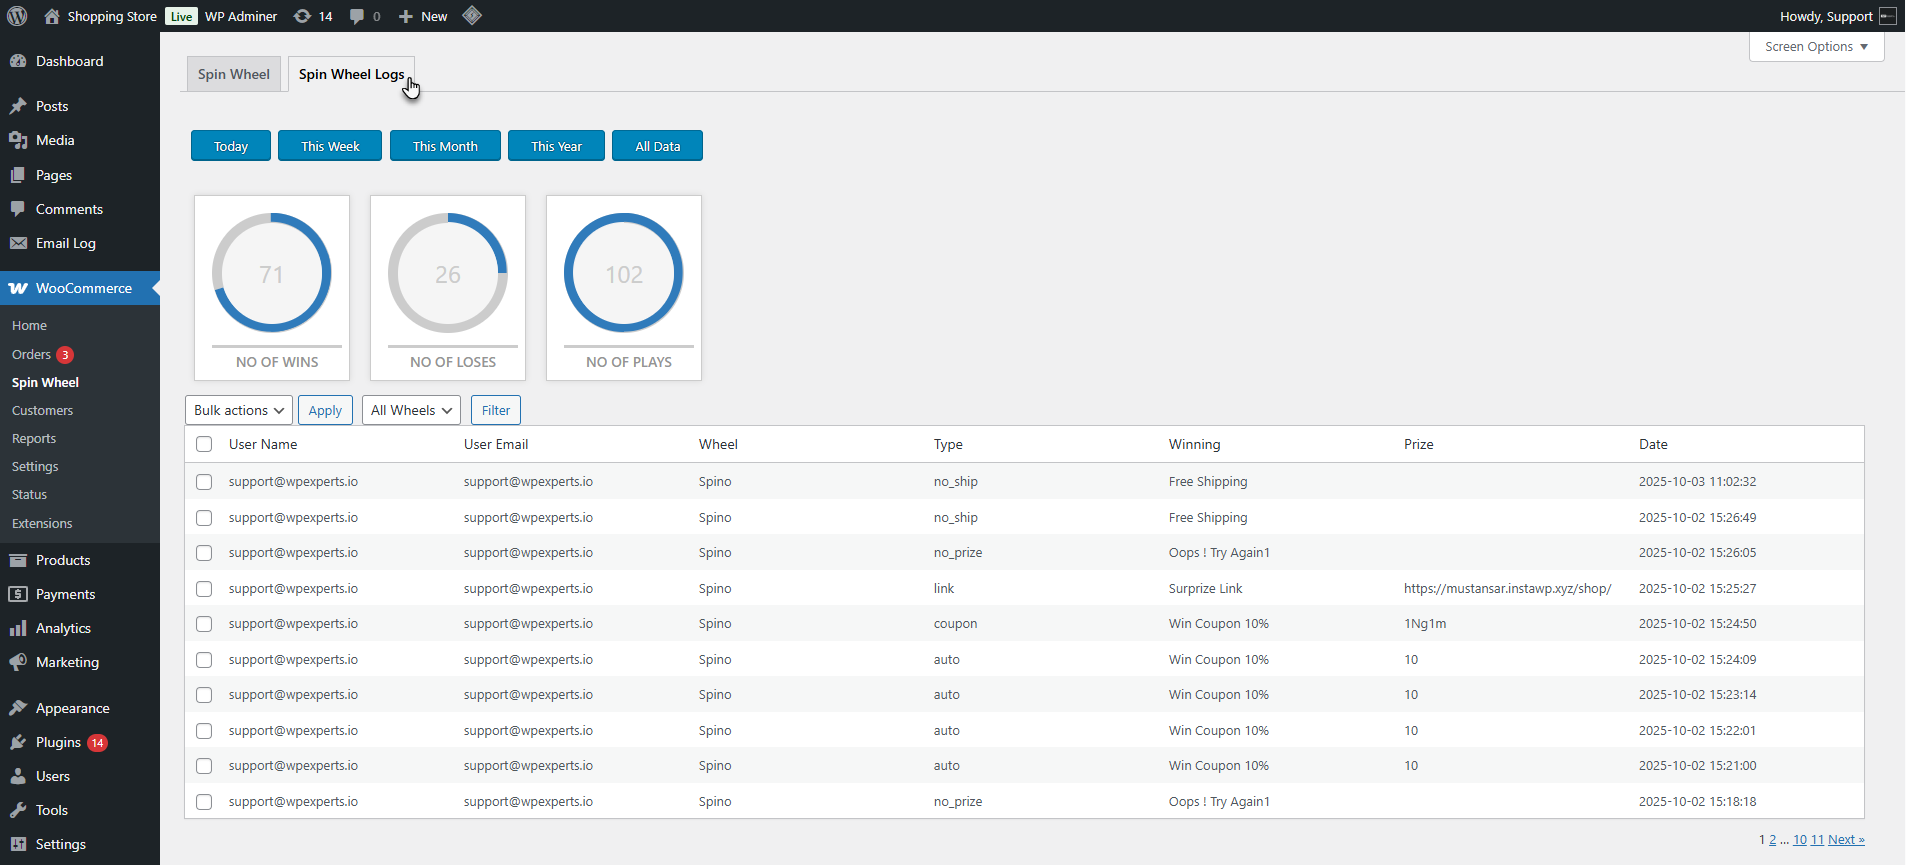
Spin Wheel Statistics
↑ Back to top- A section below the log table will show key metrics:
- Number of Wins
- Number of Losses
- Number of Plays
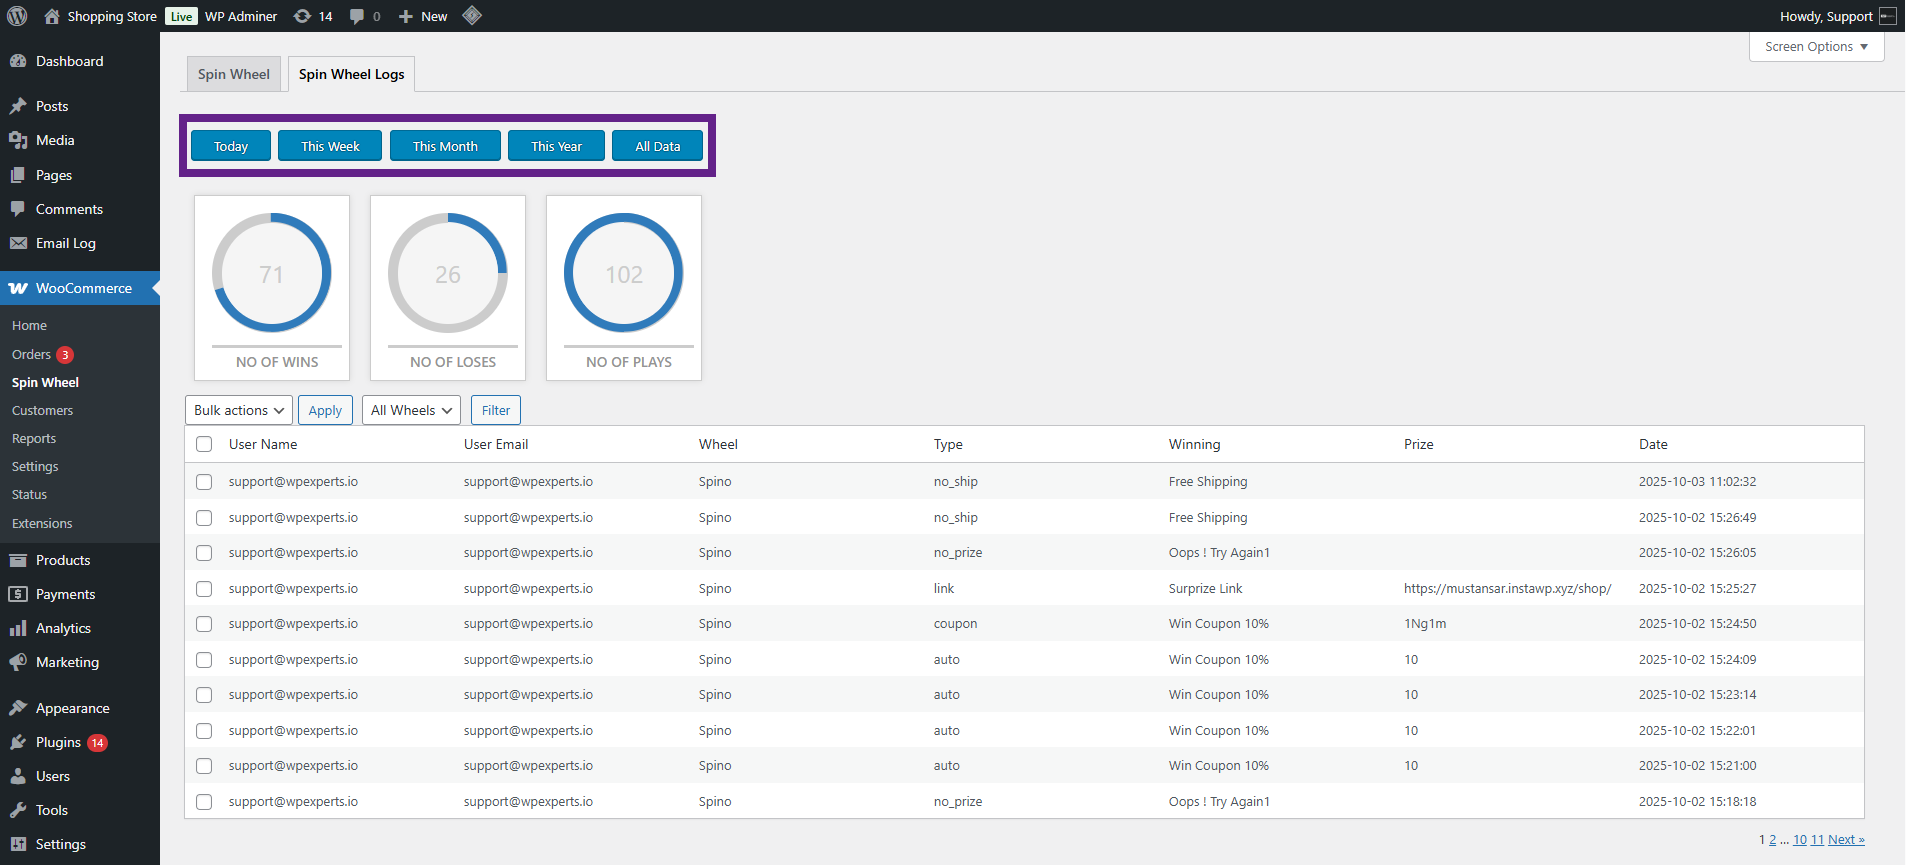
- Filtering Options:
- Time-based filters are available: Yearly, Monthly, Weekly, or Daily views.
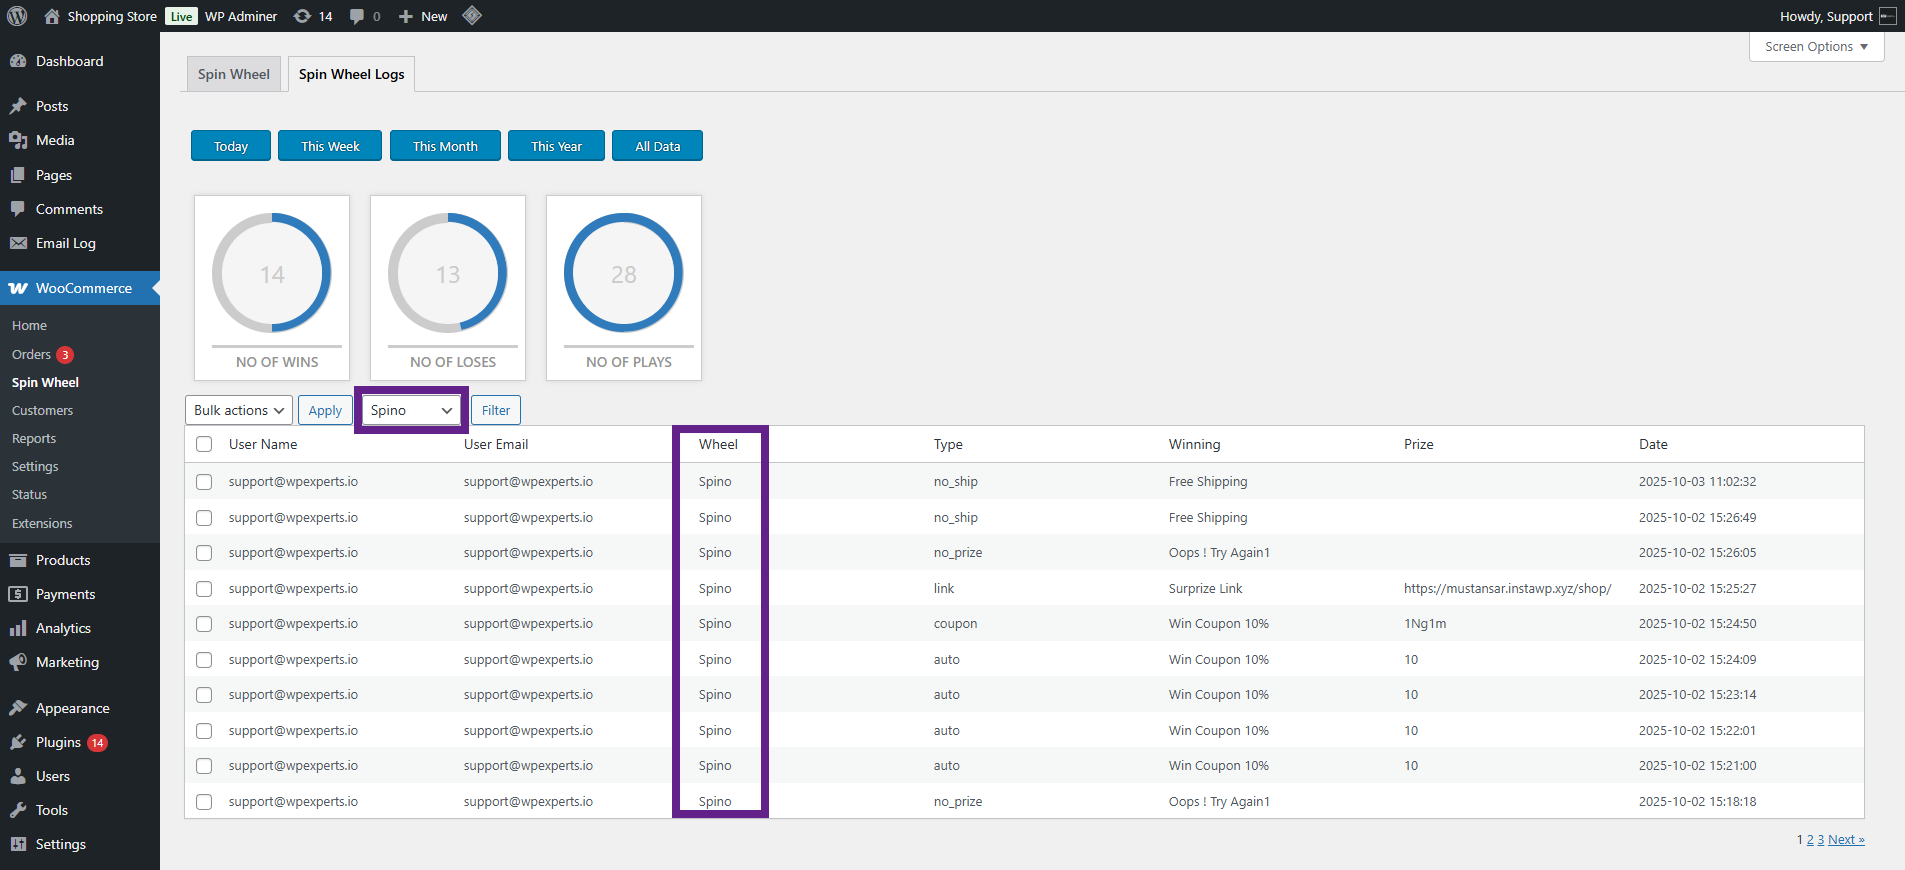
- The admin can filter statistics by using a specific wheel.
- Both filters can work simultaneously and will provide data according to the filters set. Firstly, select the time filter and then select the Wheel.
Spin Wheel Logs Table
↑ Back to top- A log table will be displayed containing the following columns:
- Username
- User Email
- Wheel
- Type
- Winning(Label)
- Prize
- Date & Time
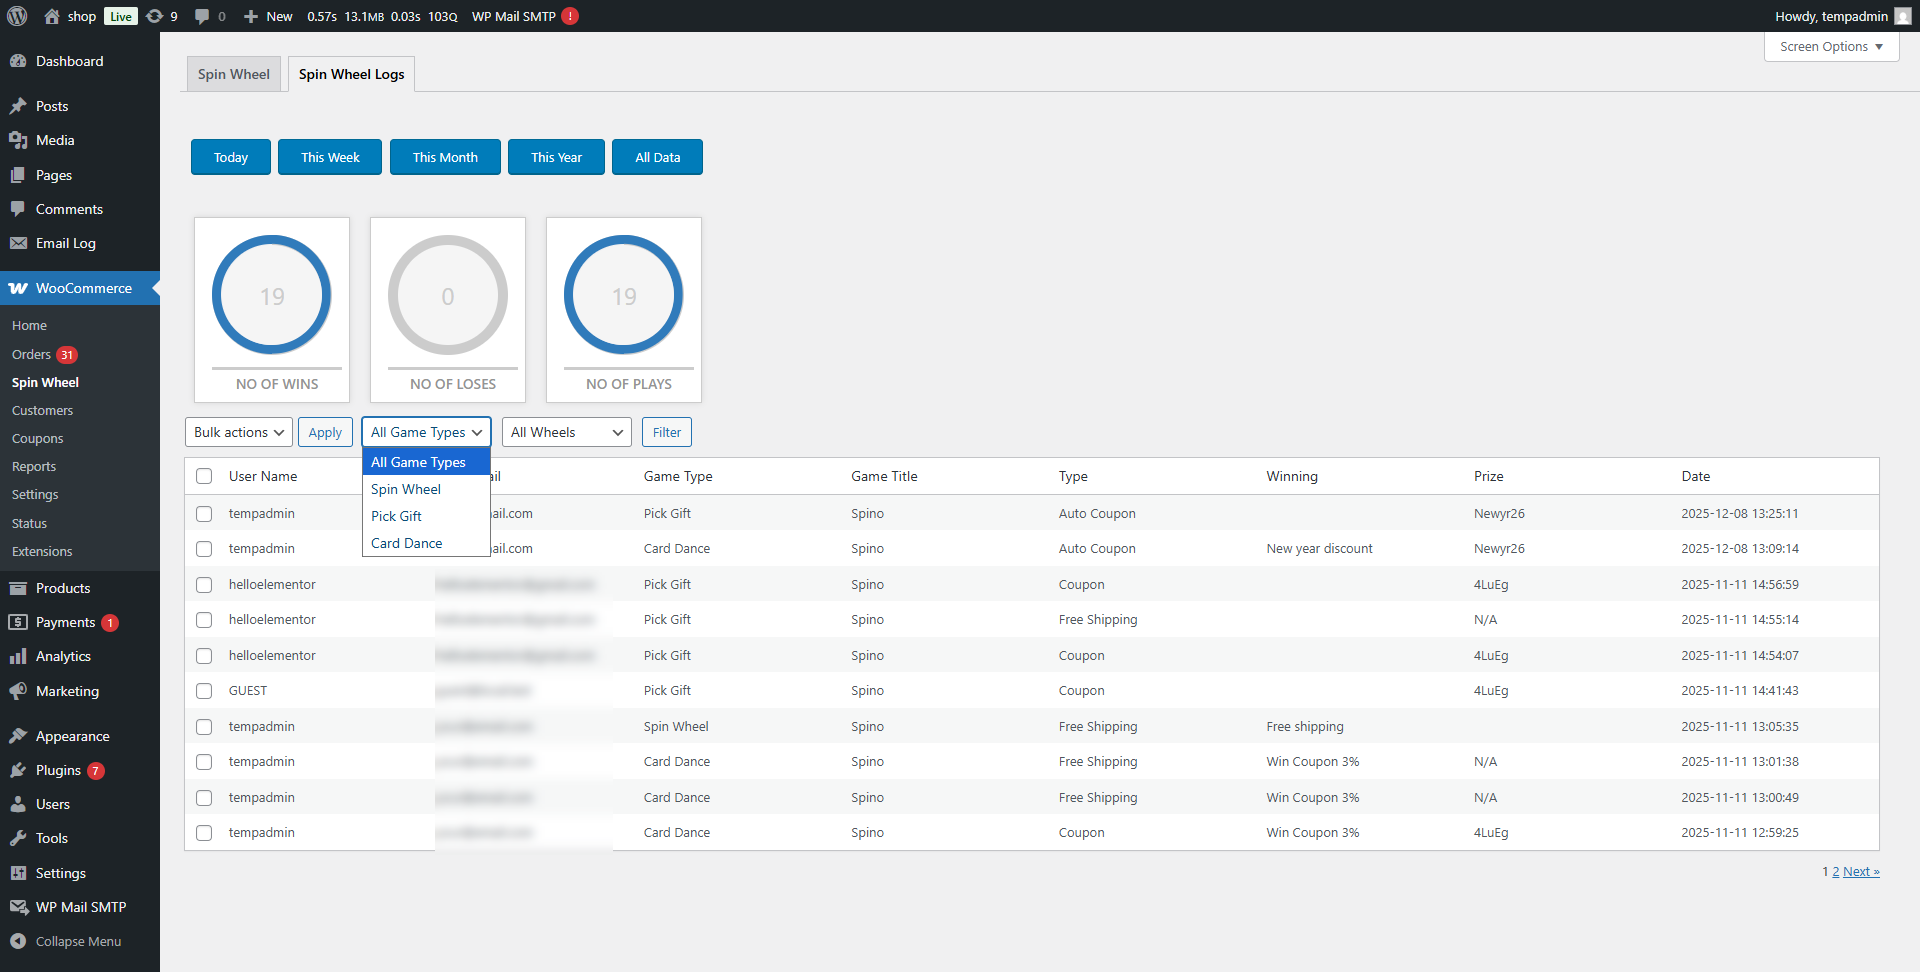
Filters
↑ Back to top- Two filters will be displayed above the logs table:
- Game Type
- Game Title
Game Type
↑ Back to top- A dropdown containing:
- All (default)
- Spin Wheel
- Card Dance
- Pick a Gift
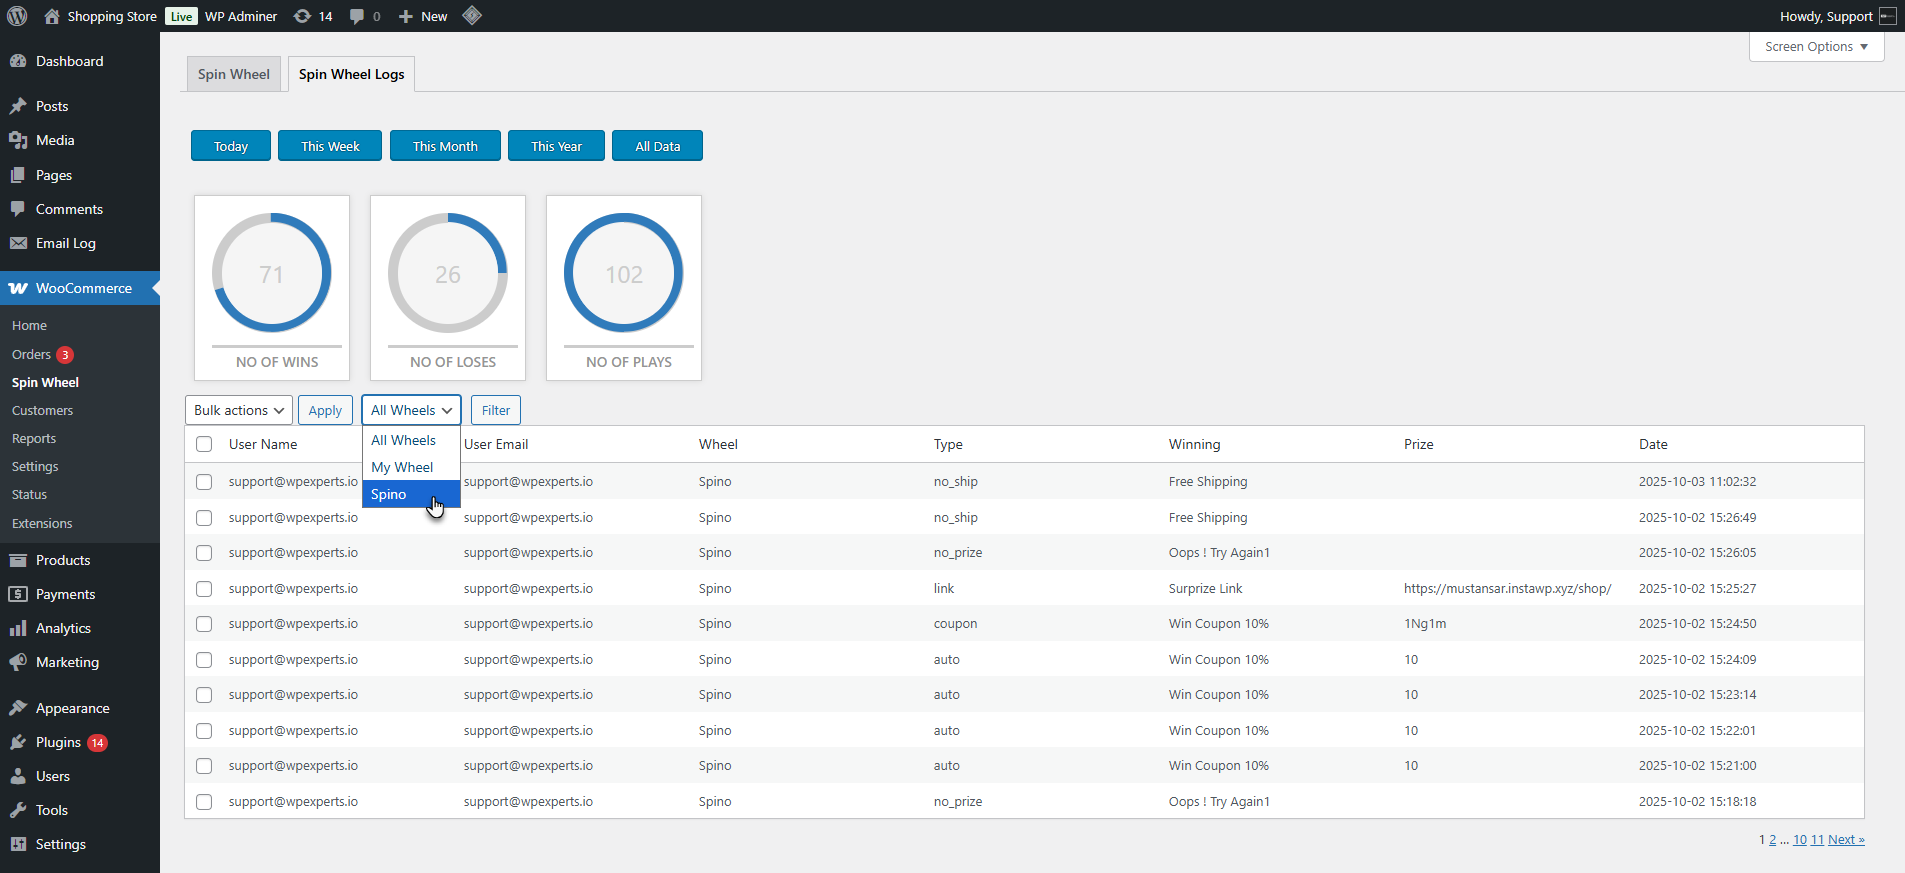
Game Title Filter
↑ Back to top- The Game Title dropdown defaults to All Wheels whenever the page loads.

When clicked, it displays all game titles available under the Game Type.
- For example, if Spin Wheel is selected, titles such as New Customers, New Year Spin, Spino, etc., will appear.
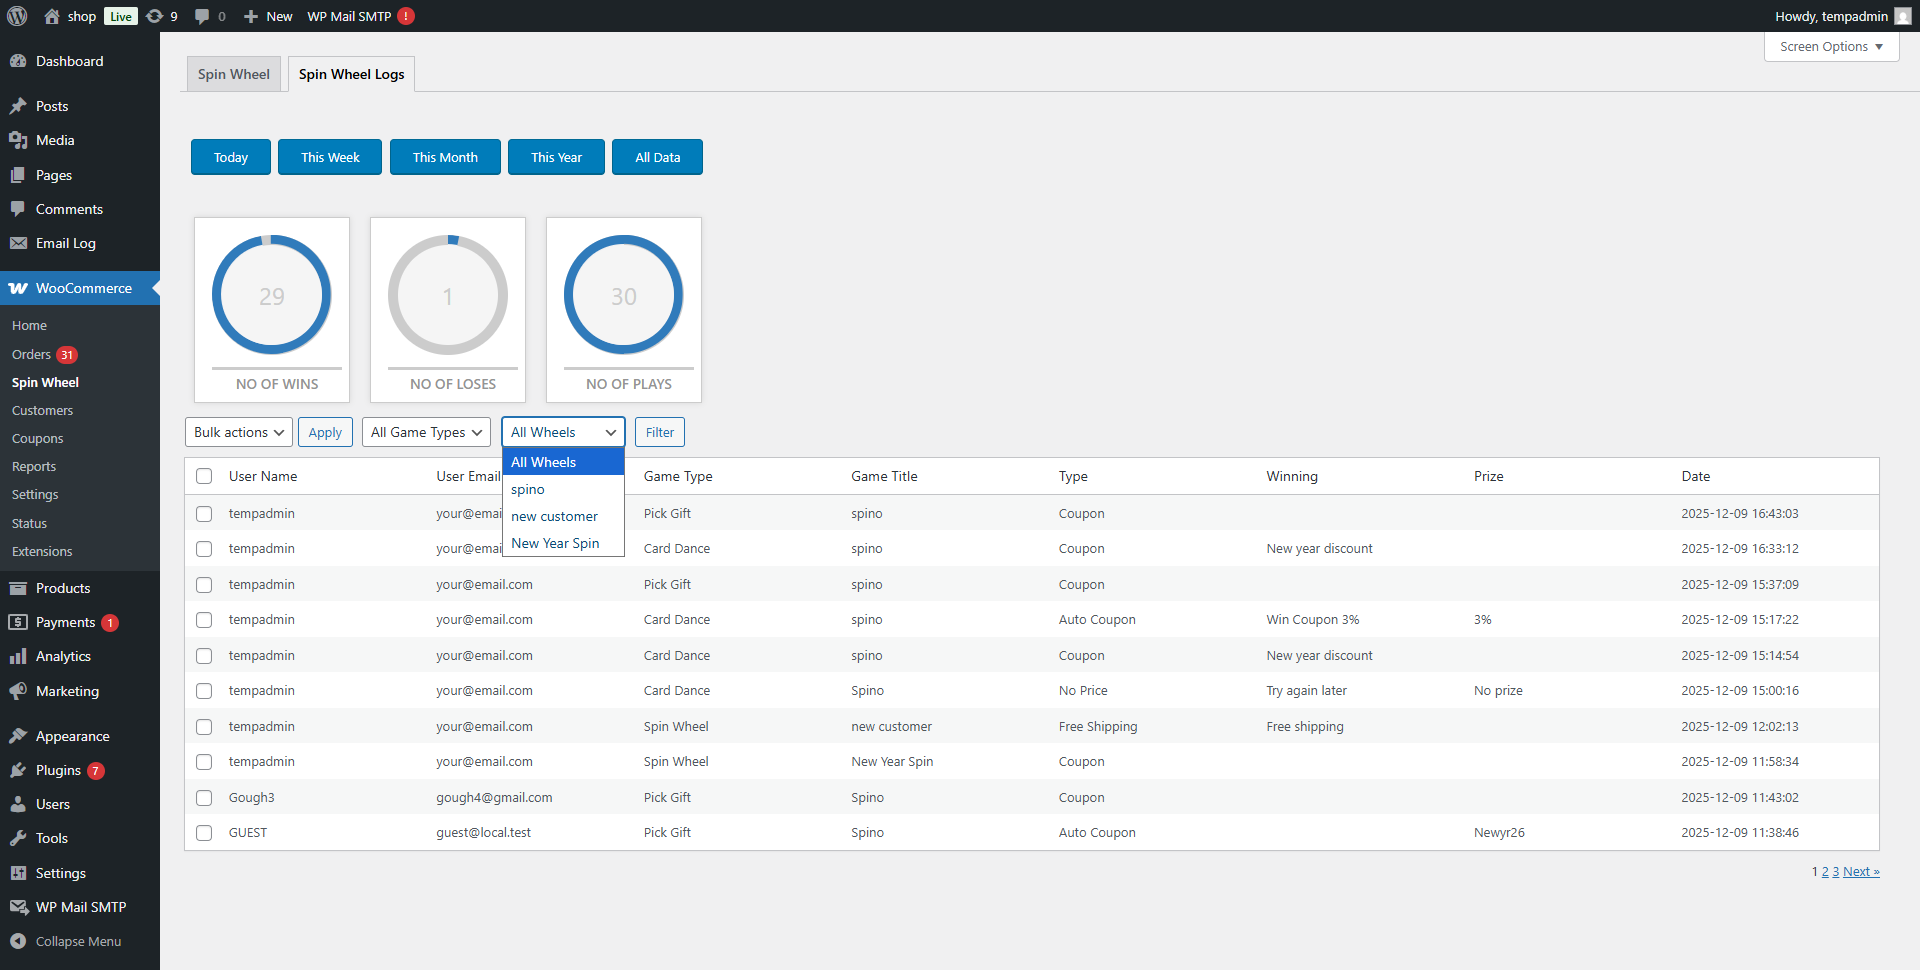
- The Game Type and Game Title filters work together, allowing admins to refine the results.
- The logs section will automatically refresh and display entries based on the active filter selections.