
Extend – Product Page Customizer is a WooCommerce plugin that lets you level up your product pages with conversion-focused features that simply help you sell more.
Installation
↑ Back to topTo start using a product from WooCommerce.com, you can use the “Add to store” functionality on the order confirmation page or the My subscriptions section in your account.
- Navigate to My subscriptions.
- Find the Add to store button next to the product you’re planning to install.
- Follow the instructions on the screen, and the product will be automatically added to your store.
Alternative options and more information at:
Managing WooCommerce.com subscriptions.

Plugin Settings Overview
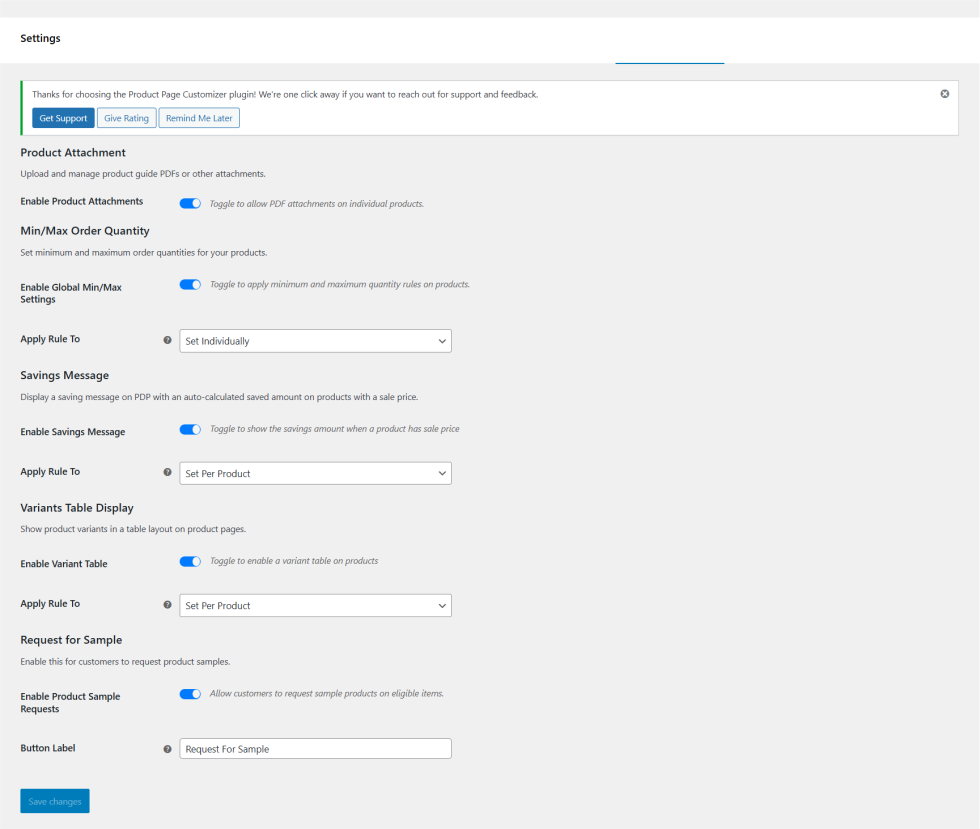
↑ Back to topWhen you open the plugin’s settings page, you’ll find several configurable options as described below:
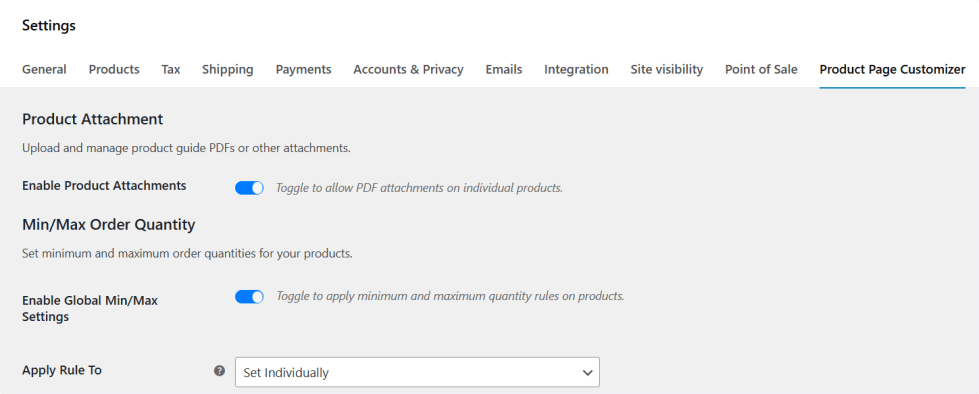
1. Product Attachment
↑ Back to topManage PDF attachments for your product display pages (PDP).
- Enable Product Attachments
Toggle this option to allow PDF attachments on individual products.
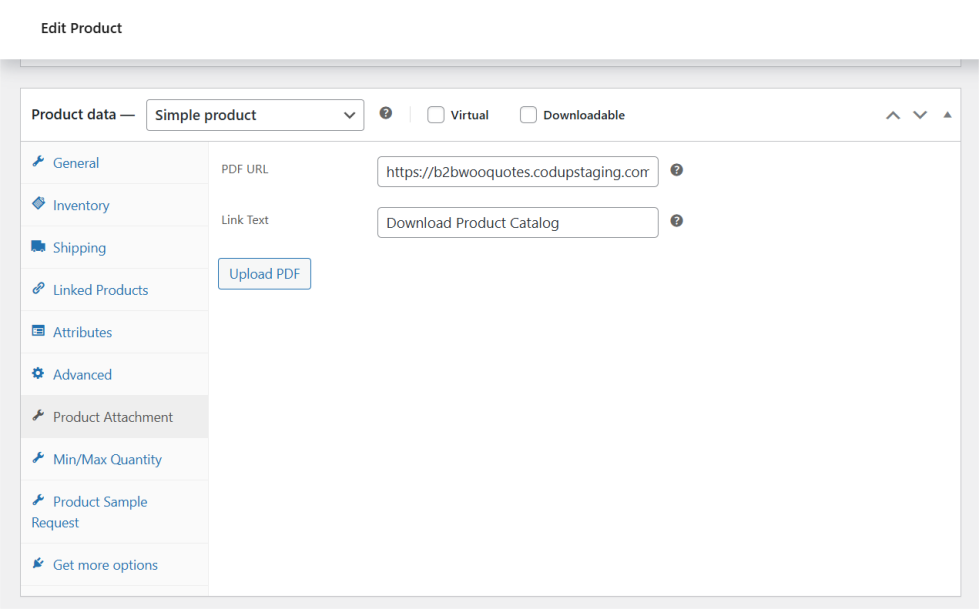
- How to Add Attachments to Products
- After enabling, go to Products > Edit Product in your WordPress dashboard.
- Under the Product Data section, select Product Attachment.
- Upload the PDF file. The PDF URL will automatically populate in the PDF URL field.
- Enter the text you want displayed on the product attachment button on the PDP.
2. Min/Max Order Quantity
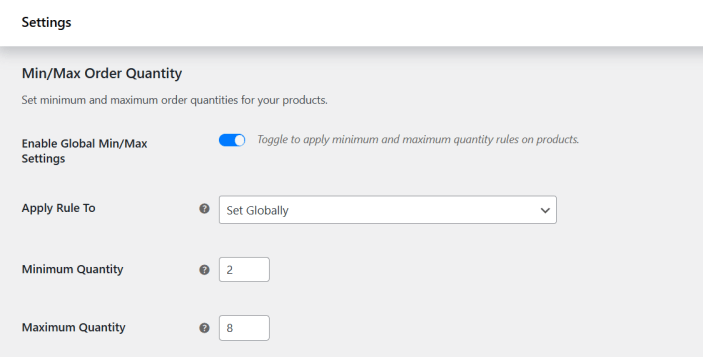
↑ Back to topSet minimum and maximum order quantities globally or per individual product.
- Global Settings
Enable the Enable Global Min/Max Settings toggle to set min/max quantities for products. - Apply Rule To : Either apply the MOQ globally or for individual products.
- For Individual Products:
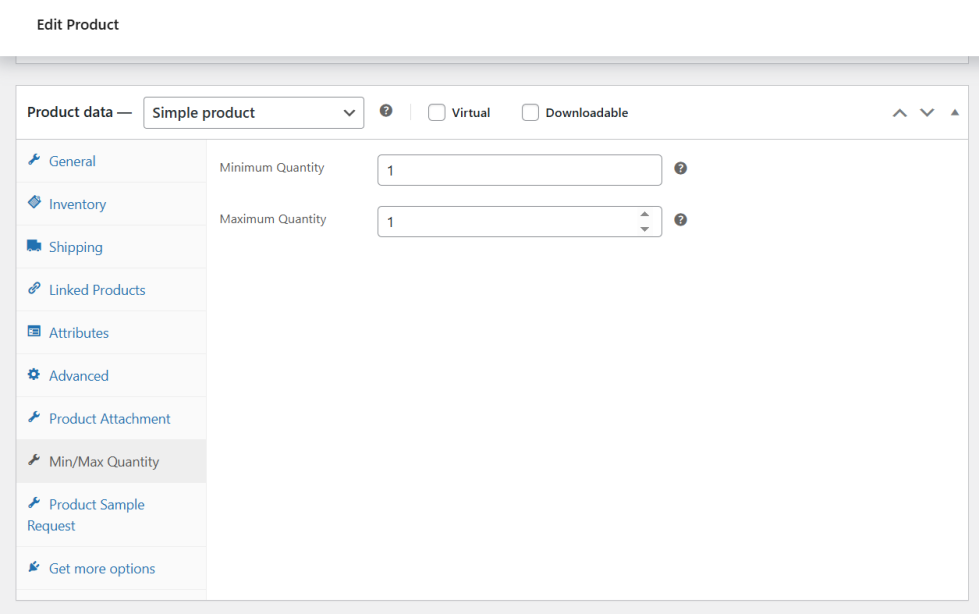
- Navigate to Products > Edit Product.
- In the Product Data section, select Min/Max Quantity.
- Specify the minimum and maximum quantities for that product.
- These per-product settings override global settings if both are set.
Note:
You can leave global min/max fields blank and still specify quantities individually on product pages.
3. Savings Message
↑ Back to topDisplay a savings message on product pages showing the calculated savings on sale items.
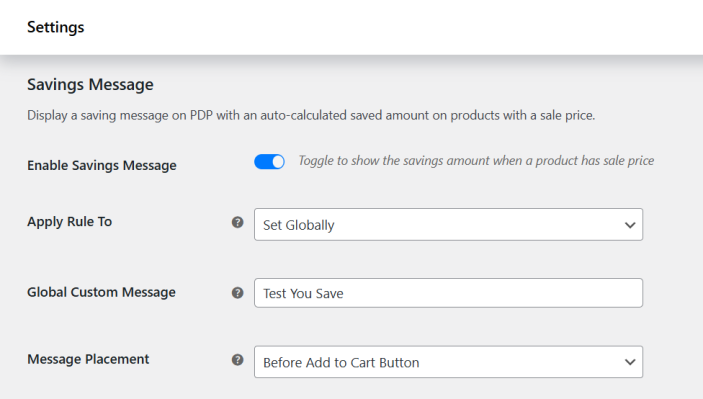
- Global Settings:
- Global Custom Message: Enter the text to display on all products with a sale price.
- Message Placement: Choose where the message appears on the PDP — either above or below the Add to Cart button.
- Per Product Settings:
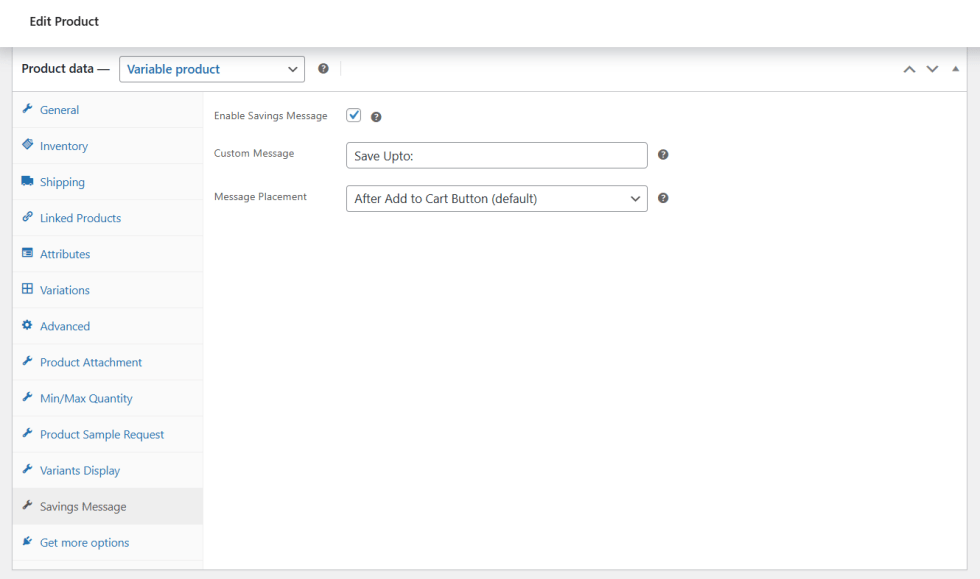
- Go to Products > Edit Product.
- Under Product Data, select Savings Message.
- Options include:
- Enable Savings Message
- Custom Message (override global message)
- Message Placement (above or below Add to Cart)
4. Variants Table Display
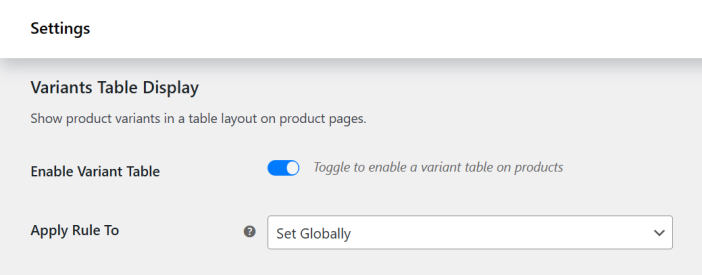
↑ Back to topShow product variants in a table layout on product pages.
- Enable Variant Table: Toggle this to display variant tables globally or per product.
- Set Per Product:
- Go to Products > Edit Product.
- Under Product Data, select Variants Display.
- Enable the variant table display for that product.
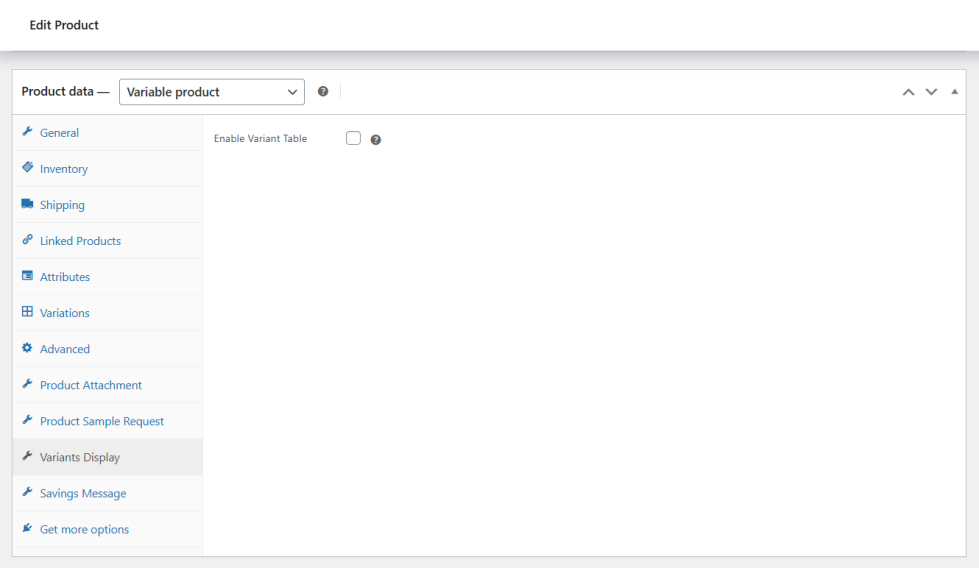
Note: if you want to disable this feature on any individual product you can disable it from the Products > Edit Product > Variants Display and disable this
5. Request for Sample
↑ Back to topAllow customers to request product samples on eligible products.
- Enable Product Sample Requests:
Toggle to enable the sample request feature. - Button Label:
Set the label text for the sample request button shown on the product page.
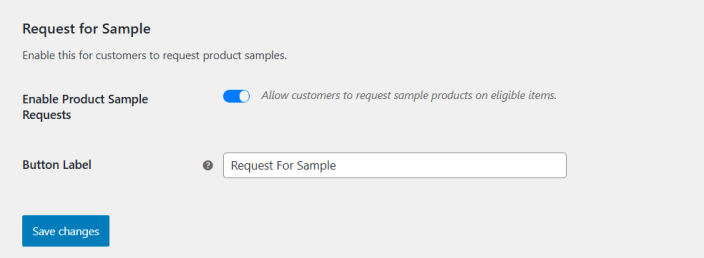
Note: if you want to disable this feature on any individual product you can disable it from the Products > Edit Product > Request for Sample and disable this

