Recently Viewed Products for WooCommerce displays the products recently viewed by Members and Guests on a separate page.
Installation
↑ Back to top- Download the .zip file from your WooCommerce account.
- Go to: WordPress Admin > Plugins > Add New and Upload Plugin with the file you downloaded with Choose File.
- Install Now and Activate the extension.
Setup and Configuration
↑ Back to topGeneral
↑ Back to topGeneral Settings
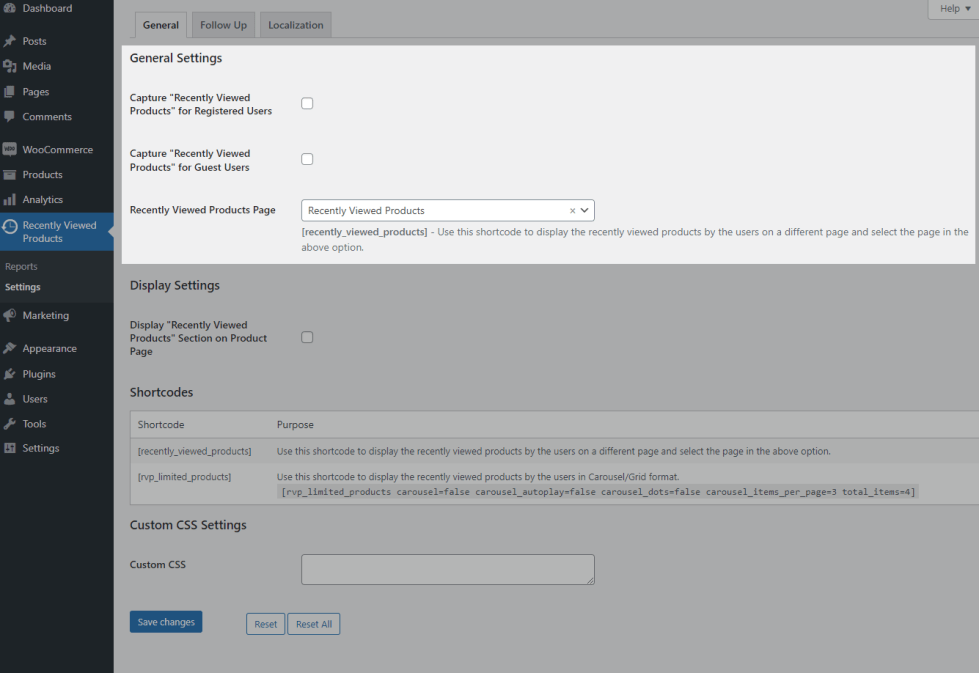
- To capture and display Recently Viewed Products for Logged-in Users, enable the “Capture Recently Viewed Products for Registered Users” checkbox.
- By default, captured products will be displayed for 1 Month to registered users. You can change the value using the Set the Duration to Display Captured Products for Registered Users option.
- The Recently Viewed Products will be displayed.
- To capture and display Recently Viewed Products for Guest Users, enable the “Capture Recently Viewed Products for Guest Users” checkbox.
- If a user views the same product multiple times, then the visit count will be updated every 12 hours. You can change the value using this option[Update Visit Count After].
Example: If you viewed Product A, then the visit count will be updated to 1. If you viewed the same product again within 1 hour, then the count will not be updated to 2. It will be updated only after 12 hours if you view the same product again.
- When the plugin is activated for the first time, a Recently Viewed Products page will be created automatically by the plugin and the page will be assigned in the “Recently Viewed Products Page” option. You can change the Recently Viewed Products on any page as per your preference. To display the Recently Viewed Products on a different page, place the “[recently_viewed_products]” shortcode on the page you want to display the Recently Viewed Products and select the page in the “Recently Viewed Products Page” option.
Display Settings
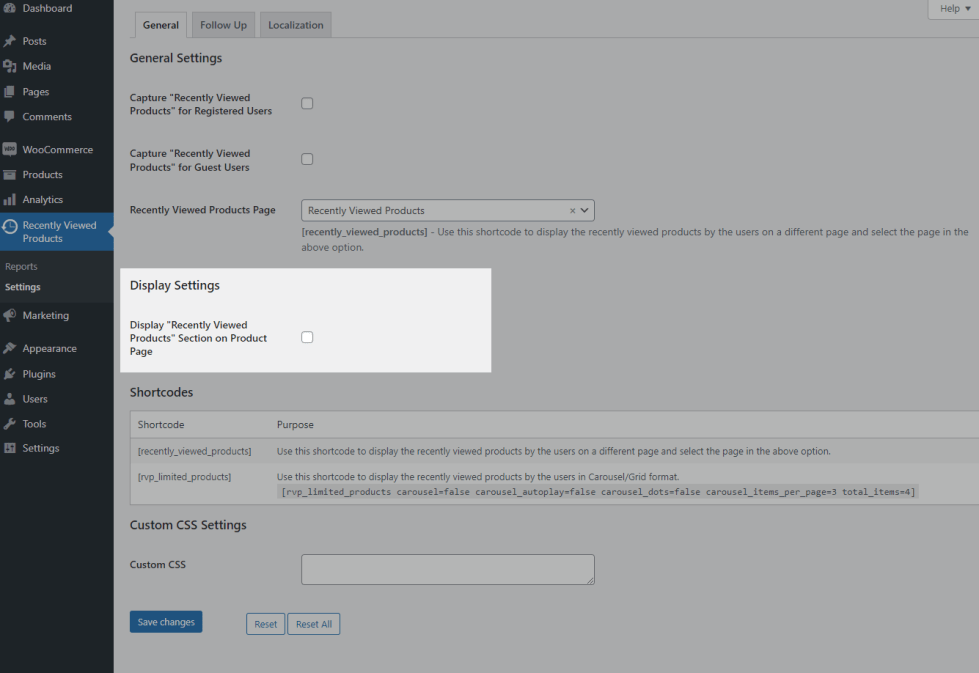
- If you want to display the Recently Viewed Products on the Single Product Page, enable the “Display “Recently Viewed Products” Section on Product Page” checkbox.
- You can display the Recently Viewed Products in a Grid/Carousel using Display Type option.. This can be customized in the “Display Type” option.
- If you chosen Carousel type, you can make use of these options[Carousel Autoplay, Carousel Dot Indicator, No of Products to display during Navigation] based on your needs.
Shortcodes
↑ Back to top
- [recently_viewed_products] – Use this shortcode to display the recently viewed products by the users on a different page.
- [rvp_limited_products] – Use this shortcode to display the recently viewed products by the users in Carousel/Grid format. [rvp_limited_products carousel=false carousel_autoplay=false carousel_dots=false carousel_items_per_page=3 total_items=4].
Custom CSS Settings
↑ Back to topYou can make use of the Custom CSS settings for styling the Recently Viewed Section based on your needs.
Follow Up
↑ Back to topEmail Settings
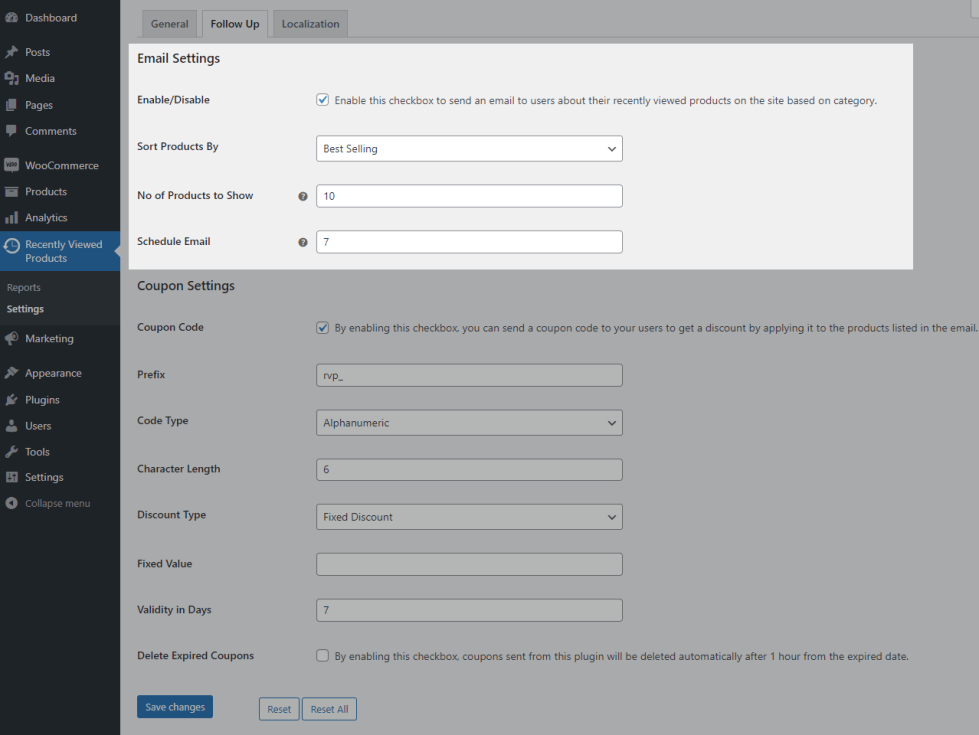
- If you wish to send an email to your users to share the products they viewed recently on your site, then enable[Enable/Disable] the checkbox.
- You can display the products in email based on the following options given in “Sort Products by”
- Best Selling
- Top Rated
- Latest
- Price Low to High
- Price High to Low
- By default, 10 products will be displayed in the email if a user has viewed more products. You can change the value based on your needs in “No of Products to Show” field.
- By default, email will be sent to the users after 7 days of the email status becomes inactive. You can change the value in Schedule Email field.
Coupon Settings
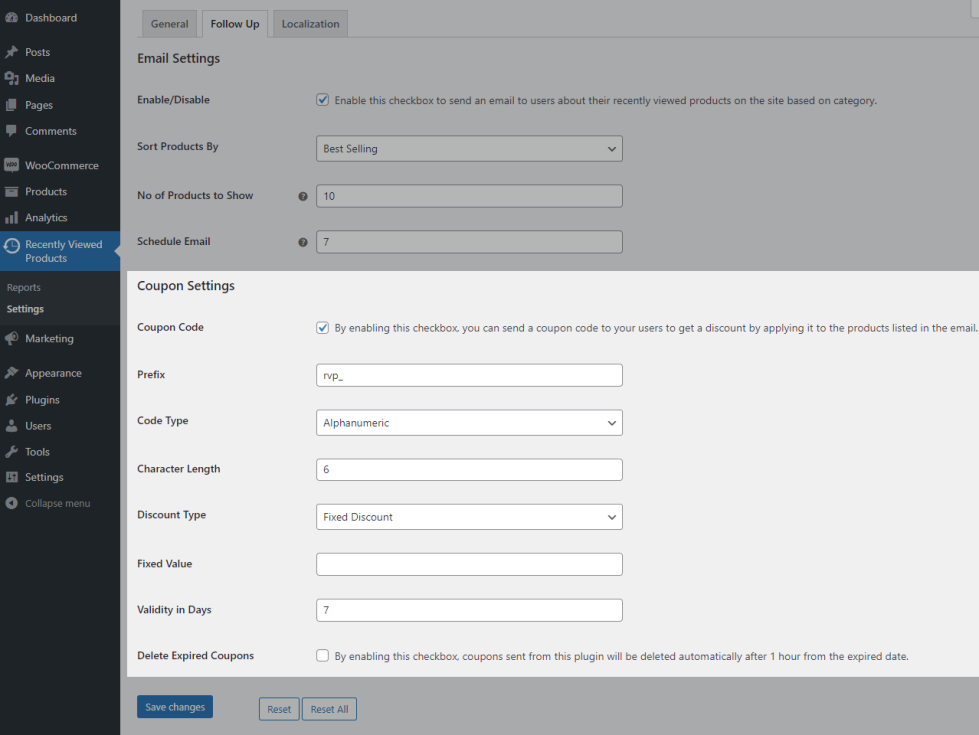
- If you wish to offer a coupon to your users for encouraging them to make a purchase their recently viewed products, then enable Coupon Code checkbox.
- You can customize the follow options based on your needs,
- Prefix
- Code Type
- Character Length
- Discount Type
- Validity in Days
- If you wish to delete the expired coupons automatically, enable “Delete Expired Coupons” checkbox.
Localization
↑ Back to top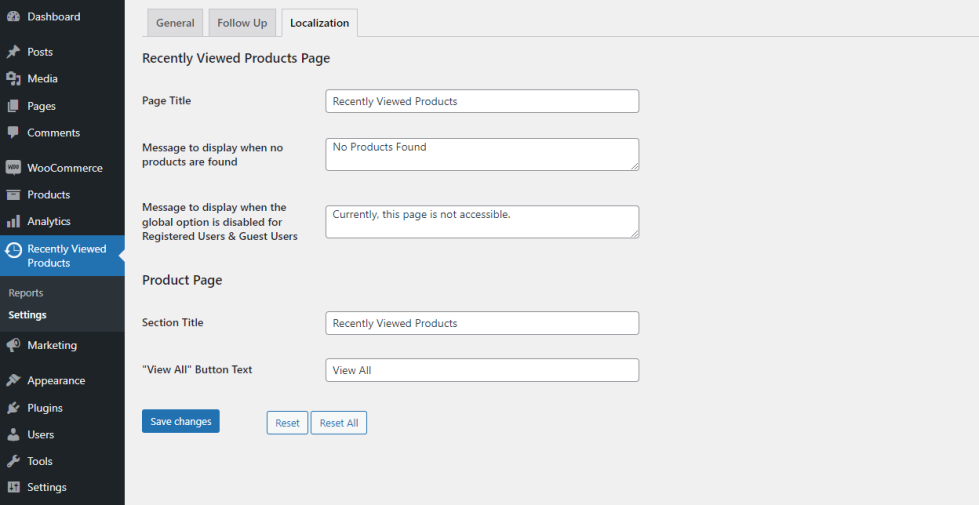
You can customize the messages displayed to the user in this section.
Usage
↑ Back to topRecently Viewed Products for Logged-in Users
↑ Back to top- A Logged-in User visits a Product’s Single Product page.
- During that time, an entry will be created for that product on the “Recently Viewed Products” page.
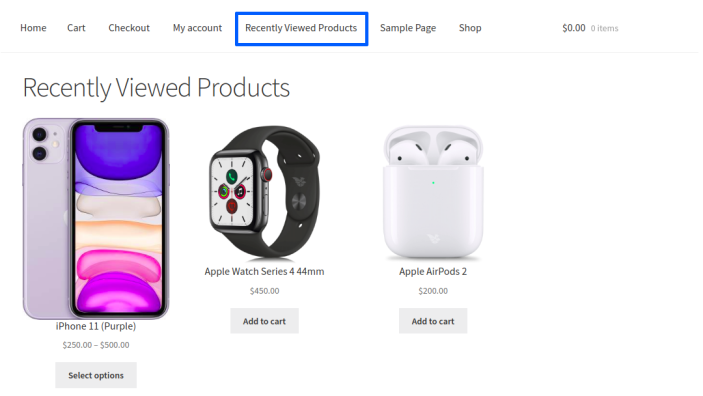
- Similarly, for every product which has been visited, an entry will be created in the Recently Viewed Products Page.
- From this page, users can easily identify the products which they viewed earlier and make their purchase decisions accordingly.
- For Logged-in Users, the duration to display the Recently Viewed Products can be customized.
Recently Viewed Products for Guest Users
↑ Back to top- A Guest User visits a Product’s Single Product page.
- During that time, an entry will be created for that product in the “Recently Viewed Products” page.
- Similarly for every product which has been visited, an entry will be created in the Recently Viewed Products Page.
- From this page, users can easily identify the products which they viewed earlier and make their purchase decisions accordingly.
- For Guest Users, the entries in the Recently Viewed Products will be removed once the Browser/Tab is closed.
Send Follow-up emails
↑ Back to top- You can send follow-up emails to logged-in users about the recently viewed products on the site. You can also optionally send a coupon in the email which can encourage your users to complete the purchase.
- Once you turn on the Follow up feature, you can track the product & user details using Follow Up menu & Email Log menu. You can find these menus under,
- WordPress Dashboard -> Recently Viewed Products -> Follow Up
- WordPress Dashboard -> Recently Viewed Products -> Email Log
Admin Reports
↑ Back to top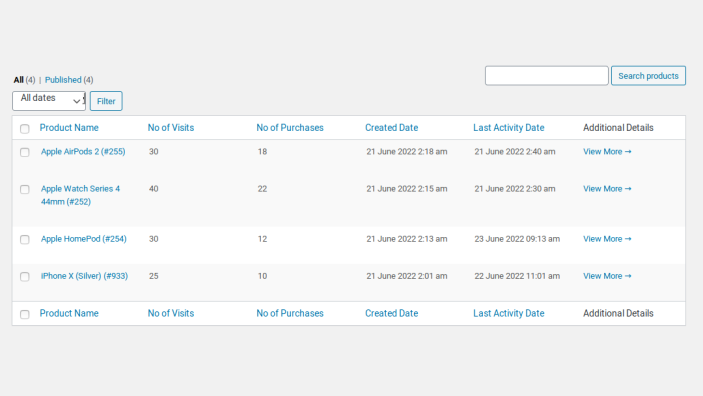
A separate section to capture and display the following info:
- Visit Count for each product
- Purchase Count for products purchased from Recently Viewed Products Page
Translation
↑ Back to topThe Recently Viewed Products for WooCommerce plugin is translation-ready meaning you can edit the po files to translate the text to any language.
The steps to do the translation are as follows. For example, if we were to translate to French:
- Download and install Poedit
- Open the file recently-viewed-products-for-woocommerce > languages > recently-viewed-products-for-woocommerce.pot using Poedit.
- Create a new translation file by clicking Create new translation button.
- Choose the Source text and set its corresponding French text in Translation Text Area.
- Save the changes.
- Save the file name as recently-viewed-products-for-woocommerce-fr_FR.po.
- If you are using WordPress Version 3.9.13 or below, then in wp-config.php define the WPLANG as French. Syntax is define(‘WPLANG’, ‘fr_FR’);
- If you are using WordPress Version 4.0 or above, then go to WordPress dashboard > Settings > General and select the Site Language as French.
