Booking and Appointment simplifies the booking process, offers flexible pricing adjustments, and automates email notifications for a smooth scheduling experience.
Installation
↑ Back to topTo start using a product from WooCommerce.com, you can use the “Add to store” functionality on the order confirmation page or the My subscriptions section in your account.
- Navigate to My subscriptions.
- Find the Add to store button next to the product you’re planning to install.
- Follow the instructions on the screen, and the product will be automatically added to your store.
Alternative options and more information at:
Managing WooCommerce.com subscriptions.

Configuration
↑ Back to topAfter you have installed and activated the Booking and Appointment for WooCommerce extension, you have two types of settings: General and Product Level.
In Product level, change the product data to configure the product or services. You can choose from
- Advance Booking
- Simple Booking
- Appointments
In version 1.0.4, we introduced the new Simple Booking option, allowing you to set up bookings quickly and easily. This feature is available at the Product level. Simply change the product data to Simple Booking and configure the required settings.
General Level Settings
↑ Back to topGo to WooCommerce > Booking & Appointment tab. Here, you have multiple tabs, which are General Settings, Booking Calendar, Services, Email Templates, Global Availability, and Appointment Schedule.
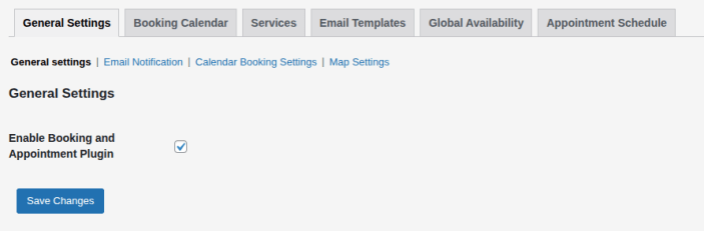
General Settings
↑ Back to top- Enable Booking & Appointment Plugin: Checkbox Option to enable the booking and appointment plugin.
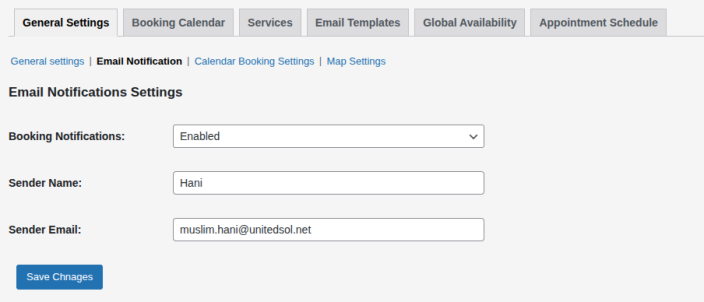
Email Notifications
↑ Back to top- Booking Notifications: You can enable or disable notifications for bookings and appointments.
- Sender Name: The name of the sender can be entered in this section.
- Sender Email: The email of the sender for email notifications can be entered here.
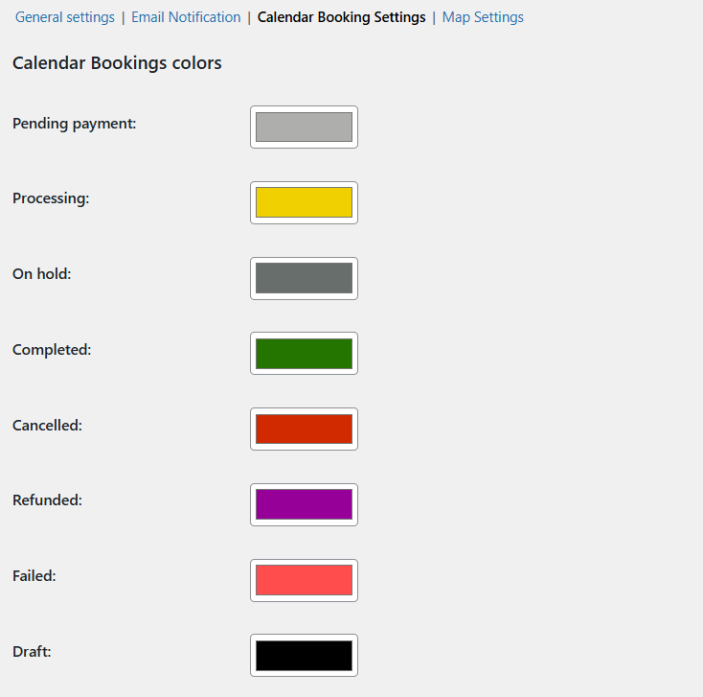
Calendar Booking Settings
↑ Back to topYou can assign unique colors to each booking status in the WooCommerce booking plugin, including Pending Payment, Processing, On Hold, Completed, Cancelled, Refunded, Failed, and Draft.
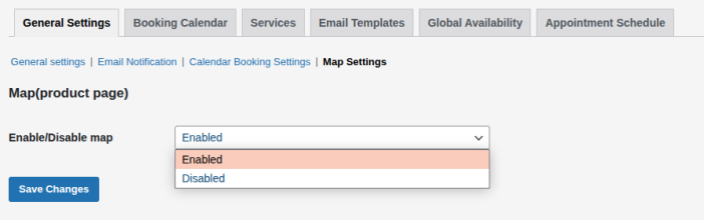
Map Settings
↑ Back to top- Enable/Disable Map: You have the option to enable or disable the map on the product page here.
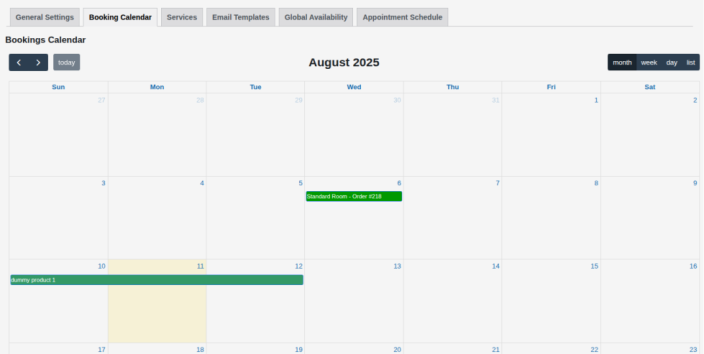
Booking Calendar
↑ Back to topIn the booking calendar section, you can view all bookings with their dates and times, along with which rooms are available or reserved. It helps you manage multiple bookings efficiently and maintain accurate availability.
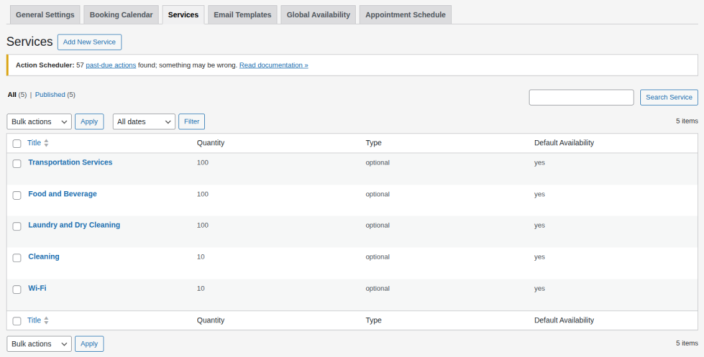
Services
↑ Back to topYou can add or manage the services you will provide with Booking and Appointment. It will be visible at the product level settings. You can choose them to be optional or mandatory.
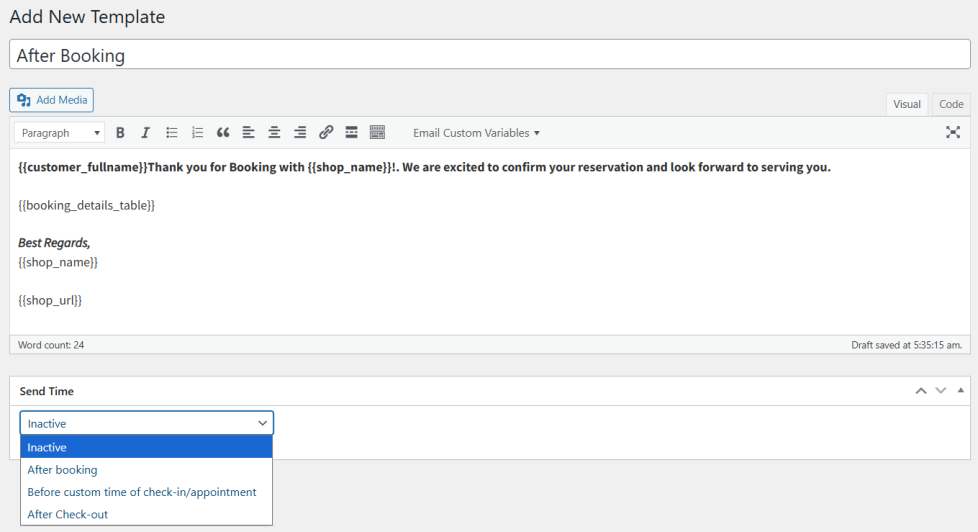
Email Templates
↑ Back to topCreate customized email templates for Booking and Appointment, and automatically send them to your customers. You can add custom variables and schedule when you want the emails to be sent.
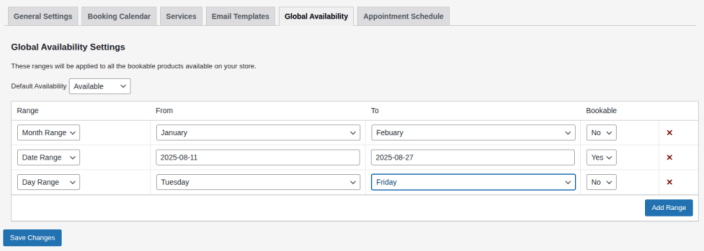
Global Availability
↑ Back to topSet the global availability for products, which will apply to all bookable items across the store. You can add date, day, and month ranges as needed.
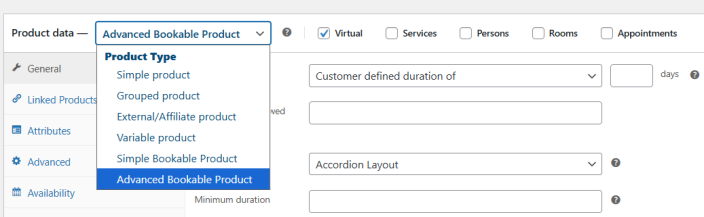
Product Level Settings (Advanced Bookable Product)
↑ Back to topWithin the WordPress admin panel, go to WooCommerce > Products and click on ‘Add New’ or edit an existing product. Change the product data to an Advanced Bookable product.
Next, go to the General tab inside the Product Data section. Here, you can set the fixed and customer defined duration of the booking. For selecting the “fixed” option, you can set the number of days.
Set the maximum number of bookings allowed per day. If you want to charge per head, check the “count persons” box.
Check or uncheck the box if booking requires confirmation. You can also allow customers to cancel their booking by checking the box.
You can set the location of the product and display it on the frontend. You can insert the defined location so customers can easily locate the destination.
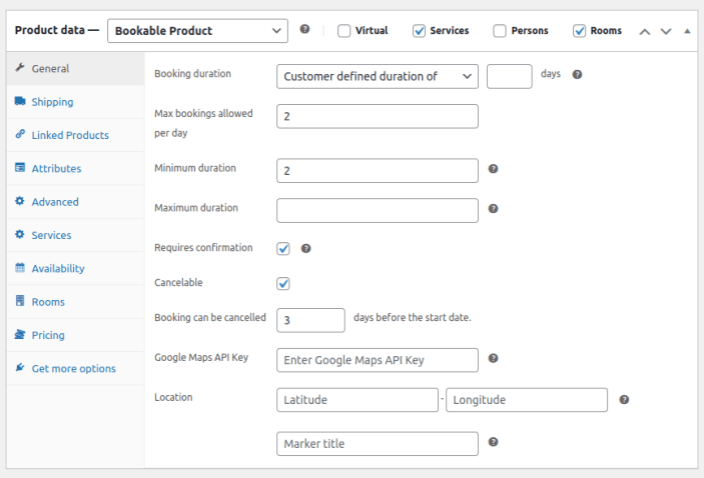
There are checkbox options for Services, Persons, and Rooms in the Product data header section. You can check each one according to your needs. After checking, options will be displayed in the product data section tabs.

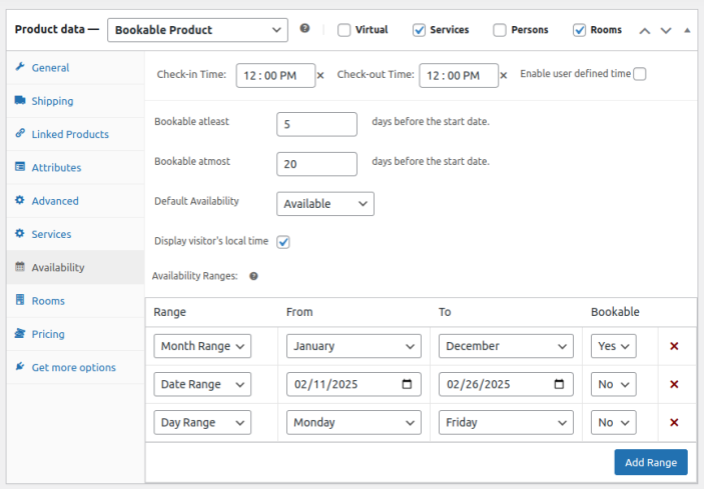
Availability
↑ Back to topBy clicking on the ‘Availability’ tab you can set the availability of the booking. You can also set the check-in and the check-out time by selecting the “Enable User Defined Time” option.You can set the starting day of the booking and the last day for the booking. Set the availability of the booking of specific product or room.
Display the check-in and check-out times based on the customer’s local time from their current location.
You can also set the duration for booking. It allows you to manage the bookable products and the ranges it will be available in.
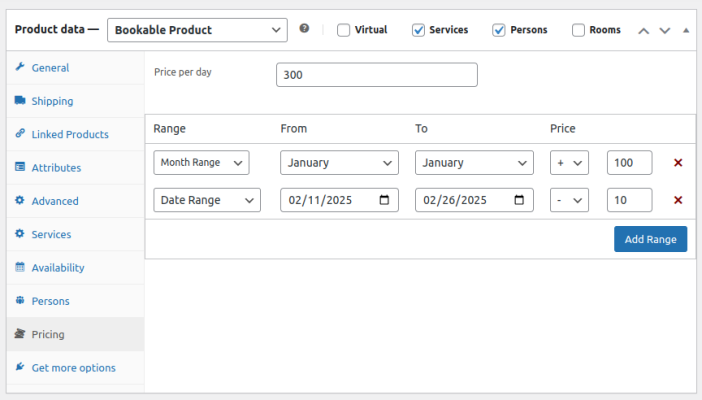
Pricing
↑ Back to topBooking and Appointment for WooCommerce allows you to set the pricing for the bookable product and also add multiple ranges. You can set the specific duration and add price against the specific duration.
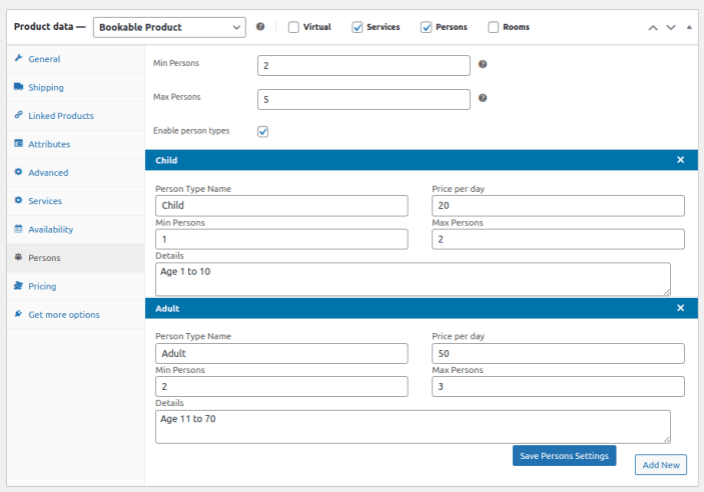
Persons
↑ Back to topYou can set a minimum and maximum limit for the persons. Furthermore, you can also set the pricing for a specific person type.
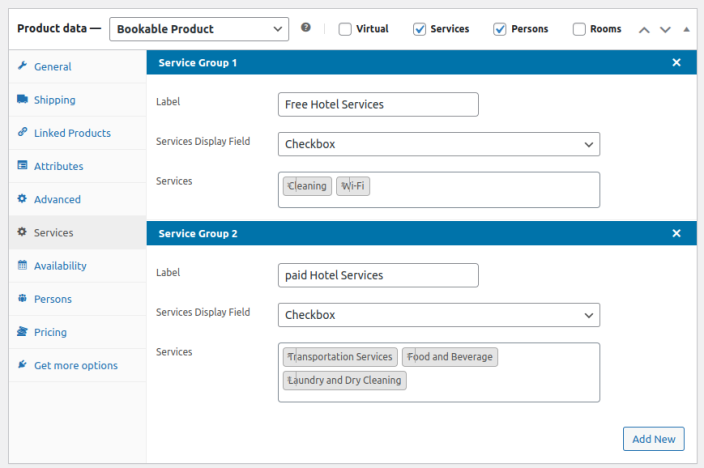
Services
↑ Back to topSimply include the services you are providing within the general settings, as shown below. Booking and Appointment for WooCommerce enables you to create services in Booking & Appointment > Services tab.
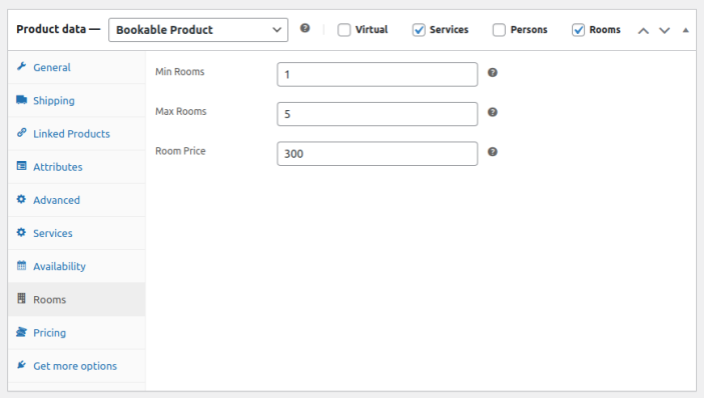
Rooms
↑ Back to topThe rooms section allows you to set how many rooms can be booked at once by defining minimum and maximum limits. You can also set a specific price for each room.
Appointments
↑ Back to topYou can create the appointments by changing product data to an Advanced Bookable Product and then clicking on the Appointments checkbox. It will display the setting allowing you to set the price and duration of the appointment.
If a customer selects a specific staff member, the slot duration and price assigned to that staff member will take priority over the product-level settings.
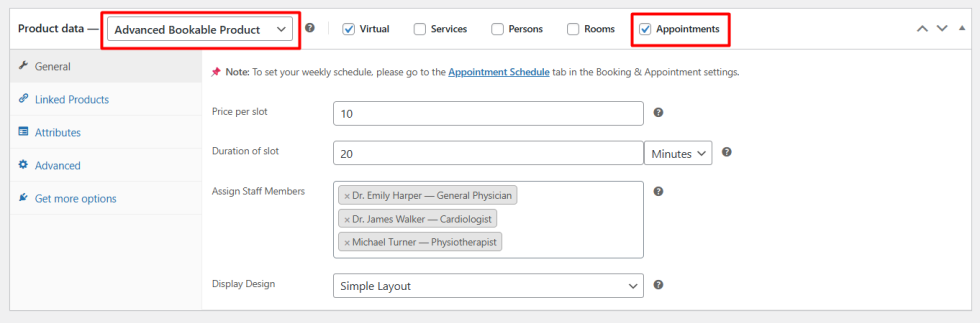
You can set the labels, schedule, and staff members for the appointments in the global setting.
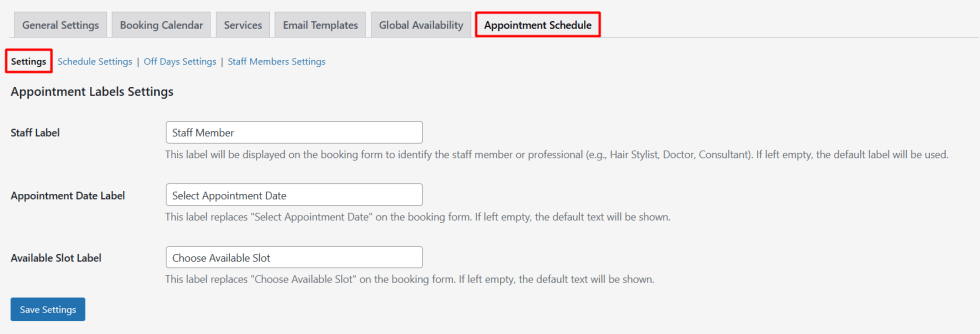
General Settings
↑ Back to top- Staff Label: Sets the text shown for selecting a staff member on the booking form.
- Appointment Date Label: Changes the label for choosing an appointment date.
- Available Slot Label: Updates the text displayed for selecting a time slot.
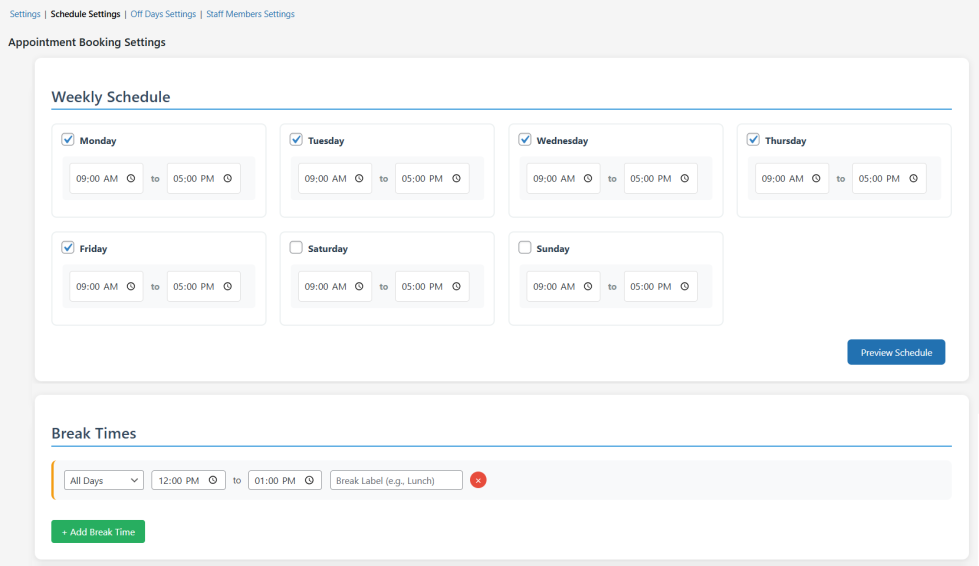
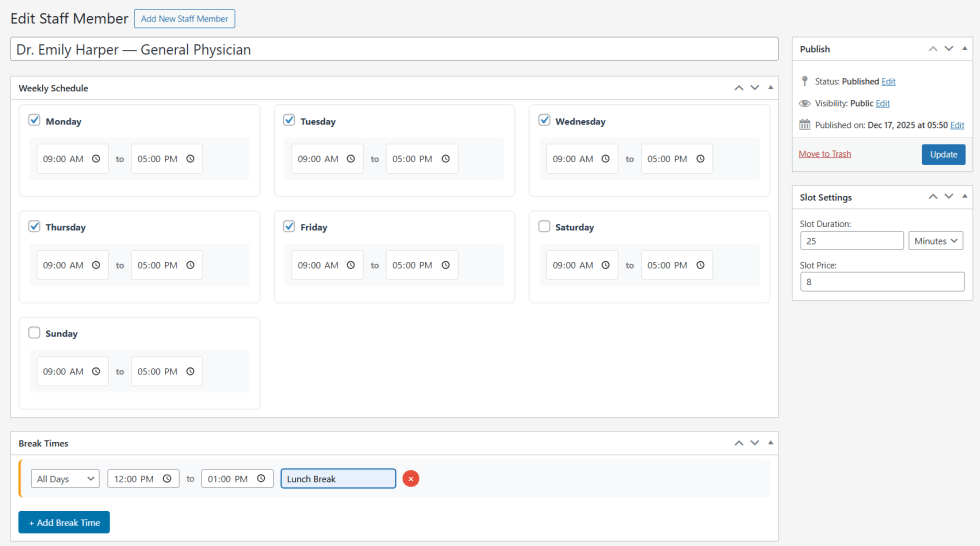
Schedule Settings
↑ Back to topSet the weekly schedule for the appointments. Check the day of the week for which you want to enable the appointment, and also adjust the time accordingly.
Add a break time between the slots. Adjust the day of the week and time duration of the break. You can create multiple break times for different days of the week.
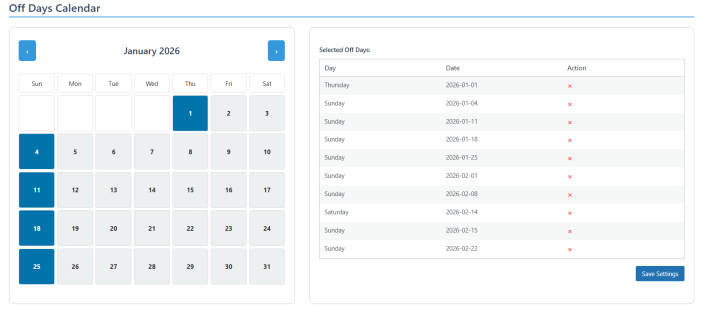
Off Days Settings
↑ Back to topSelect the days on the calendar to disable appointments on those specific dates. It lets you easily disable appointments for holidays and weekends.
Staff Members Settings
↑ Back to topYou can create multiple staff members and manage each person’s schedule, slot duration, pricing, and break times independently.
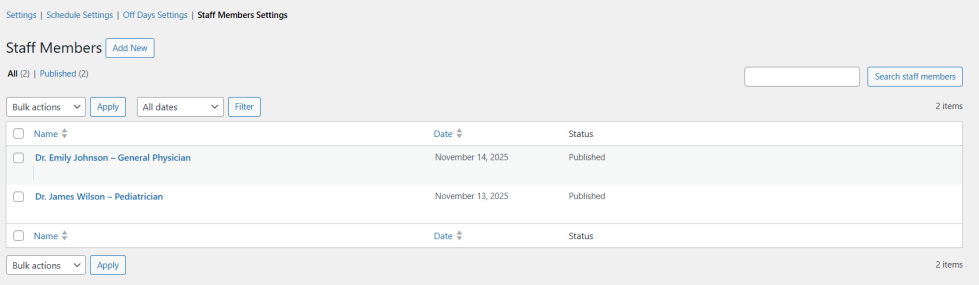
Further define the weekly schedule, off days, slot duration, and price, along with break times
Product Level Settings (Appointment)
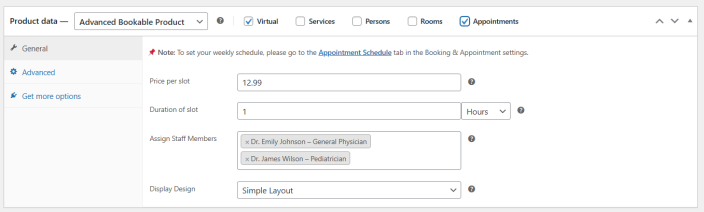
↑ Back to topEnable the appointment for WooCommerce by clicking on the checkbox in the product data. You can further configure the appointments.
- Price per Slot: Set the price per slot for the customers
- Duration of Slot: Select the duration of the appointment slot. You can select between minutes and hours.
- Assign Staff Members: Select staff members to assign. If a staff member is selected, the duration and price of the slot will be displayed for the specific staff member. You can set the staff in the Global Settings.
- Display Design: Choose between multiple option styles, i.e, Simple and Accordion.
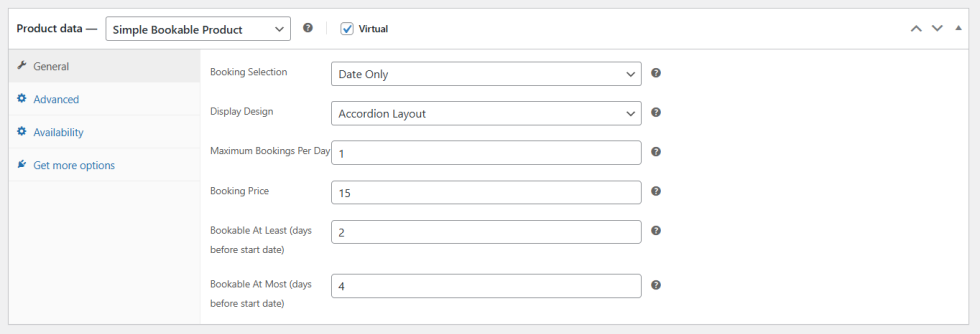
Product Level Setting (Simple Bookable Product)
↑ Back to topBooking and Appointment enables you to set up bookings for a specific product easily. Using the simple booking settings, you can configure the following:
- Booking Selection: Select between the Date or Date & Time option to display at the front end.
- Display Design: Choose between the two layouts, i.e, Simple and Accordion.
- Maximum Bookings per Day: Set the maximum bookings allowed per day for the specific product.
- Booking Price: Set the price of the booking per day.
- Bookable At Least: Select the minimum number of days in advance that a customer can book.
- Bookable At Most: Select the maximum number of days in advance that a customer can book.