Extend – Booking Filters for WooCommerce, is an extension for the WooCommerce Bookings plugin. Booking Filters enables the customers to filter and display bookable services based on the availability and other related properties of the service like date, time, price, rating, and keyword search.
This instructional guide is for the store owners to help them properly set-up and configure the plugin as per their store requirements.
Note: It is required that WooCommerce and WooCommerce Bookings plugins must be installed and activated on your store to use the features of the Booking Filters plugin.
Once you have received your copy of the plugin with a valid license. You can proceed with the installation process by following the steps below.
- Log in to the Admin Dashboard of your store and click on the Add Plugin option under the Plugins menu on the left side of the dashboard.
- Once the dashboard is reloaded, it will give you a new page with the title Add Plugin. Right next to the page title, you will find a button namely Upload Plugin. Upon clicking that button, you will be presented with the option to upload the plugin.
- Simply click the Choose File button to locate and upload the plugin and then click the Install Now button to install the plugin on your store.
- After the upload and installation process is finished. You will be presented with the Activate button option, which you can click to activate the plugin.

When the plugin is installed and activated, navigate to WooCommerce -> Booking Filters. Click on the Booking Filter tab from the menu.
What you’ll see is a list of settings and options you can configure, which are listed below with an explanation:
Search by Start/ End Date:
The date filter control enables the customers to search for the available bookings based on the specified date or date range. The date filter control gives you the following options.
- It enables you to change the labels of the filters.
- It enables you to make the Start or End date as a required field for the customers to use for filtration.
- It enables you to show/hide the Start Date/End Date control from the filter by enabling or disabling it.
Search by Start/ End Time:
The time filter control enables customers to search for the available bookings based on the specified time or time range. It should also be noted that the time filter control only works if the Search Type is set to the Fuzzy Match. The time filter control gives you the following options.
- It enables you to change the labels of the filters.
- It enables you to make the Start or End time as a required field for the customers to use for filtration.
- It enables you to show/hide the Start and End Time control from the customers by enabling or disabling them.
Price Filter:
The price filter control enables customers to search for available bookings based on the price range. The price filter control gives you the following options.
- It enables you to show/hide price filter control by enabling or disabling.
- It enables you to change the filter label.
Search by Rating:
The rating filter control enables customers to search for available bookings based on the customer submitted ratings of the service. The ratings are based on a scale of 1 to 5, represented by stars, while 5 being the highest rating. The rating filter control gives you the following options.
- It enables you to show/hide rating filter control by enabling or disabling it.
- It enables you to change the filter label.
Search by Keyword:
The keyword search filter control enables customers to search for available bookings based on the name of the service. The keyword search filter control gives you the following options.
- It enables you to show/hide keyword filter control by enabling or disabling it.
- It enables you to change the filter label.
Search by Attributes:
The attributes search filter control enables customers to search for available bookings based on the attributes of bookable products. The attributes search filter control gives you the following options.
-
- It enables you to show/hide attribute filter control by enabling or disabling it.
- It enables you to change the filter label.
- It enables you to select attributes that you want to show on the filter.
Search by Categories:
The category search filter control enables customers to search for available bookings based on the category of the bookable product. The category search filter control gives you the following options.
- It enables you to show/hide category filter control by enabling or disabling it.
- It enables you to change the filter label.
- It enables you to select and add categories in the filter so the customer can use them to filter bookable products.
Search by Tags:
The tag search filter control enables customers to search for available bookings based on the tag of the bookable product. The tag search filter control gives you the following options.
- It enables you to show/hide tag filter control by enabling or disabling it.
- It enables you to change the filter label.
- It enables you to select and add tags in the filter so the customer can use them to filter bookable products.

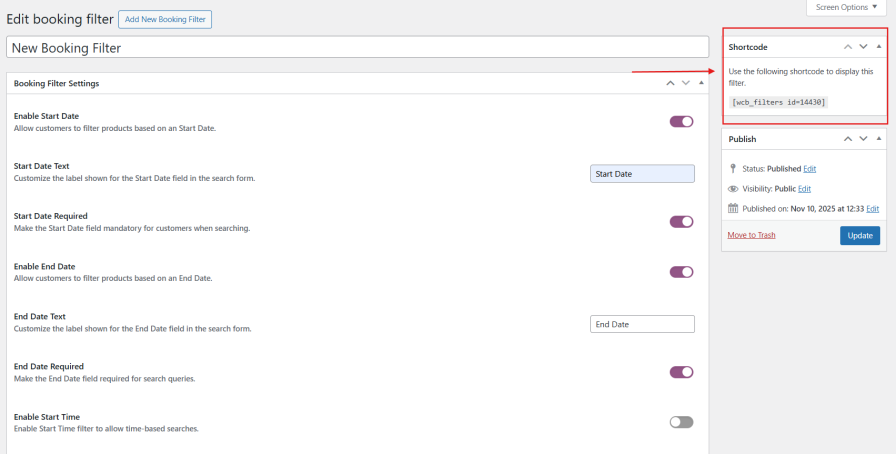
The plugin gives you the ability to generate multiple shortcodes so you can configure multiple booking filters with their own unique settings and options and embed them on separate pages of your store.
Click on
Create New Booking Filter , Configure the settings for the booking filters, save the settings
Scroll over at the top and copy the unique shortcode and embed it wherever you like.
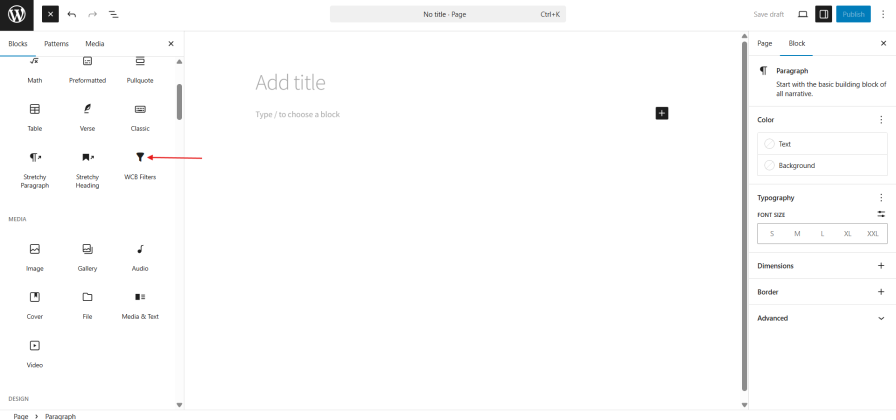
Booking Filters can be inserted onto a page as a Gutenberg block. To do that, just open the page you want to add the filter to.
Click on the plus icon to add the
WCB Filter Gutenberg block from the Widgets section in the Gutenberg blocks menu. Click to insert.
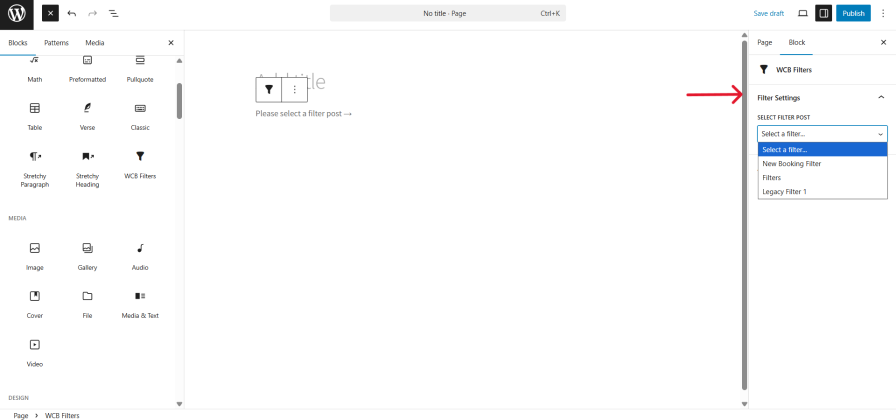
Once inserted you will see a ‘Please select a filter post’ click it and then under block settings select which booking filters rules which you have created you wnat to display on this page
To embed it, simply paste the shortcode which you have copied from admin settings on any text area of your site. This can be the text editor of a page or a text widget area.
You can use the text widget area to embed the Booking Filter on the sidebar.
Should you need any further assistance regarding this plugin, feel free to contact us at
woosupport@codup.io and have our support team look into the issue for you. Thank you!