Run flash sales with countdown timers, banners, and custom discount rules to boost urgency, conversions, and user engagement.
Installation
↑ Back to topTo start using a product from WooCommerce.com, you can use the “Add to store” functionality on the order confirmation page or the My subscriptions section in your account.
- Navigate to My subscriptions.
- Find the Add to store button next to the product you’re planning to install.
- Follow the instructions on the screen, and the product will be automatically added to your store.
Alternative options and more information at:
Managing WooCommerce.com subscriptions.

Configuration
↑ Back to topAfter you have installed and activated the Plugin, go to WooCommerce > Flash Sales. Here, you can create multiple rules for flash sales. To add New Flash sales, you need to click on the Add new Flash sale button to configure the following.
- Title: Set the title for the flash sale rule.
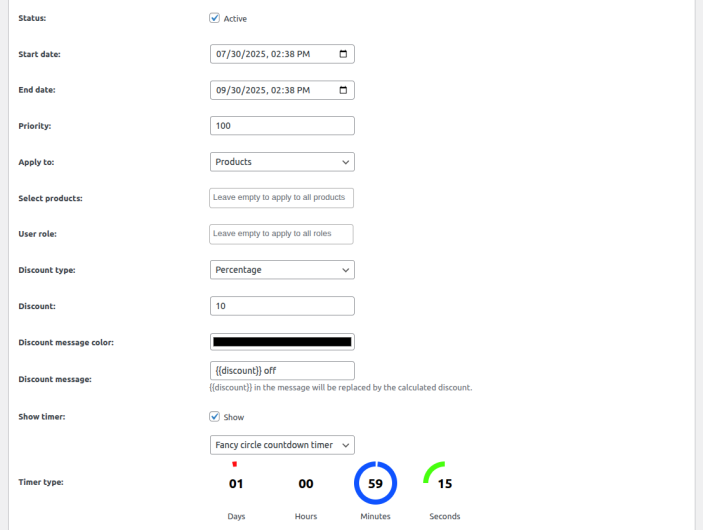
Flash Sale Settings:
- Status: Enable or disable the flash sale.
- Start Date: Set when the flash sale will begin.
- End Date: Set when the flash sale will end.
- Priority: Set the sale priority in case multiple promotions are active.
- Apply To: Choose to apply the sale to specific products or categories.
- Select Products / Categories: Select individual products / categories to include in the flash sale.
- User Roles: Choose which user roles (e.g., Guest, Customer, Admin) the sale applies to.
- Discount Type: Select the discount type (Percentage or Fixed).
- Discount: Set the discount value.
- Discount Message Color: Choose the color of the message text.
- Discount Message: Enter a message like {{discount}} off. The {{discount}} will be dynamically replaced.
- Show Timer: Enable or disable the countdown timer.
- Timer Type: Select the timer style (e.g., Fancy Circle Countdown).
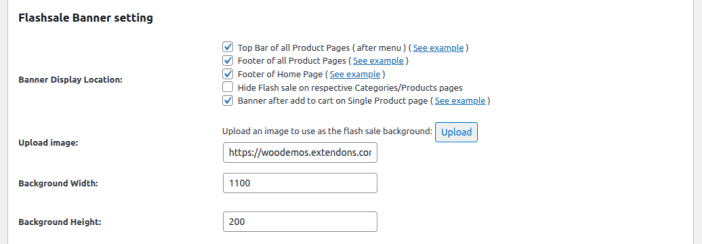
Flashsale Banner Settings
↑ Back to top- Banner Display Location: Choose where to display the flash sale banner:
- Top Bar of all Product Pages
- Footer of all Product Pages
- Footer of Home Page
- Footer of All Other Pages
- Hide on selected product/category pages
- After Add to Cart on Single Product Page
- Upload Image: Upload a custom image as the banner background.
- Background Width: Set the width of the banner (e.g., 1100px).
- Background Height: Set the height of the banner (e.g., 200px).
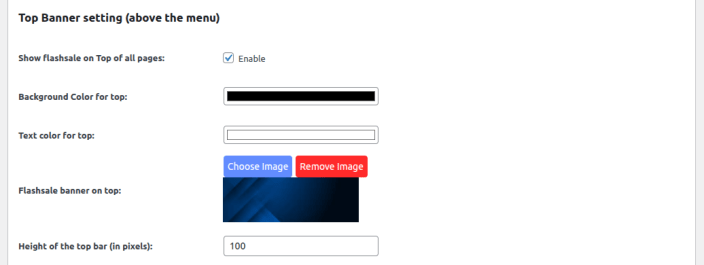
Top Banner Settings (Above Menu):
↑ Back to top- Show Flash Sale on Top of All Pages: Enable this to display a banner at the top of the site.
- Background Color for Top Bar: Choose the background color.
- Text Color for Top Bar: Choose the text color.
- Top Bar Height: Set the height in pixels (e.g., 100px).
Add to Cart Button Settings
↑ Back to top- Button Color: Set a custom color for the Add to Cart button.
- Button Text: Customize the text of the Add to Cart button.
