InstaMail Verification for WooCommerce allows your WooCommerce store to automatically verify customer email addresses in real-time during both checkout and user registration, preventing invalid emails from completing purchases or creating accounts.
Store owners can also manage flagged emails through a comprehensive admin interface, set up email allow lists to bypass verification for trusted addresses, and track detailed verification analytics to maintain clean customer databases and reduce bounce rates.
Installation
↑ Back to topTo start using a product from WooCommerce.com, you can use the “Add to store” functionality on the order confirmation page or the My subscriptions section in your account.
- Navigate to My subscriptions.
- Find the Add to store button next to the product you’re planning to install.
- Follow the instructions on the screen, and the product will be automatically added to your store.
Alternative options and more information at:
Managing WooCommerce.com subscriptions.

Setup and Configuration
↑ Back to top
Kickbox Account
↑ Back to topIf you haven’t set up a Kickbox account yet, go to Kickbox.com and sign up for a new account. Once you’ve signed up for a new account, you should have access to Kickbox dashboard where you can generate your Live and Sandbox API keys.
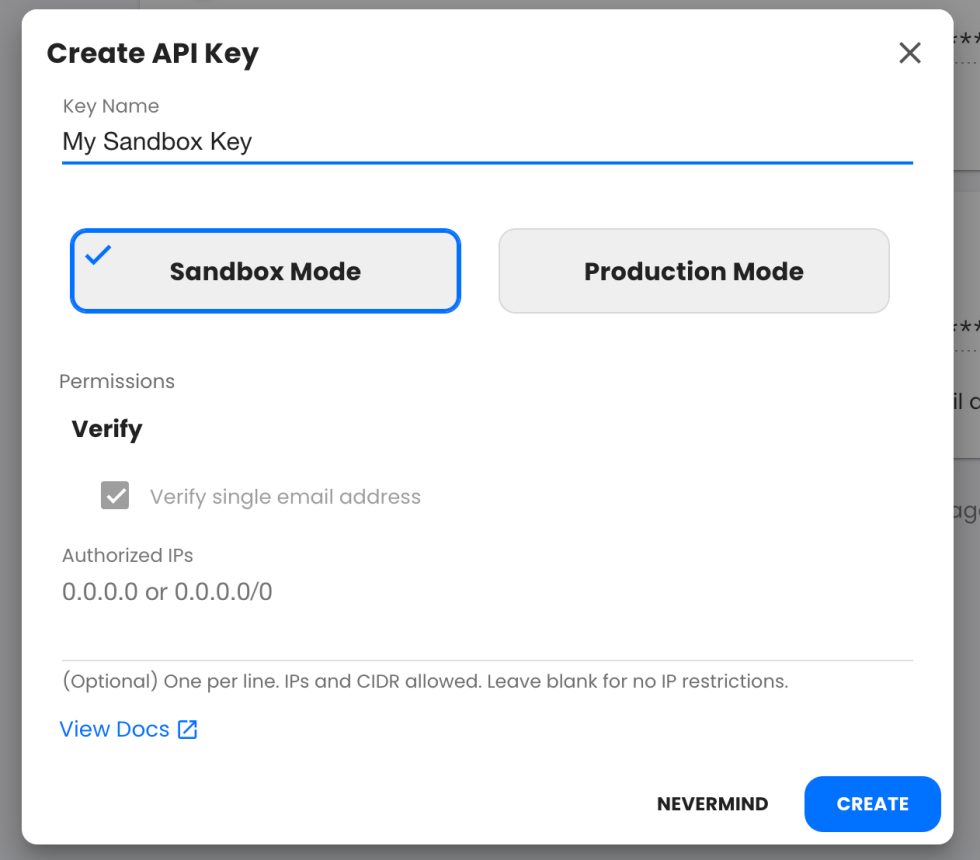
Kickbox Sandbox Mode
It is highly recommend for you to test your site in Sandbox mode to get a sense of how the integration works. Sandbox Mode lets you test the email verification API without using credits. All results are fake, and the default result is “deliverable”. Sandbox mode will not impact your Kickbox credits.
Go ahead and create an API key – we highly recommend to start with a Sandbox key and once you feel like you’re ready, switch over to a Live API key. Your API key will be used below to setup the integration in your WooCommerce store.
Getting started
↑ Back to topTo set up your store with the Kickbox Integration For WooCommerce:
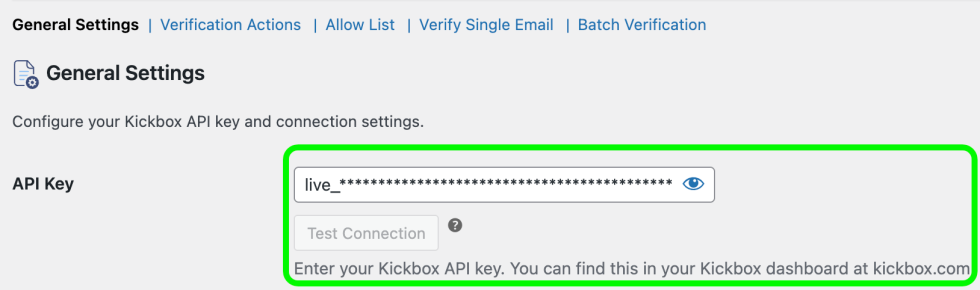
- Go to: WooCommerce > Settings > Kickbox .
- End your Kickbox API Key in the API Key field:
- Click on “Test Connection” to make sure that your API key is valid.
- Click on Save changes to save your API key.
Configure Verification Actions
↑ Back to topBefore enabling Kickbox’s real-time email verification in your Checkout or Account Registration pages, you’ll need to configure the Verification Actions. Verification Actions allow you to pick what action to take for each email verification result type. We recommend you study the below result types and what they mean:
| Result | Description |
|---|---|
| Deliverable | A deliverable result means the recipient’s mail server stated the recipient exists. Kickbox has also performed additional analysis and determined this address is safe to send to within our 95% Delivery Guarantee. |
| Undeliverable | An undeliverable result means the email address does not exist or is syntactically incorrect (and thus does not exist). |
| Risky | A risky result means the email address has quality issues and may result in a bounce or low engagement. Use caution when sending to risky addresses. Accept All, Disposable, and Role addresses are classified as Risky. These email addresses are potentially problematic and may require removal or additional testing. |
| Unknown | Kickbox will return an unknown result when it is unable to get a response from the recipient’s mail server. This often happens if the destination mail server is too slow or temporarily unavailable. In some cases, retrying your request after about 5 minutes will return a valid or invalid response. Unknown addresses don’t count against your verification balance. |
For more detailed information about each verification result type, see the Kickbox Terminology Documentation.
Each Verification Action has three options that you can pick from:
- Allow – allows the user to proceed through the checkout or account registration process.
- Allow but flag for review – allows the user to proceed, but flags the email for review. You can view flagged emails in the Flagged Emails page.
- Block – blocks the user from proceeding in either the check or account registration forms, resulting in an error message.
Now that you understand each verification result type and the configurable behavior, navigate to the WooCommerce > Settings > InstaMail Verification and click on the Verification Actions tab:
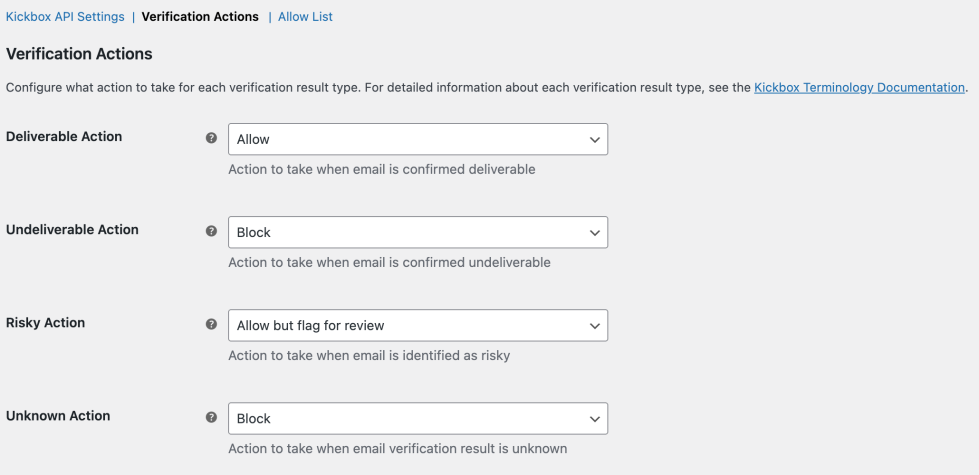
Go ahead and configure each action for each result type and click “Save Settings”.
Below is our recommended setup, however you will ultimately have to configure these options according to what best suits your store:
| Action | Recommendation |
|---|---|
| Deliverable Action | Allow We recommend to allow all deliverable emails as the recipient’s mail server has confirmed the email exists. These emails also fall into Kickbox’s 95% Delivery Guarantee. |
| Undeliverable Action | Block Since the email doesn’t exist, we should block it. |
| Risky Action | Block Since the email has quality issues and may result in a bounce or low engagement. |
| Unknown | Allow but flag for review Unknown emails might be a result of mail servers responding too slow, we still want these users to be allowed through. |
Setting Deliverable Action to “Block”
Setting the Deliverable Action to “Block” will block healthy users and emails from checkout out and/or completing account registration on your site. We typically don’t recommend this type of configuration.
Enable Checkout & Registration Verification
↑ Back to topCongratulations! Now that you’ve configured your verification actions, you can enable email verifications on your checkout and/or account registration pages. Click on the General Settings tab and enable these options and click “Save Settings”:
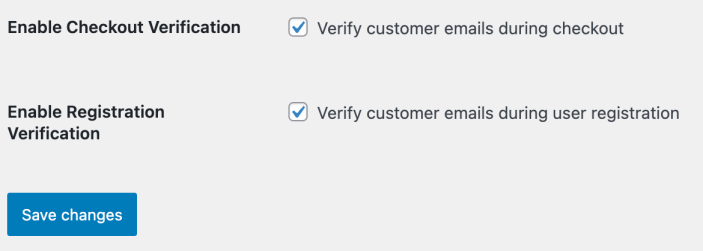
Once these settings are enabled, users will be verified in real-time according to your Verification Actions configuration!
Allow List
↑ Back to topThe plugin allows you to configure an Allow List which will circumvent the verification process as well as circumvent any Flagged Emails that have been reviewed with a decision (either block or allow). This can be useful for VIP customers or other users that you know for a fact that you want to allow to proceed in the checkout and/or registration processes.
To configure the Allow List, go to WooCommerce > Settings > Kickbox and click on the “Allow List” tab:
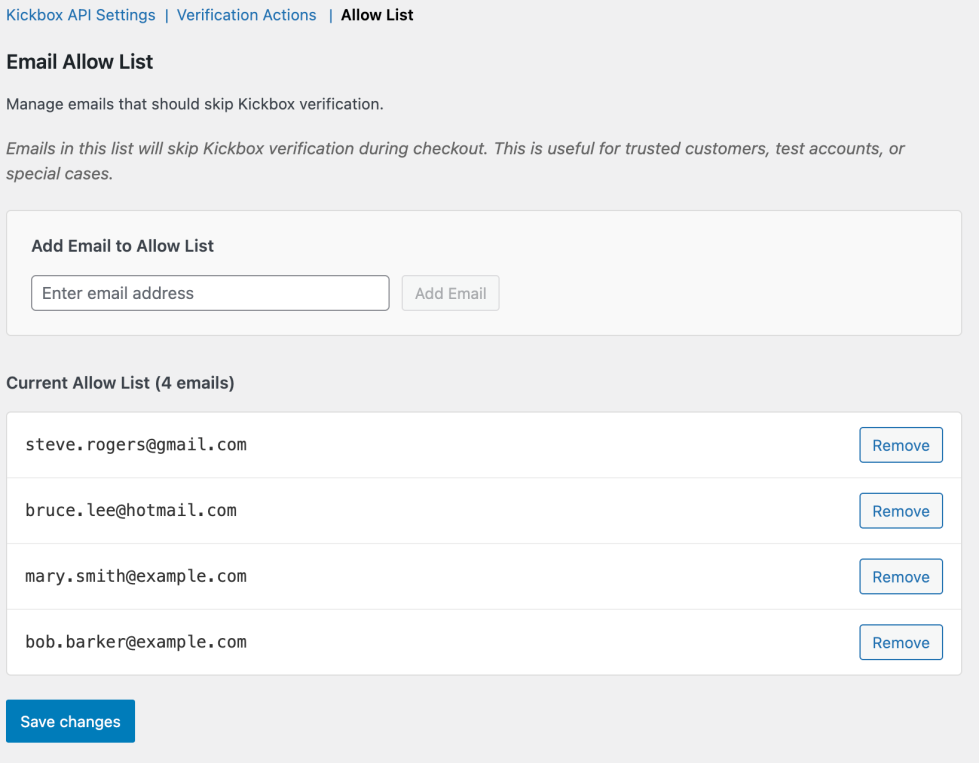
To add an email to the Allow List, type in an email and click “Add Email”. To remove one, click on the “Remove” button next to the email you want to remove. Note: changes to the allow list are immediate.
Integrations
↑ Back to topInstaMail Verification integrates with popular WordPress plugins to verify email addresses in additional contexts beyond WooCommerce checkout and registration. You can enable integrations from WooCommerce > Settings > InstaMail Verification > Integrations.
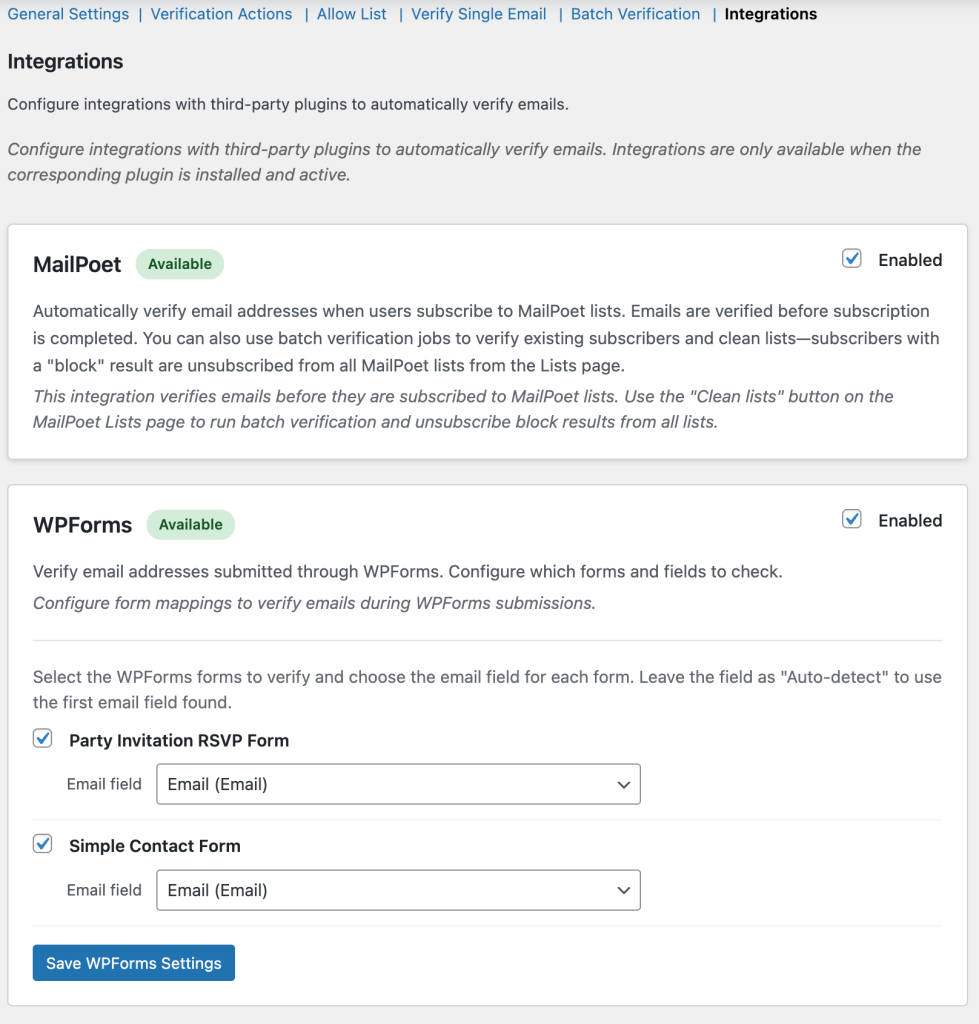
MailPoet Integration
↑ Back to topWhen the MailPoet integration is enabled, InstaMail Verification can:
- Verify on subscribe: Automatically verify email addresses when users subscribe to MailPoet lists. Verification runs before the subscription is completed, preventing invalid emails from being added to your lists.
- Clean lists: Run batch verification on all MailPoet subscribers and automatically unsubscribe addresses that receive a “block” verification result from all MailPoet lists.
To enable the MailPoet integration:
- Go to WooCommerce > Settings > InstaMail Verification.
- Open the Integrations tab.
- Find MailPoet and ensure it is enabled (it should show as available if MailPoet is installed and active).
- Save your changes.
Cleaning MailPoet Lists
The Clean lists feature allows you to verify all existing MailPoet subscribers and automatically remove addresses that should be blocked based on your Verification Actions configuration.
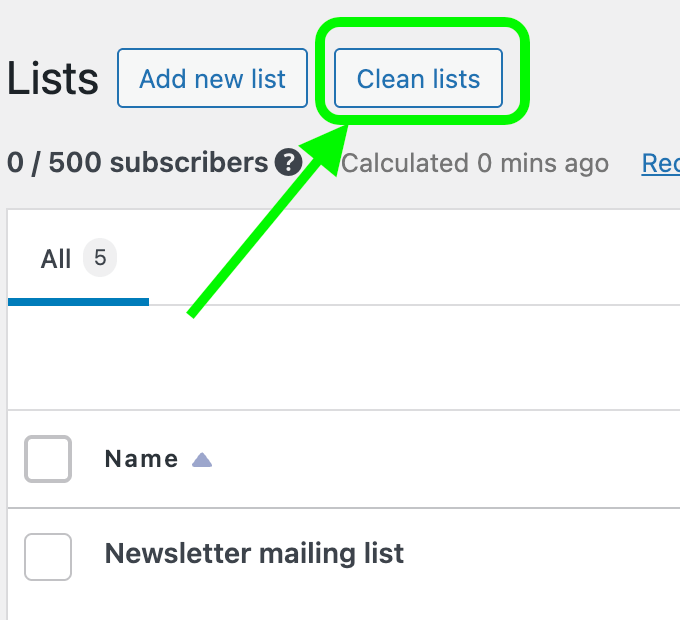
To use Clean lists:
- Ensure the MailPoet integration is enabled (see above).
- Go to MailPoet > Lists in the WordPress admin.
- Click the Clean lists button (it appears next to “Add new list” only when the integration is enabled).
- Review the subscriber count in the confirmation dialog and confirm to start the batch job.
- Monitor the progress bar as the job runs. When complete, the page refreshes and shows a summary notification with total processed, deliverable/undeliverable/risky/unknown counts, and how many were unsubscribed per list.
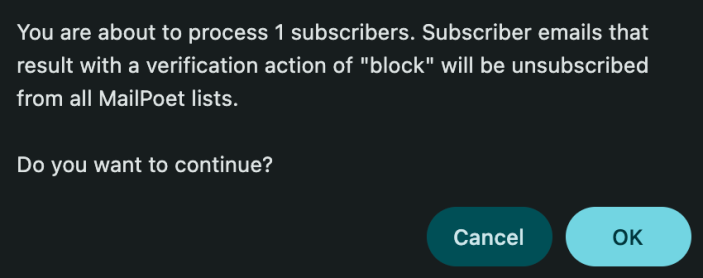

Note: If there are zero subscribers, clicking “Clean lists” will show a message asking you to ensure your lists have subscribers; no batch job is started.
Which addresses get unsubscribed during Clean lists is determined by your Verification Actions settings. Any MailPoet subscriber whose email receives a verification result that is configured to Block (e.g., undeliverable or risky) will be unsubscribed from all MailPoet lists as part of the same job.
Full job details and per-list unsubscribed counts are available in WooCommerce > Settings > InstaMail Verification > Batch Verification (Job History section).
WPForms Integration
↑ Back to topThe WPForms integration allows you to verify email addresses submitted through WPForms forms. This helps prevent invalid emails from being collected through your contact forms, newsletter signups, or other WPForms submissions.
To enable and configure WPForms integration:
- Ensure WPForms is installed and active on your site.
- Go to WooCommerce > Settings > InstaMail Verification.
- Open the Integrations tab.
- Find WPForms and enable it (it should show as available if WPForms is installed and active).
- Configure form mappings: For each WPForms form you want to verify emails from, select which form field contains the email address. The integration will automatically detect email fields, but you can also manually select a specific field.
- Save your settings.
Once configured, when a user submits a WPForms form that has email verification enabled:
- The email address is verified in real-time using Kickbox.
- If the email receives a verification result configured to Block (based on your Verification Actions), the form submission is blocked and an error message is displayed to the user.
- If the email receives a result configured to Allow but flag for review, the submission proceeds but the email is added to your Flagged Emails list for review.
- If the email is deliverable or configured to Allow, the form submission proceeds normally.
The WPForms integration uses the same Verification Actions configuration as checkout and registration, ensuring consistent email validation across your entire site. Emails verified through WPForms will appear in your Flagged Emails list with an origin of “WPForms” if they are flagged for review.
Usage
↑ Back to topBatch Verification
↑ Back to topBatch Email Verification is a powerful feature that allows you to verify a large number (up to 1 million!) email addresses at once using Kickbox’s industry-leading Batch Verification API. Whether you’re preparing for a major product launch, cleaning up your customer database, or validating a new marketing list, this feature gives you the power to ensure every email you send has the highest chance of reaching its destination.
We’ve made it incredibly easy to verify any list of emails:
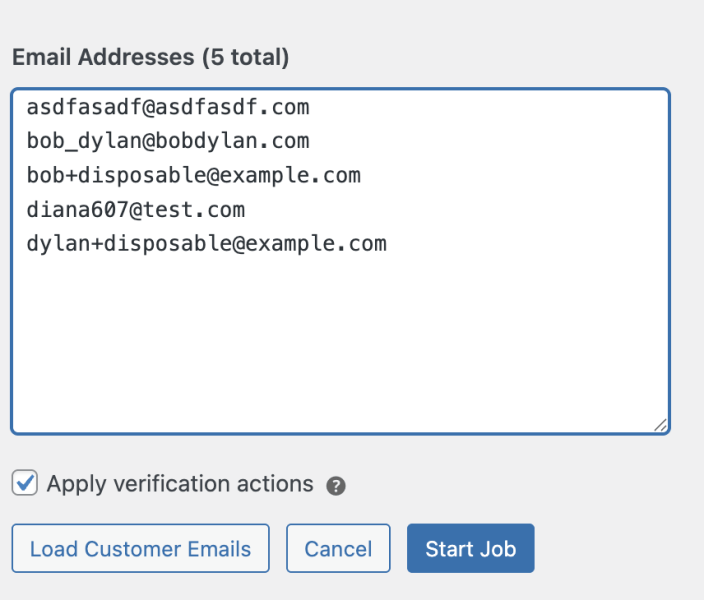
- Paste from anywhere: Copy emails from spreadsheets, CRM systems, or anywhere else—we’ll automatically handle commas, semicolons, tabs, or newlines
- Load existing customers: One-click button to pull all your WooCommerce customer emails
- Load MailPoet subscribers: If MailPoet integration is enabled, you can load all MailPoet subscriber emails directly into the batch verification job
- Apply verification actions checkbox: if this box is checked off, the plugin take each email and run the integration against email. That means it’ll take the results, log them and record them for statistical analysis, and apply verification actions which will result in the emails showing up in the “Flagged Emails” section.
Once you’ve curated your list of emails you’d like to verify against, click on “Start Job” and watch your verification job progress in real-time:

Once your batch verification completes, you get:
- CSV file automatically saved to your WordPress media library
- Downloadable results with full verification details for every email
- Job history so you can track all your verification campaigns
- Detailed statistics showing exactly what percentage of your list is deliverable
The Batch Verification feature is perfect for things like Marketing Campaigns or just regular List Maintenance of your customers!
Kickbox Credit Balance
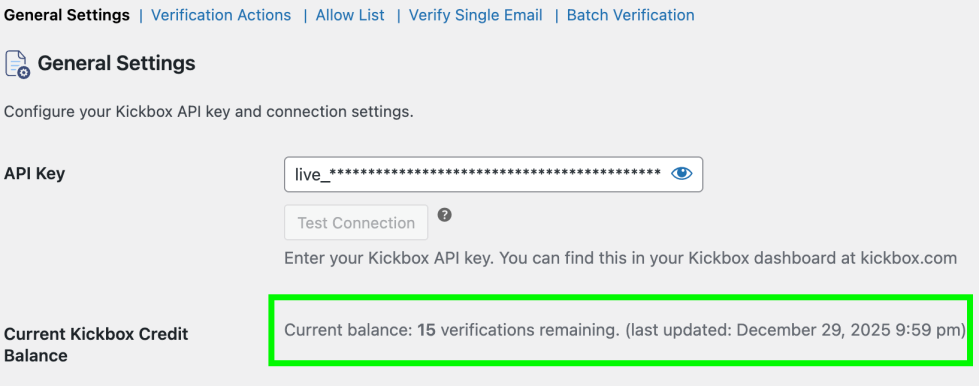
↑ Back to topFor your convenience, the plugin will keep track of your Kickbox Verification credit balance. This balance can be viewed at any time under WooCommerce > Settings > InstaMail Verification under the “General Settings” tab:
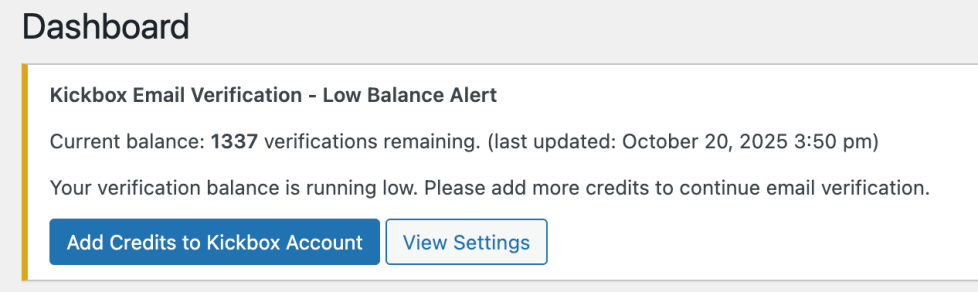
If your balance runs low (below 50 verifications remaining), the plugin will notify you of this in the admin settings page:
Flagged Emails
↑ Back to topNow that your site is verifying email addresses in real-time, you can review any Flagged Emails. To do this, go to WooCommerce > Flagged Emails. You will be greeted with a table that contains all the flagged emails for you to review:
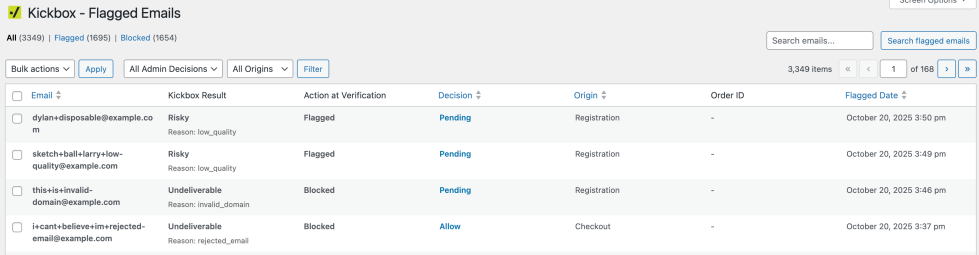
The table contains 7 columns to help you review flagged emails and to decide what do with them:
| Column | Description |
|---|---|
| The email that was flagged | |
| Kickbox Result | The Kickbox Result. The first line is one of the result types (Deliverable, Undeliverable, Risky or Unknown) and the second line is the reason. |
| Action at Verification | The action that was taken at time of Verification. This directly maps to the Verification Actions configuration. For example, if “Risky” emails are set up to be blocked, then the entry for the email will be “Blocked”. |
| Decision | The admin decision – either Pending, Block or Allow. By providing a decision, you will override the Verification Actions in the settings page. If you decide to leave this in a “Pending” state (in other words, not make a decision), then the plugin will default to the Verification Action behavior. Note that once an email is either Flagged or Blocked, subsequent verifications will look to this table to determine the Verification Action. This avoids re-verifying an email and minimizes the number of Kickbox credits you end up using. |
| Origin | The origin of where the email was either Flagged or Blocked. Either “Checkout” or “Registration”. |
| Order ID | If an email was Flagged but allowed to be processed through checkout, then an accompanying Order Id will be linked to the flag email. |
| Flagged Date | The date in which the email was Flagged (or Blocked). |
Reviewing Flagged Emails (Admin Decision)
If an email makes its way to the Flagged Email list, there are a few things you can do during the review process. You’ll see that under the “Decision” column, there will be a “Pending” value when an email first gets flagged. This means an email is pending your review. If you click on it, you’ll see the following modal:
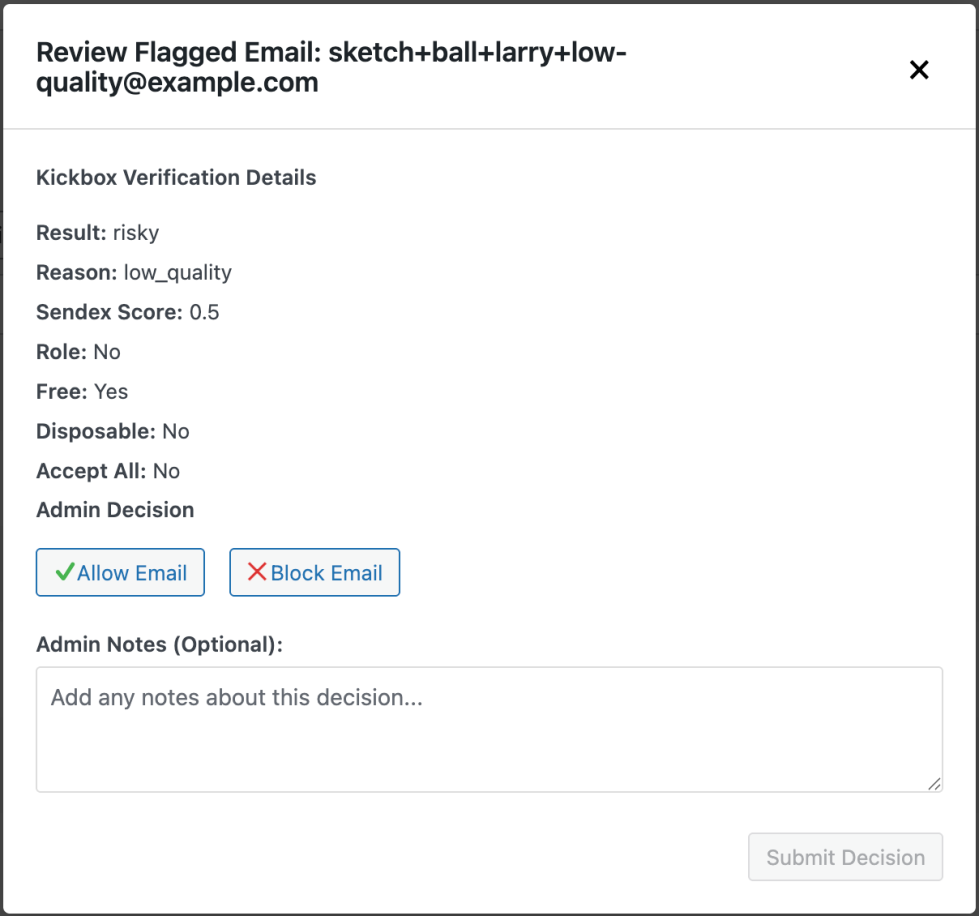
The modal provides you with more details around the email and why it was Flagged or Blocked – these are details that were returned directly from the Kickbox Verification API.
Now you can decide if you want to Allow the Email through or Block it. Once you’ve made a decision, the plugin will record it. If a user decides to come back and use the same email, the plugin will look to this decision to figure out if it should block the user, or allow it to proceed. You can always come back and edit this decision if you want to!
Additionally, you can also add some notes about the decision for posterity purposes as well as to inform other admin users around the reasoning behind your decision.
Blocked decisions on allowed emails
Note that if you decide to block an email that was allowed to proceed, then the plugin will not stop the user from logging back into their account. If you feel that this should be a feature, please fill out the feature request form.
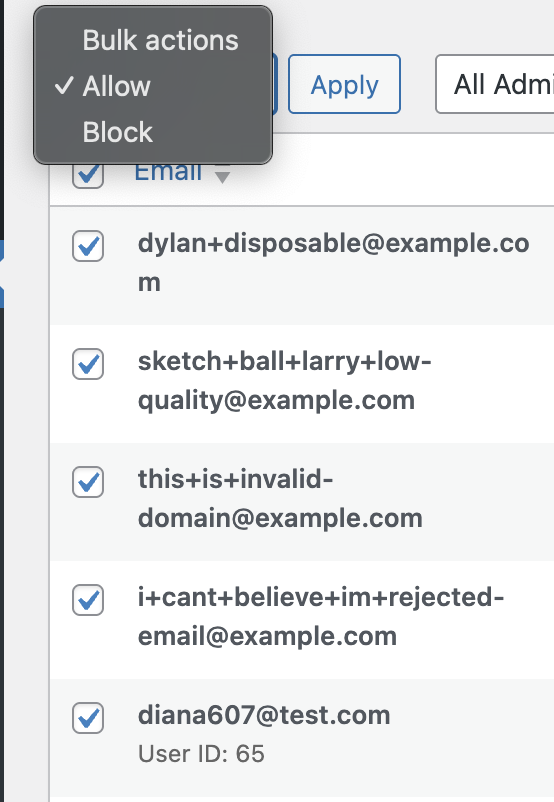
Bulk Admin Decisions
You can apply bulk action on the Flagged Emails for the admin decision. You can apply either “Block” or “Allow” in bulk:
- Click the “Bulk actions” drop-down menu
- Select either “Allow” or “Block” and click “Apply”
- Select the emails you’d like to apply the bulk action to
- The plugin will apply the decision in bulk for all the emails you selected in step (3)
- You’ll notice that the Admin Decision Note will show as “Bulk action applied“
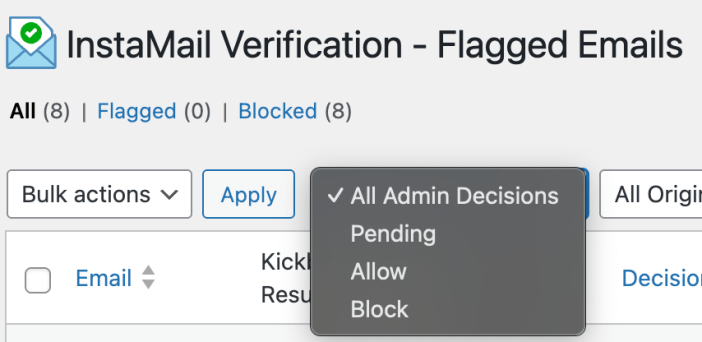
Filters
You can filter the results by “All”, “Flagged” emails or “Blocked” emails:

For each one of these categories, you can also filter by Admin Decision and Origin:
Screen Options
Note that you can also configure the table UI via WordPress’s built-in Screen Options:

These options allow you hide columns, or limit the number of items returned per page.
Verification Analytics
↑ Back to topYou can keep track of Verification Stats and Analytics under Analytics > Email Verifications:
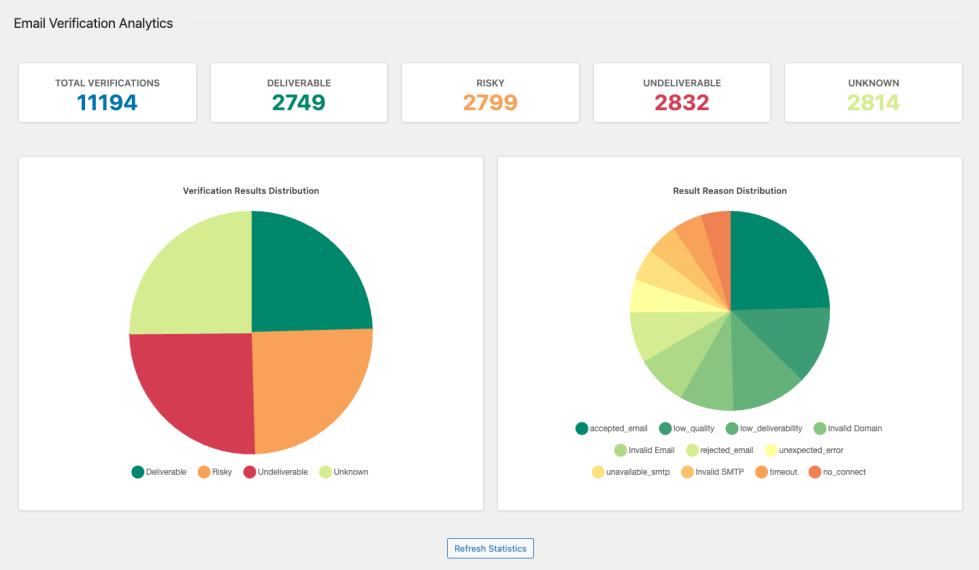
The Email Verifications report provides you with a number of useful stats such as the counts of verification result types, as well as Pie Charts showing the result type distribution as well as the reasons.
Dashboard Widget
For your convenience, you can also add a Dashboard Widget for a quick view of the current stats relating to Email verifications:
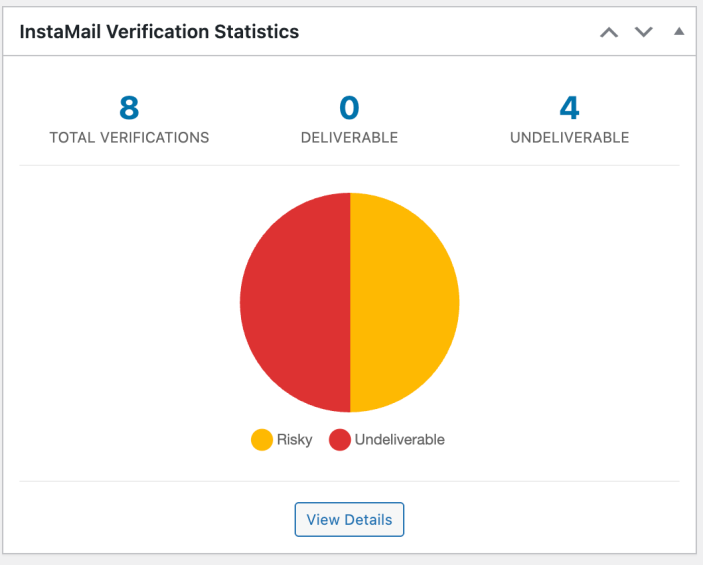
You can enable the InstaMail Verification Statistics Widget via the Screen Options in the Dashboard:
