| PHP Compatible | 8.0+ Recommended (UAT will test on 8.1 & 8.2) |
| WordPress Version | 6.4.2 or (Latest at the time of development) |
| WooCommerce Version | 9.3.3 or (Latest at the time of development) UAT will test on the Latest Version. |
| Product Quantity | v.1.0 |
Plugin Description
↑ Back to topWoocommerce Product Quantity aims to manage and control the number of items a customer can purchase, ensuring inventory accuracy and optimizing the shopping experience.
Features
↑ Back to top- Product Quantity General Setting
- Simple Product Settings
- Variable Product Settings
- Product Quantity Rules
- Notices
Installation
↑ Back to top- Download the .zip file from your WooCommerce account.
- Go to WordPress AdminDashboard > Plugins> Upload Plugin > Choose File.
- Install Now and Activate Plugin.
Getting Started
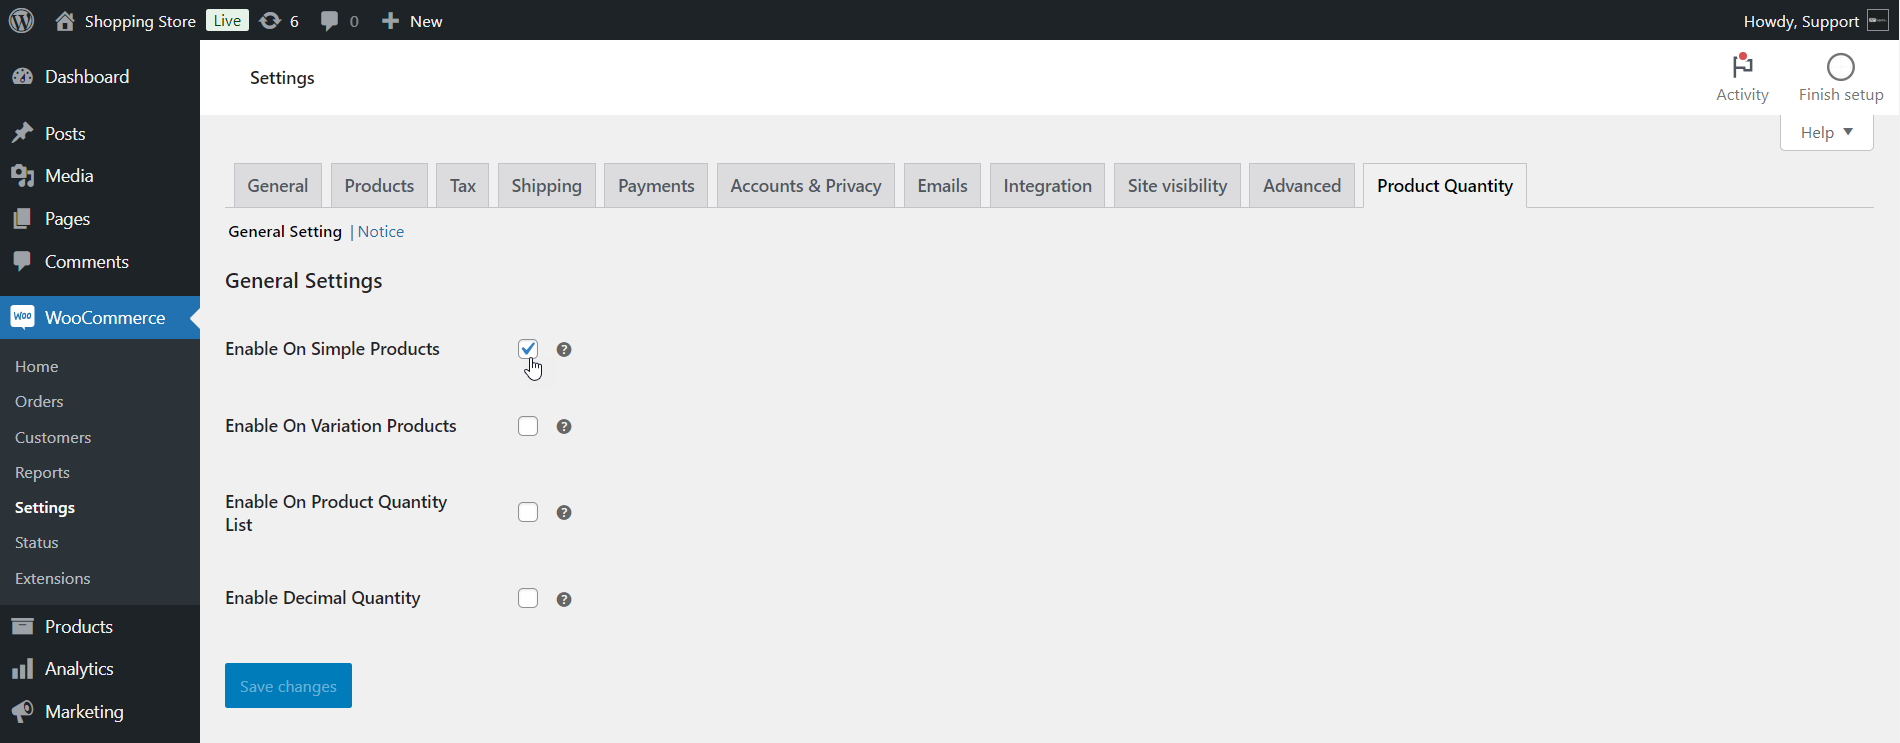
↑ Back to topGeneral Settings – Enable On Simple Products
↑ Back to top- Go to WordPress Admin Dashboard > WooCommerce > Settings > Product Quantity > General Settings.
- Click on Enable On Simple Product option from the General Settings tab.
- Click on the Save Changes button.
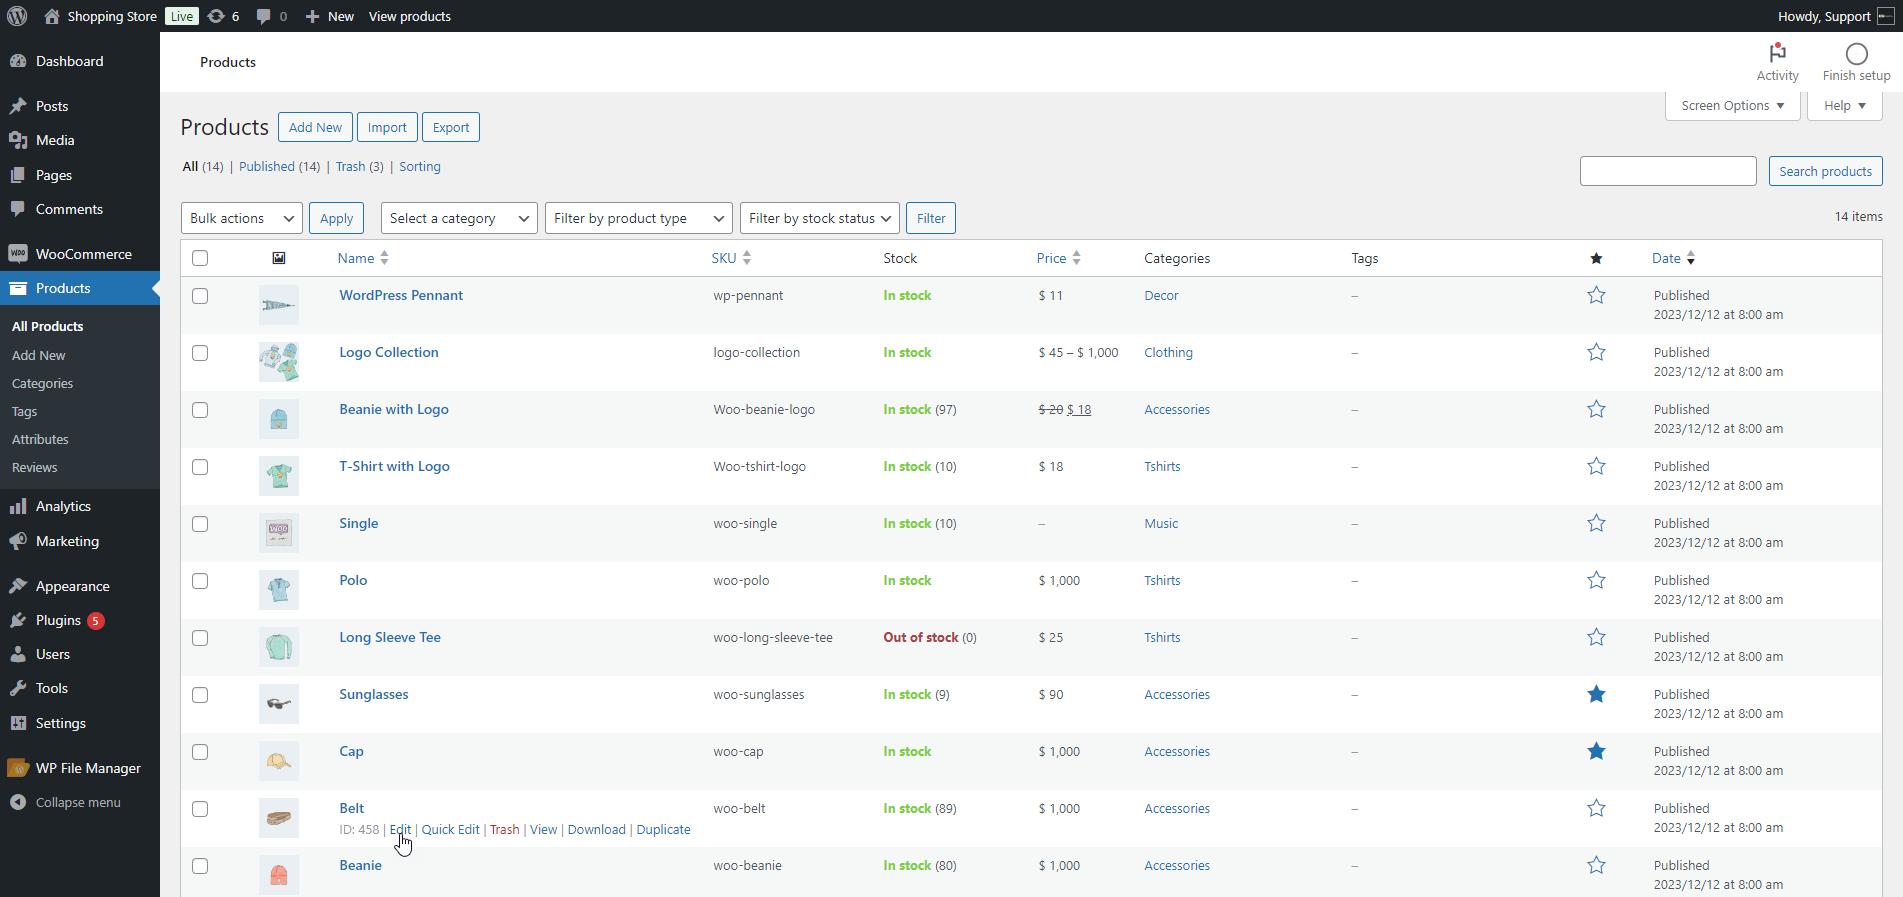
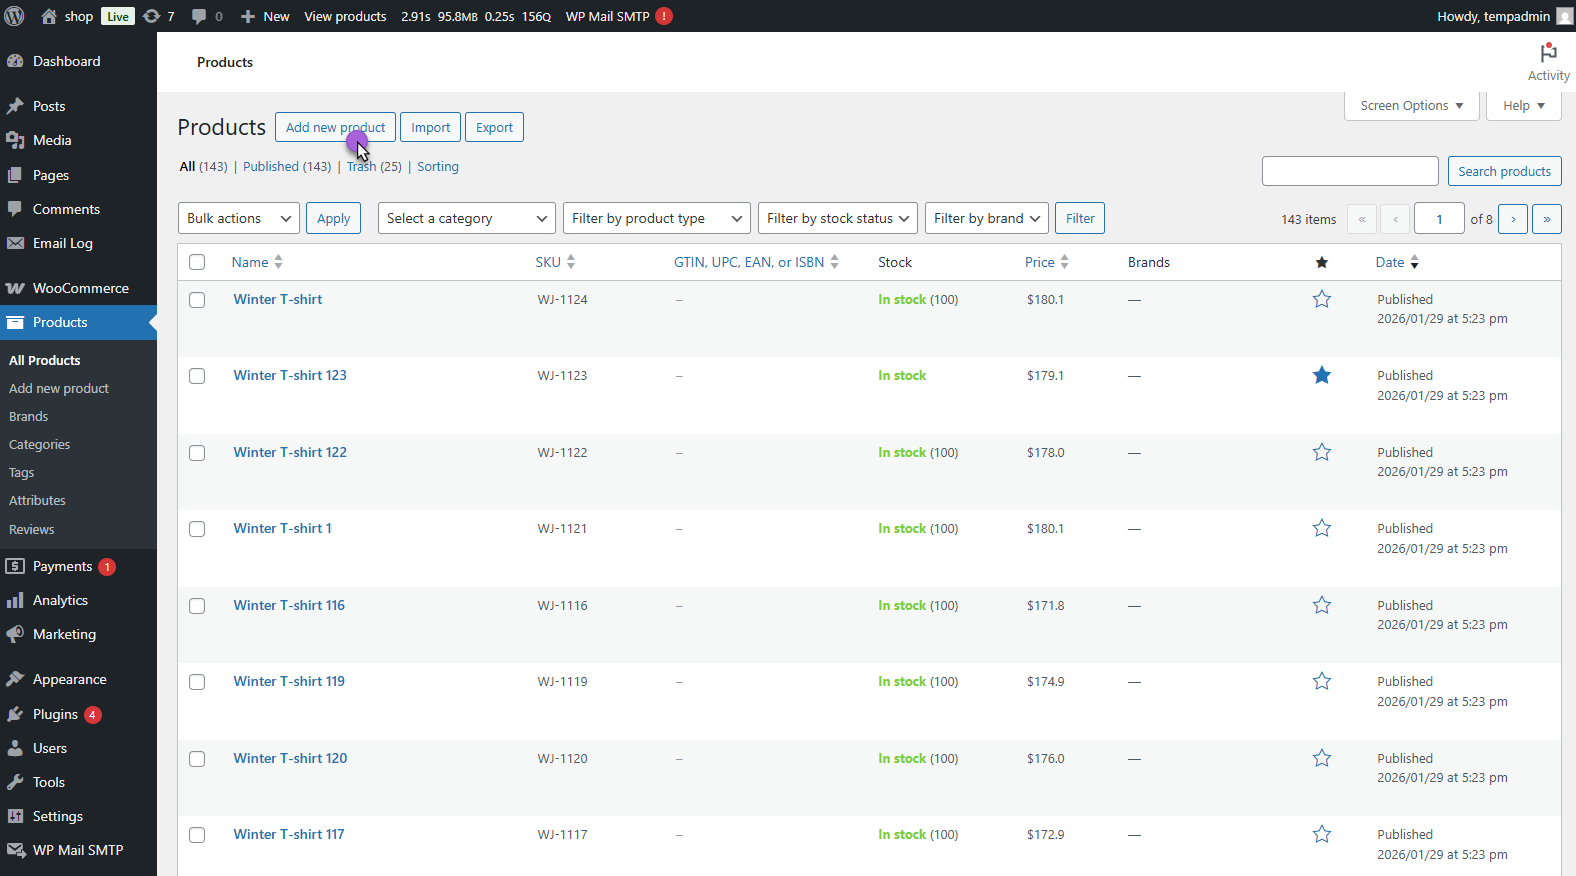
- Navigate to the WordPress Admin Dashboard > Products.
- Click on the Add New button or Edit the existing one.
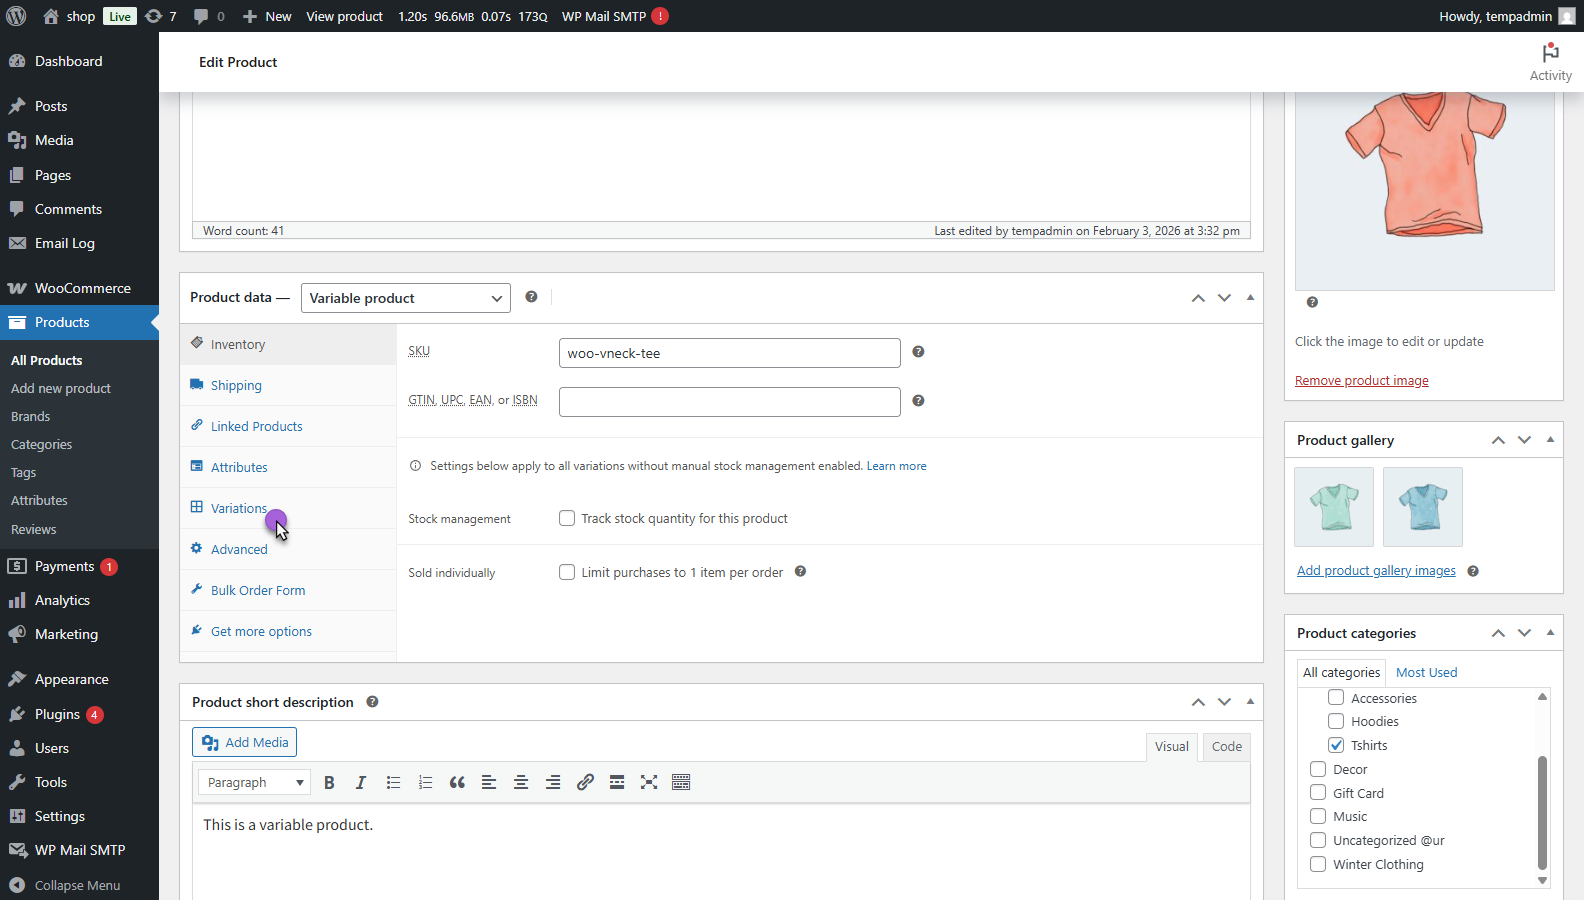
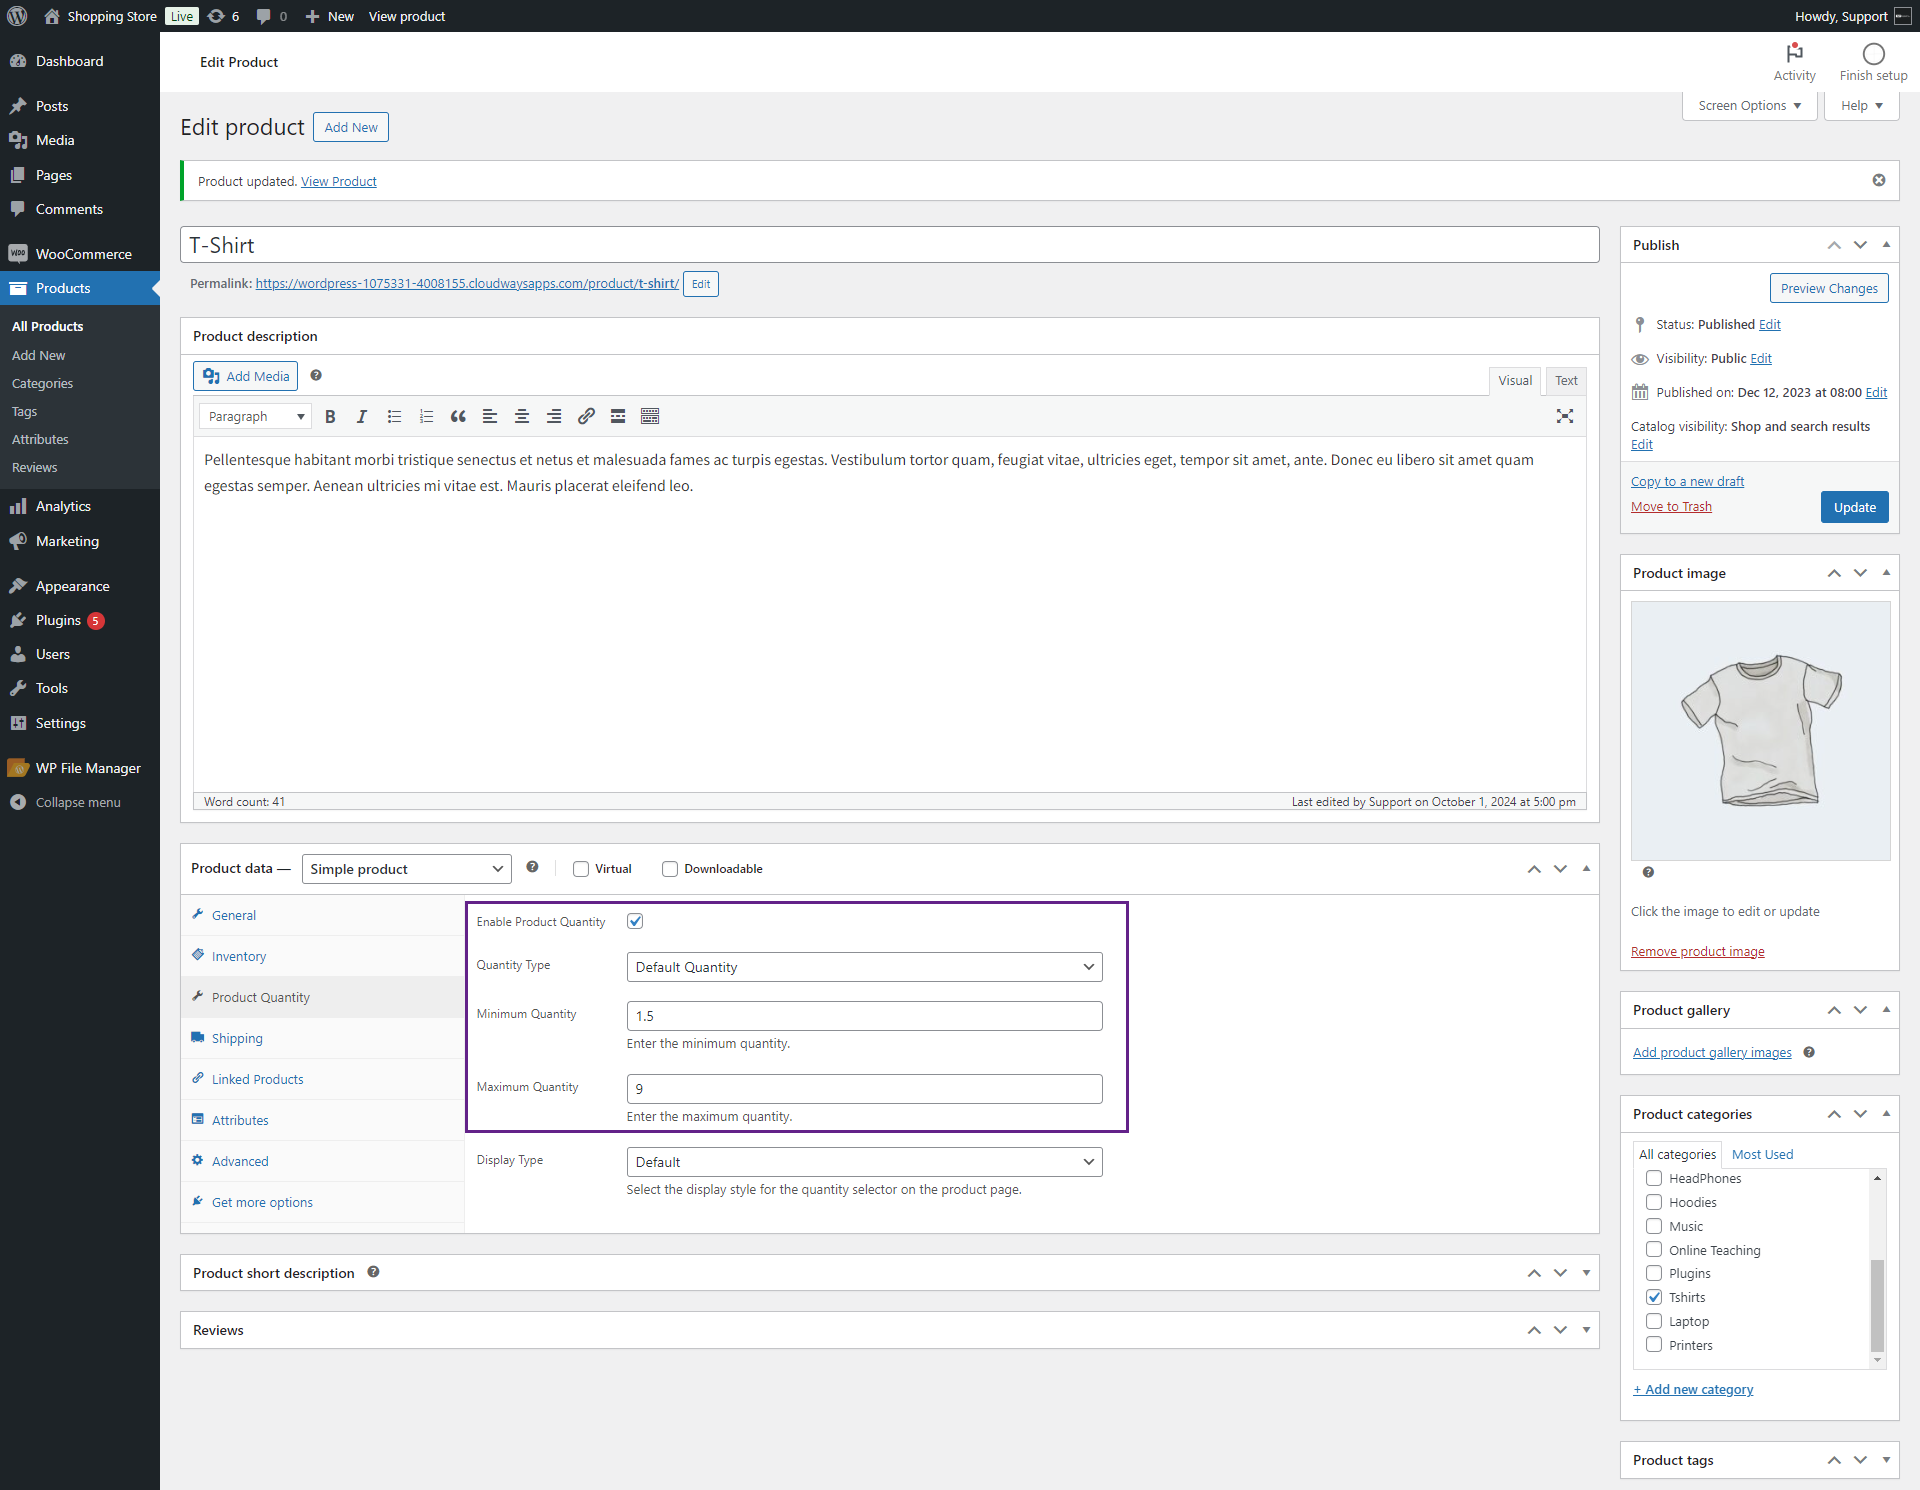
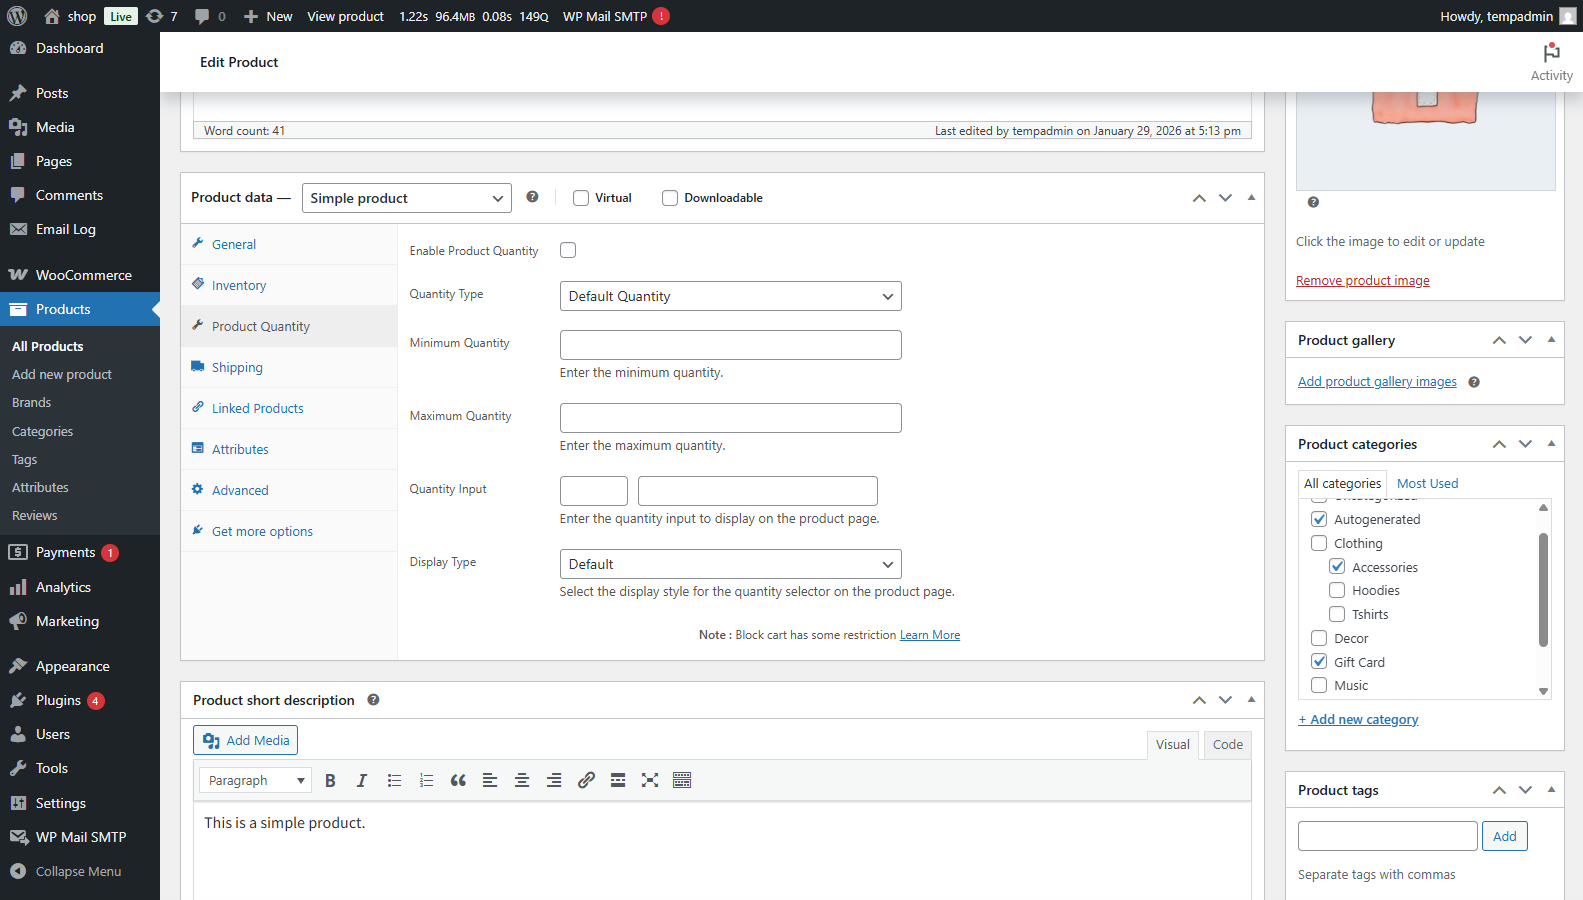
- Navigate to the Product Data > Product Quantity tab.
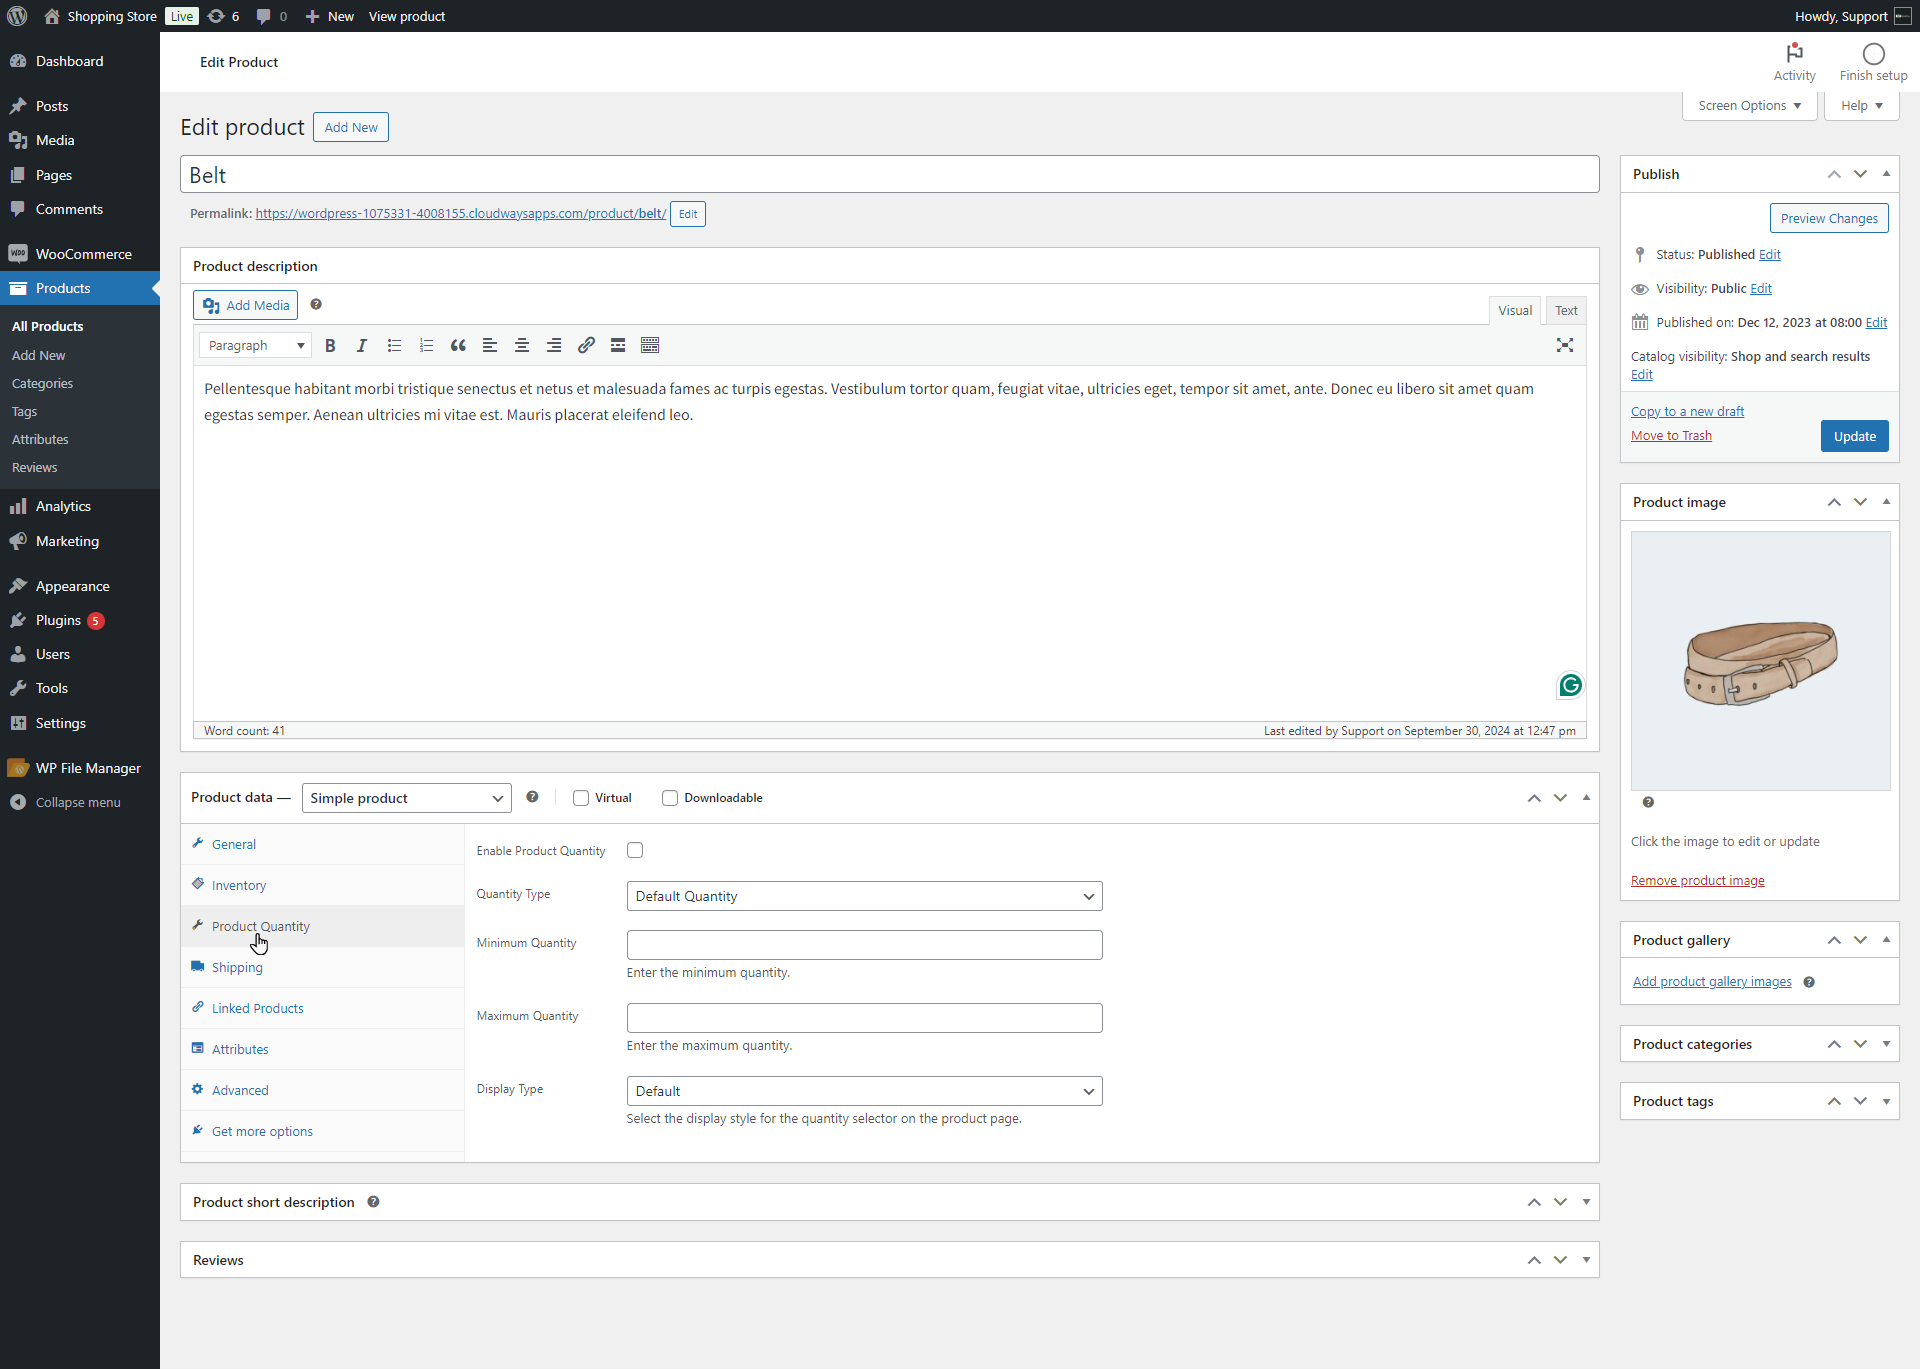
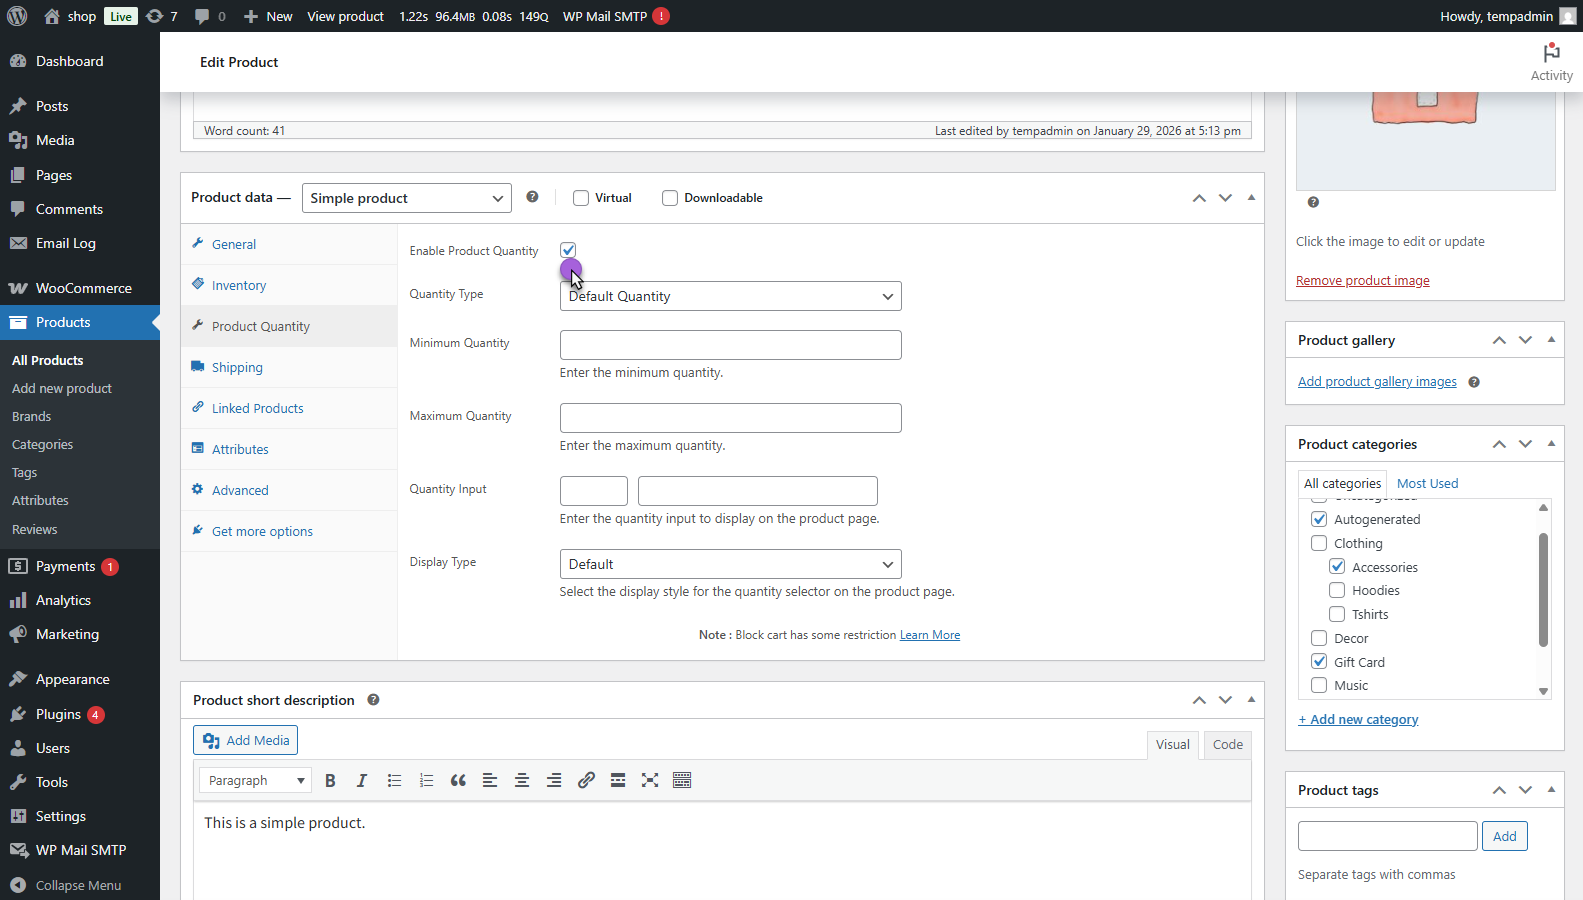
Enable Product Quantity
↑ Back to top- Click the checkbox of Enable Product Quantity. To apply restrictions for the users on that particular product.
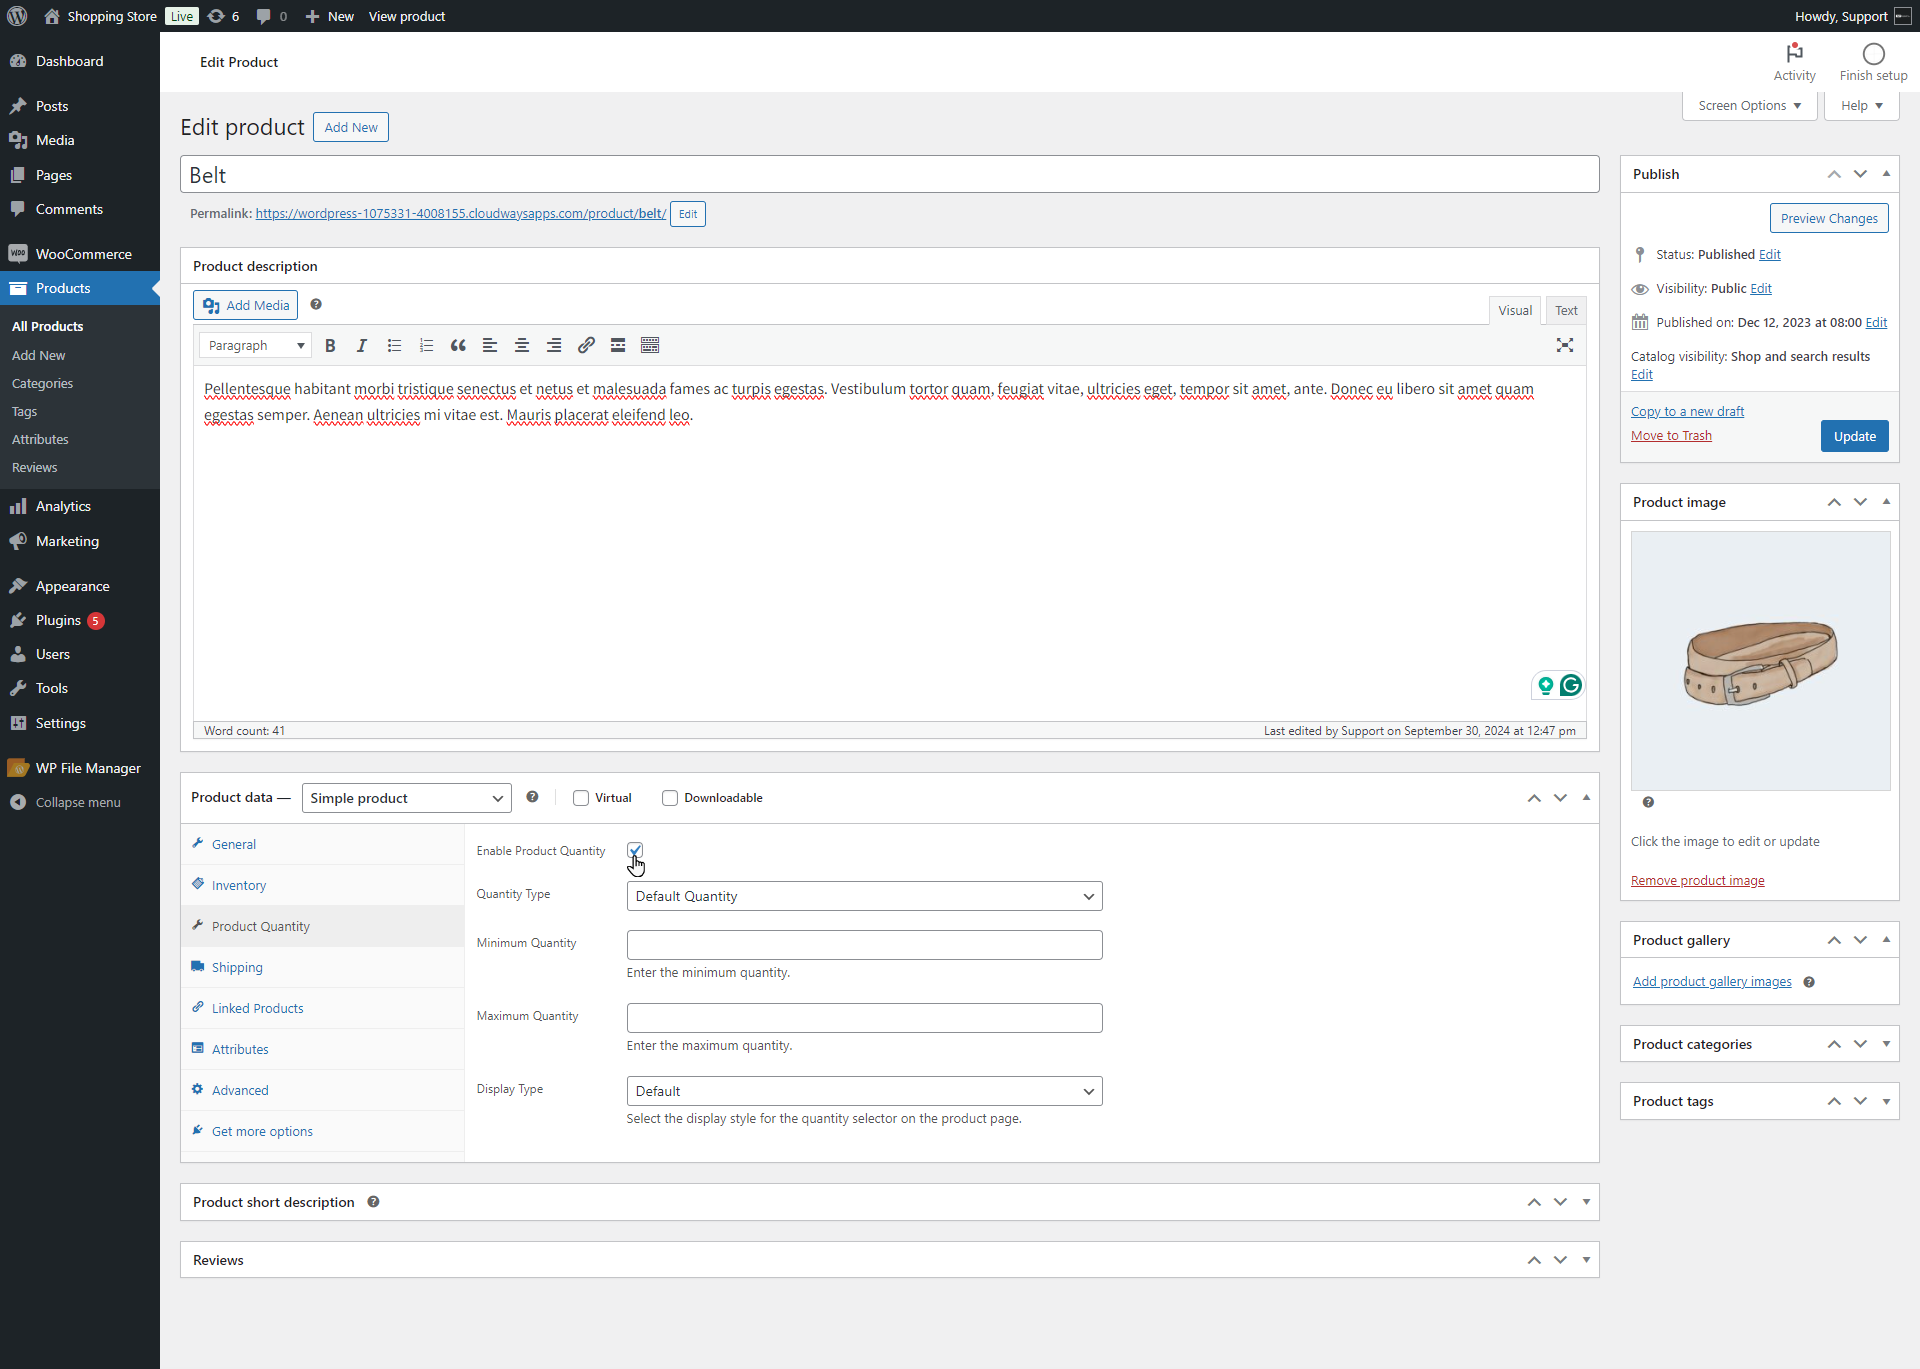
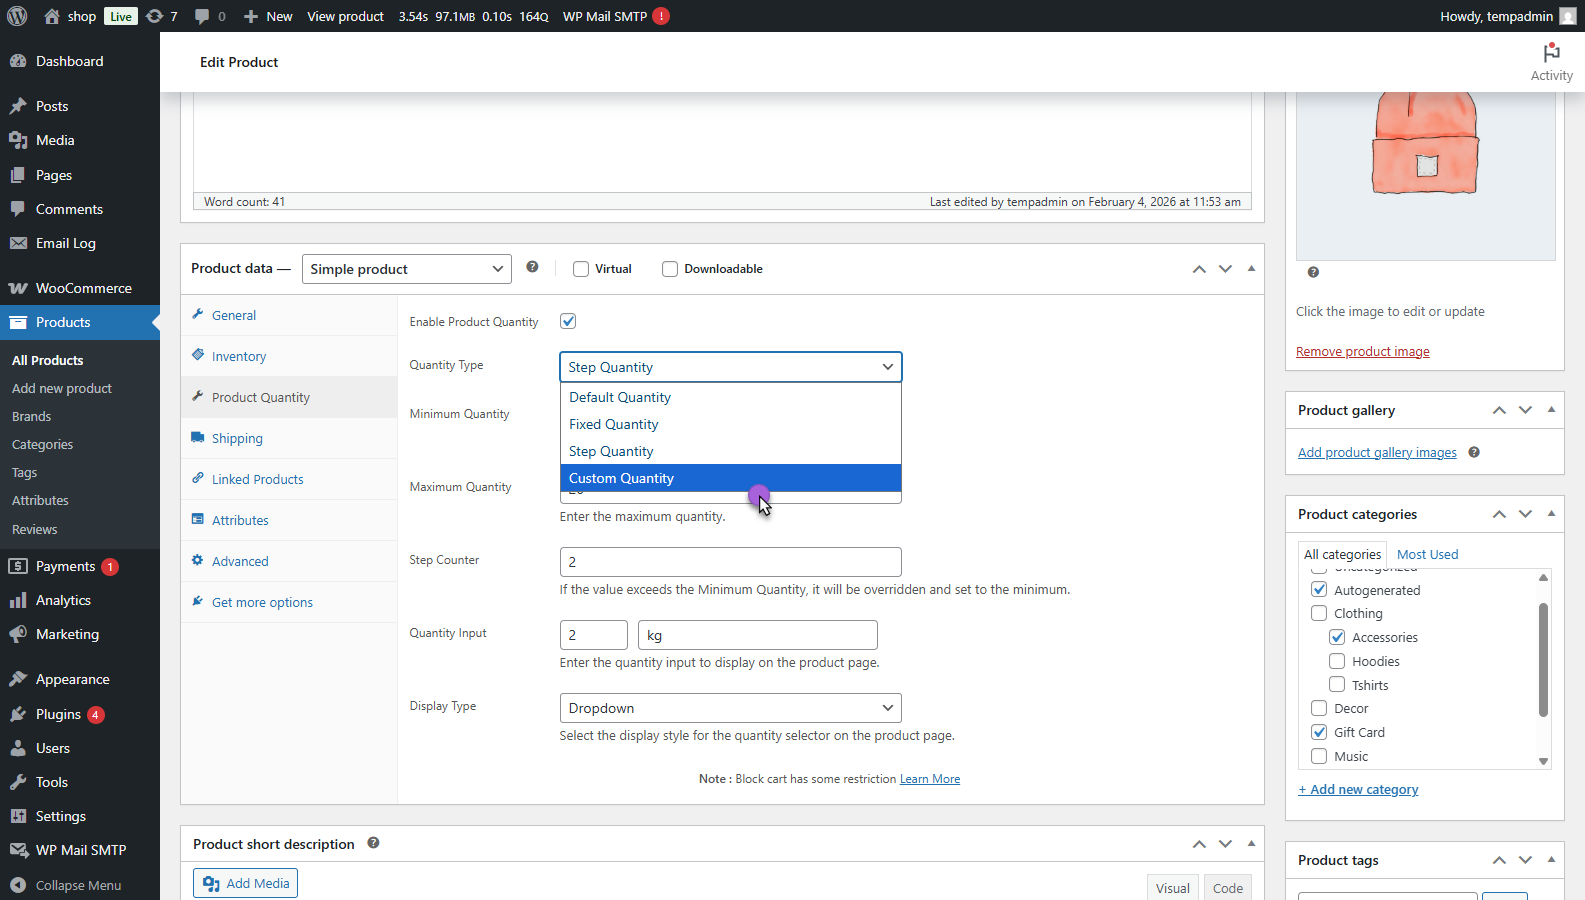
Quantity Type
↑ Back to top- Navigate and click on the Quantity Type drop-down menu. By default, it will select WooCommerce’s default quantity type.
- It consists of the following options;
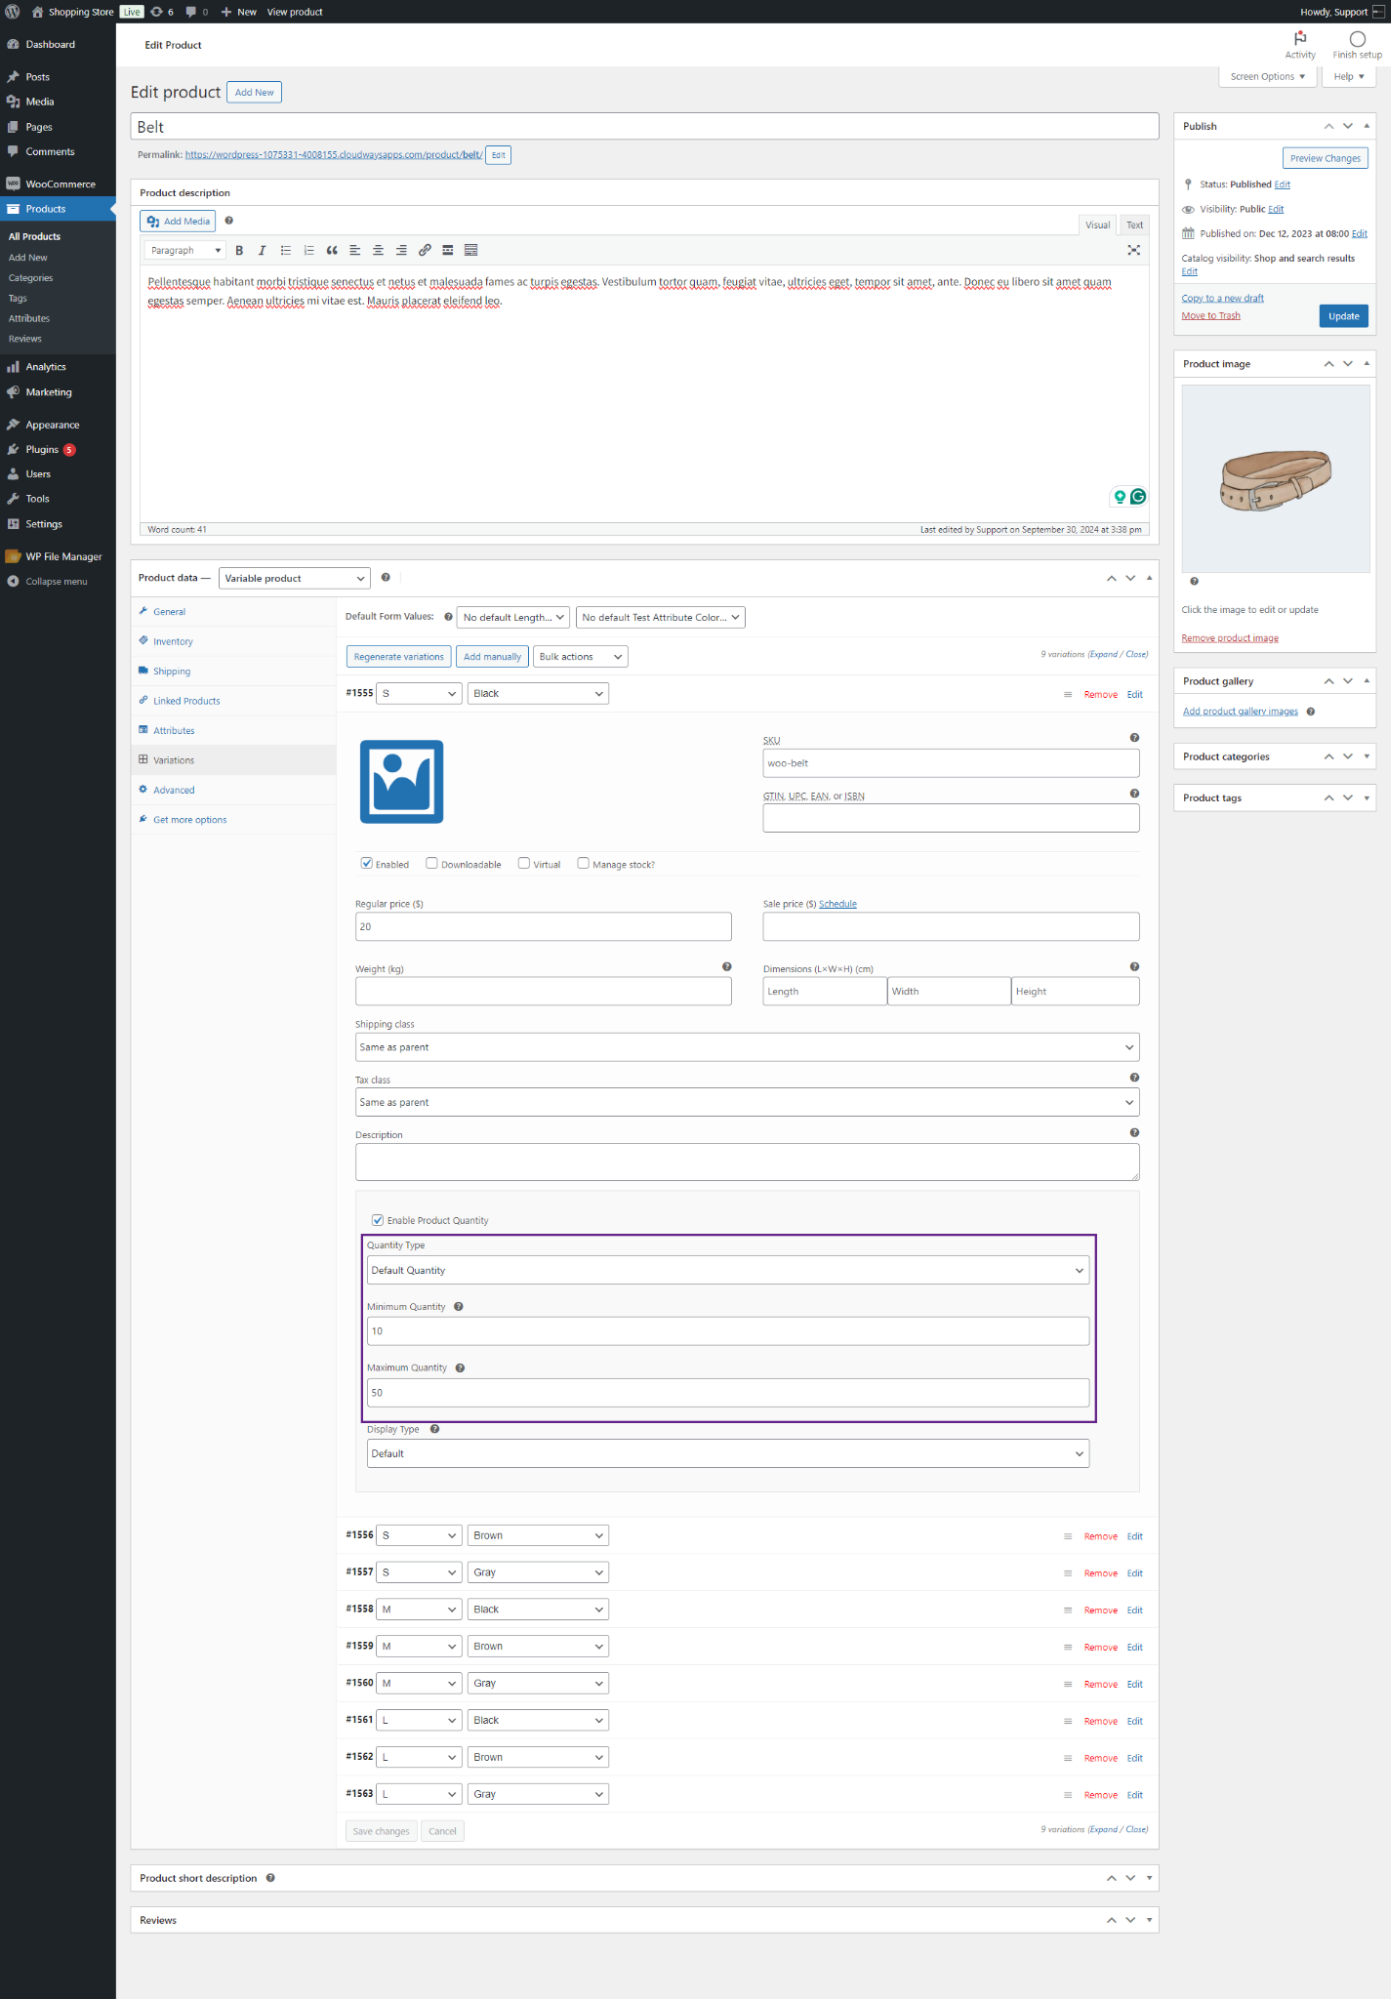
Default Quantity
- In the Quantity Type, by default, the Default Quantity will be selected; it consists of the following options;
- Minimum Quantity: Admin can set the minimum quantity in the Minimum Quantity text box.
- Maximum Quantity: Admin can set the maximum quantity in the Maximum Quantity text box.
- Click on the Update button.

Front-end Screenshot
- Login to your account.
- Go to the Product Page.
Quantity Input
↑ Back to topThe Quantity Input feature allows store owners to display product quantity details (such as unit type and quantity value) on the product page. This helps customers clearly understand how the product is measured or sold (e.g., pieces, kg, liters, packs), improving transparency and purchase confidence.
Quantity Input Setup
- Log in to the WordPress Admin Dashboard.
- Go to Products.
- Click Add New Product or Edit an existing product.

- Scroll down to the Product Data section.
- Navigate to Product Quantity > Quantity Input.
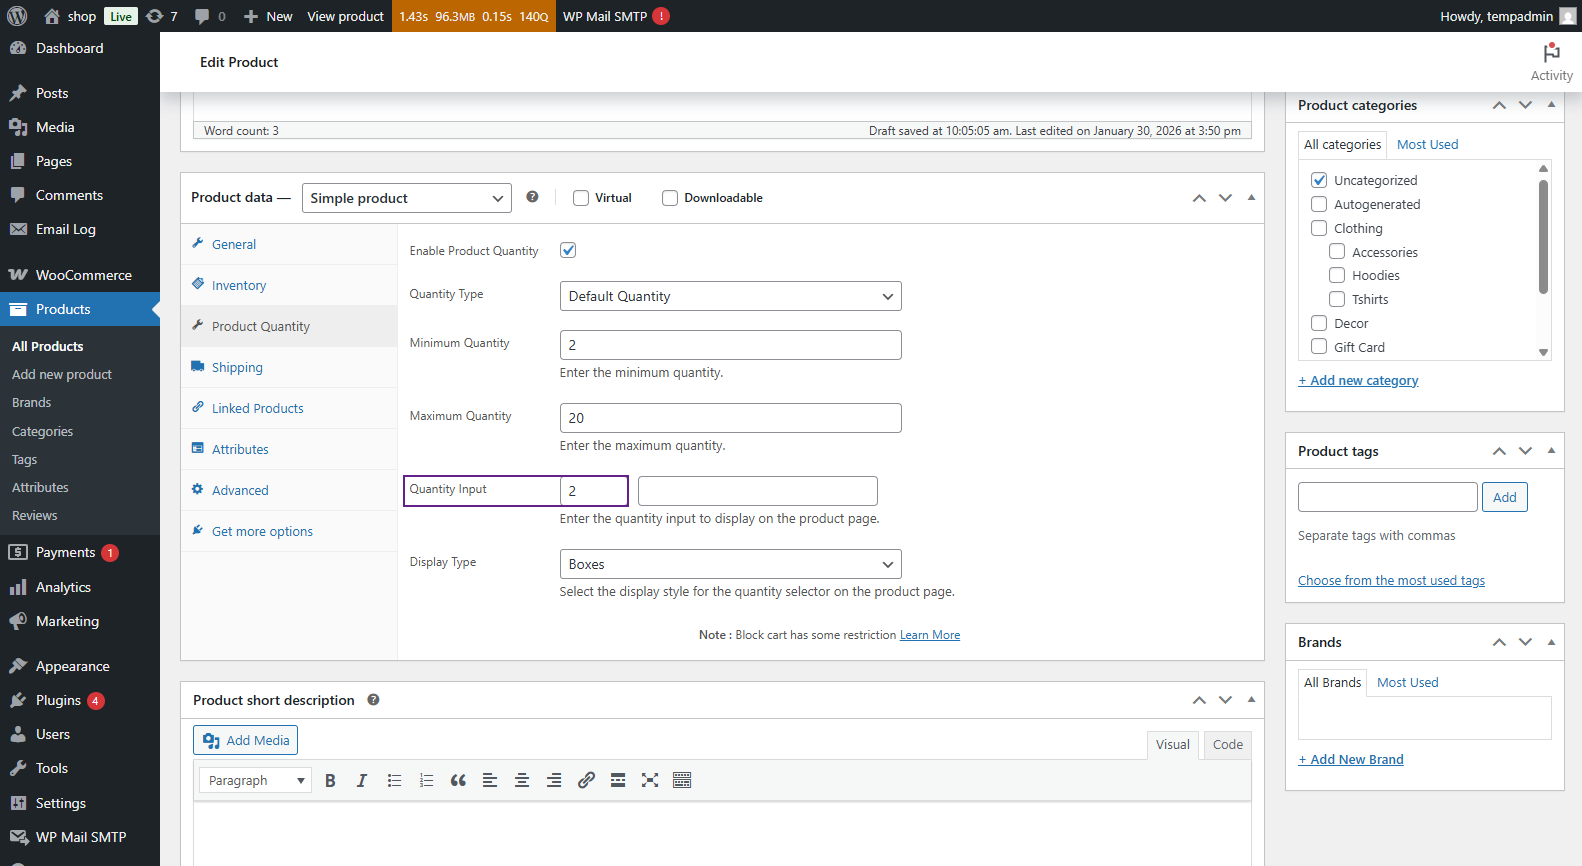
Quantity Input for Simple Products
Enable Quantity Input
- In Product Data > Product Quantity > Quantity Input.
- This displays quantity details for the selected product.
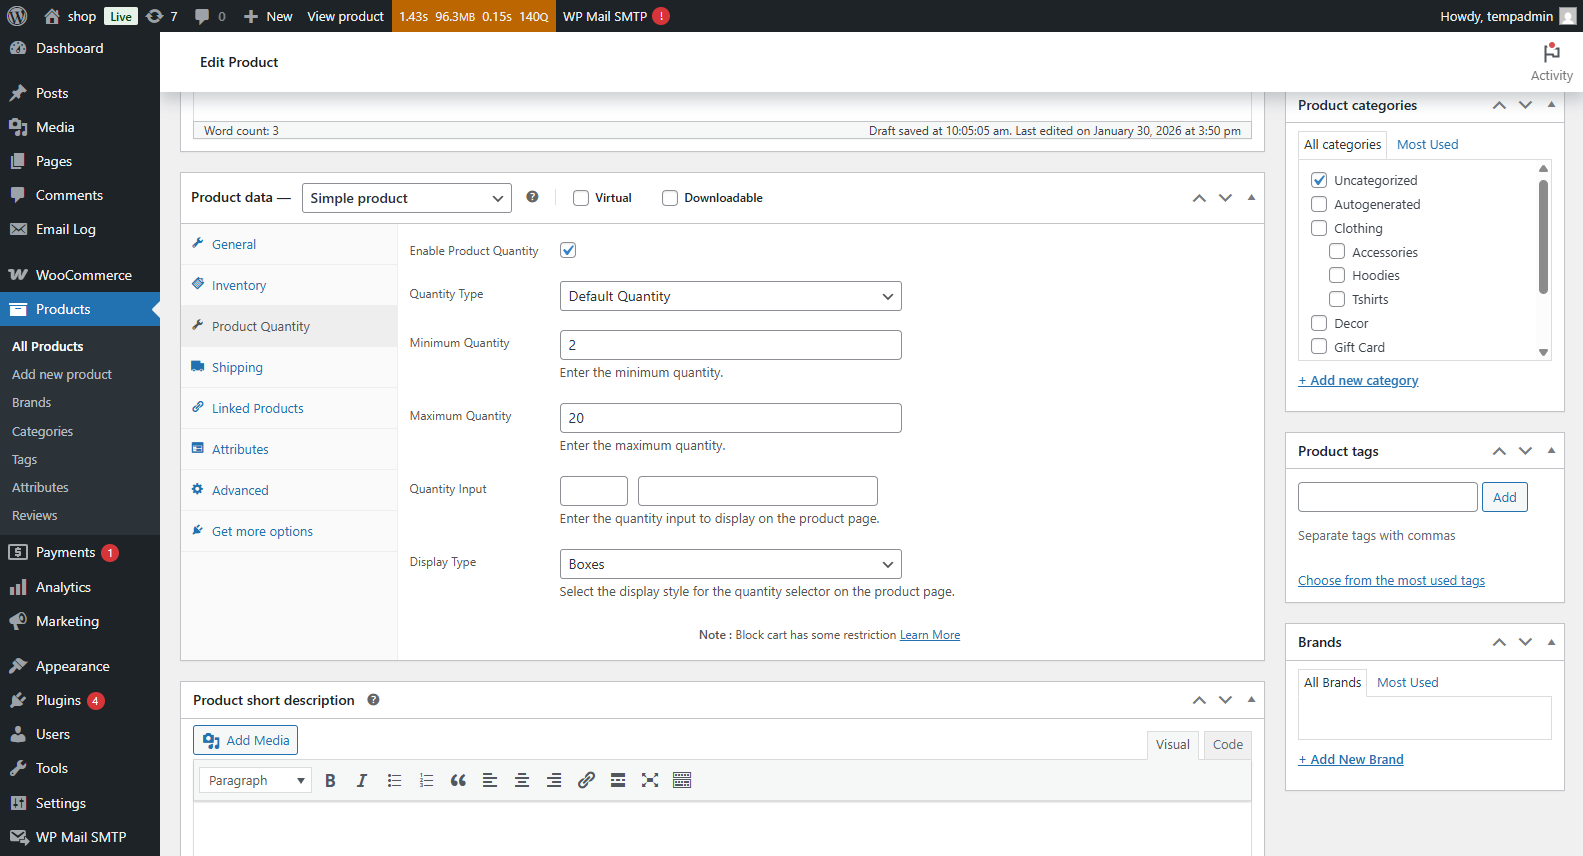
Quantity Value
- Enter the quantity value for the product (e.g., 1, 500, 10).
- This helps customers understand the exact amount included per product.
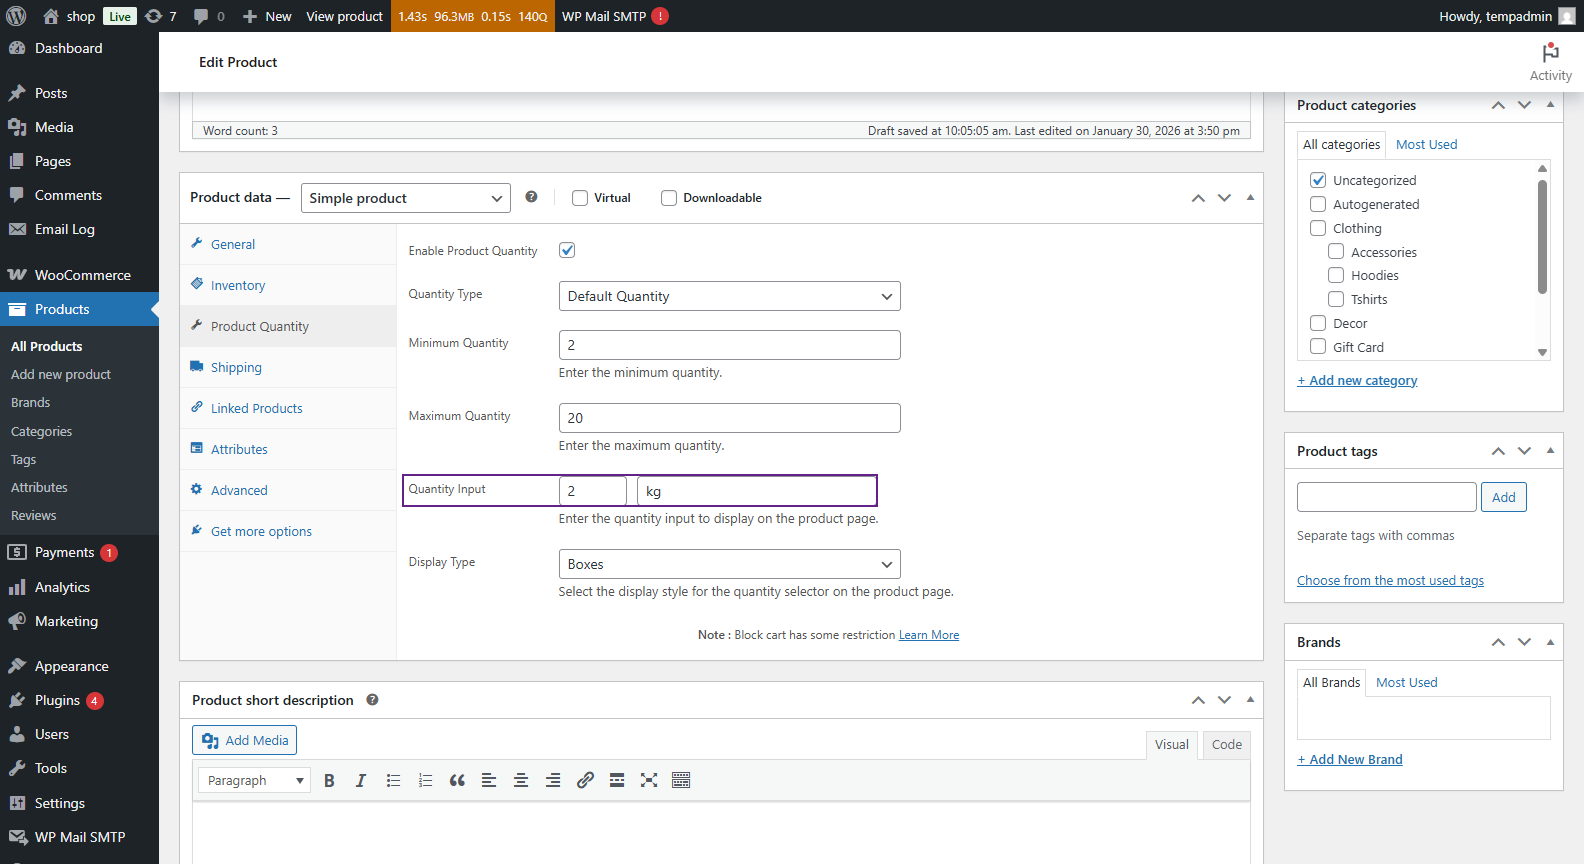
Quantity Unit
- Enter the unit name in the Quantity Unit field (e.g., pcs, kg, liters, packs).
- This unit will be shown to customers on the product page.
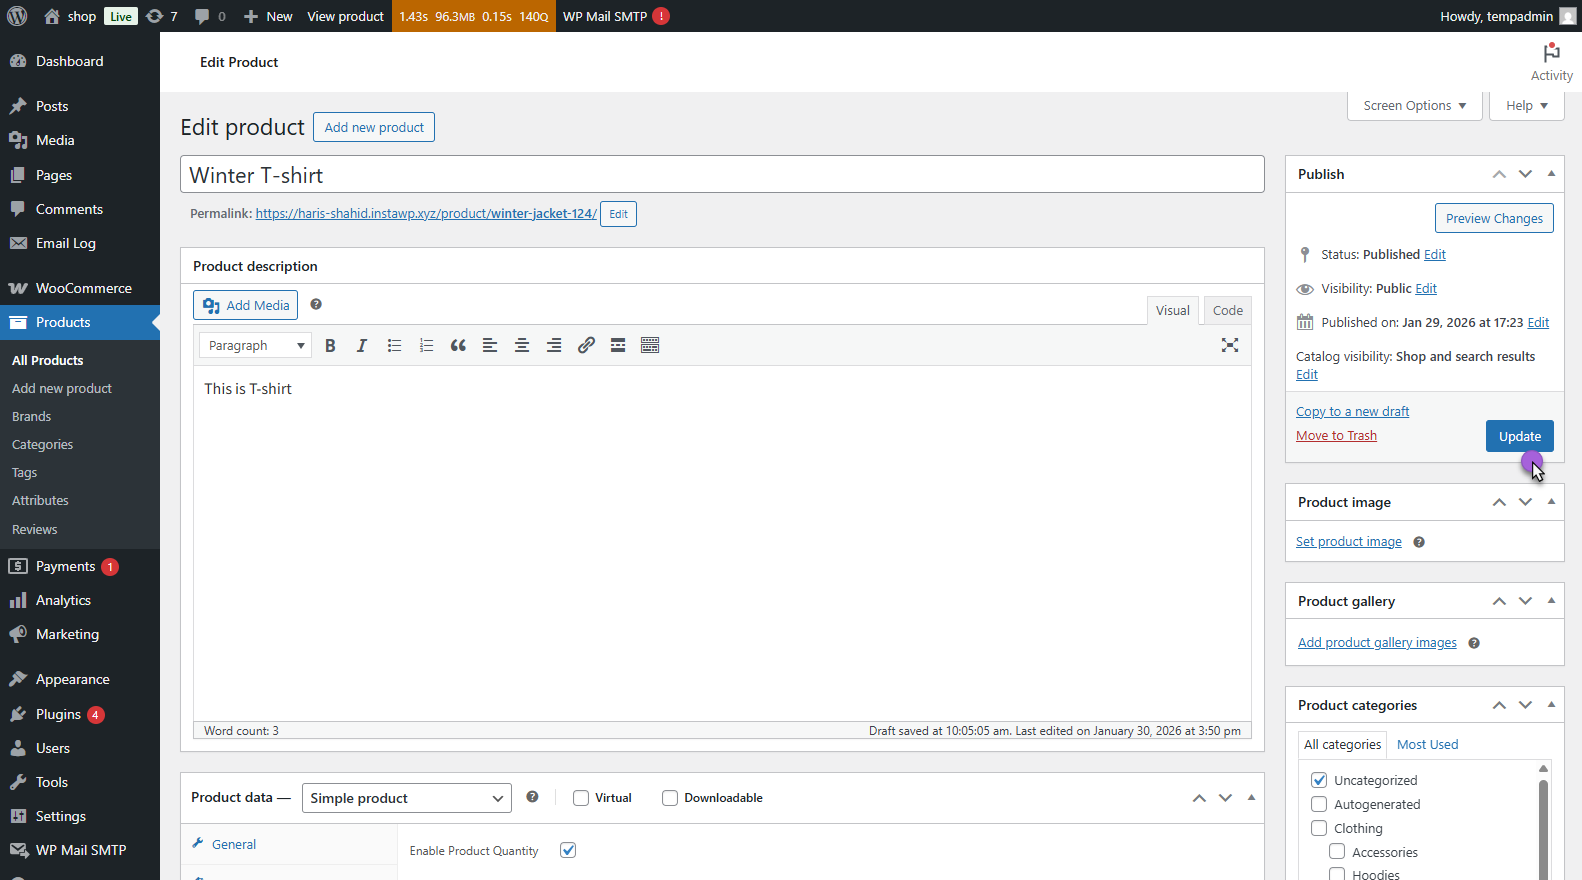
Save Changes
- Click on the Update button to save the product settings.
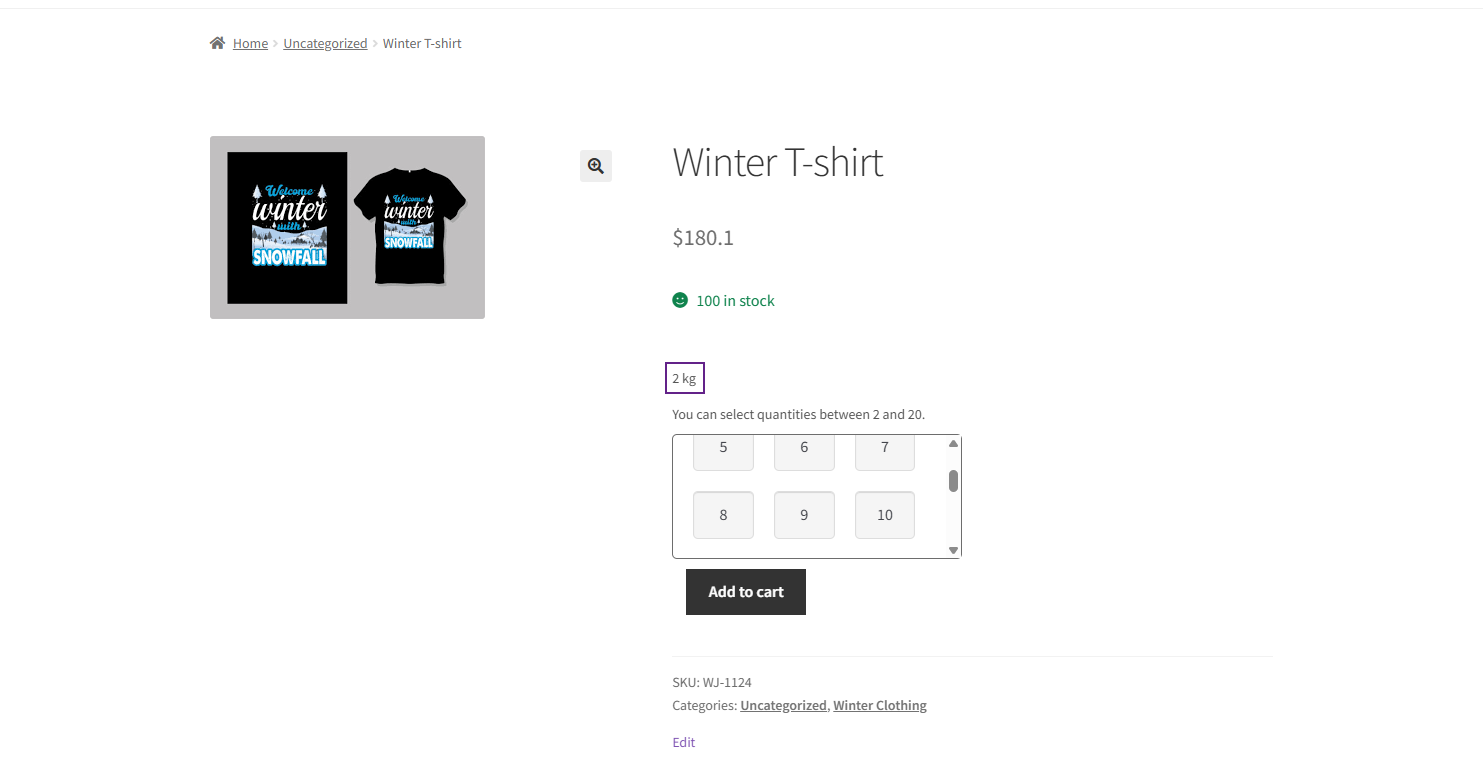
Front-End Screenshot
- Log in to your account.
- Go to the Product Page.
- The quantity input information will be displayed along with the product details.
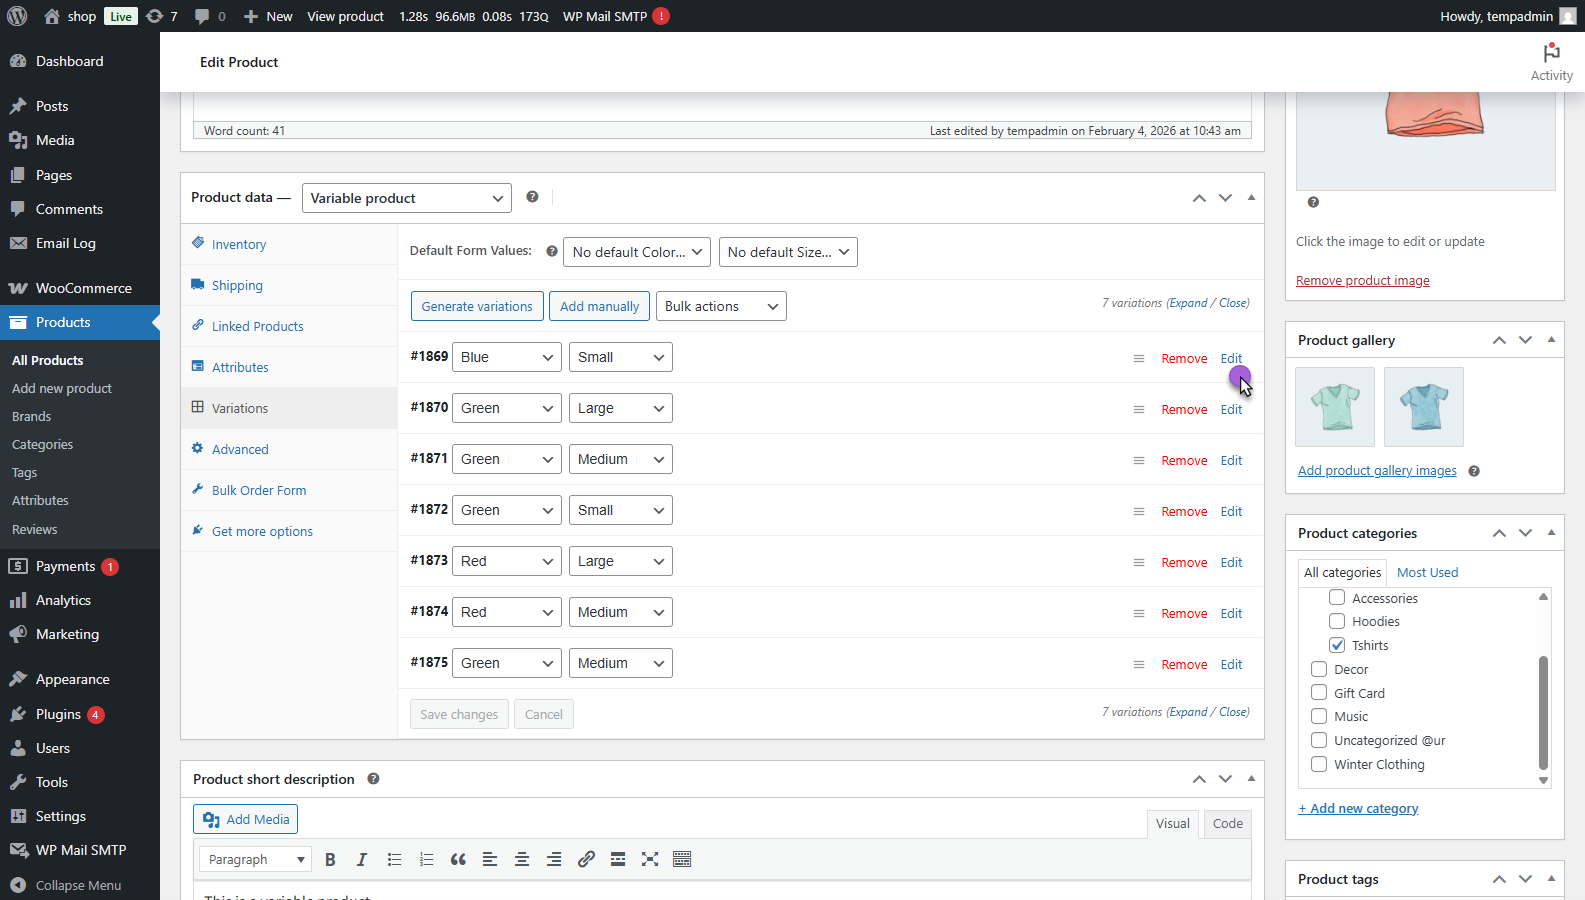
Quantity Input for Variable Products
Enable Quantity Input
- Navigate to Products > Edit Variable Product.
- Go to Product Data > Variations
Set Quantity for Variations
- Select a product variation.
- Enter the Quantity Value for that specific variation.
- Enter the Quantity Unit (e.g., kg, pcs).
- Repeat the steps for each variation if required.
Save Changes
- Click Update to apply the changes.
Front-End Screenshot
- Log in to your account.
- Visit the Variable Product Page.
- Select a variation.
- The quantity input details will update based on the selected variation.
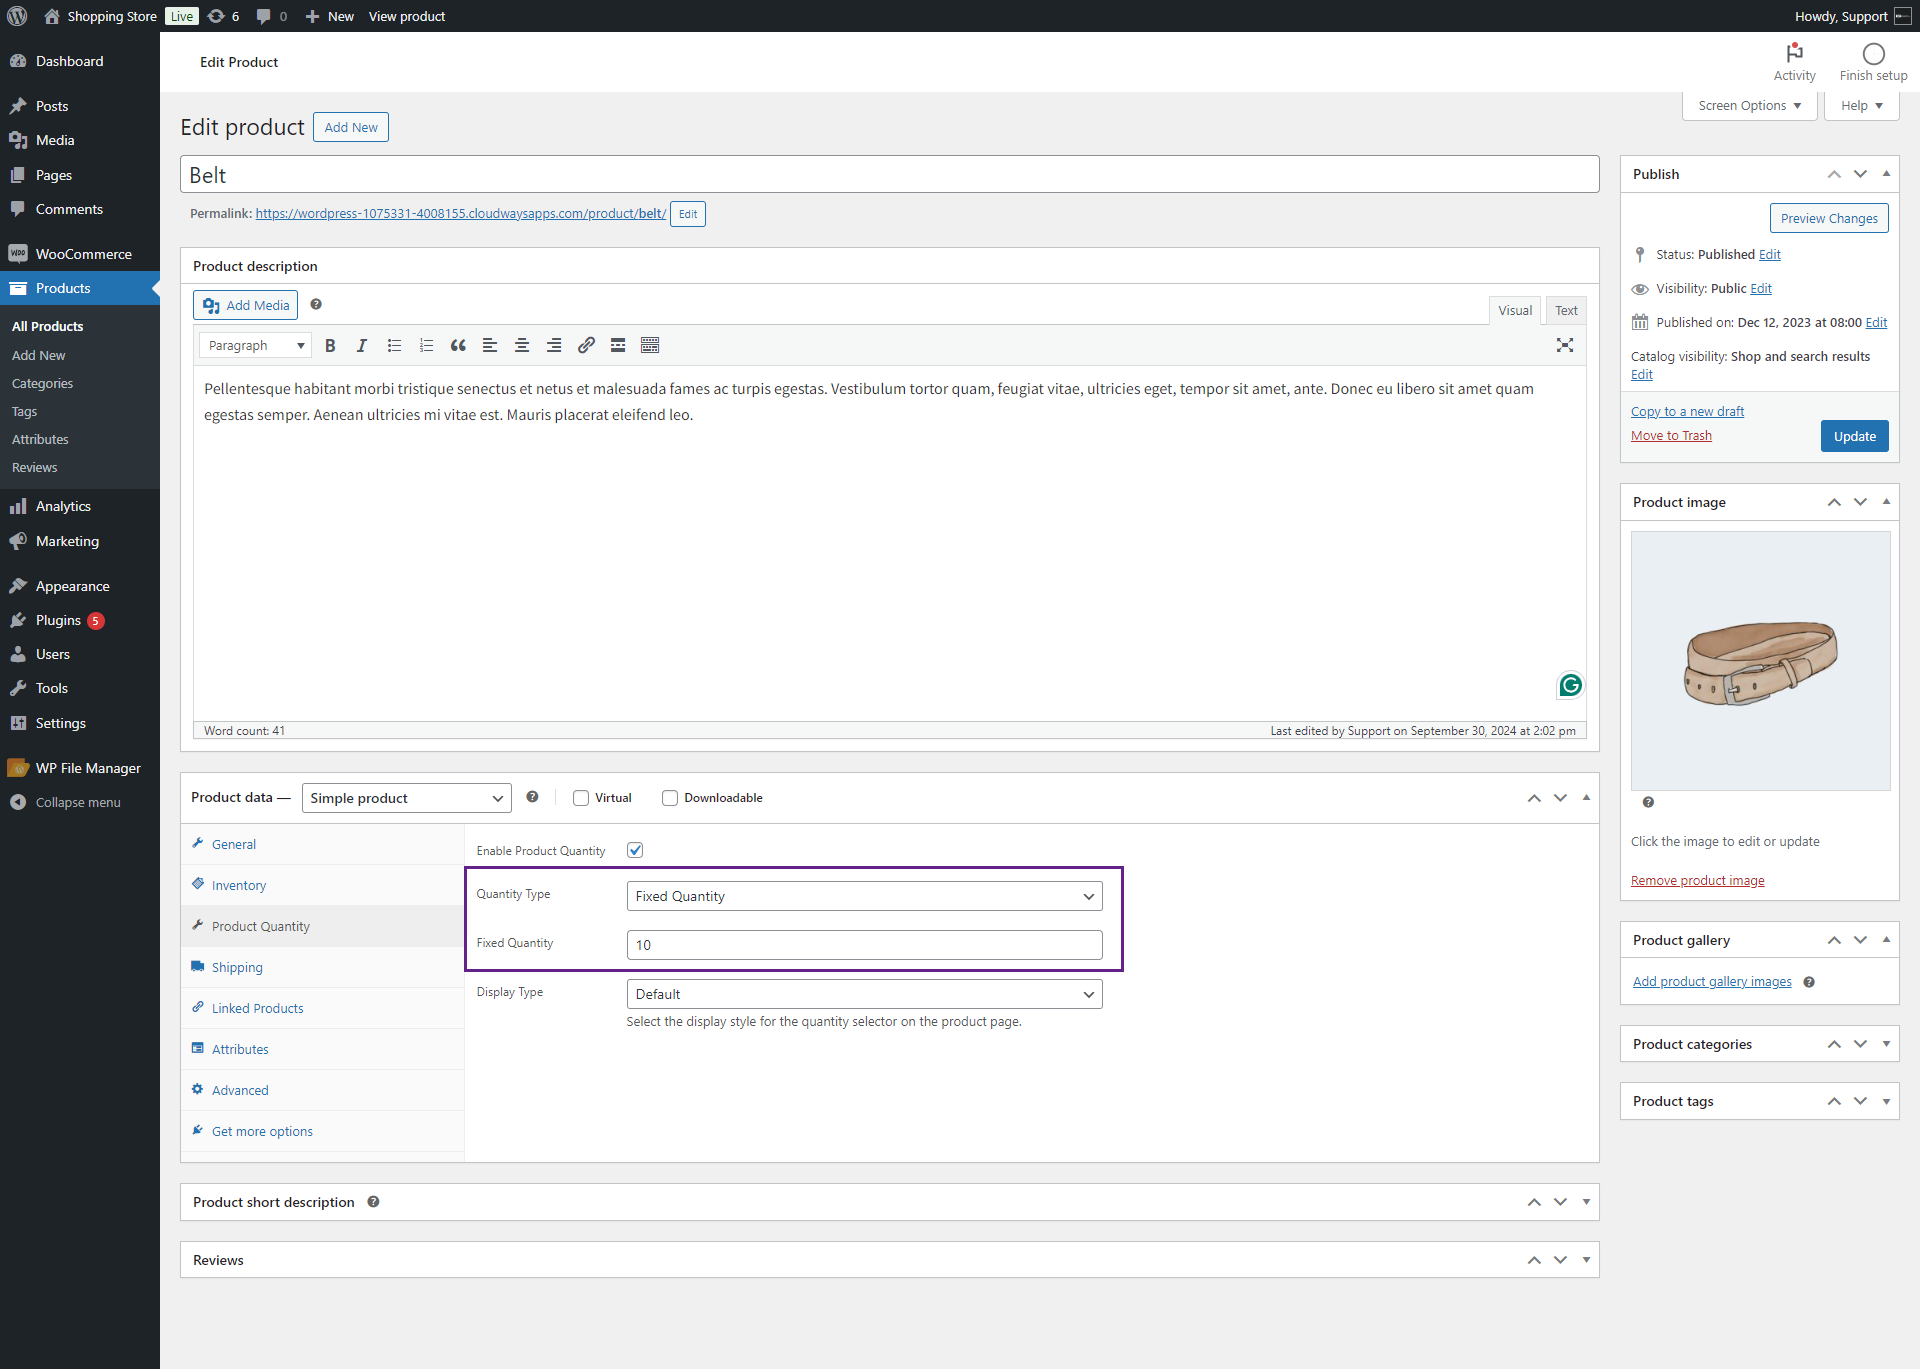
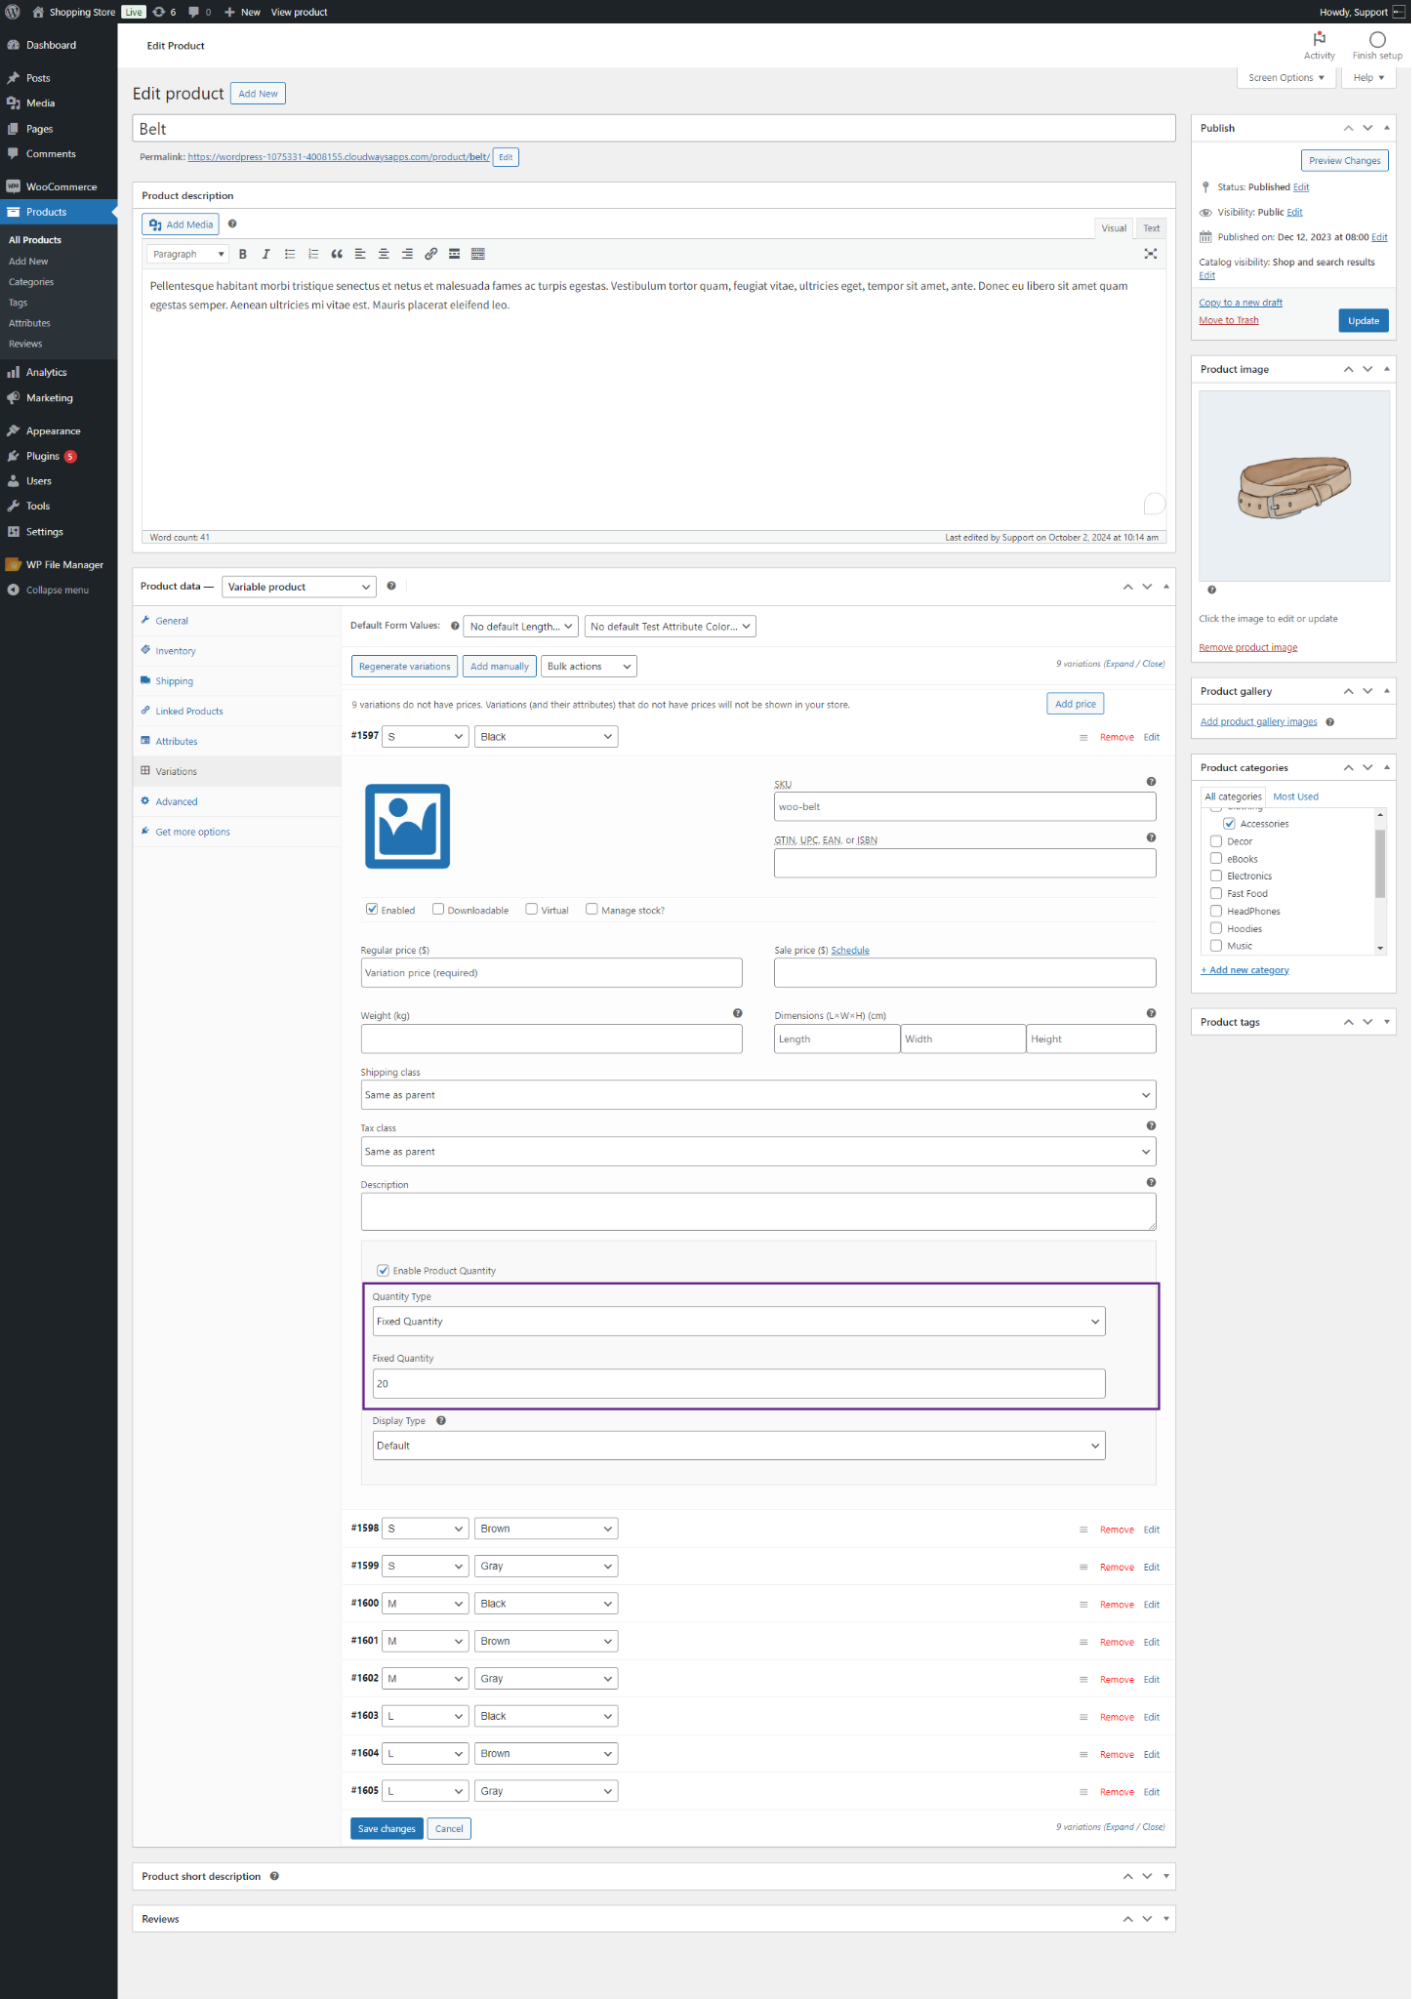
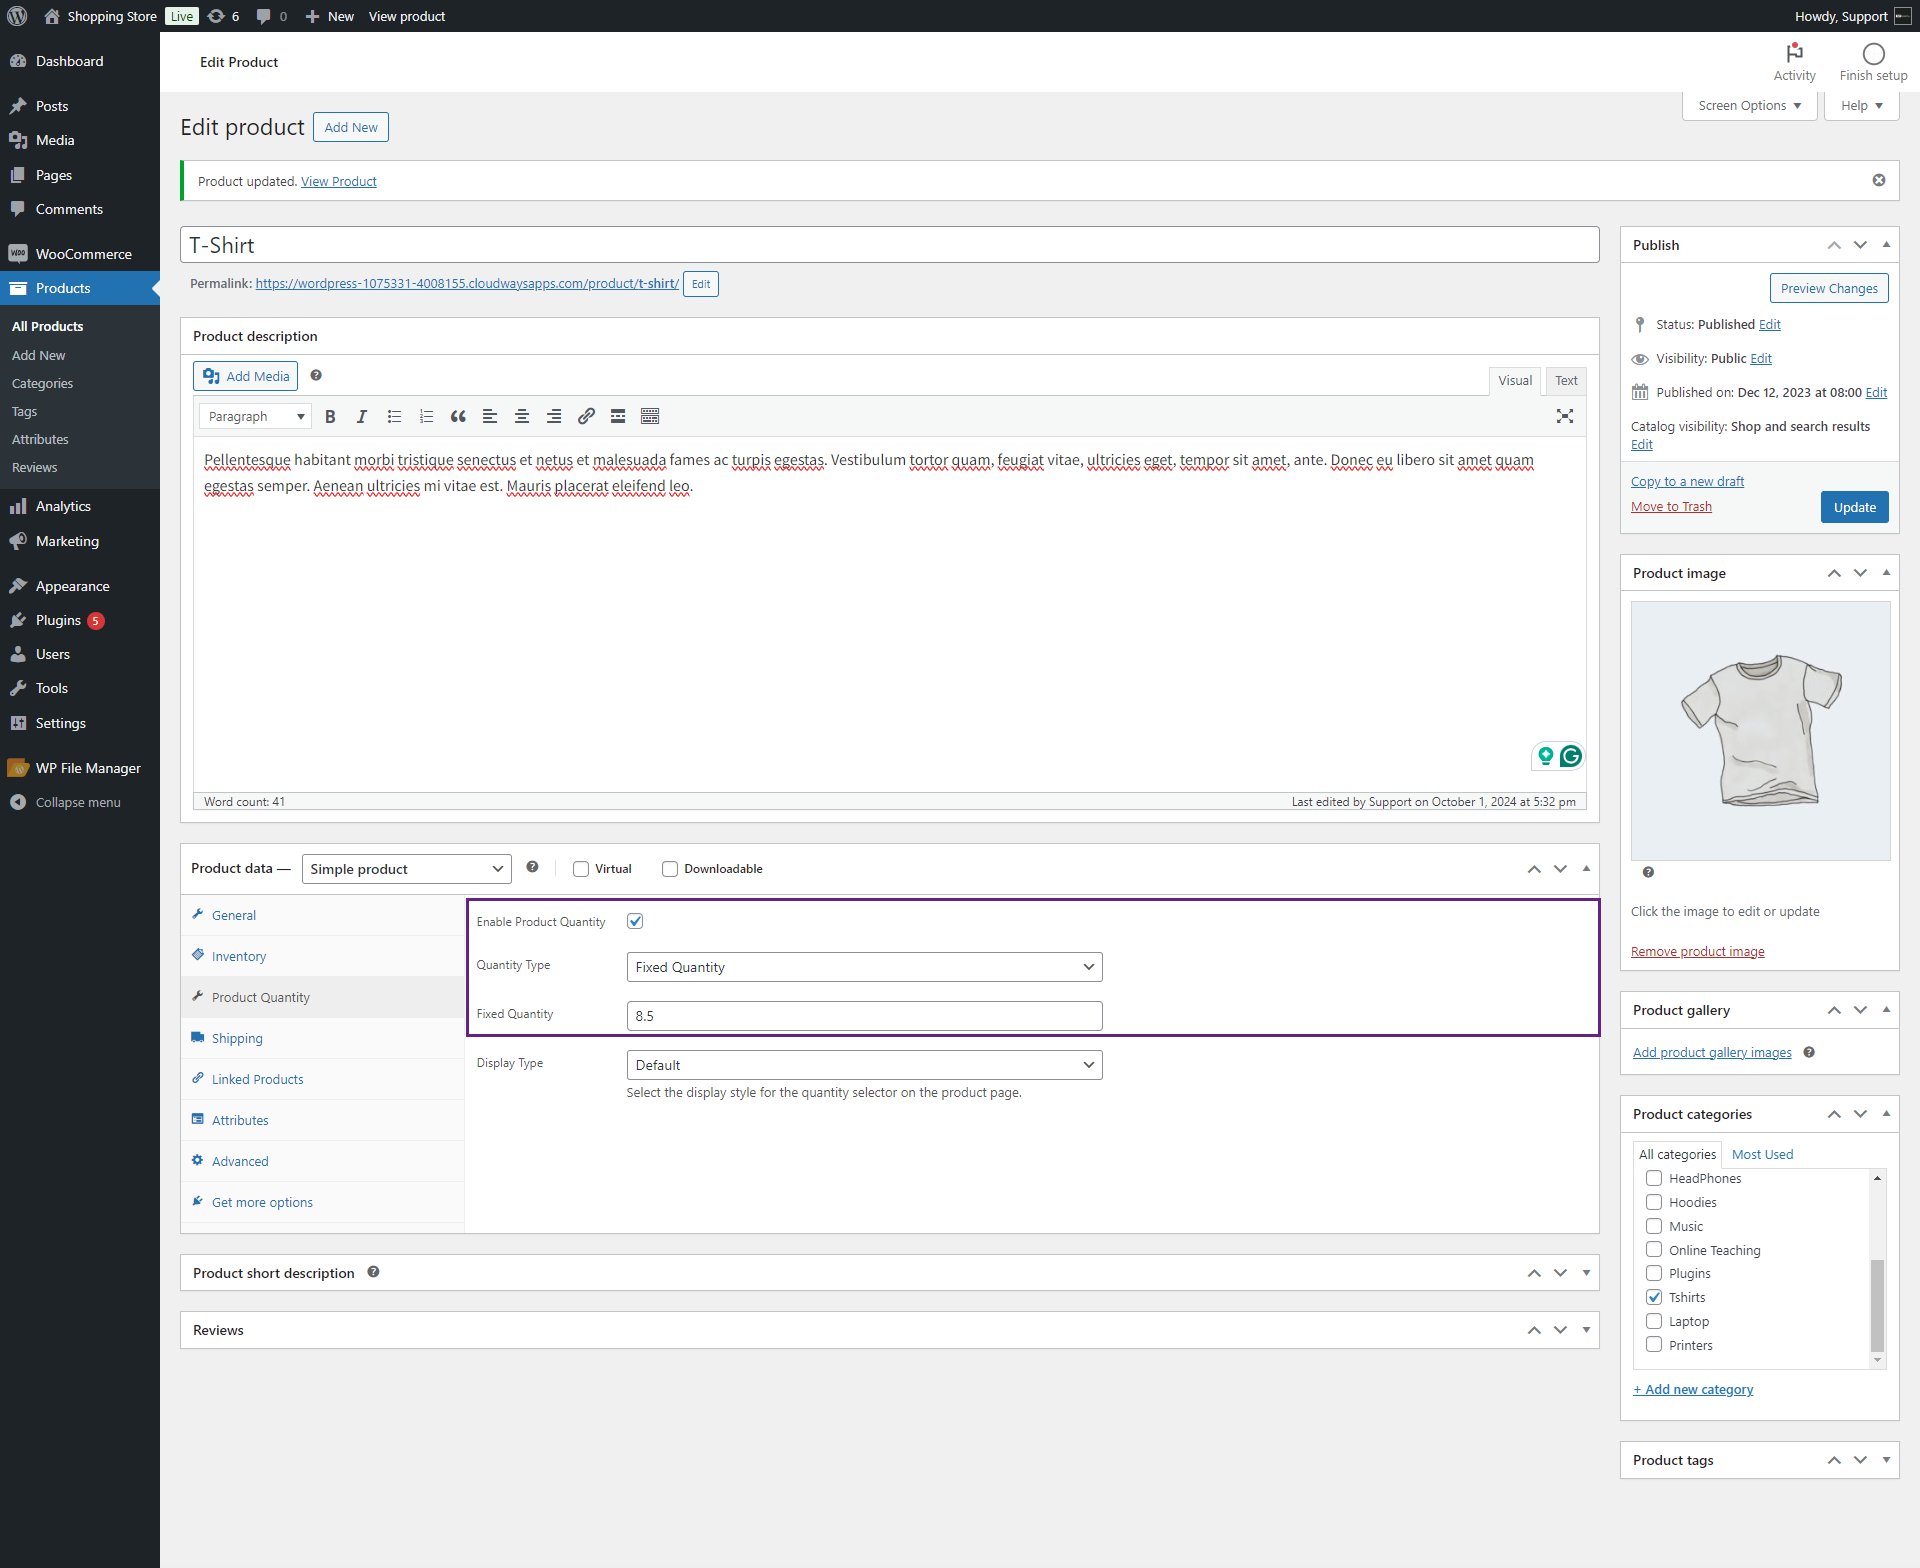
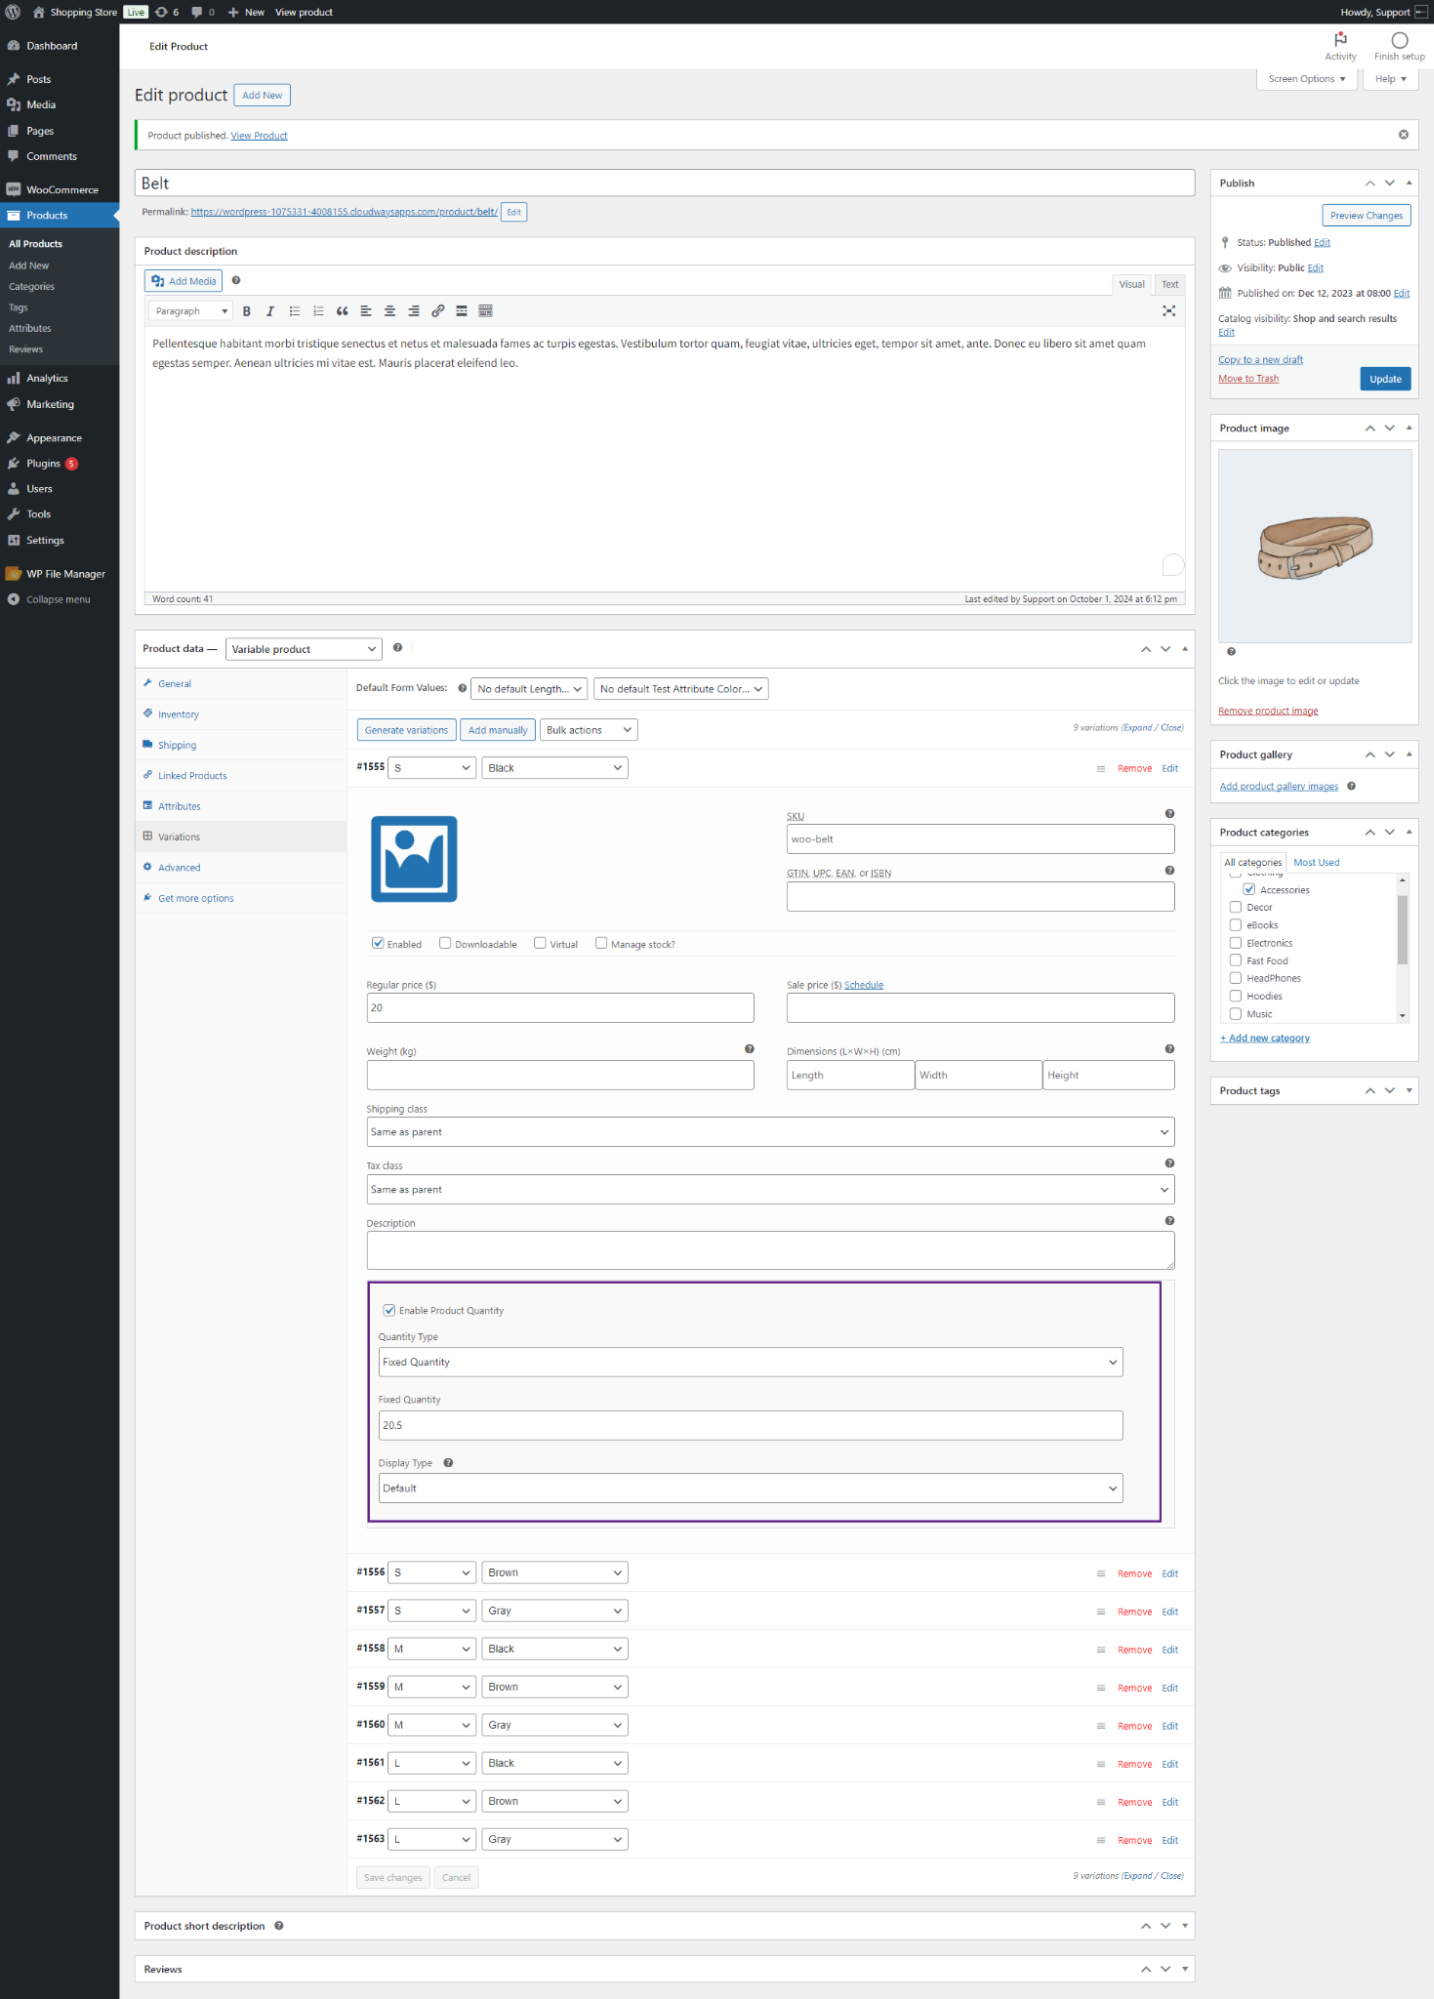
Fixed Quantity
- Admin selects Fixed Quantity from the Quantity Type drop-down menu. It consists of the following options;
- Fixed Quantity: Admin can enter the fixed quantity in the text box.
- Click on the Update button.
Front-end Screenshot
- Login to your account.
- Go to the Product Page.

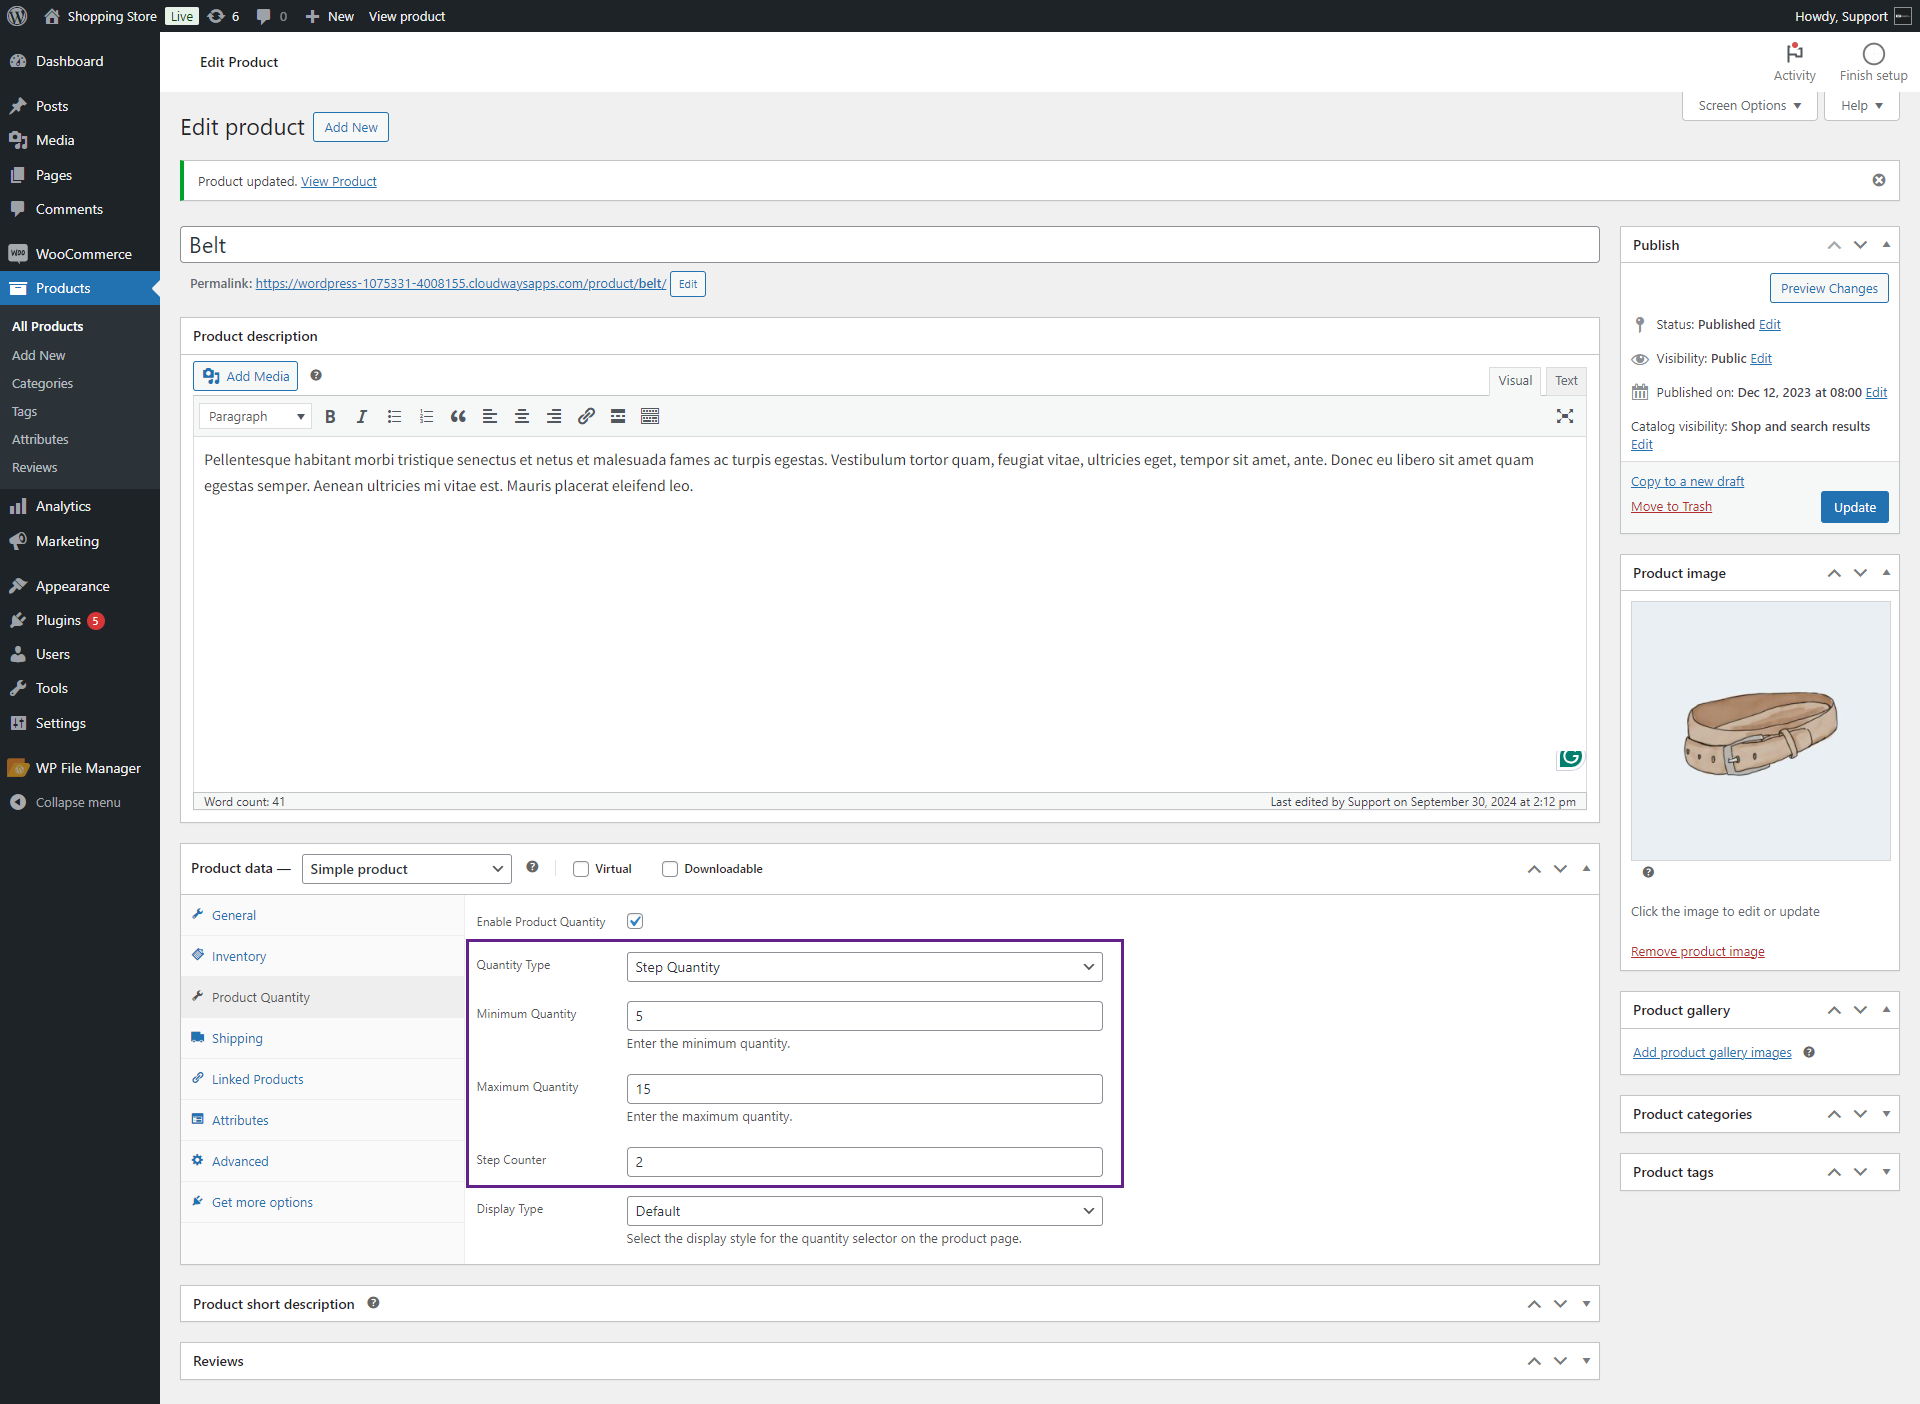
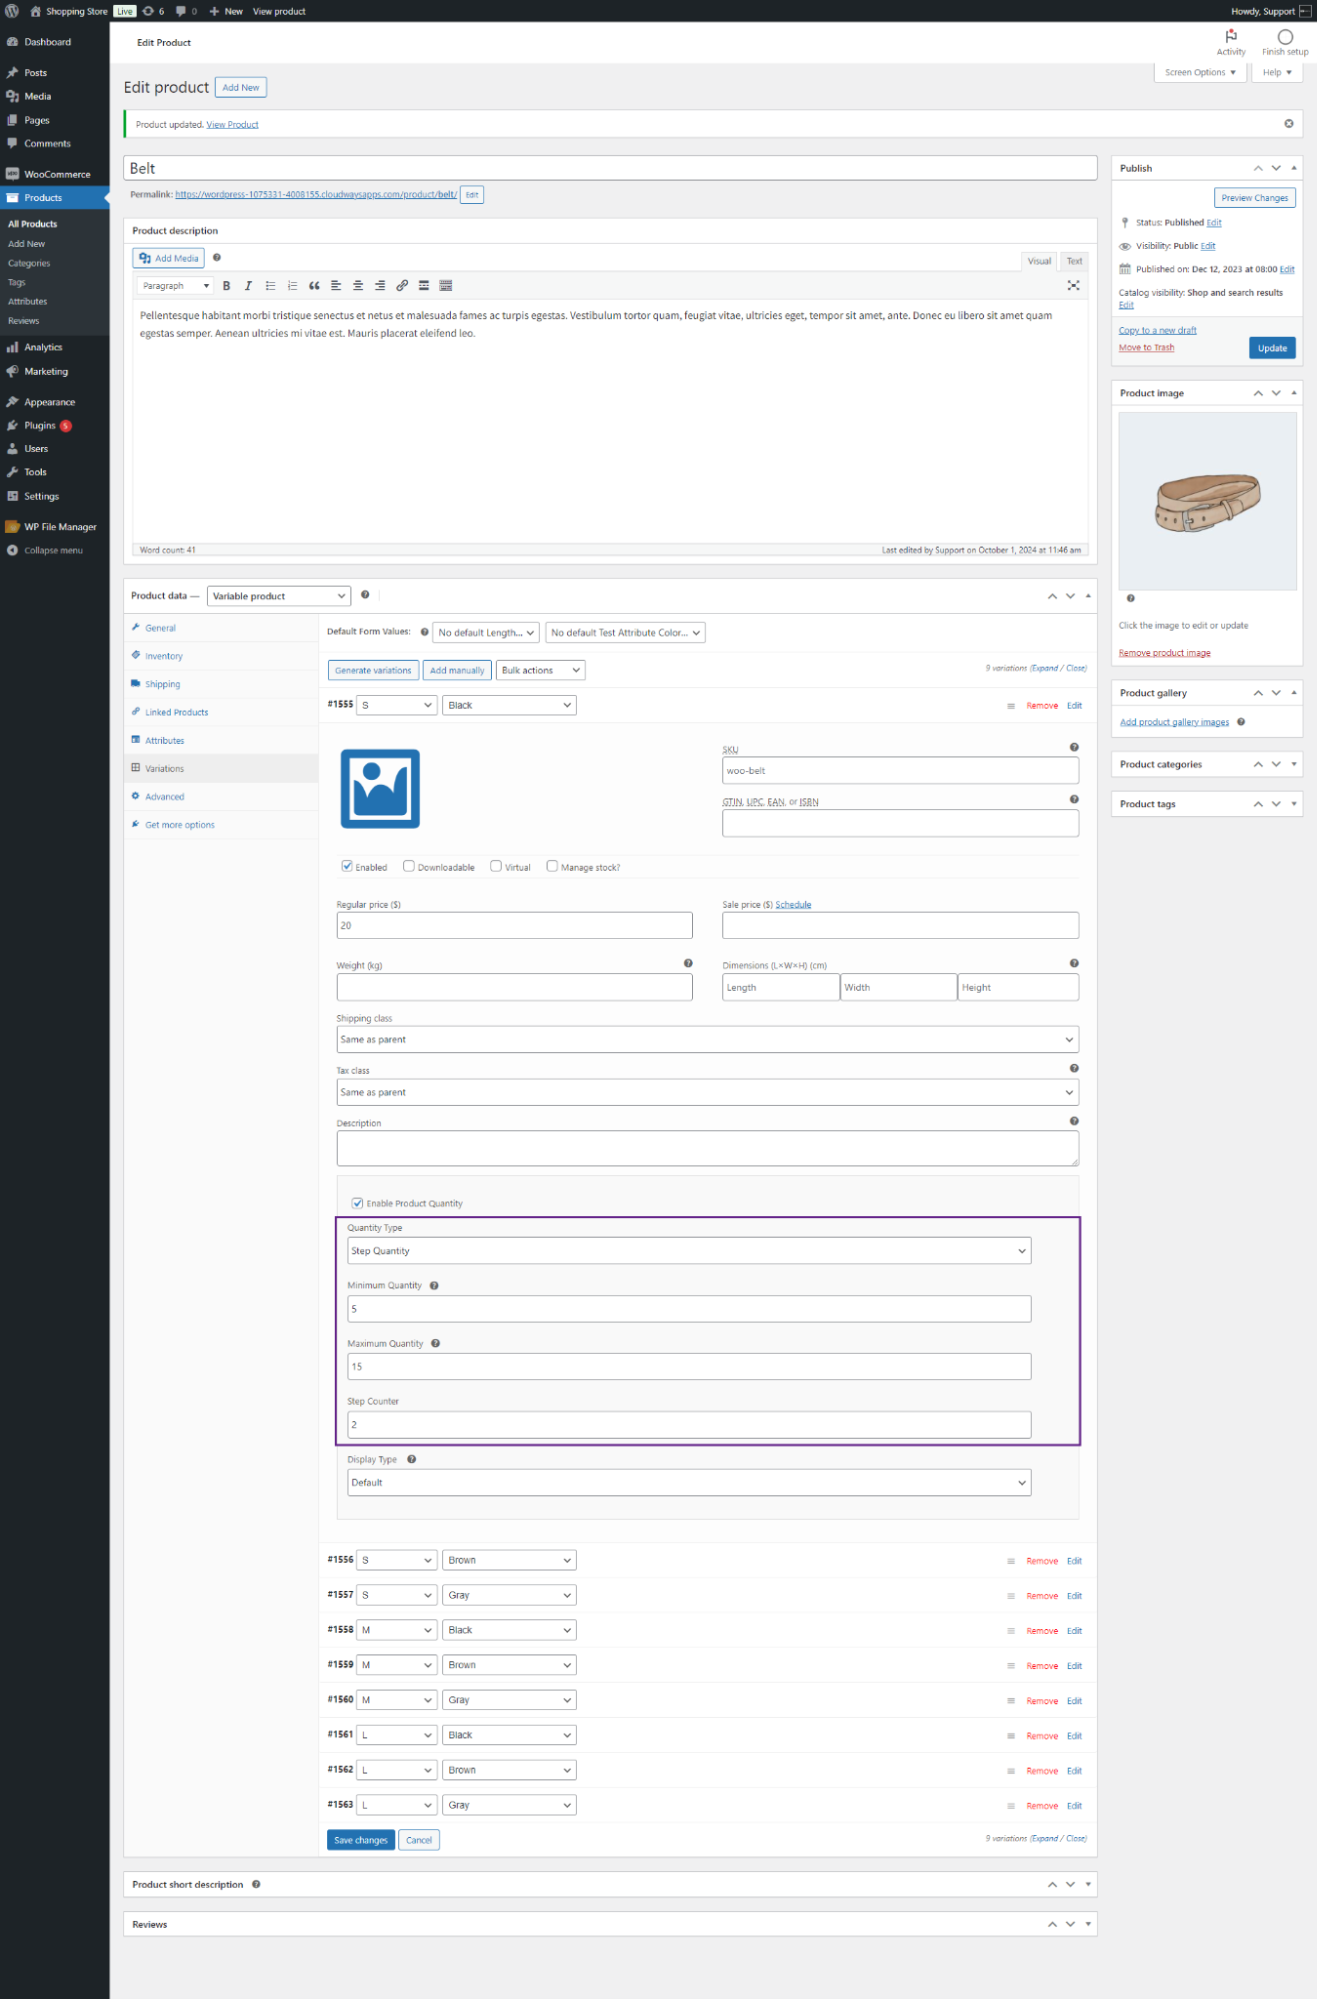
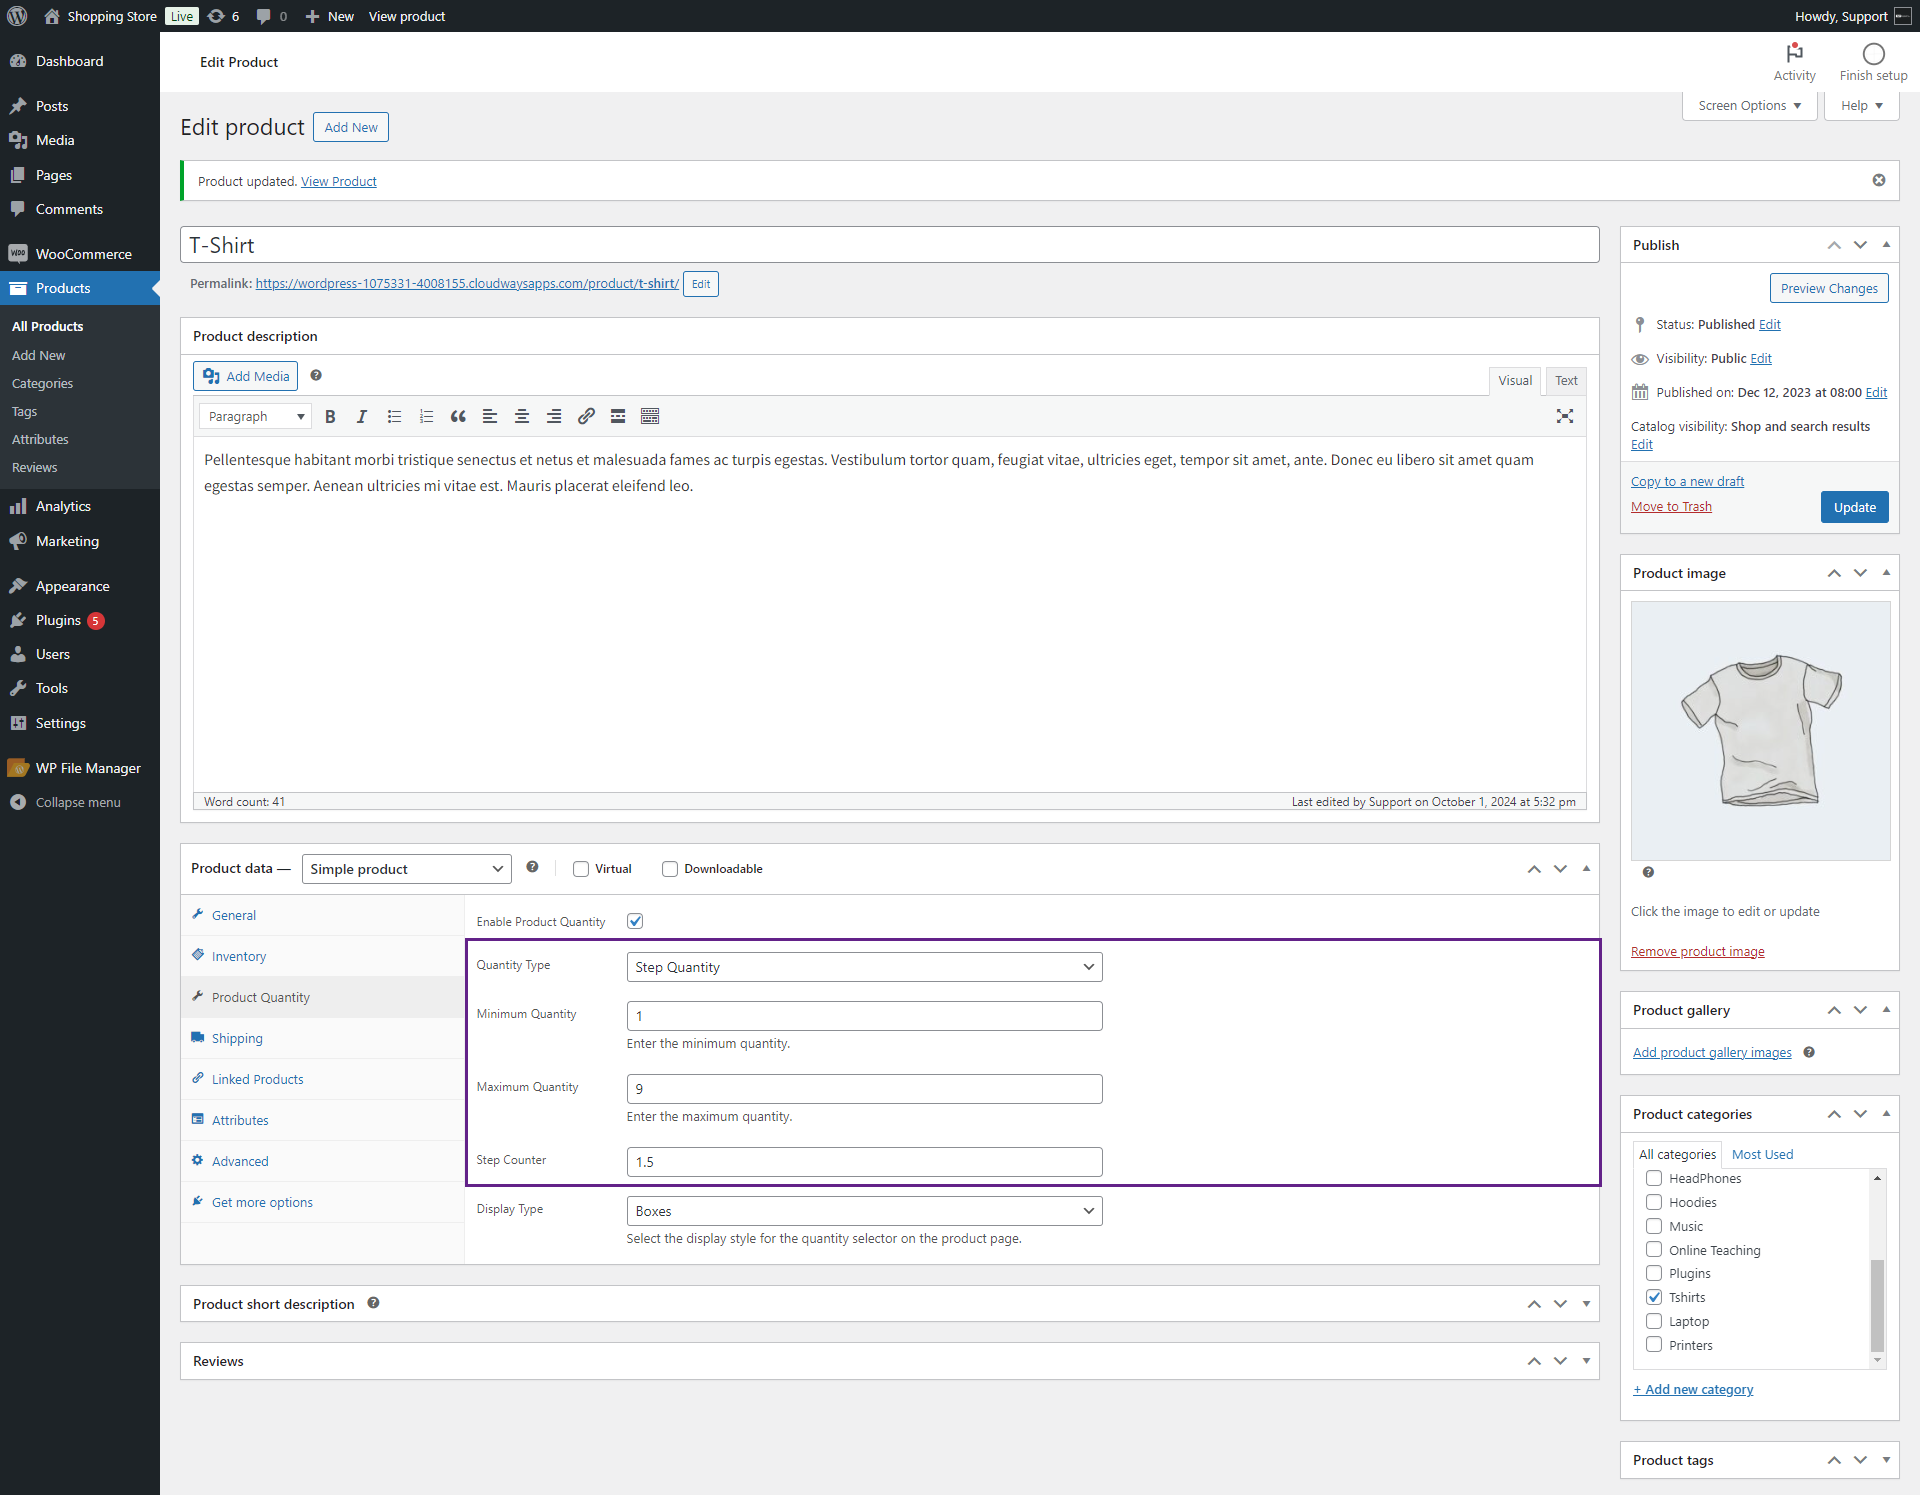
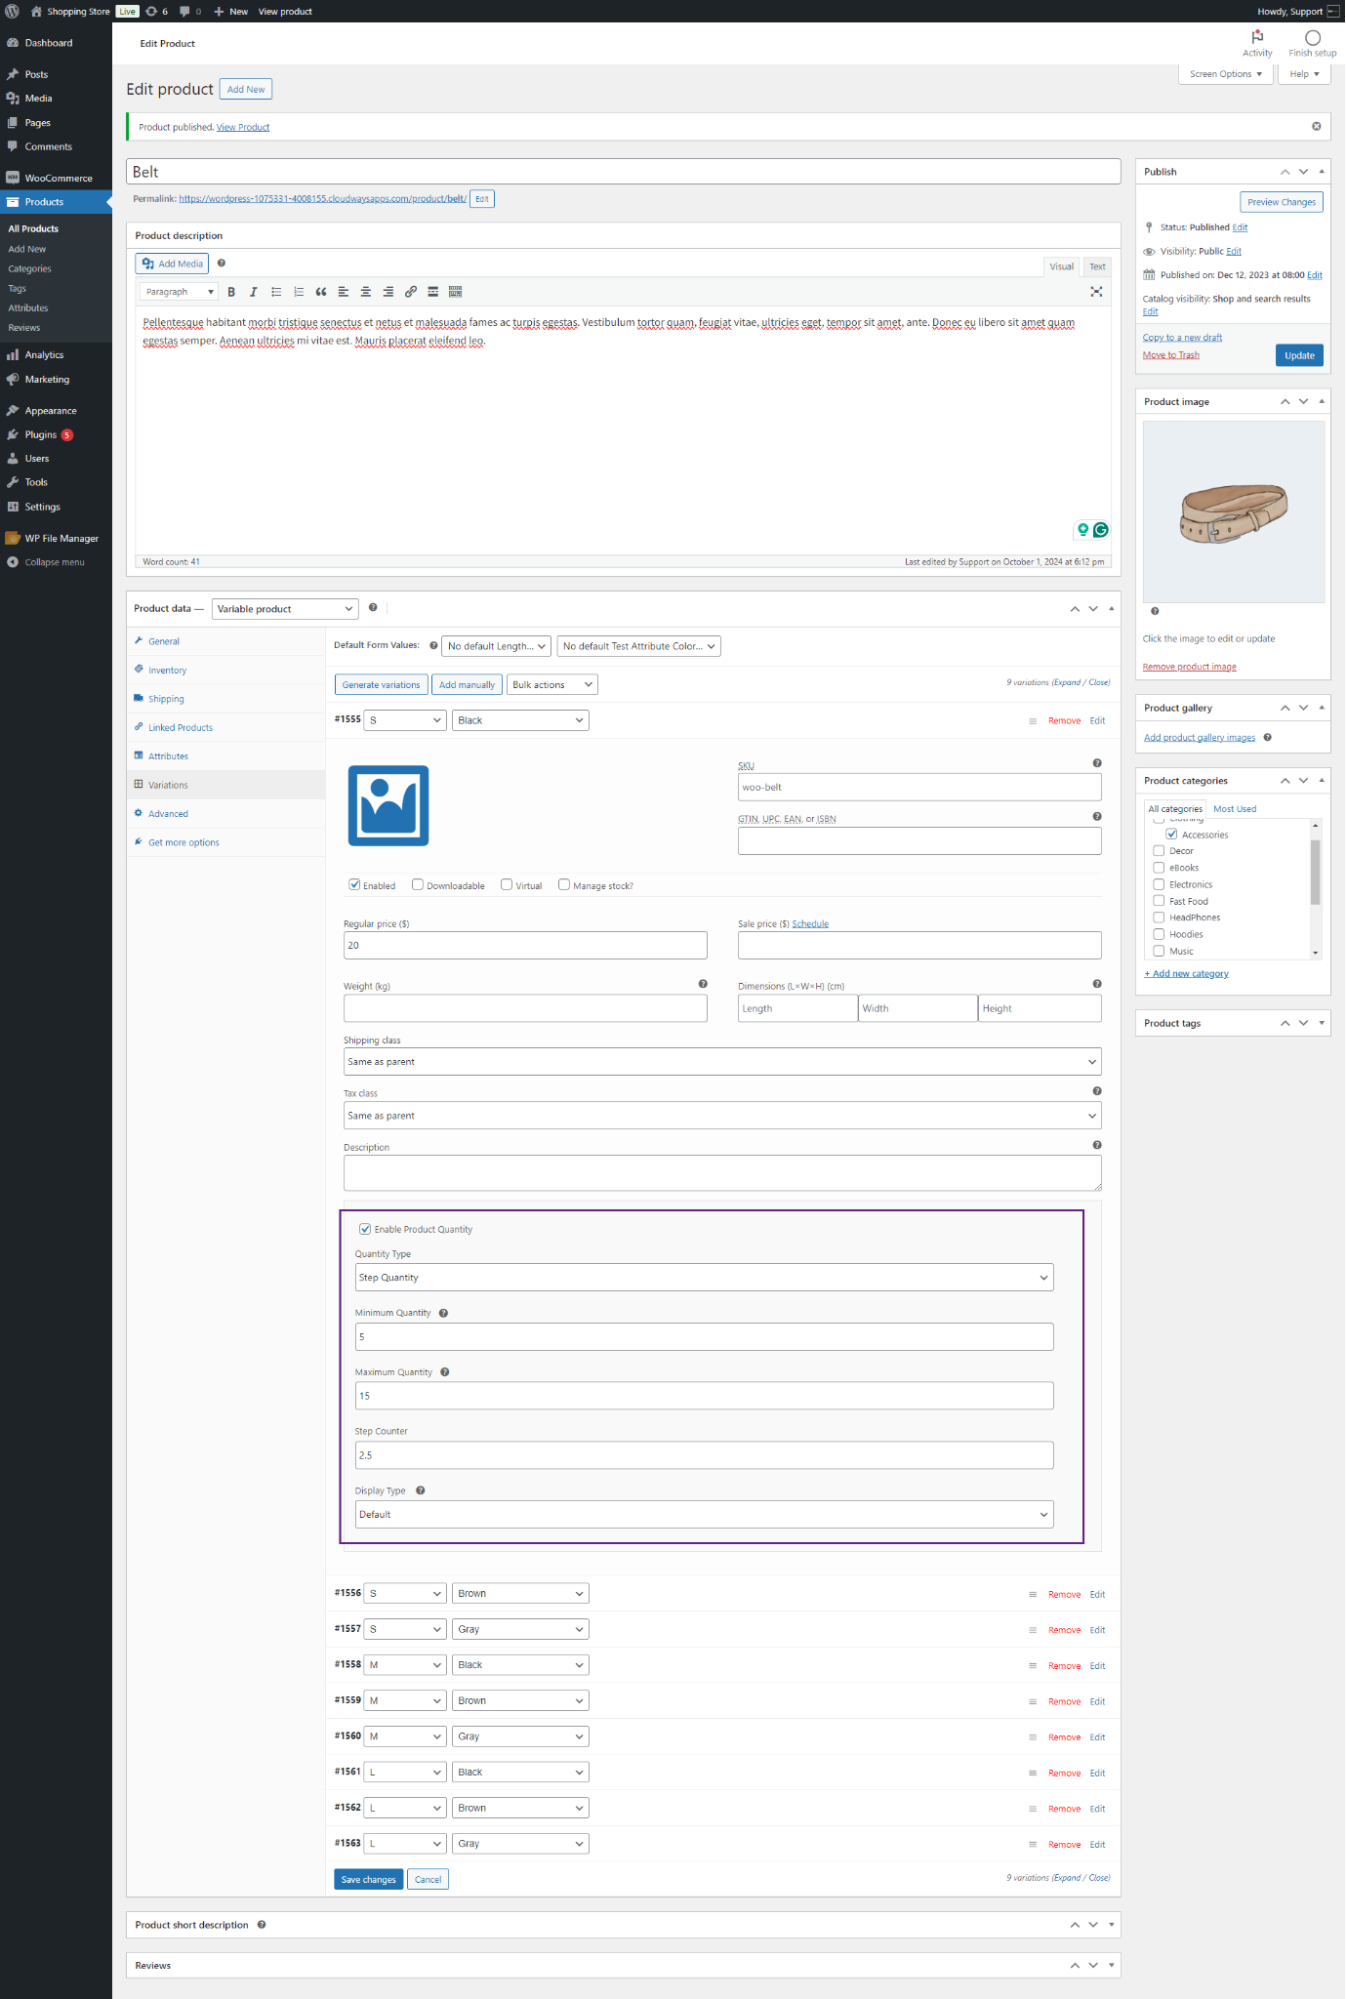
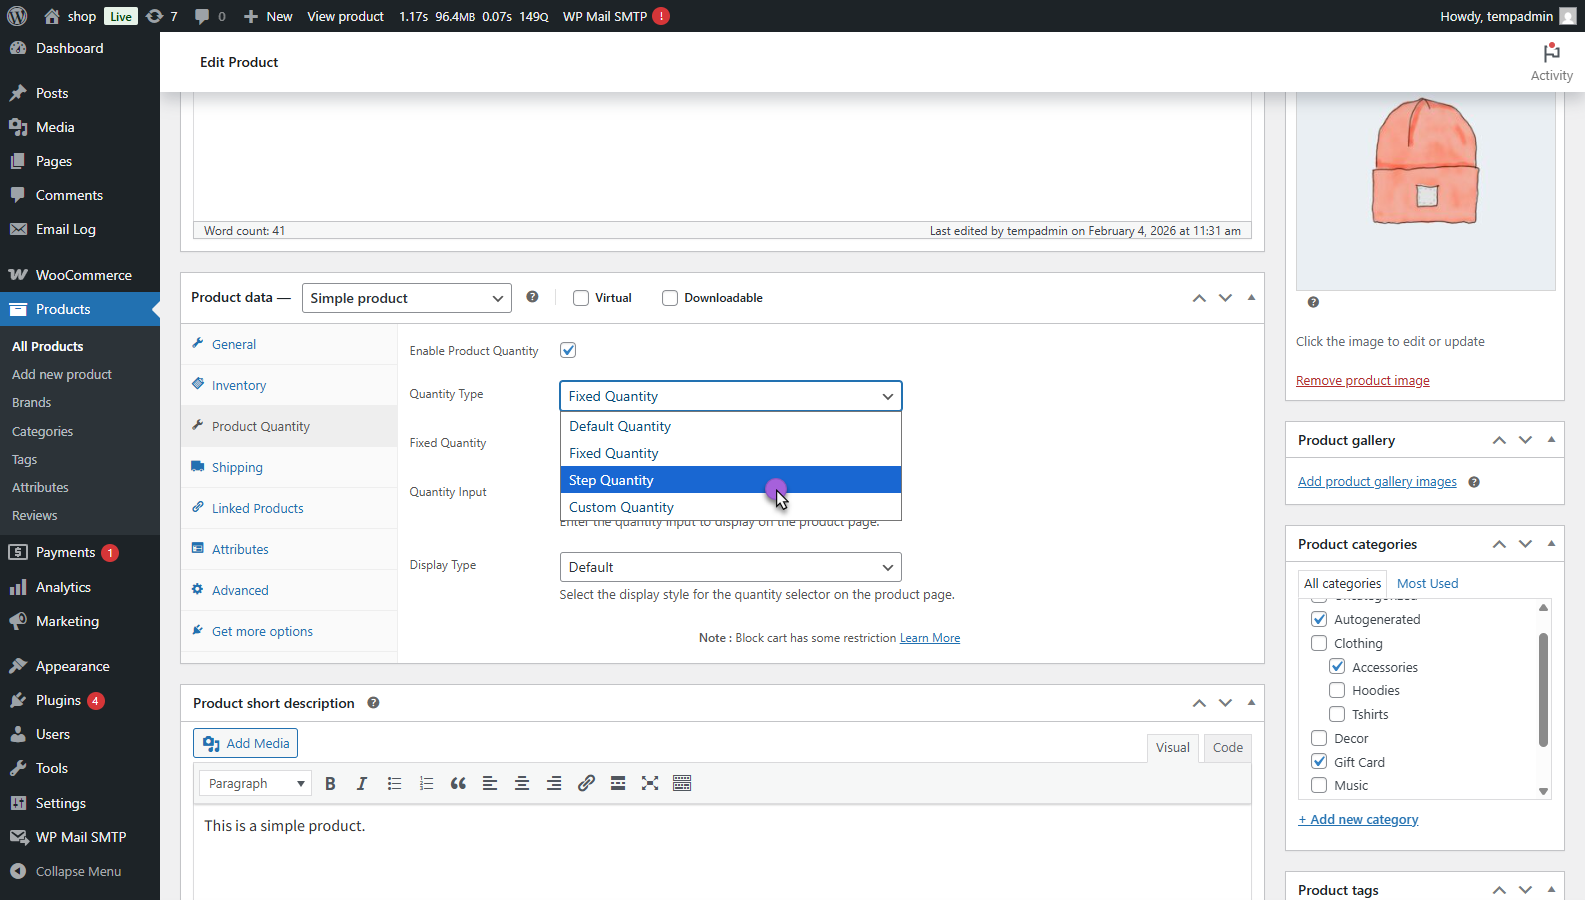
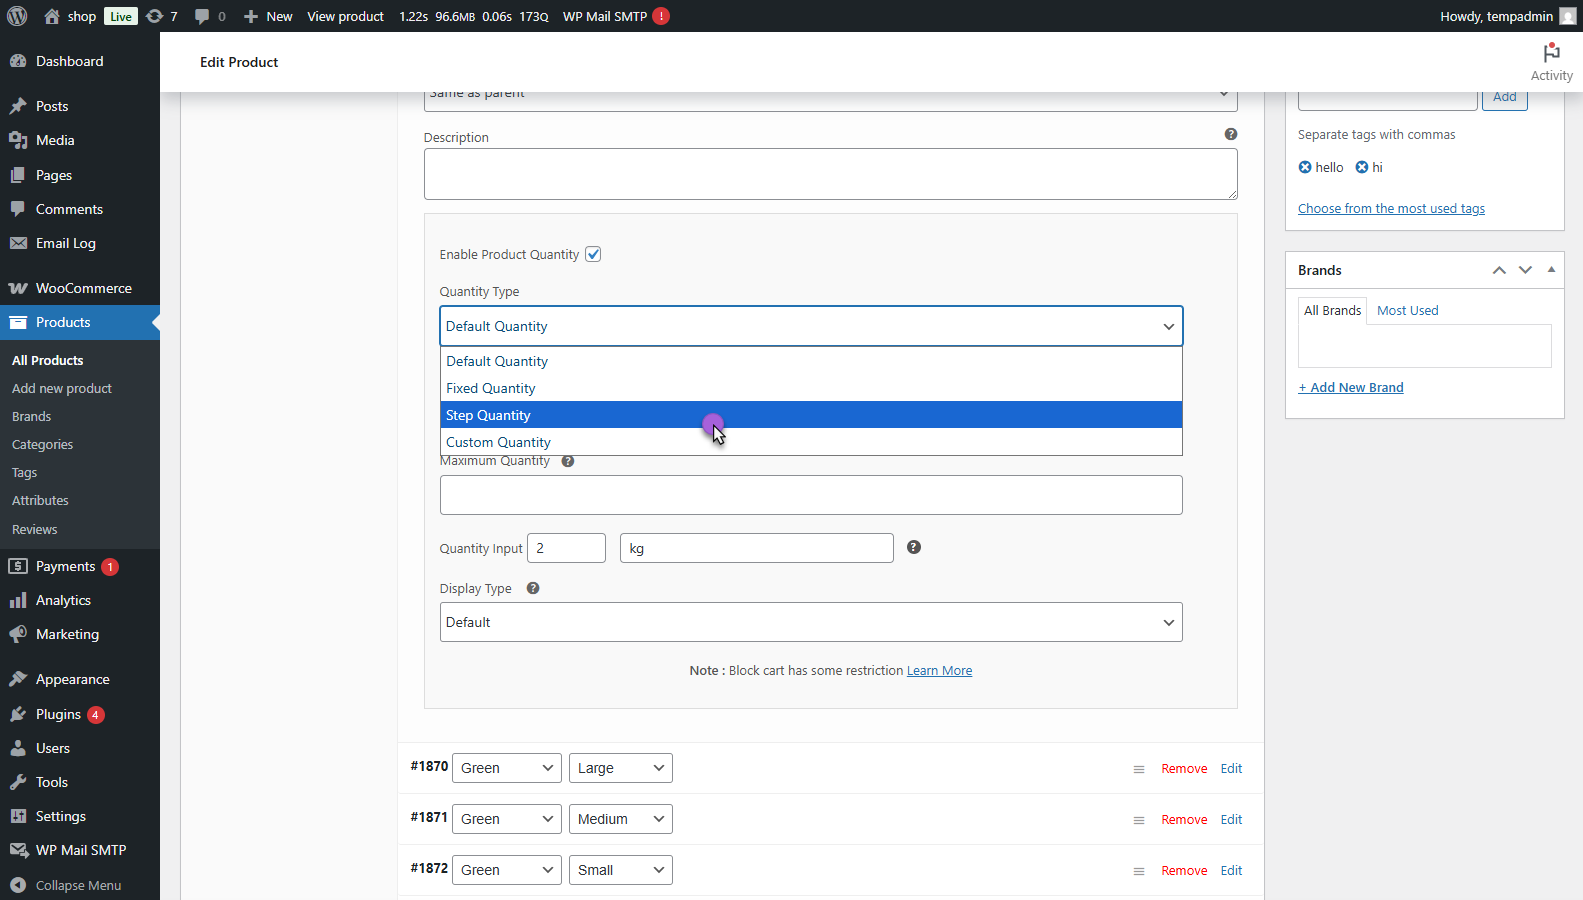
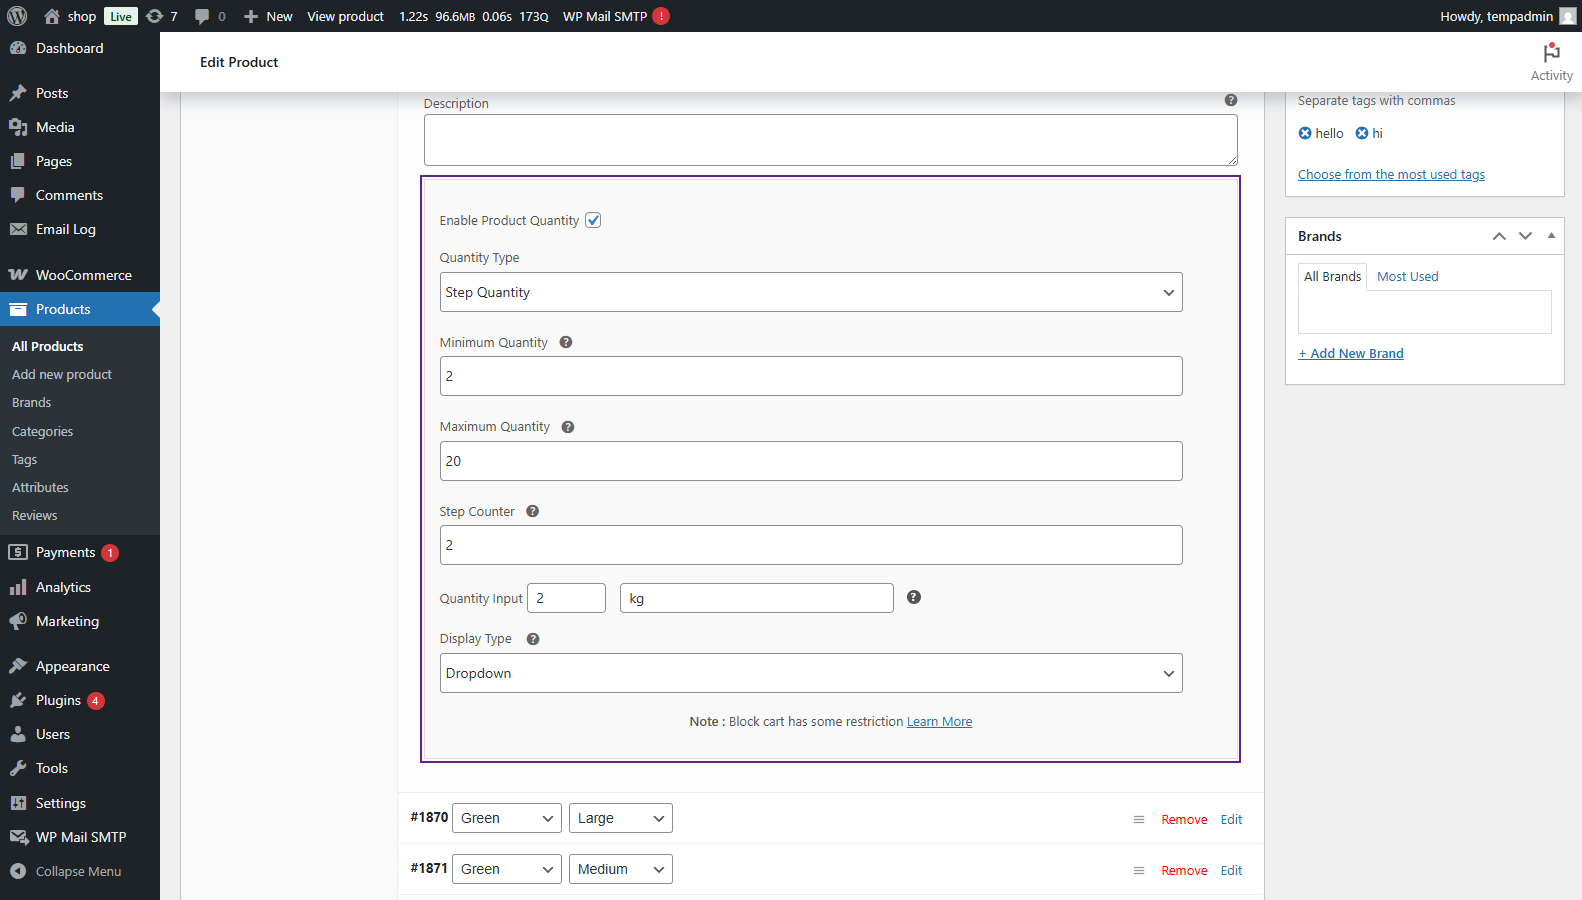
Step Quantity
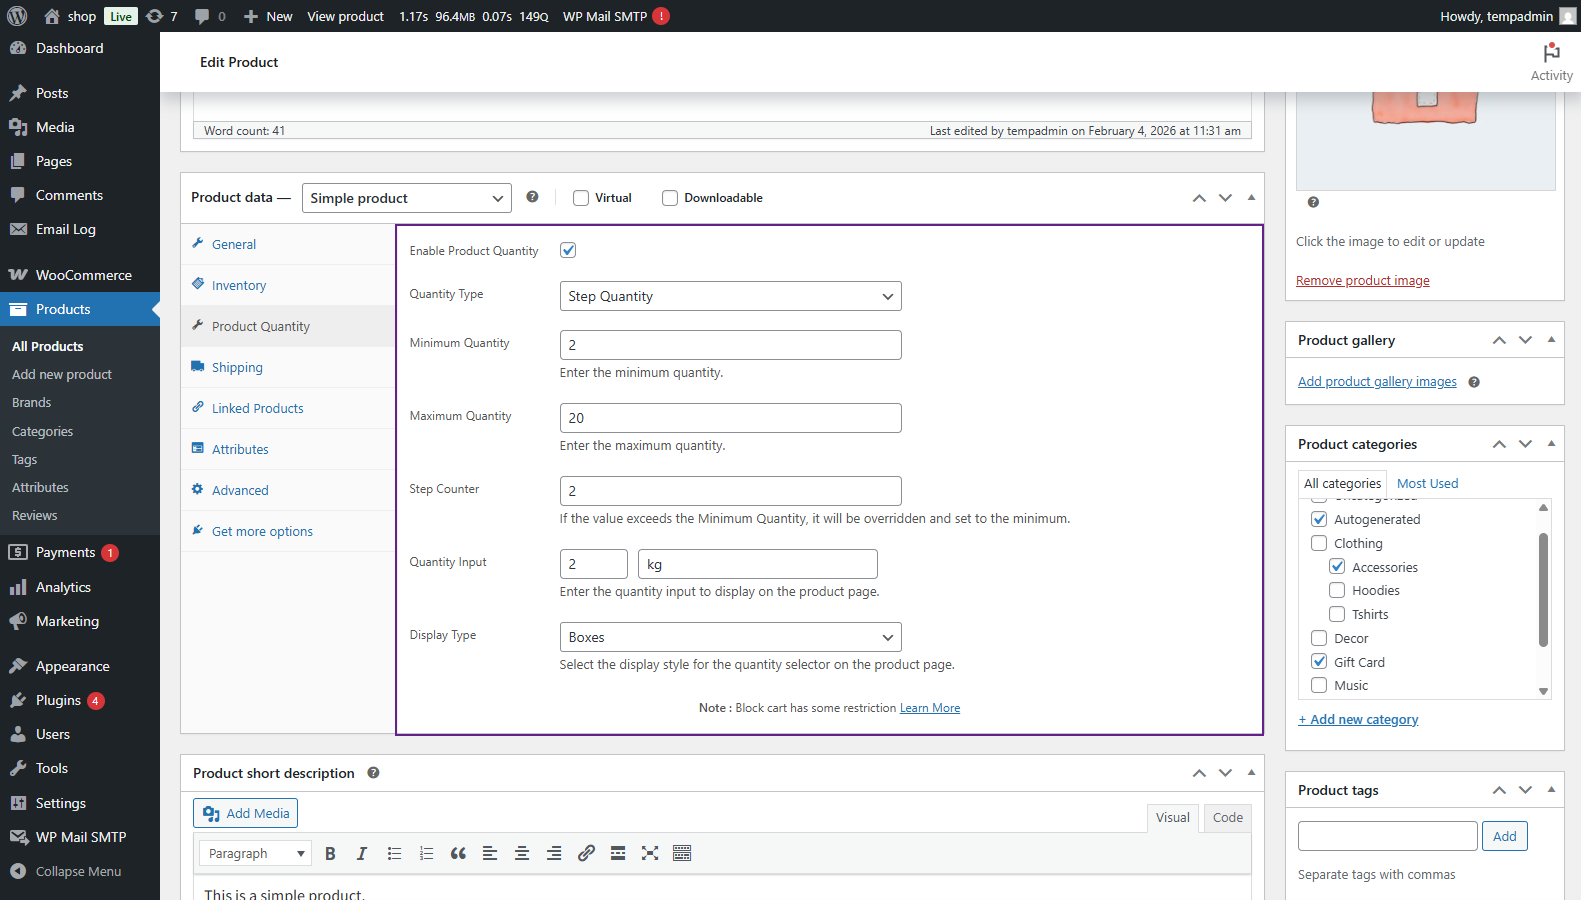
- Admin selects Step Quantity from the Quantity Type drop-down menu; it consists of the following options;
- Minimum Quantity: Admin can set the minimum quantity in the text box.
- Maximum Quantity: Admin can set the maximum quantity in the text box.
- Step Counter: The admin can set the step counter, which means it will start from the minimum quantity and skip multiples of the number declared by the admin on Step Quantity until it reaches the maximum quantity.
- Click on the Update button.
Front-end Screenshot
- Login to your account.
- Go to the Product Page.
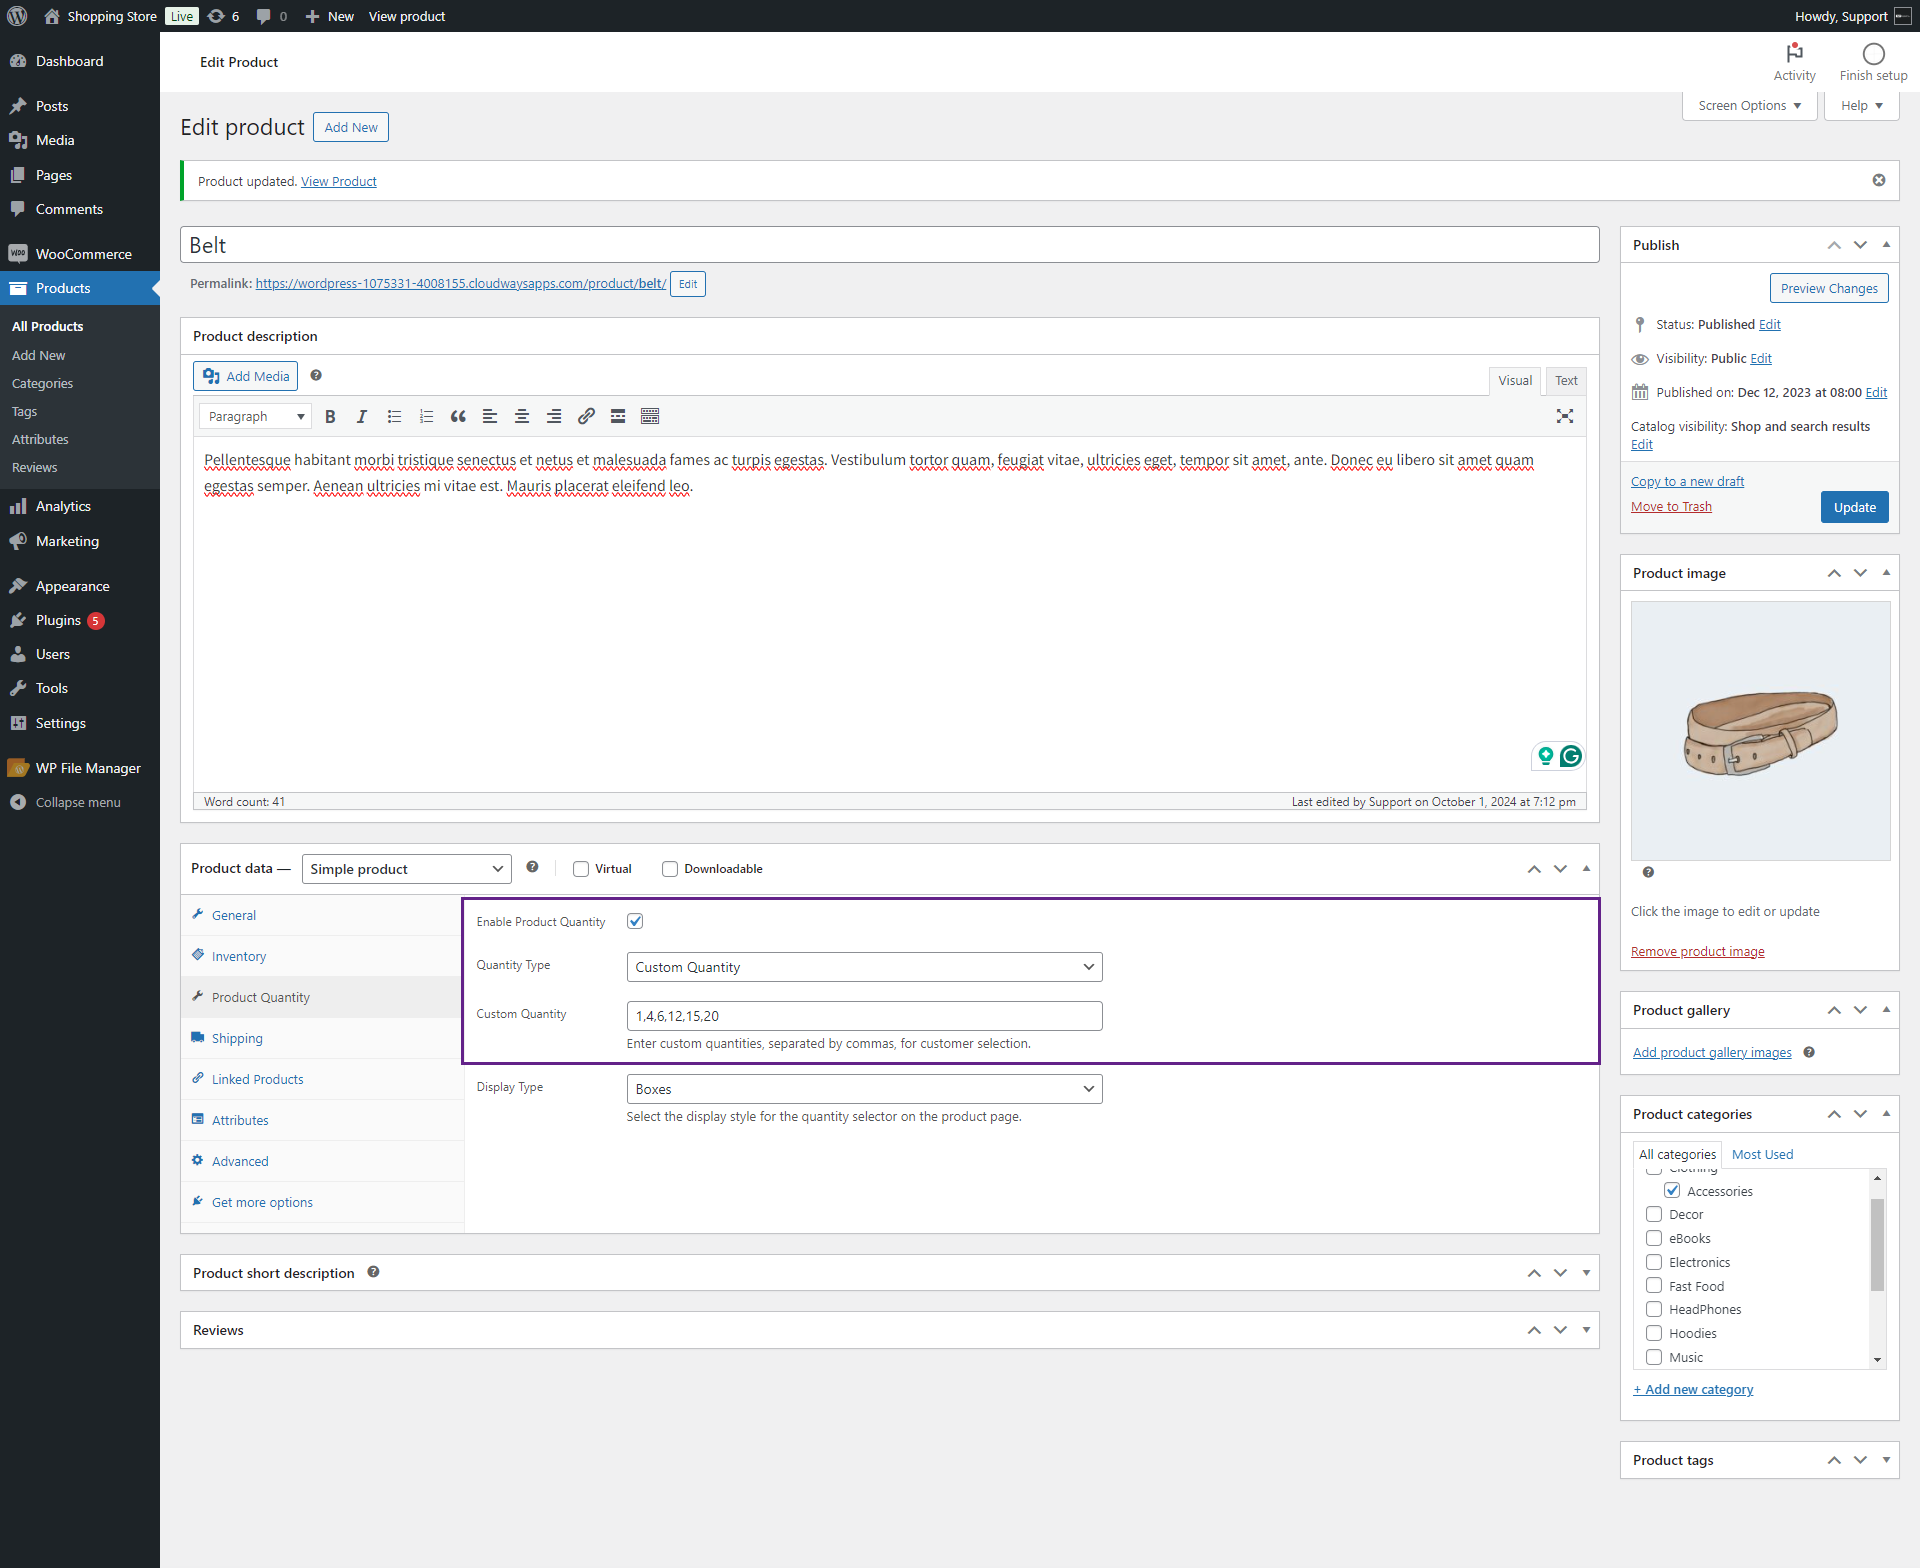
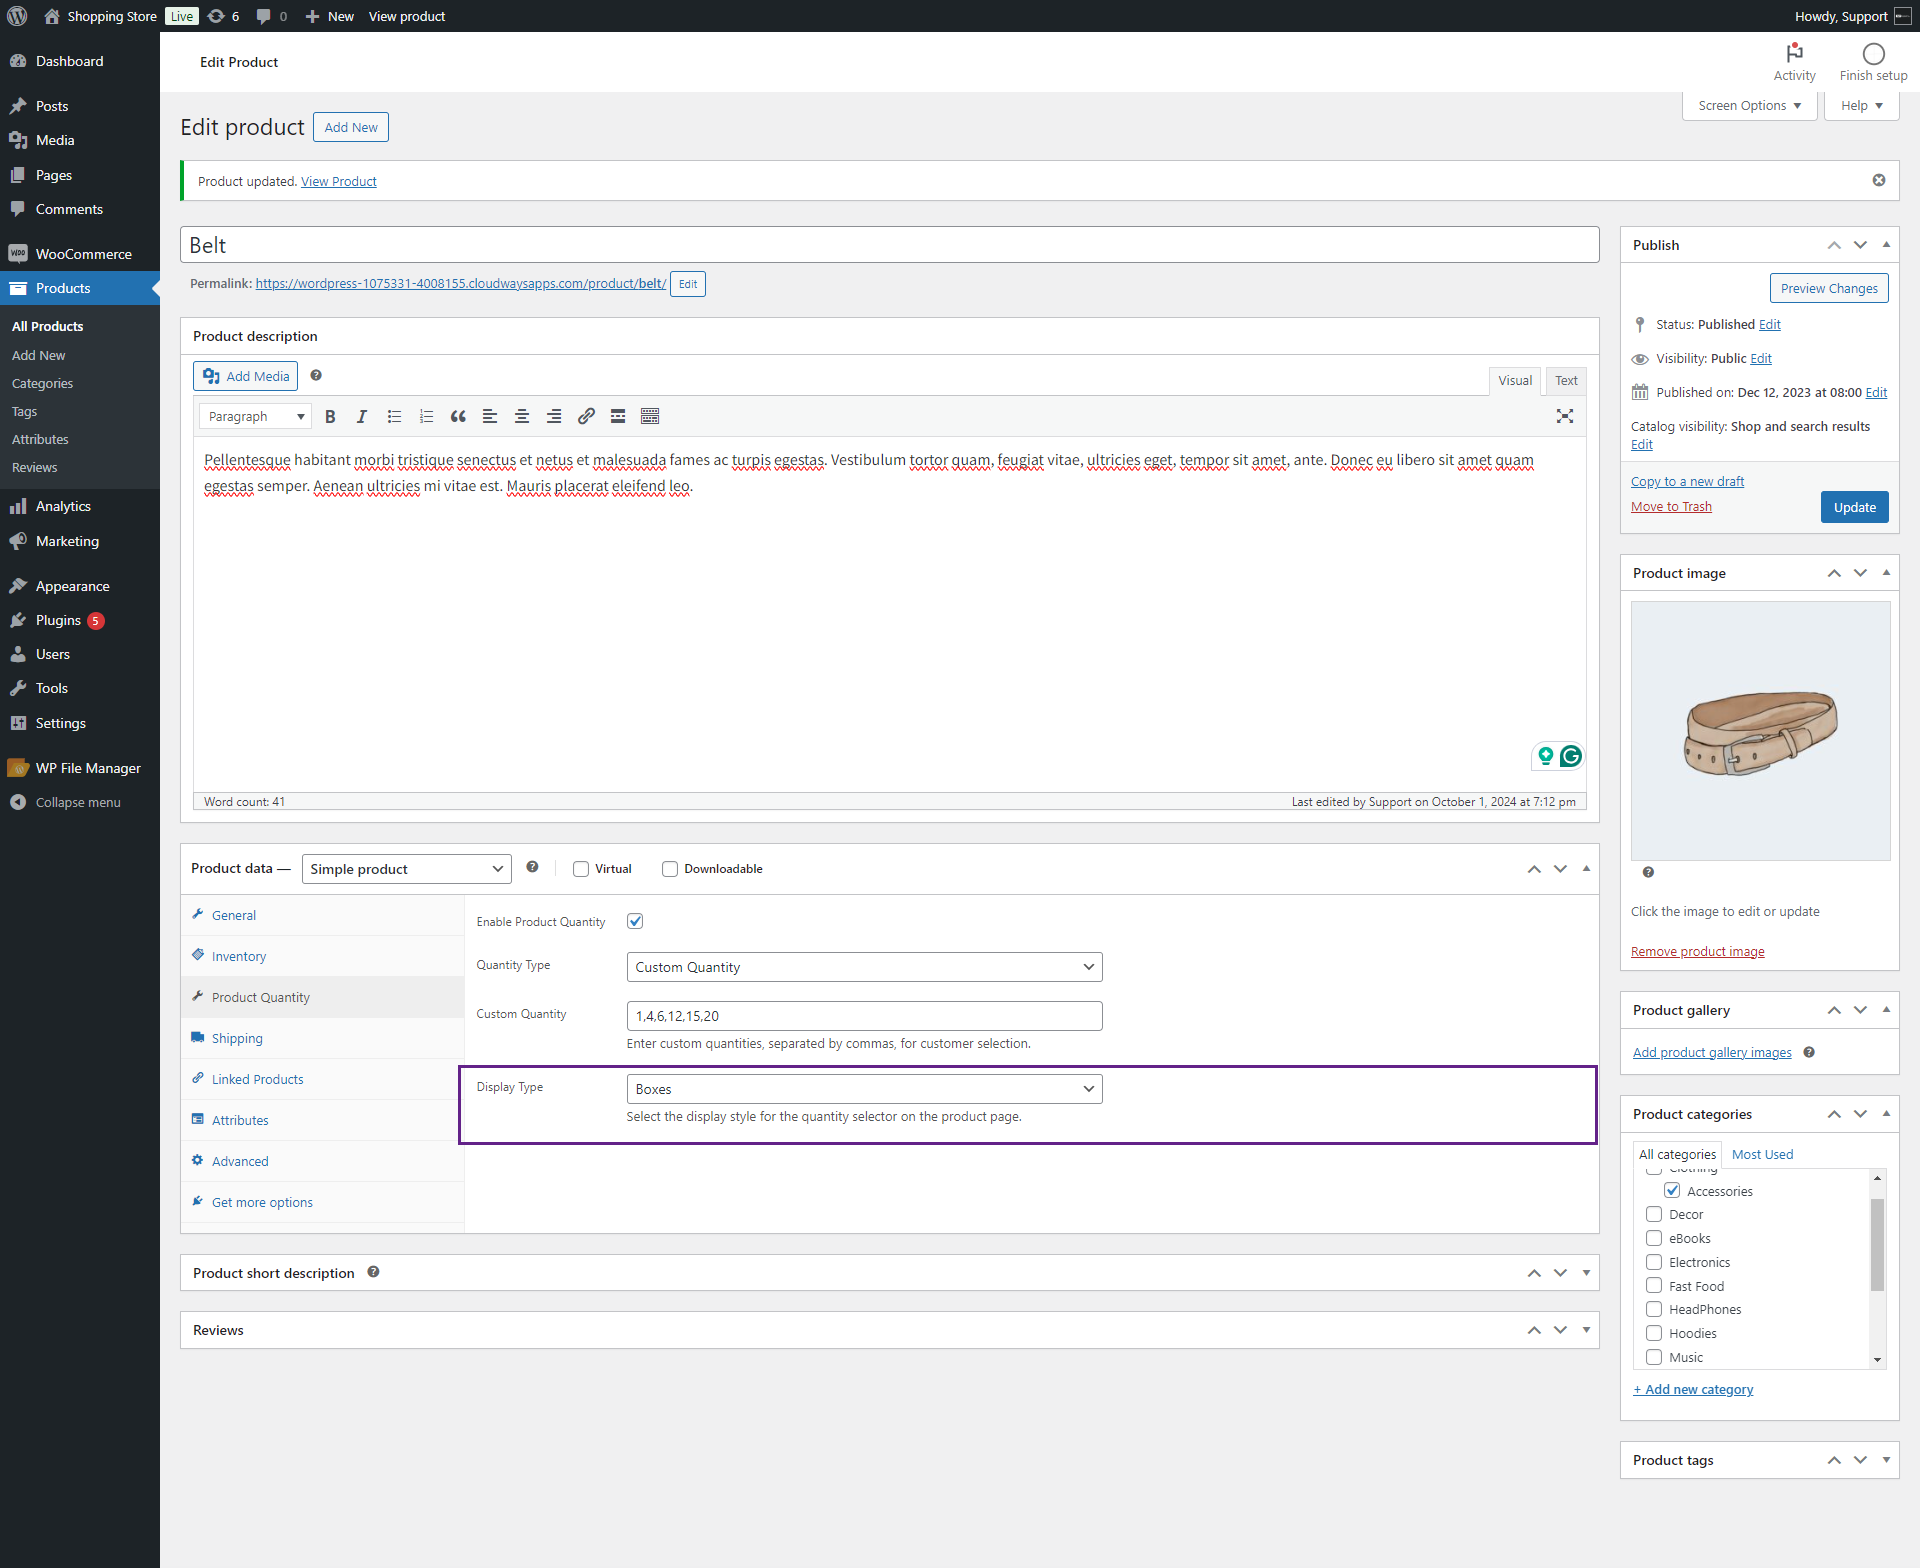
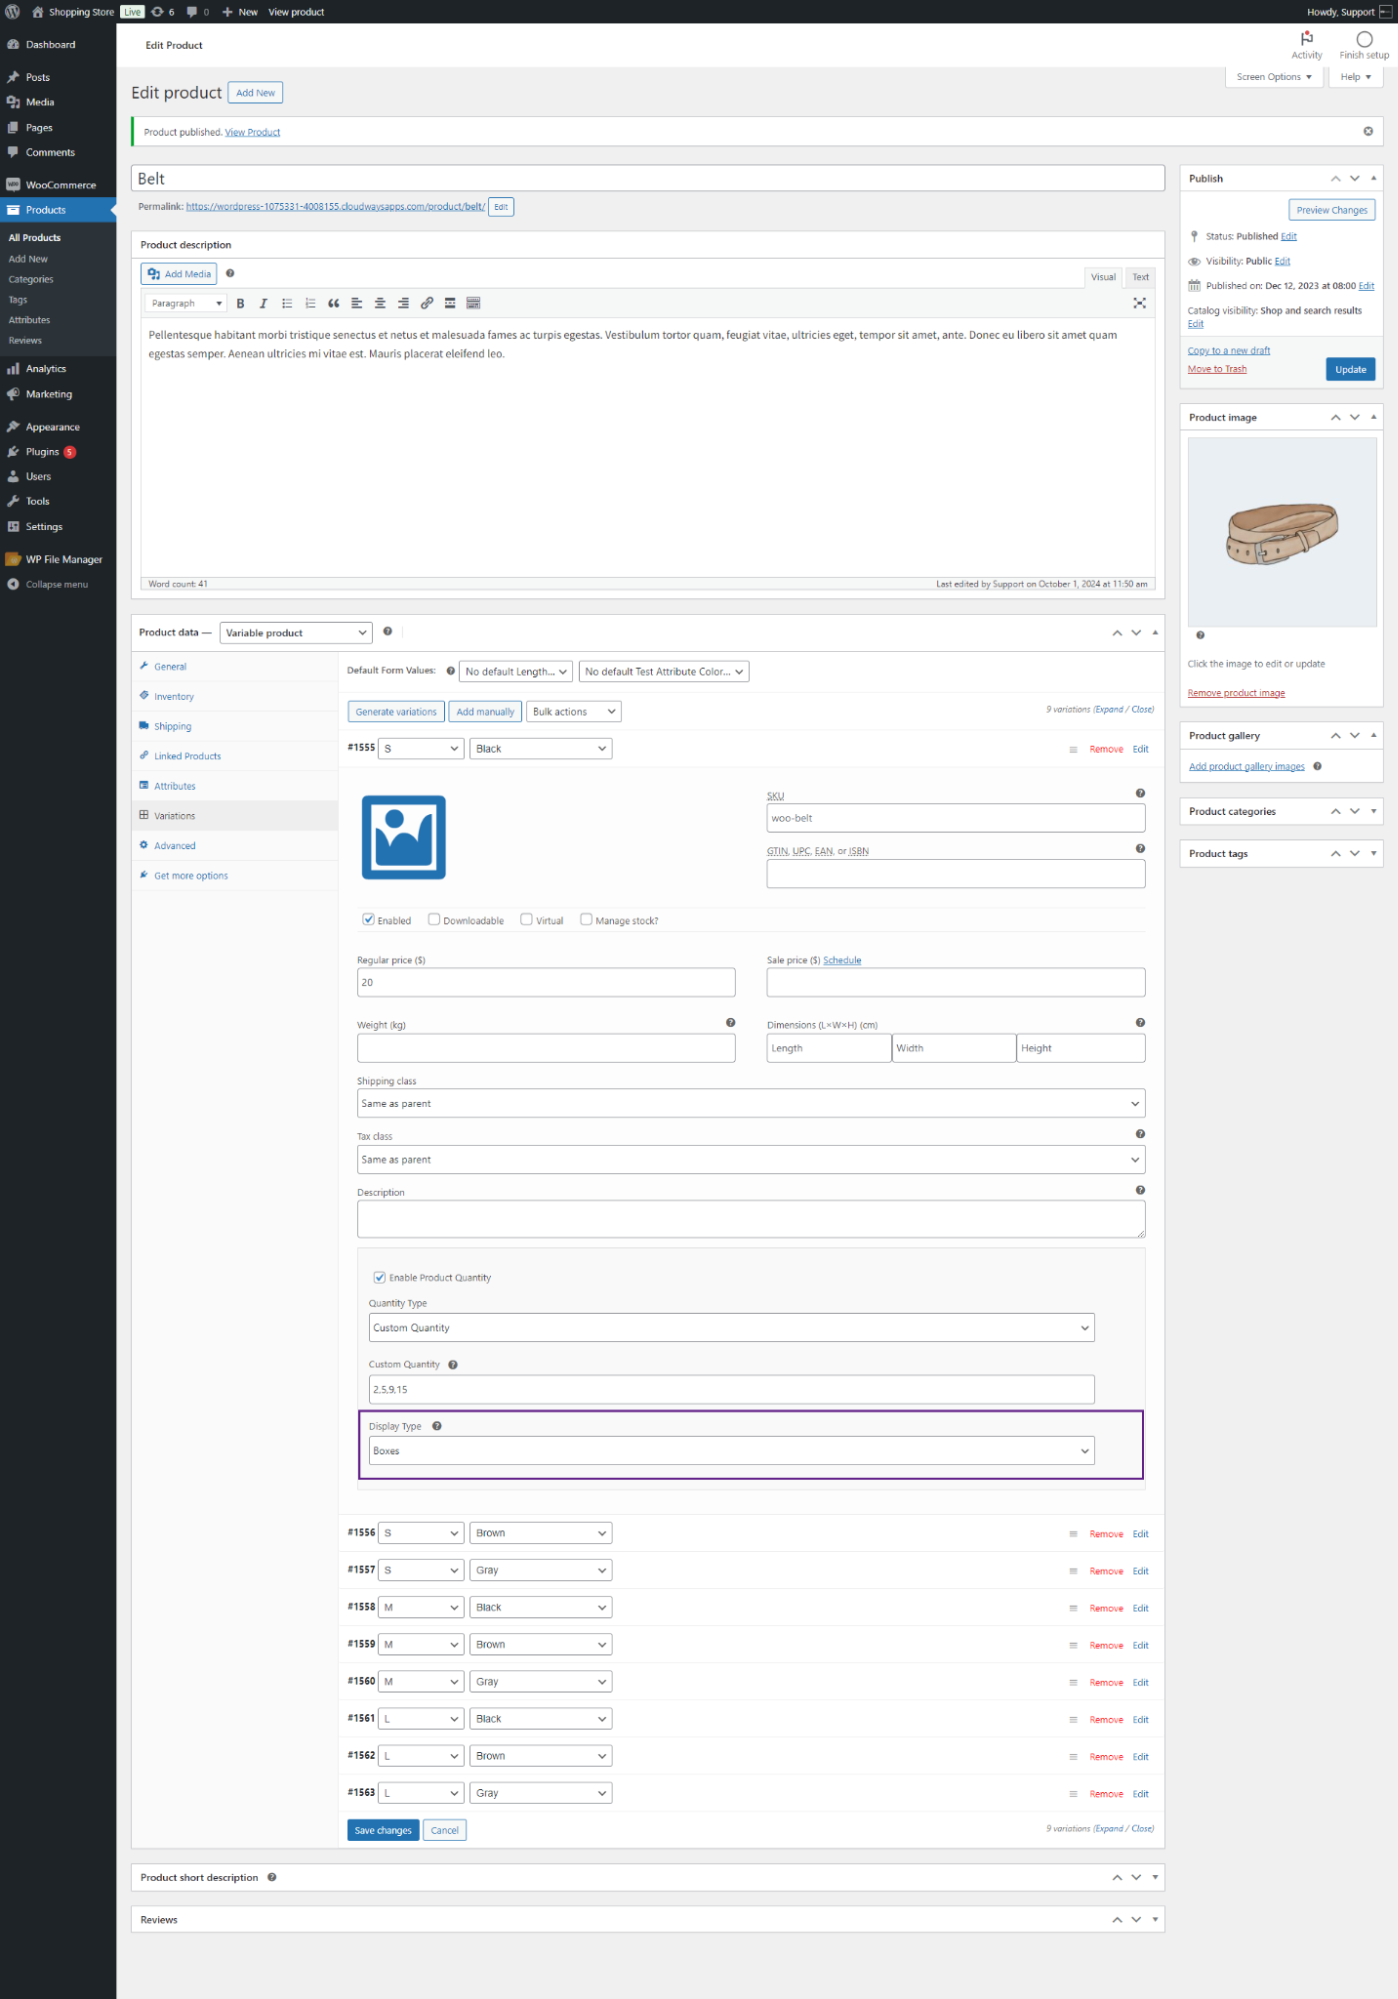
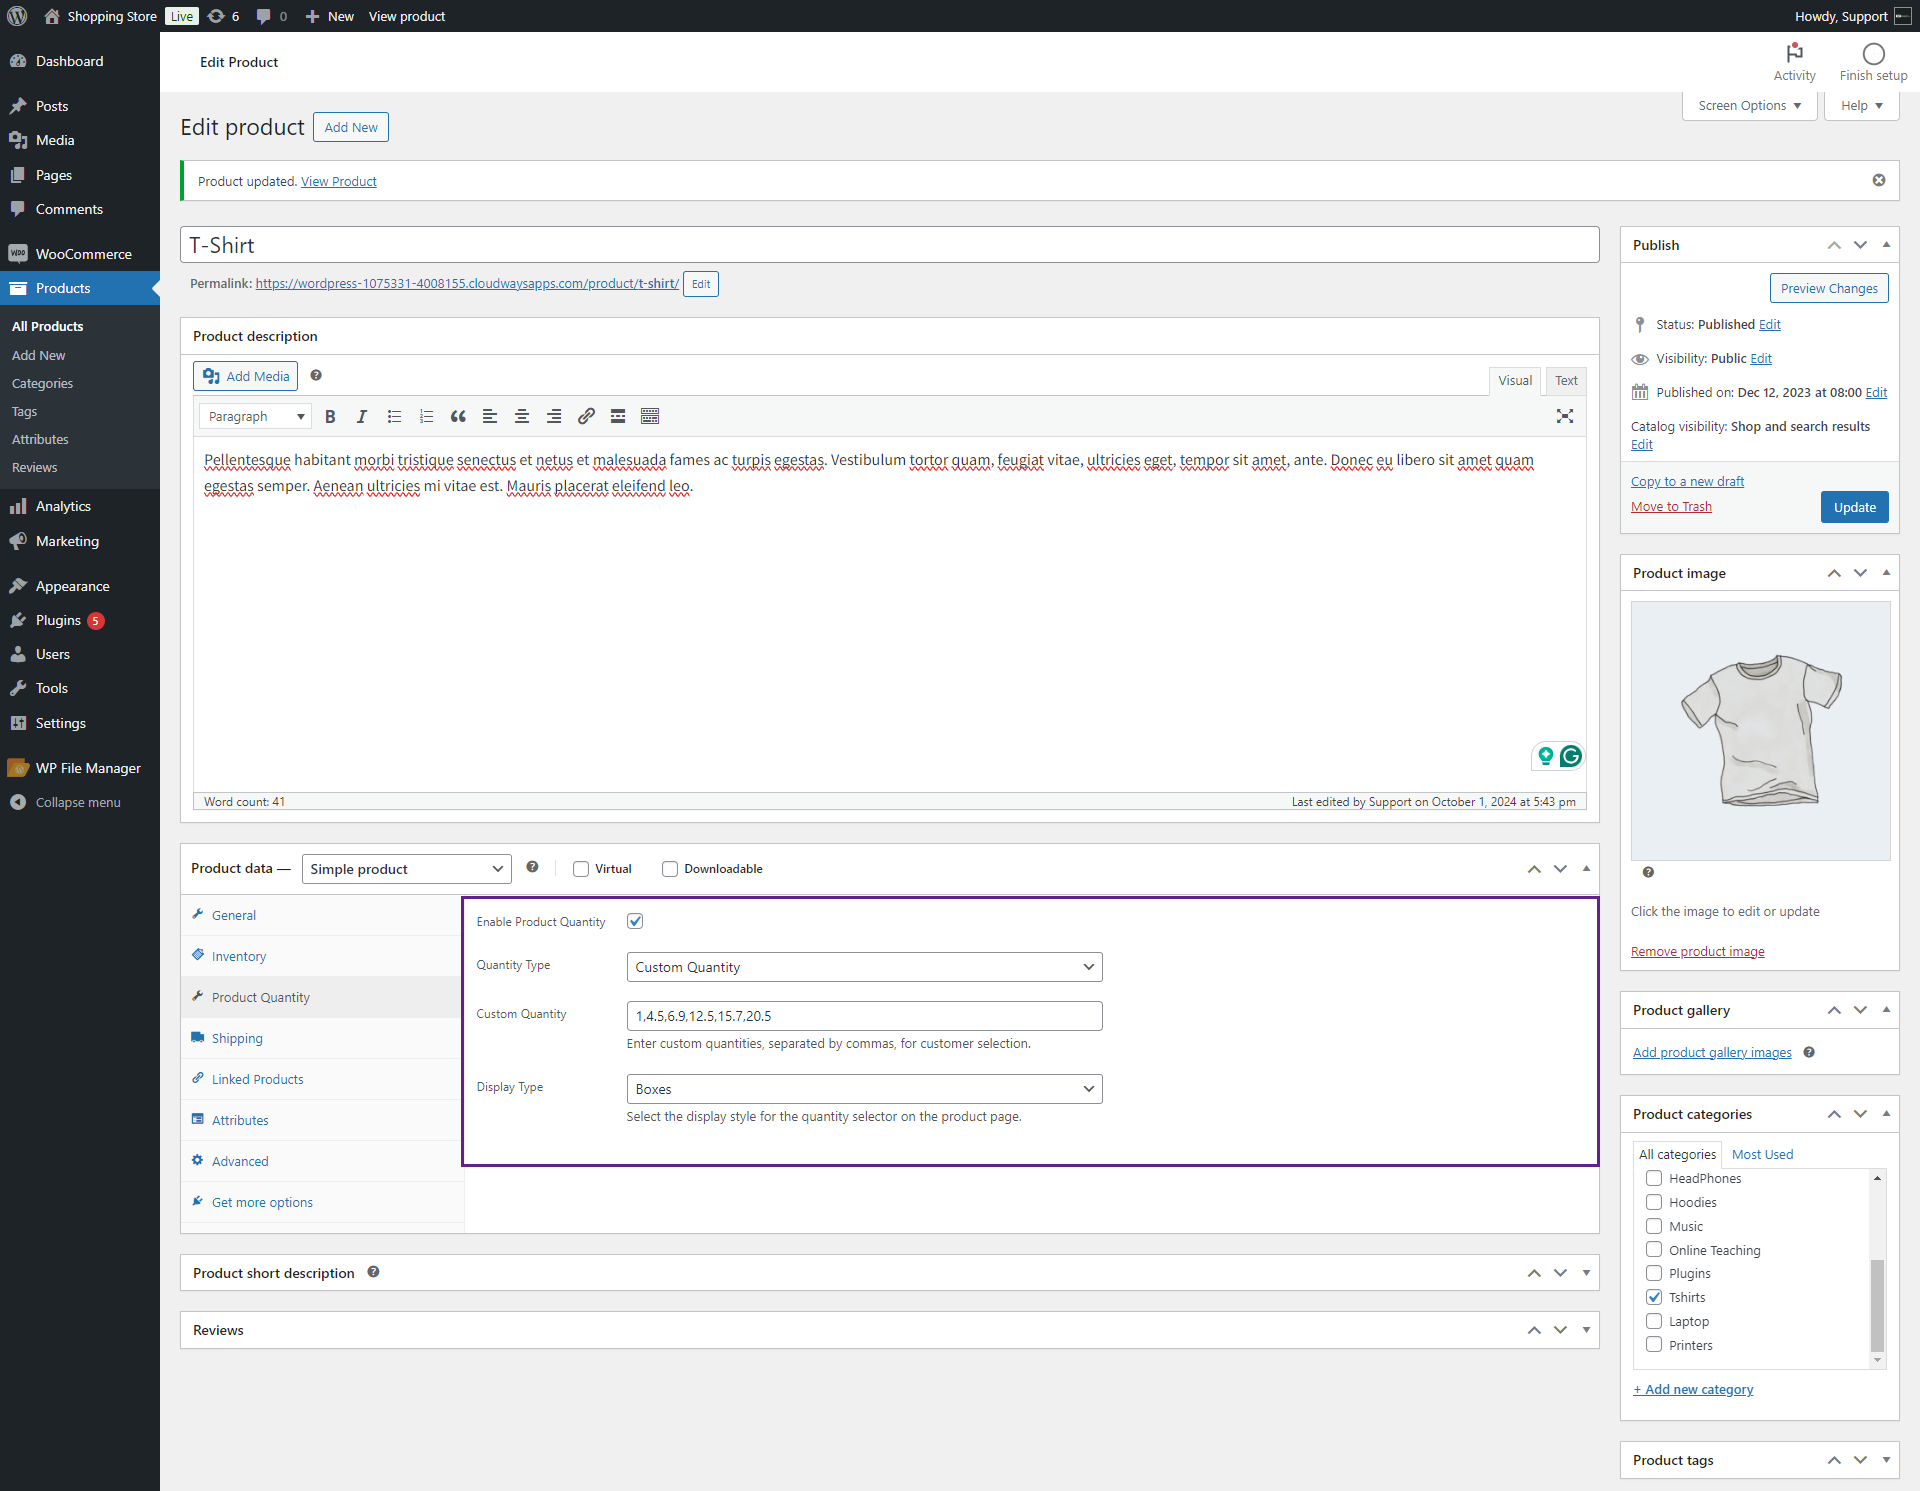
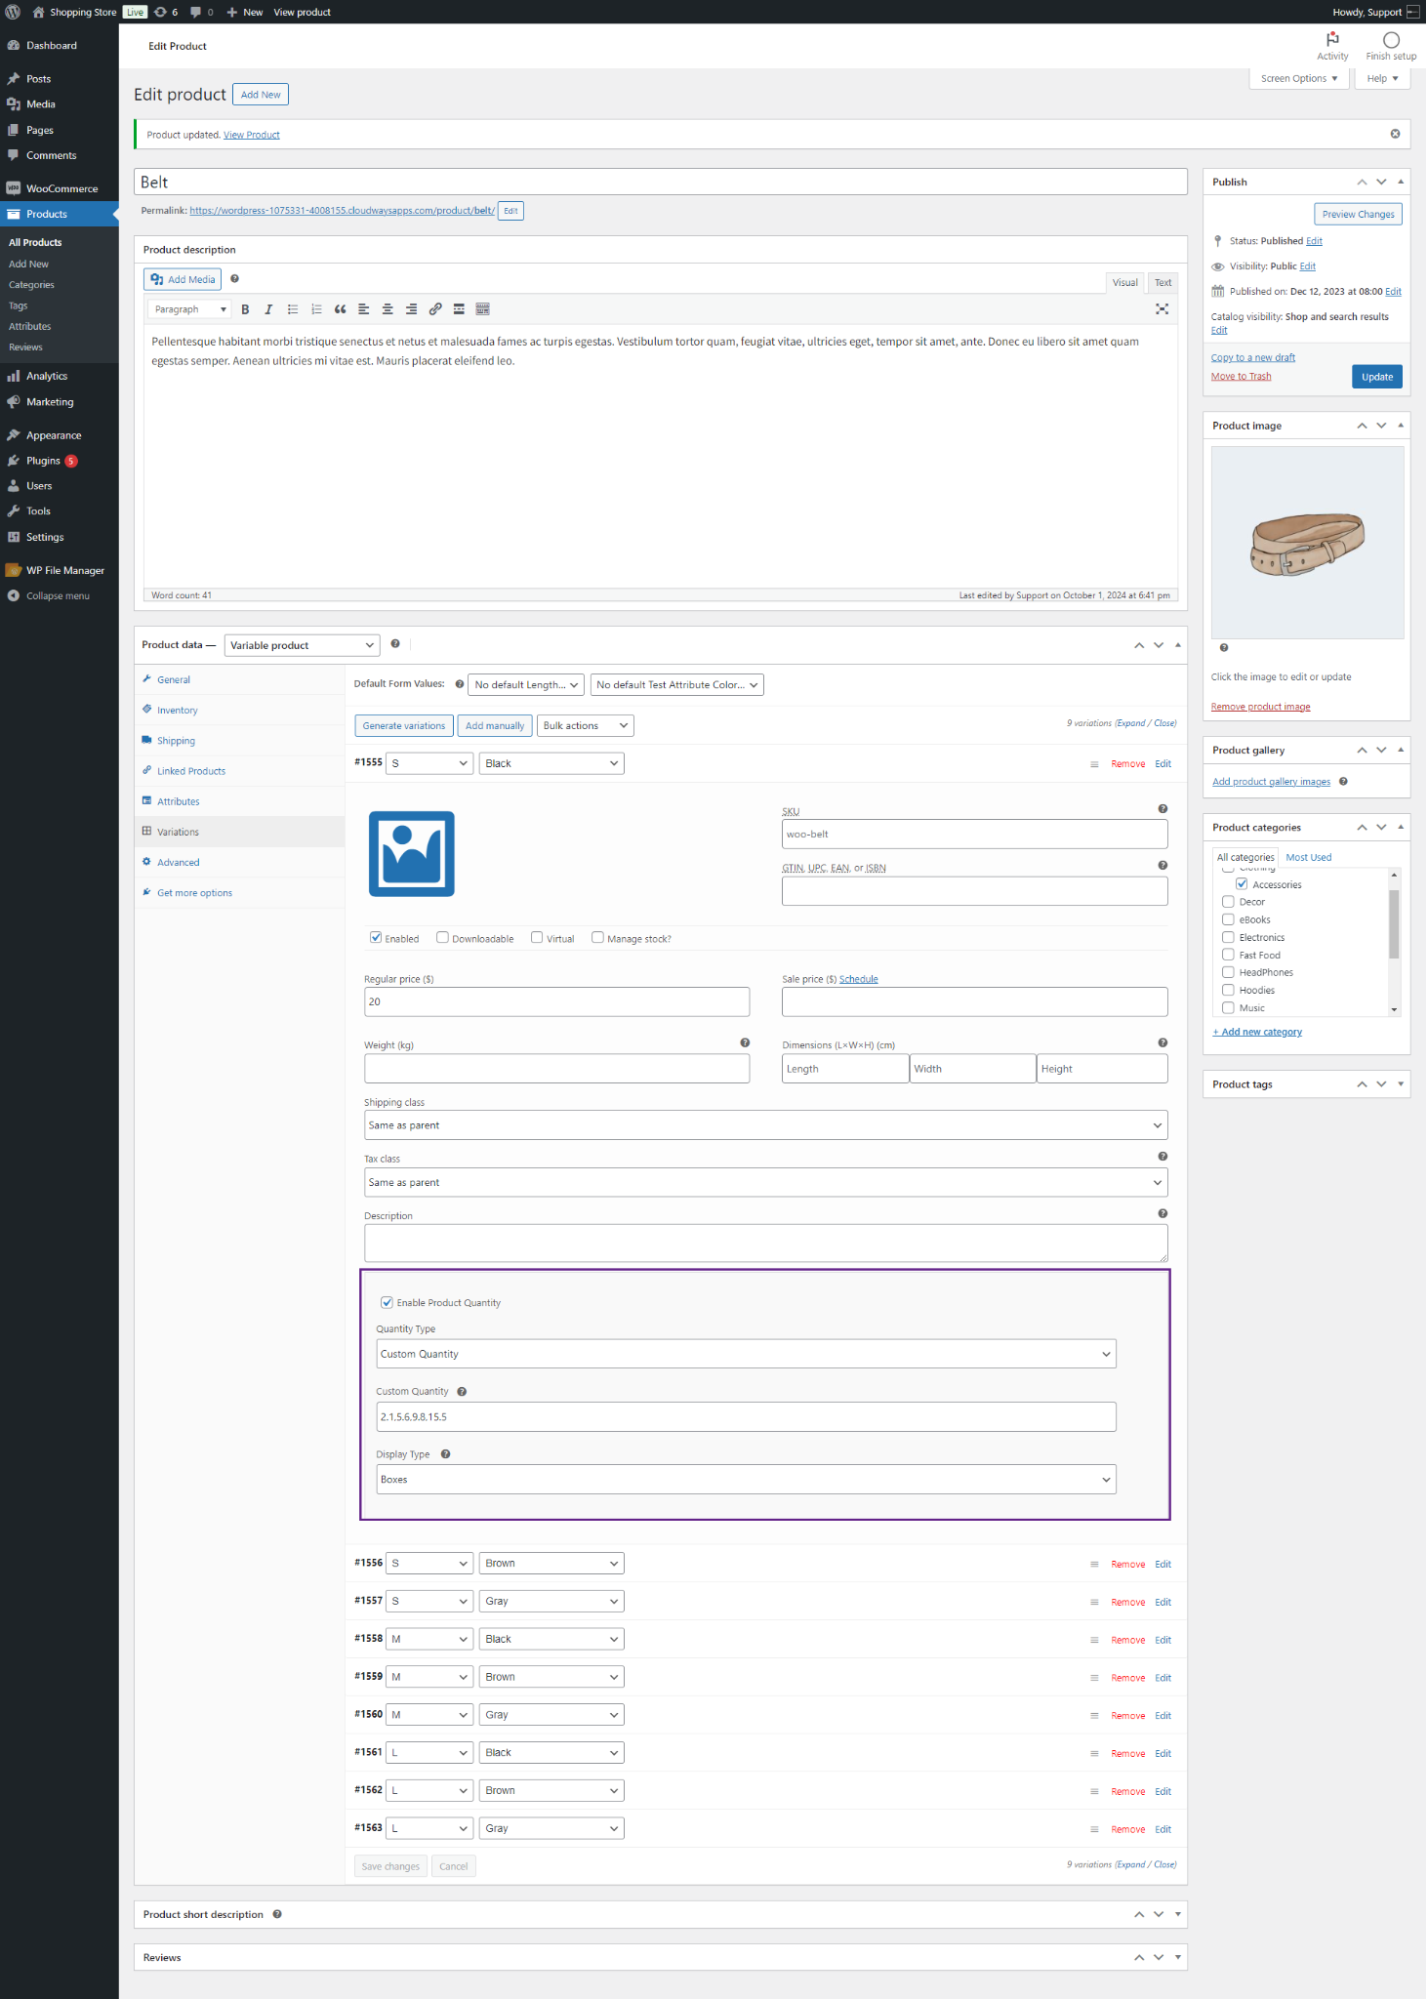
Custom Quantity
- Admin selects Custom Quantity from the Quantity Type drop-down menu. It consists of the following options:
- Custom Quantities: The admin can set multiple comma-separated custom quantities in the text box.
- Click on the Update button.
- Click on the Update button.
Front-end Screenshot
- Login to your account.
- Go to the Product Page.

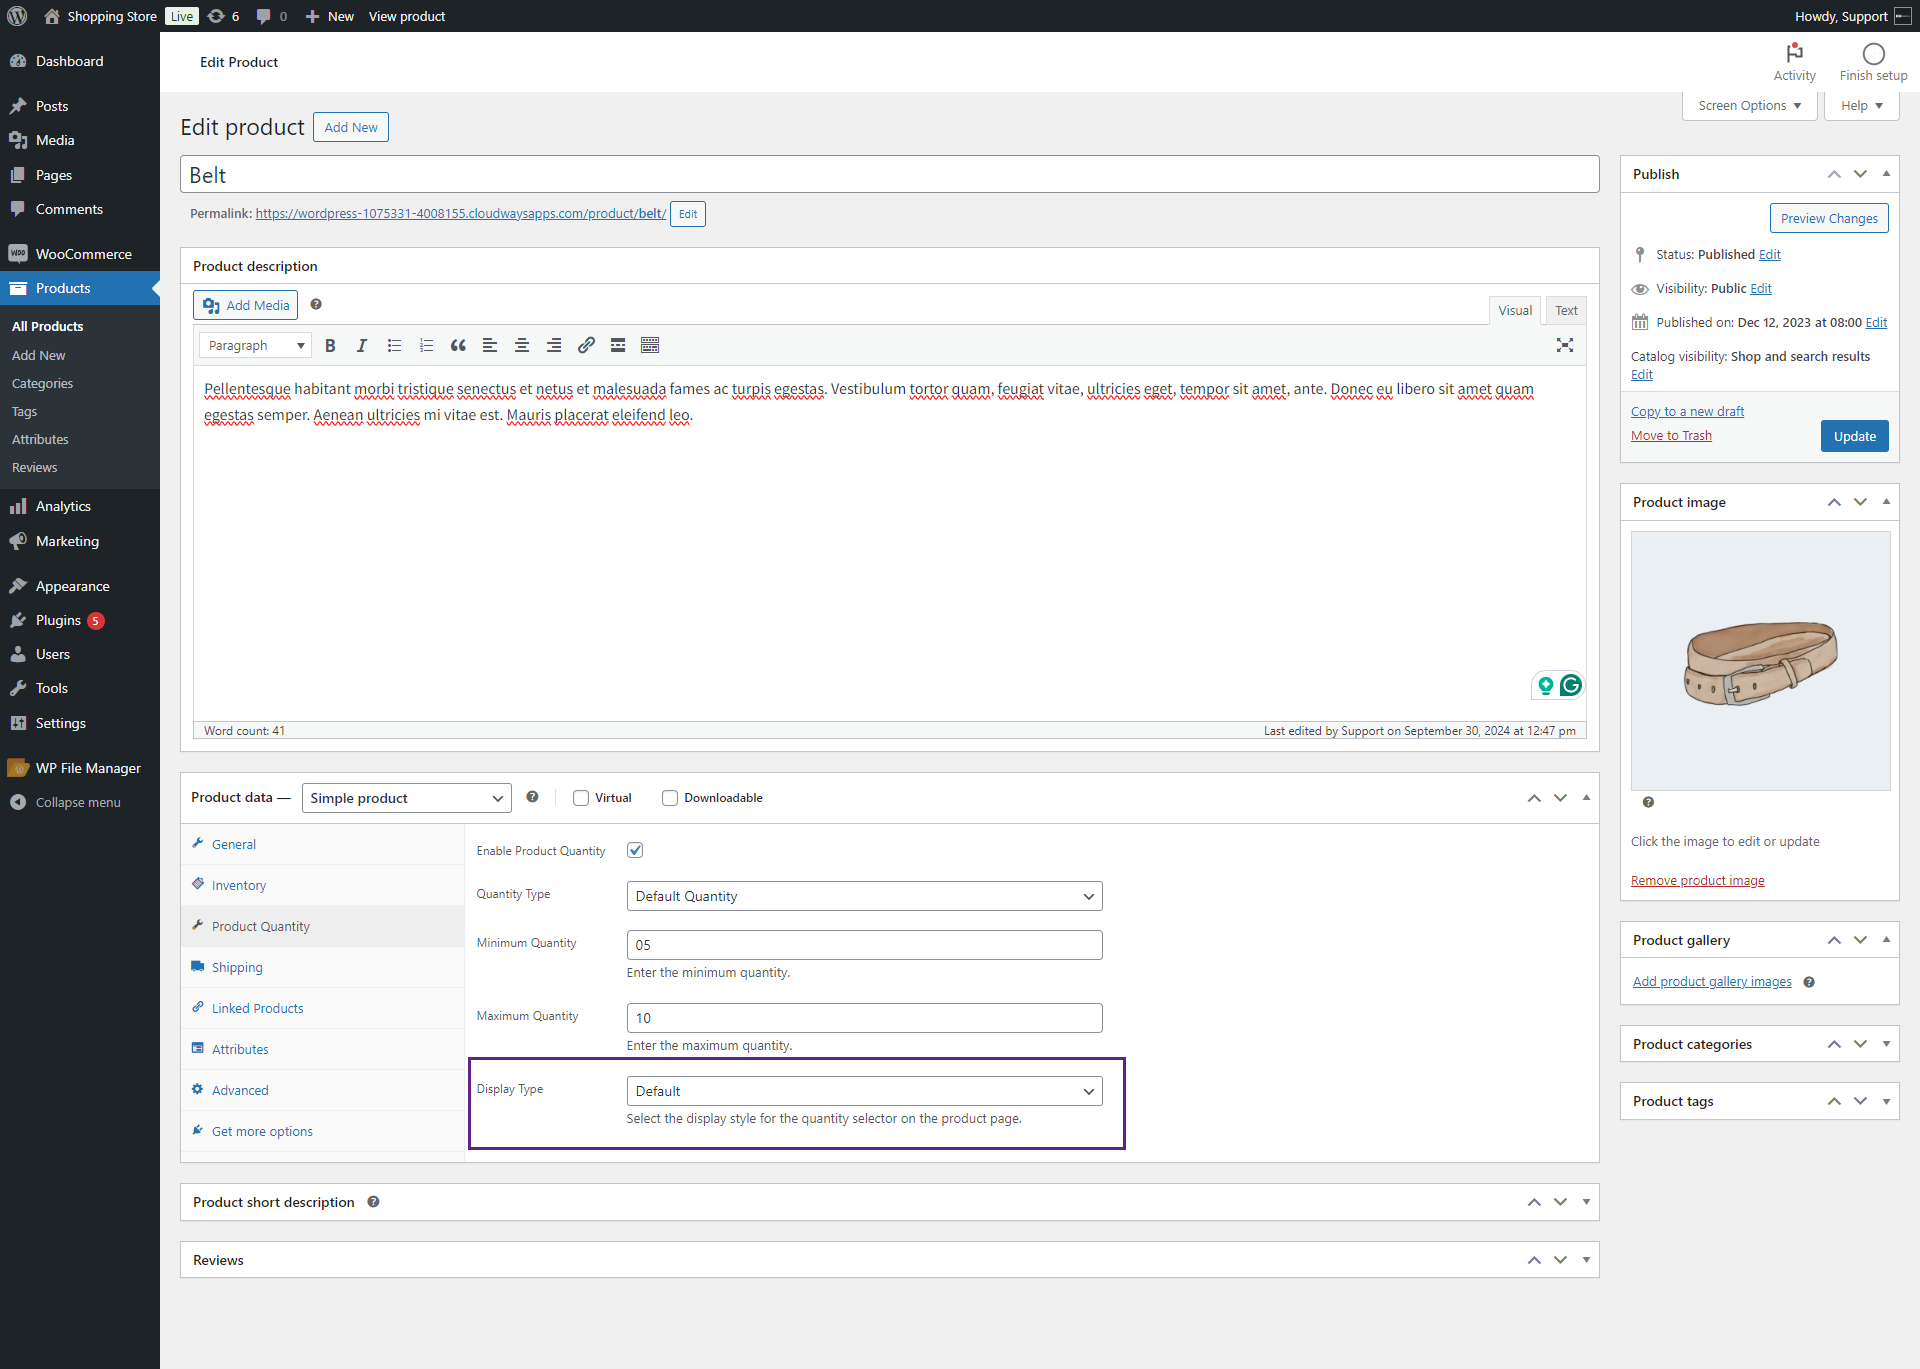
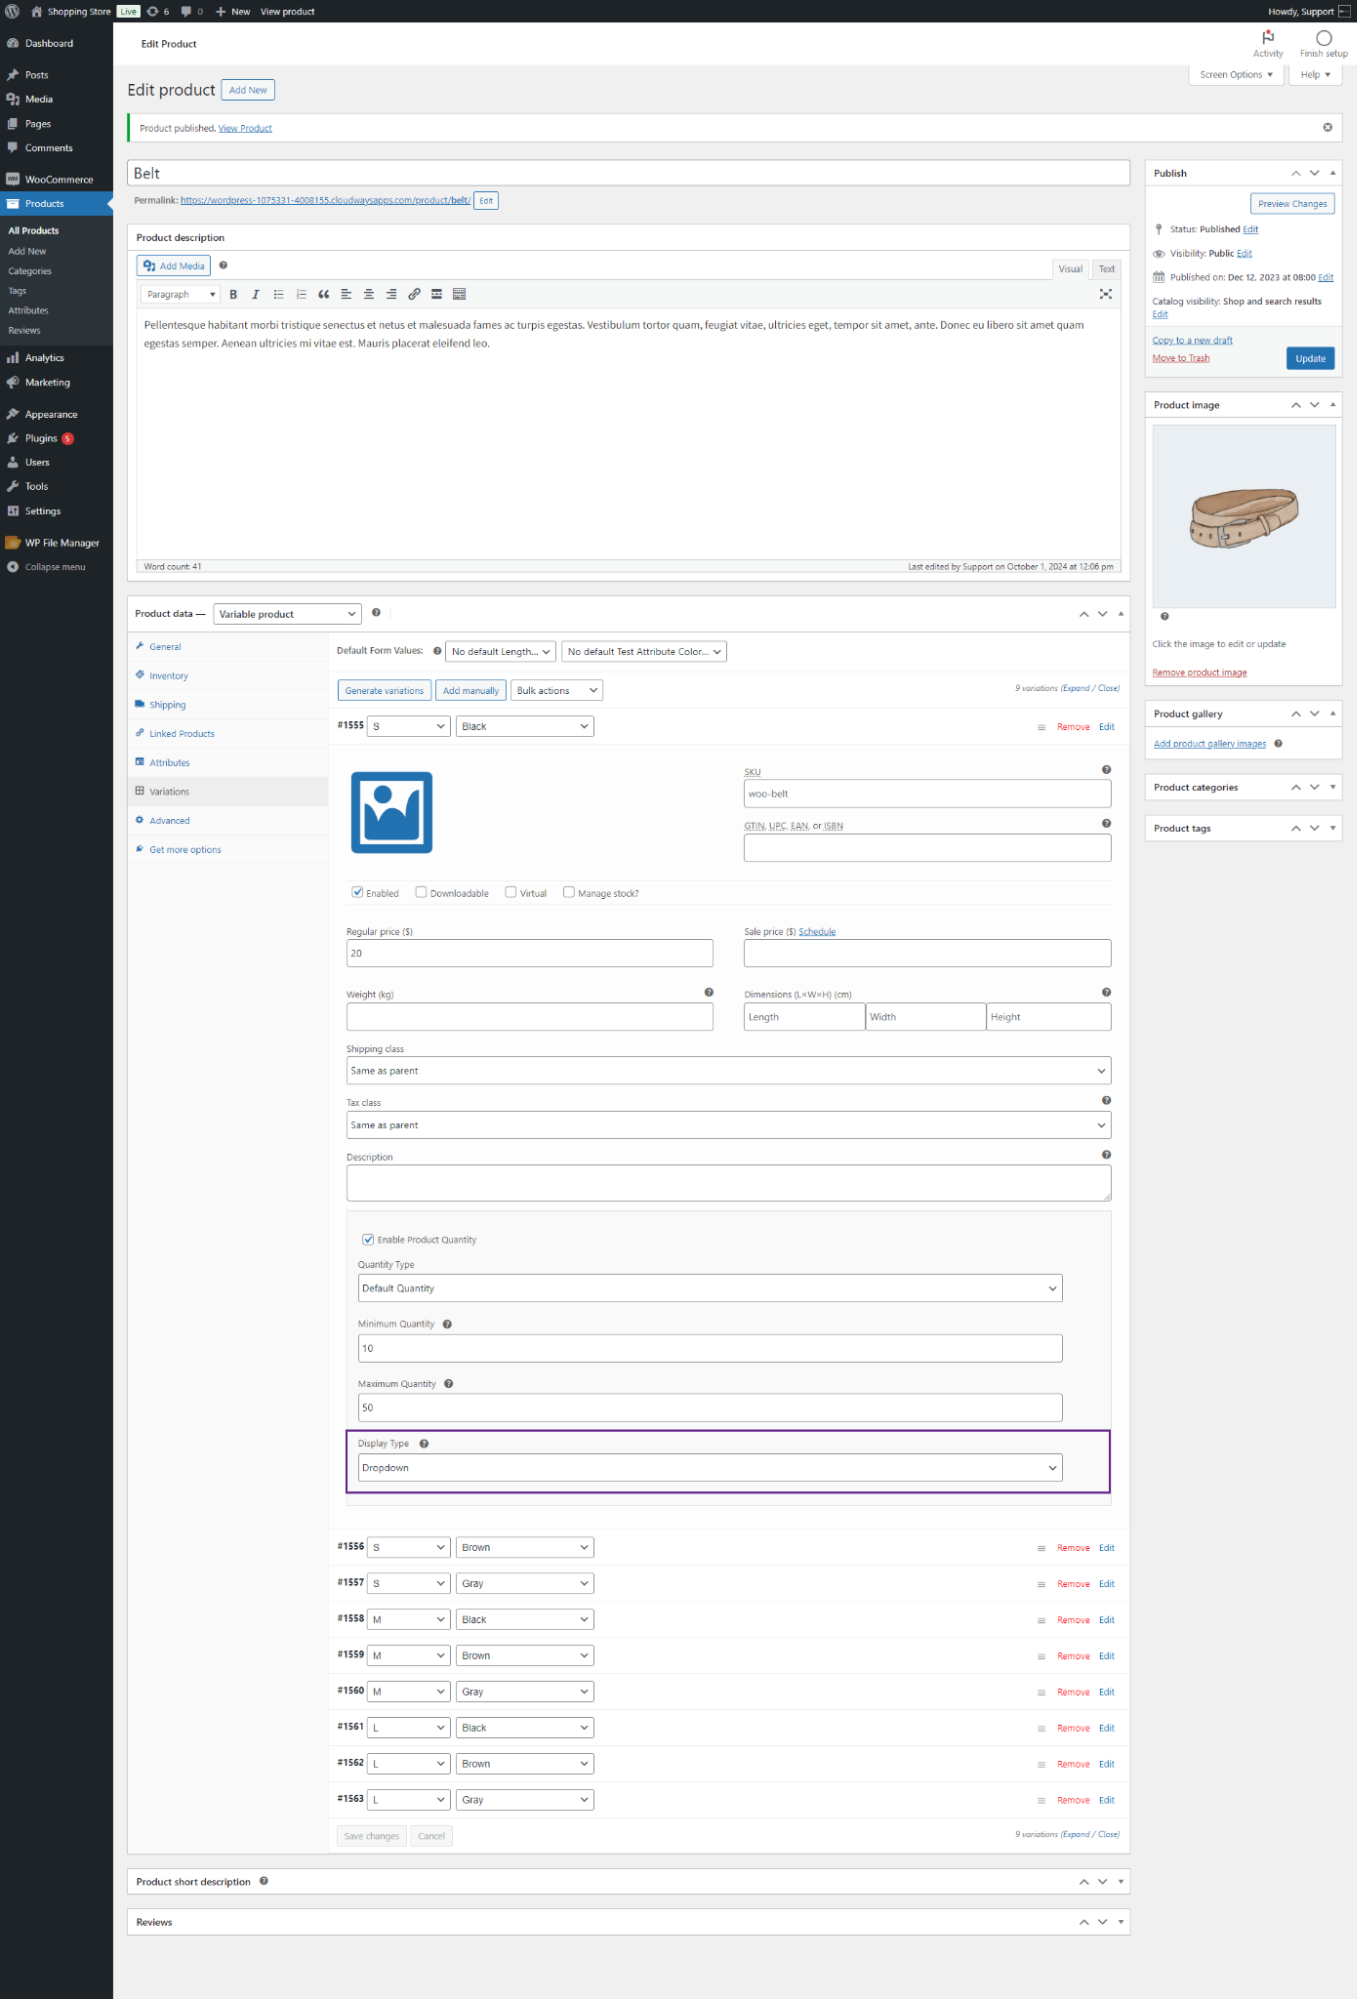
Display Type
↑ Back to top- Navigate and click on the Display Type drop-down menu. By default, it will select WooCommerce’s default quantity type.
- It consists of following options:
Default
- Admin selects Default from the drop-down menu.
- Click on the Update button.
Front-end Screenshot
- Login to your account.
- Go to the Product Page.

Boxes
- Admin selects Boxes from the drop-down menu.
- Click on the Update button.
Front-end Screenshot
- Login to your account.
- Go to the Product Page.
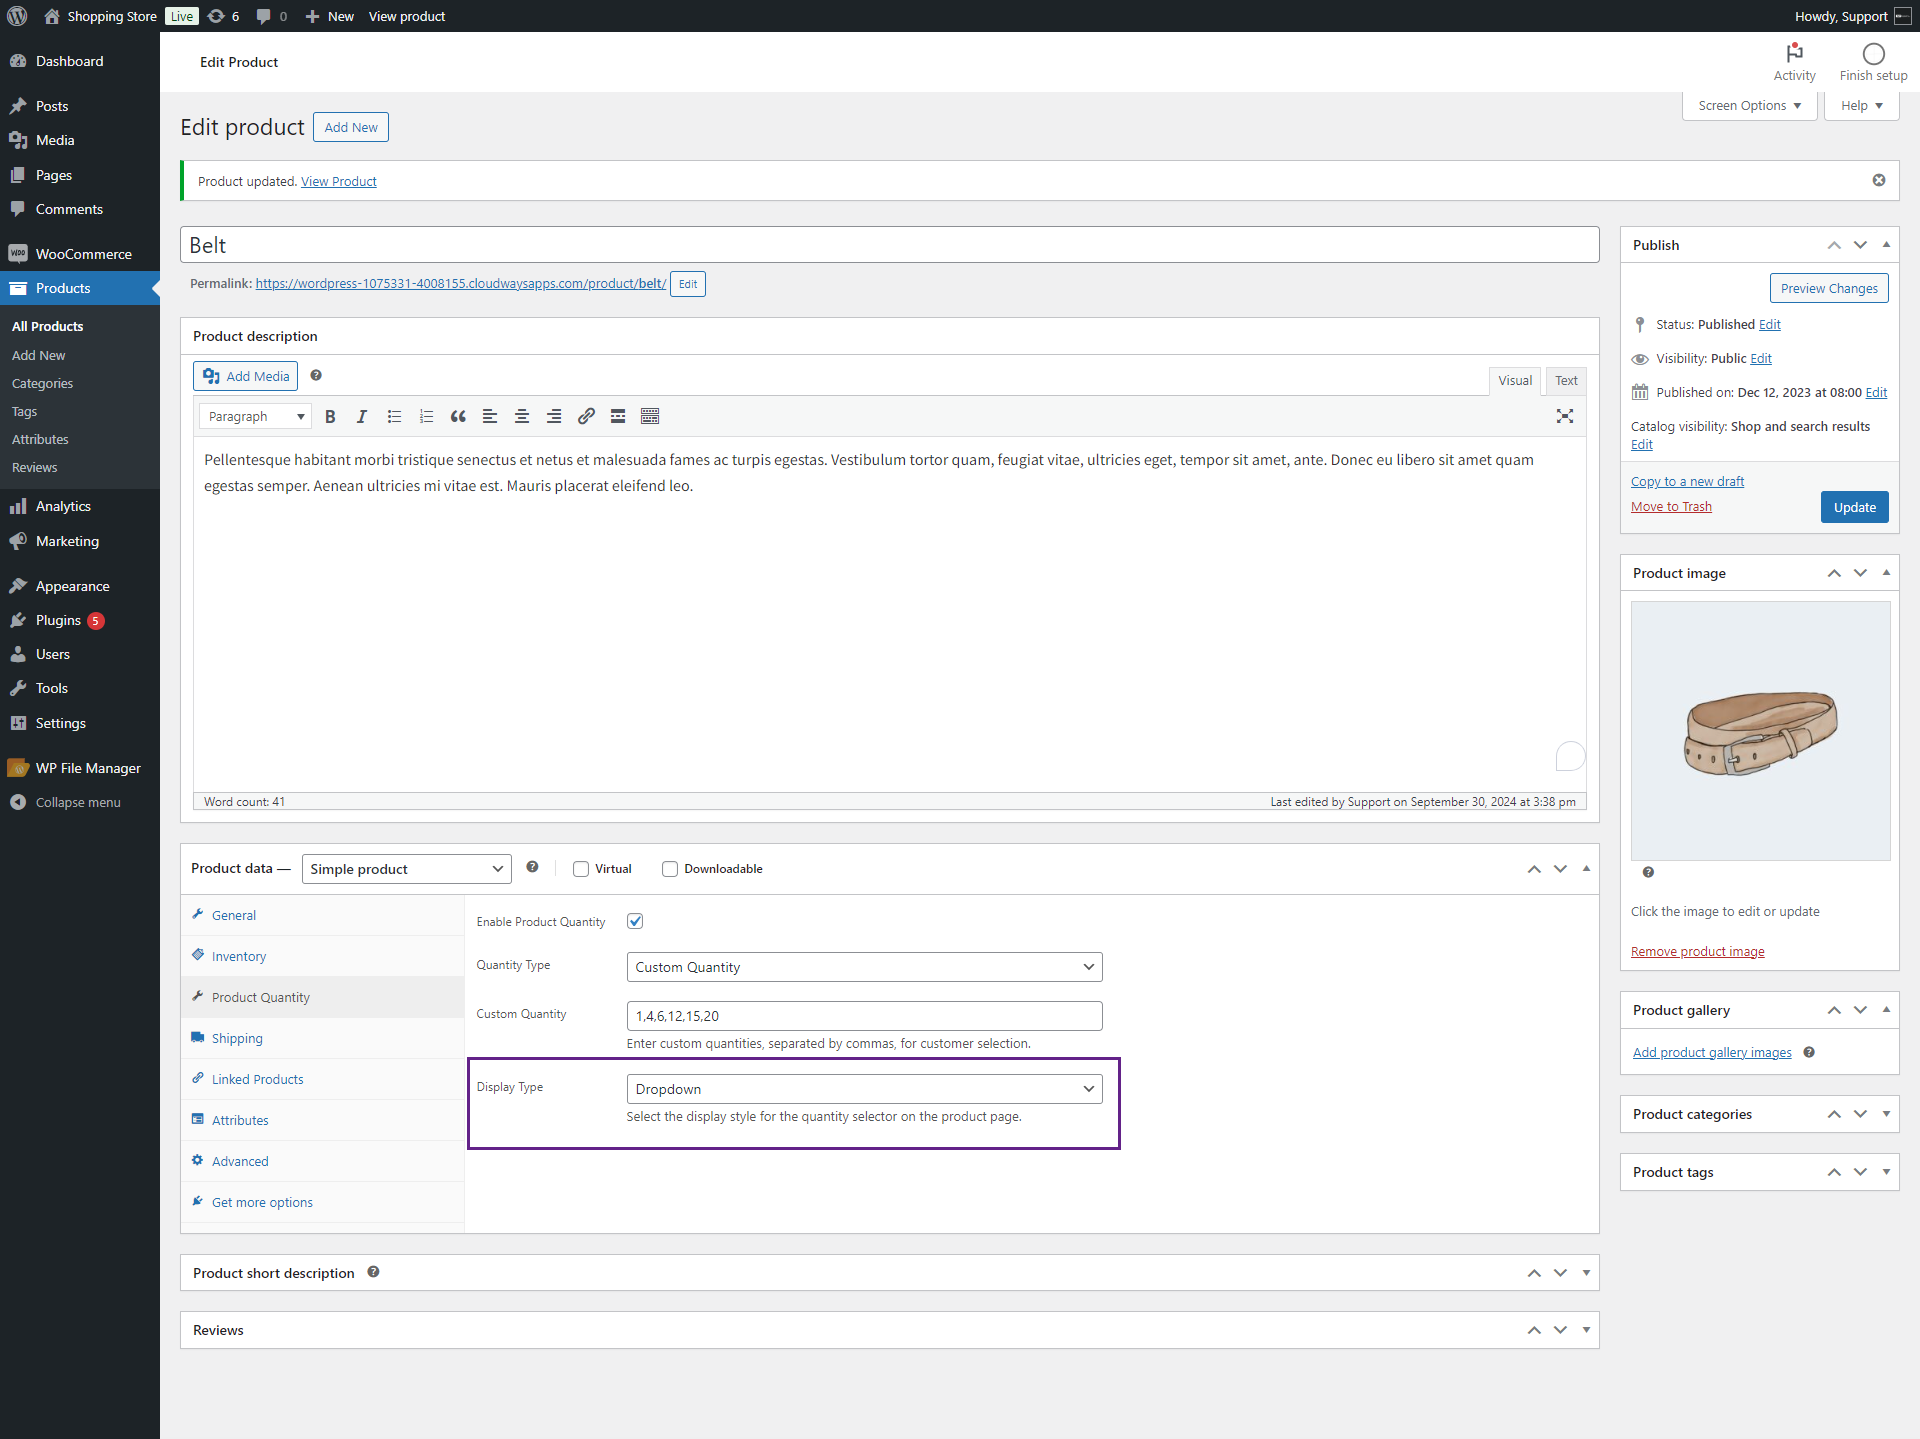
Dropdown
- Admin selects Dropdown from the drop-down menu.
- Click on the Update button.
Front-end Screenshot
- Login to your account.
- Go to the Product Page.
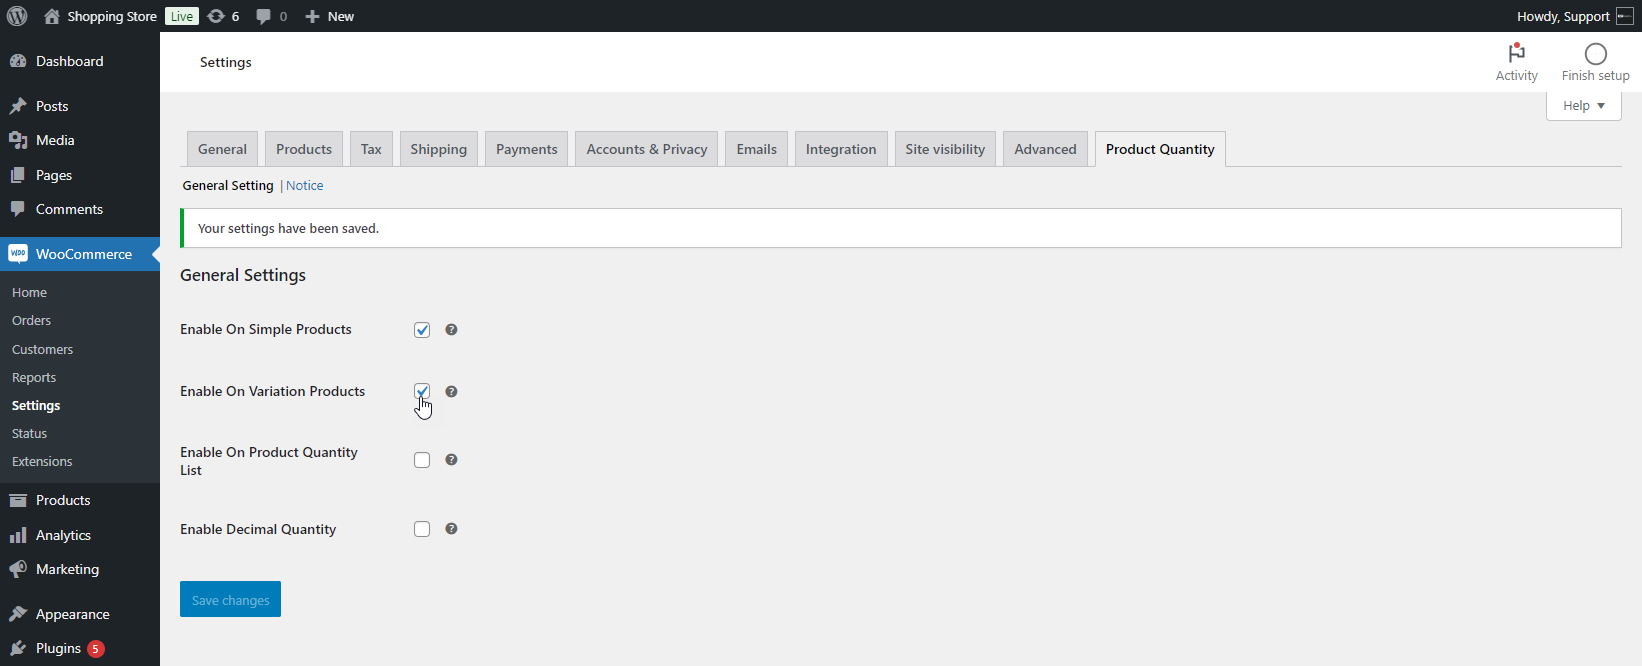
General Settings – Enable On Variation Products
↑ Back to top- Go to WordPress Admin Dashboard > WooCommerce > Settings > Product Quantity > General Settings.
- Click on the Enable On Variation Products checkbox from the General Settings tab.
- Click on the Save Changes button.
- Navigate to the WordPress Admin Dashboard > Products.
- Click on the Add New button or Edit the existing one.

- Navigate and click on the Product Data > Variations from the side tab.
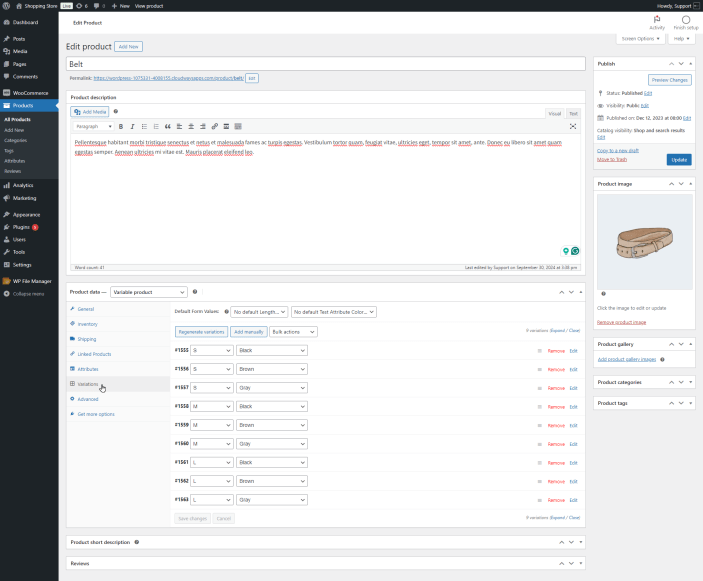
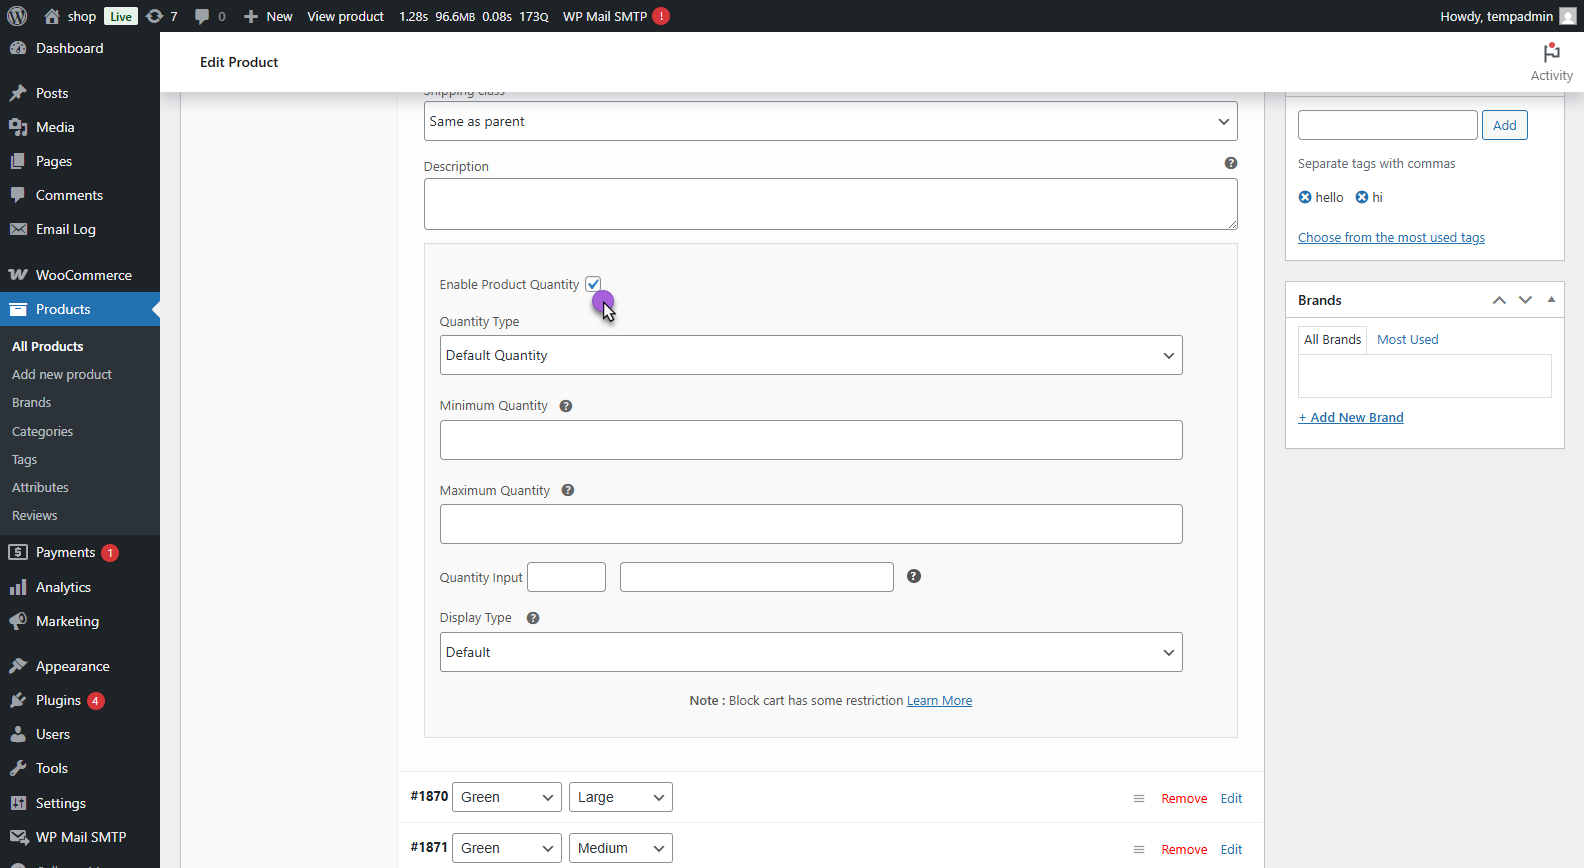
Enable Product Quantity
↑ Back to top- Expand any Variation and navigate to the Product Quantity.
- Click the checkbox of Enable Product Quantity.
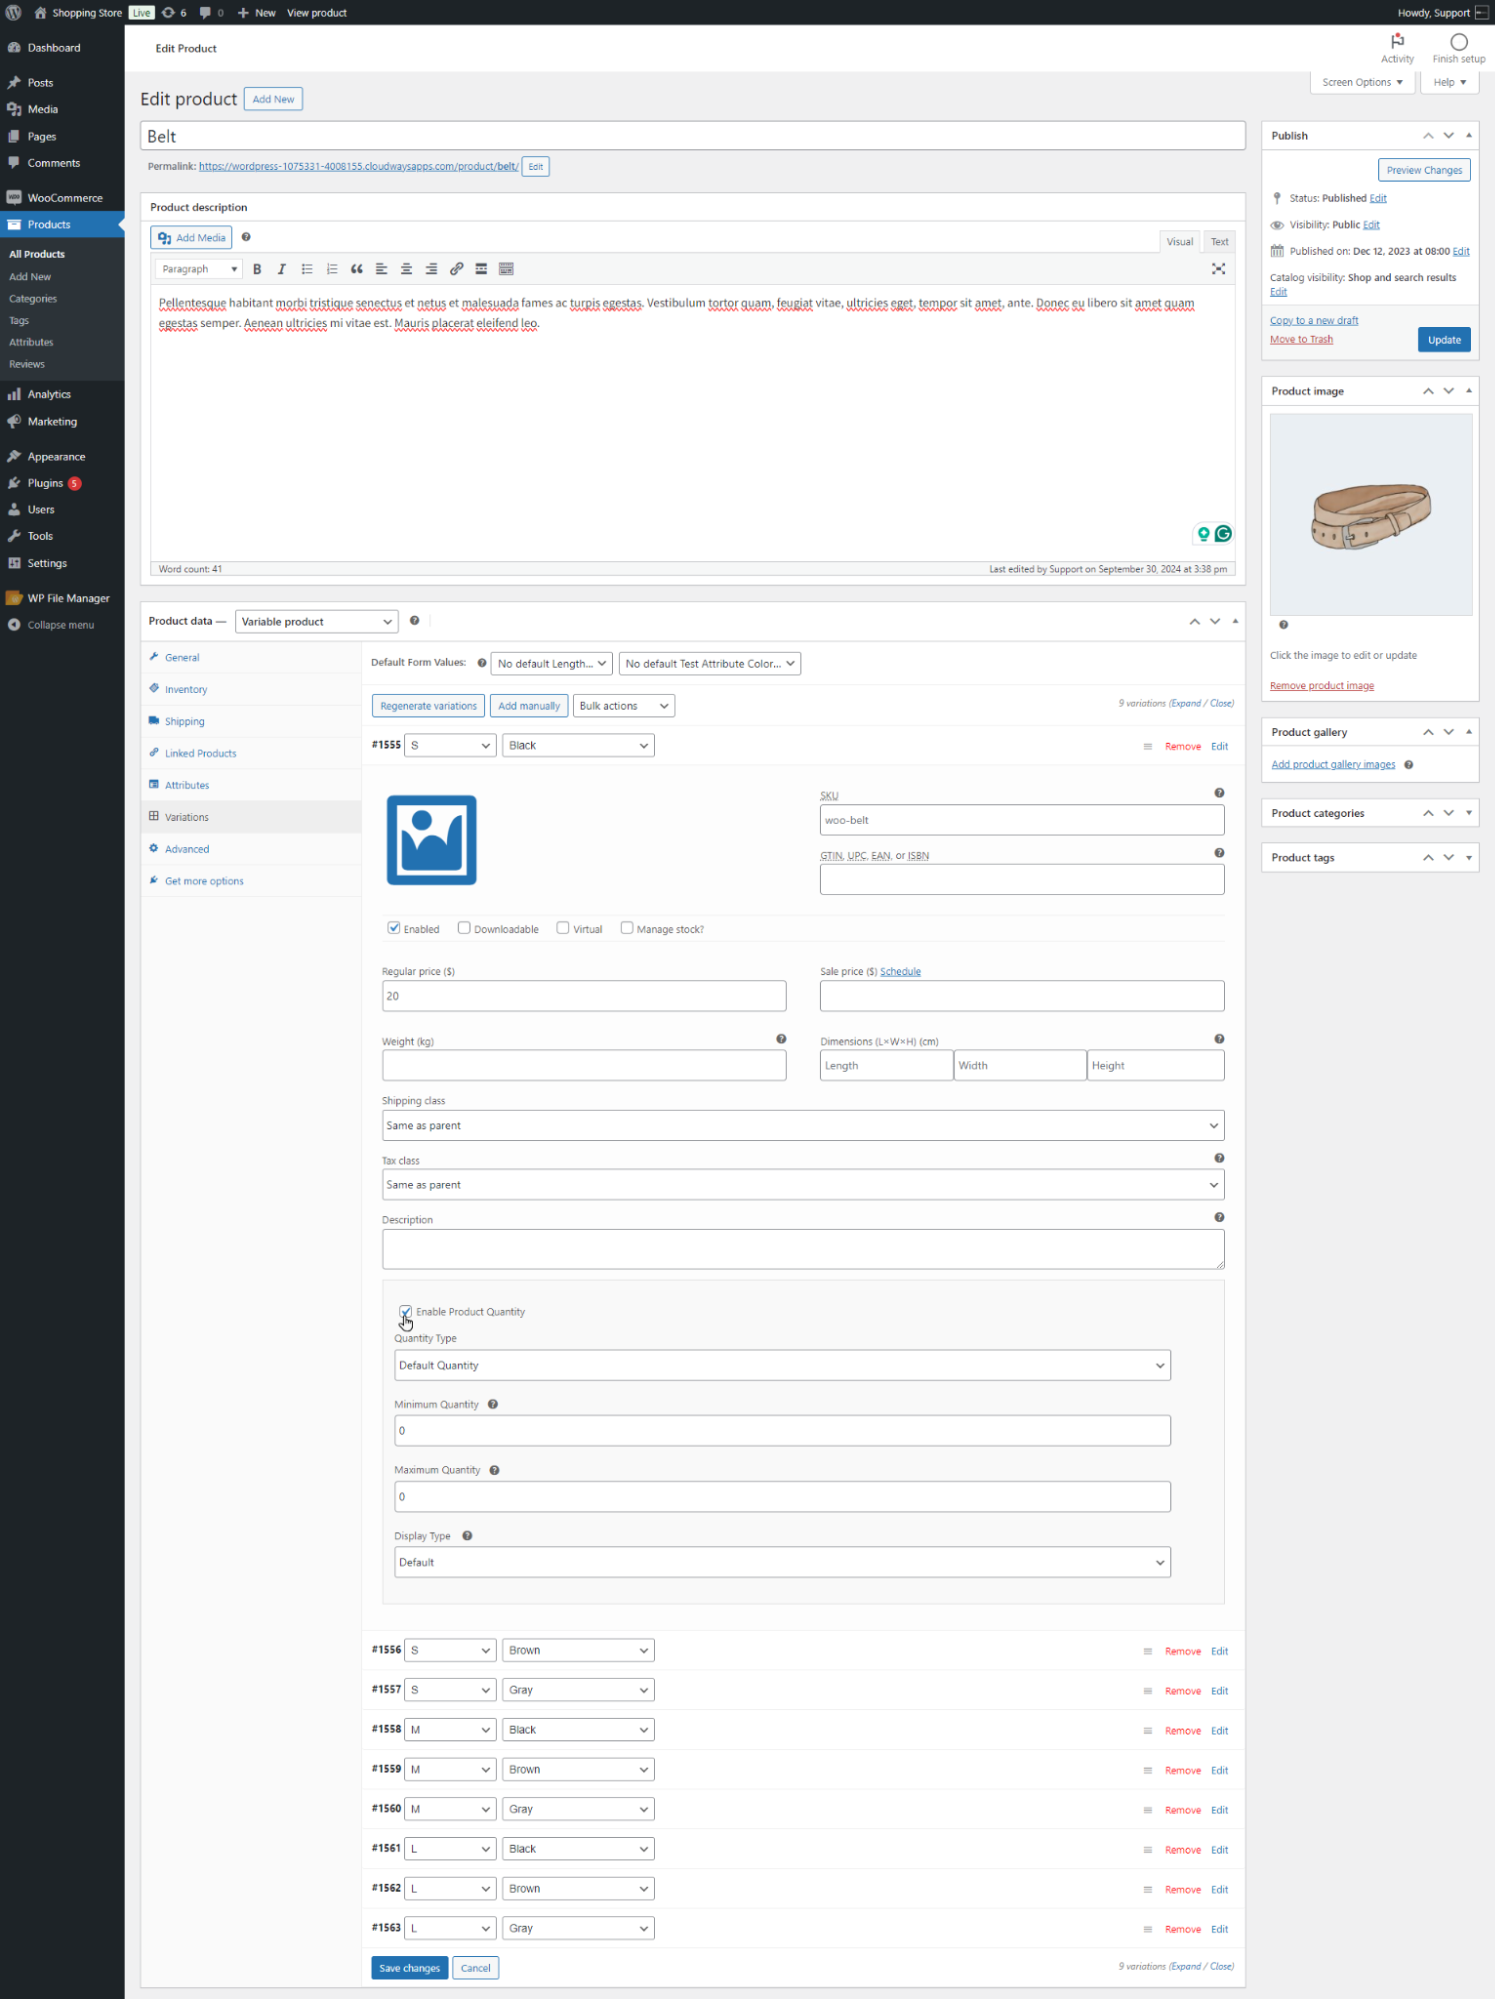
Quantity Type
↑ Back to top- Navigate and click on the Quantity Type drop-down menu.
- It consists of the following options;
Default Quantity
- In the Quantity Type, the Default Quantity will be selected by default. It consists of the following options;
- Minimum Quantity: Admin can set the minimum quantity in the text box.
- Maximum Quantity: Admin can set the maximum quantity in the text box.
- Click on the Update button.
Front-end Screenshot
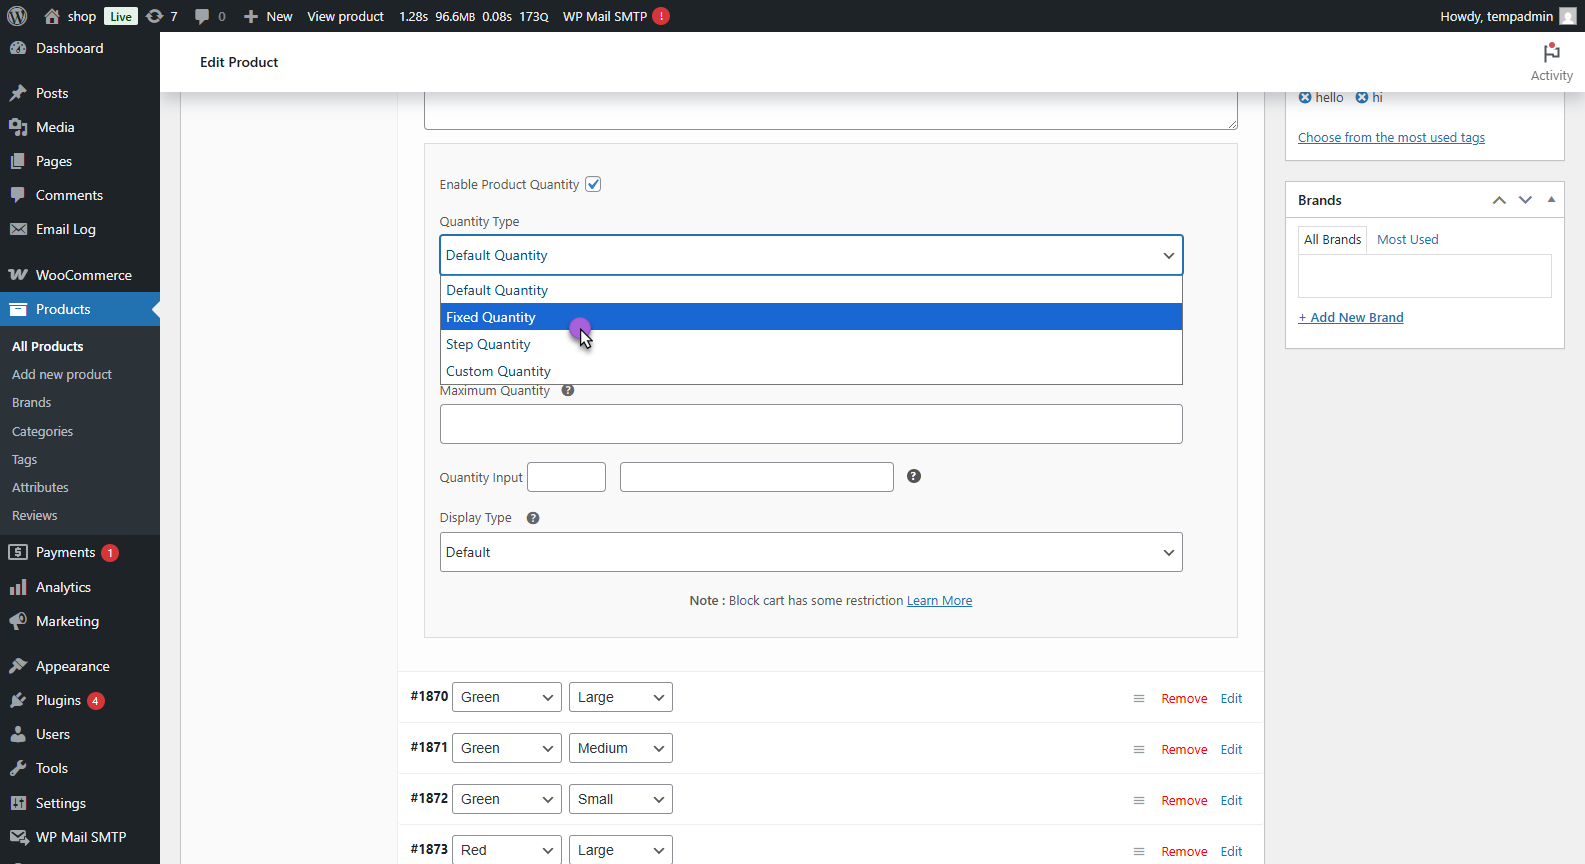
Fixed Quantity
- Admin selects Fixed Quantity from the Quantity Type drop-down menu. It consists of the following options;
- Fixed Quantity: Admin can insert the fixed quantity in the text box.
- Click on the Update button.
Front-end Screenshot
Step Quantity
- Admin selects Step Quantity from the Quantity Type drop-down menu. It consists of the following options;
- Minimum Quantity: Admin can set the minimum quantity in the text box.
- Maximum Quantity: Admin can set the maximum quantity in the text box.
- Step Counter: The admin can set the step counter, which means it will start from the minimum quantity and skip multiples of the number declared by the admin on Step Quantity until it reaches the maximum quantity.
- Click on the Update button.
Front-end Screenshot
Custom Quantity
- Admin selects Custom Quantity from the Quantity Type drop-down menu. It consists of the following options;
- Custom Quantities: The admin can insert multiple commas-separated custom quantities in the text box.
- Click on the Update button.

Front-end Screenshot
Display Type
↑ Back to top- Navigate and click on the Display Type drop-down menu. By default, it will select WooCommerce default quantity type.
- It consists of the following options:
Default
- Admin selects Default from the drop-down menu.
- Click on the Update button.

Front-end Screenshot
- Login to your account.
- Go to the Product Page.

Boxes
- Admin selects Boxes from the drop-down menu.
- Click on the Update button.
Front-end Screenshot
- Login to your account.
- Go to the Product Page.
Dropdown
- Admin selects Dropdown from the drop-down menu.
- Click on the Update button.
Front-end Screenshot
- Login to your account.
- Go to the Product Page.
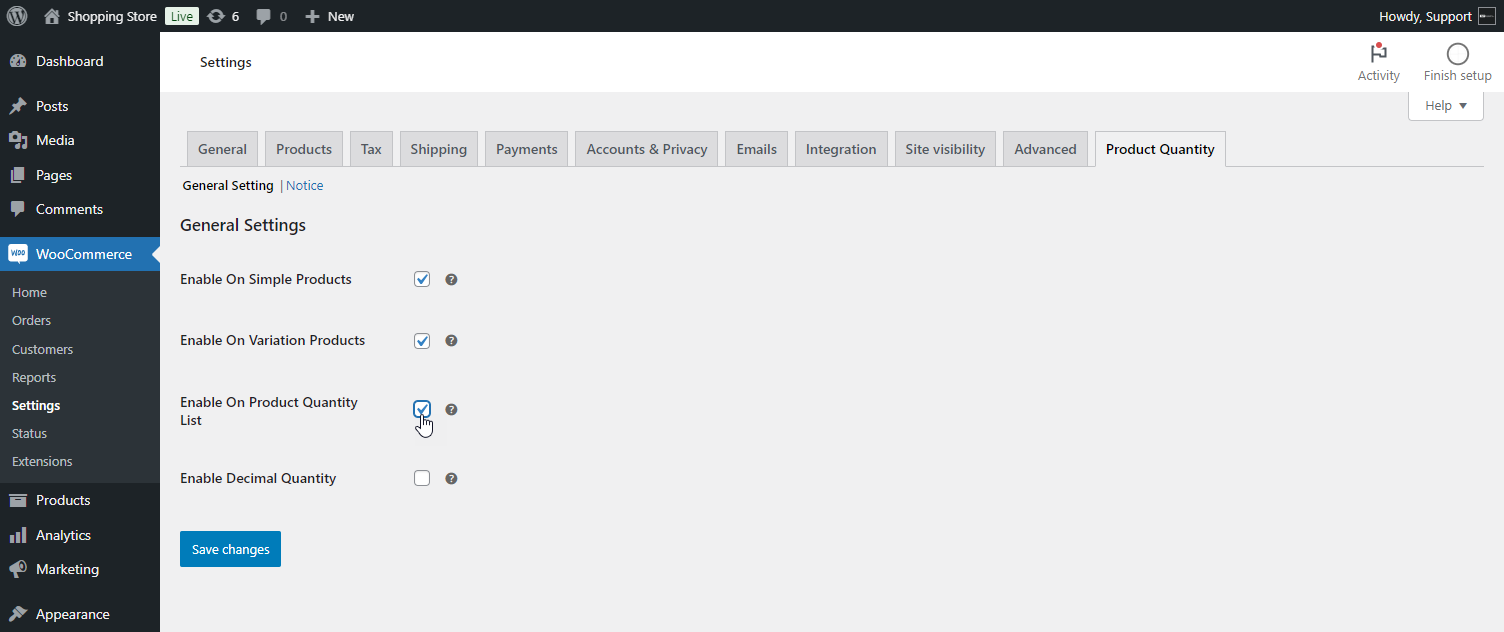
General Settings – Enable On Product Quantity List
↑ Back to top- Go to WordPress Admin Dashboard > WooCommerce > Settings > Product Quantity > General Settings.
- Click on the Enable On Product Quantity List checkbox from the General Settings tab.
- Click on the Save Changes button.
- Navigate to the Product Quantity List on the side menu.
- Click on the Add New button or Edit the existing one.
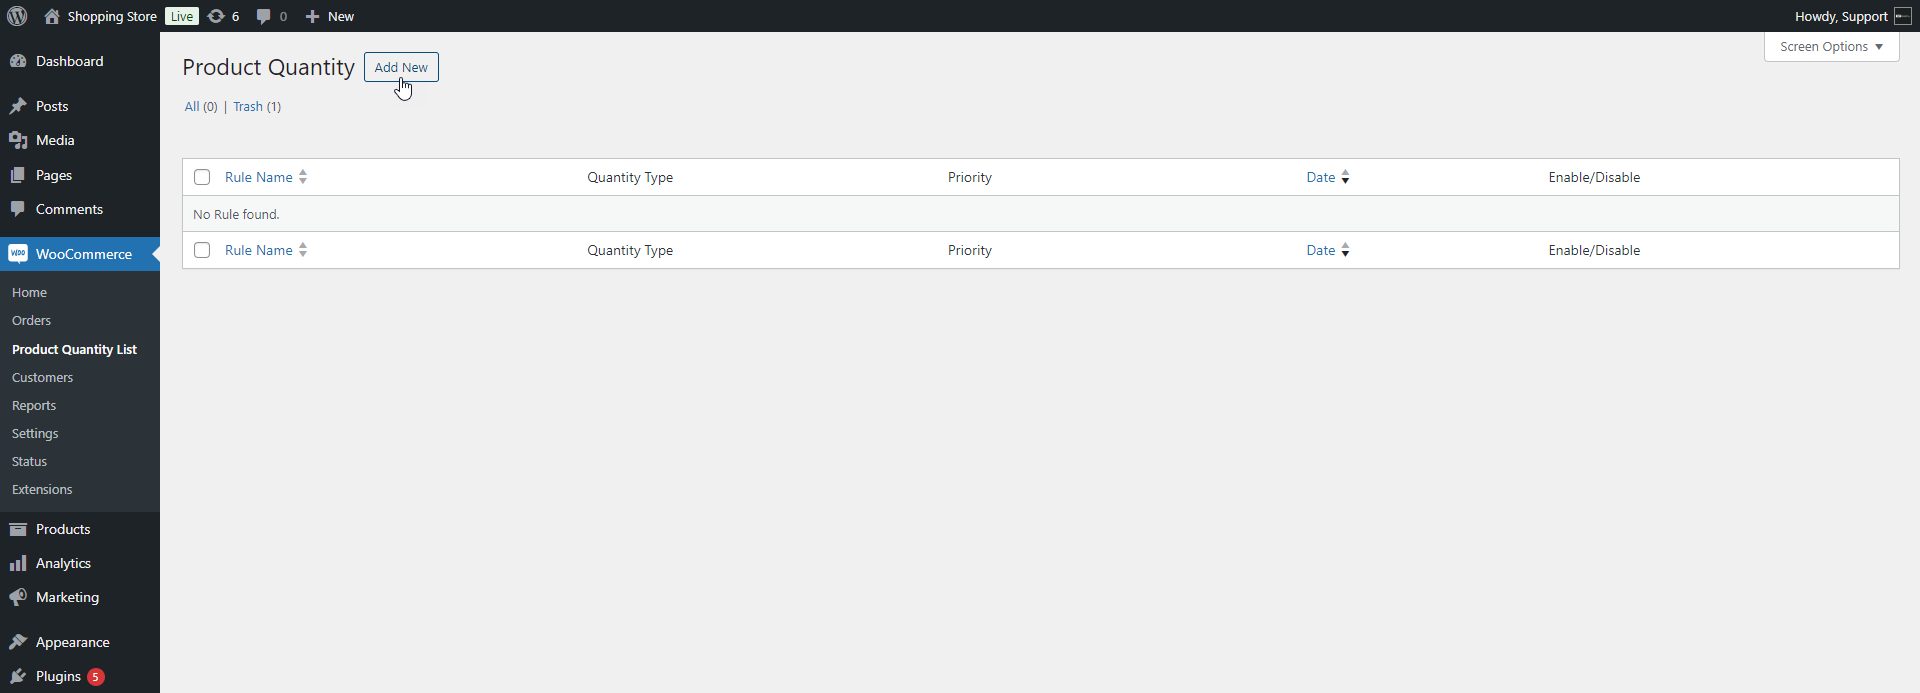
- A tab will open that will consist of the following settings:
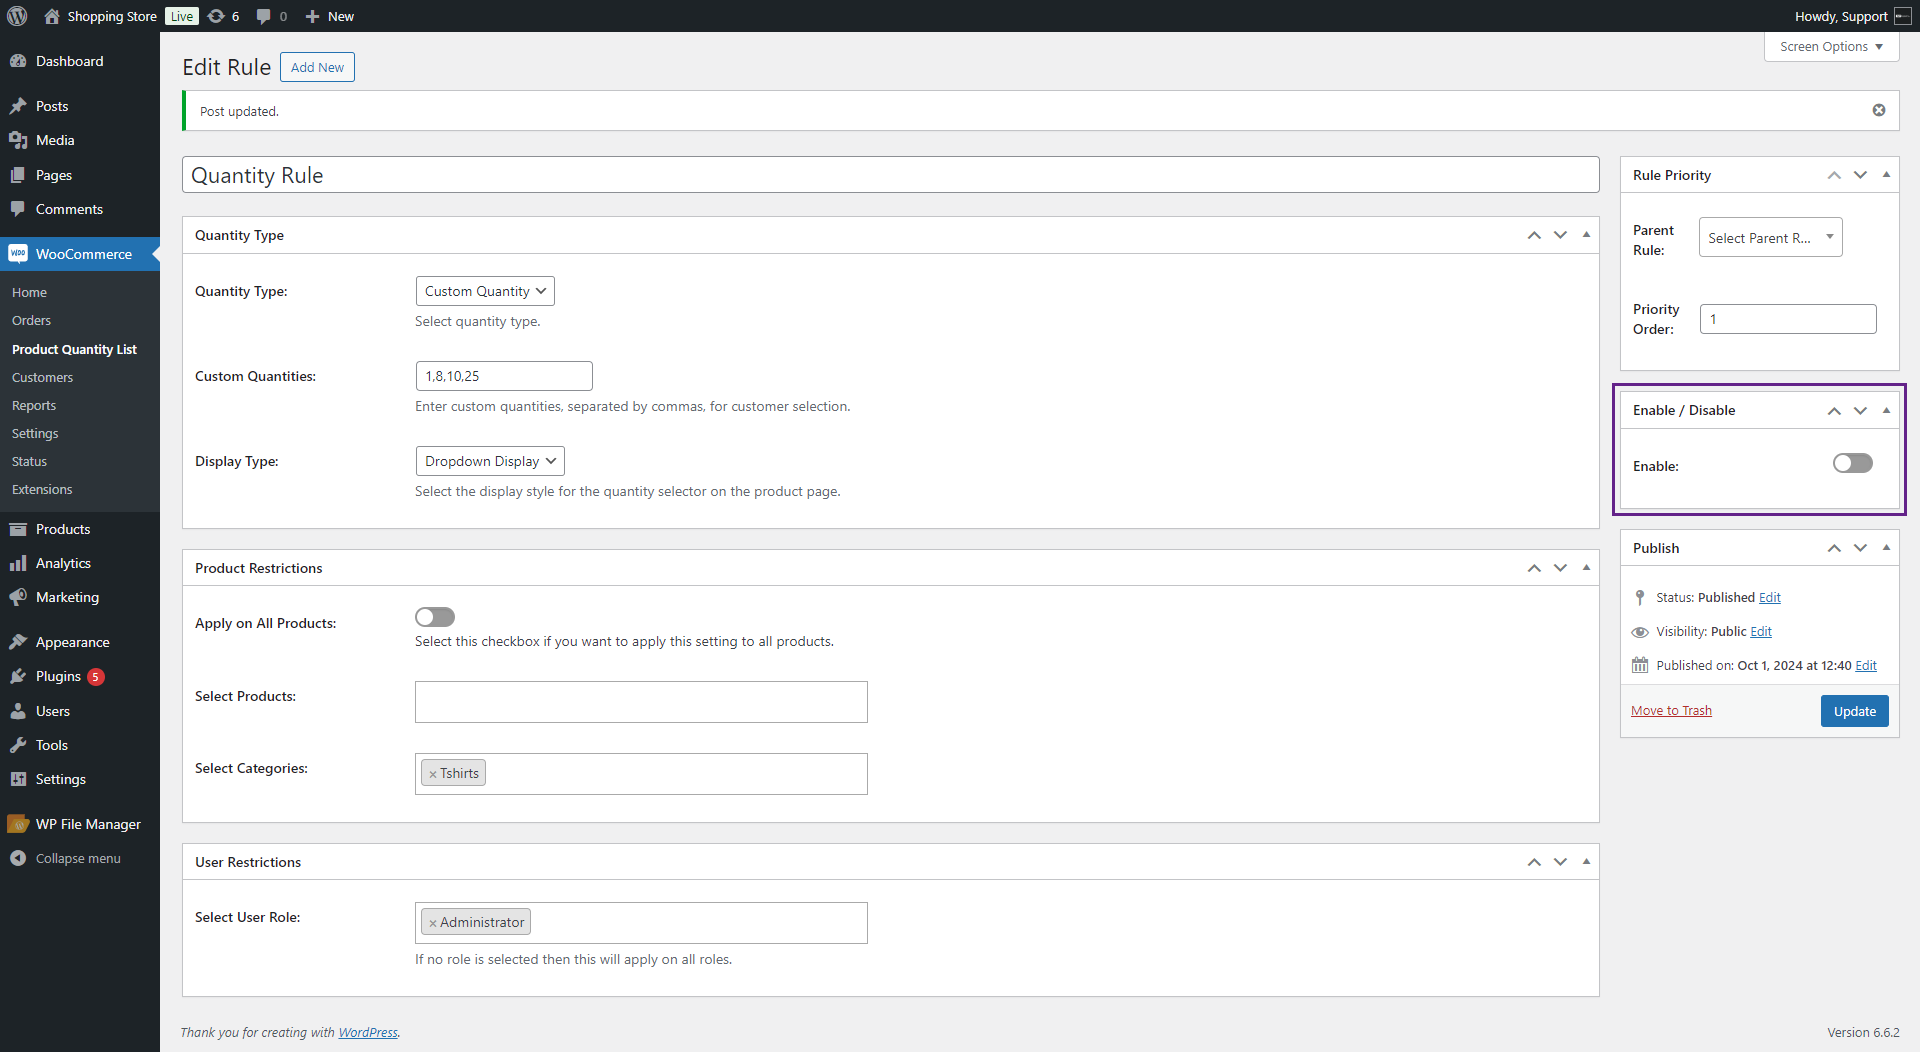
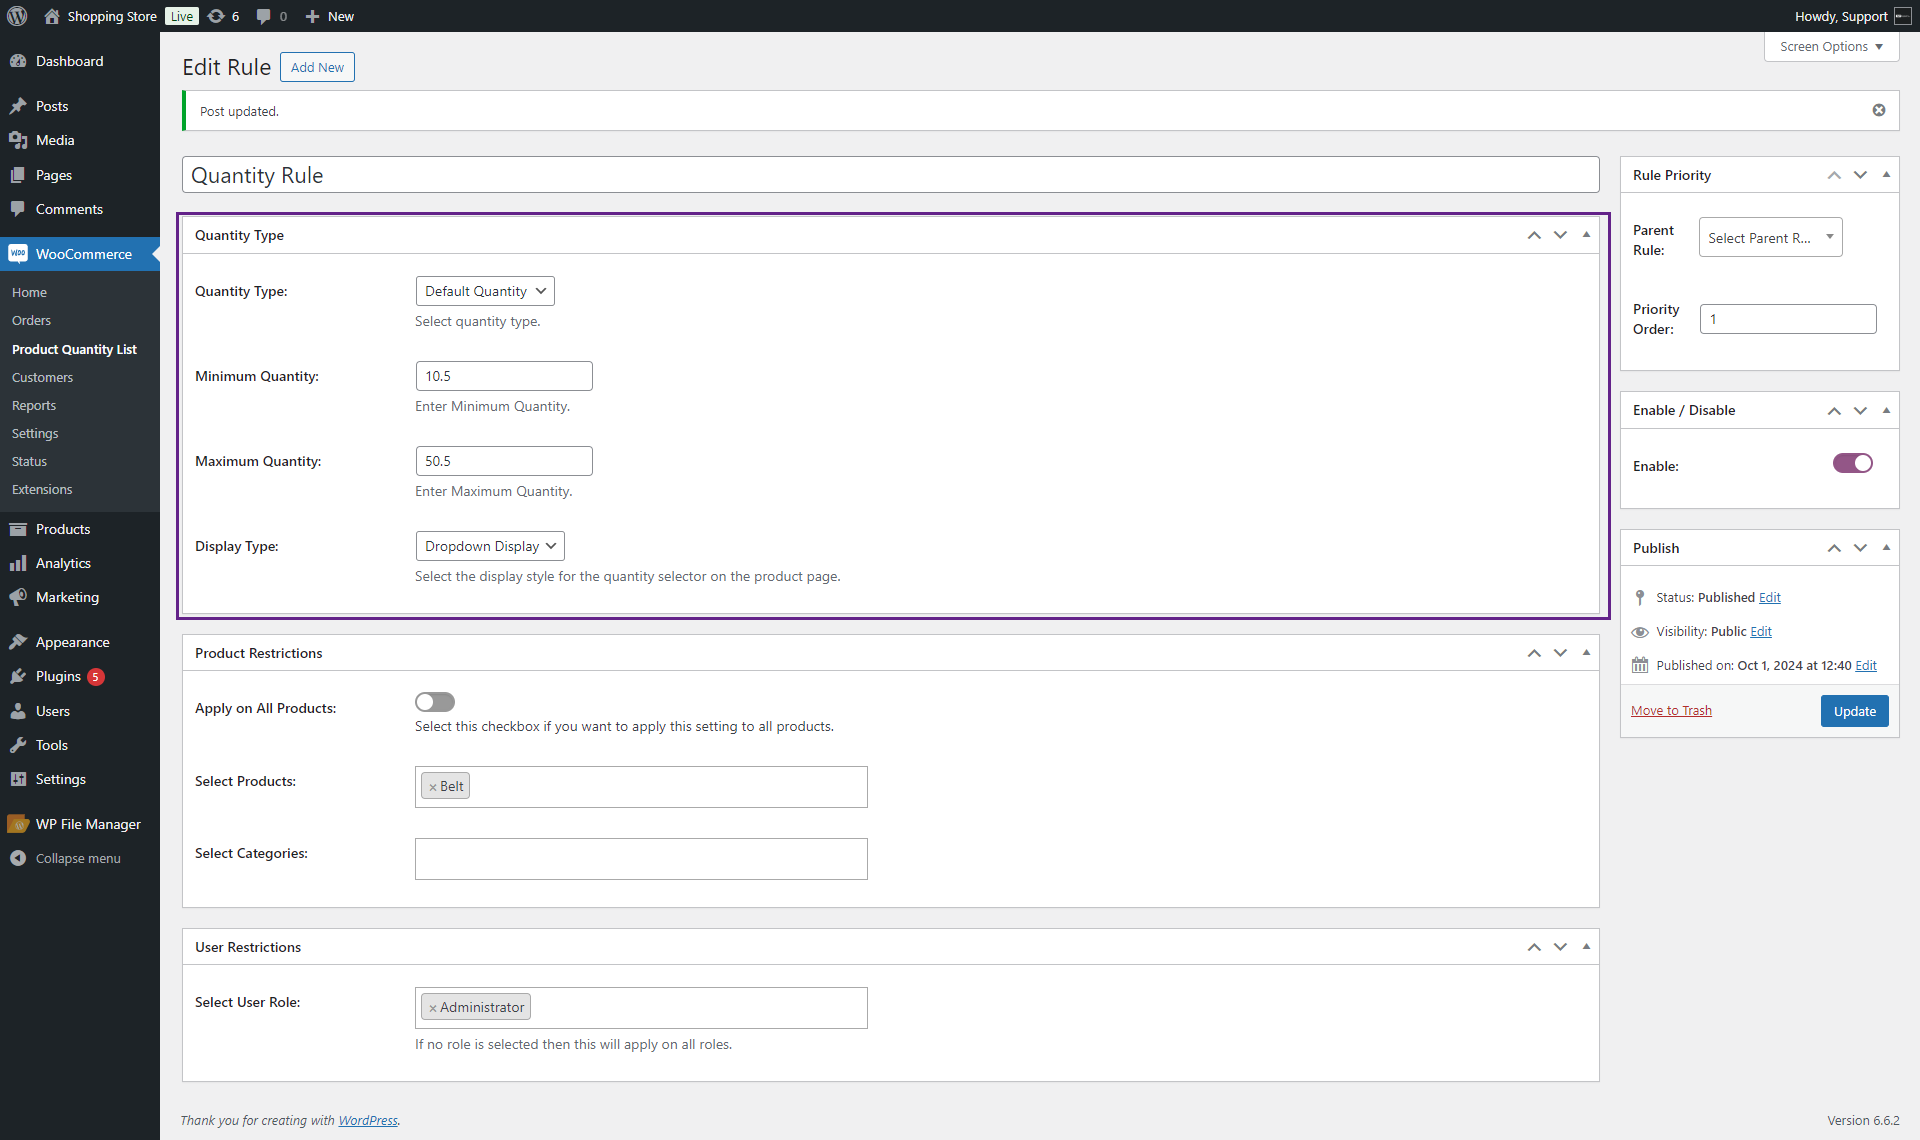
Add New Rule
↑ Back to topAdd Title
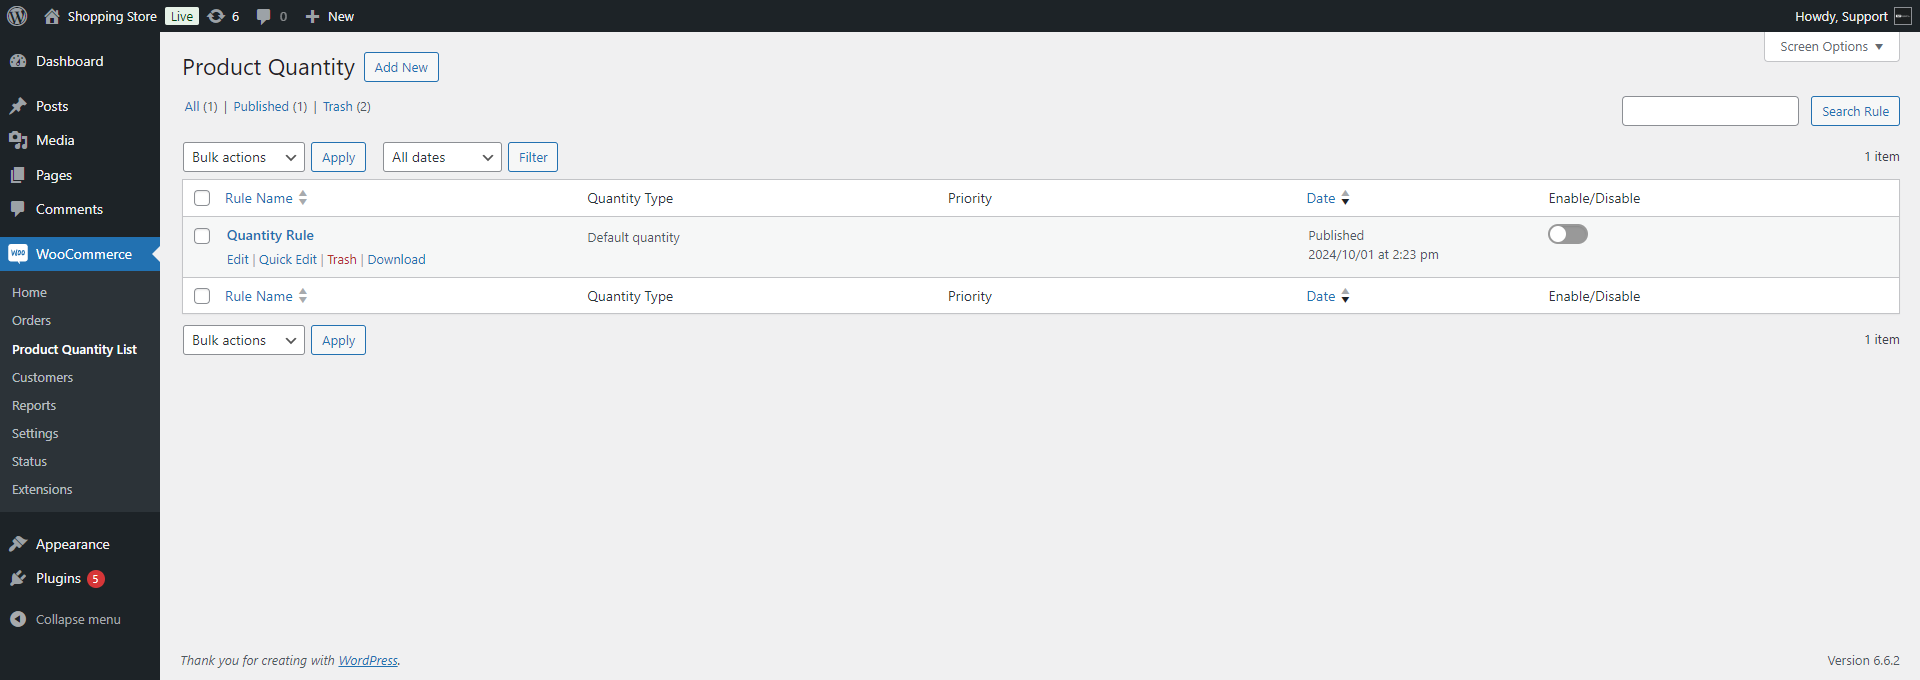
- The Admin can enter the Name in the text box, which will be the title to refer to a rule in the Table.
- Rule in product quantity list table.
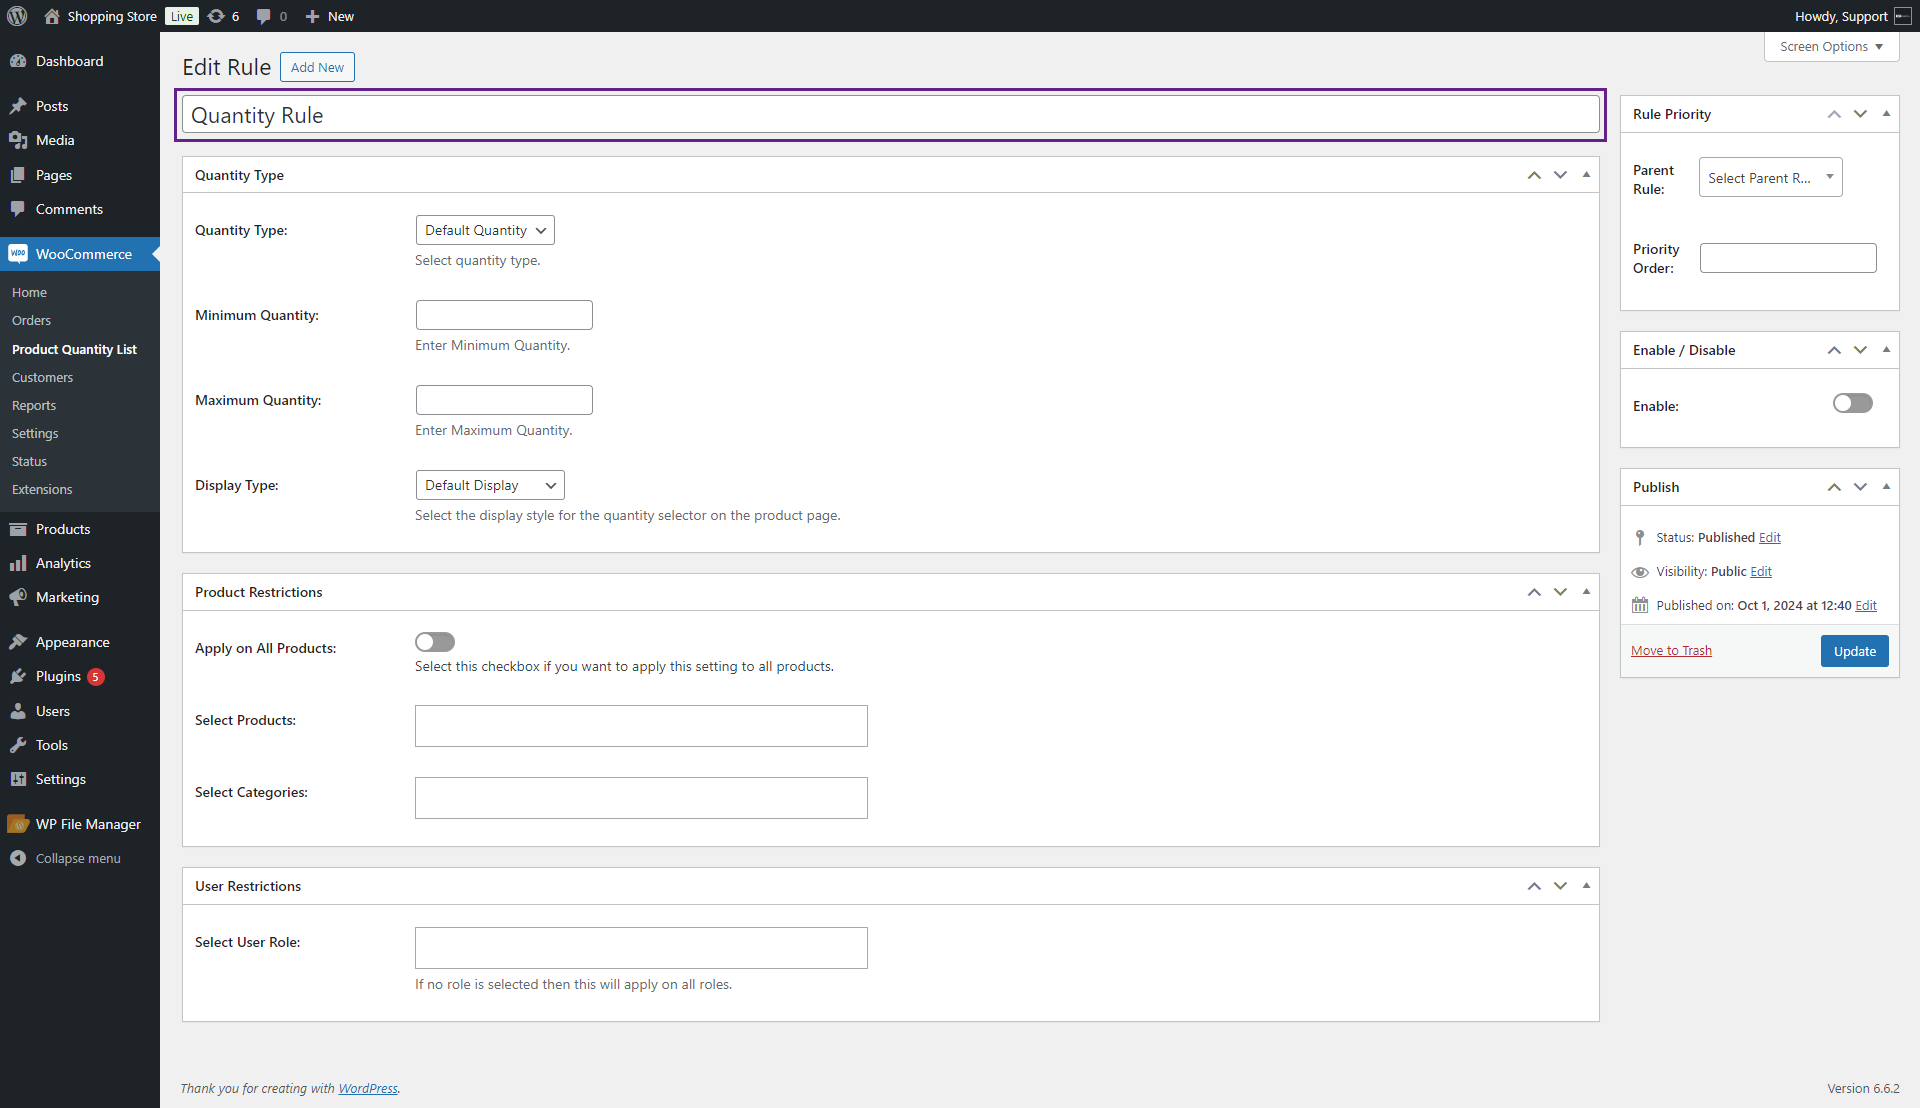
Quantity Type
- In the Quantity Type meta box, navigate and click on the Quantity Type drop-down menu.
- It consists of the following options;
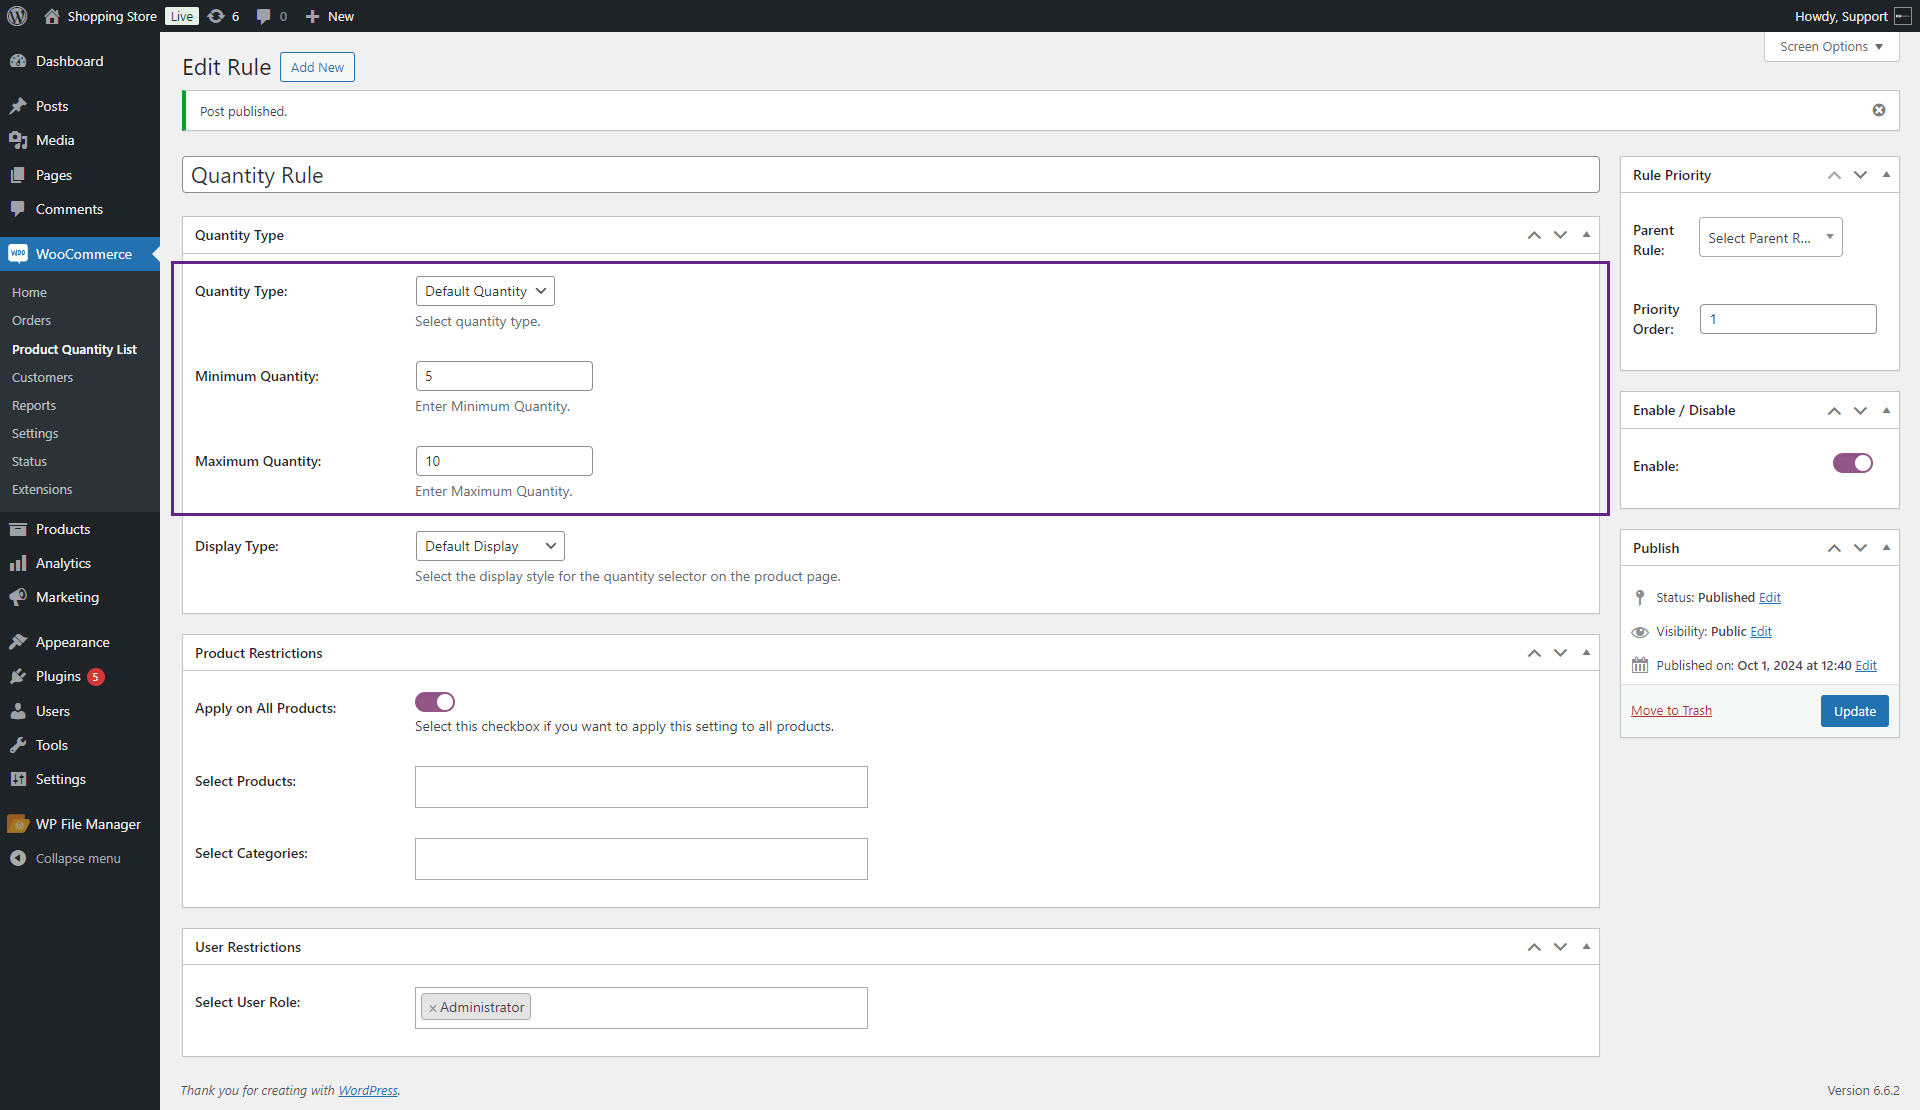
- Default Quantity
- In the Quantity Type, the default quantity will be selected by default. It consists of the following options;
- Minimum Quantity: Admin can set the minimum quantity in the text box.
- Maximum Quantity: Admin can set the maximum quantity in the text box.
Front-end Screenshot
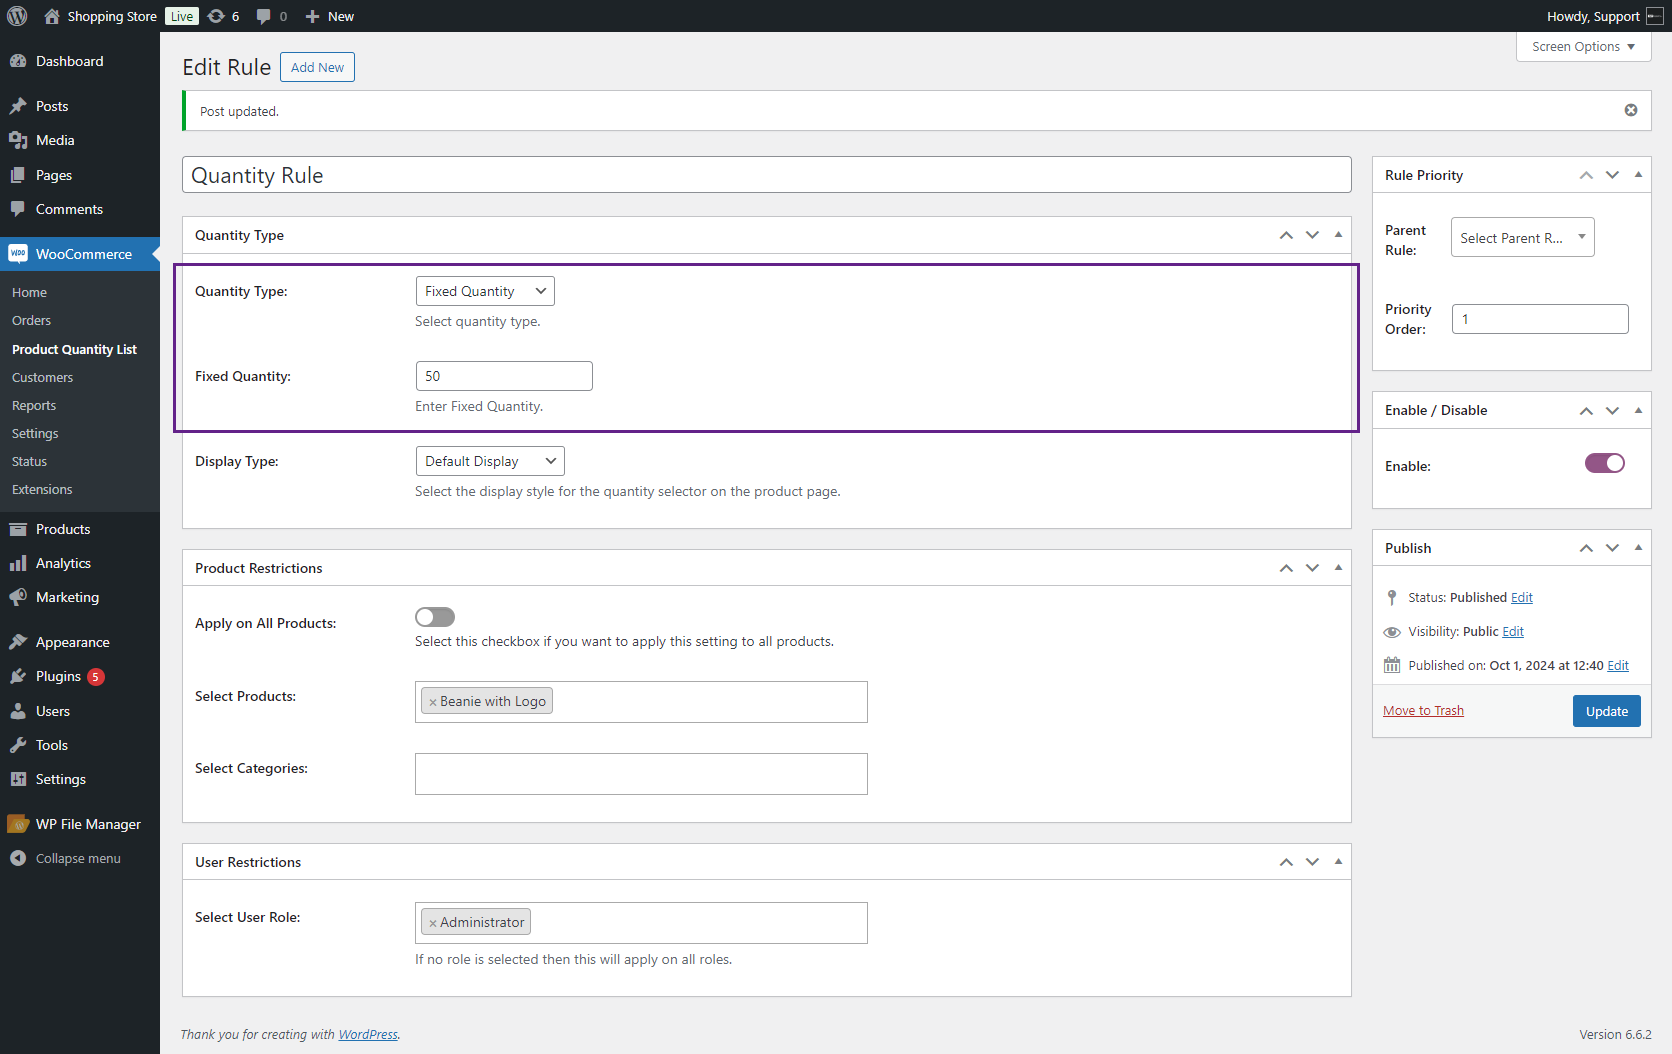
- Fixed Quantity
- Admin selects Fixed Quantity from the drop-down menu. It consists of the following options;
- Fixed Quantity: Admin can insert the fixed quantity in the text box.
Front-end Screenshot

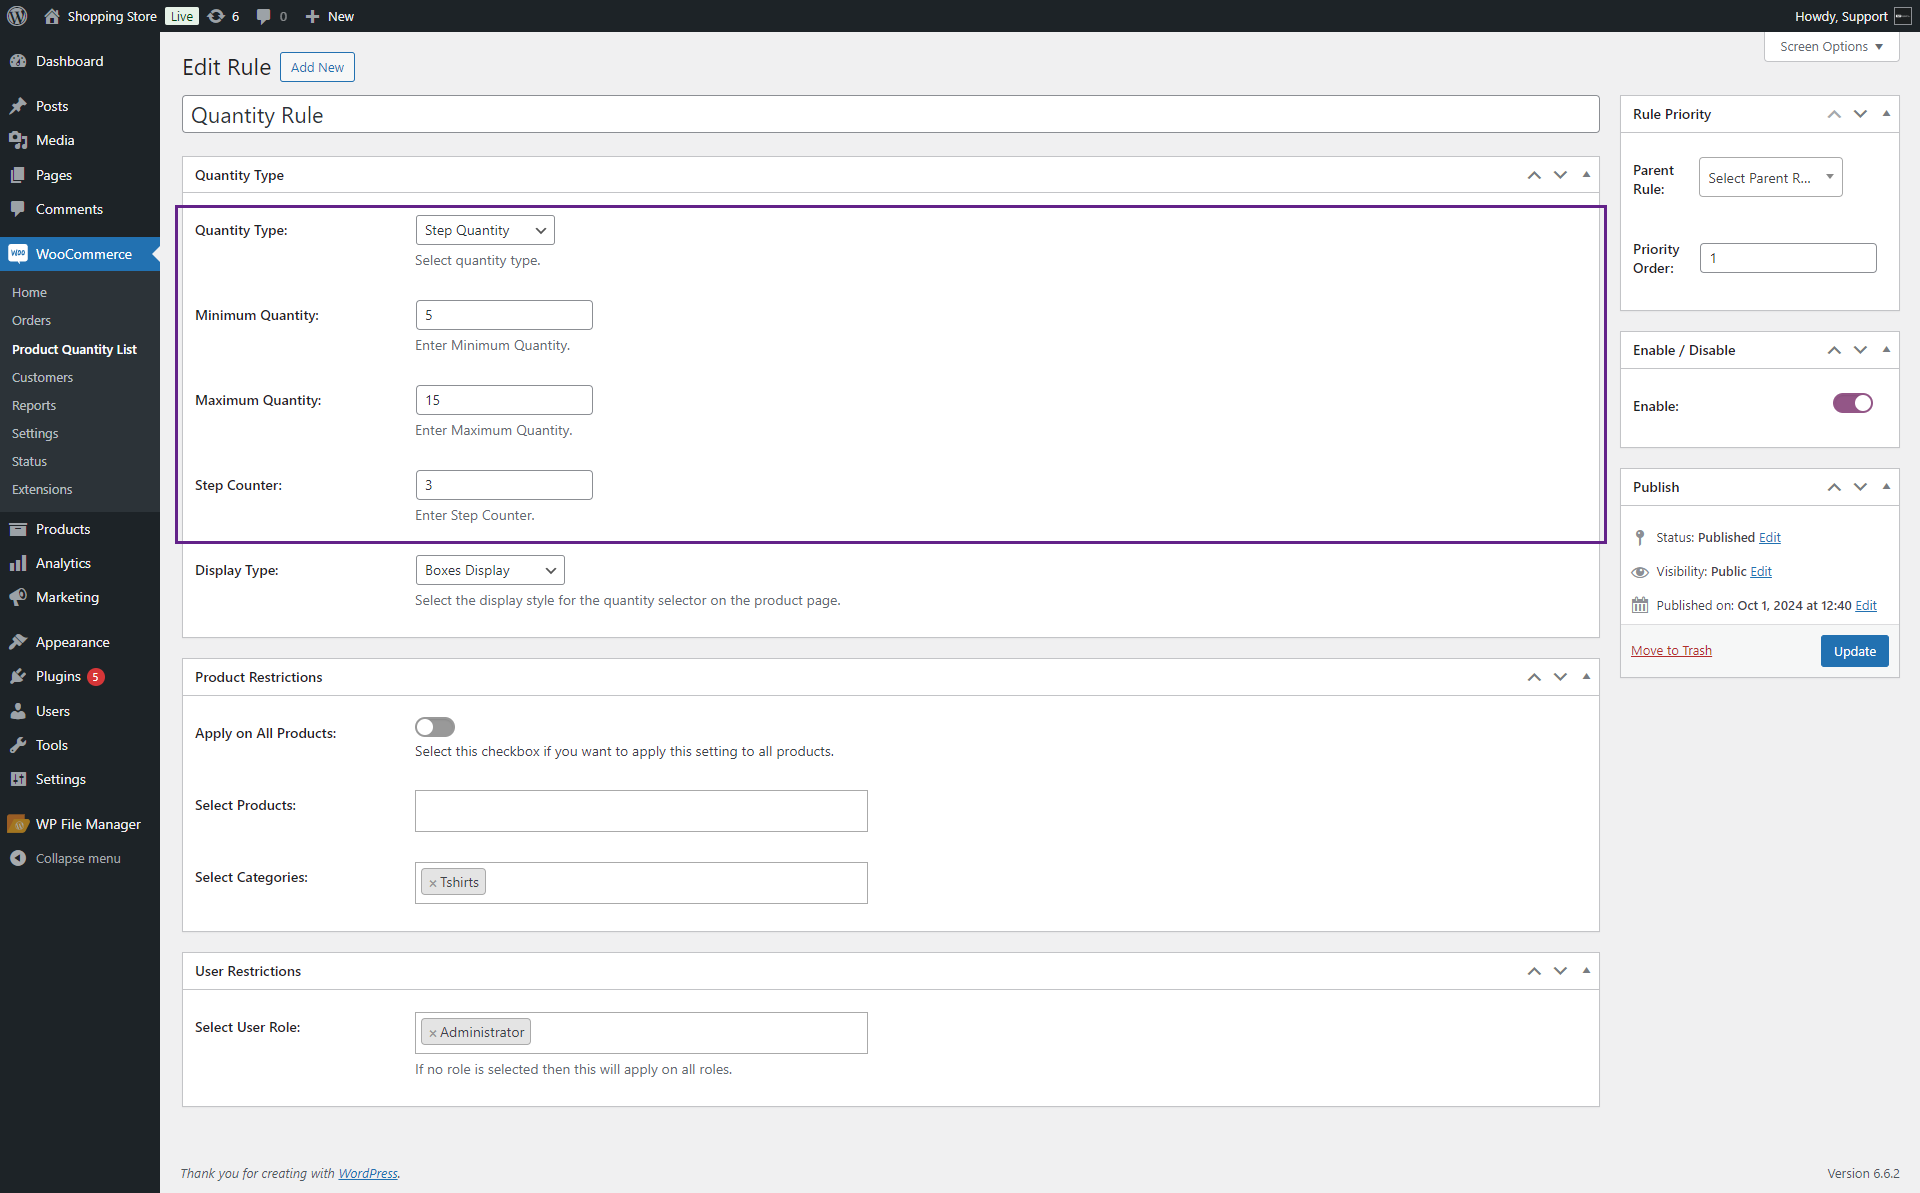
- Step Quantity
- Admin selects Step Quantity from the drop-down menu. It consists of the following options;
- Minimum Quantity: Admin can set the minimum quantity in the text box.
- Maximum Quantity: Admin can set the maximum quantity in the text box.
- Step Counter: The admin can set the step counter, which means it will start from the minimum quantity and skip multiples of the number declared by the admin on Step Quantity until it reaches the maximum quantity.
Front-end Screenshot
- Custom Quantity
- Admin selects Custom Quantity from the drop-down menu. It consists of the following options;
- Custom Quantities: The admin can enter multiple commas-separated custom quantities in the text box.
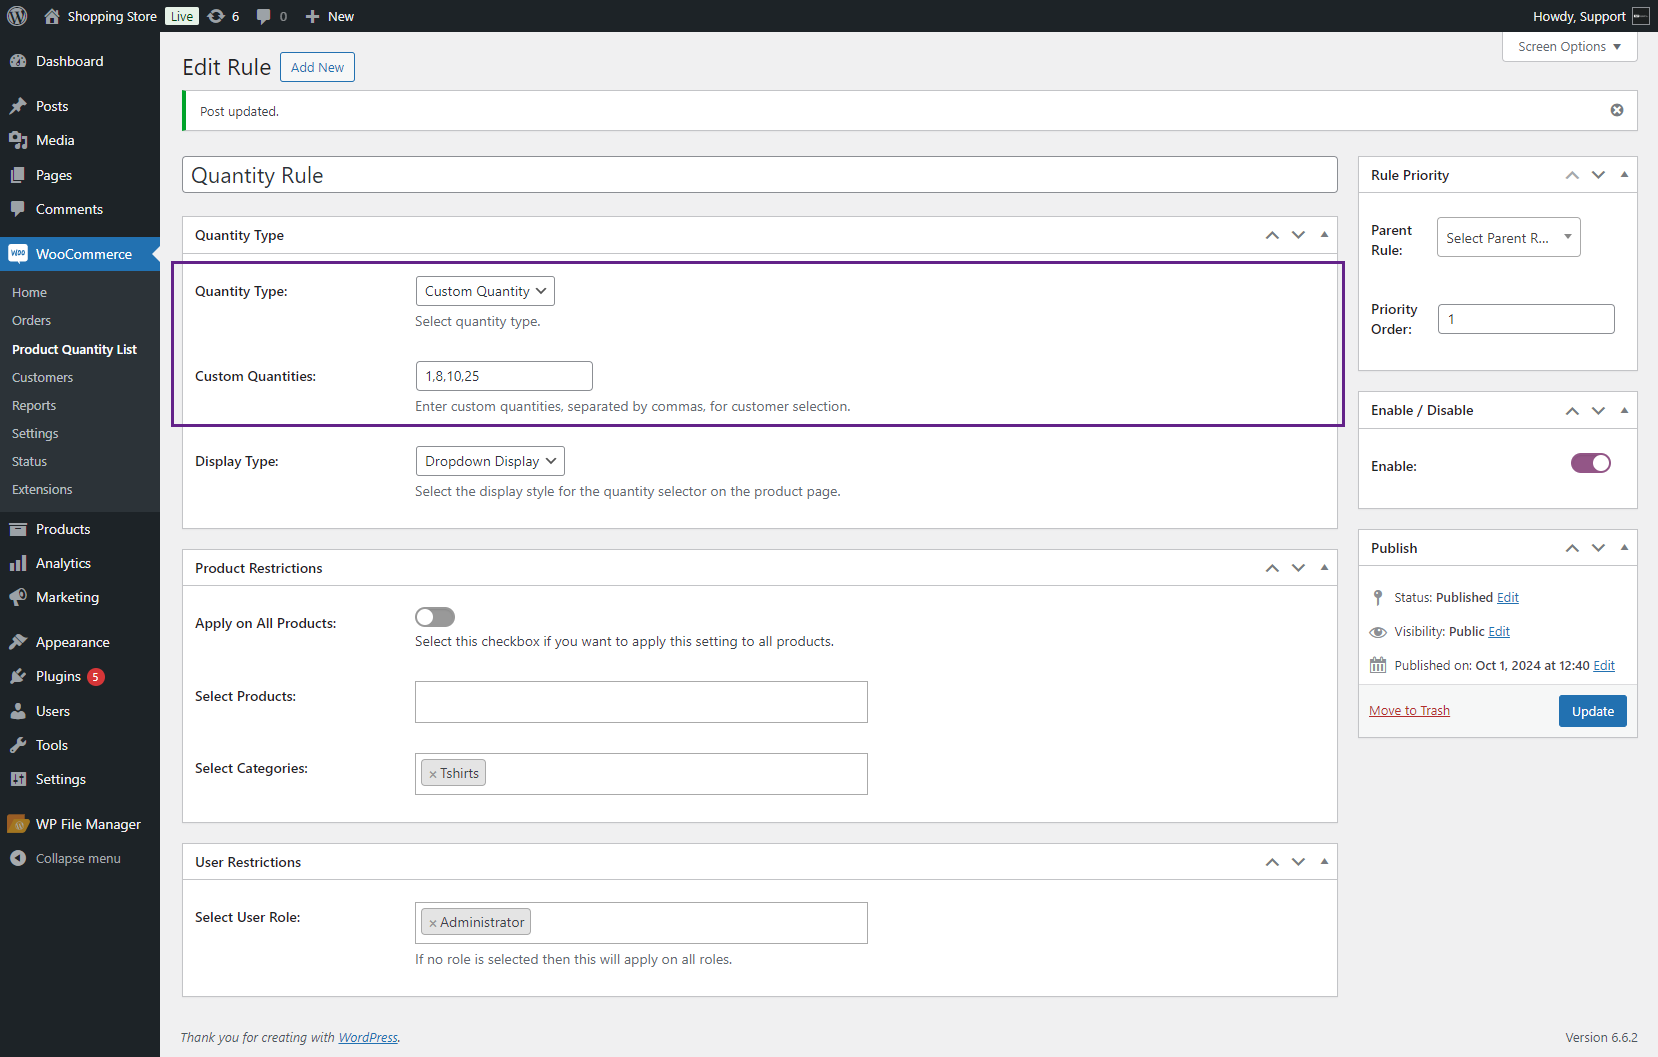
Front-end Screenshot

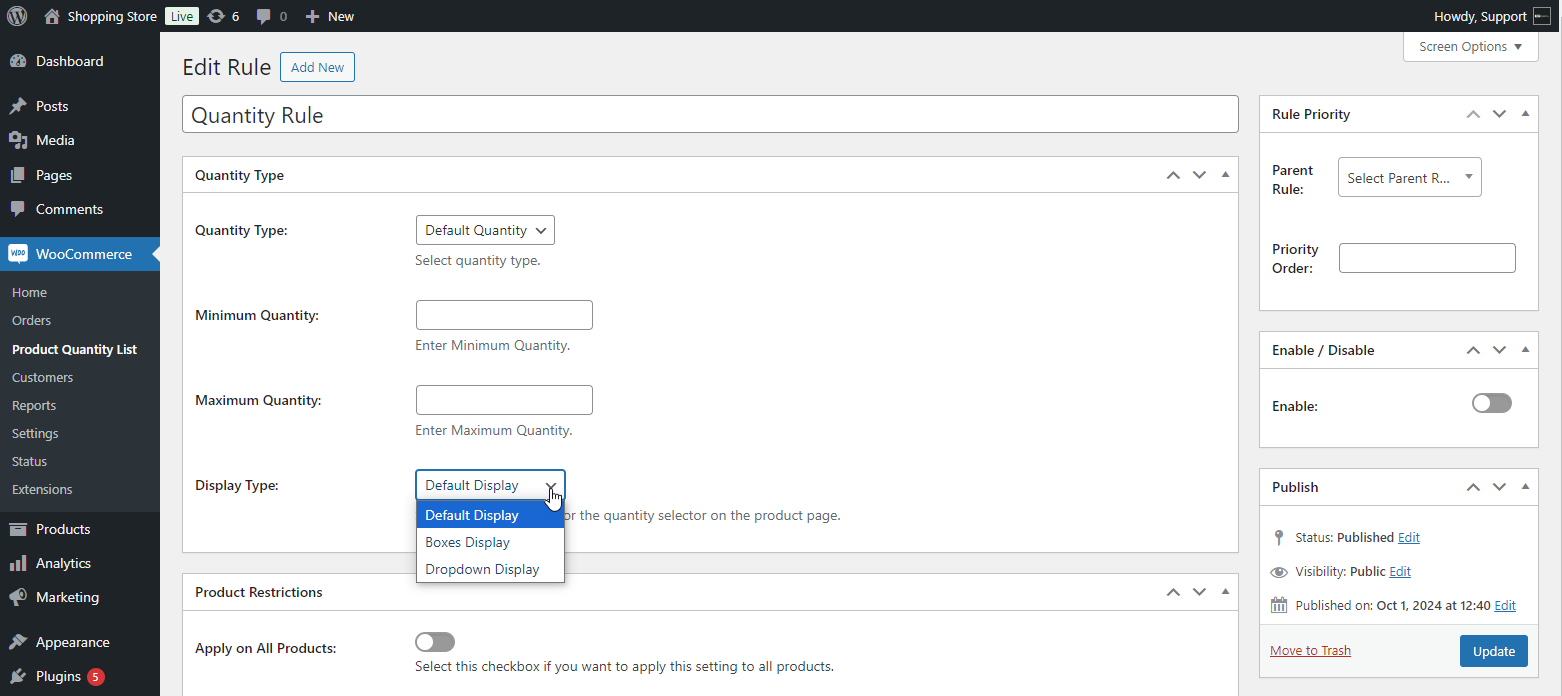
- Display Type
- Navigate and click on the Display Type drop-down menu.
- It consists of the following options;
- Default quantity selector
- Boxes quantity selector
- Dropdown quantity selector
Product Restrictions
- In the Product Restrictions meta box, the following options will appear;
- Apply on All Product
- If the admin wants to apply this rule to his entire shop page, click on the Apply to All Products toggle button.
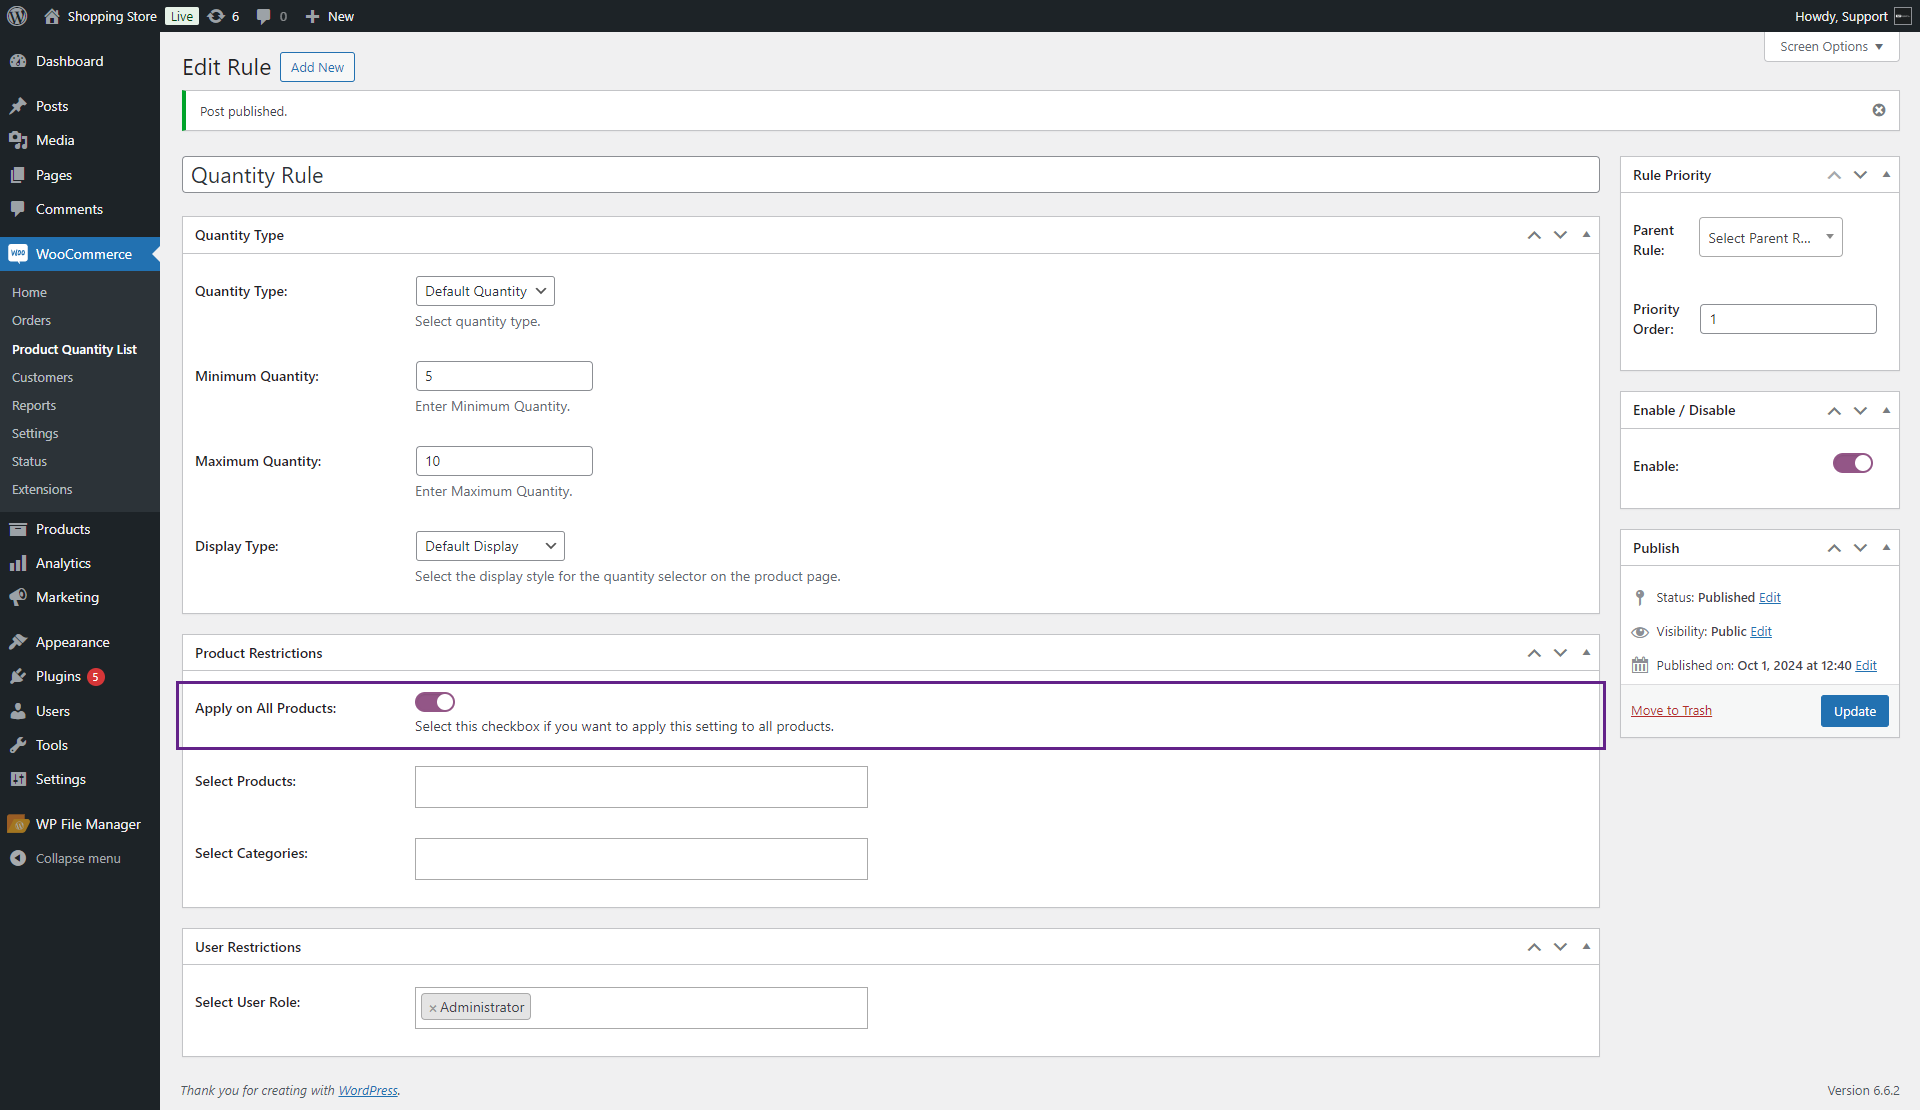
Front-end Screenshot

- Select Products
- If the admin wants to apply this rule to particular products, enter the name and select the products from the Select Product multi-selecting box.
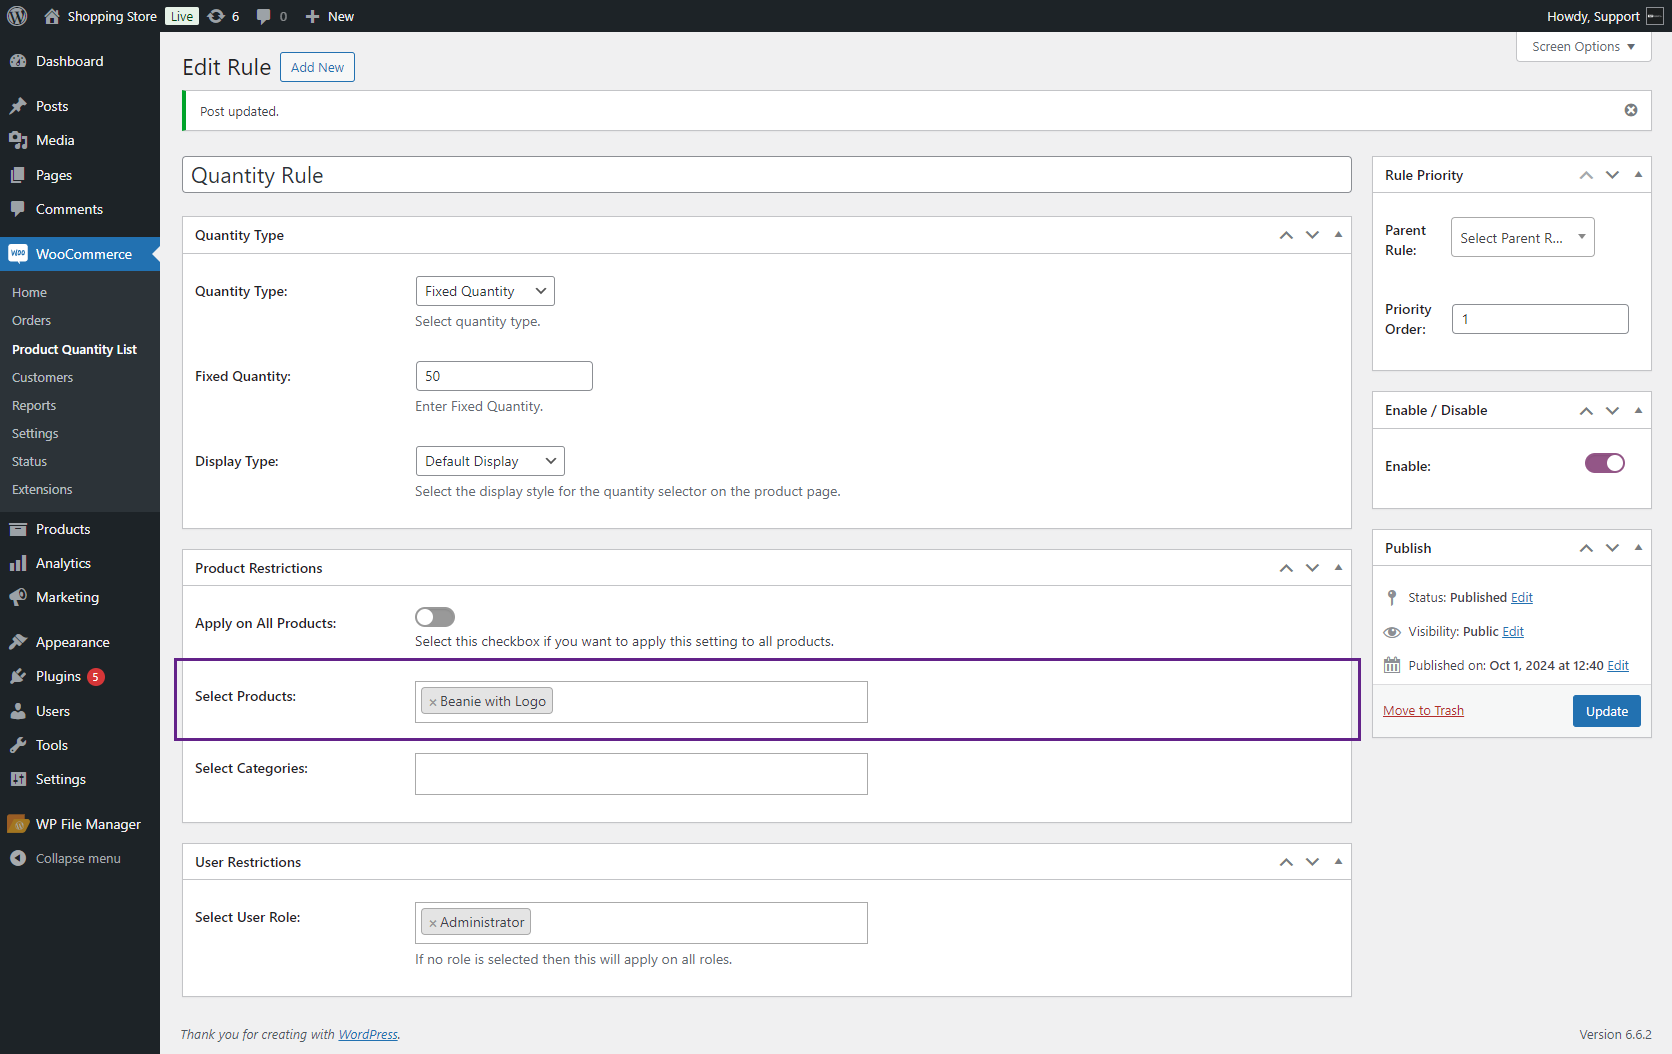
Front-end Screenshot

- Step Categories
- If the admin wants to apply this rule to particular product categories, enter the names and select the categories from the Select Categories multi-selecting box.
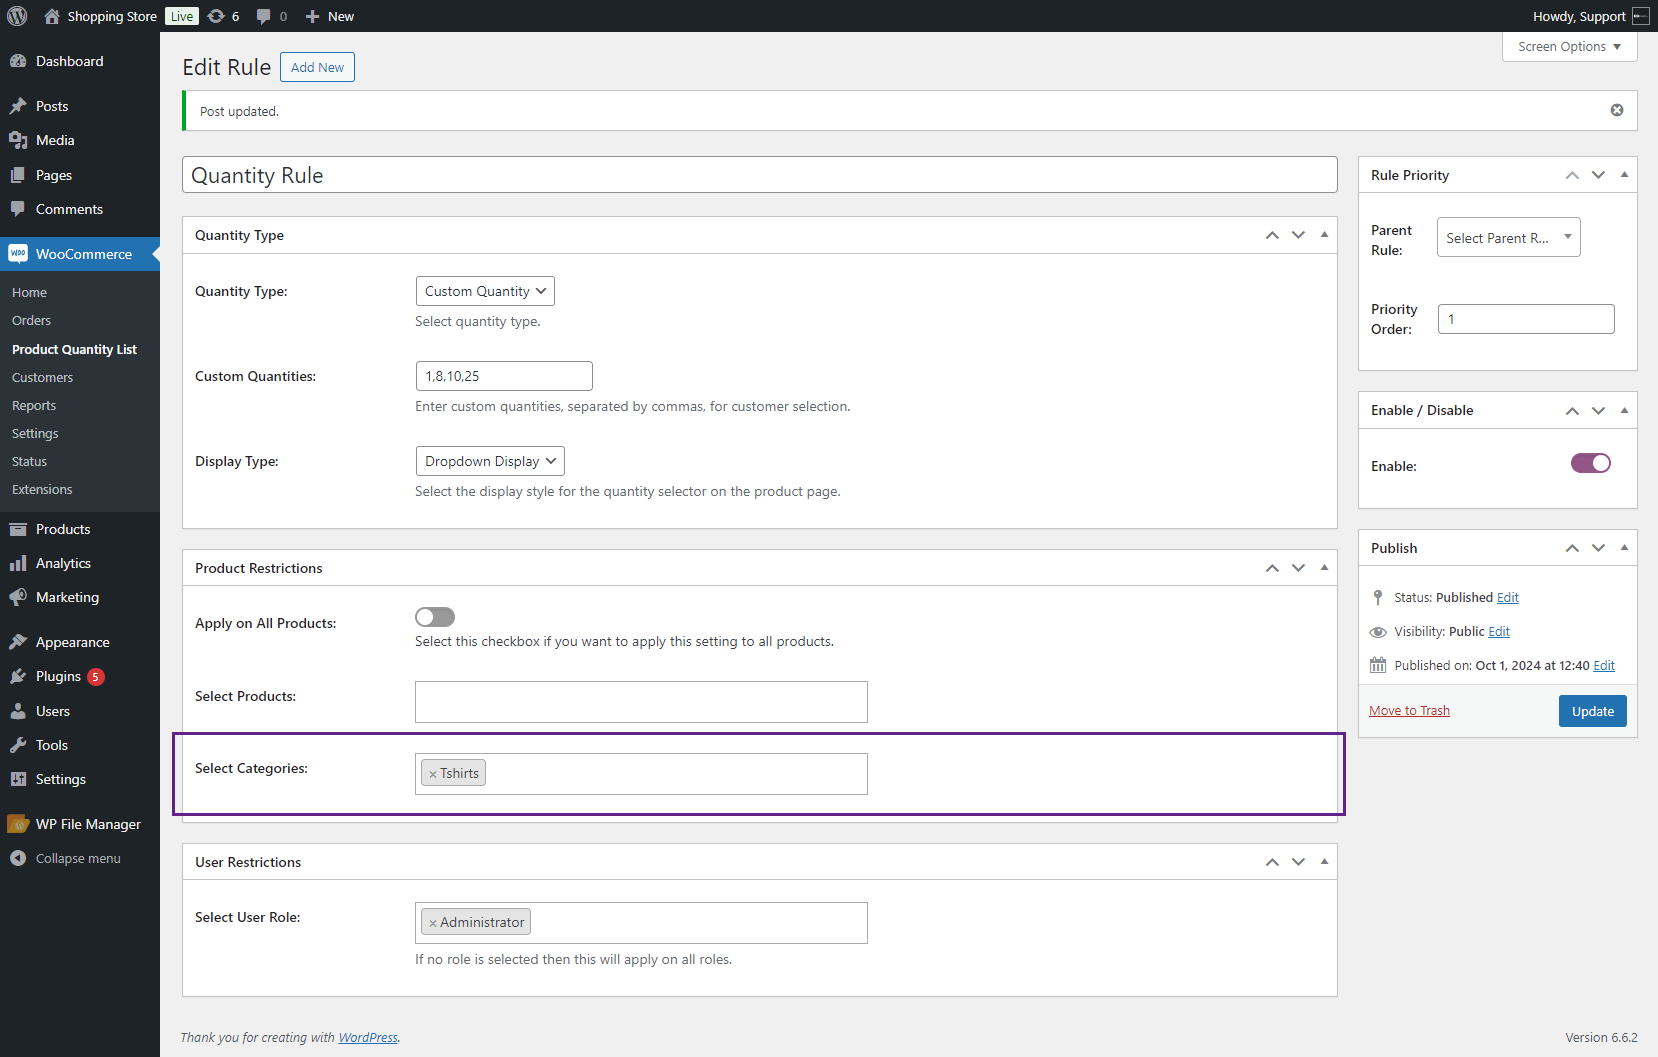
Front-end Screenshot

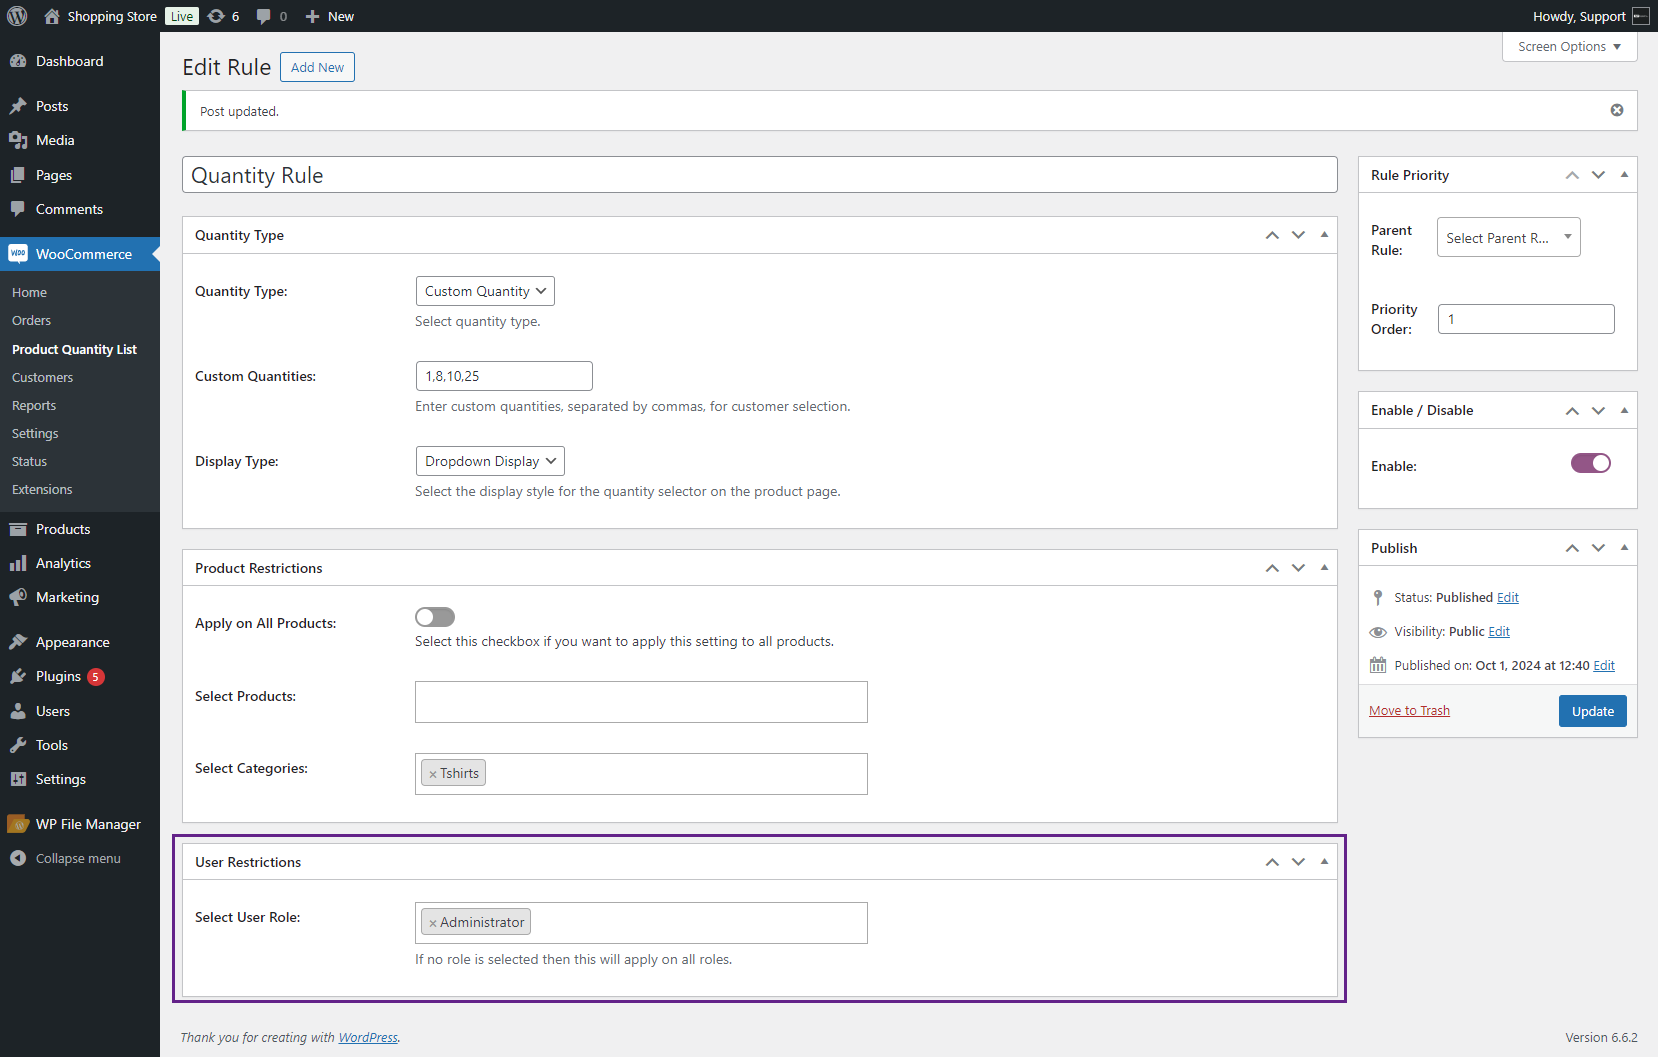
User Restrictions
- In the User Restrictions meta box, the following options will appear;
- Select User Role
- If the admin wants to apply this rule to particular User Roles or Individual Users, enter the name and select the User Roles or Individuals in the Select User Role multi-selecting box.
Before

After

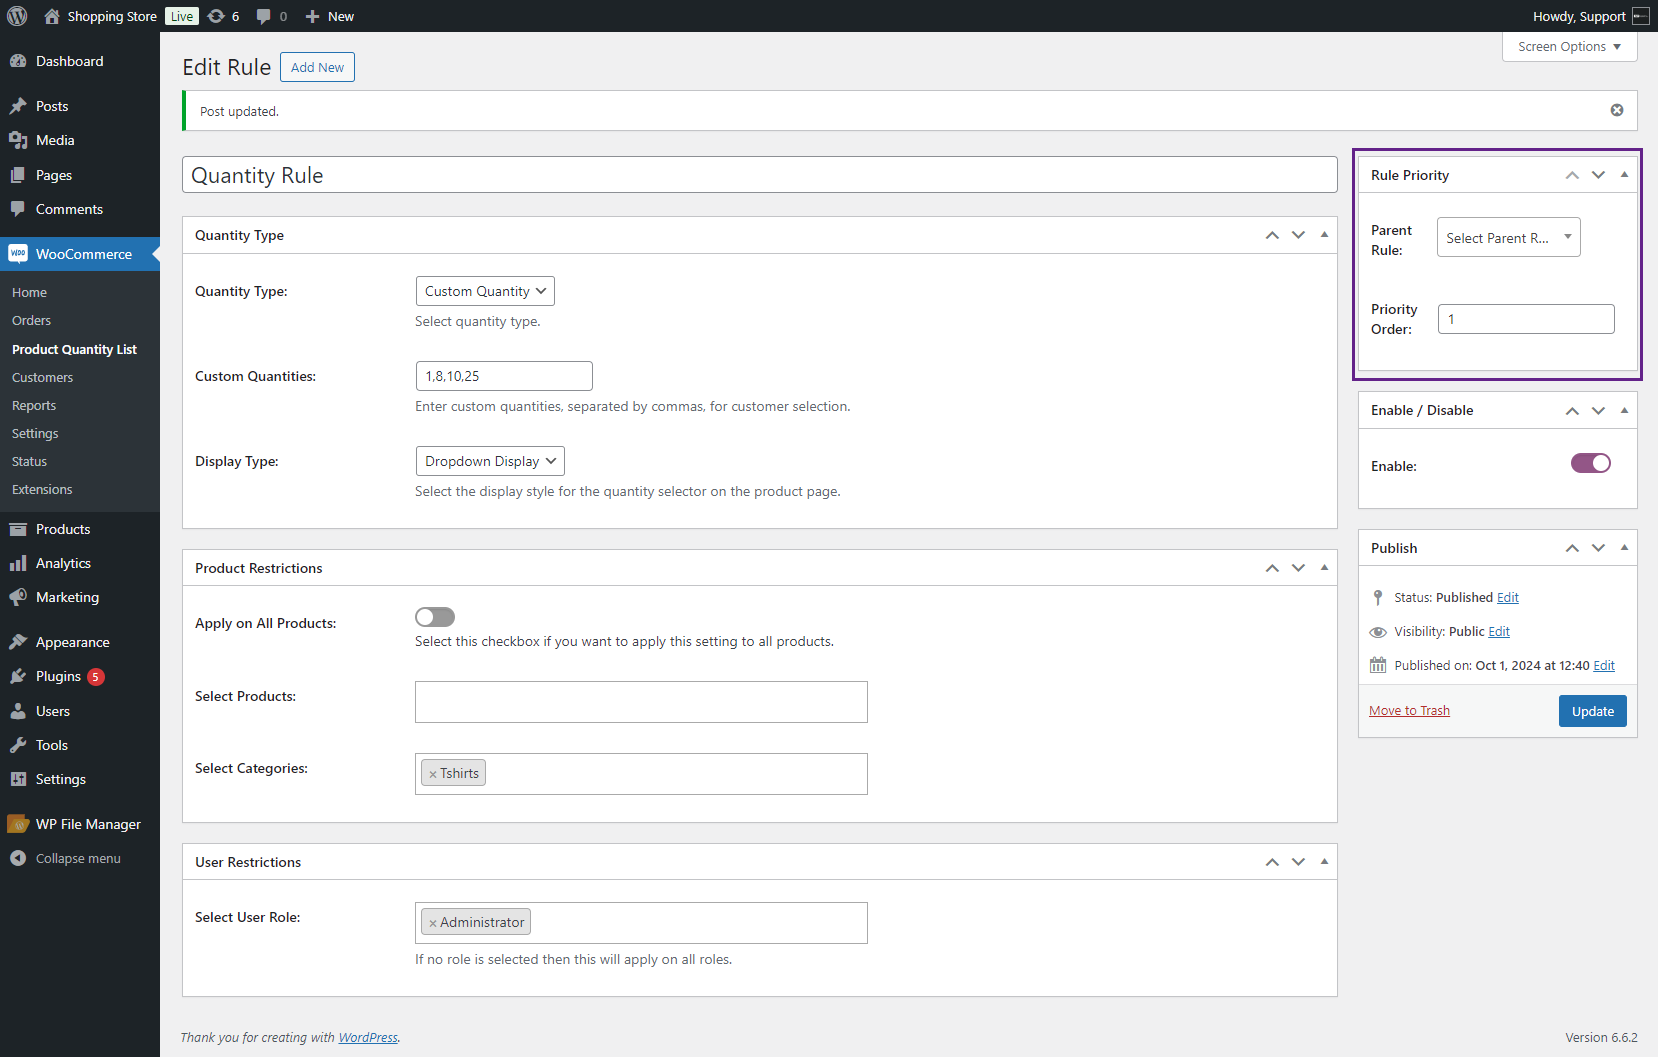
Rule Priority
- Navigate to the Rule Priority meta box.
- When the admin clicks on the drop-down menu of Parent Rule, all other rules already made by the admin will appear; whatever rules the admin selects will be considered parents of that rule.
- Priority Order is the priority of appearing of a particular rule on the user’s end when a Single Role or an Individual User has multiple Product Quantity Rules.
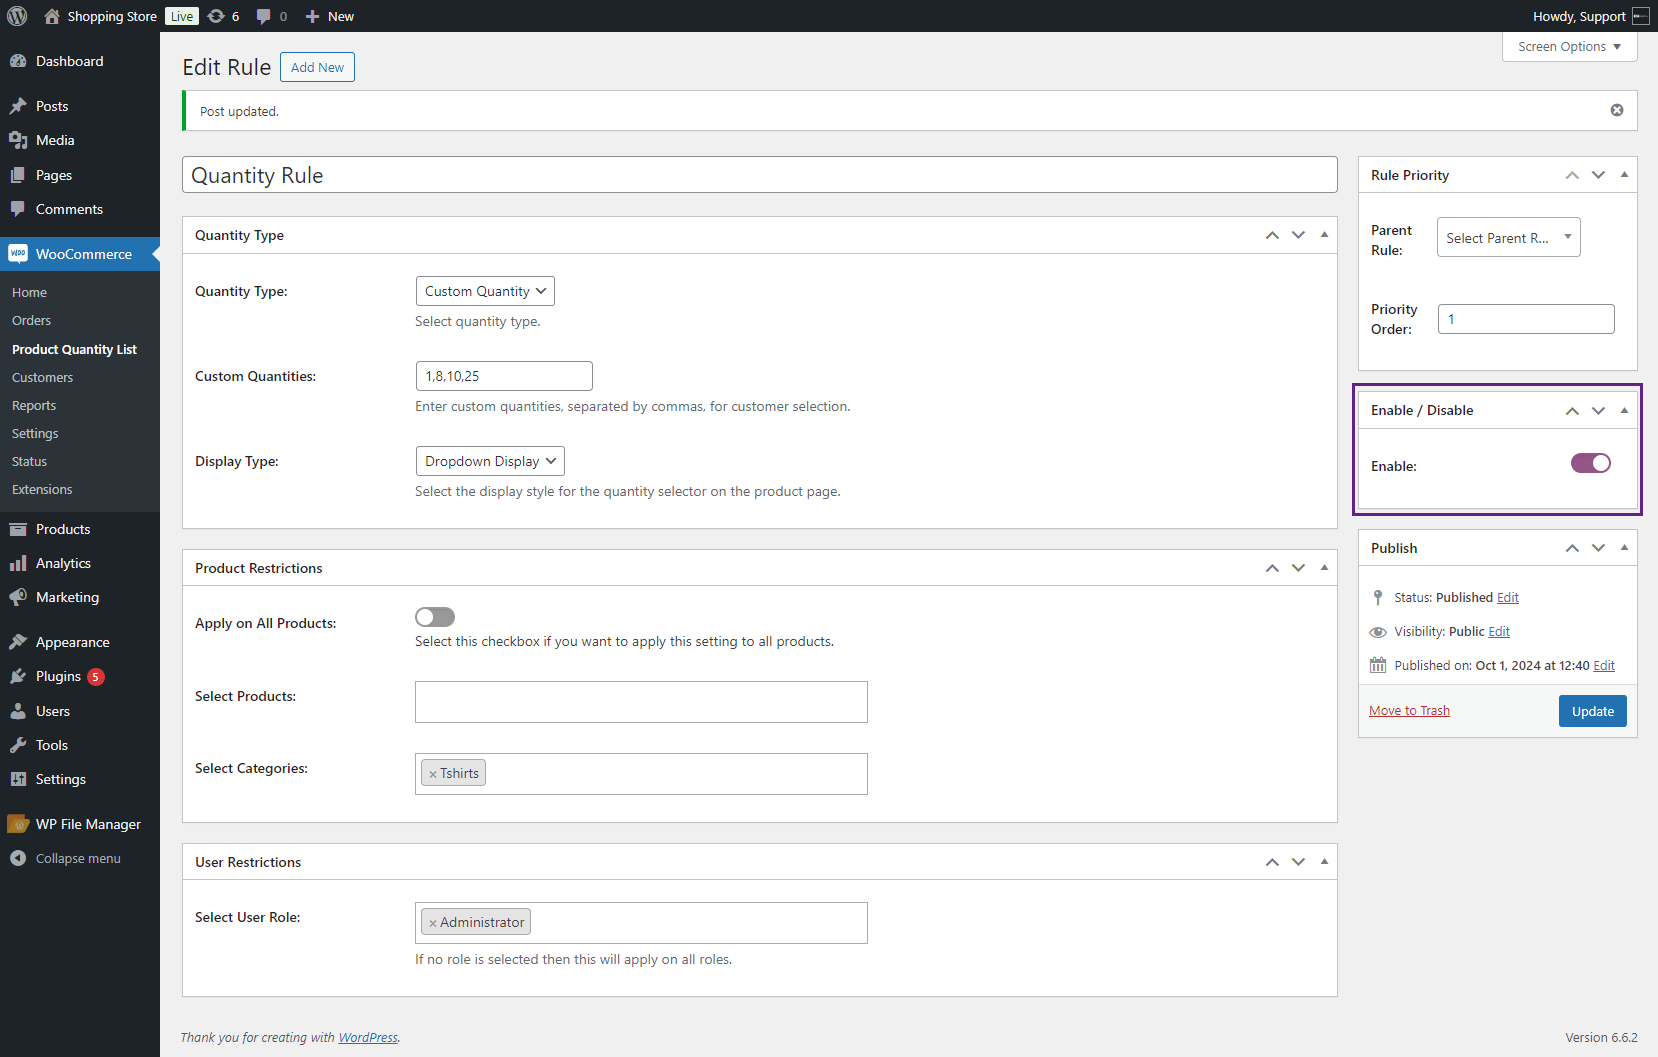
Enable / Disable
- Navigate to the Enable/Disable meta box.
- The admin clicks on it to activate the rule, and whatever the admin sets in product Quantity rules will appear on the customer’s end accordingly.
Before
Front-end Screenshot

After
Front-end Screenshot

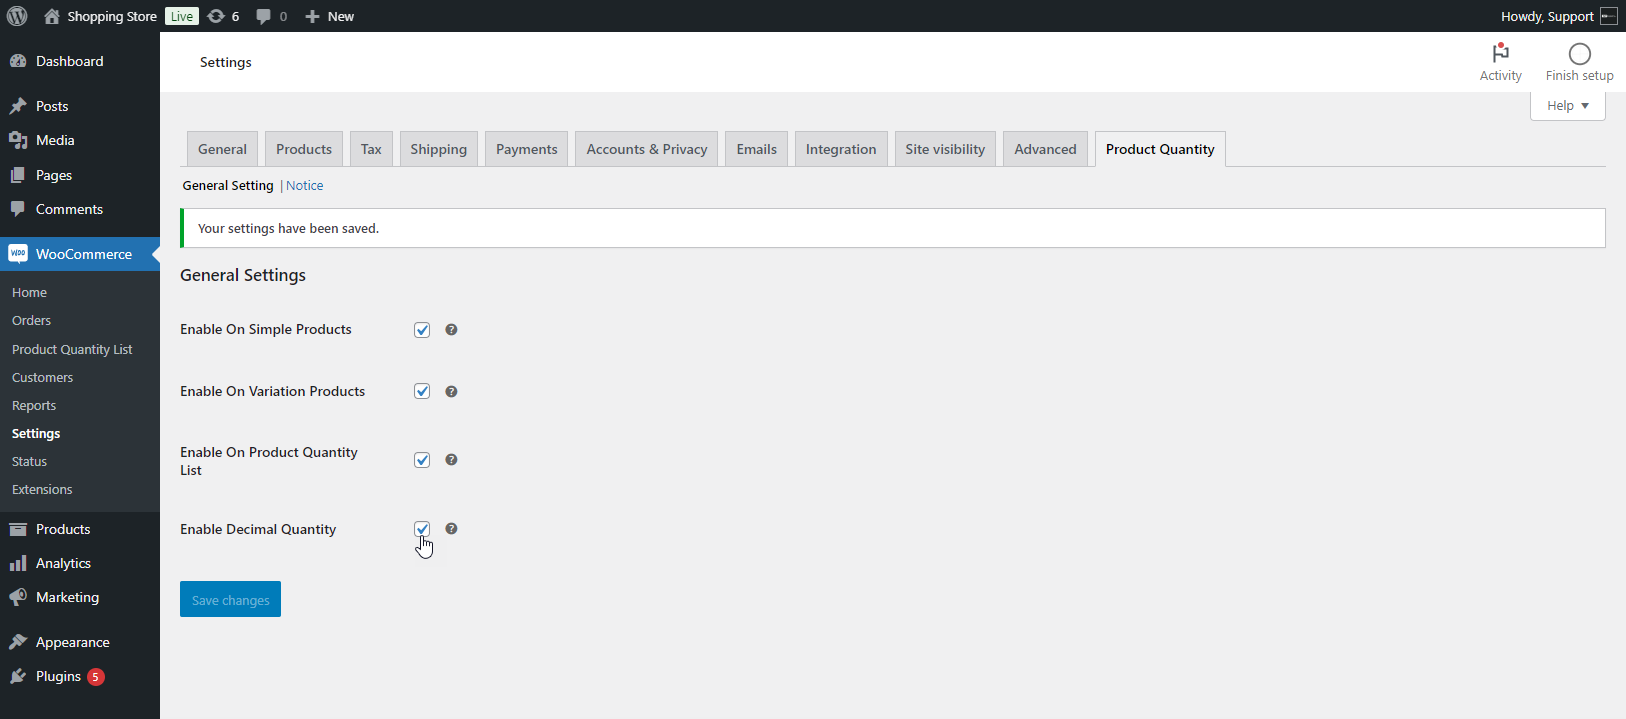
General Settings – Enable Decimal Quantity
↑ Back to top- Go to WordPress Admin Dashboard > WooCommerce > Settings > Product Quantity > General Settings.
- Click on the Enable Decimal Quantity option from the General Settings tab.
- Click on the Save Changes button.
Decimal Quantity On Simple Products
↑ Back to topDefault Quantity
- In the Quantity Type, the default quantity will be selected by default. It consists of the following options;
- Minimum Quantity: The admin can set the minimum quantity in decimal points in the text box.
- Maximum Quantity: The admin can set the maximum quantity in the text box.
- Click on the Update button.
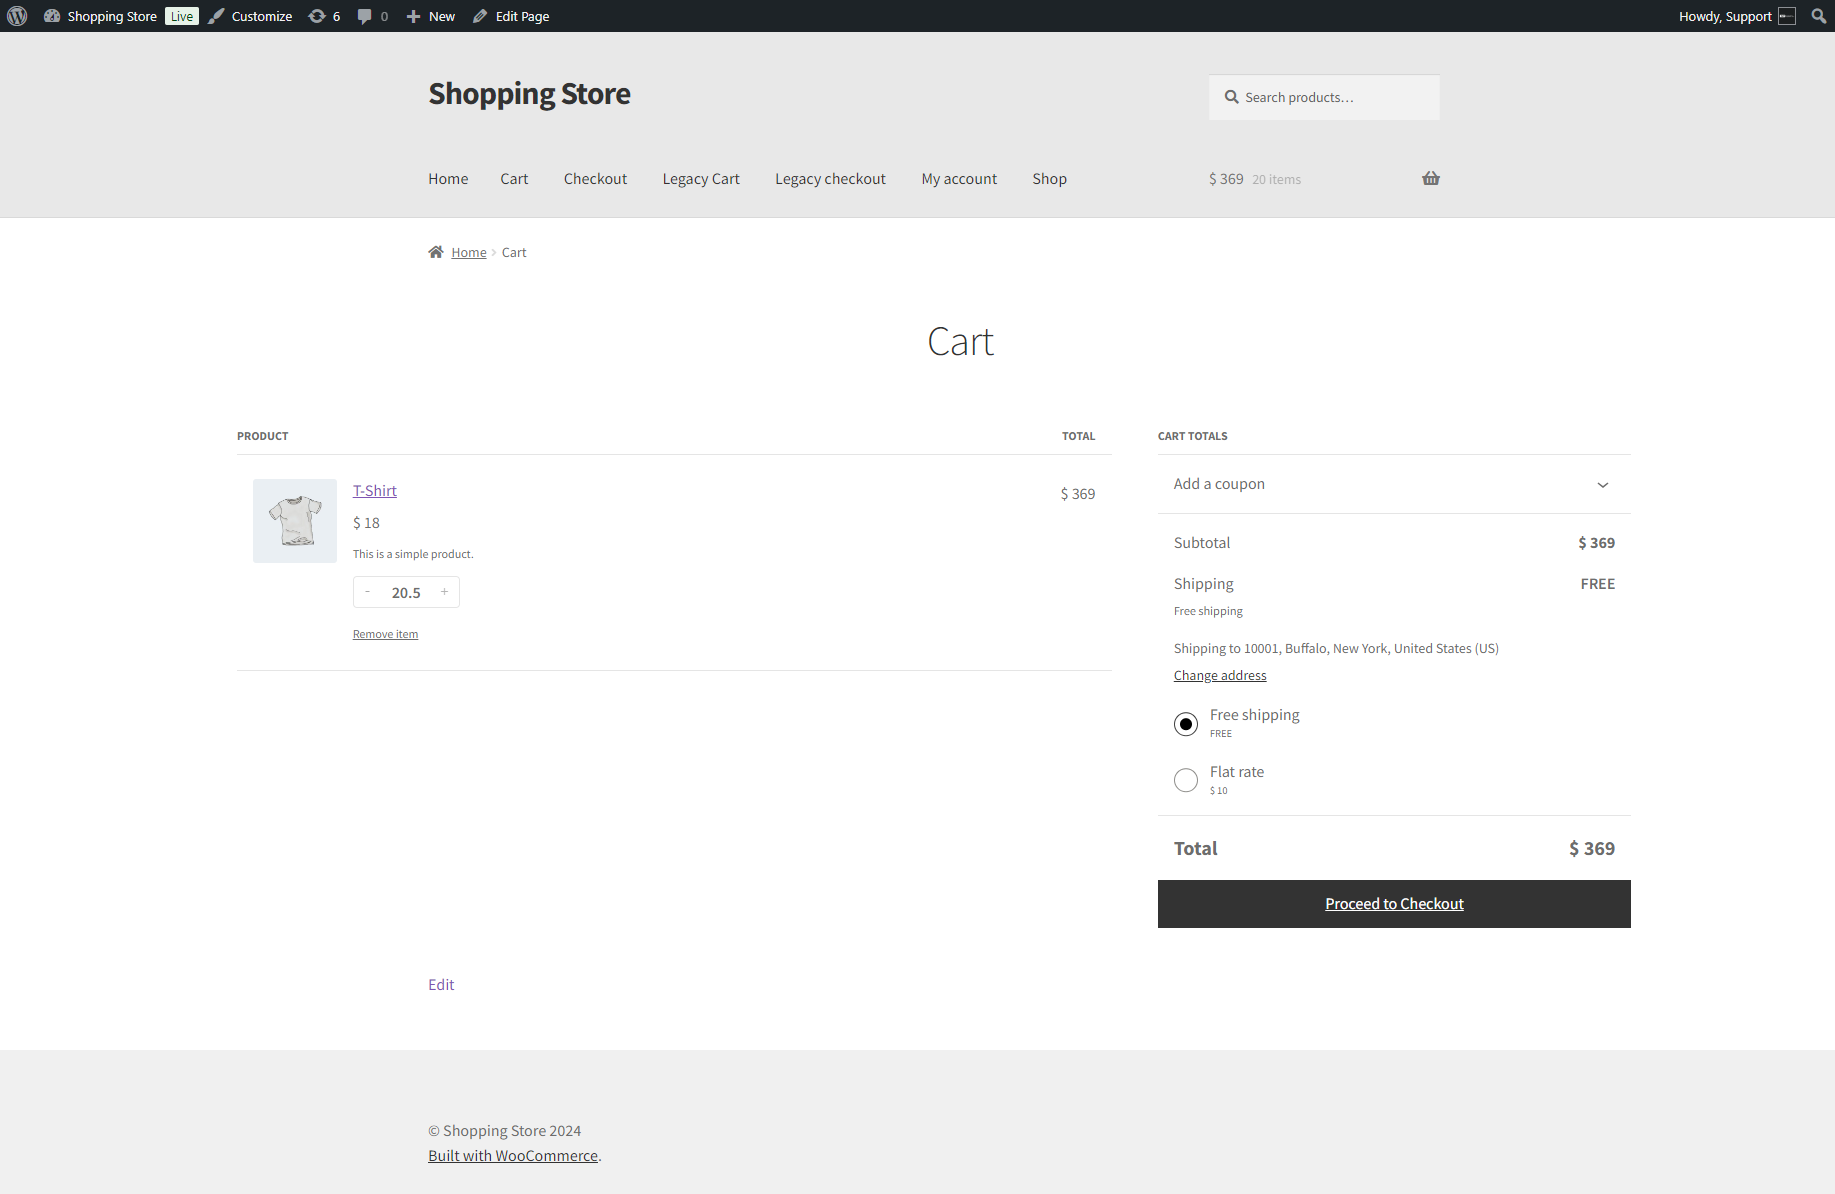
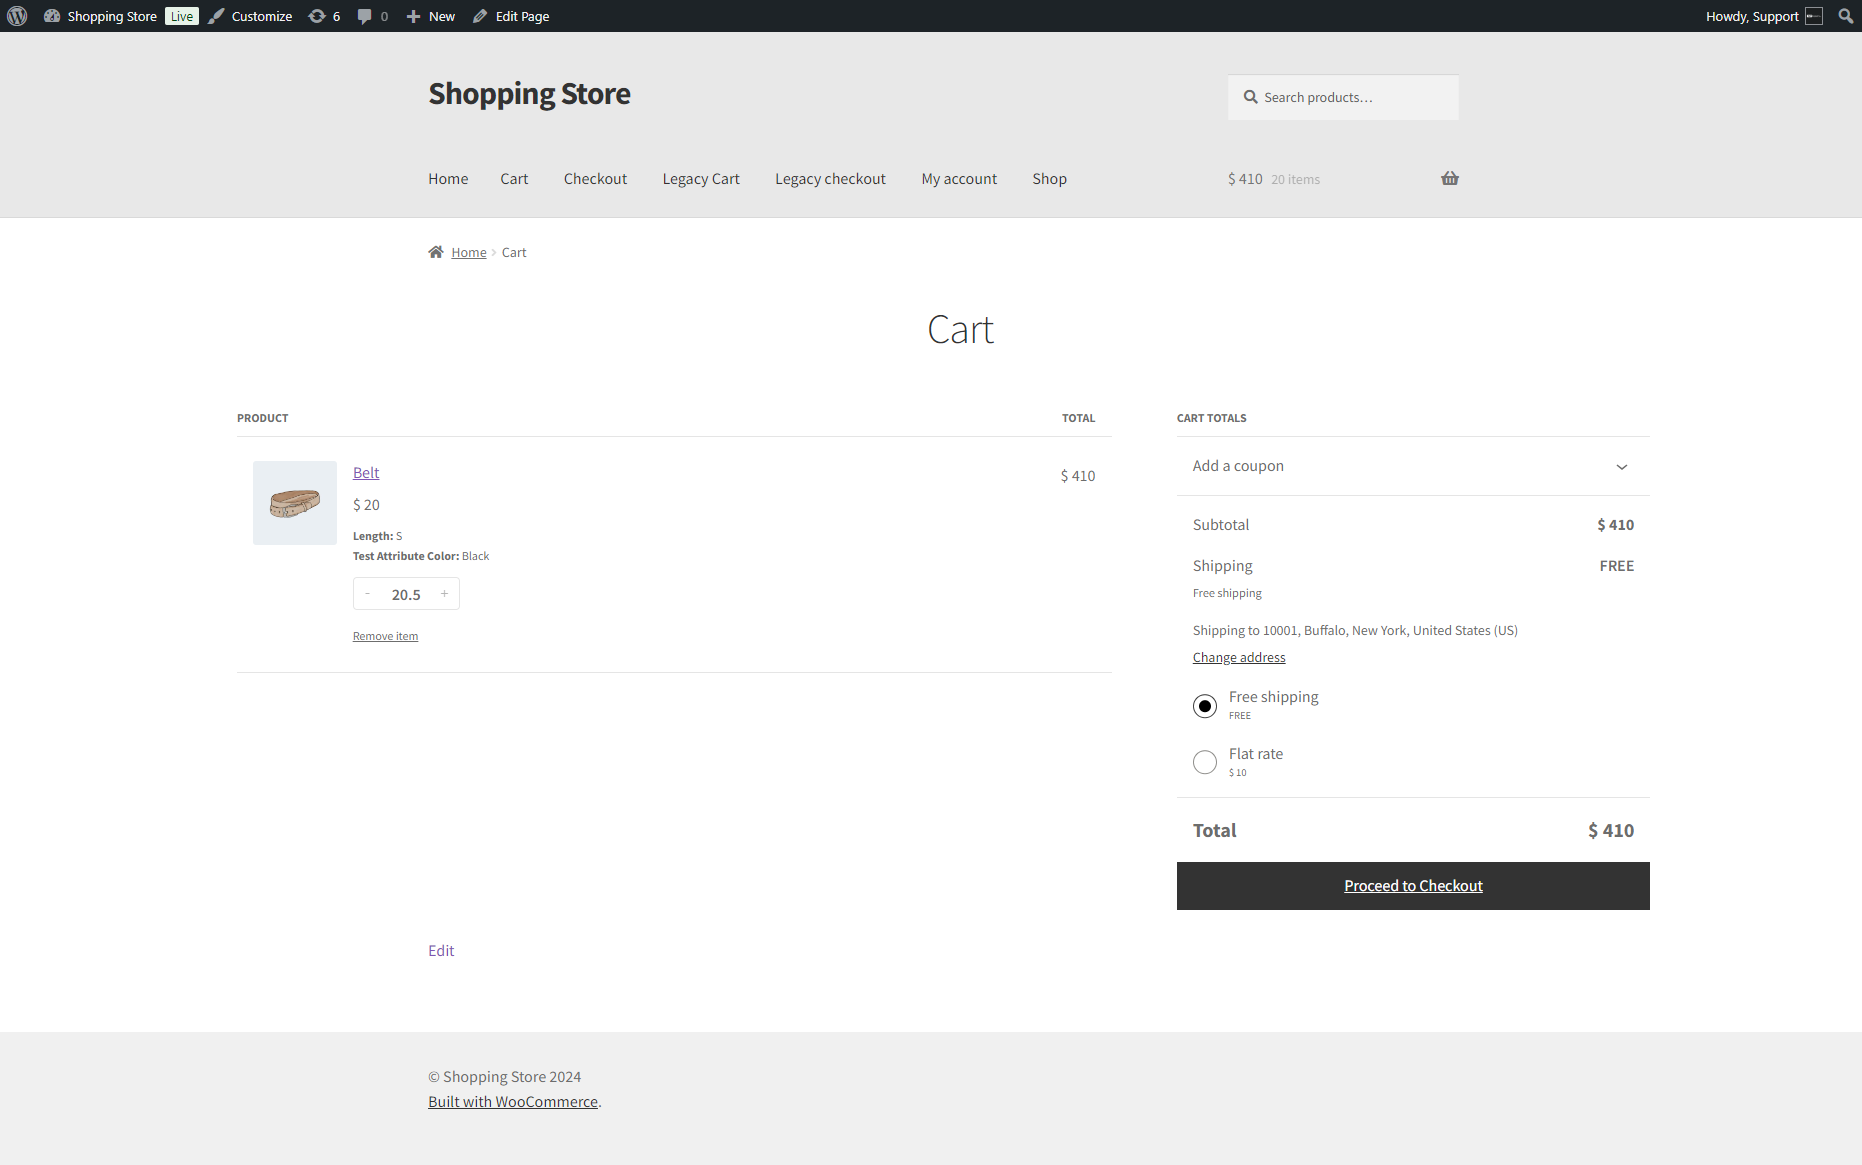
Front-end Screenshot
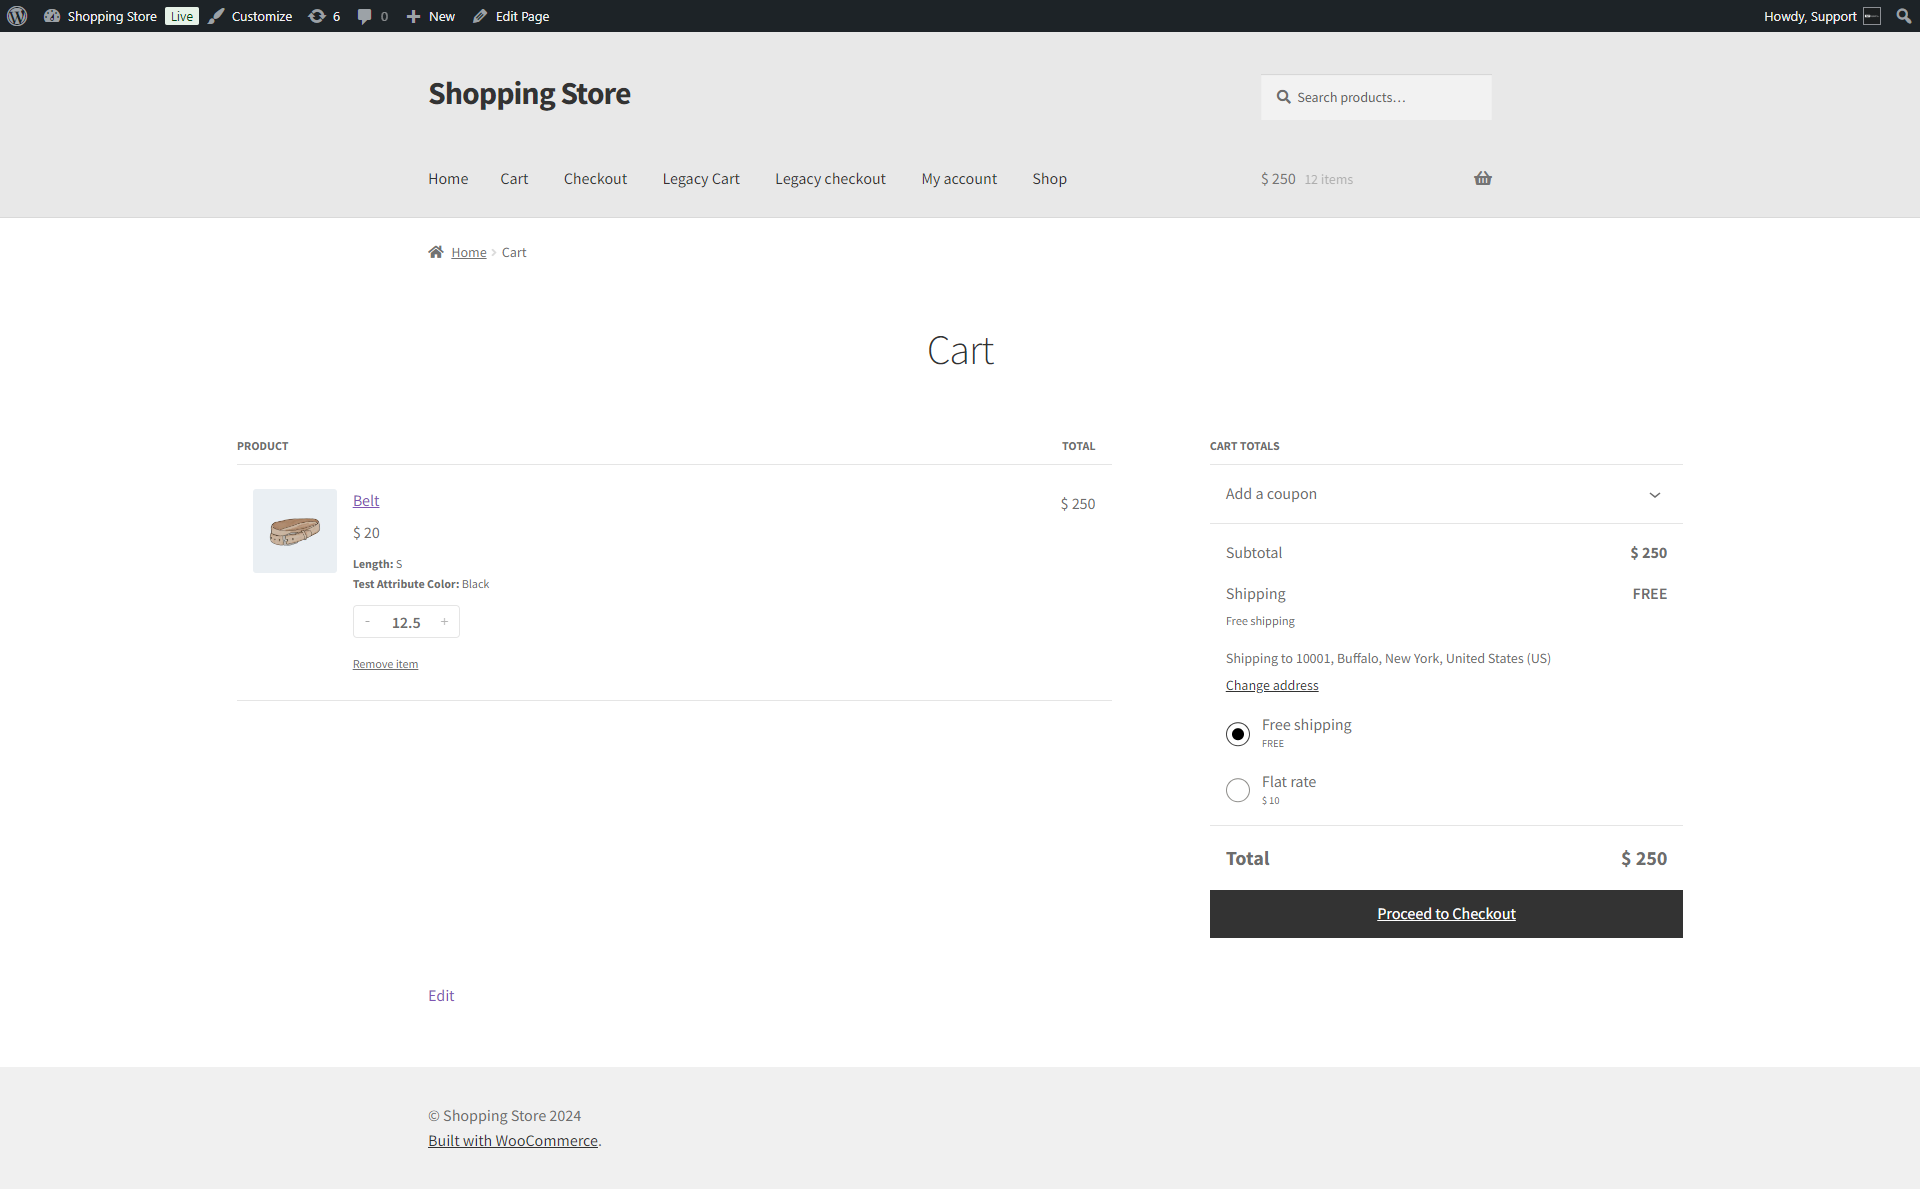
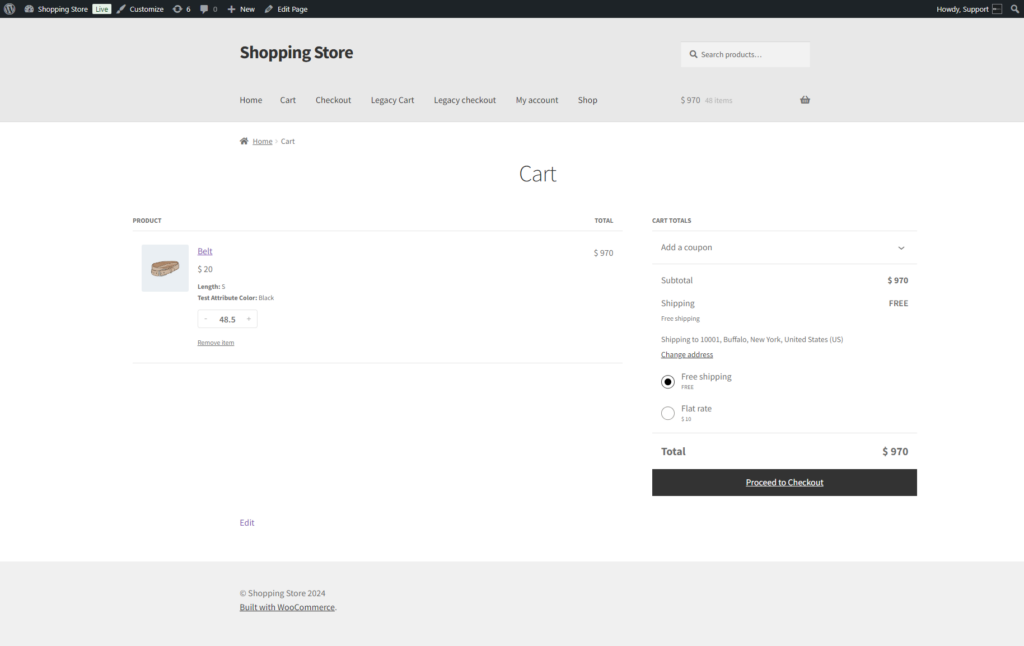
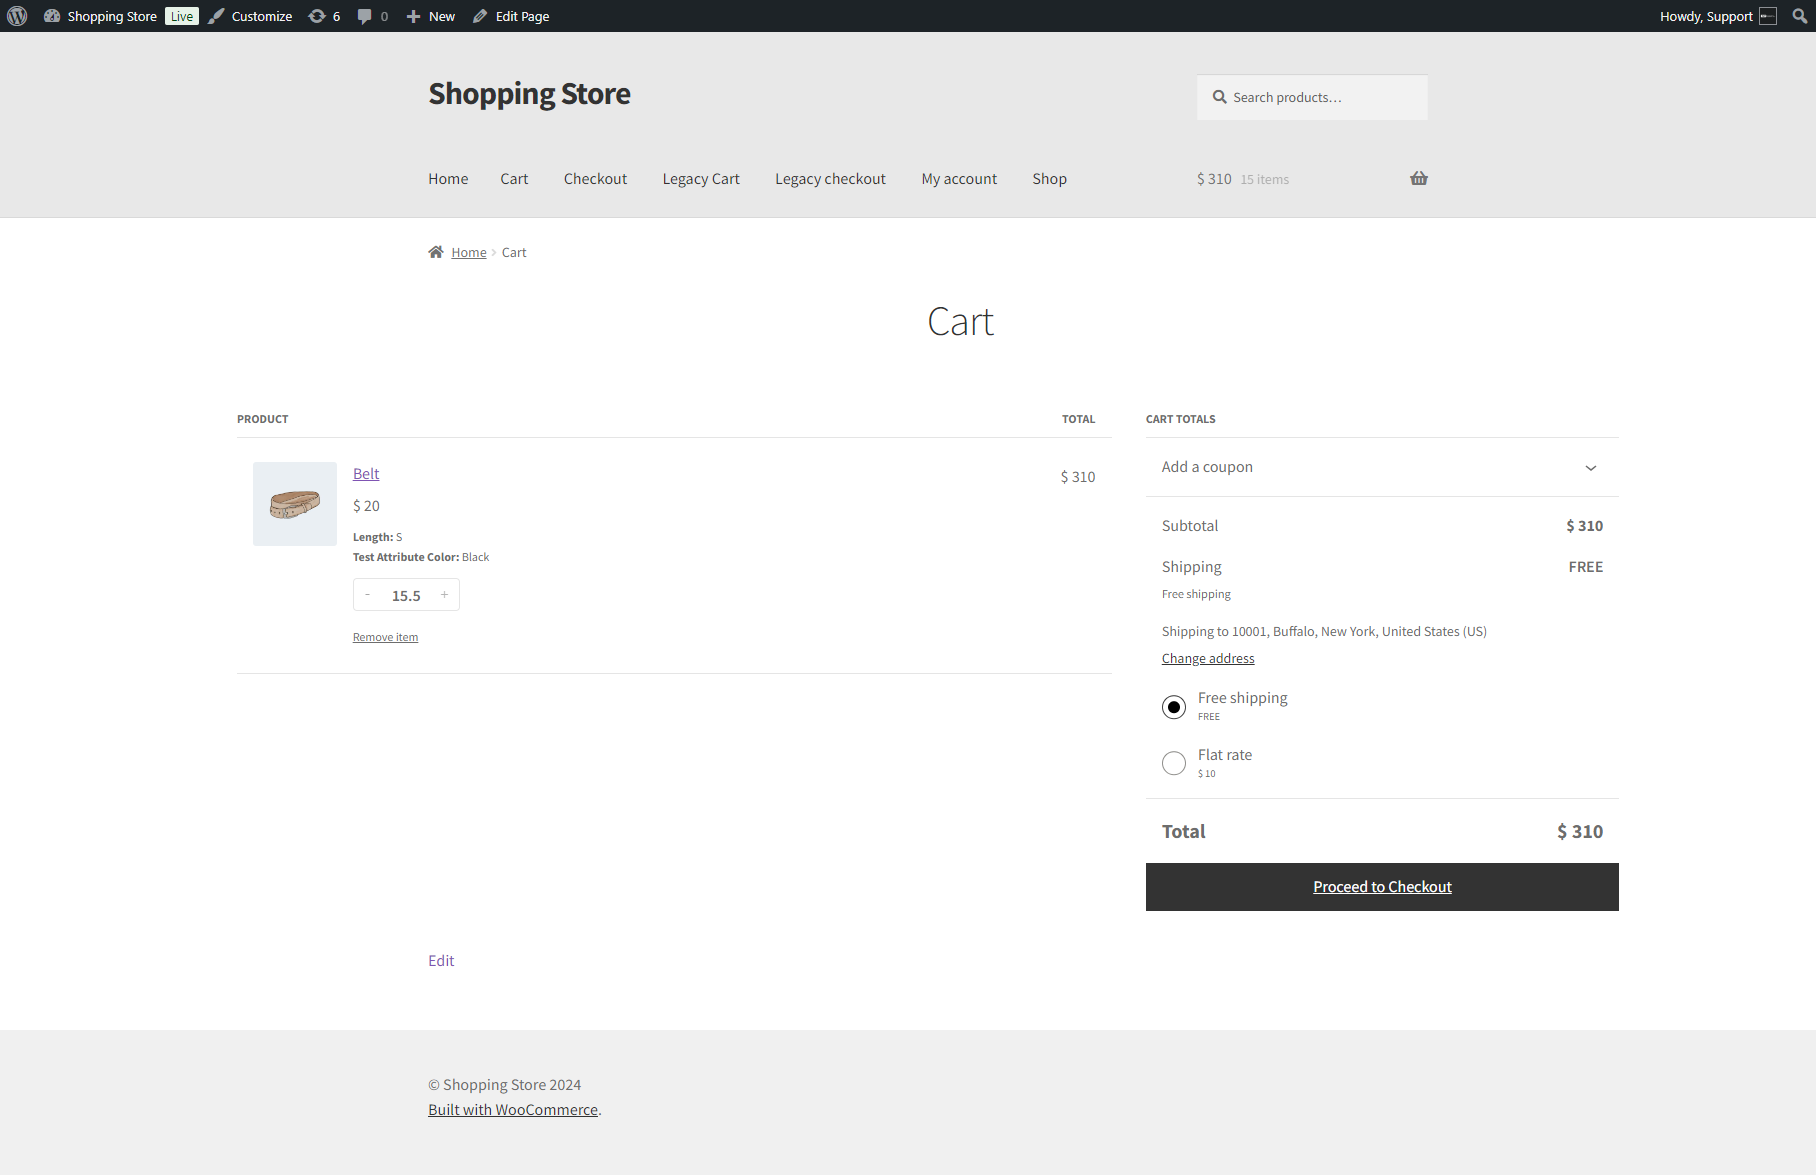
- On Block Cart/Checkout

PLEASE NOTE: When the user changes the quantity on the cart page, the block cart validations will override the product quantity validations.
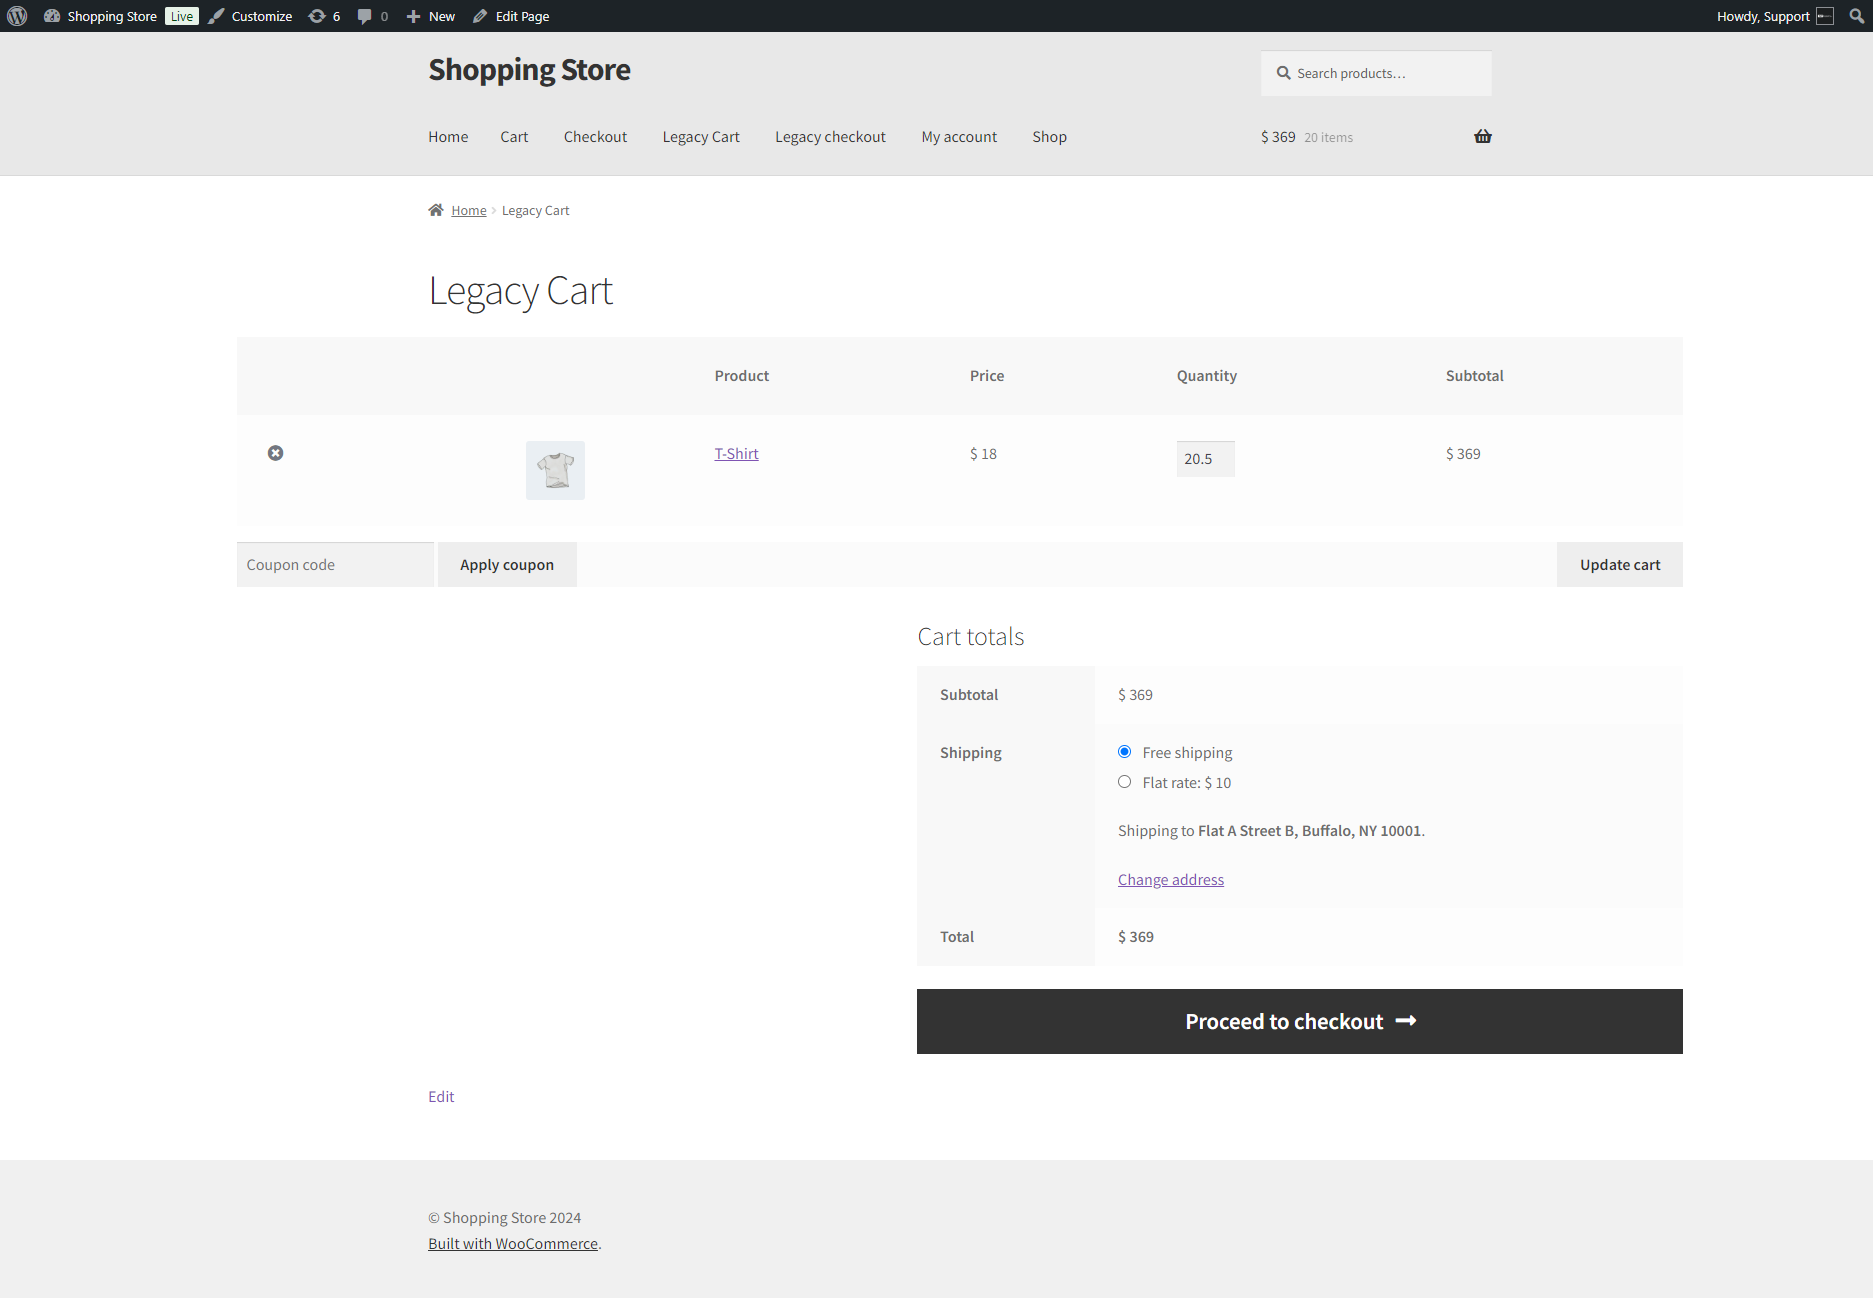
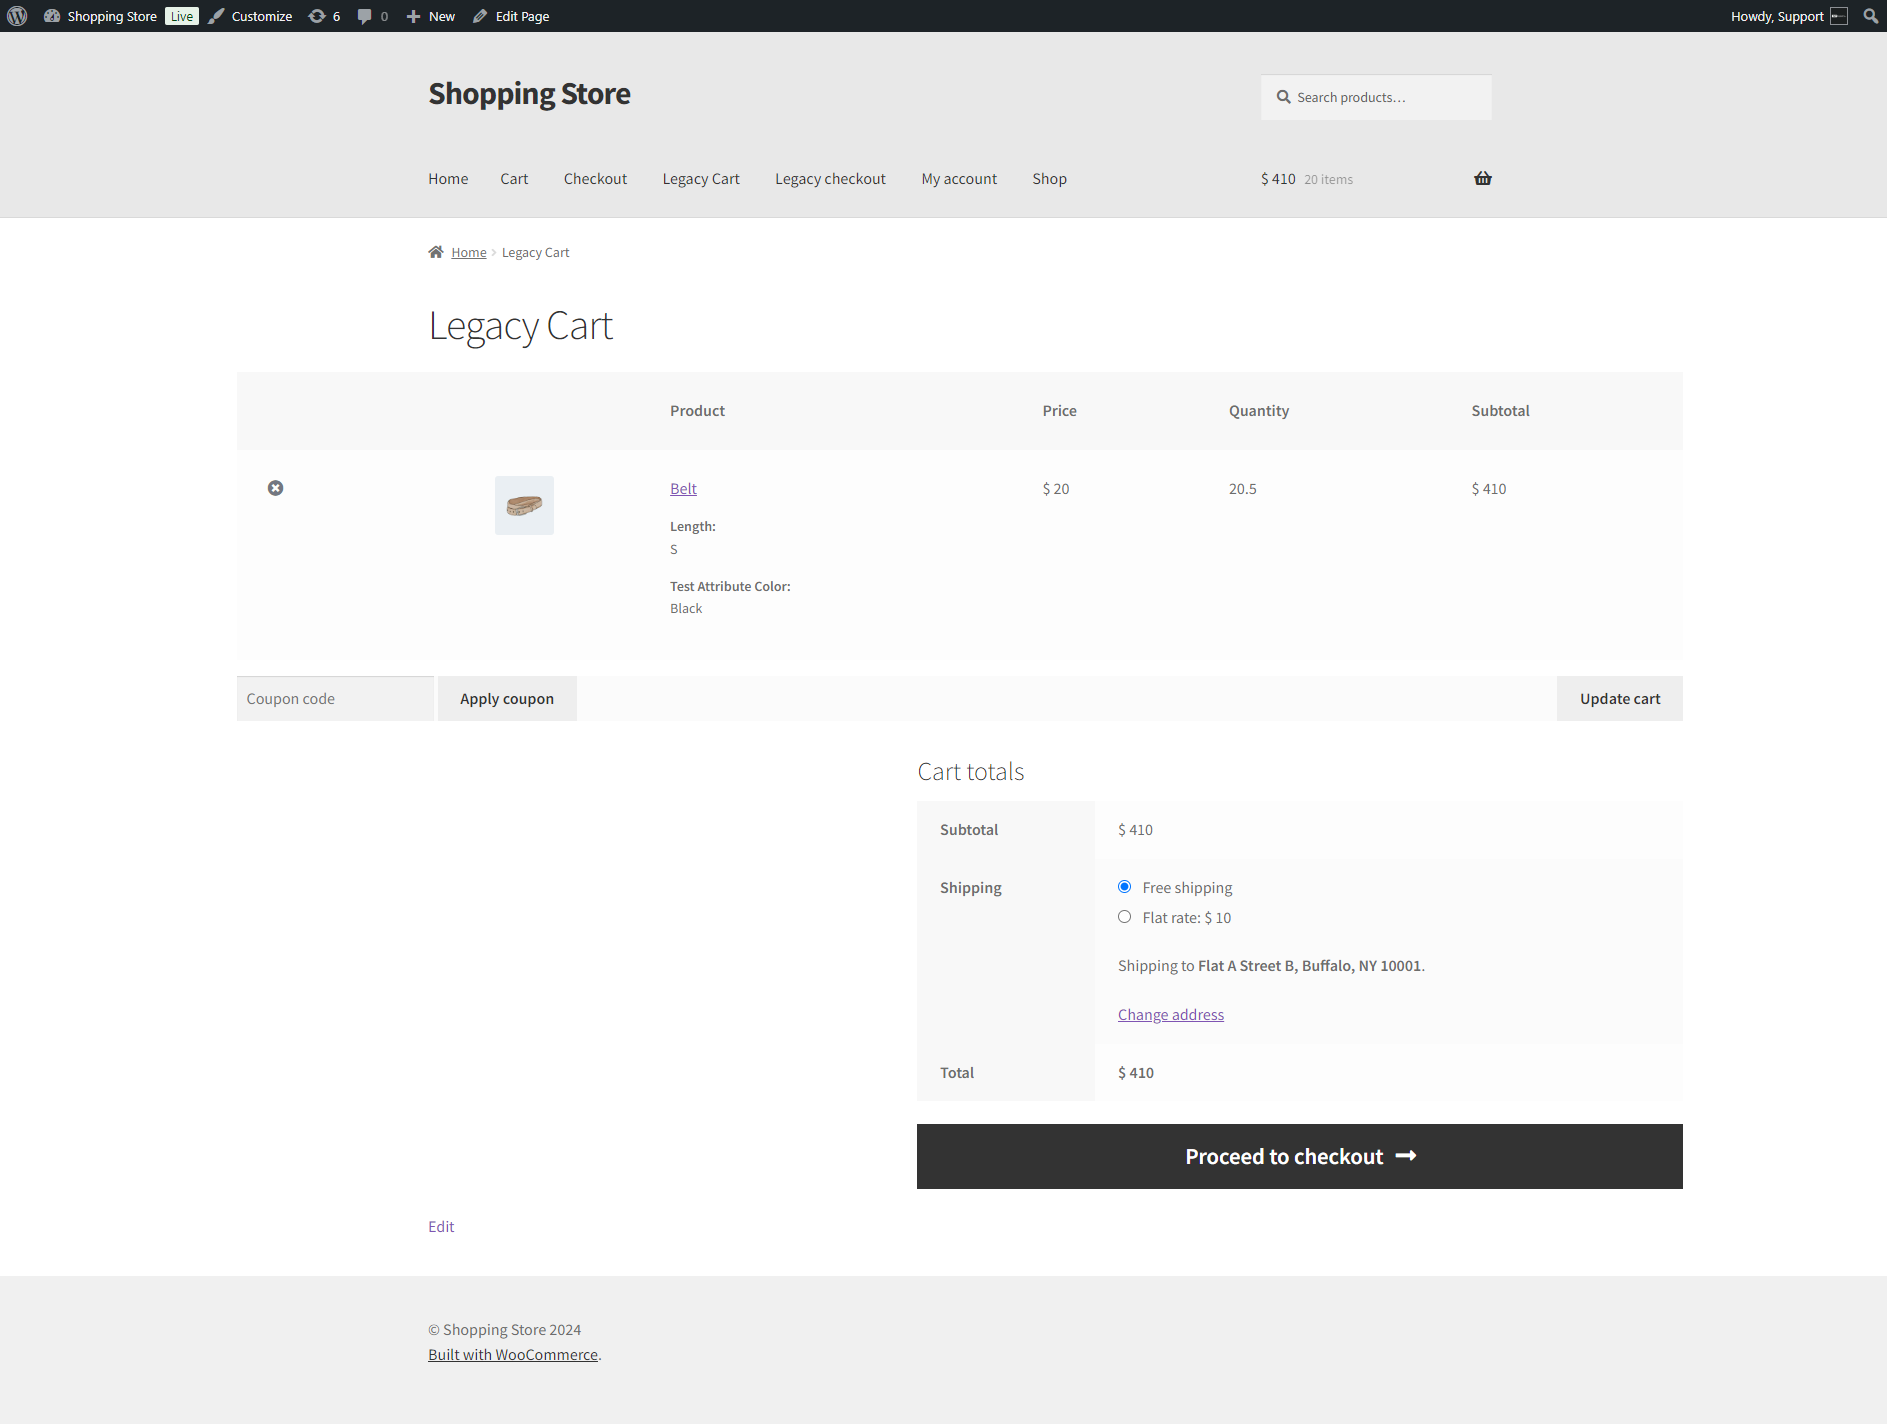
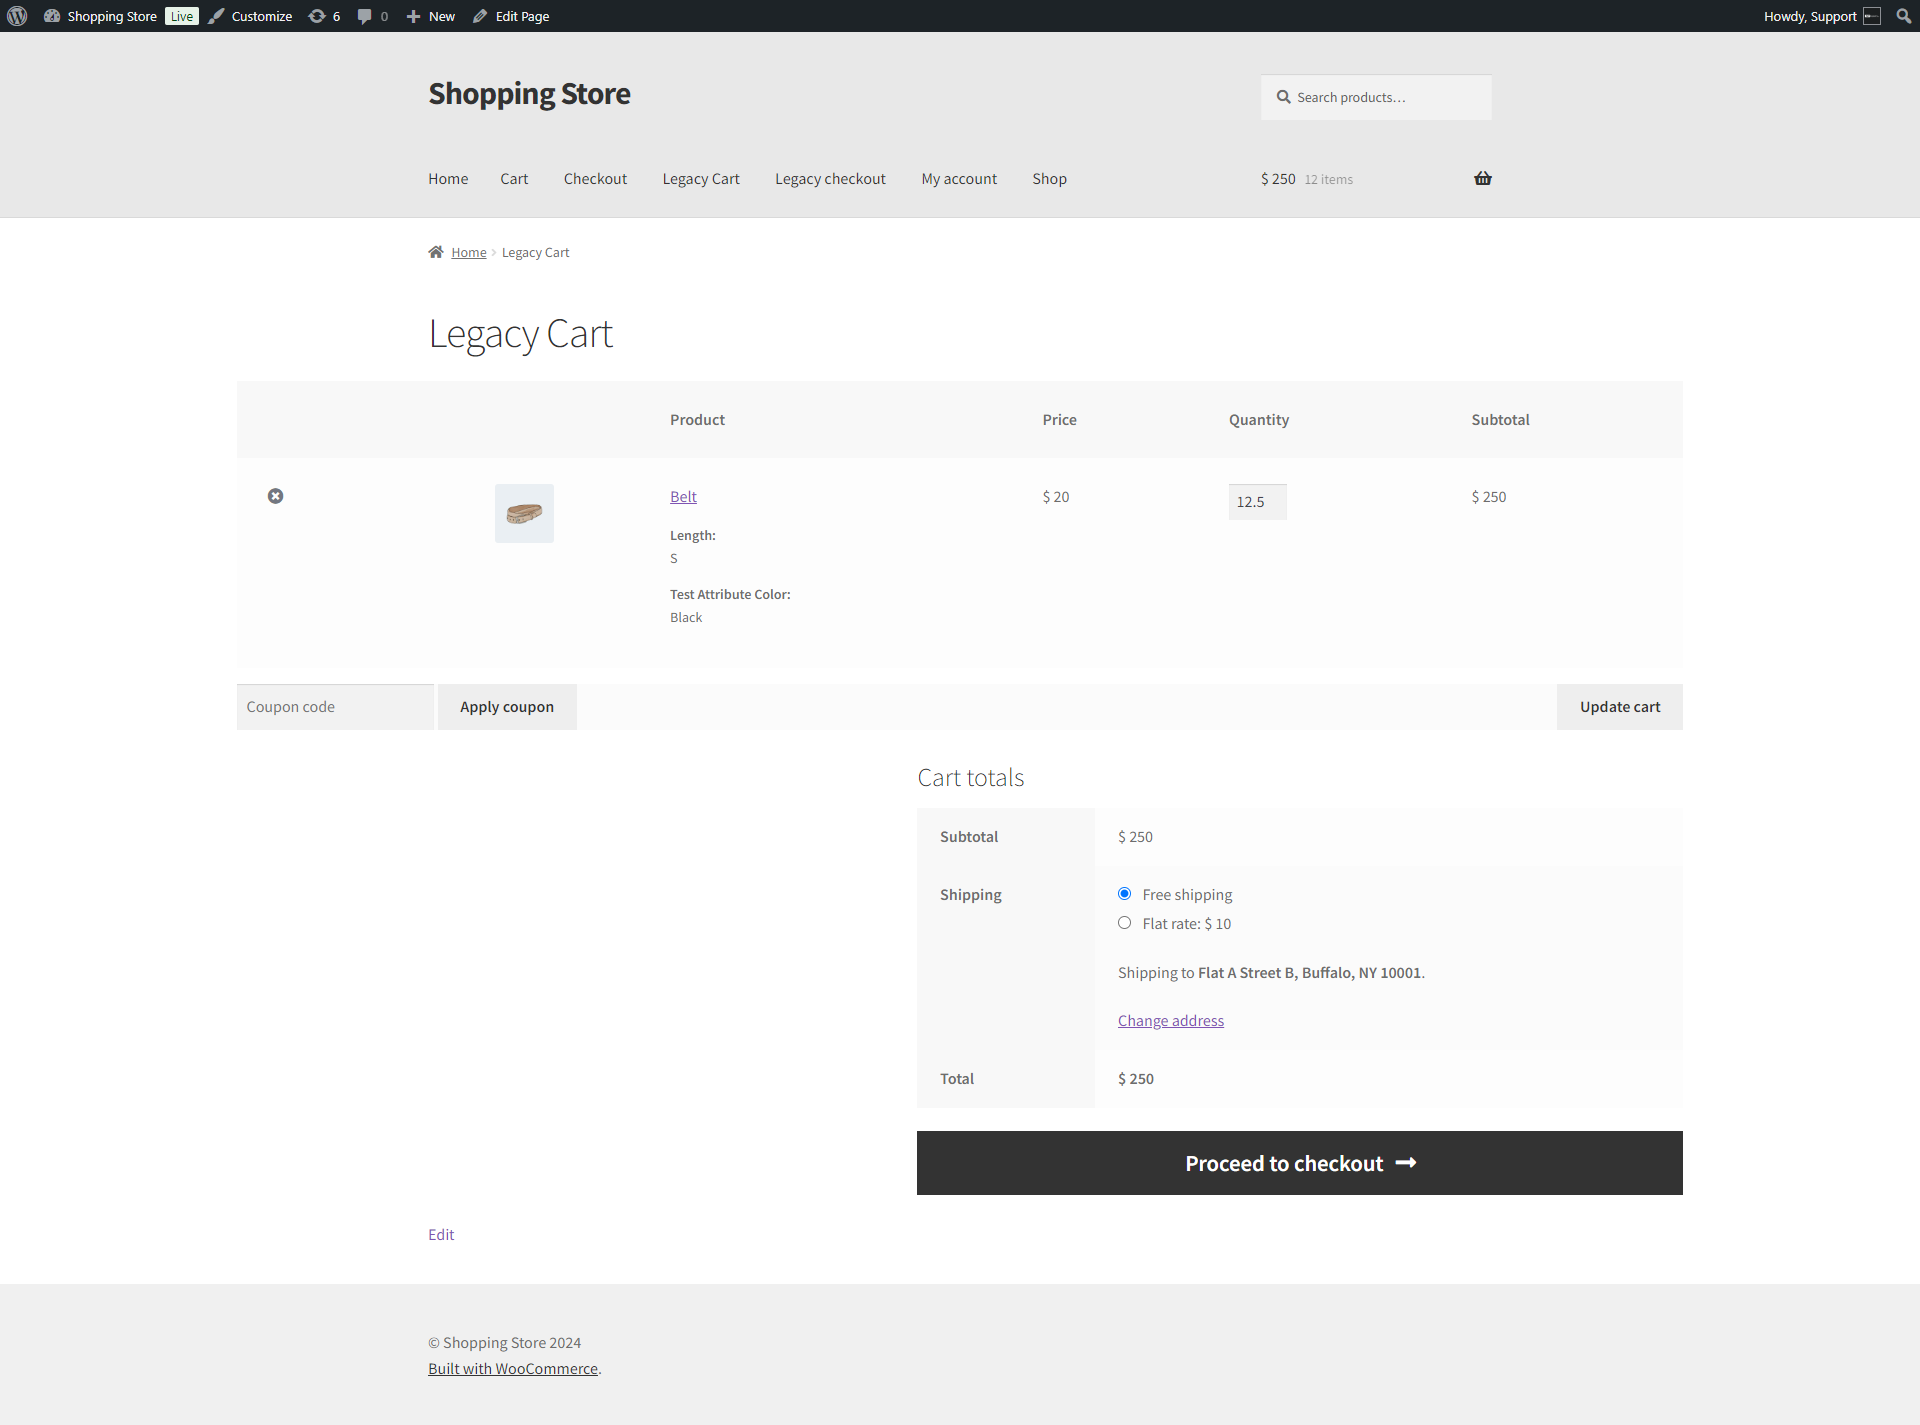
- On Legacy Cart/Checkout

PLEASE NOTE: the legacy cart will not override the product quantity validations.
Fixed Quantity
- Admin selects Fixed Quantity from the drop-down menu. It consists of the following options;
- Fixed Quantity: Admin can insert the fixed quantity in the text box.
- Click on the Update button.

Front-end Screenshot
- On Block Cart/Checkout

PLEASE NOTE: When the user changes the quantity on the cart page, the block cart validations will override the product quantity validations.
- On Legacy Cart/Checkout

PLEASE NOTE: the legacy cart will not override the product quantity validations.
Step Quantity
- Admin selects Step Quantity from a drop-down menu. It consists of following options;
- Minimum Quantity: Admin can set the minimum quantity in the text box.
- Maximum Quantity: Admin can set the maximum quantity in the text box.
- Step Counter: The admin can set the step counter, which means it will start from the minimum quantity and skip multiples of the number declared by the admin on Step Quantity until it reaches the maximum quantity.
- Click on the Update button.
Front-end Screenshots
- On Block Cart/Checkout

PLEASE NOTE: When the user changes the quantity on the cart page, the block cart validations will override the product quantity validations.
- On Legacy Cart/Checkout

PLEASE NOTE: the legacy cart will not override the product quantity validations.
Custom Quantity
- Admin selects Custom Quantity from a drop-down menu. It consists of the following options;
- Custom Quantities: The admin can insert multiple commas-separated custom quantities in the text box.
- Click on the Update button.
Front-end Screenshots
- On Block Cart/Checkout
PLEASE NOTE: When the user changes the quantity on the cart page, the block cart validations will override the product quantity validations.
- On Legacy Cart/Checkout
PLEASE NOTE: the legacy cart will not override the product quantity validations.
Decimal Quantity On Variation of Products
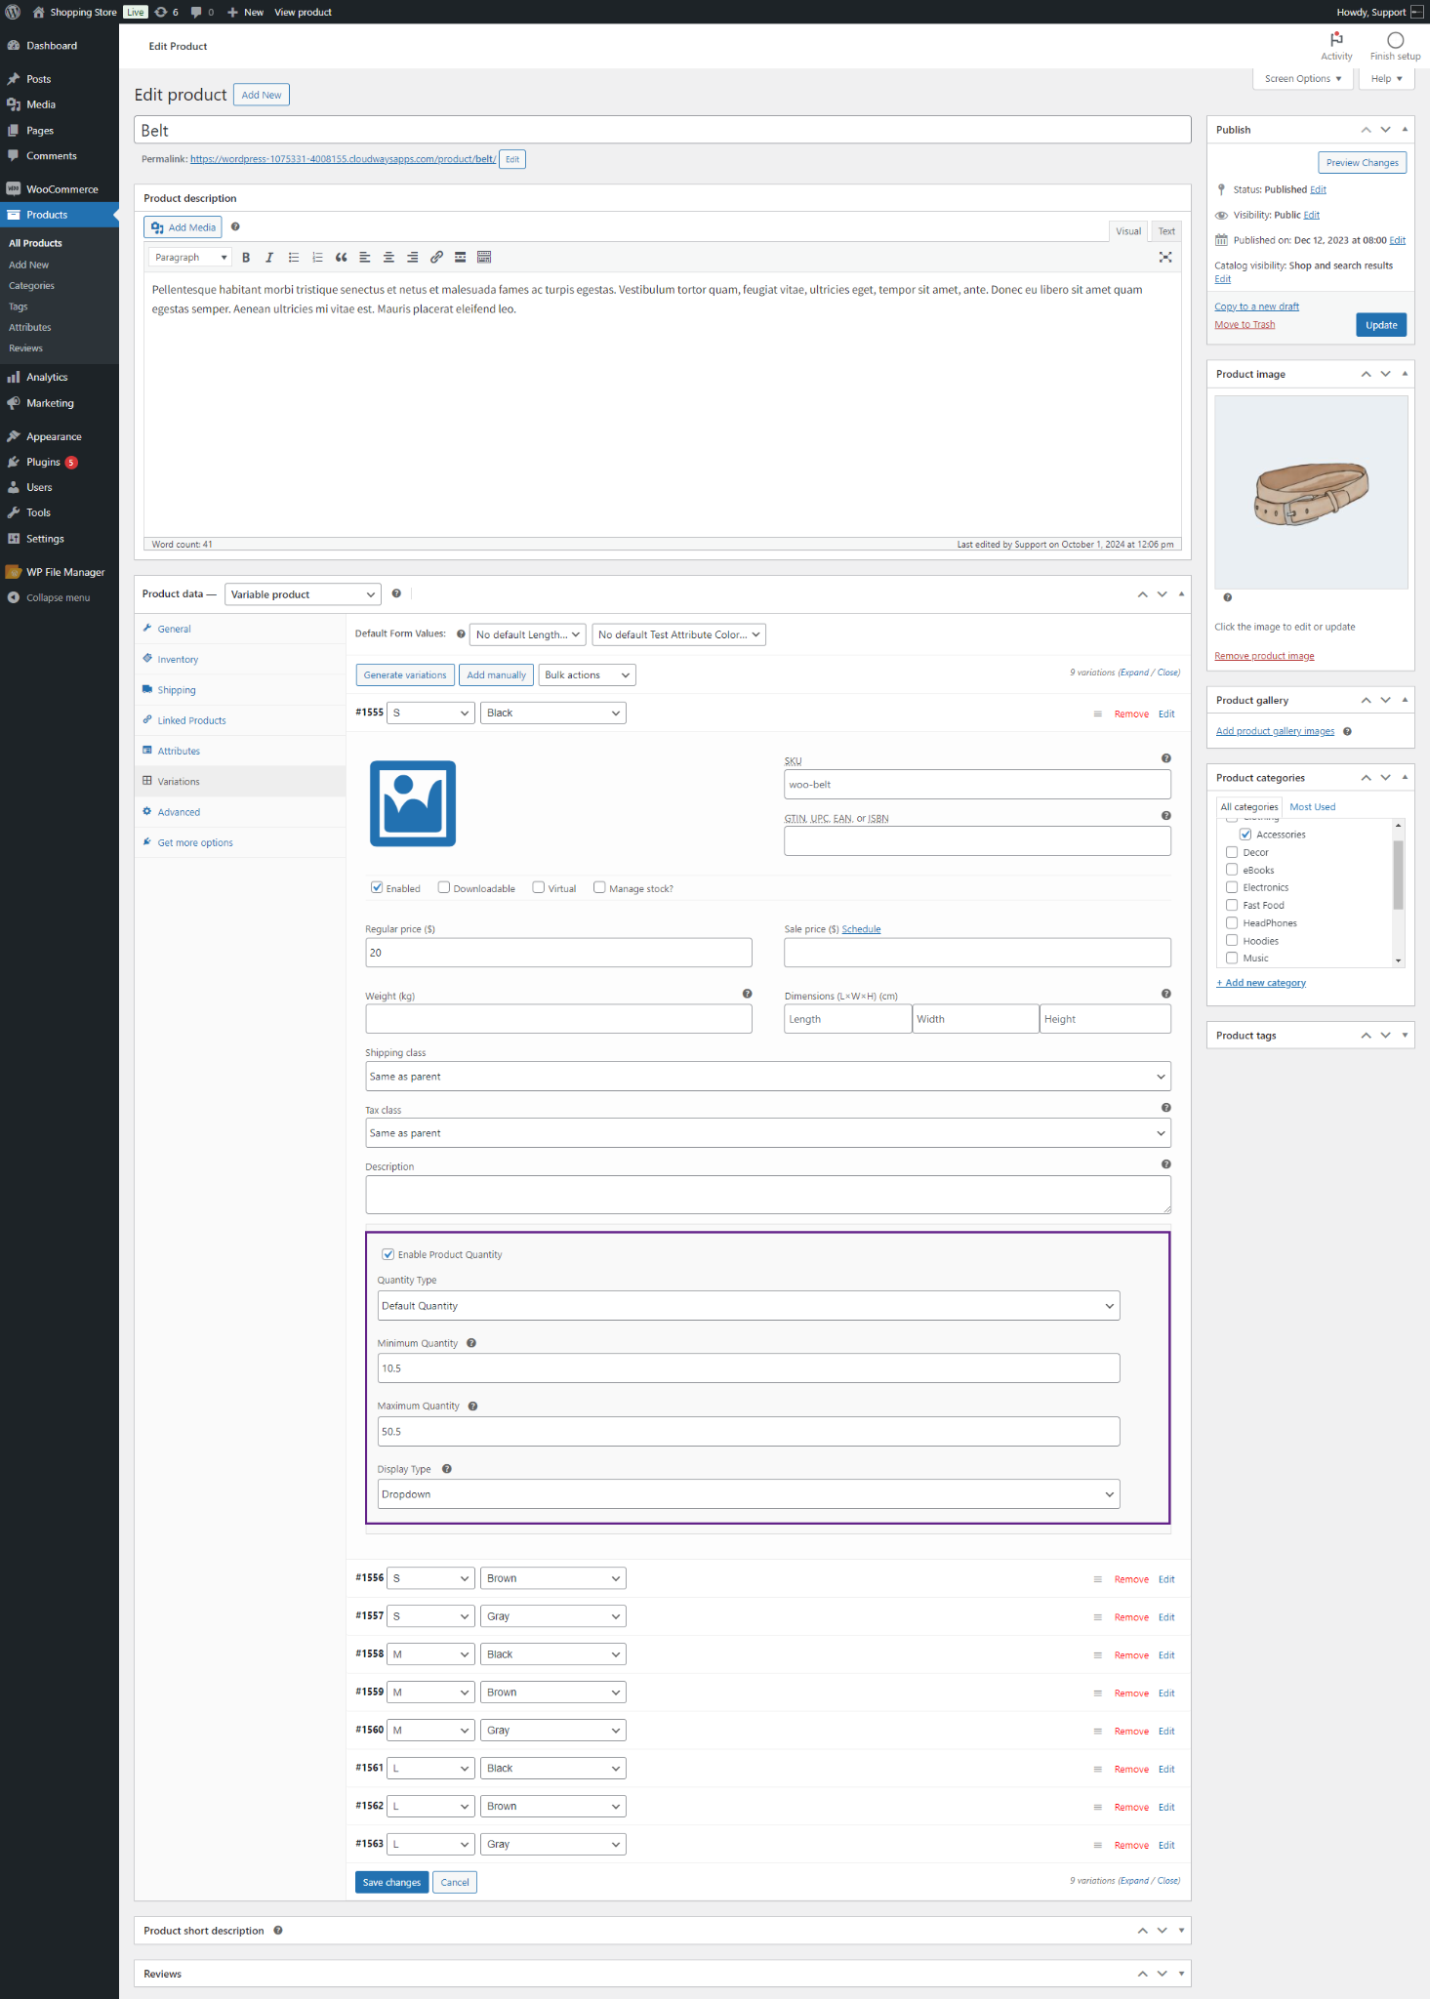
↑ Back to topDefault Quantity
- In the Quantity Type, the default quantity will be selected by default. It consists of the following options;
- Minimum Quantity: The admin can set the minimum quantity in decimal points in the text box.
- Maximum Quantity: The admin can set the maximum quantity in decimal points in the text box.
- Click on the Update button.
Front-end Screenshots
- On Block Cart/Checkout

PLEASE NOTE: When the user changes the quantity on the cart page, the block cart validations will override the product quantity validations.
- On Legacy Cart/Checkout

PLEASE NOTE: the legacy cart will not override the product quantity validations.
Fixed Quantity
- Admin selects Fixed Quantity from the drop-down menu. It consists of the following options;
- Fixed Quantity: Admin can insert the fixed quantity in the text box.
- Click on the Update button.
Front-end Screenshots
- On Block Cart/Checkout
PLEASE NOTE: When the user changes the quantity on the cart page, the block cart validations will override the product quantity validations.
- On Legacy Cart/Checkout
PLEASE NOTE: the legacy cart will not override the product quantity validations.
Step Quantity
- Admin selects Step Quantity from a drop-down menu. It consists of following options;
- Minimum Quantity: Admin can set the minimum quantity in the text box.
- Maximum Quantity: Admin can set the maximum quantity in the text box.
- Step Counter: The admin can set the step counter, which means it will start from the minimum quantity and skip multiples of the number declared by the admin on Step Quantity until it reaches the maximum quantity.
- Click on the Update button.
Front-end Screenshots

- On Block Cart/Checkout
PLEASE NOTE: When the user changes the quantity on the cart page, the block cart validations will override the product quantity validations.
- On Legacy Cart/Checkout
PLEASE NOTE: the legacy cart will not override the product quantity validations.
Custom Quantity
- Admin selects Custom Quantity from the drop-down menu. It consists of the following options;
- Custom Quantities: The admin can insert multiple commas separated custom quantities in the text box beside the Custom Quantity option in decimal numbers.
- Click on the Update button.
Front-end Screenshots

- On Block Cart/Checkout

PLEASE NOTE: When the user changes the quantity on the cart page, the block cart validations will override the product quantity validations.
- On Legacy Cart/Checkout
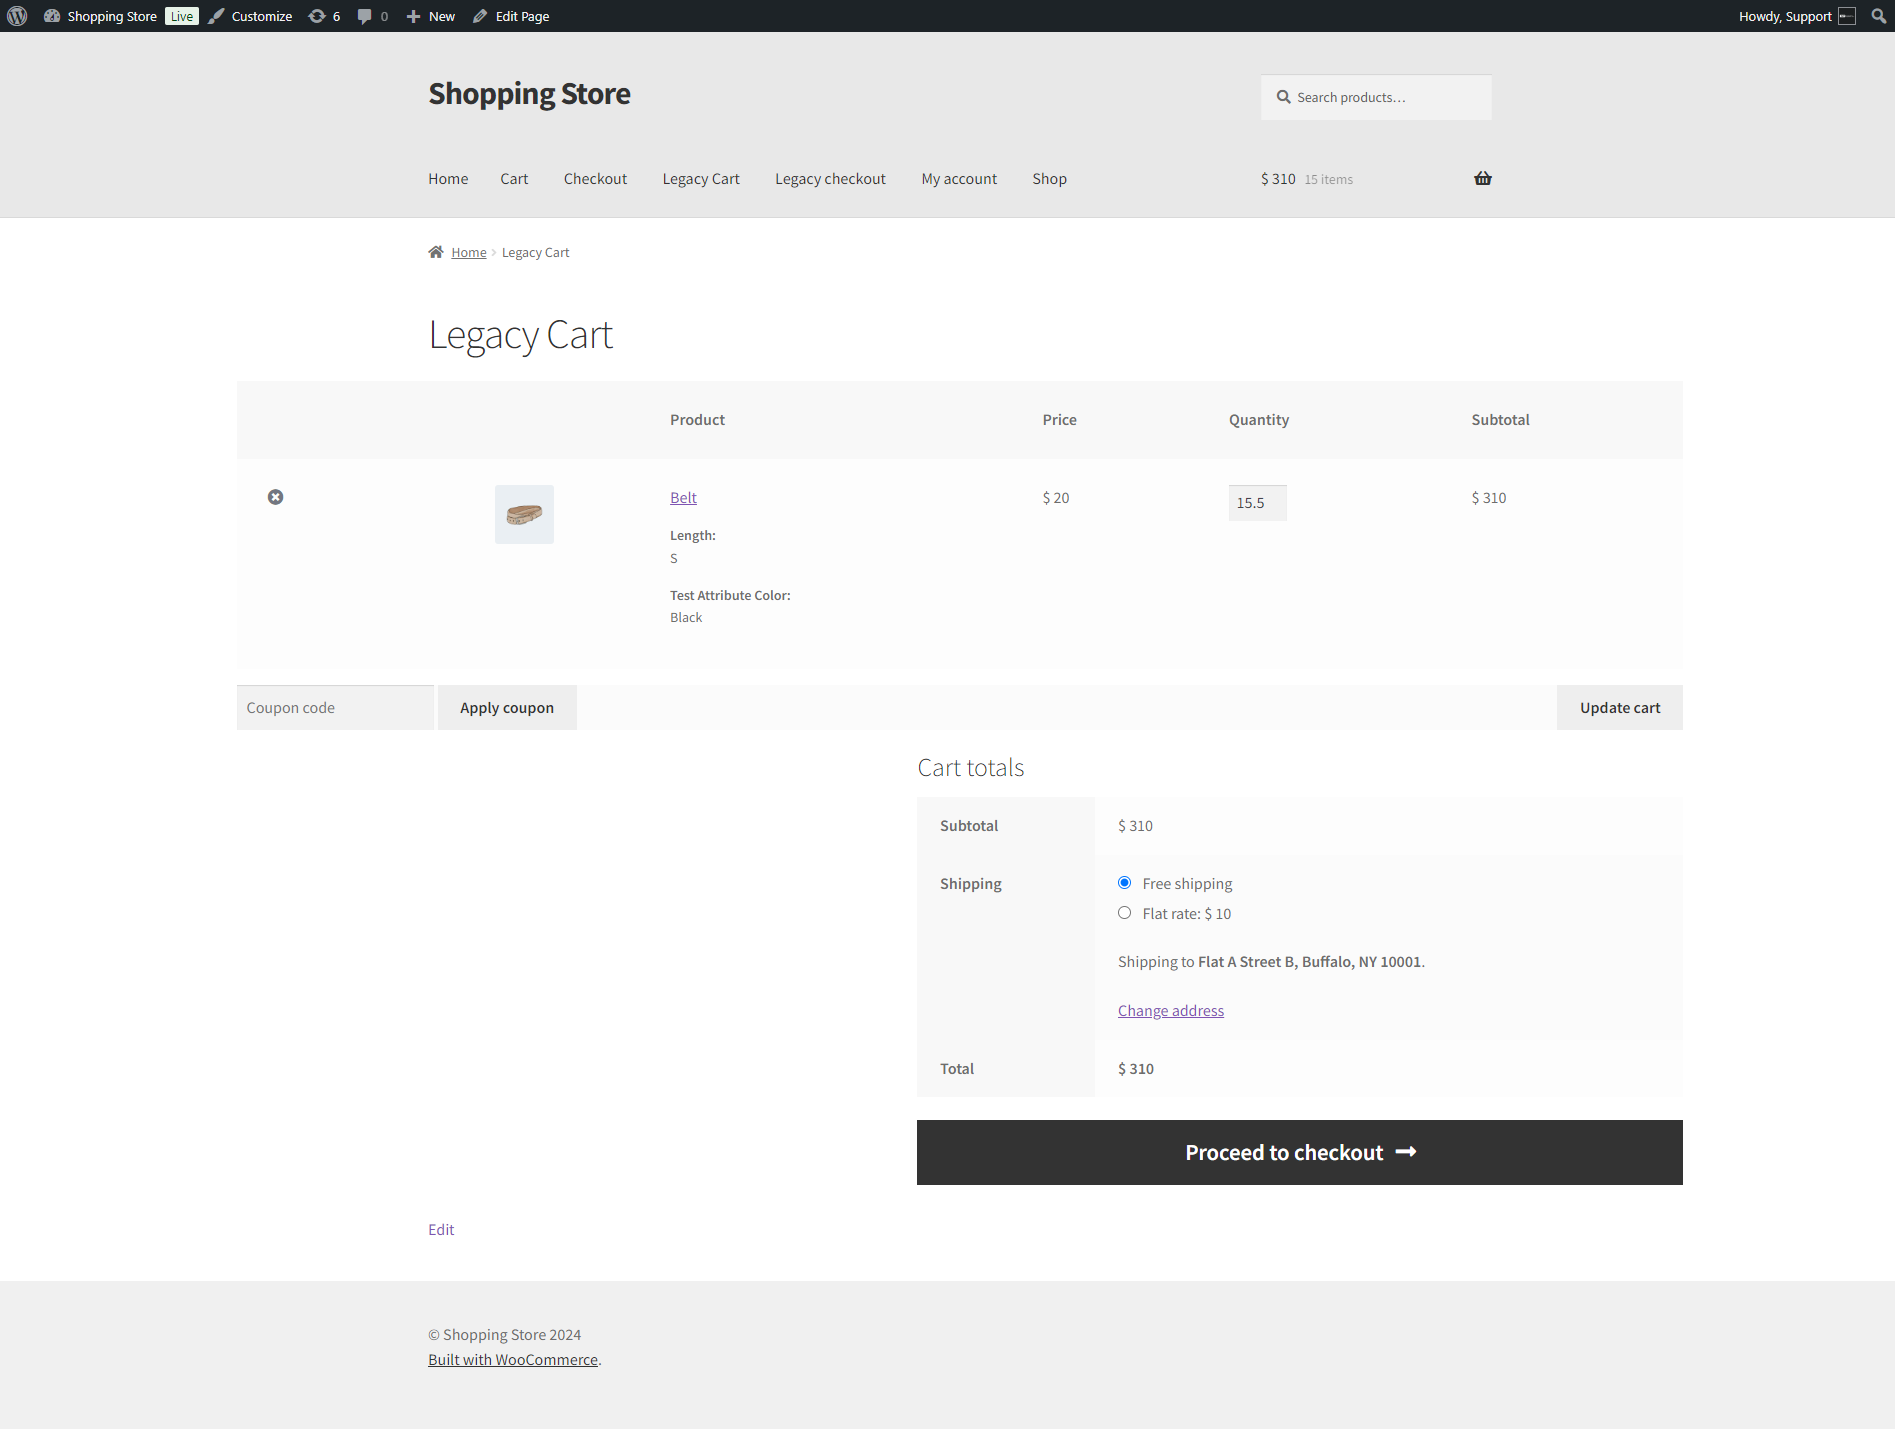
PLEASE NOTE: the legacy cart will not override the product quantity validations.
Decimal Quantity On Product Quantity Rules
↑ Back to topDefault Quantity
- In the Quantity Type, the default quantity will be selected by default. It consists of the following options;
- Minimum Quantity: The admin can set the minimum quantity in decimal points in the text box.
- Maximum Quantity: The admin can set the maximum quantity in the text box.
- Click on the Update button.
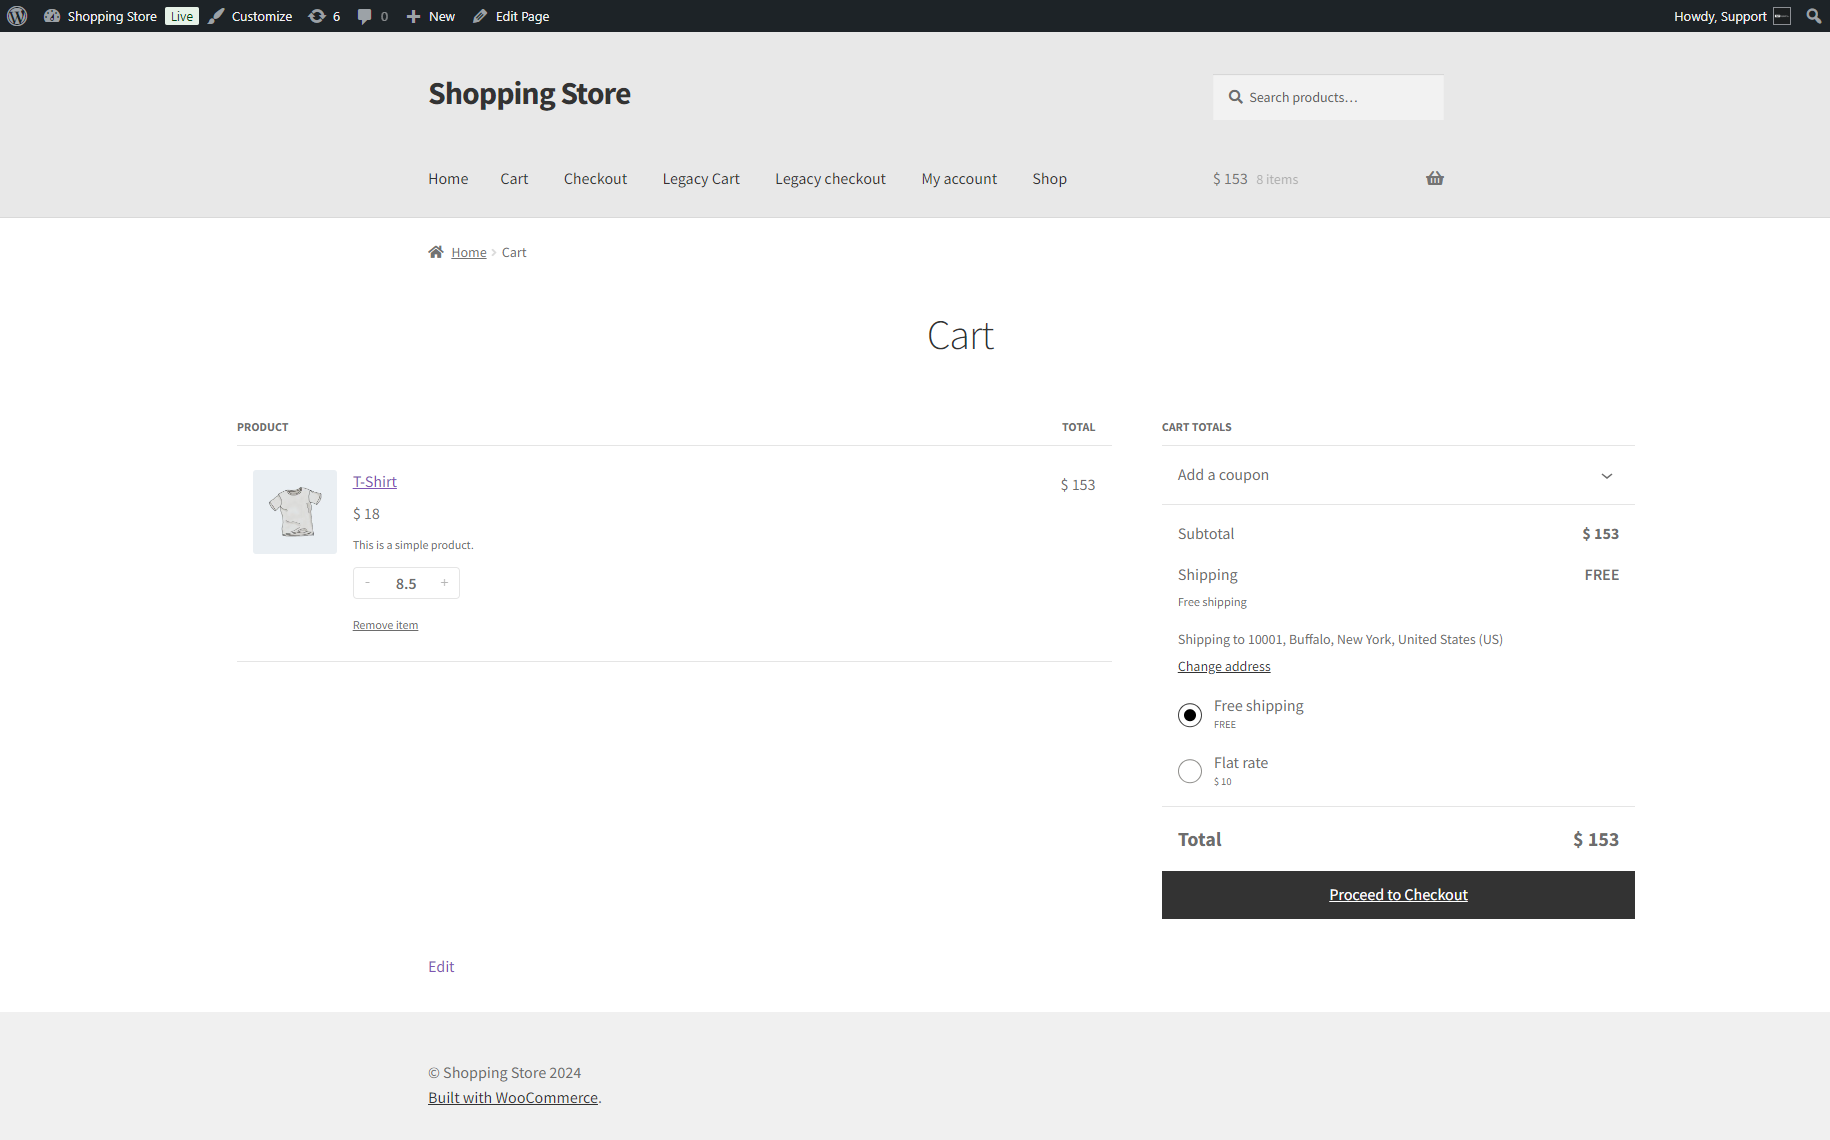
Front-end Screenshots

- On Block Cart/Checkout
PLEASE NOTE: When the user changes the quantity on the cart page, the block cart validations will override the product quantity validations.
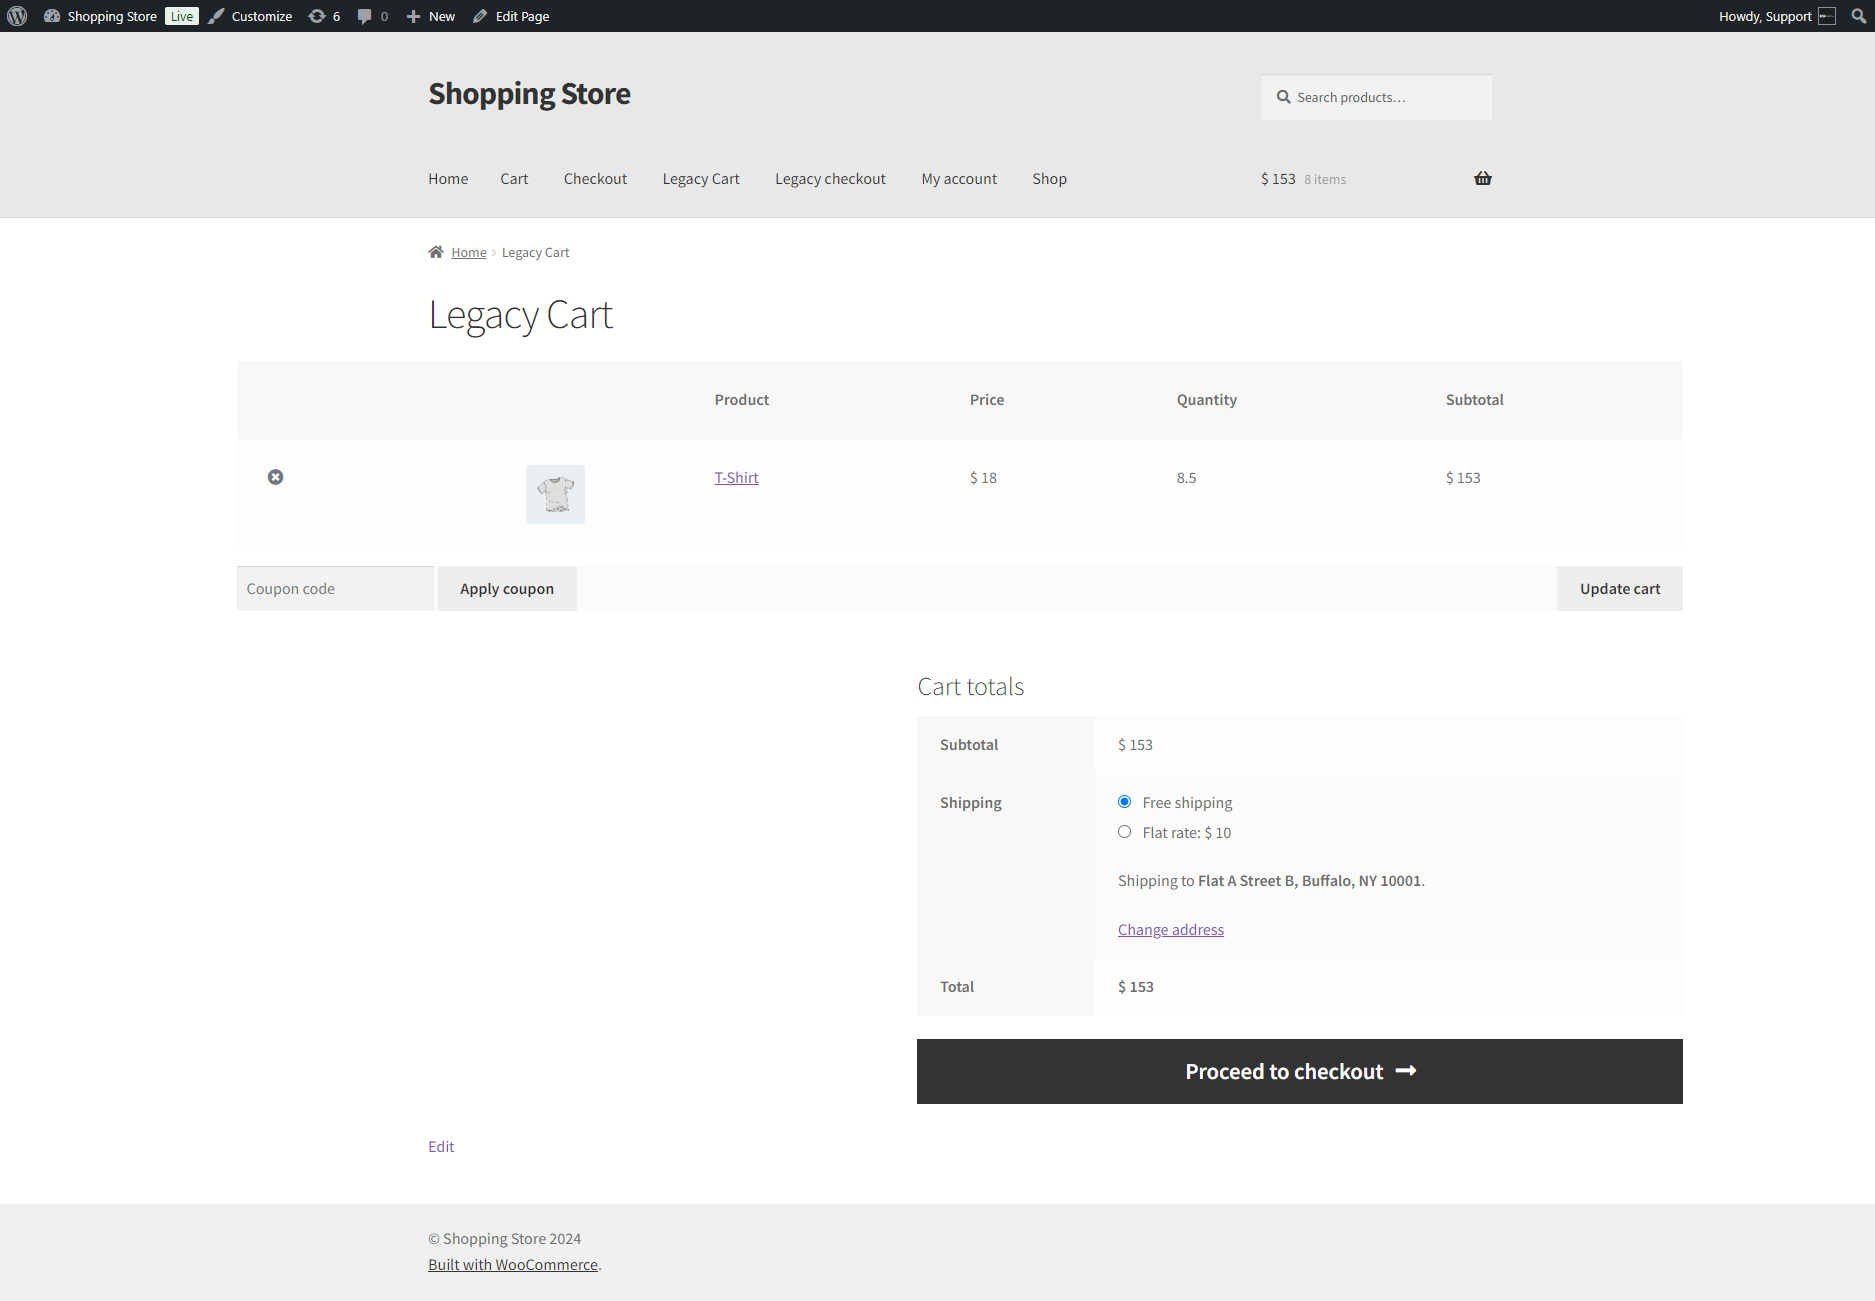
- On Legacy Cart/Checkout

PLEASE NOTE: the legacy cart will not override the product quantity validations.
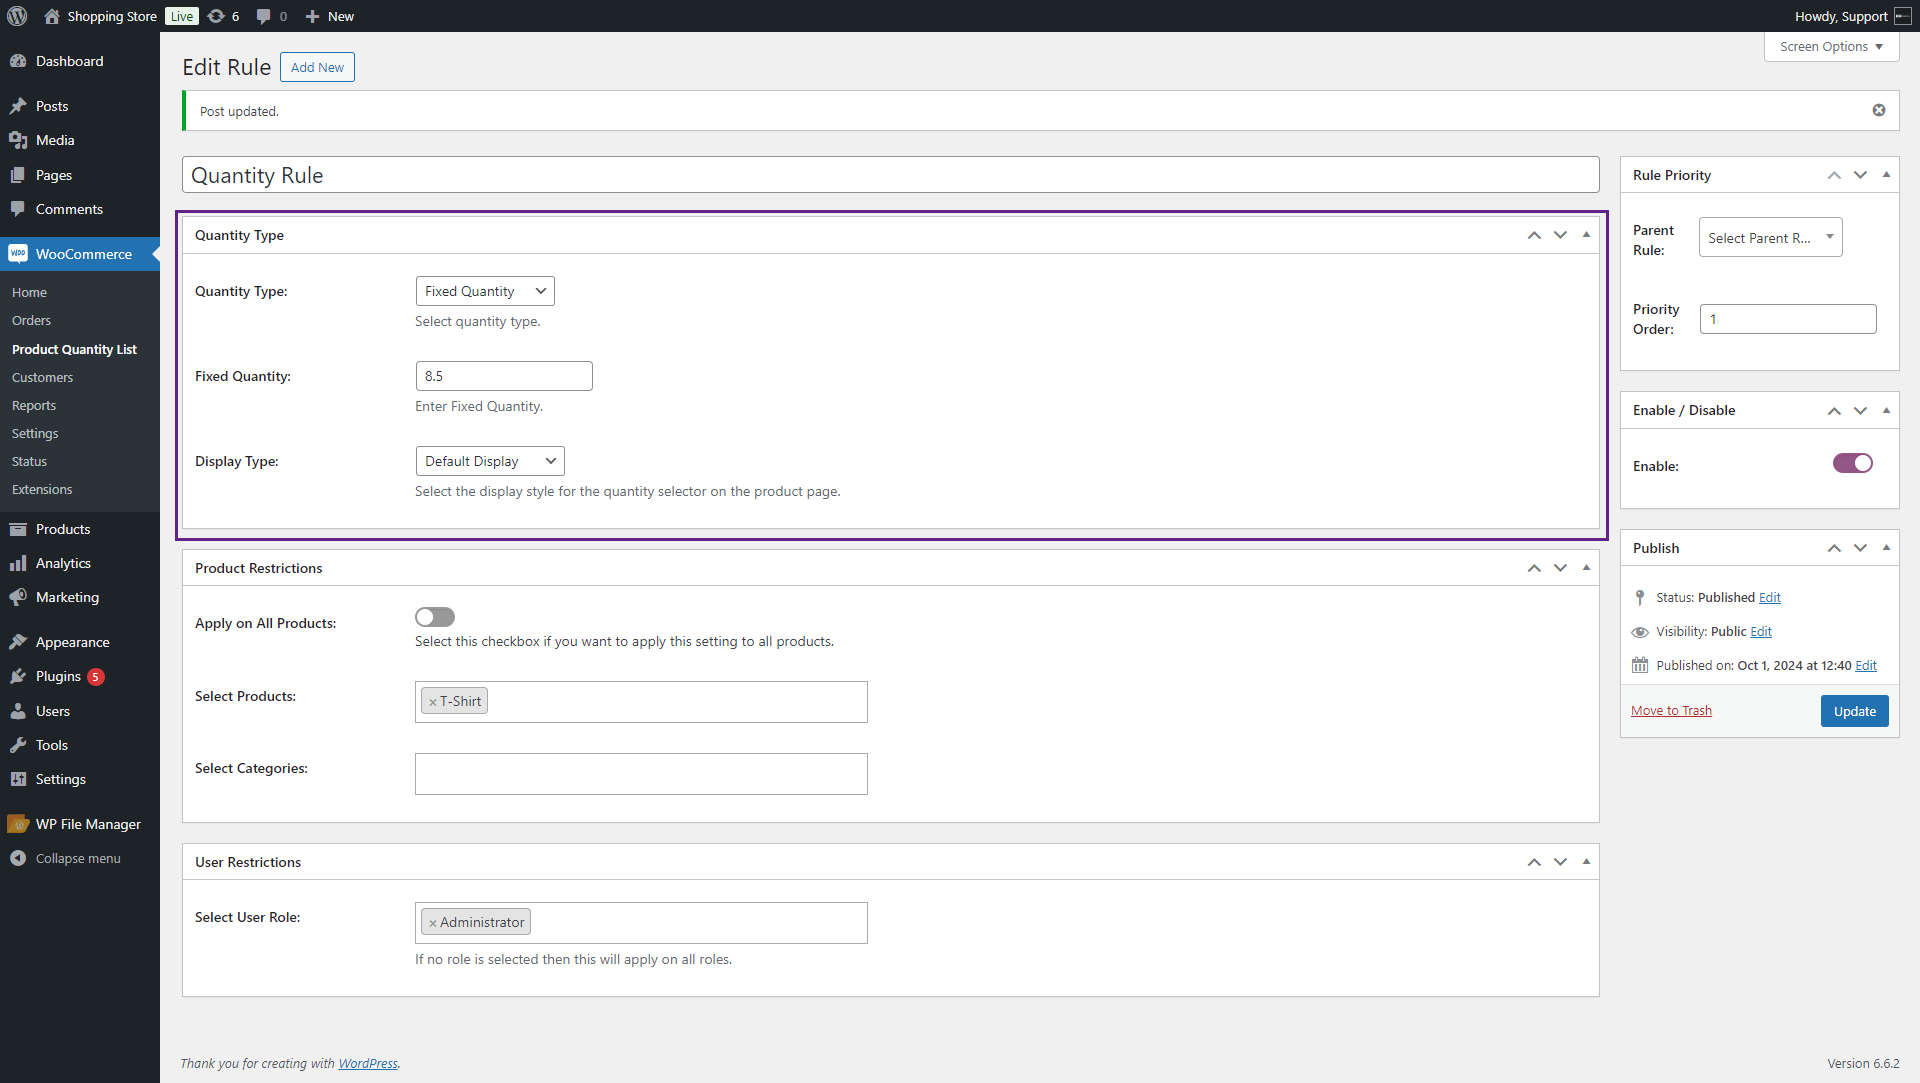
Fixed Quantity
- Admin selects Fixed Quantity from the Quantity Type drop-down menu; it consists of following options;
- Fixed Quantity: Admin can insert the fixed quantity in the text box.
- Click on the Update button.
Front-end Screenshots

- On Block Cart/Checkout
PLEASE NOTE: When the user changes the quantity on the cart page, the block cart validations will override the product quantity validations.
- On Legacy Cart/Checkout
PLEASE NOTE: the legacy cart will not override the product quantity validations.
Step Quantity
- Admin selects Step Quantity from the Quantity Type drop-down menu; it consists of the following options;
- Minimum Quantity: The admin can set the minimum quantity in decimal numbers in the text box.
- Maximum Quantity: The admin can set the maximum quantity in decimal numbers in the text box.
- Step Counter: The Admin can set the step counter. This means it will start from the minimum quantity and skip the multiple of the number declared by admin on Step Quantity till the maximum quantity in decimal numbers.
- Click on the Update button.

Front-end Screenshots

- On Block Cart/Checkout

PLEASE NOTE: When the user changes the quantity on the cart page, the block cart validations will override the product quantity validations.
- On Legacy Cart/Checkout

PLEASE NOTE: the legacy cart will not override the product quantity validations.
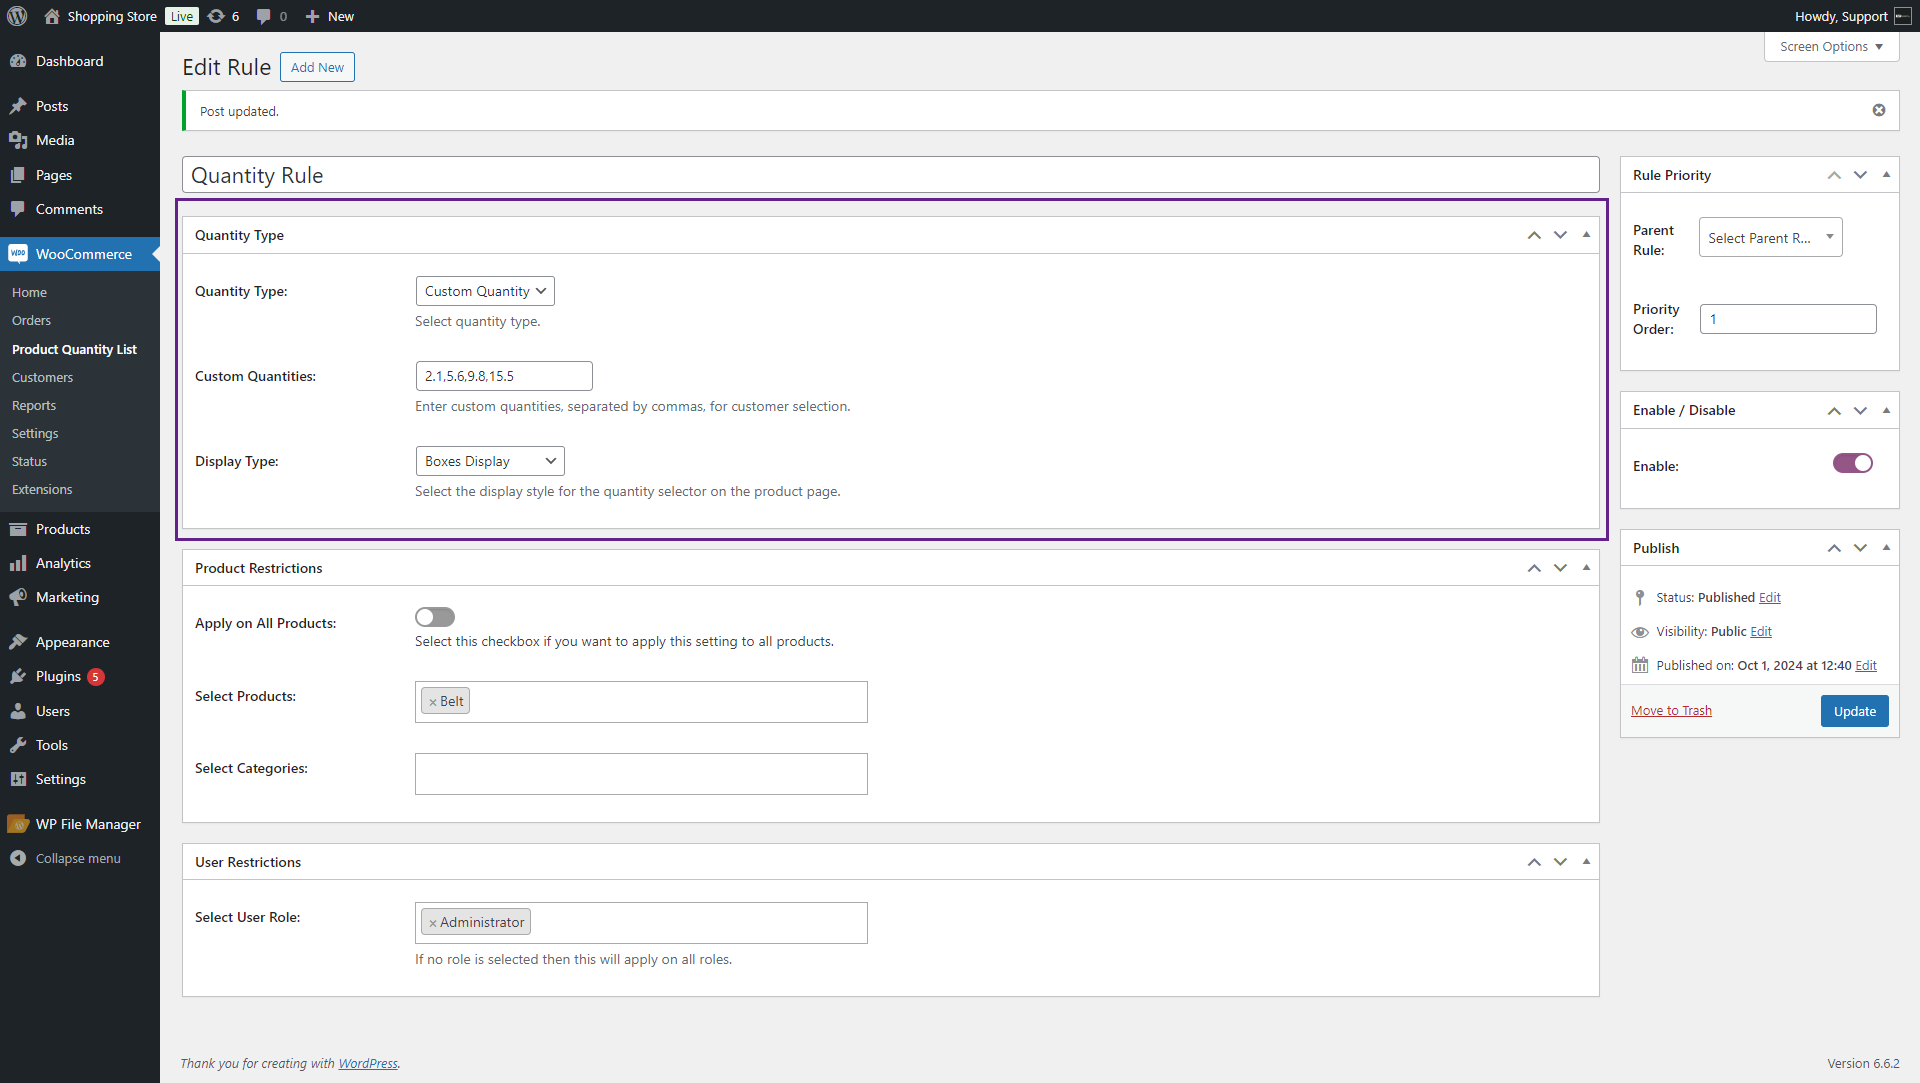
Custom Quantity
- Admin selects Custom Quantity from the Quantity Type drop-down menu; it consists of following options;
- Custom Quantities: The admin can insert multiple commas separated custom quantities in the text box beside the Custom Quantity option in decimal numbers.
- Click on the Update button.
Front-end Screenshots
- On Block Cart/Checkout
PLEASE NOTE: When the user changes the quantity on the cart page, the block cart validations will override the product quantity validations.
- On Legacy Cart/Checkout

PLEASE NOTE: the legacy cart will not override the product quantity validations.
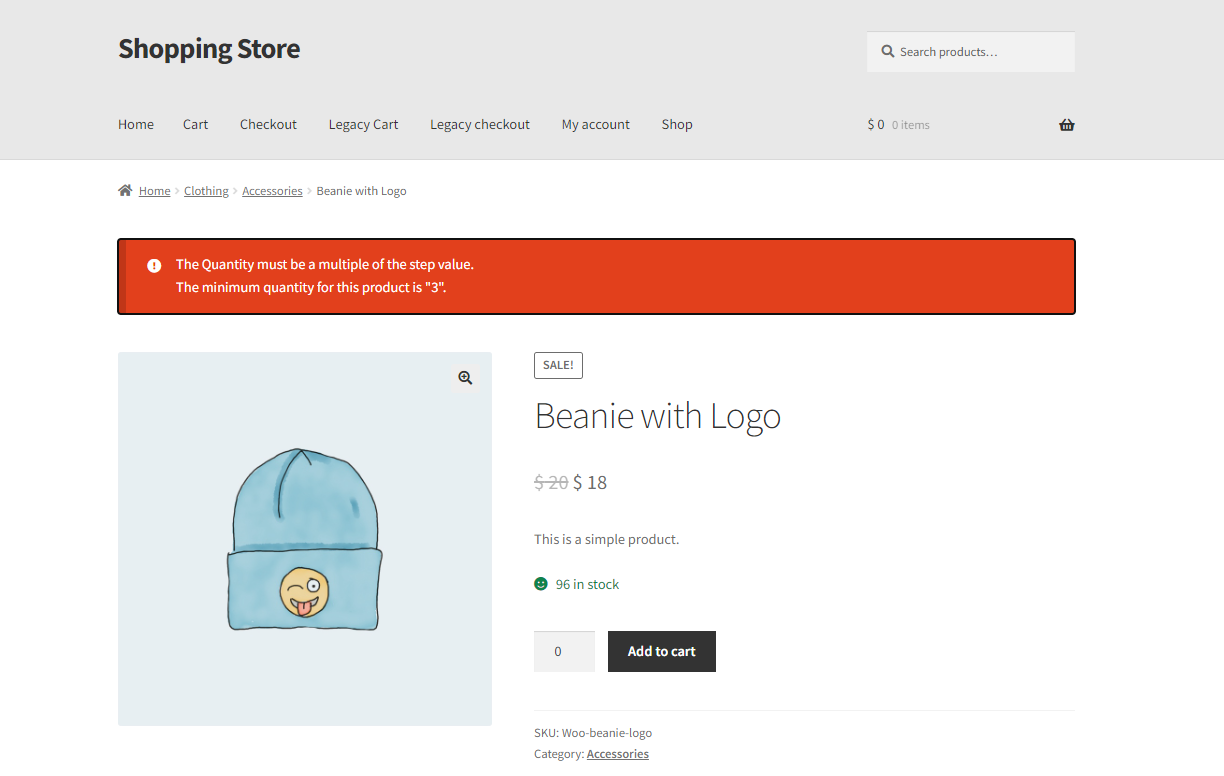
Notices
↑ Back to top- Go to the WordPress Admin Dashboard > WooCommerce > Settings > Product Quantity > Notices.

- The admin can configure notices for users when they exceed the set minimum or maximum quantity.
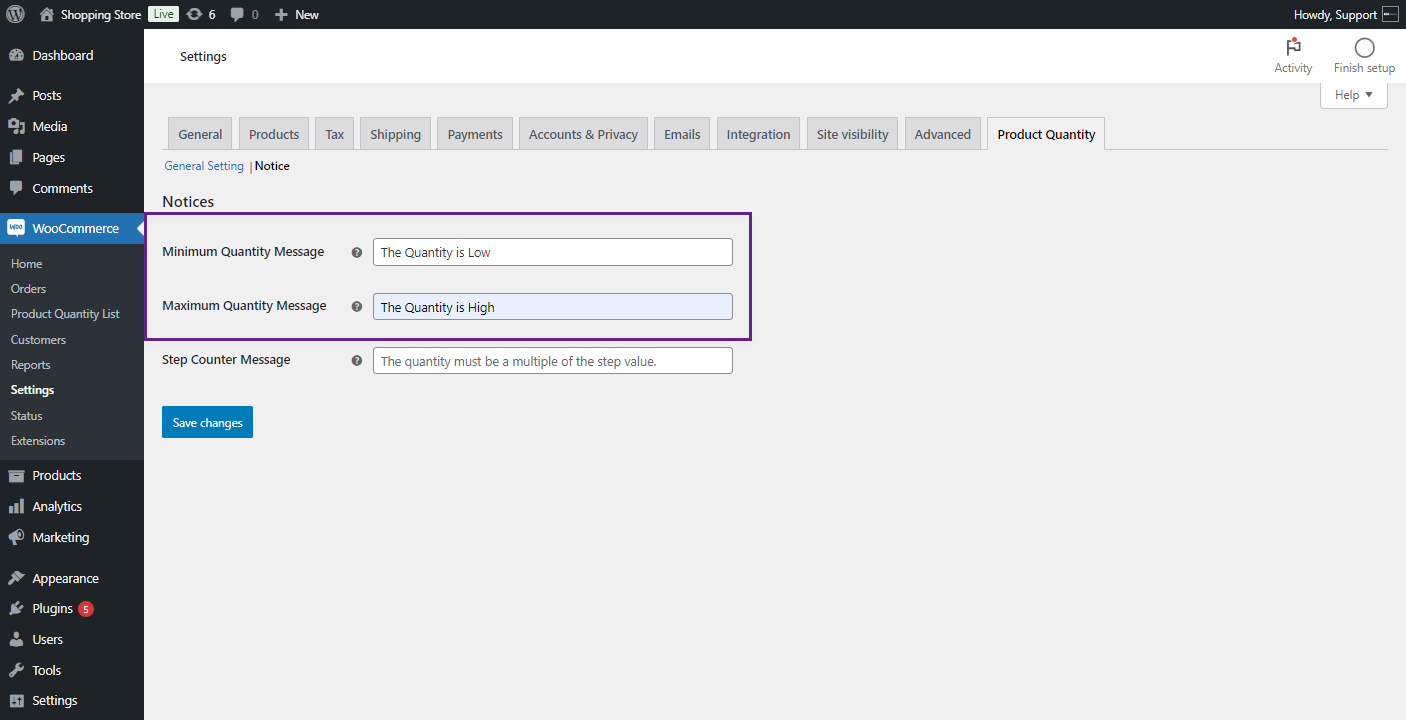
- The admin can add a notice for the step counter, which will appear as an alert on the product and cart pages when the user’s selected or entered quantity is not a multiple of the number defined by the admin.
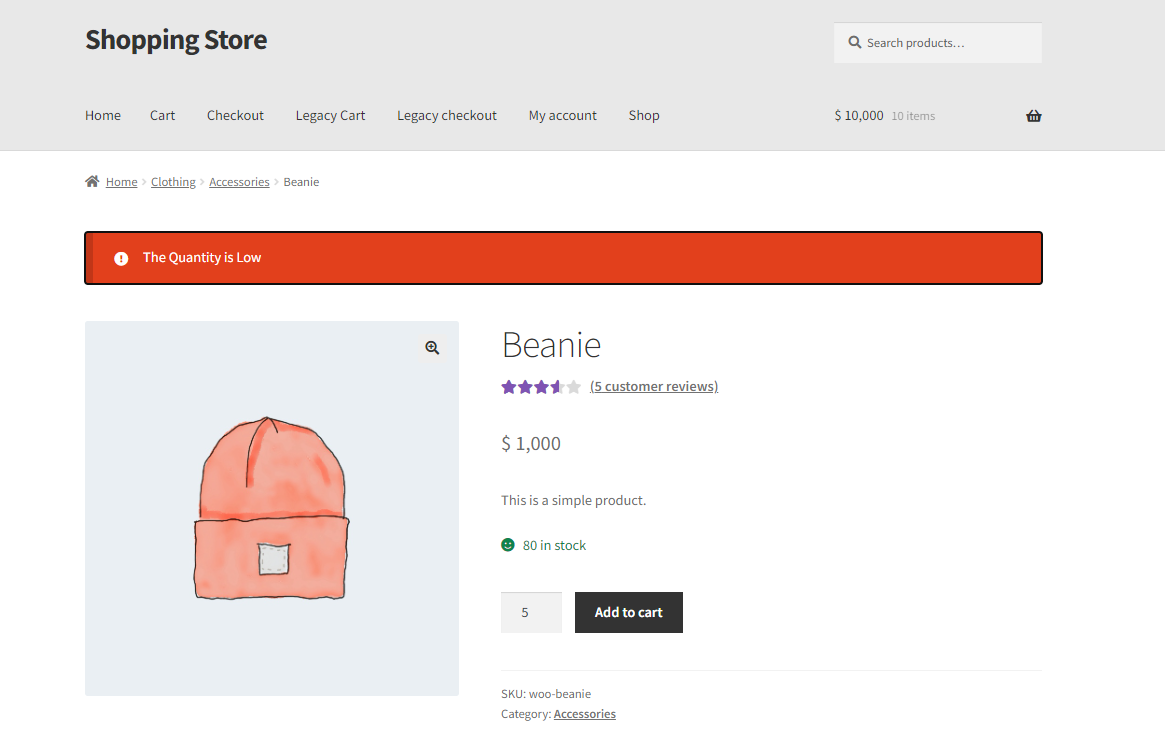
Front-end Screenshots
- Minimum Quantity Message
- Maximum Quantity Message
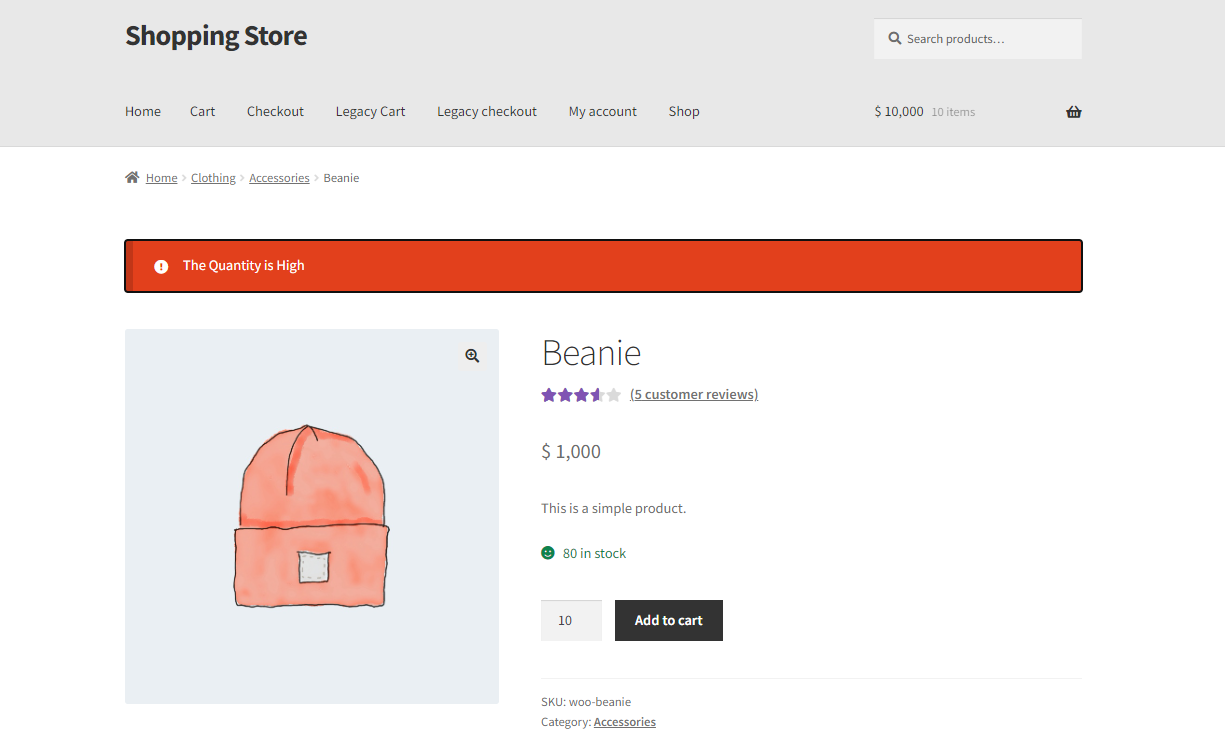
- Step Counter Message
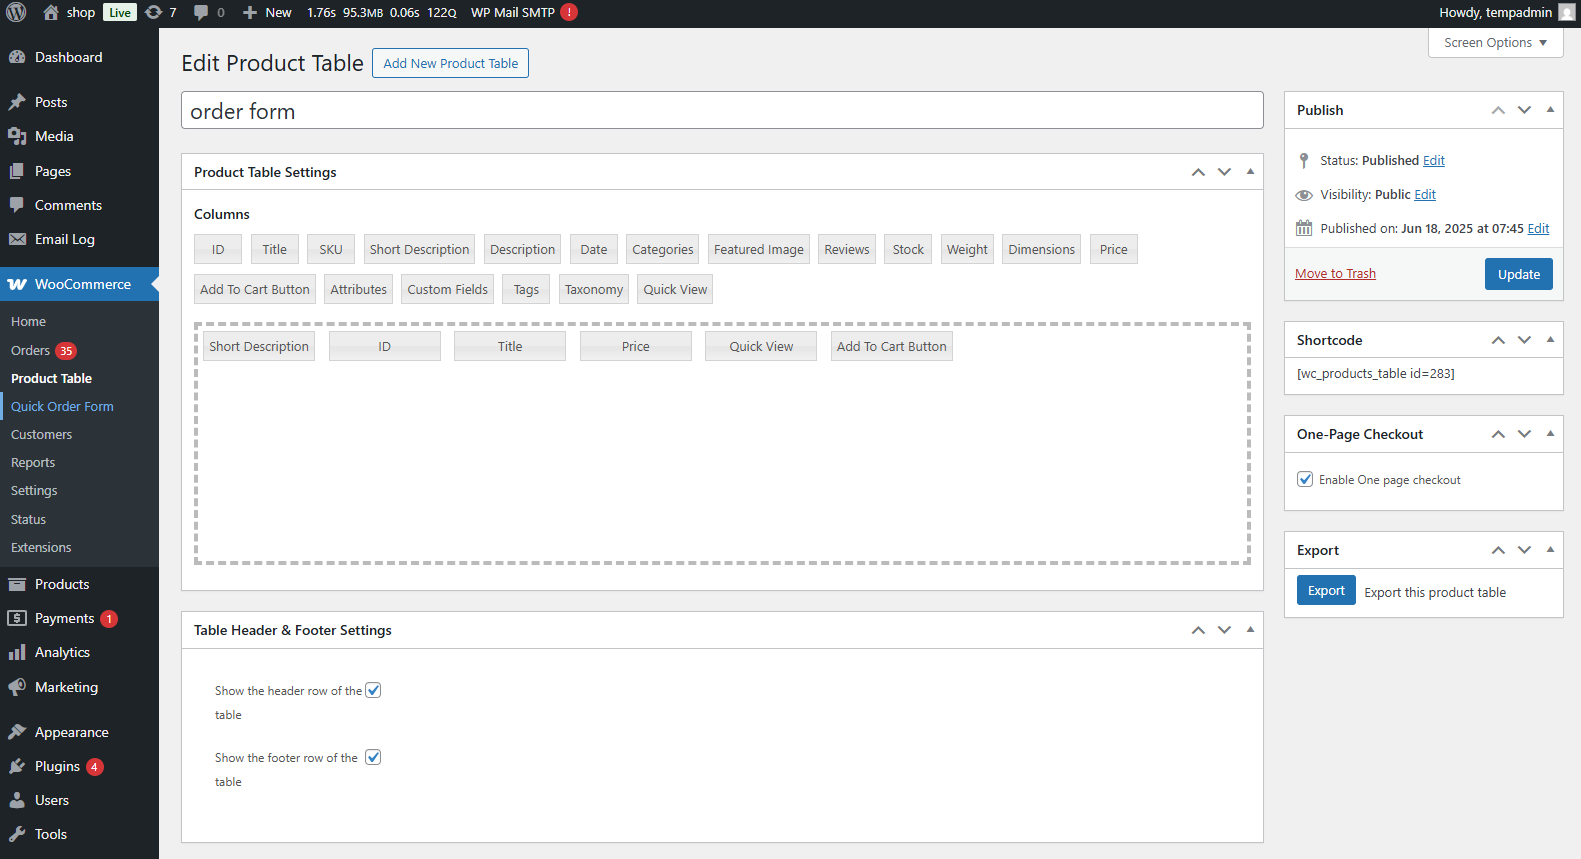
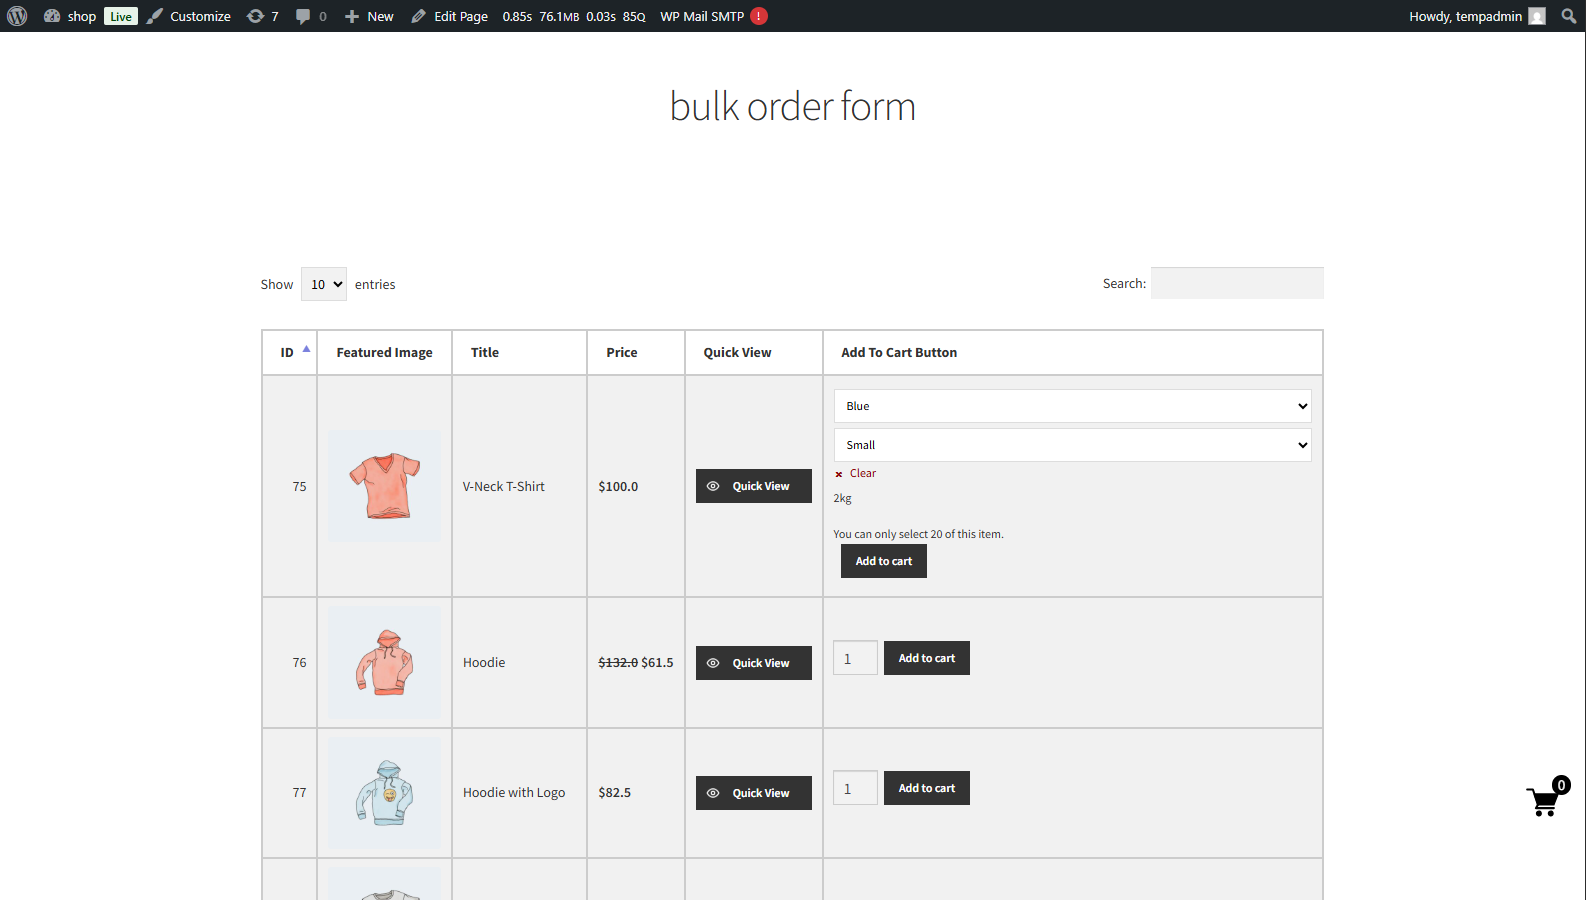
Compatibility with Bulk Order Form for WooCommerce
↑ Back to topThe Product Quantity feature is fully compatible with the Bulk Order Form for WooCommerce plugin. This compatibility ensures that the Product Quantity configuration (Fixed, Step, or Custom Quantity) is correctly reflected in the Bulk Order Form.
Product Quantity with Bulk Order Form
- Install and activate the Product Quantity plugin.
- Install and activate the Bulk Order Form for WooCommerce plugin.
- Configure the Bulk Order Form as per your store’s requirements.
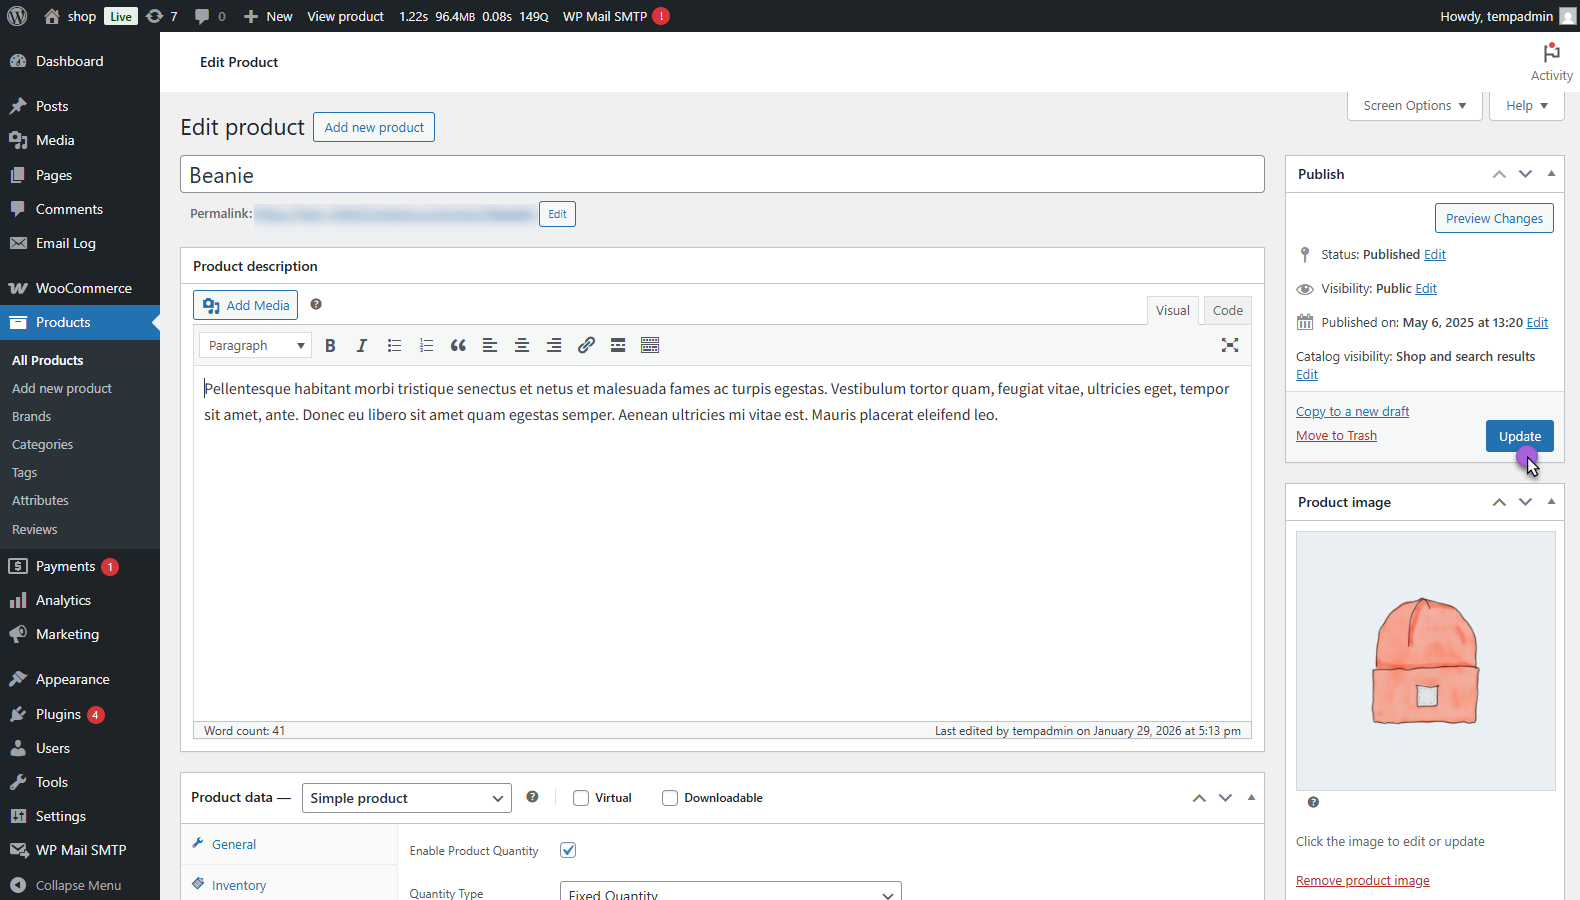
Simple Product – Fixed Quantity
- Navigate to WordPress Admin Dashboard > Products.
- Click Add New Product or Edit an existing simple product.
- Scroll to Product Data > Product Quantity.
- Enable Product Quantity by clicking the checkbox.

- Select Fixed Quantity as the quantity type.
- Enter the fixed quantity value.

- Click Update to save the product.
- Create a Bulk Order Form based on your requirements.
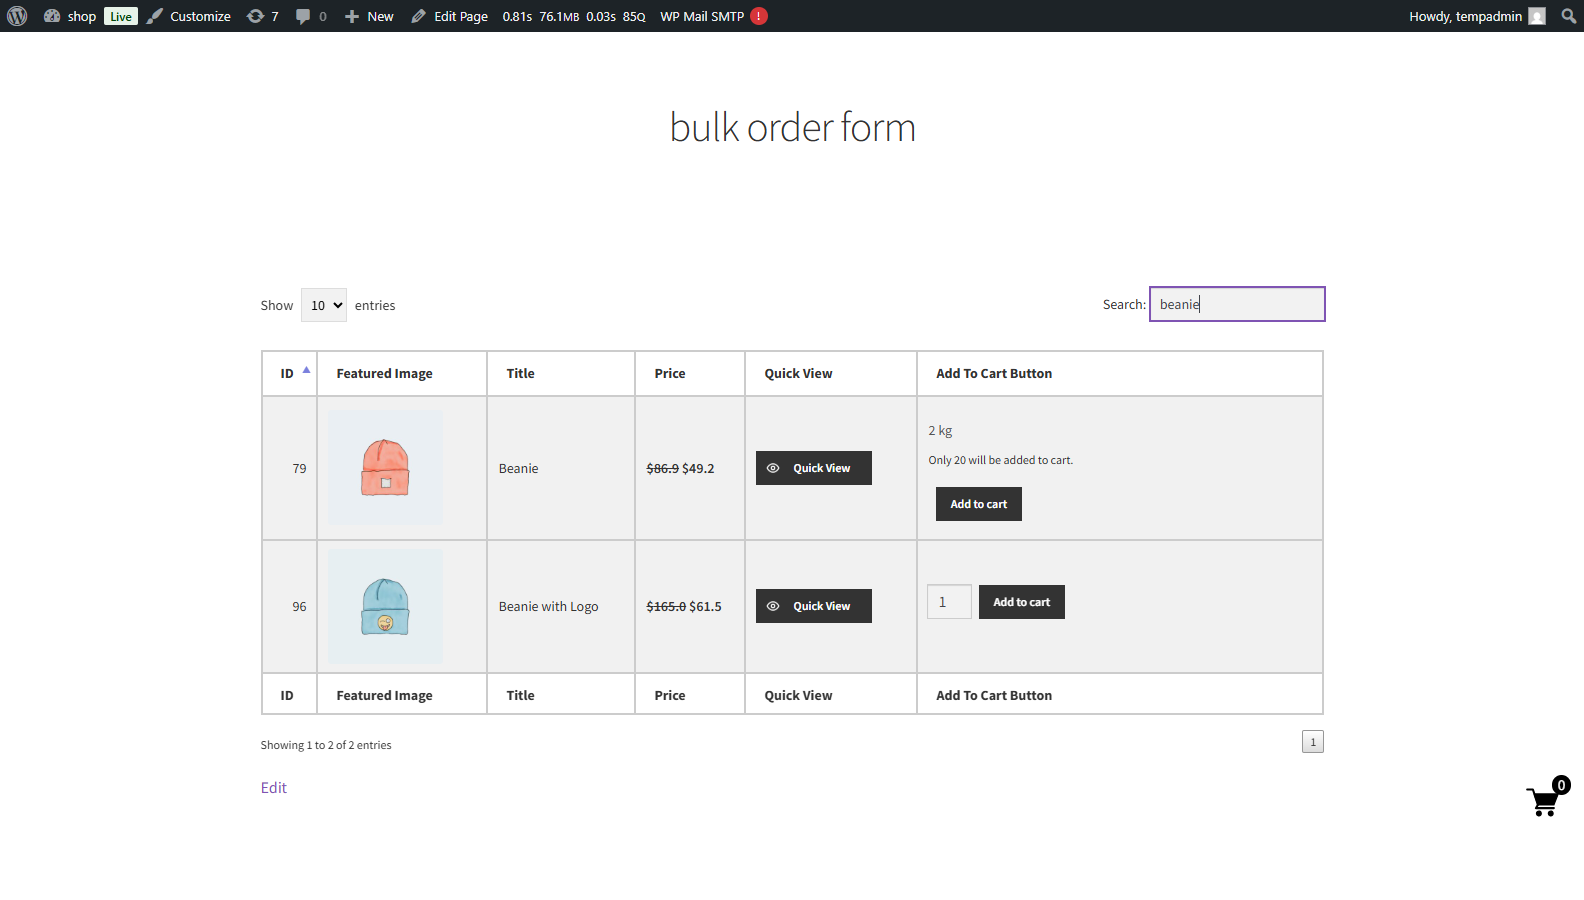
Front-End Impact
- The fixed quantity is displayed correctly in the Bulk Order Form product table.
- Customers can only order the predefined fixed quantity.
- Quantity input appears correctly in the Add to Cart column and Quick View pop-up
Simple Product – Step Quantity
- Navigate to Products > Edit Simple Product.
- Scroll to Product Data > Product Quantity.
- Enable Product Quantity by clicking the checkbox.
- Select Step Quantity as the quantity type.
- Set the Minimum Quantity, Maximum Quantity, and Step Counter.
- Click Update to save the product.
- Create a Bulk Order Form based on your requirements.
Front-End Impact
- The Quantity selector displays correctly in the Bulk Order Form.
- Step-based quantity increments function properly.
- Quantity values match the Product Quantity configuration.
Simple Product – Custom Quantity
- Navigate to Products > Edit Simple Product.
- Scroll to Product Data > Product Quantity.
- Enable Product Quantity by clicking the checkbox.
- Select Custom Quantity as the quantity type.
- Enter comma-separated custom quantities.
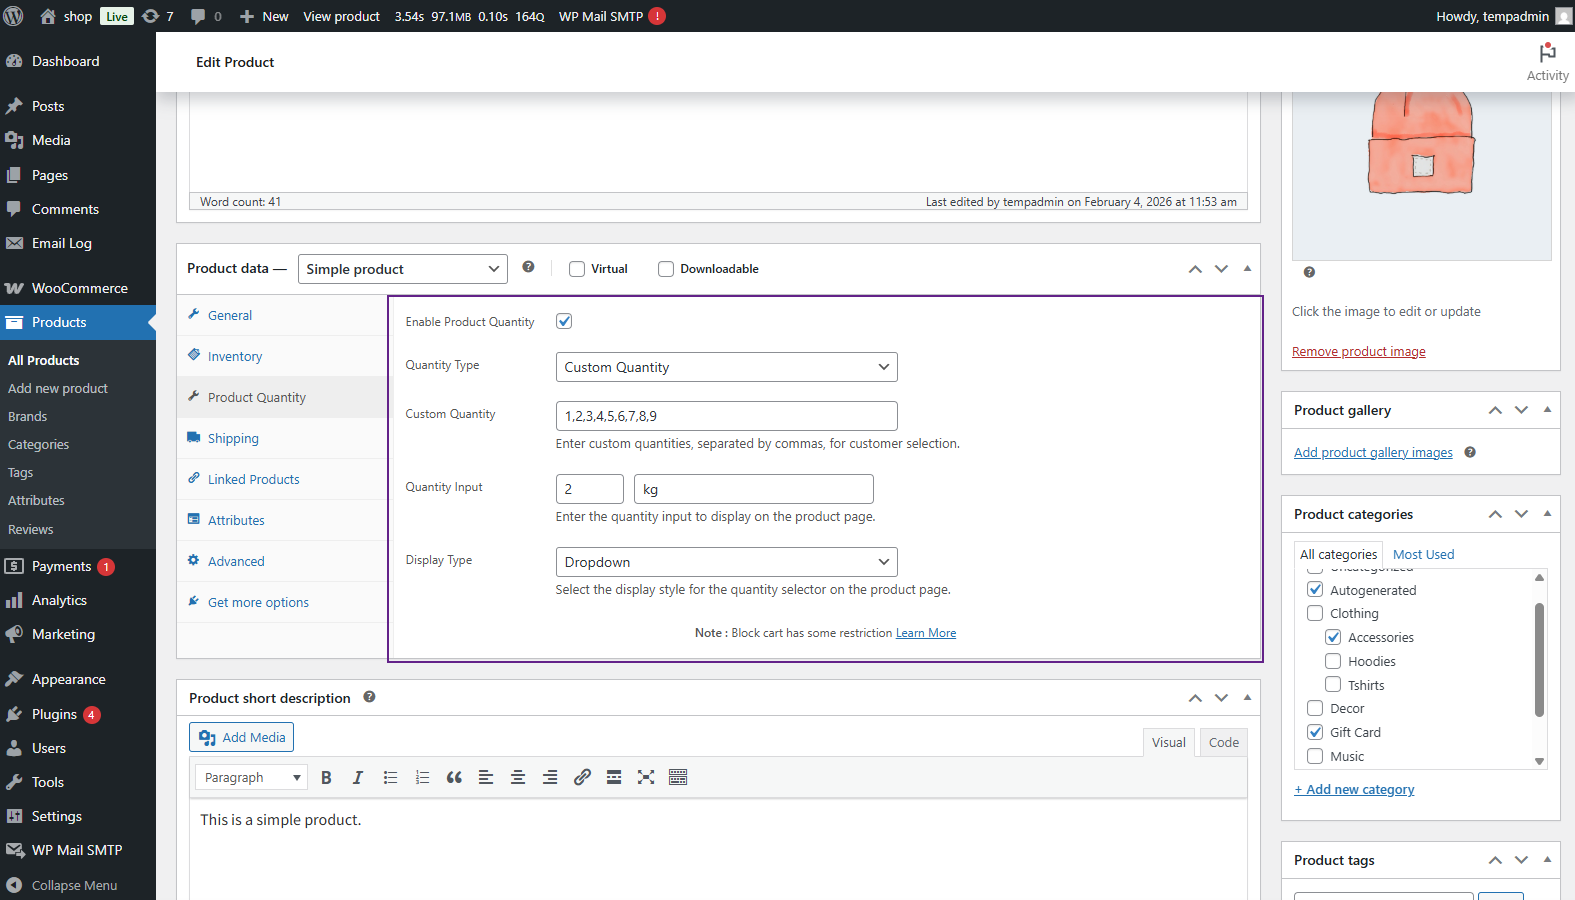
- Click Update to save the product.
- Create a Bulk Order Form based on your requirements.
Front-End Impact
- The Custom quantity options appear correctly in the Bulk Order Form.
- Customers can only select predefined custom quantities.
Variable Product – Fixed Quantity
- Navigate to Products > Edit Variable Product.
- Go to Product Data > Variations.

- Expand a variation.
- Enable Product Quantity for the variation.
- Select Fixed Quantity and enter the quantity value.
- Save the variation and click Update.
- Create a Bulk Order Form as required.
Front-End Impact
- Fixed quantity is displayed correctly per variation.
- Bulk Order Form respects variation-level quantity rules.
- Quantity selection works as expected.
Variable Product – Step Quantity
- Navigate to Products > Edit Variable Product.
- Go to Product Data > Variations.
- Expand the desired variation.
- Enable Product Quantity.
- Select Step Quantity.
- Set Minimum Quantity, Maximum Quantity, and Step Counter.
- Save the variation and click Update.
- Configure the Bulk Order Form.
Front-End Impact
- Step-based quantity selection works correctly per variation.
- Quantity increments follow the defined step counter.