Sales Banner Images for WooCommerce is a comprehensive marketing extension designed to help store owners display promotional banner images across WooCommerce and WordPress pages. This documentation covers installation, configuration, banner management, advanced usage, best practices, and troubleshooting.
Setup and Configuration
↑ Back to top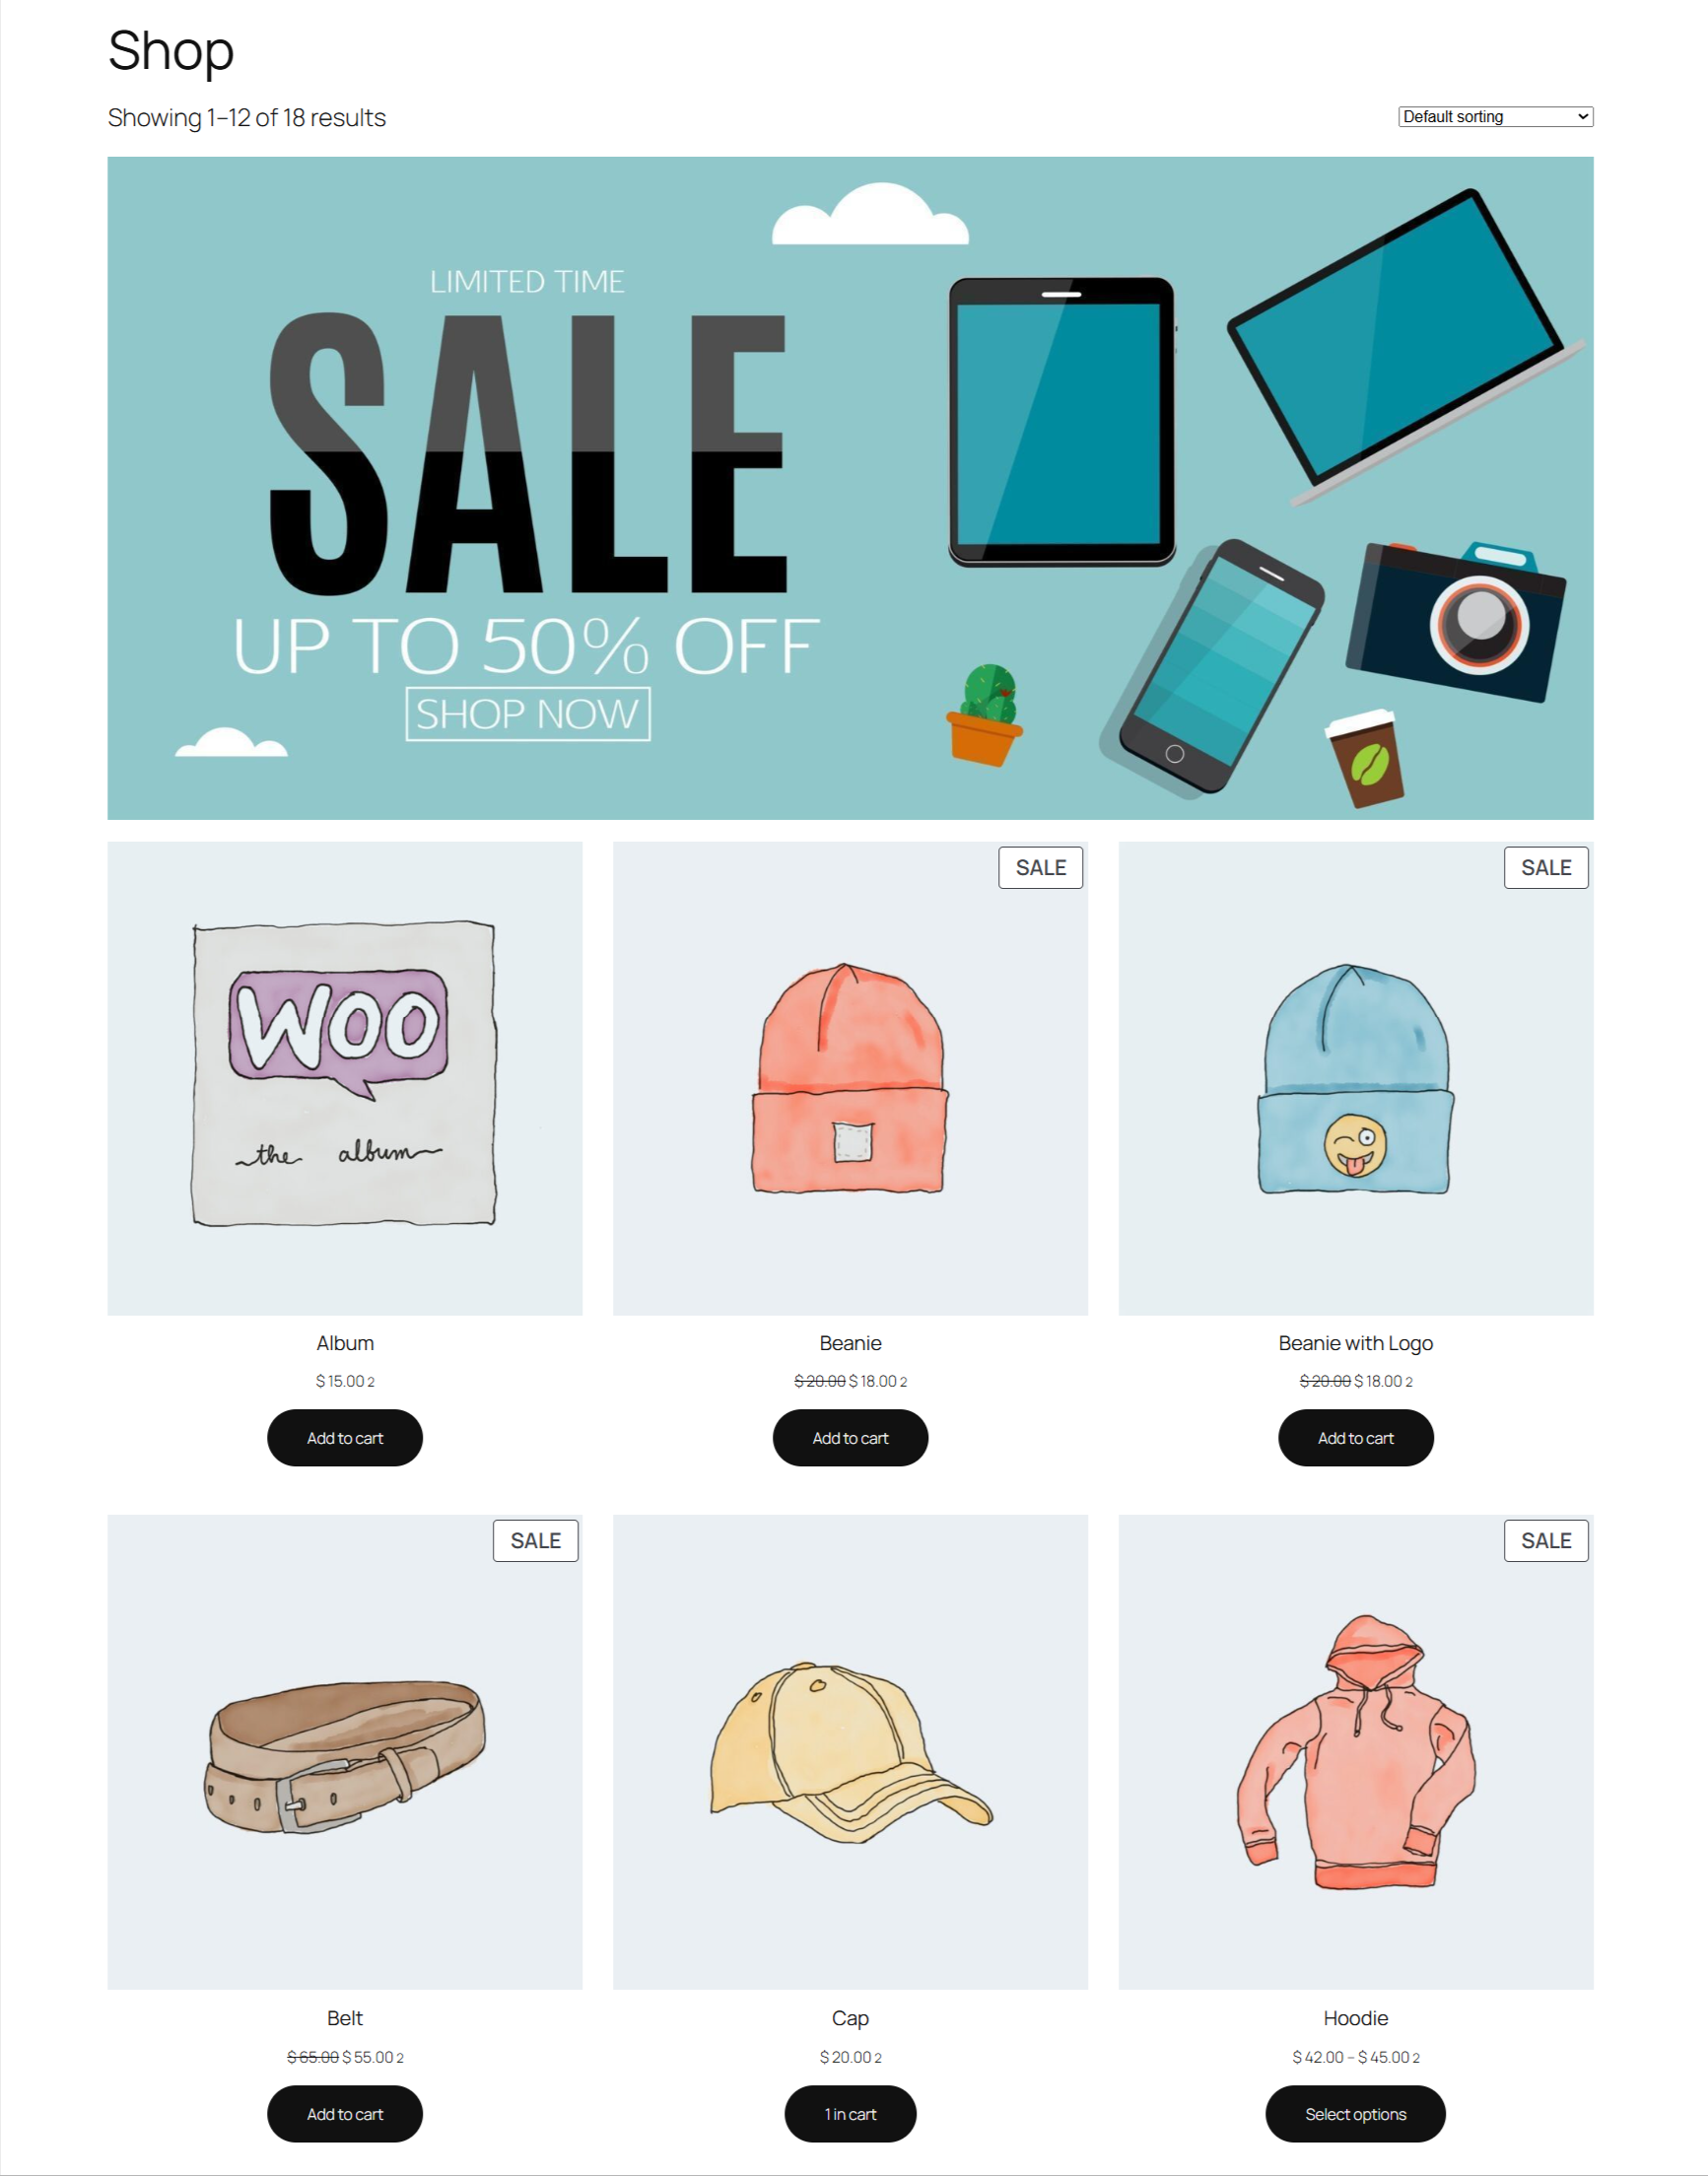
Installation
↑ Back to topAutomatic Installation
↑ Back to top- Go to Plugins → Add New in WordPress admin
- Search for Sales Banner Images for WooCommerce
- Click Install Now, then Activate
Manual Installation
↑ Back to top- Upload the plugin folder to
/wp-content/plugins/ - Activate the plugin from Plugins → Installed Plugins
Plugin Architecture & How It Works
↑ Back to topThe plugin detects the current page context (product, category, cart, checkout, etc.) and injects banner markup at predefined WooCommerce and WordPress hook locations. Banners are loaded only when required to ensure optimal performance.
Settings Overview
↑ Back to topAll plugin settings are located at:
WooCommerce → Settings → Banner Images
Settings are divided into logical sections for easy management.
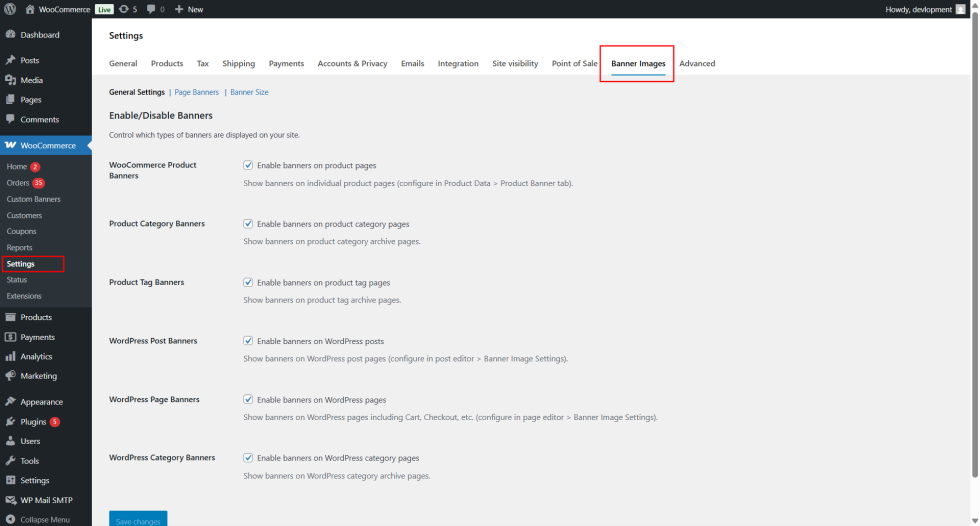
Banners Settings
↑ Back to top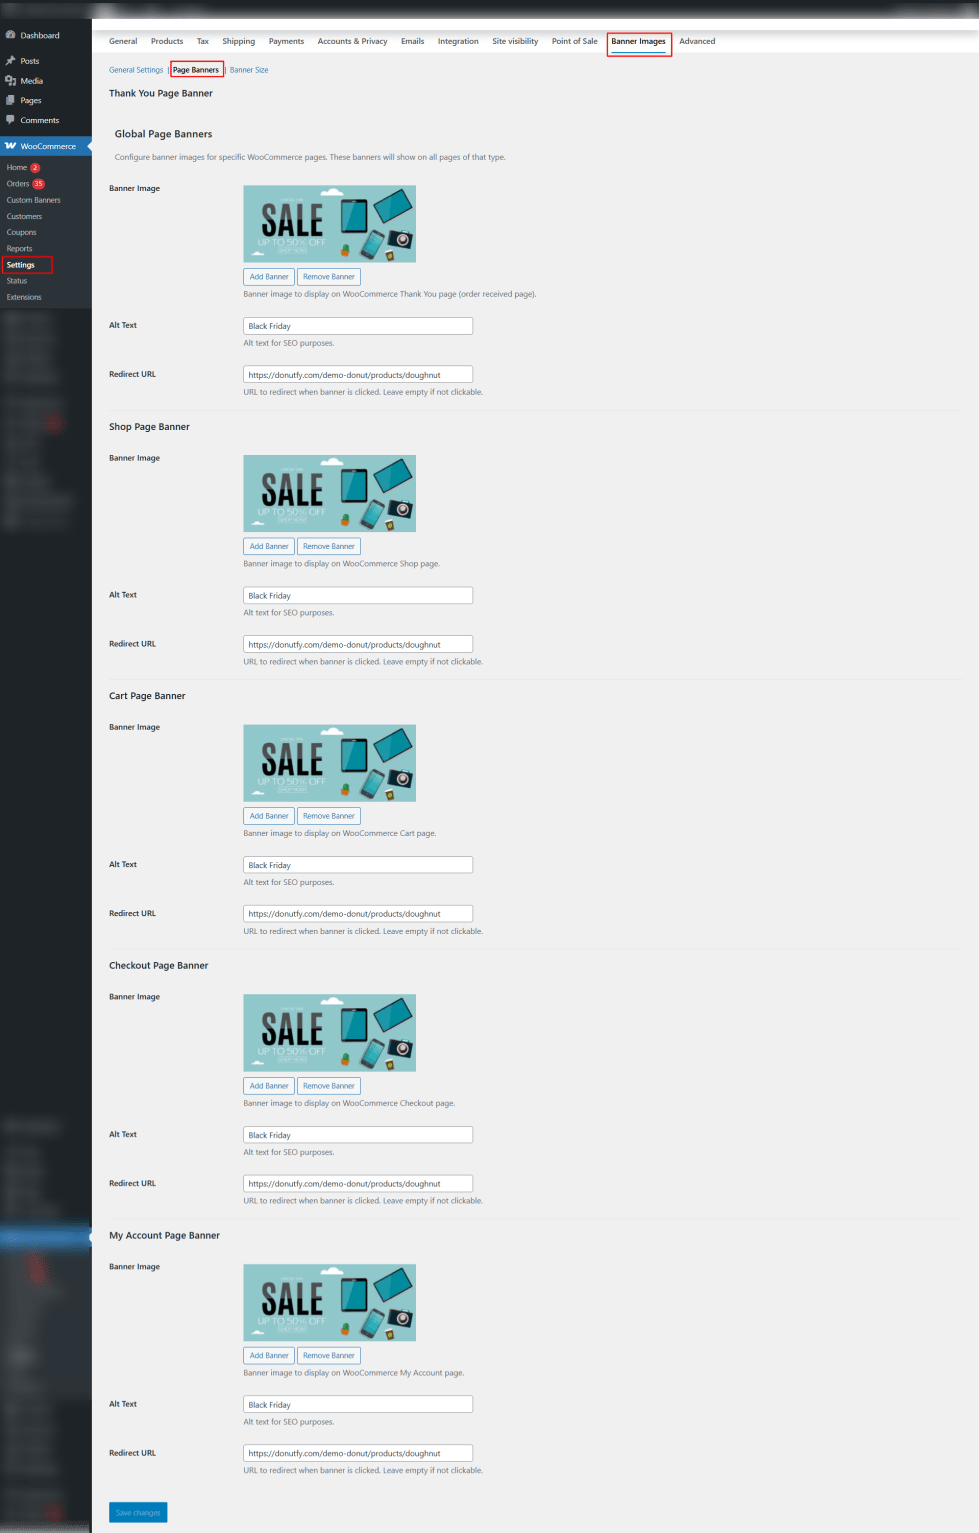
Banner Size Settings
↑ Back to top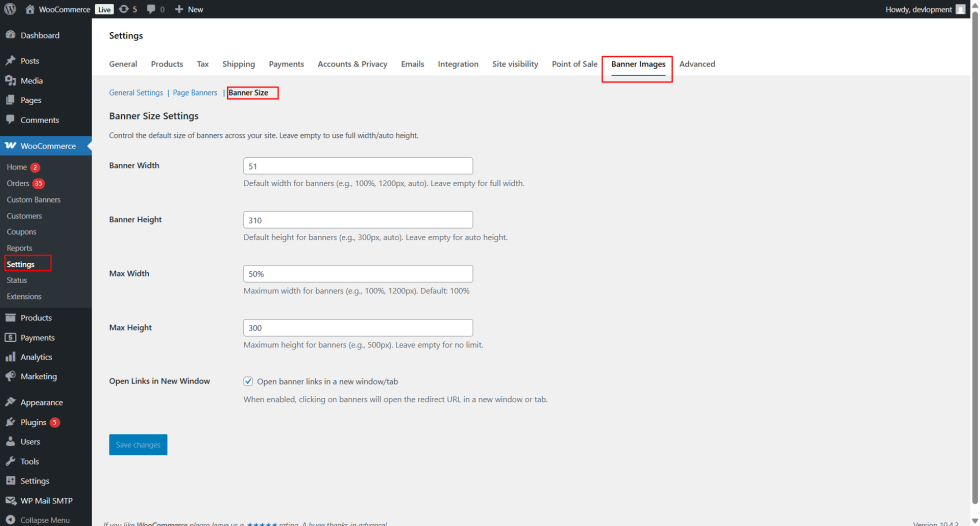
Banner Types & Locations
↑ Back to topSupported banner locations include:
- Single product pages
- Product category and tag archives
- Shop page
- Cart page
- Checkout page
- Thank You page
- My Account page
- WordPress posts and pages
- WordPress category archives
Notes: Adding Banners to Posts, Pages & Categories
↑ Back to topEditing a Post or Page Banner
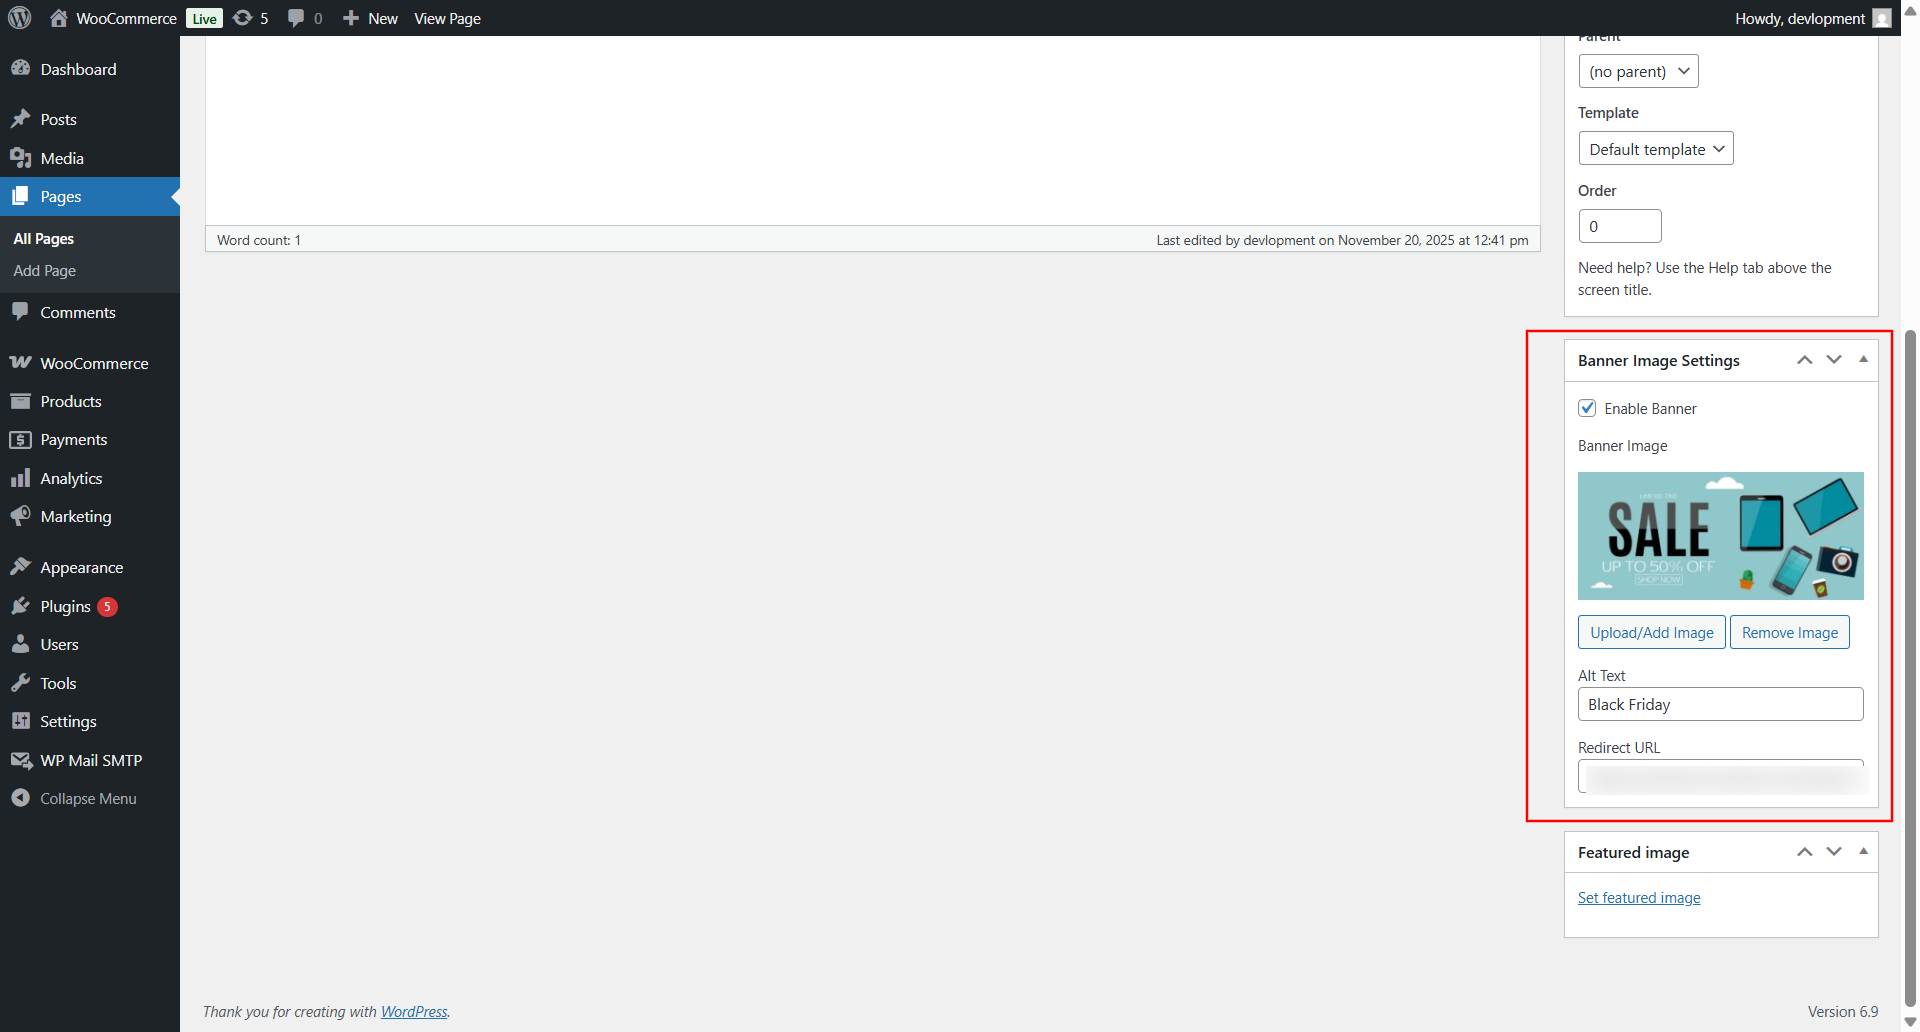
↑ Back to topTo add a banner to a WordPress post or page:
- Go to Posts → All Posts or Pages → All Pages
- Edit the desired post or page
- Locate the Sales Banner meta box
- Upload or select a banner image from the media library
- (Optional) Add:
- Banner link URL
- Alt text for accessibility and SEO
- Update or publish the post/page
The banner will appear above the content area on the frontend.
Editing a WordPress Category Banner
↑ Back to topTo add a banner to a WordPress category:
- Go to Posts → Categories
- Edit the desired category
- Upload a banner image in the Sales Banner field
- Save changes
The banner will display at the top of the category archive page.
Banner Upload Options
↑ Back to topAll banner images are uploaded using the WordPress Media Library, ensuring:
- Secure uploads
- Image reuse across the site
- Compatibility with media optimization plugins
Supported image formats include JPG, PNG, and WebP (depending on WordPress configuration).
External & Internal Link Support
↑ Back to topEach banner supports optional linking:
- Link to products, categories, pages, or external URLs
This makes banners ideal for:
- Promotions
- Affiliate links
- Announcement pages
- External campaigns
Important Notes
↑ Back to top- Banner display depends on page-type enable/disable settings
- If a banner does not appear, ensure it is enabled in
WooCommerce → Settings → Banner Images - Cached pages may require cache clearing after changes
- Banner links are optional—images can be displayed without links
Product Banners
↑ Back to topAdding a Product Banner
↑ Back to top- Edit a product in WooCommerce
- Locate the Sales Banner panel
- Upload or select a banner image
- Add optional alt text and link URL
- Update the product
The banner will appear above the product content on the frontend.
Category & Tag Banners
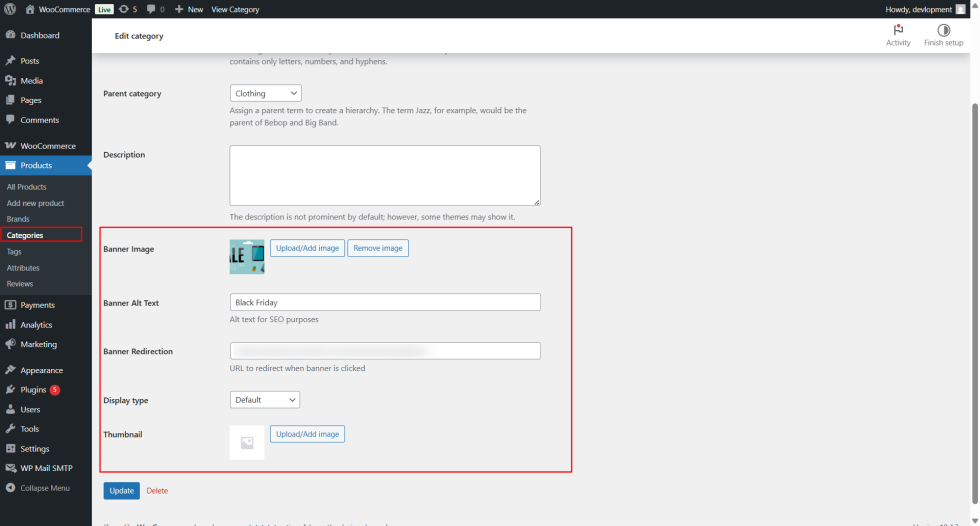
↑ Back to topAdding Category or Tag Banners
↑ Back to top- Go to Products → Categories or Products → Tags
- Edit the desired category or tag
- Upload a banner image
- Save changes
The banner will display above the product grid for that archive.
Global Page Banners
↑ Back to topGlobal banners apply site-wide for specific WooCommerce pages.
Supported Pages
↑ Back to top- Shop
- Cart
- Checkout
- Thank You
- My Account
Configuration
↑ Back to top- Navigate to WooCommerce → Settings → Banner Images → Page Banners
- Upload banner images for required pages
- Save settings
WordPress Content Banners
↑ Back to topThe plugin integrates with standard WordPress content types.
Supported Content
↑ Back to top- Posts
- Pages
- WordPress categories
Banners appear above the main content area.
Custom Banners & Shortcodes
↑ Back to topCustom banners allow full placement control.
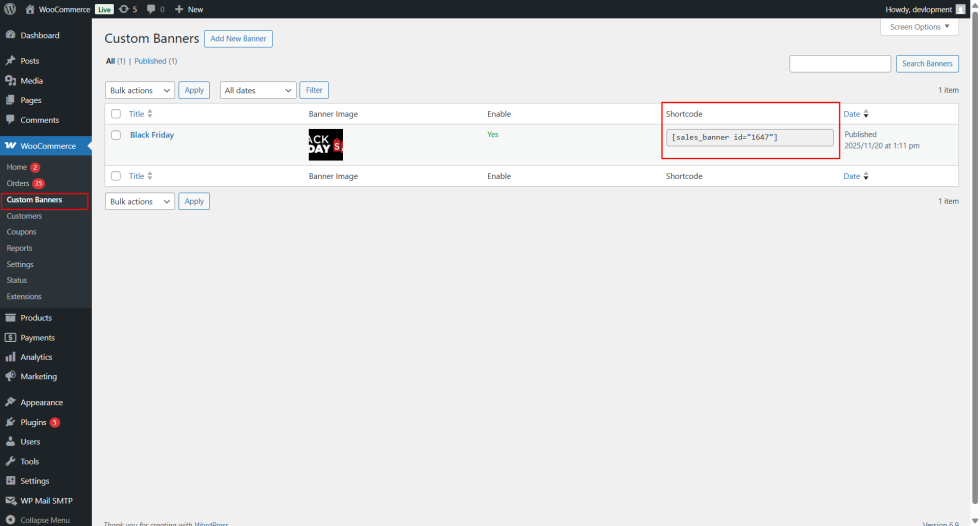
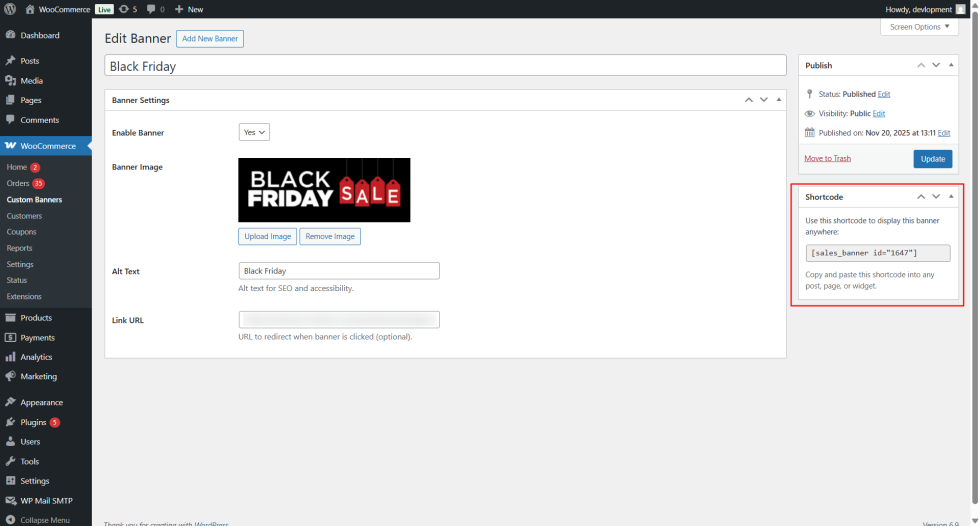
Creating a Custom Banner
↑ Back to top- Go to WooCommerce → Custom Banners
- Click Add New
- Upload banner image and configure options
- Save the banner
Using Shortcodes
↑ Back to top[sales_banner id=”1″]
Shortcodes can be placed inside content, widgets, or templates.
Design & Size Controls
↑ Back to topYou can customize banner appearance globally:
- Width and height
- Maximum width and height
- Link behavior (same tab or new tab)
These settings ensure consistent design across the site.
Responsive Behavior
↑ Back to topAll banners are responsive by default. Images scale proportionally to screen size and container width, ensuring optimal display on mobile, tablet, and desktop devices.
Advanced Usage
↑ Back to topUsing Banners with Page Builders
↑ Back to topShortcodes can be used inside page builders that support shortcode rendering.
Conditional Display
↑ Back to topEnable or disable banners per page type to create targeted campaigns.
Best Practices
↑ Back to top- Use high-quality, optimized images
- Keep banner messages short and clear
- Avoid excessive banners on a single page
- Test banners on mobile devices
Troubleshooting
↑ Back to topBanner Not Displaying
↑ Back to top- Ensure WooCommerce is active
- Confirm banners are enabled for the page type
- Clear caching plugins
- Check theme compatibility
Layout Issues
↑ Back to top- Verify image dimensions
- Disable conflicting theme banner features